To avoid these ads, REGISTER NOW!

Woodworking 101--Tools and Tips

OP
J

jimreed2160

Well-known member
Joined
Aug 7, 2016
Messages
3,589
Location
Tallahassee FL
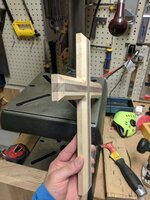
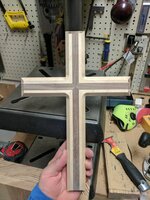
HPW--Good question about taking the joint apart and doing it right. Well, the backstory on that is that I pretty much wore myself out on that the first time. It was a great learning experience and I think I could do it now with new wood. The solution requires a jig or box to hold the workpiece steady in position for a compound cut. But none of my saws were big enough to make the cut. I should have taken it to a cabinet shop and begged for help. I finally gave up when it lined up and fit. In defeat, I smeared the open part of the joint with putty and this is the part that broke. Sawing the putty with a handsaw and applying the splines is now my second attempt to fix the original botch.

Big M--What you are dealing with is called "sticker stain" in the trade. It is enzyme action in the wood caused by slow drying. It is not fungal and is just visual. It adds interest.

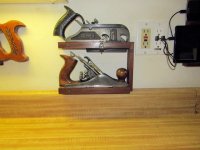
Bob--Your saw does have a Disstonish look to it. Since Australia was a designated spot for malcontents and troublemakers, I am sure you felt right at home. Glad they let you return. And yes, The Dutchess and The Queen are probably from the same royal stewpot. Both were probably consigned to marry a scoundrel for some imagined family sin.

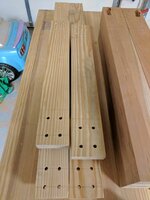
R--You really hit the jackpot on that walnut. With a top like that your table is already a hit.
 
To avoid these ads, REGISTER NOW!
OP
J

jimreed2160

Well-known member
Joined
Aug 7, 2016
Messages
3,589
Location
Tallahassee FL
Moulding repair

I had a chance to work in the garage this morning while The Queen was at her house of beauty. Here is what I found.

DSCN3681.jpg


DSCN3682.jpg


Just need to take it down. This shot is after some careful sawing.

DSCN3683.jpg


I used chisels and followed them with sandpaper. Here is a progress shot.

DSCN3687.jpg


From the side.

DSCN3688.jpg


Here is a close up showing additional damage from the accident.

DSCN3690.jpg


Time for some woodworking "bondo". I make mine with sawdust and Titebond glue. It is nice to have some heavy plastic junk mail to use as a mixing board. Here is the sawdust.

DSCN3684.jpg


It takes about this much glue.

DSCN3685.jpg


And you mix it like pasta.

DSCN3686.jpg


And then pack it in. I like to tighten it up with my fingers.

DSCN3691.jpg


Once dry, it responds well to sanding. Sometimes it takes a second coat to fill in gaps. We shall see how this one comes out. Stay tuned.
 
OP
J

jimreed2160

Well-known member
Joined
Aug 7, 2016
Messages
3,589
Location
Tallahassee FL
Sorry to have been MIA for the past few days. My daughter and granddaughter came up for a visit. They were excited to see the desk in working order and eagerly anticipate delivery in a few weeks. I need to keep up the progress.

Other good news is that they took home two boxes of scraps. I have a hard time throwing away cutoffs--especially good hardwood cutoffs. They filled two kitty litter pails of scraps so now I have more room for new scraps. Win-win!

Rainy weather means that I should be able to squeeze in some shop time this afternoon. :beer:
 

Craptain

Well-known member
Joined
Apr 18, 2013
Messages
4,028
Location
Tampa Bay FL
Sorry to have been MIA for the past few days. My daughter and granddaughter came up for a visit. They were excited to see the desk in working order and eagerly anticipate delivery in a few weeks. I need to keep up the progress.

Other good news is that they took home two boxes of scraps. I have a hard time throwing away cutoffs--especially good hardwood cutoffs. They filled two kitty litter pails of scraps so now I have more room for new scraps. Win-win!

Rainy weather means that I should be able to squeeze in some shop time this afternoon. :beer:

What happens to the scraps?
I ask because I have an artist acquaintance who runs a kids workshop. She will stop by occasionally and pick up a bucket of cut-offs that the kids will use for art projects. The odder the shape the better.
 

Bob Heine

ALLIANCE MEMBER
Joined
Oct 24, 2009
Messages
10,705
Location
Boca Raton, Florida
Jim, I save scraps because the day after I throw one away I find a perfect use for it. Case in point: I kept passing the two tuned-up planes just laying on their sides on the workbench. Thinking I might have a hardwood scrap to make two small shelves, I dug through the "Short Scrap Box" and found this:
attachment.php


One rip cut on the table saw, a couple of notches to save the blade edges on the radial arm saw, another small scrap, 8 screws and a coat of Tung Oil and the planes are on display, where I might remember to use them. I also drilled a 5/16" hole through the smaller shelf to store the new fence. Might have to spend money on a brass insert to mount the depth gauge on the shelf as well.
attachment.php
 

Attachments

  • Plane Shelf 1.jpg
    Plane Shelf 1.jpg
    95.2 KB · Views: 260
  • Plane Shelf 6.jpg
    Plane Shelf 6.jpg
    79.9 KB · Views: 259

jfranci3

Well-known member
Joined
Oct 18, 2014
Messages
57
Question... I'm doing a re-trim project around the house. Occasionally I need to mill a 2-5" long longitudinal relief/cove/etc on the backside of the board to help transition between two surfaces. The trim is 3.5" so I can't do it with an electric planer
How dumb is what I am doing... I'm taking my miter saw, beveled 45deg, holding it in place, sliding the board into the saw blade, and milling out 1/8th or so at a time. Obviously there are finger concern, but I'm able to keep my hand a safe distance away. Am I going to ruin/overheat the 10" 60t blade? Ruin the bearing on the motor? Explode something in my face? Is there some better way without trying to plane my entire house?
 

Craptain

Well-known member
Joined
Apr 18, 2013
Messages
4,028
Location
Tampa Bay FL
I would say very dumb. Sounds like a recipe for disaster to me. I have done a similar technique on my table saw, but that is a stable and (mostly) predictable machine. I don't have a better idea but I am sure someone here will.

Sent from my SM-G900T using Tapatalk
 
OP
J

jimreed2160

Well-known member
Joined
Aug 7, 2016
Messages
3,589
Location
Tallahassee FL
JF--Let me make sure I understand your trim issue. There are some bowed out places in the wall near the floor and the trim sits proud. Is this it? If so, here is a limb saving solution. You can use your table saw to trim a diagonal piece from the back side. Trim away about 1/2 of the footprint and feather it off to about an inch from the top. If that is too unstable to nail, you could add some nailing shims before and after the wall defect(s). If the bows are not too bad you can use your old friend, Mr Spackle. I always spackle the top trim crack to create a good paint seal. Depending on the top trim shape, this trick can conceal a gap up to 1/8" or more. Once the trim is painted, the spackle gap is not visible.

Another thing to do is figure out why the defects exist. When I prepped my bathroom for a new floor, I discovered a botched repair behind the floor trim. The sheetrock was flexing because someone cut it off behind the trim and left an opening. Then they shimmed the studs and banged the trim home. It was probably a water damage repair. But done by an idiot. I cut the rock even and finished off the last 4" with hardieboard. I resolved the flex issue, plugged up all the bug holes, and provided a firm foundation for the new trim. Sometimes these simple trim jobs are not simple after all.

Good luck with your repair.
 
OP
J

jimreed2160

Well-known member
Joined
Aug 7, 2016
Messages
3,589
Location
Tallahassee FL
Craptain--My daughter makes jewelry in her spare time and she will use the scraps for display pieces and for necklaces. I just got through sending all of my cherry shavings from the last project to my other daughter who uses them in crafts for her classroom. One man's trash...

Bob--Good save on the wood. That is exactly why I hate to throw out scraps. I have a whole use hierarchy that takes wood from big projects to smaller projects, to repair and handles, to shims, to stain test strips, etc. Not much hits my trashcan but sawdust. But the scraps do seem to pile up while they are waiting for use.

Question--Does anyone have a good system for storing/displaying scraps? I throw mine in buckets and seem to spend lots of time rummaging around for things.
 

Craptain

Well-known member
Joined
Apr 18, 2013
Messages
4,028
Location
Tampa Bay FL
.

Question--Does anyone have a good system for storing/displaying scraps? I throw mine in buckets and seem to spend lots of time rummaging around for things.

Good? Well not really. Mine also tend to go into buckets, though I do try to keep some level of separation of types. So all my cherry goes one way, oak another etc then the catch all.


Sent from my SM-G900T using Tapatalk
 

rrich1

Well-known member
Joined
Oct 7, 2015
Messages
793
After vacation I was finally able to get some work done on the gaming table. I got the mortises cut on the legs and the tapers drawn out. They are too thick for the table saw so I will need to find a band saw to do the tapers. I got the aprons and top pieces cut and rough dimentioned. Joining them has been some what of a pain on my short bed jointer so I am needing to finish the job manually [emoji123]. What do you do when your workbench still isn't done? You improvise clamping solutions! 2460e916483898c1413e336efca84ce3.jpg15e3adf03be0fb256ac126ecd008c261.jpg3e303e8ff1139bd4eb30189b35354238.jpg221bd36deedc0898919d6ac463750405.jpg

Sent from my Pixel XL using Tapatalk
 

Attachments

  • 2460e916483898c1413e336efca84ce3.jpg
    2460e916483898c1413e336efca84ce3.jpg
    89.3 KB · Views: 1
  • 15e3adf03be0fb256ac126ecd008c261.jpg
    15e3adf03be0fb256ac126ecd008c261.jpg
    159.9 KB · Views: 1
  • 3e303e8ff1139bd4eb30189b35354238.jpg
    3e303e8ff1139bd4eb30189b35354238.jpg
    94.1 KB · Views: 1
  • 221bd36deedc0898919d6ac463750405.jpg
    221bd36deedc0898919d6ac463750405.jpg
    91.2 KB · Views: 1

rrich1

Well-known member
Joined
Oct 7, 2015
Messages
793
Jimreed: yup. I actually used my bench when I did the mortising of the legs but it isn't stable enough to do planing on it. I did drill holes in the stretchers as well for the dowels. Kind of a pain on the small table of the drill press. I guess add that to the list of shop projects. 3cda51810c7599e07b0599ddd195f57d.jpg078a799204ec5750a48d8944905e5292.jpg

Sent from my Pixel XL using Tapatalk
 

Attachments

  • 3cda51810c7599e07b0599ddd195f57d.jpg
    3cda51810c7599e07b0599ddd195f57d.jpg
    72.3 KB · Views: 1
  • 078a799204ec5750a48d8944905e5292.jpg
    078a799204ec5750a48d8944905e5292.jpg
    180.5 KB · Views: 1
OP
J

jimreed2160

Well-known member
Joined
Aug 7, 2016
Messages
3,589
Location
Tallahassee FL
Desk crown

My visitors have left and The Queen is sleeping so I am able to get back into the shop. We left the glue/sawdust paste to dry on the moulding. Here it is after a few days.

DSCN3692.jpg


I sanded it down using a wood block and sandpaper.

DSCN3693.jpg


Then I applied stain twice.

DSCN3694.jpg


I will shoot it with poly tomorrow and call this repair complete.
 
OP
J

jimreed2160

Well-known member
Joined
Aug 7, 2016
Messages
3,589
Location
Tallahassee FL
If your store still has one buy it, the hardware is worth probably the same or more as their asking price. It's a pretty good table.

I am happy with mine. They even supply hold downs to attach the base as Turbo pointed out. I used regular bolts to attach and recovered mine for use up top. More accessories to use.
 
To avoid these ads, REGISTER NOW!
OP
J

jimreed2160

Well-known member
Joined
Aug 7, 2016
Messages
3,589
Location
Tallahassee FL
Desk top moulding

Now it is time to mount the moulding crown. Here is the bookcase.

DSCN3697.jpg


And here is the crown with the poly drying.

DSCN3698.jpg


And here they are together.

DSCN3699.jpg


The underside looks like this.

DSCN3700.jpg


My dowel centers are still MIA so I have to improvise. I will use four finish nails.

DSCN3701.jpg


DSCN3702.jpg


I marked the reverse, placed the crown in place, and tapped each spot with a wooden hammer. The nail divots are pretty easy to see.

DSCN3704.jpg


Once I pulled the nails, I needed to widen the holes. I used the awl and went around at an angle.

DSCN3705.jpg


The holes were a bit ragged. But that is why I keep a short throw (3") brace handy with a countersink loaded.

DSCN3708.jpg


DSCN3706.jpg


It took only a few turns to make them nice.

DSCN3707.jpg


I measured and then cut four dowels. Turns out that my 100 year old Parker carriagemaker's vise gets lots of use. The smooth jaws are great for ww and a coping saw gnaws through the dowel quickly.

DSCN3709.jpg


Next step is to glue them and send them home with a mallet.

DSCN3710.jpg


By now, I am drenched with sweat and ready to cool off. Once the glue dries I will make the receiver holes. Stay tuned.
 
OP
J

jimreed2160

Well-known member
Joined
Aug 7, 2016
Messages
3,589
Location
Tallahassee FL
New project

Somehow I just cannot get this stuff out of the shop fast enough. Last night the kitties were frolicking around and somehow managed to jump onto the antique mirror and knock it down. It had heavy plate glass in it and that stuff did a number on the frame.

DSCN3695.jpg


Some of the corners are pretty bashed.

DSCN3696.jpg


The glass mess was hard enough to deal with. Now I will have to repair the frame and get new glass. At least I know where I can go for that.

This frame has a real history. It looks like an Empire veneer and gesso frame from the 19th century. Base is pine. My parents picked it up at an antique shop when I was very young. My mom loved it and had it in her bedroom until they broke up the house. There was a spot the size of a pencil eraser in the mirror. My guess is that the glass was repurposed. I grew up with this thing and the small defect ignited my OCD every time I looked into it. Sorry to see the accident but I will be happy to get rid of the defect. "Out, you damned spot!" sez I while nodding to Lady MacBeth.
 

RagTopTA

Well-known member
Joined
Feb 26, 2015
Messages
1,892
Location
Wichita Falls , Texas
I picked up my first plane at a Garage sale this morning for $2. Dont know a thing bout them really but want to learn. Is this a descent find ?
 

Attachments

  • IMG_20170811_110314 (1).jpg
    IMG_20170811_110314 (1).jpg
    139.6 KB · Views: 74
  • IMG_20170811_110310.jpg
    IMG_20170811_110310.jpg
    146.8 KB · Views: 77
  • IMG_20170811_110257.jpg
    IMG_20170811_110257.jpg
    144.4 KB · Views: 89

Bob Heine

ALLIANCE MEMBER
Joined
Oct 24, 2009
Messages
10,705
Location
Boca Raton, Florida
I picked up my first plane at a Garage sale this morning for $2. Dont know a thing bout them really but want to learn. Is this a descent find ?
RagTopTA, I found one selling one on eBay for $38.99 + $16.45 shipping so someone thinks it's valuable.
http://www.ebay.com/itm/Windsor-Design-No-4-Smooth-Plane-New-/142468978323?

It was sold by Harbor Freight but I don't know the original price. HF now sells a similar Central Forge No. 4 Jack and Mini Plane set for $14.99 + $6.99 shipping.
https://www.harborfreight.com/no-4-jack-and-mini-plane-set-92553.html

Hard to go wrong for $2 and it has been my experience that HF tools are fine as long as you don't need parts. Because they no longer sell the Windsor Design #4 Plane, parts are likely to only be available on Craig's List or eBay.

I bought a 12" Miter Saw last year and a part broke the first day. It was my fault so I tried to buy the part. Not available so all I could do was return the whole thing for a free warranty replacement.
 

RagTopTA

Well-known member
Joined
Feb 26, 2015
Messages
1,892
Location
Wichita Falls , Texas
Ahh HF stuff.. yay... I figured it might be ok to jack around with clean it up and learn how to use one. I see them at fleas and G sales but have never bougth one. Than sk for the info Bob
 
OP
J

jimreed2160

Well-known member
Joined
Aug 7, 2016
Messages
3,589
Location
Tallahassee FL
RagTop--That is a reasonably good looking Bailey type plane. Clean it up and sharpen the blade and you will have a good user. The wood looks exceptionally nice. Good luck making shavings.
 

RagTopTA

Well-known member
Joined
Feb 26, 2015
Messages
1,892
Location
Wichita Falls , Texas
RagTop--That is a reasonably good looking Bailey type plane. Clean it up and sharpen the blade and you will have a good user. The wood looks exceptionally nice. Good luck making shavings.

thanks! I will def get her cleaned up and might even get to use the blade sharpening add on that came on my brockgrinder!!
 
OP
J

jimreed2160

Well-known member
Joined
Aug 7, 2016
Messages
3,589
Location
Tallahassee FL
Lost but found

Today I cleaned up a workbench and found my dowel points.

DSCN3711.jpg


Too bad I had some projects that needed them last week. Oh well, I guess I need to store them in a drawer and MARK it. The new set I ordered should be here in a few days. Then I can put them all in the same place.
 
OP
J

jimreed2160

Well-known member
Joined
Aug 7, 2016
Messages
3,589
Location
Tallahassee FL
Desk bookcase install

I made the bookcase removable so the desk could be used with or without. The bottom has a big dovetail on each end.

DSCN3712.jpg


The matching dovetails attach to the desk with dowels but can be removed.

DSCN3713.jpg


So with a little huffing and puffing, I was able to get the bookcase installed.

DSCN3714.jpg


The doors have removable pins. That's good because the glass adds a considerable amount of weight.

DSCN3715.jpg


Now it is all together.

DSCN3718.jpg


DSCN3720.jpg


DSCN3721.jpg


WooHoo! The heavy lifting is done and now I just need to finish up a few details. My punch list is getting smaller. Need some trim for the bookcase next. I noticed that it is a little wobbly when the doors are open so I need to firmly attach it to the desk. Stay tuned as I head for the finish line.
 

cheechi

Well-known member
Joined
Feb 29, 2012
Messages
4,384
Location
Triad, NC
Lost but found

Today I cleaned up a workbench and found my dowel points.

DSCN3711.jpg


Too bad I had some projects that needed them last week. Oh well, I guess I need to store them in a drawer and MARK it. The new set I ordered should be here in a few days. Then I can put them all in the same place.

put those in one of those plano or flambeau divided containers along with any dowels you have and the drill & stop needed for each so you can get out the whole kit all at once and work. Sharpie writes on those containers really well.
 

rrich1

Well-known member
Joined
Oct 7, 2015
Messages
793
Jim: looking good.

I think I got all the bows out of the boards. This was probably only half of the shavings. My son was having fun picking them up.

Also turned my planner blades around. Hopefully have some smoother cuts later today. 8fab51cb9cefd69cb0d006cadbcf1426.jpg

Sent from my Pixel XL using Tapatalk
 

Attachments

  • 8fab51cb9cefd69cb0d006cadbcf1426.jpg
    8fab51cb9cefd69cb0d006cadbcf1426.jpg
    109.2 KB · Views: 4
OP
J

jimreed2160

Well-known member
Joined
Aug 7, 2016
Messages
3,589
Location
Tallahassee FL
New project

This little orphan arrived today in pretty bad shape. It is a #5 Greene and Tweed basa hammer.

DSCN3722.jpg


It is really heavy and has a 2 1/2" face.

DSCN3723.jpg


It needs derusting, a new handle, and two new faces. This is a big heavy bruiser and will be nice to have around once it gets back on its feet.
 
OP
J

jimreed2160

Well-known member
Joined
Aug 7, 2016
Messages
3,589
Location
Tallahassee FL
Desk

Well, The Queen had a root canal this morning. Two hours and the endodontist really earned his pay on this one. I have been nursing her today and did not make much progress on the desk.

I have odds and ends to finish up on the secretary desk. Once I installed the glass doors, I noticed that the bookcase is now unstable--especially when both doors are open. The prospect of it falling down on unsuspecting granddaughter is frightening and I have been pondering the fix. Here is what I am dealing with.

DSCN3726.jpg


The bookcase top rests on the desk and is supported by three skids and the front piece. The skids are about 2 inches wide and are firmly attached. My plan is to attach hinges to the skids and the desk. That way, the top can be removed and the desk can be used by itself because the hinges will be out of sight. But when the bookcase is set on top, three hinges with a total of 12 screws will hold it firmly and keep it from tipping forward.

As you can see from the picture, nothing lines up. I need three end grain spacers for the skids and three regular spacers for the back. Then I can drive screws deep into the desk top for the bottom hinge and deep into the end grain for the skids.

With that resolved, I can move on to trim. Here is the bottom of the bookcase.

DSCN3727.jpg


The side of the skid needs to be clad in moulding that wraps around the front bottom of the bookcase. But before that is installed, I need to install a spacer on the front of the bookcase.

So now I am taking the desk apart for these fixes. Looks like the bookcase needs to go to the shop. Stay tuned.
 

R_einan

Well-known member
Joined
Aug 29, 2016
Messages
461
Location
Eastern WA
Finished up the side table I was working on; has a couple small annoyances still, and I'm not sure there is anything to fix them. One, I can't seem to pad the top without leaving pad lines, not sure if it's temp related, but I've tried multiple cuts of shellac with no real success. Two, on the the side aprons has a slight bow that appeared after assembly and before finish work. Left the legs on that side a little less than 1/16 of an inch from the table top. I'm sure I could plane the center down to make it line up, but I don't have a quality plane to do that work. So I will live with it for now, maybe after it acclimated to my living room I'll consider adjusting it.
 

Attachments

  • IMG_2317.jpg
    IMG_2317.jpg
    148.5 KB · Views: 73
  • IMG_2321.jpg
    IMG_2321.jpg
    140.7 KB · Views: 66
  • IMG_2318.jpg
    IMG_2318.jpg
    142.3 KB · Views: 69

rrich1

Well-known member
Joined
Oct 7, 2015
Messages
793
Did a small prototype project today. Still needs sanding and finish. Not perfect but I think it came out pretty well. a994aa8f693f6d109ff54d7f1496a3d4.jpgadf576693300115551f9f4af27bb5c85.jpg

Sent from my Pixel XL using Tapatalk
 

Attachments

  • adf576693300115551f9f4af27bb5c85.jpg
    adf576693300115551f9f4af27bb5c85.jpg
    91.6 KB · Views: 2
  • a994aa8f693f6d109ff54d7f1496a3d4.jpg
    a994aa8f693f6d109ff54d7f1496a3d4.jpg
    93.4 KB · Views: 1

R_einan

Well-known member
Joined
Aug 29, 2016
Messages
461
Location
Eastern WA
Thanks Jim, I'm pretty happy with how it turned out.

Rrich- that's beautiful, and gives me an idea I hadn't considered. My mom wants a lazy Susan for her table for entertaining, I really like how the miters meet in the center there.
 

rrich1

Well-known member
Joined
Oct 7, 2015
Messages
793
R_einan: thanks. Ended up out in the shop and sanded it and put a coat of Danish oil on. The key hole slot isn't pretty. Plunged it in by hand. My fence was too big. Oh well. No one will see it. e433357361fb4f76b61221386e1fbfcb.jpg

Sent from my Pixel XL using Tapatalk
 

Attachments

  • e433357361fb4f76b61221386e1fbfcb.jpg
    e433357361fb4f76b61221386e1fbfcb.jpg
    89.2 KB · Views: 1
To avoid these ads, REGISTER NOW!
Top Bottom