To avoid these ads, REGISTER NOW!

Woodworking 101--Tools and Tips

OP
J

jimreed2160

Well-known member
Joined
Aug 7, 2016
Messages
3,589
Location
Tallahassee FL
4--Thanks for the posting. I love Rockler and their innovation. I gotta agree with Craptain--this thing is pretty spendy.

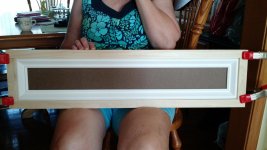
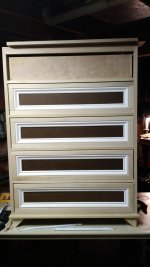
It made me think about ww and innovation. Problem solving is one reason that ww has held my interest for all these years. Most of my projects are concepts that I build until they are finished. In these projects, I solve problems until I am done. You might think that a set of plans would reduce the problem solving but that has not been the case with me. I was working with a very detailed set of plans once and had to deviate because I thought the structure was not strong enough. My on the spot engineering added a lot of beef and strength to where it was needed. More problem solving.

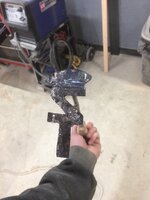
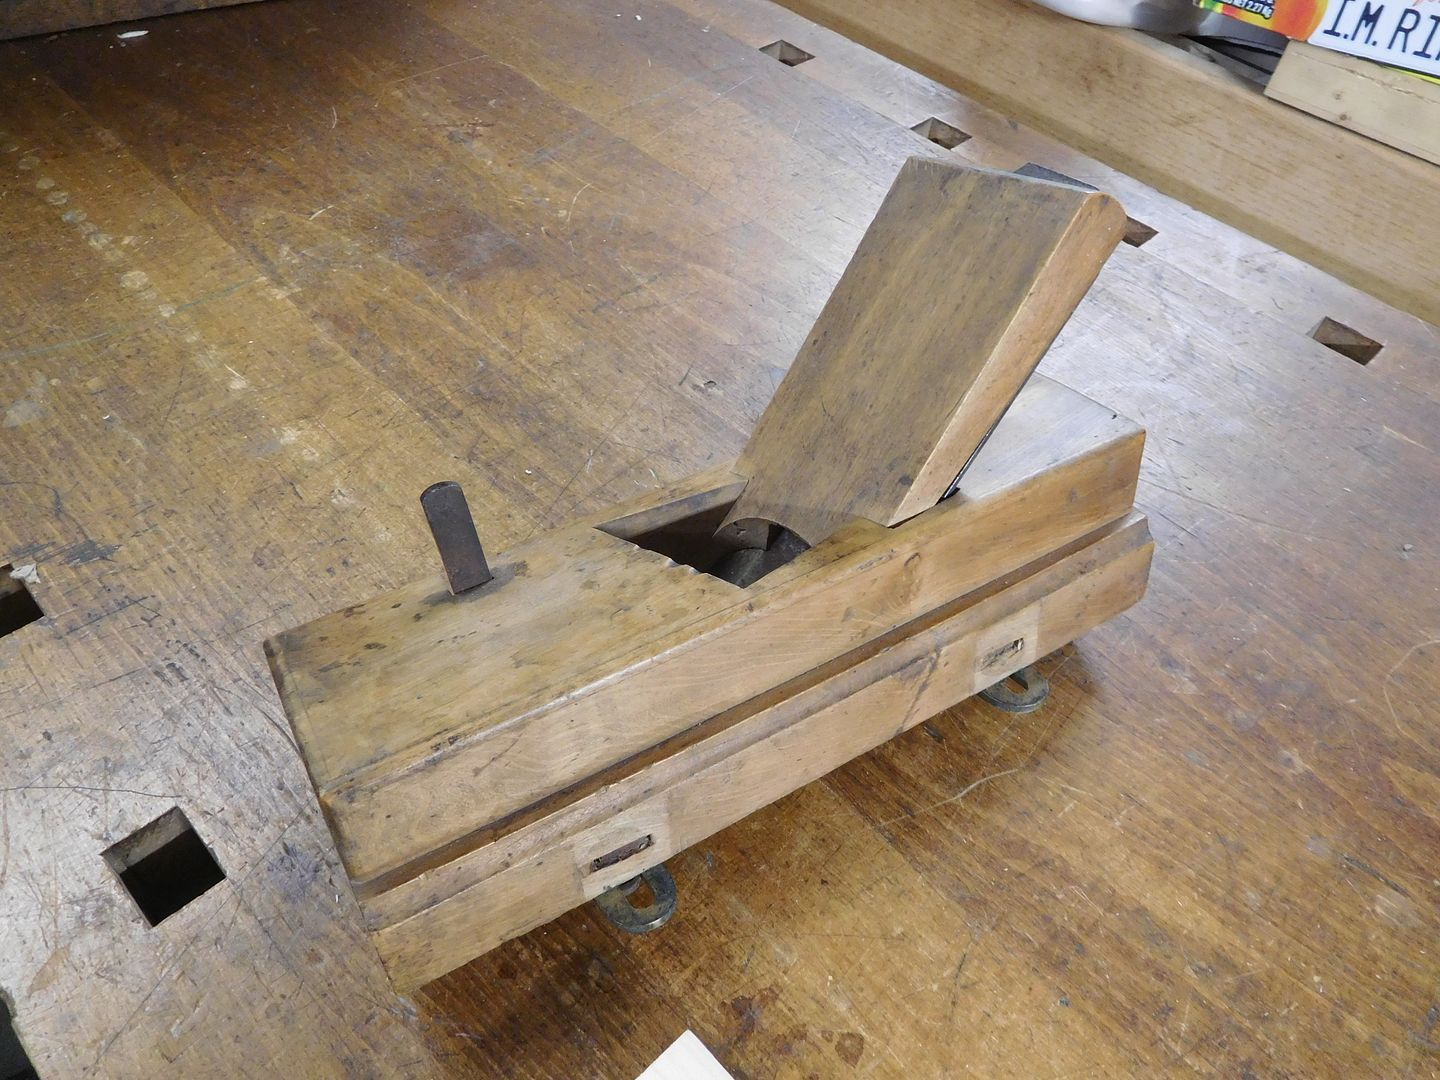
And our dude in the video was slapping boxes together one day and thought he could join plywood in a unique way. And his idea was good enough to turn into a commercial product. Good for him. I sometimes found innovative solutions buried in antique furniture. It made me feel closer to the maker but it also made me sad to think that his innovation was buried deep in the project. Only to be discovered years after his death.

So now we have the internet to expose and share our innovations. As us ww continue to build and innovate, let's share those ideas here at GJ on WW101. Time to make some shavings. :beer:
 
To avoid these ads, REGISTER NOW!

4Kings

Well-known member
Joined
Nov 2, 2010
Messages
263
Location
Southwest Missouri
haven't posted much in this thread but I consider myself pretty much of a hack that's getting better with each project I complete. Currently working on a bookcase to match some other pieces I have done for my daughter. Here's some pics...
 

Attachments

  • 2017-01-25 12.55.14.jpg
    2017-01-25 12.55.14.jpg
    145.1 KB · Views: 81
  • 2016-08-04 19.29.38.jpg
    2016-08-04 19.29.38.jpg
    145.3 KB · Views: 89
  • 2015-12-13 11.07.46.jpg
    2015-12-13 11.07.46.jpg
    153.9 KB · Views: 92
  • 2015-11-26 13.13.00.jpg
    2015-11-26 13.13.00.jpg
    143.8 KB · Views: 89
OP
J

jimreed2160

Well-known member
Joined
Aug 7, 2016
Messages
3,589
Location
Tallahassee FL
If you have a milling machine, Why didn't you just mill a nice clean slot in the first place?

Good suggestion. My mill is a small light duty HF hobby mill. I usually drill waste holes so the mill has less material to remove. In this case, I did not punch the initial holes and the drill bit drifted. When I cleaned up the slot in the mill, it occurred to me that I should have started there because I had thin material.

I am serious about making a set or two but my end mills are too large. I was lucky to find this small one. It is time to order some small diameter carbide mills and some steel stock.

Thanks for your insight and advice. A second set of eyes is always helpful.
 
OP
J

jimreed2160

Well-known member
Joined
Aug 7, 2016
Messages
3,589
Location
Tallahassee FL
Using "HF" and "mill" in the same sentence is an oxymoron as far as I'm concerned. :eyecrazy:

Well I am a woodworker, not a machinist. The mill was dirt cheap--I have a much larger investment in tooling. BUT it has paid for itself. I use it for light jobs like making plane blades and repairing planes. It is in a small cubby in the garage and only used dry. My uses are very specialized and I am sure that a real machinist would just smile and shake his head. But it works well for me.

Just like my HF anvil. Well, it is probably more of an anvil shaped object. But it too was dirt cheap. I used it almost exclusively to stamp numbers in the plane blades I made. On rare occasions I used it to take bends out of handsaws. I doubt the anvil would stand up to forge work, but that is not why I purchased it.

Not that I don't appreciate good tools. On the other end of the spectrum are my vises. In fact, I am over-vised in the shop. Every bench has at least one vise attached. Sometimes I even use my Reed 1C or my Athol 624 when I work on planes. I used a 100 year old vintage Parker when I filed the cutter. It is real overkill but I like vises.

I thought someday that I might upgrade the mill, but that day has passed. Loud spinny things scare me more than they excite me anymore. What I really like is the swish-swish of a plane gliding down a board. :thumbup:
 
OP
J

jimreed2160

Well-known member
Joined
Aug 7, 2016
Messages
3,589
Location
Tallahassee FL
Tool-o-rama

The tool-o-rama continues today since my shop is about 59 degrees. A few weeks ago I posted some pictures of an OWT router. These routers were common companions to wooden plow planes of the day and were used with the plow blades to make stopped cuts of dados and grooves. The blades were bedded like normal plane blades with most of them being 45 degrees. My example was a scraper version with a higher angle.

Today we have a different version of the OWT router. These were made as finishing tools. Once the ww of yore made his dado, it was probably a little rough. So a tool was developed with a very slight (about 2-3 degrees) cutting angle. These tools were very good finishers and could be used on dished carvings as well as the dados. Here is my Ulmia version.

DSCN1964.jpg


The Ulmia medallion dates it to the 1950s.

DSCN1963.jpg


It has a wide cutter.

DSCN1965.jpg


But that footprint could be replicated by a common Stanley 71 1/2 cast router.

DSCN1968.jpg


Here is the topside of the Stanley with its user made accessory bottom.

DSCN1966.jpg


Some ww try to make grooves using these planes but I don't recommend it. They are best used as finishers.
 

drivesitfar

Well-known member
Joined
Oct 23, 2013
Messages
36,007
Location
Pacific Northwest
JIM: you definitely have a lot of old planes and tools. thanks again for showing us what they are and how to use them.

ALL: so Jim was mentioning filing in a vise and for him and all of you that do that if you might throw a clean or oily rag on the slide of the vise on top of the slide under the jaws then you can maybe keep a lot of those filings from getting inside your vise and you won't have to clean your vises as often. this is even more necessary on open screw type vises and will give your old vises an even longer life.

cheers and carry on with the WOODWORKING and i can hardly wait until my daughter's wedding is over so i can start setting up my shed as a woodshop.
 
OP
J

jimreed2160

Well-known member
Joined
Aug 7, 2016
Messages
3,589
Location
Tallahassee FL
Spokeshaves

Here are two early metallic spokeshaves. They look like Leonard Bailey models from the last half of the 19th century.

DSCN1970.jpg


The dual cutter is pretty neat.

DSCN1971.jpg


They made a lot of the duals so it must have been a popular model. Maybe it was handy to slip in the toolbox because of its compact size. But I honestly cannot remember using a flat spokeshave and having to switch to a curved blade.
 

McFarmer

Well-known member
Joined
Aug 29, 2009
Messages
2,139
haven't posted much in this thread but I consider myself pretty much of a hack that's getting better with each project I complete. Currently working on a bookcase to match some other pieces I have done for my daughter. Here's some pics...


I really like the dresser, nice flush fit drawers are hard to do. What joint did you use ?

I think I will get into painted wood more, I have a lot of plain figured ash to use up.
 

4Kings

Well-known member
Joined
Nov 2, 2010
Messages
263
Location
Southwest Missouri
Thanks MC. I have a pic that kinda shows it. It's just a basic box made from 1/2 birch ply with a lock joint. The drawer face is just 1/4 mdf with applied popular stiles and rails, then some molding. I think the pics will help make my it clear.
 

Attachments

  • 2016-07-24 10.38.37.jpg
    2016-07-24 10.38.37.jpg
    142.7 KB · Views: 150
  • 2016-07-30 19.18.47.jpg
    2016-07-30 19.18.47.jpg
    145.5 KB · Views: 146
  • 2016-07-26 20.46.22.jpg
    2016-07-26 20.46.22.jpg
    145.5 KB · Views: 142
  • 2016-07-24 17.05.37.jpg
    2016-07-24 17.05.37.jpg
    142 KB · Views: 143
OP
J

jimreed2160

Well-known member
Joined
Aug 7, 2016
Messages
3,589
Location
Tallahassee FL
Was it a 2-in-1 type of tool?

Yes. Two separate tools on one frame. Curved spokeshaves are good for fitting hammer handles and flat spokeshaves are good for tasks like chamfering edges. Each is used for very different reasons although both are shaves. Having both types on one frame takes up less room in the toolbox. I guess the best example today is our combination bit screwdrivers.
 
OP
J

jimreed2160

Well-known member
Joined
Aug 7, 2016
Messages
3,589
Location
Tallahassee FL
More Tool-o-Rama

It is still too chilly in the shop for a project so let's talk about chisel planes today. These planes have a lot in common with the OWT routers and the Stanley #71 series. The difference is that chisel planes have a different heritage because they descended from handplanes.

It is common to use a chisel to remove large defects, but chisels can be hard to control in tight spaces. The ww could use a plane, especially one in bull nose mode. In fact, the #90/92/93/94 series all have a bull nose configuration. Perhaps a light bulb went off when they introduced the #90 in 1898 and followed with the #92 and #93 in 1902. Some bright designer might have seen something that sparked the idea. Anyway, Stanley introduced their metallic chisel plane, the #97, in 1905. It has the same basic footprint as the #4 bench plane, a bedding angle (13 1/2 degrees) the same as the low angle block, and the bull nose feature of the #9X series. Here is a family photo.

DSCN1973.jpg


From left to right, the Stanley #90, a Stanley low angle block, a LN small chisel plane, a LN large chisel plane, and a Stanley #4 bench plane. The small blade in the foreground is a JR special. I made my own 0 angle chisel using a blade from a Stanley #60 **** chisel. Since the handle was toast, I cut it off and ground a spear point on the blade. Then I added a rare earth magnet to use as a handle. I used this one for years to clean glue drips from my workbench while protecting the surface.

Here is the low angle block plane profile with the LN small. It is easy to see the borrowed points.

DSCN1974.jpg


And here is a better shot of the true edge first tools.

DSCN1975.jpg


The #90 has a 1 1/4 width blade and I think the chisel is about 1 1/2.

Using these specialty planes is a little counter intuitive. They are not meant to shave wood--they are slicers. The blade should NOT contact the wood. We all know that most planes work because they protrude slightly BELOW the sole. But chisel planes are meant to slice something that is slightly ABOVE the surface of the wood. Here is a picture of one removing a glue spot on a board.

DSCN1976.jpg


Here you can see where I damaged the surface of the wood by having the blade set too aggressively.

DSCN1977.jpg


So let's take on another common project. Here we have a walnut dowel pin that we want to be flush with the surface. We all know that a flush cutting saw will work, but will also scar the surface. Most of us will do this and then clean up with sandpaper. But there is an easier way.

DSCN1980.jpg


The easier way, of course, is to use a chisel plane.

But how do we hold it? Easy. First grab the rear with one paw.

DSCN1981.jpg


And grab the front with your other paw.

DSCN1982.jpg


Now, use your brain to combine both of those pictures. I would have made single photo if I could snap a picture with my teeth.

Just use a slicing motion and work around the dowel. Pretty soon it will be cut off flush.

DSCN1984.jpg


These planes might not get much use, but they or their bull nose counterparts can be handy. I used a bullnose #92 when I needed to adjust trim inside a wooden tool chest. I needed more precision than a chisel allowed and the space was just too tight for a conventional plane. My guess is that these chisel planes are favorites of trim carpenters and boat builders. If you are unable to find a true chisel plane, you can probably get by using your #90 in bullnose mode. Either way, just remember the chisel plane and its friends when you are in tight quarters.
 

Sgt Nox

Member
Joined
Dec 4, 2016
Messages
16
Location
Rochester, NY
More helpful content Jim. If it wasn't for you I would literally know next to nothing about planes.


Sent from my iPhone using Tapatalk
 

mefast

Well-known member
Joined
Sep 1, 2015
Messages
99
Location
Southwestern, Ontario
Good to see everyone's projects and more of Jim's useful hand tool knowledge. I quite enjoy reading this daily and has given me motivation to find time to work on my projects.

I didn't make a lot of progress today, but did cut my first mortise and tenons since owning a garage and these tools. Nothing too fancy, but a good start. Also got the two side sections' profiles sanded down to match. Two steps closer to finishing this shelf:

View media item 67739
View media item 67737
View media item 67738
 
OP
J

jimreed2160

Well-known member
Joined
Aug 7, 2016
Messages
3,589
Location
Tallahassee FL
4Kings--Nice design. It really shows well. Thanks for explaining.

Sgt--Thanks for your kind words.

Mefast--Kudos on your project. Chip away at it daily and that shop will be organized before you know it.

I am looking at another chilly shop day and a trip to the dentist for the queen but there is a panel raising plane on the workbench calling to me. Pictures to follow. The good news is that I found another ww project. Temps will be in the 70s on Tuesday and I think shavings are going to fly.
 
OP
J

jimreed2160

Well-known member
Joined
Aug 7, 2016
Messages
3,589
Location
Tallahassee FL
Drill Press Table

So it warmed up enough to do a little shop maintenance today. I had to pick up meds for the queen's toothache and of course that trip included a swing by the nearby HF. I have been eyeballing this table for awhile and finally decided to try it out. Not a bad way to spend $19.97.

DSCN1985.jpg


It will replace about 25 lbs of iron.

DSCN1987.jpg


So the iron gets a temporary rest.

DSCN1986.jpg


The table fasteners do not fit because there is a tiny issue with the throat of the DP. My options are to cut the table to fit or move the mounting screws. Being inherently lazy, I choose the path of least resistance.

DSCN1988.jpg


The table is 24" wide so I measured to the centerline and then used a sharpie and then chalk to mark an arc using the rattlecan. This is a tricky cut on the bandsaw and I sure don't want to use a handheld scrollsaw. It looks like a perfect job for my handy coping saw.

DSCN1989.jpg


I started cutting towards me so I could see the blade good. Sawdust piled up quickly and I was puffing on it to keep the mark clear. AND then I ran out of saw throat.

DSCN1990.jpg


No problem--just rotate and adjust the blade and tighten it back down.

DSCN1991.jpg


NOW I have plenty of throat.

DSCN1992.jpg


That is a pretty fancy cut for a $5 saw. It took all of about three minutes.

DSCN1993_1.jpg


HA! I eyeballed that thing pretty good.

DSCN1994.jpg


Here is a picture of the underside.

DSCN1995.jpg


And here it is in place. I also picked up a $9 floor pad for the new bench while I was at HF.

DSCN1997.jpg


The nice centerpiece is the sacrificial block which takes a hit everytime you overshoot with your bit. I thought it was too nice to mess up so I geared up to make one.

DSCN1998.jpg


I found a hickory scrap that was the exact size on one side. So I cut it to thickness. Here is the bookmatch I cut with the bandsaw. Pretty dang clean.

DSCN1999.jpg


I cut it to size and trimmed it to fit using my #4 bench plane.

DSCN2000.jpg


Pretty good fit.

DSCN2001.jpg


Now I have two.

DSCN2002.jpg


So I will be testing this thing out for the next few months. We had a table set up on a DP that I used when I worked at Rockler. It was much nicer (and way more expensive) than this one. I enjoyed using it and I think I will like this one a lot. Maybe I can find a quick way to mount the cross slide table for those occasional metal drilling jobs.
 
Last edited:

turbowoodworker

Well-known member
Joined
Mar 18, 2012
Messages
3,526
Location
Apex NC
Hey Jim,
Forgive me if this is too obvious but those blue bar-like things on the underside of your DP table are actually workpiece hold downs, not table fasteners.
 
To avoid these ads, REGISTER NOW!
OP
J

jimreed2160

Well-known member
Joined
Aug 7, 2016
Messages
3,589
Location
Tallahassee FL
Hey Jim,
Forgive me if this is too obvious but those blue bar-like things on the underside of your DP table are actually workpiece hold downs, not table fasteners.

You are correct in your observation. Those blue things are generic hold downs. They are supplied with the kit and the instructions recommend using them to attach the table to your drill press.

BUT you have given me an idea. I can replace those things with washers and nuts and recover the knobs and hold downs for use topside. Thanks for your sharp eyes. :thumbup:
 

rk5n

Active member
Joined
Jan 11, 2016
Messages
39
Next time I see one of those cheap steel Stanley low angle block planes, I'm gonna buy it and cut the front off for my own chisel plane. Don't worry, I won't butcher a nice #60 or 65
 
OP
J

jimreed2160

Well-known member
Joined
Aug 7, 2016
Messages
3,589
Location
Tallahassee FL
Next time I see one of those cheap steel Stanley low angle block planes, I'm gonna buy it and cut the front off for my own chisel plane. Don't worry, I won't butcher a nice #60 or 65

Good plan. Sometimes the planes missing the adjustable front piece can be had for just a few coins. Just be careful with the plane. The LN instructions warn of the sharp protruding blade. I keep mine in boxes just to remind me of how sharp they are.
 
OP
J

jimreed2160

Well-known member
Joined
Aug 7, 2016
Messages
3,589
Location
Tallahassee FL
Adjustable Panel Raising Plane

When I was gathering planes for the cold spell Tool-o-rama, I found this really nice panel raising plane. It looks like it is from the late 19th or early 20th century and probably was factory made. It is stamped "45" on the heel, which probably refers to the bedding angle of the skewed blade. It is bedded at 45 degrees and skewed at about 30. The body is dense--maybe pear or lemonwood.

DSCN2009.jpg


It has a nicker and an adjustable guide. Both of these features were probably user upgrades because they are a little rough and don't have the fit and finish of the plane body and wedge.

DSCN2010.jpg


DSCN2011.jpg


DSCN2012.jpg


DSCN2013.jpg


Notice how the corner is not squared to the body of the plane. It is made to cut a 90 degree corner on the raised panel while allowing the plane body to taper the edge.

It cuts some nice curly shavings but the whole cut is off. I am not able to lower the blade enough to cut full width.

DSCN2014.jpg


A closer look at the guide and the issue is revealed.

DSCN2016.jpg


It seems like Jethro, the crude cabinetmaker, was a little off with his measurements and filed the blade gap in the wrong place. Once the guide is in place, there is no clearance for the blade and it cannot lower. Must fix but of course the 100 year old screws don't want to cooperate. Will get medieval on them.

DSCN2017.jpg


Here is the bottom of the guide. It clearly shows a scribe mark but Jethro did not file to the mark? Was it quittin' time? The answer is lost to time.

DSCN2018.jpg


It is time to use my vintage Parker vise with its sock-o-death jaws.

DSCN2019.jpg


I began my career in the shop as a woodworker. I liked the feel and smell of wood. I did not care for rusty metal. It was heavy and mysterious. Over the years, however, I have developed metal working skills from necessity. Here is what I learned:

The young craftsman who aspires to be a quality woodworker should develop his metalworking skills.

So a few minutes of filing does this.

DSCN2020.jpg


The screws don't look so hot.

DSCN2021.jpg


One of them is pretty chewed. Must fix.

DSCN2022.jpg


I don't have a thread chaser but I do have a set of files.

DSCN2023.jpg


Redneck thread chasing.

DSCN2024.jpg


Everything goes together OK and I adjust the blade.

DSCN2027.jpg


I pull the first shaving. WOO-HOO--it is full length.

DSCN2025.jpg


Just look at that cut!

DSCN2026.jpg


The very last shaving gets wispy and that signals that the plane has bottomed out.

DSCN2029.jpg


The side of the raised panel is smooth.

DSCN2031.jpg


And the profile is spot on.

DSCN2030.jpg


Just put a little rabbet on the bottom and this panel is ready to go into the door.

I know that routers and shapers are the way to go if you are building a kitchen. BUT if you are working on that special project like a secretary desk, you need to consider hand raised panels. They are not that hard to do and they really add a touch of hand craft to your project. There is pride in saying, "Yes, sonny, I gnawed that panel myself using only a handplane." :bowdown:
 
Last edited:

sawduststeve

Well-known member
Joined
Oct 7, 2016
Messages
2,137
Location
Havering-Atte-Bower,London/Essex boarders, England
Adjustable Panel Raising Plane


And the profile is spot on.

DSCN2030.jpg


That Sir ^^^ is fantastic, and a great job with getting it to work as it should.It's a lovely shaving it takes off long grain, how does it perform cross grain?.
I enjoy this thread and you certainly know your stuff, thanks for taking the time to post.:)
I'm glueing up some oak door panels tomorrow for a project i'm on, I can post some photos here if you don't mind.
Regards
Steve.
 

mefast

Well-known member
Joined
Sep 1, 2015
Messages
99
Location
Southwestern, Ontario
You guys weren't kidding when you said that hand planes are addictive. I've been looking to buy a 'starter kit.' So far I think that would be made up of a Jack (No. 5), a Jointer (No. 7), a Smooth (No. 4), a Block (No. 60-1/2) and a Rabbet (No. 92).

Think those will get me started? Any specifics to look for when buying? I'm thinking of trying to find used vintage models as everything I've read said they are built better.
 
OP
J

jimreed2160

Well-known member
Joined
Aug 7, 2016
Messages
3,589
Location
Tallahassee FL
Thanks for your kind words, Steve. I am sure the cross grain is acceptable but with lots of "character". I have a project in mind that will test that. BTW, I was reading a Preston catalog from 1909 last night. The copy for the stringing router (see previous) said that "when using it cross grained, it would be helpful to gauge the lines of both sides before using the wide blades." I am sure that advise also applies to cross grained panels. They surely meant to use a marking gauge or marking knife to score the edges. On this plane, I think the nicker would do a good job. I am normally not a fan of nickers but this one is really good.

By all means, please post pictures of your work. We all like to see the works of others. And don't worry about judging. Your work has to look better than some of the stuff I have showed. I set the bar pretty low for redneck woodworking when I am in a hurry. In that age old quality vs speed race, I opt for speed a lot. Especially when I am working on utility projects. Welcome to 101.
 
OP
J

jimreed2160

Well-known member
Joined
Aug 7, 2016
Messages
3,589
Location
Tallahassee FL
Mefast--Jump in--the water is just fine. Your list is a good start and those planes should see lots of use in your shop. I am partial to Stanley planes made up until WWII as they seem to have the most quality. Planes with broken totes seem to be the best bargains. And fixing wood should not be hard for a woodworker. Most of my user planes have repaired totes. I was one of the youngest kids in my neighborhood of baby boomers and lots of hand me down toys made their way to my house. Of course, they were discarded because they were broken or incomplete. I learned how to fix and improvise parts at an early age. As a result, I feel much more at home with well used and repaired items.

Good luck in your quest for some planes.
 

trainer

Well-known member
Joined
Nov 28, 2005
Messages
2,019
Location
Northern Ontario, Canada
I'm finishing up my kitchen reface project with 53 separate raised panels. Im happy with the results but the next project will be smaller and involve fewer power tools. Router and dust collector running with full safety gear gets old pretty quickly.
 

sawduststeve

Well-known member
Joined
Oct 7, 2016
Messages
2,137
Location
Havering-Atte-Bower,London/Essex boarders, England
Thanks for the welcome Jim.
Here's what I started with.
Eight pieces of European Oak 6" x 1"x 24" to make four 22" x 10" panels.
I put a slot in the centre of the meeting edges, 1/4" x 1/2" and cut two lengths of loose tongue for glueing into the slot. this serves two purposes 1, it has doubled the surface area of your glue, a stronger joint. 2, if the joint separates you won't see daylight through it.


sawduststeve

Well-known member
Joined
Oct 7, 2016
Messages
2,137
Location
Havering-Atte-Bower,London/Essex boarders, England
Boards sanded and cut to size, spot the joint and the mistake.


Sorry if these are four of the most boring pictures ever, tomorrow I'm going to shape the panels in a style that matches Jims hand planed one.

Apologises for only one picture at a time,my computer skills need to improve.
Regards
Steve.
 
OP
J

jimreed2160

Well-known member
Joined
Aug 7, 2016
Messages
3,589
Location
Tallahassee FL
Trainer--53 doors needed some power behind it. Whew! Raising those panels would make you look like Popeye AND take forever. Time to take a breather.

Steve--Good pictures. Can't wait to see the next phase.
 

ez-duzit

Well-known member
Joined
Jun 24, 2013
Messages
5,096
Location
Marina del Rey
One point to keep in mind on "foaming/expanding" glue--those bubbles decrease the density, have no strength, and so weaken the glue joint.
 

ztorres

Well-known member
Joined
Sep 22, 2016
Messages
195
Location
Iowa
I've been making more boxes lately and I'm tired of branding each piece with three different pieces to make my brand. So I decided that I'd make my own. I drew out a mirrored image on a piece of 1/4" thick 2" wide bar stock, and cut the outline out with a grinder. Then I took a dremel tool and cut the edges and corners to a finer point and cut a recess between the top and bottom. Then I took a couple pieces of 1/4" round and made a handle. Then I took some Oak and made a wooden handle. I don't have a pit to get it hot so I used a torch to try it out. I'm putting poly on the handle now but here is the "final" product
331d167ac250a06c76ef52707e5c2fc5.jpg
e5fbf7e0e3dea4df5eec960e4735670a.jpg
The sample burn
1f6f2e474cc3afbdf662443fcc953aa3.jpg


Zach
 

Attachments

  • 331d167ac250a06c76ef52707e5c2fc5.jpg
    331d167ac250a06c76ef52707e5c2fc5.jpg
    456.3 KB · Views: 1
  • e5fbf7e0e3dea4df5eec960e4735670a.jpg
    e5fbf7e0e3dea4df5eec960e4735670a.jpg
    507.2 KB · Views: 0
  • 1f6f2e474cc3afbdf662443fcc953aa3.jpg
    1f6f2e474cc3afbdf662443fcc953aa3.jpg
    505.8 KB · Views: 1
To avoid these ads, REGISTER NOW!
Top Bottom