To avoid these ads, REGISTER NOW!

Woodworking 101--Tools and Tips

OP
J

jimreed2160

Well-known member
Joined
Aug 7, 2016
Messages
3,589
Location
Tallahassee FL
Stands back in shock :shocking:

You mean in all that wood you don't?

Easy for me to say, my shop landlord is a lumber yard who specializes in Hardwoods. And yes, I do get special pricing.
http://andersonlumberstpete.com/

Oh and I do happen to have a chunk big enough to make at least one mallet, though I doubt that is it's fate.

Well, I have managed to accumulate a small stash of premium wood. BUT making a lowly mallet from 16/4 rosewood is just an EMBARRASSMENT of RICHES. Kinda like making doorstops from birdseye maple.
 
To avoid these ads, REGISTER NOW!

derosa

Well-known member
Joined
Oct 19, 2010
Messages
1,078
Location
Oceanside, NY
I need to make a couple of nice mallets for which I do have a hefty stack of 8/4 and 12/4 applewood, makes for a solid and pretty piece.
 

rrich1

Well-known member
Joined
Oct 7, 2015
Messages
793
I decided to build Jay Bates' workbench . To keep it within a moderate budget I am going to use southern yellow pine from my lumber store. Its 8/4 stock and 12" wide. There is a lumber sale going on but couldn't come up with something moderately close to support cost. To dress it up a little bit I was thinking of putting an accent strip along each long side and maybe laminate a strip in each leg. If I did this what would be a good complementary wood with syp?

Sent from my Pixel XL using Tapatalk
 
OP
J

jimreed2160

Well-known member
Joined
Aug 7, 2016
Messages
3,589
Location
Tallahassee FL
I decided to build Jay Bates' workbench . To keep it within a moderate budget I am going to use southern yellow pine from my lumber store. Its 8/4 stock and 12" wide. There is a lumber sale going on but couldn't come up with something moderately close to support cost. To dress it up a little bit I was thinking of putting an accent strip along each long side and maybe laminate a strip in each leg. If I did this what would be a good complementary wood with syp?

Sent from my Pixel XL using Tapatalk

I vote for walnut because it would provide great contrast.
 

derosa

Well-known member
Joined
Oct 19, 2010
Messages
1,078
Location
Oceanside, NY
I like the way you think. What about padauk? I have a few boards of that as well as some walnut and possibly cherry.

Sent from my Pixel XL using Tapatalk

If you have it then why not, the color will really stand out against the pine, some cherry will work as well once aged, a couple days laid out in direct sun after being fully dimensioned will bring the color out.
 
OP
J

jimreed2160

Well-known member
Joined
Aug 7, 2016
Messages
3,589
Location
Tallahassee FL
I agree. Padouk or cherry would be good choices also. Cherry and padouk are both phototrophic--they respond to sunlight. Padouk loses its bright red color and turns brown while cherry darkens from pink to rich brownish red.

I like your idea of a contrasting wood on the bench. It gives it a little bling along with some personality.
 

ez-duzit

Well-known member
Joined
Jun 24, 2013
Messages
5,094
Location
Marina del Rey
...I am going to use southern yellow pine...To dress it up a little bit I was thinking of putting an accent strip along each long side and maybe laminate a strip in each leg...

Nothing wrong with budget lumber for your bench. I would avoid contriving to tart it up. Let your workmanship show, rather than decorate it with more expensive trim.
 

cheechi

Well-known member
Joined
Feb 29, 2012
Messages
4,384
Location
Triad, NC
you can get red oak at the same hardware store and while it wouldn't be that great of a contrast I think it would be a better accent to keep it all in that same vein. Plus when you make your tail and/or face vises you won't have to 'add' the hardwood to the jaws you can build the vise into your accent. Or if your strip isn't on the edge then it will match anyway.
 

rrich1

Well-known member
Joined
Oct 7, 2015
Messages
793
Thanks for all the responses. I appreciate it. I'm going to go back to my wood working store and get the syp. I think cherry and padauk would look really good. Not a definite I'll put it in but might grab another board while I'm there. My store is basically a rockler just without the name on the front. They sell rockler products.

Sent from my Pixel XL using Tapatalk
 
OP
J

jimreed2160

Well-known member
Joined
Aug 7, 2016
Messages
3,589
Location
Tallahassee FL
Speaking about workbenches, I need to finish up this top replacement. Here is a mock up.

DSCN2890.jpg


Interlocking flooring should be just a "snap", right? We shall see.
 

R_einan

Well-known member
Joined
Aug 29, 2016
Messages
461
Location
Eastern WA
R--Ditto on the Freud blades. Underbench storage is a great idea. I suggest you mock up the bench with cardboard boxes to check the overhang and make sure you have enough clearance for your knees. And extra inch or two could make a big difference.

Interesting thought there Jim; thank you. I started reconsidering the design a little. Finished specs of the design call for 16'9" long against the side wall of his pole barn style shop, top depth will be 25" and the height will be 40". With the original design, which is meant for a stick built wall, the rear supports are simply attached to the studs. As this is a poll barn, there isn't vertical studs to stake to so rear legs are necessary. There will be a total of 12 legs spaced to leave 36" between each leg. My previous plan was to half lap the top of each leg and fit into a cross lap in the top board. Which I will do in the rear. However, I think I may skip the cross lap in the front board so I end up with a 3/4" overhang of the top to the legs. That way drawer fronts and cabinet doors won't stick out past the front skirt. Will end up cleaner looking.

Which model Freud dado is recommended? I've seen sd208, sd508, as well as a diablo dd208 which is made by Freud.
 
Last edited:
OP
J

jimreed2160

Well-known member
Joined
Aug 7, 2016
Messages
3,589
Location
Tallahassee FL
Workbench top refresh

If you remember, the Masonite top looked like this:

DSCN2886.jpg


It came up pretty easy.

DSCN2887.jpg


When he dropped it off, the PO was talking about his dad and how proud he was of his bench. We looked for a signature but could not find one. I had son do the honors. It adds a nice personal touch, I think.

DSCN2901.jpg


So I hope John would be proud of this update to his bench. The LN #62 does a good job trimming this stuff.

DSCN2896.jpg


My strategy was to do it like a floor so I started at the front edge and worked back. I measured width so the last two courses would be full. The short course is on front where all of the fitting is necessary.

DSCN2897.jpg


It snaps together pretty easily.

DSCN2898.jpg


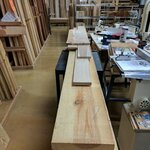
Here is some scrap. I cut the wrong end off. :headscrat

DSCN2899.jpg


Almost done. Just need a little trim.

DSCN2900.jpg


WooHoo. Finished and secure. John used screws about every six inches. I was a little more spare.

DSCN2902.jpg


DSCN2903.jpg


So I am happy with my $19.09 investment. The new top is durable and pretty. The surface is a little slick for my taste, but this is bench #2 and will not see serious ww. The snap laminate flooring is quick and cheap. It beats plywood for feel (no edge splinters) and it beats 2x construction lumber for cost. In the right situation, this stuff rocks.
 
OP
J

jimreed2160

Well-known member
Joined
Aug 7, 2016
Messages
3,589
Location
Tallahassee FL
Summer project

I started this cherry secretary desk in 2004 during a job lull but things picked up and I never got around to finishing it. My granddaughter is eyeballing it so the time has come to fix it up.

DSCN2895.jpg


Finishing it involves the usual punch list of glass, handles, trim, etc. One larger chore is to finish off the concealed storage compartment. I can do most of the work where it stands so it will be nice to have an inside ww project during the heat of summer.
 

cheechi

Well-known member
Joined
Feb 29, 2012
Messages
4,384
Location
Triad, NC
re-reading your suggestion jim, were you saying that your scrub plane blade's radius is the diet coke can? or just giving examples of radius gage alternatives?

I have no other scrub plane to reference and don't really know how to go about saying 'this must be the right one' or anything.

That is a nice looking bench top. Most ww benches don't have any fasteners at the top and I wonder how do you anticipate that affecting potential work on it, even with the heads recessed is there potential for marring/scratching or anything negative?
 

rk5n

Active member
Joined
Jan 11, 2016
Messages
39
Finished two projects I've been working on for a while.

First is a coffee table. Base is mortise and tenon construction with honey locust stock and the top is curly maple finished with Arm-R-Seal.

20170406_165349.jpg

Next is a lamp. The lumber yard has a pile of scrap outside for free. It's mostly poplar off cuts but I found some thin mahogany strips, 2.5" wide and 1/4" to 1/16" thick. Because they were so thin I was able to bent laminate them together without steaming. Base is concrete.

20170407_153454.jpg
 
OP
J

jimreed2160

Well-known member
Joined
Aug 7, 2016
Messages
3,589
Location
Tallahassee FL
re-reading your suggestion jim, were you saying that your scrub plane blade's radius is the diet coke can? or just giving examples of radius gage alternatives?

I have no other scrub plane to reference and don't really know how to go about saying 'this must be the right one' or anything.

That is a nice looking bench top. Most ww benches don't have any fasteners at the top and I wonder how do you anticipate that affecting potential work on it, even with the heads recessed is there potential for marring/scratching or anything negative?

A Diet Coke can is a pretty aggressive radius but I am pretty sure that is what I used on the Stanley #40 blades that I made. I will check today. There is nothing very scientific about it. Smaller radius means there is less blade to "bite". Larger radius is harder to push but easier to smooth afterward. Some ww even put a heavy camber on their #5 and use that. It works for light scrub work but fails on hard and twisted lumber.

As for the fasteners, the PO used recessed woodscrews and lots of them. Never gave me a problem so I did the same. I think it will be OK as a general workbench. My other plan was to replace the Masonite with 8/4 soft maple but nixed that project when I saw the flooring. Time and money vs quick n dirty. I am liking the look but the slick surface is not so hot. We will see how it holds up to use.
 
To avoid these ads, REGISTER NOW!
OP
J

jimreed2160

Well-known member
Joined
Aug 7, 2016
Messages
3,589
Location
Tallahassee FL
Thinking about a radius

So I gathered up a variety of radius gauges this morning.

DSCN2915.jpg


Turns out that the Diet Coke was a little too tight for a scrub blade. Here are three scrub planes--L to R--Stanley #40, Stanley #40 1/2, and LN #40 1/2.

DSCN2914.jpg


The #40 likes Chicken of the Sea tuna.

DSCN2913.jpg


The Stanley #40 1/2 is good with Grits.

DSCN2912.jpg


And the LN goes with Sherwin-Williams.

DSCN2910.jpg


I have a few sets of radius gauges that I use for decorative plane blades. The sets work for small diameters but fail for larger blades and large cambers. This problem sends me on a walk-about and I find suitable large radius gauges everywhere around the house.
 

cheechi

Well-known member
Joined
Feb 29, 2012
Messages
4,384
Location
Triad, NC
Perfect thanks. I think the paint can is about what I had in mind for this thin HF blade. Looks like the #40 is a much thicker blade that could account for it having such an aggressive radius compared to the others. Even though the LN is a much thicker blade than the HF I think I could make that work.
 
OP
J

jimreed2160

Well-known member
Joined
Aug 7, 2016
Messages
3,589
Location
Tallahassee FL
Perfect thanks. I think the paint can is about what I had in mind for this thin HF blade. Looks like the #40 is a much thicker blade that could account for it having such an aggressive radius compared to the others. Even though the LN is a much thicker blade than the HF I think I could make that work.

The HF blade is 5/64 and the LN is 11/64. And yes, that thicker blade does perform much better.
 
OP
J

jimreed2160

Well-known member
Joined
Aug 7, 2016
Messages
3,589
Location
Tallahassee FL
Today's project

It is a nice cool day--perfect shop weather. I decided to work on the old sewing box. If you remember, there was a pincushion in the middle. Well, that had to go. The surprise is that it was a tiny drawer but too small to keep.

DSCN2917.jpg


DSCN2918.jpg


So I found a nice piece of birdseye scrap.

DSCN2919.jpg


But I ripped it too narrow! Drat! Must be more careful. Time for scrap #2.

OK. This is about right.

DSCN2921.jpg


I shaved it into submission. That is a more careful method.

DSCN2922.jpg


And here is our little drawer mock up.

DSCN2923.jpg


One of the characteristics of my furniture is walnut with birdseye trim. This just fits in with that. More fun later. Stay tuned.
 

Autonomous

Well-known member
Joined
Dec 26, 2015
Messages
66
Last night I had a need for a router ( post that simple project next week when done), so I finally had a reason to break out "The Legacy".

http://vintagemachinery.org/pubs/detail.aspx?id=4638

This is a Craftsman router left to me by my father in law after he passed last year. JRM was a collector of things, to the point of becoming a hoarder in his final years. He left a home and garage full of treasures and trash, none of which he would part with until his final resting. In his Will I was left all woodworking tools and supplies, to which I have tried to slowly put to use.

I will post a few more tools later, but for today I bring you a few quick and dirty pictures of this fine instrument:


79690807410a10851ff375a7700abc41.jpg43971f0b0f250f96fc8547c2faba9e80.jpgdca940e8e1515e9638ad33c1259f6d8b.jpg

It is from 1972 at least, in amazing condition, with a 22° bevel bit stuck in the collet. A little PB Blaster freed up the hieght adjustment wing nut, the collet and bit. It spins at full speed happily, and did a fine job of putting a bevel on my simple project. The "Permanex" carrying case has a few cracks, but it is 45 years young.

Time to go to work, more tools later.

Sent from my Pixel XL using Tapatalk
 

Attachments

  • dca940e8e1515e9638ad33c1259f6d8b.jpg
    dca940e8e1515e9638ad33c1259f6d8b.jpg
    114.9 KB · Views: 0
  • 43971f0b0f250f96fc8547c2faba9e80.jpg
    43971f0b0f250f96fc8547c2faba9e80.jpg
    119.1 KB · Views: 0
  • 79690807410a10851ff375a7700abc41.jpg
    79690807410a10851ff375a7700abc41.jpg
    103.4 KB · Views: 0

rrich1

Well-known member
Joined
Oct 7, 2015
Messages
793
Purchased my bench lumber on Saturday. I ended up with syp and hickory for a slight contrast. There was virtually no cost difference between the two so I figured I'd see how it will turn out. The wide Hickory board will be the front of the leg vise. d1ed5c07a069c362ceb6a48ebea5ee72.jpga2a11b6c97c018093ab7ede50ba1e0e1.jpg3980a2b225be8c5b620c0823c69b5f33.jpg34cd292e652267676efbab5ea767bcc3.jpg

Sent from my Pixel XL using Tapatalk
 

Attachments

  • 34cd292e652267676efbab5ea767bcc3.jpg
    34cd292e652267676efbab5ea767bcc3.jpg
    91.3 KB · Views: 0
  • 3980a2b225be8c5b620c0823c69b5f33.jpg
    3980a2b225be8c5b620c0823c69b5f33.jpg
    67.5 KB · Views: 0
  • a2a11b6c97c018093ab7ede50ba1e0e1.jpg
    a2a11b6c97c018093ab7ede50ba1e0e1.jpg
    73.1 KB · Views: 0
  • d1ed5c07a069c362ceb6a48ebea5ee72.jpg
    d1ed5c07a069c362ceb6a48ebea5ee72.jpg
    87.4 KB · Views: 0
Last edited:
OP
J

jimreed2160

Well-known member
Joined
Aug 7, 2016
Messages
3,589
Location
Tallahassee FL
Auto--I have that very router, blow plastic case, and edge guide. Purchased around the same time. Good tool. I dedicated it to a router table and still use it on occasion.

rrich1--Nice to see you have started your bench. Good luck with the build.
 

rrich1

Well-known member
Joined
Oct 7, 2015
Messages
793
EZ- I think it will work well together and still on my budget side of price for the build.
Jimreed- thanks!

Sent from my Pixel XL using Tapatalk
 

cheechi

Well-known member
Joined
Feb 29, 2012
Messages
4,384
Location
Triad, NC
dca940e8e1515e9638ad33c1259f6d8b.jpg

It is from 1972 at least
Those VA bits are a very nice vintage. I have about a hundred VA taps & dies same era based on the packaging, and I like them a lot. And those particular router bits were made 30 minutes south of Whiteside's factory.
 

rrich1

Well-known member
Joined
Oct 7, 2015
Messages
793
Made "some" sawdust tonight. Got the top pieces rough cut and jointed. To late tonight to plane and get glued up. Will do it tomorrow. ed77a78bfcd1124768c5ad3a8425e431.jpgf336f575388bbd55623b523018287a0f.jpg312a9b00efb955646a645381d56e2b5f.jpg

Sent from my Pixel XL using Tapatalk
 

Attachments

  • ed77a78bfcd1124768c5ad3a8425e431.jpg
    ed77a78bfcd1124768c5ad3a8425e431.jpg
    90.9 KB · Views: 0
  • 312a9b00efb955646a645381d56e2b5f.jpg
    312a9b00efb955646a645381d56e2b5f.jpg
    144.5 KB · Views: 0
  • f336f575388bbd55623b523018287a0f.jpg
    f336f575388bbd55623b523018287a0f.jpg
    122.2 KB · Views: 1

Autonomous

Well-known member
Joined
Dec 26, 2015
Messages
66
@jimreed2160 I've been thinking about integrating this into a router table, but I may buy a cheap half inch shank router to do so, as I really hate to cover it up.

@cheechi Thanks for the report, I was wondering about the quality of the few bits I have. Having never used a router I had nothing to compare to, but the one bit I opened and used was untarnished by time and cut smooth and easy. I guess I should have figured Made in the USA woodworking gear, Vermont no less, would have been well made in the 70's/80's.

@rrich1 that is a solid pile of dust and shavings. Careful with the matches.

Sent from my Pixel XL using Tapatalk
 

R_einan

Well-known member
Joined
Aug 29, 2016
Messages
461
Location
Eastern WA
My Father-in-law gave me this router he found for $5 at a yard sale. It's a Porter Cable 100 with the 1001 base. It's missing the height adjustment ring and one handle, and had the switch removed and hardwired to a **** un-grounded cord. Picked up a switch and a new cord tonight and rewired it. Works pretty good.
 

Attachments

  • IMG_2136.jpg
    IMG_2136.jpg
    130.5 KB · Views: 46
  • IMG_4263.jpg
    IMG_4263.jpg
    131.9 KB · Views: 36
OP
J

jimreed2160

Well-known member
Joined
Aug 7, 2016
Messages
3,589
Location
Tallahassee FL
rrich1--Thanks for the progress shots. We like pictures.

Auto--I will try to dig out my vintage router table. It may give you some ideas.

R--So FIL paid $5. Good score for him. BUT you got the PC router for FREE, so you get the medal. :rocker: Good job restoring it to a safe working life. If that is the PC router that came with two bases, you are in luck. There should be scores of extra bases on that auction site.
 

TwoBytes

Well-known member
Joined
Mar 14, 2014
Messages
789
Location
Canberra, 'Stralia
I posted these pics on my thread, apologies to anybody who's seeing them twice.

This thread got me motivated to get Dad's old plane out.

It's a bit rough looking, and the blade was blunt and worse, it had a big gap in the middle when I put a straightedge across the end.

I didn't think to get any "before" pics of the blade, but here's the "during"...
View media item 70217
And the after...
View media item 70218
View media item 70219
View media item 70220
View media item 70221
Dad couldn't remember when he bought it, but it's still in the original box, and it was $13.23, so I'm guessing it was a long time ago!

Next thing is to do something about the rust. What's the best thing for that? I don't have an electrolysis bath, although that would be nice. Soak in vinegar?

And I'll refinish the handles. They're solid, but covered in cracked lacquer that's falling off.
 

TwoBytes

Well-known member
Joined
Mar 14, 2014
Messages
789
Location
Canberra, 'Stralia

Attachments

  • 43971f0b0f250f96fc8547c2faba9e80.jpg
    43971f0b0f250f96fc8547c2faba9e80.jpg
    115.3 KB · Views: 1
OP
J

jimreed2160

Well-known member
Joined
Aug 7, 2016
Messages
3,589
Location
Tallahassee FL
Twobytes--Good job on the plane blade. As for the rust, overnight in vinegar will probably take care of that brown stain. How does the sole look? That is the part that needs to be rust free.

Good to see that your dad saved the box. Collectors love those things.
 

Autonomous

Well-known member
Joined
Dec 26, 2015
Messages
66
@TwoBytes That router looks to be in great shape and the steel box is awesome. Less impact resistant than today's plastic but 1000X classier.

@Jim When you get time I'd be thankful to see your table setup. Your posts are full of inspiration.

Sent from my Pixel XL using Tapatalk
 
To avoid these ads, REGISTER NOW!
Top Bottom