To avoid these ads, REGISTER NOW!

Woodworking 101--Tools and Tips

losvre

Well-known member
Joined
Dec 13, 2011
Messages
1,199
Location
UK
I'd suggest that there are other possibly more useful planes you might want to consider first, such as: low angle block plane, rabbet/shoulder plane, etc.
I agree, I am not sure if I need a joiner plane, just wondering.

A low angle 60, is on the list and for a few special jobs I have got the one below, haven't used it yet:eek:
53d06b3682ce9f11dc699b31ecb84973.jpg9a48b68a543c6d87591d696d80935df3.jpg

Sent from my SM-A510F using Tapatalk
 

Attachments

  • 9a48b68a543c6d87591d696d80935df3.jpg
    9a48b68a543c6d87591d696d80935df3.jpg
    86.3 KB · Views: 2
  • 53d06b3682ce9f11dc699b31ecb84973.jpg
    53d06b3682ce9f11dc699b31ecb84973.jpg
    60.5 KB · Views: 0
To avoid these ads, REGISTER NOW!

ez-duzit

Well-known member
Joined
Jun 24, 2013
Messages
5,095
Location
Marina del Rey
You likely won't get much use from the multi plane. Perhaps you might trade it foe a plane which you will use regularly.

The planes I use most frequently are the low angle block, shoulder and jack.
 
OP
J

jimreed2160

Well-known member
Joined
Aug 7, 2016
Messages
3,589
Location
Tallahassee FL
Losvre--Good luck as you grow with your planecraft. I agree that a low angle block would be a good choice. I like my #7 jointer, though. The multiplane is outstanding. There is a learning curve to it but that is one handy plane to have. Nothing better for cutting a 1/8" groove. Keep the pictures coming. We love pictures. :rocker:
 

drivesitfar

Well-known member
Joined
Oct 23, 2013
Messages
36,007
Location
Pacific Northwest
CK: i agree you did a great job and you might even get something better than a kiss for this present to your bride. how many years?

any chance you have some during pictures? i also would like to know what wood cause it does look like cedar. also what tools did you use and what screws?

thanks
 
OP
J

jimreed2160

Well-known member
Joined
Aug 7, 2016
Messages
3,589
Location
Tallahassee FL
Quick project--plate boards

Let's get into our WayBack machine and travel back to Chapel Hill, NC. The time is 1968 and some rednecks from the piedmont have just arrived in town. They find themselves at the Zoom-Zoom Room restaurant, where waiters are scurrying about with sizzling platters. It is one of the house specialities--The Gambler--a strip steak served on a bed of onions in a sizzling cast iron skillet.

Well I was a big fan and picked up some of the skillets when I found them. They add a lot of flair to any meal and were great for dinner parties. The only problem was finding something to set the hot thing on. I settled for potted plant cork bases but they were round and just did not look right. So now many years later, I have a better solution.

Since I have a stash of hickory and a shop begging for projects, all systems are go. My fifteen minute shop session today was a pair of hickory skillet mats for tonight's cookout. The Queen and I will be dining in style.

DSCN3208.jpg


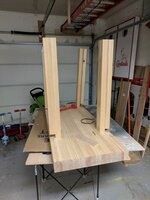
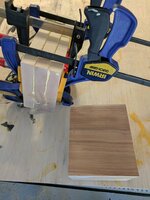
Normal place setting allows about 15" per diner, so that shall be the size. It was easy enough to use the table saw to cut and square two suitable blanks.

DSCN3210.jpg


Both edges were a little rough.

DSCN3211.jpg


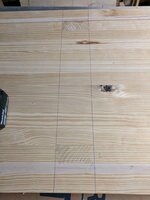
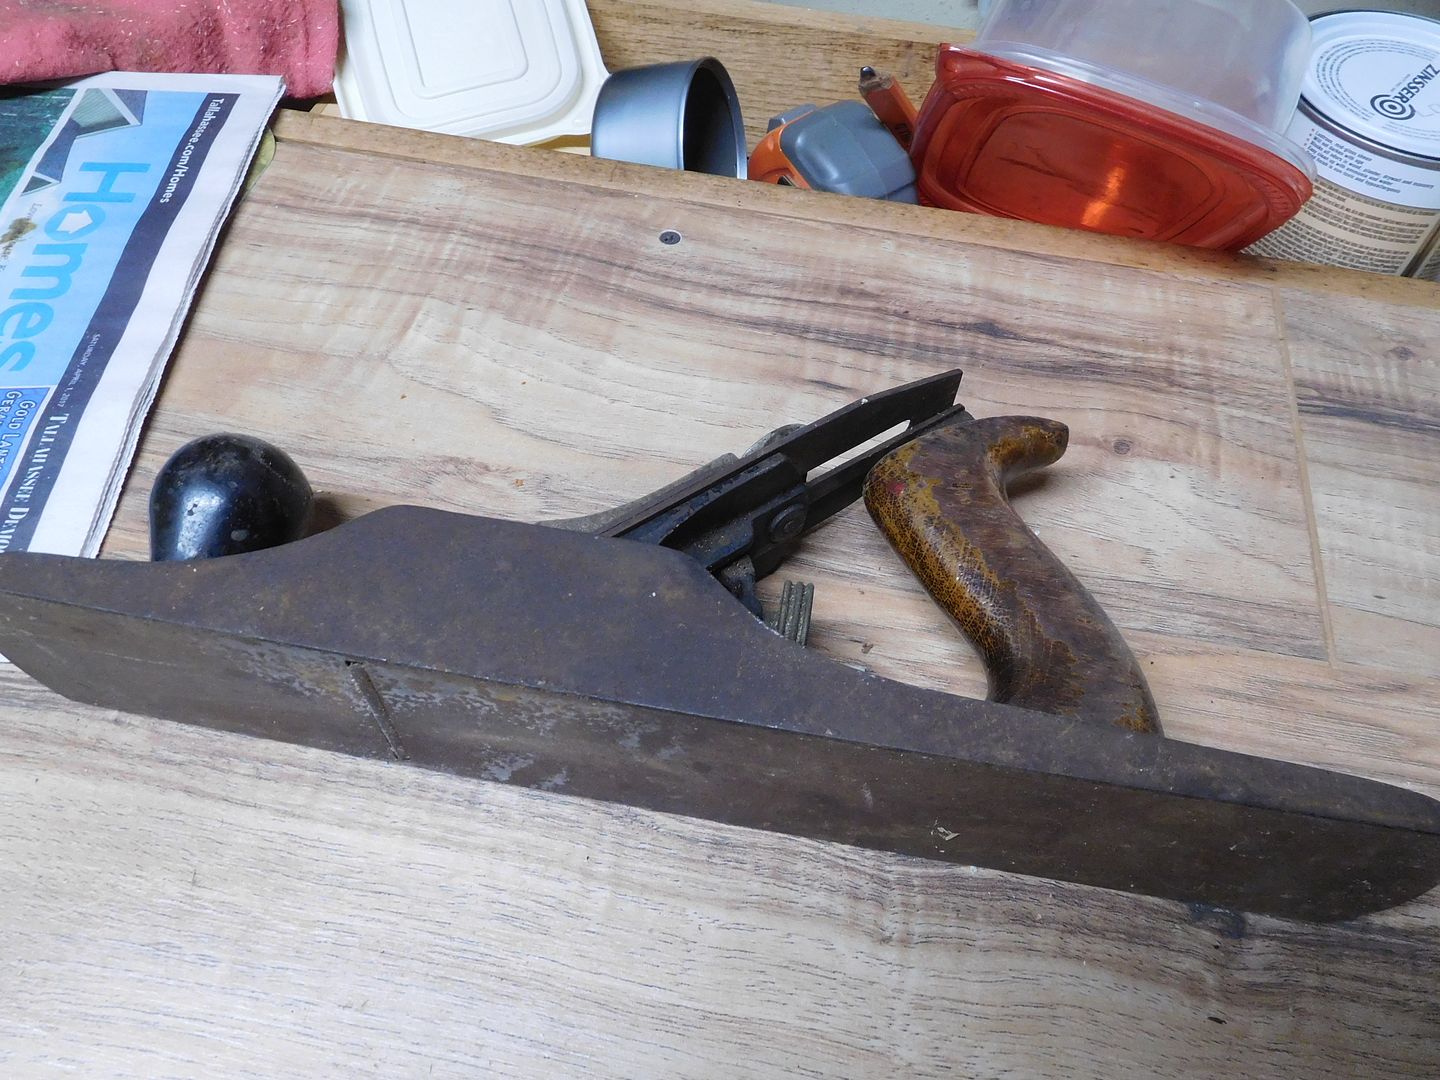
So I went to town with my LN #7.

DSCN3212.jpg


When you make three or four passes and get nice ribbon shavings like this, you are done.

DSCN3213.jpg


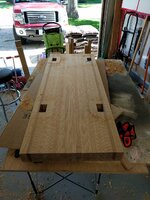
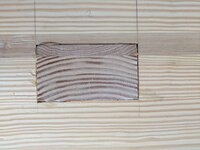
A little touch up with sandpaper and both of them are good to go.

DSCN3214.jpg


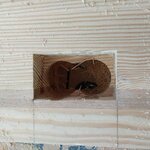
The hickory is pretty. Here is a close up of the grain.

DSCN3216.jpg


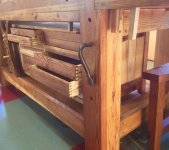
Now that the shop is organized and straightened up, it is a pleasure to work in. I can knock out projects quickly. WooHoo!

My hat is tipped to every veteran and active service member as we remember and honor those who fell in battle.
 

ScottsGT

Well-known member
Joined
Jan 1, 2014
Messages
4,883
Location
Lake Wateree, SC
Aren't you going to route in a place for the pan to sit in so it doesn't slide around?

What times dinner? I'll bring the beverages!

I like this! Think I'll do one for when me and the wife split one of those 1" thick rib eyes we have all the time.
 
OP
J

jimreed2160

Well-known member
Joined
Aug 7, 2016
Messages
3,589
Location
Tallahassee FL
Aren't you going to route in a place for the pan to sit in so it doesn't slide around?

What times dinner? I'll bring the beverages!

I like this! Think I'll do one for when me and the wife split one of those 1" thick rib eyes we have all the time.

Dinner was around 5. Sorry you missed it. The boards worked great. I guess I could get fancy and dish out a spot but the cast iron pretty much stays in place.

I sliced the onions and broke them into thin rings, oiled the bottoms of the skillets, and distributed the onion all around. They stayed in the oven at 320 degrees F for about 45 minutes. Onions got nice and soft. I let the steak rest for 5-7 minutes while the sourdough bread was toasting. Then I divided the huge Costco strip in the middle and placed a large hunk on each bed of onions. Grilled corn on the cob finished out the meal. At the end of service, I was able to clear the table and remove the still very warm skillets by hand.

YUM!
 

56vette461

Well-known member
Joined
Jan 13, 2013
Messages
492
Location
Northern California
Jimreed, your dinner menu is absolutely delightful. I have 12 of the flat grill pans and 12 -5" skillets. Strip steaks, onions, mushroom are always a big favorite. The skillets are perfect for chocolate chip cookie desserts. Now the wooden planks are perfect. I'll be looking at to make a few of those for our BBQ weekends. Thanks.
 

rrich1

Well-known member
Joined
Oct 7, 2015
Messages
793
Finally able to get some work done this weekend. My wife had surgery this week and I took the week off. Took the plunge and got the legs measured out where I think I want them. Cut them out with a forstner bit, router, and lots of chiseling. They are not perfect by any means but I did get the hickory lines matched up darn near perfect.

I also got the stretchers cut, planed, and glued up. Still need to cut them to final length and cut the half laps on them and the legs.

I have been looking at bench crafted or wooden vises for the leg vise. I was talking with my father in law and apparently he can make me the screw and nut! I went and bought a piece of tiger maple and am going to glue up pieces of hickory for the hub.
84da6745f10a659fb1cf56eef5d88137.jpg3438331f74916a16a6a4f6ad8013f634.jpg4ca048abd6b65e95499af26269ecdf28.jpgde9e56cfc4c7b64b168040d4b41815c0.jpgf720fdca87558f02e1ccc817a5d5fb75.jpg

Sent from my Pixel XL using Tapatalk
 

Attachments

  • f720fdca87558f02e1ccc817a5d5fb75.jpg
    f720fdca87558f02e1ccc817a5d5fb75.jpg
    85.1 KB · Views: 0
  • 84da6745f10a659fb1cf56eef5d88137.jpg
    84da6745f10a659fb1cf56eef5d88137.jpg
    81.2 KB · Views: 0
  • 3438331f74916a16a6a4f6ad8013f634.jpg
    3438331f74916a16a6a4f6ad8013f634.jpg
    107.2 KB · Views: 0
  • 4ca048abd6b65e95499af26269ecdf28.jpg
    4ca048abd6b65e95499af26269ecdf28.jpg
    70.7 KB · Views: 0
  • de9e56cfc4c7b64b168040d4b41815c0.jpg
    de9e56cfc4c7b64b168040d4b41815c0.jpg
    195.1 KB · Views: 0
OP
J

jimreed2160

Well-known member
Joined
Aug 7, 2016
Messages
3,589
Location
Tallahassee FL
56--Get moving on the planks. They worked out well and should be a crowd pleaser.

Shorty--Well, there were four big thick strips in the pack and we grilled one. That leaves three for a quality check.

rrich--I can almost see that bench in action. Hope your wife is recovering ok. Shoptime is a good stress reliever. I am anxiously anticipating your vise work.
 
OP
J

jimreed2160

Well-known member
Joined
Aug 7, 2016
Messages
3,589
Location
Tallahassee FL
Maybe it is the summer malaise already setting in but I didn't make it out into the shop until after 11 this morning. It's kinda a lull time between projects and I just cranked up the tunes and did a little straightening up. Back in the shop annex I noticed a line of Stanley Bedrock planes--all #605 jack planes. The round sides (early version) needed tote work but the flat sides (later version) all had good totes. One in particular stood out. It was the dirtiest and had the most rust. That plane looked like a good project to do while I figure out what the next big thing is.

DSCN3217.jpg


DSCN3219.jpg


I began taking it apart and was pleased to see that someone really used this plane. It was full of sawdust and wood shavings.

DSCN3220.jpg


DSCN3221.jpg


There are two types of Bedrock frogs. The early versions are very similar to Bailey planes and attach with two screws. The difference between Baileys and Bedrocks is that the Bedrocks have a flat machined mating surface. There is much less machining on the Bailey frogs as they are bedded on casting surfaces that project. Early Bedrocks have round sides like Bailey planes but the later Bedrocks have flat sides. In addition, the flat sided Bedrocks have a unique attachment method which uses pins and pointed end screws. Here is the frog and the plane sole. Notice all of the machining marks on the mating surfaces.

DSCN3223.jpg


Here are the attachment pieces. The pin goes in the slot and projects through the hole. It is engaged by the pointed screw. When the screw is loose, the frog can be adjusted forward and backward. Forward tightens up the mouth and backward opens it up. Cool because you do not have to remove the blade.

DSCN3222.jpg


Speaking of the blade, there is good and bad news. The business end is mostly rust free. But the exposed end is pretty gnarly.

DSCN3224.jpg


Other side shows a similar sight.

DSCN3225.jpg


The sole is dirty and has a bunch of white paint residue or something on it.

DSCN3226.jpg


But some brushing and stick time works wonders.

DSCN3227.jpg


Small parts are in Evaporust bath. I need to pick up a piece of 3" pipe to make a container for the sole. While the Evaporust works, I will watch the Band of Brothers marathon and nap. More later. Stay tuned.
 
OP
J

jimreed2160

Well-known member
Joined
Aug 7, 2016
Messages
3,589
Location
Tallahassee FL
Fever Dreams

Ever have those fever dreams where all problems are solved? Well I had one a few nights ago and scurried out to HD this morning. Here is what I bought.

DSCN3228.jpg


Guess what? A flat sided Bedrock #605 just fits inside a 3" PVC drain pipe.

DSCN3229.jpg


I watch idiots all the time on reno shows. Pipe doping cannot be too difficult. And the end is on. It was seriously over-doped but I wiped off the overspray.

DSCN3230.jpg


Here is the top.

DSCN3231.jpg


The mallet came in handy because the end cap got stuck.

DSCN3232.jpg


No need to build a stand--I have a patternmaker's vise.

DSCN3233.jpg


I took a break and made lunch for the Queen. She is in good spirits these days because I have agreed to adopt a rescue kitty. We have a line on a pair. Stay tuned for pictures if all goes well. Maybe I can post pictures of the shop cat adventures.

After lunch I inserted the plane. It is waaaay down in there.

DSCN3234.jpg


Then I filled the thing with Evaporust.

DSCN3235.jpg


And capped it off.

DSCN3236.jpg


So while it cooks away, I think I will go take a nap. I guess the upside of having a kitty around is that I can replenish my stock of plastic litter pails. :dunno:
 

ScottsGT

Well-known member
Joined
Jan 1, 2014
Messages
4,883
Location
Lake Wateree, SC
Brilliant! But does Evaporust create any off gassing that might pressurize that tube if it is tight? I'm sure the tube can handle the pressure, but you might get a little surprise when you unscrew it.

OK, I've got to ask. Are you guys retired or just self employed? I can't get nearly the garage time you guys seem to get. :dunno:
Lately the only garage time I get is walking through it either going to work or coming home from work. :sad:
 

turbowoodworker

Well-known member
Joined
Mar 18, 2012
Messages
3,522
Location
Apex NC
Scott has a great question. I watched gas bubble off the last vise I had in vinegar and wondered if it was hydrogen or worse. There is probably no reason to have a capped end anyway, so I would consider leaving it open and not get that surprise.
 
OP
J

jimreed2160

Well-known member
Joined
Aug 7, 2016
Messages
3,589
Location
Tallahassee FL
Scotts--I worked full time or went to school beginning at age 12 and was finally able to tell the workplace to KMA after 53+ years. Now they call me Jimmy 2 Naps.

Turbo--If it outgasses, it is not much. I have had it working in the kitty litter container with lid on and also in a sealed deli meat container. Never noticed any outgassing but there might be some. I really got the cap so I could store the EV in the tube during uses and not have it evaporate. I guess we will all know if I hear a loud *POP* tonight. :willy_nil
 

rrich1

Well-known member
Joined
Oct 7, 2015
Messages
793
More progress today before I had to stop and pressure wash the deck.

I got all but one of the half laps joints spot on. First time doing them and it wasn't even the first one that I screwed up. [emoji17]

Scott: I work second shift. Two kids under 5. Shop time is late at night or when the kids want to play outside. bfc7db39324f2aaab7f745e06d3a36ea.jpg9a99535e08ddeff4260e3be8ecb90cbb.jpg192483ad2befac748d211cbd4dfbc3f5.jpgac0e9a96639cfe8d4ec5ff32bd9c7ea4.jpg

Sent from my Pixel XL using Tapatalk
 

Attachments

  • 9a99535e08ddeff4260e3be8ecb90cbb.jpg
    9a99535e08ddeff4260e3be8ecb90cbb.jpg
    112.6 KB · Views: 0
  • 192483ad2befac748d211cbd4dfbc3f5.jpg
    192483ad2befac748d211cbd4dfbc3f5.jpg
    97.1 KB · Views: 0
  • ac0e9a96639cfe8d4ec5ff32bd9c7ea4.jpg
    ac0e9a96639cfe8d4ec5ff32bd9c7ea4.jpg
    94 KB · Views: 0
  • bfc7db39324f2aaab7f745e06d3a36ea.jpg
    bfc7db39324f2aaab7f745e06d3a36ea.jpg
    91.8 KB · Views: 0
To avoid these ads, REGISTER NOW!

Craptain

Well-known member
Joined
Apr 18, 2013
Messages
4,028
Location
Tampa Bay FL
Scotts,Turbo and all. Evaporust does not out gas. The chemistry is not like acids or electrolysis and does not produce gasses. So Jim is safe putting a cap on it.

Sent from my SM-G900T using Tapatalk
 

cheechi

Well-known member
Joined
Feb 29, 2012
Messages
4,384
Location
Triad, NC
Evaporust doesn't offgas as far as I know.

Rusty iron is typically FeO and FeOH mixed. Vinegar is acetic acid, HC2H3O2. When they react they will product Fe(II)C2H3O2 (red), Fe(III)C2H3O2 (black), H2 gas, H2O and depending on impurities or other factors some of the acetate ion (C2H3O2) may stay in solution or even precipitate with other cations, and possibly break down to H2O2 (hydrogen peroxide), H2CO3 (carbonic acid, or seltzer water) that breaks down to CO2 + H2O and room temperature.

Short answer, any off gassing is both insignificant chemically and insufficient to build up enough pressure to make a difference.

edit: craptain types faster
 
OP
J

jimreed2160

Well-known member
Joined
Aug 7, 2016
Messages
3,589
Location
Tallahassee FL
CP & chi--Thanks for the chemistry lesson. I let the body soak for about six hours and then fished it out with a coathanger. Sorry, no pictures. The washdown was uneventful and now the EV is capped off. The vise worked so well that it is the temporary home for the EV.
 

ScottsGT

Well-known member
Joined
Jan 1, 2014
Messages
4,883
Location
Lake Wateree, SC
Damn! Woodworkers and chemists all in one thread. Figures a guy with a users name close to "Cheech" as in Cheech and Chong would know about mixing chemicals. LOL!!
Dave's not here!

On another note, went out to dinner with the wife, drank a half of a bottle of wine and came home and took a nap in the Lazyboy and woke up and went down to the garage and got some garage time in. WooHoo! Got to sweep the floor and almost finished up a project. Once I get it hung on the wall in the kitchen I'll post up here.
 

rrich1

Well-known member
Joined
Oct 7, 2015
Messages
793
Got the bench on it's feet today. It's tall at over 37". Before glueing and doweling in the legs I'll decide if I want it lower.

The mortis have tear out on each but the hickory lines match up damn near perfect! Not bad for a first timer and hand plane use! Tenon's are still long at the moment.

I also got the hickory hub glued, jointed, and planed and ready to be cut for the leg vise hub. Glued up the hickory for the nut today as well. 815b07a49f338592df2ee7434bc140f2.jpg2f68357c04c73266e36e994d2b1e86dd.jpg6492f2947b49a3febc4e756d97e13ae2.jpgcccdc304bfc24d032fa659ffadc38501.jpg7e0e012756da6c8530194ffe581830db.jpg

Sent from my Pixel XL using Tapatalk
 

Attachments

  • cccdc304bfc24d032fa659ffadc38501.jpg
    cccdc304bfc24d032fa659ffadc38501.jpg
    161 KB · Views: 0
  • 7e0e012756da6c8530194ffe581830db.jpg
    7e0e012756da6c8530194ffe581830db.jpg
    83.4 KB · Views: 0
  • 2f68357c04c73266e36e994d2b1e86dd.jpg
    2f68357c04c73266e36e994d2b1e86dd.jpg
    114.4 KB · Views: 0
  • 815b07a49f338592df2ee7434bc140f2.jpg
    815b07a49f338592df2ee7434bc140f2.jpg
    104.7 KB · Views: 0
  • 6492f2947b49a3febc4e756d97e13ae2.jpg
    6492f2947b49a3febc4e756d97e13ae2.jpg
    88.6 KB · Views: 0

ztorres

Well-known member
Joined
Sep 22, 2016
Messages
195
Location
Iowa
Rich,
Looks great. I'd kill for a bench that was that tall


Sent from my iPhone using Tapatalk
 

rrich1

Well-known member
Joined
Oct 7, 2015
Messages
793
Rich,
Looks great. I'd kill for a bench that was that tall


Sent from my iPhone using Tapatalk
Thanks. I'm 6' 1" so it isn't bad at all. It's the same height as my L shaped workbench right now which I enjoy. I was just trying to figure out how to get multipurpose use out of it. I'll most likely keep it this height.

Sent from my Pixel XL using Tapatalk
 

drivesitfar

Well-known member
Joined
Oct 23, 2013
Messages
36,007
Location
Pacific Northwest
RR: thanks for bringing us along in your journey while you've been building a cool wood bench. :thumbup:

Cheech: Craptain might have given us a good answer, but you confirmed it very nicely with all your Chemistry. thanks

Scott: DAVE'S NOT HERE :beer::lol_hitti:lol_hitti:lol_hitti

Jim: do we need to start a fund to get you come AC in your shop so we can see cool projects during the summer? thanks again for posting up all your cool woodworking tools and skills.

ALL: another member Denwood (Woody) posted up a question that he wants to finish his cabinets with a hardwood instead of the veneer tape you glue or heat on so he found this routering method. anybody use this method yet or have a better one they like better?
 

Attachments

  • edgeband_flush_big.jpg
    edgeband_flush_big.jpg
    19.8 KB · Views: 35

ADNICK

Well-known member
Joined
Feb 6, 2017
Messages
45
Location
Comfort TX
That's great work....my bench is almost 35" and I'm 6'

Would not want it any lower....

Just finished a cabinet of drawers for mine, I'll post a picture shortly,
Andy
 
OP
J

jimreed2160

Well-known member
Joined
Aug 7, 2016
Messages
3,589
Location
Tallahassee FL
rrich--It walks! It talks! Great progress on the bench.

Andy--We love pictures.

Drives--I agree with your buddy--solid wood looks best. I will post some pictures of edge treatments as soon as Photobucket comes back up. As for the air, I have that handled. Like everything else, there is an elaborate story. Let's just say I hope to have AC in the shop before the scorching 4th of July.
 

ADNICK

Well-known member
Joined
Feb 6, 2017
Messages
45
Location
Comfort TX
My Roubo build took around 8 months, and that was after the material was gathered, and I needed a break after it was together enough to use.

So I turned my attention to shop appliances, shooting boards, including a long grain version, saw benches...that kind of stuff. Kept thinking that there sure was a lot of unused spaced under my bench...the long grain shooting board turned out to be one of my most used jigs, and I never thought I needed one...


Put a shelf under the bench but that just made me wish for something better.

So started looking/searching examples of workbenches with cabinets, and of course the Shaker benches are the pinnacle of that type of bench...

I did not want the compilation of building a Shaker cabinet into my Roubo, so I designed a simple little component type box out of plywood. Decided to use plywood mainly for the rigidity of the box. It will end up with an overlay of long leaf pine heartwood.

Cabinet dimensions are 66" long, 19" high and 17" deep, keeping it small enough to slide between the bench legs and still have space on top and bottom for storage and cleaning.

3 banks of drawers, 6 drawers per bank, 2 banks with half blind, and one (center) with through dovetails. Different spacing and ratios on each, all done as dovetail practice.
The dowel pulls were cut with a Stanley dowel machine from Jim!

Here is the sorta finished project, still have to put in drawer stops and one or two need a little tweaking.

Andy
 

Attachments

  • sorta finished.jpg
    sorta finished.jpg
    139.4 KB · Views: 155
  • dovetail and end view.jpg
    dovetail and end view.jpg
    139.9 KB · Views: 140
  • dovetail detail.jpg
    dovetail detail.jpg
    143 KB · Views: 139

Lucien421

Member
Joined
Mar 16, 2017
Messages
8
Location
Linyi City, China
Thanks for your nice sharing, JIM, my dad used to be a carpenter, and I know the feeling of sitting among piling of freshly cut shavings, is just so nice and warm, get you so close to the nature, and I think one of the goals that carpentry is pursuing the perfectism, as my dad shaved and polished many times just want to have a mirror like surface of his works.
 

ckadams00

Well-known member
Joined
Sep 12, 2011
Messages
1,273
Location
Seattle, WA
CK: i agree you did a great job and you might even get something better than a kiss for this present to your bride. how many years?

any chance you have some during pictures? i also would like to know what wood cause it does look like cedar. also what tools did you use and what screws?

thanks

Thanks drivesitfar - 23 years! I was going to build two but I needed to get one finished in time. I'm very happy how it turned out!

I picked some very good clear cedar from a lumber yard and then cut it down on my table saw. I used a mitre saw for smaller cuts and a jig saw for the rounded parts. Everything was rounded over with a router, then sanded on a belt sander and finally finish sanded with a palm sander at 220 and 600 for the chair slats and arm rests.

I used the red chair which was falling apart as the pattern, but wanted to improve the design, so I enclosed the seat slats which I think give it a much cleaner look. I also dislike the traditional gap where your **** sits so I filled that in with a wider seat rest, and because it will catch water fro the back slats I drilled drainage holes under each one (you can't see the on the finished chair but water won't stand). Everything was put together with stainless screws that were countersunk, then plugged with walnut just for appeal. Two clear coats.


/media/DSC02345_zpsywsuopjs.jpg.html]
DSC02345_zpsywsuopjs.jpg
[/URL]
 

Craptain

Well-known member
Joined
Apr 18, 2013
Messages
4,028
Location
Tampa Bay FL
At last CK. The finished chair is good looking but here we want to see construction pictures.
Well done and kudos for the thoughtful variations on your pattern.

Sent from my SM-G900T using Tapatalk
 

drivesitfar

Well-known member
Joined
Oct 23, 2013
Messages
36,007
Location
Pacific Northwest
CK: i could tell you just didn't SLAP IT TOGETHER. nice work and really nice design improvements. what kind of stain did you use? with the stainless screws and the walnut plugs just wiping on a little stain every year or two and this should last another 23 years.

thank you!!

and another WELL DONE

AD: amazing workbench. WELL DONE!!

can you take a few more full view pictures and post them? also what is that piece that looks like a capital letter I for? does it slide back and forth?

nice work
 
To avoid these ads, REGISTER NOW!
Top Bottom