To avoid these ads, REGISTER NOW!

Woodworking 101--Tools and Tips

rossddvm

Well-known member
Joined
Feb 16, 2017
Messages
120
Location
NW Iowa
Re: Woodworking 101--Tools and Tips Planes questions

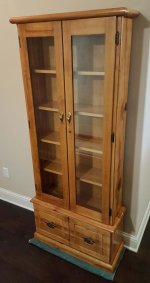
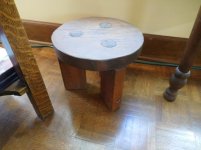
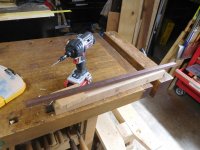
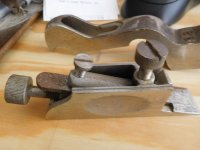
I am starting to set up a wood working shop to putter in when I retire. I have a long list of tools to get-overwhelming to do all at once. Planes are obviously an area where there is an infinite number of choices. To get up and going what are the most basic planes to try to get. Hand planes, hand held power, or bench/floor model. I am mostly interested in practical use. I may eventually have an assortment as I find what I like. My first projects will be larger cabinets and benches for the shop. Also want to do an outdoor table. Later may do some smaller more decorative projects. I am still working at this point, lots of hours. So very limited time for chasing down deals on old items. Recommendations to get started?
 
To avoid these ads, REGISTER NOW!

EOC_Jason

Well-known member
Joined
Jun 25, 2012
Messages
11,388
Location
Bentonville, AR
Watch estate sales in your area...

Craigslist
estatesales.org
gsalr.com

I've been to quite a few that had avid woodworkers with tons of near-mint equipment but was able to buy them at about 1/4 the cost of new (or less!).
 

drivesitfar

Well-known member
Joined
Oct 23, 2013
Messages
36,005
Location
Pacific Northwest
Jim: great job on the old table that i think you said you rescued out of an old Chicken Coop years ago. lots of work, but it turned out usable and looking terrific too.

Chris: when you are putting pieces in your lathe like the plum wood with those voids are you filling the gaps with clay or do tell? i'm guessing your lathe tools are very very sharp if you are able to do plywood like that without digging out chunks or is there another trick i'm missing.

ALL: thanks all for sharing your woodworking tips and projects and keep them coming with pictures and your thoughts cause there is a lot to learn for some of us WOOD BUTCHERERS that would some day like to improve our skills.

I was picking up a few shop chairs at a client's warehouse and he gave me a few nice pieces of APPLEWOOD I think he called it. it's maybe the one of the nicest pieces of plywood that i've seen and at 1/2 inch thick i bet it would hold a few hundred pounds without bending. anybody know where to buy some of this HIGH END PLYWOOD cause i don't want to bother my client and would like to surprise him that i found some on my own?
 
OP
J

jimreed2160

Well-known member
Joined
Aug 7, 2016
Messages
3,589
Location
Tallahassee FL
ross--I can tell you from experience that having a woodshop in retirement is a blast. Having time to prepare is excellent. Just to elaborate on what EZ said, I suggest you find at least a #4 and a #5 bench plane along with the LA block and shoulder. I also recommend picking up a set of chisels and sharpening equipment. My dad always had a woodshop and that is where I got started. He made everything from fine furniture to buildings but he was self taught and never learned to sharpen. I think that held him back because it held me back and frustrated me with handtools. But I got a Tormek and learned what sharp was all about.

So my advice is to get some user chisels and user planes. Research sharpening methods and pick one. Spend your time ruining chisels and plane blades as you are learning how to sharpen. Your goal is a shiny 30 degree bevel that is square to the edge and sharp enough to shave hair from your arm. And this edge should take no more than 5 minutes to achieve, regardless of what you start with.

Learning how to sharpen opens up a new world for woodworkers. Even if you elect to stay with power tools, you will appreciate your knowledge of sharp edges. Good luck.
 
OP
J

jimreed2160

Well-known member
Joined
Aug 7, 2016
Messages
3,589
Location
Tallahassee FL
drives--Of course, we need some pictures. Did you get apple wood from an apple tree or is Applewood the brand name of the plywood? If you are looking for high end plywood, start with Steve Wall lumber. He has some really good stuff. He sells hardwoods and furniture grade plywood.

But there are many different types of ply. If your buddy gave you some really strong plywood, it was probably marine plywood. That is my guess.
 
OP
J

jimreed2160

Well-known member
Joined
Aug 7, 2016
Messages
3,589
Location
Tallahassee FL
Stanley #92 refurb

I just could not wait and began the refurb of this little plane. It arrived with blue paint(?) on the base. I know enough about Stanley planes that most paint can be removed with a fingernail. So last night I removed all of the blue paint by scraping it with my thumbnails and got it done without damaging the plane. My thumbnails, of course, will grow back.

This plane needed brushing, oiling and waxing. The blade had been ground--badly--and was out of square. I ground a new bevel and squared it up before I honed it to a mirror finish.

The plane shows very little use and the blade seems to be original. USA stamp means that the plane was made before production moved to the UK and quality took a nose dive.
 

Attachments

  • s-l1600.jpg
    s-l1600.jpg
    149 KB · Views: 47
  • DSCN5492.jpg
    DSCN5492.jpg
    130.3 KB · Views: 43
  • DSCN5493.jpg
    DSCN5493.jpg
    144.9 KB · Views: 47
  • DSCN5495.jpg
    DSCN5495.jpg
    142.5 KB · Views: 45
  • DSCN5496.jpg
    DSCN5496.jpg
    135.9 KB · Views: 48
  • DSCN5497.jpg
    DSCN5497.jpg
    138.8 KB · Views: 45
OP
J

jimreed2160

Well-known member
Joined
Aug 7, 2016
Messages
3,589
Location
Tallahassee FL
#92 continued

I oiled the open threads and put the plane back together. There is a set screw in the top piece that is used as a stop for the mouth. It stops the forward section from sliding forward once it hits the top screw shaft. This set screw is rusted in place on most of the vintage planes I find. This plane was in good condition and I only had to lightly oil the screw.

And then I adjusted the mouth. It was pretty simple. Just turn the screw so the forward section does not crash into the blade. It took a few tries to get it right.

And before final assembly I always like to set the blade depth of cut. I position the blade so it has travel in both directions and cuts a fine shaving. Then I tighten it up a bit and put the plane together.
 

Attachments

  • DSCN5505.jpg
    DSCN5505.jpg
    139.8 KB · Views: 40
  • DSCN5504.jpg
    DSCN5504.jpg
    127.5 KB · Views: 39
  • DSCN5503.jpg
    DSCN5503.jpg
    131.4 KB · Views: 40
  • DSCN5502.jpg
    DSCN5502.jpg
    132.2 KB · Views: 41
  • DSCN5501.jpg
    DSCN5501.jpg
    133.4 KB · Views: 42
  • DSCN5500.jpg
    DSCN5500.jpg
    133.5 KB · Views: 43
  • DSCN5498.jpg
    DSCN5498.jpg
    132.2 KB · Views: 42
OP
J

jimreed2160

Well-known member
Joined
Aug 7, 2016
Messages
3,589
Location
Tallahassee FL
#92 shavings, at last

Even though I set the blade for a fine shaving, it pulled a thick one once everything was together. No prob--it is easy to back off. UNLESS you tightened the beejebers out of the blade holder. That is why these things should be FINGER tight. I backed off a little bit each time and finally got to the wispy stage. You can see the progress as the shavings get thinner with each adjustment.

Now the plane is clean with a sharp and square blade. It is set properly and takes wispy shavings. Time to move it on to the user shelf.
 

Attachments

  • DSCN5507.jpg
    DSCN5507.jpg
    134.9 KB · Views: 44
  • DSCN5506.jpg
    DSCN5506.jpg
    142.7 KB · Views: 48

drivesitfar

Well-known member
Joined
Oct 23, 2013
Messages
36,005
Location
Pacific Northwest
JIM: I just GOOGLED and i think he said APPLEPLY and this stuff is SPECIAL.

here's a link for you and others to check out:

http://www.appleply.com/

anybody buy or use this stuff? i'd like to make a nice cabinet to hold some old wood bins i've had sitting around and maybe i'll try to buy a few sheets from my client if he's got any extra or having another good source would be nice too.
 

Attachments

  • 00j0j_dOfxlIrNItO_1200x900.jpg
    00j0j_dOfxlIrNItO_1200x900.jpg
    96.3 KB · Views: 42
  • 01717_gLLRlIWPKuv_1200x900.jpg
    01717_gLLRlIWPKuv_1200x900.jpg
    104.8 KB · Views: 42
OP
J

jimreed2160

Well-known member
Joined
Aug 7, 2016
Messages
3,589
Location
Tallahassee FL
Drives--That is not your dad's plywood! It is really upscale stuff. Like all plywood products, shipping is a killer. Since this stuff is made in Eugene, OR, you should be able to find a local supplier. It's nice to know that this stuff exists because it sure beats the B/C grade stuff at the box stores.
 

drivesitfar

Well-known member
Joined
Oct 23, 2013
Messages
36,005
Location
Pacific Northwest
JIM: I was in Salem a couple weeks ago at a member's home and awesome shop so I might have some IN'S with the maker since he knows a few people down there so stay tuned. Didn't i say IT WAS SPECIAL STUFF!!

BMR: I could spend hours watching the Samarai Carpenter (and have) cause he's come from almost scratch to where he's building stuff we all like. check out his other videos when you get a chance.
 

chrislehr

Well-known member
Joined
Apr 10, 2009
Messages
1,704
Location
Portland, OR
Jim:

Chris: when you are putting pieces in your lathe like the plum wood with those voids are you filling the gaps with clay or do tell? i'm guessing your lathe tools are very very sharp if you are able to do plywood like that without digging out chunks or is there another trick i'm missing.


?


They arent too sharp. Just need to be steady and keep rpms higher so you do t push into the voids and get a catch
 

chrislehr

Well-known member
Joined
Apr 10, 2009
Messages
1,704
Location
Portland, OR
Bottom is about as thin as id like. Thinner on the sides or no?

de3663246c8caacbf8451f79057717b4.jpg
 

Attachments

  • de3663246c8caacbf8451f79057717b4.jpg
    de3663246c8caacbf8451f79057717b4.jpg
    840.4 KB · Views: 1

Blue Frog

Well-known member
Joined
Jun 22, 2014
Messages
363
Location
Lynn Haven, FL
Jim,

Appleply is some of the best plywood for woodworkers. Unfortunately, I never found it available locally.

There's another that I've used extensively for my sheet-goods projects - Baltic Birch. I found it readily available at Woodwerks in Columbus, OH when I lived there. I liked it so much that I brought 7 sheets with me when I moved to Lynn Haven near Panama City.

I've found some about 45 miles from me in Chipley, FL at Acadian Hardwoods. You might check in the Tallahassee area for Baltic Birch plywood.
 
OP
J

jimreed2160

Well-known member
Joined
Aug 7, 2016
Messages
3,589
Location
Tallahassee FL
Blue--Good to see another ww in the panhandle. It is a paradox. We are surrounded by trees but live in a desert of finished materials.
 

rrich1

Well-known member
Joined
Oct 7, 2015
Messages
793
Well ****. I ran out of paint. I still need a second coat on the inside of the doors and to do touch ups. Should be finished Tuesday. Before paint I was able to get the door handles on and I shaved the doors down with my new LN #5 laj. 8ea801ae4b4b37a7aad90c1840fb17f2.jpg2de147161150228659301feb3ce448b4.jpg6e7d9167291b98ccbceab6994739a187.jpg

Sent from my Pixel XL using Tapatalk
 

Attachments

  • 6e7d9167291b98ccbceab6994739a187.jpg
    6e7d9167291b98ccbceab6994739a187.jpg
    68.1 KB · Views: 0
  • 2de147161150228659301feb3ce448b4.jpg
    2de147161150228659301feb3ce448b4.jpg
    76.1 KB · Views: 0
  • 8ea801ae4b4b37a7aad90c1840fb17f2.jpg
    8ea801ae4b4b37a7aad90c1840fb17f2.jpg
    88.2 KB · Views: 1
To avoid these ads, REGISTER NOW!
OP
J

jimreed2160

Well-known member
Joined
Aug 7, 2016
Messages
3,589
Location
Tallahassee FL
Table update

Some of these furniture restoration projects on my todo list have been hanging around for years, so when I take them into the shop, I like to spend enough time to do a FINAL restoration. Because of that, the punch list seems to never end. Thus with this table. When I acquired it a half century ago, it was in sad shape. The feet had been restored and the drawer had been replaced. Both of the restorations were good quality but the drawer had a cheap wooden knob. I replaced it a few times and finally installed a nice brass drop pull. It looked OK but was over 100 years earlier than the piece.

So when I knew this project was getting closer to the top of the list, I searched for something more specific to the Sheraton time period. Much of that hardware was high style brass but I found a walnut rosette knob that looked at home with this country piece. Of course, it arrived unfinished. I sprayed it with poly a few months ago, but it came out rough and hairy. It went into the drawer to await a rainy day.

It is rainy and dreary here today, so the knob popped up on my todo list. I put a bolt in it this morning and used my lathe and pen turning supplies to finish it. Started with fine sandpaper, added the shellac finish and then topped it off with Hut wax. No more roughness. Now it is ready for installation.

This is why woodworkers need a lathe and why that lathe needs accessories.
 

Attachments

  • DSCN5520.jpg
    DSCN5520.jpg
    140.3 KB · Views: 54
  • DSCN5522.jpg
    DSCN5522.jpg
    132.3 KB · Views: 54
  • DSCN5523.jpg
    DSCN5523.jpg
    140.7 KB · Views: 54
  • DSCN5525.jpg
    DSCN5525.jpg
    126.7 KB · Views: 53
  • DSCN5524.jpg
    DSCN5524.jpg
    128.7 KB · Views: 53
  • DSCN5526.jpg
    DSCN5526.jpg
    133 KB · Views: 53
  • DSCN5521.jpg
    DSCN5521.jpg
    132.2 KB · Views: 51

hunterguy86

Well-known member
Joined
Jan 22, 2012
Messages
168
Location
Central Texas
The wife wants a cabinet like the one pictured below. Im going to make it out of southern yellow pine. I picked up standard 2x8x8' from the blue big box. Everything has been rough dimensioned. I will finish that part this week. I'm shooting for 1" thick.

Final dimensions will be 71" tall, 22" wide and 16" deep.

Question though. I was thinking I would rabbet in the back panel. Will this work or will expansion of the wood blow it apart over time?


8c4f9bb32785ae3bd0abf7b6e62499c1.jpg


Sent from my iPhone using Tapatalk
 

Attachments

  • 8c4f9bb32785ae3bd0abf7b6e62499c1.jpg
    8c4f9bb32785ae3bd0abf7b6e62499c1.jpg
    209.6 KB · Views: 2

Craptain

Well-known member
Joined
Apr 18, 2013
Messages
4,027
Location
Tampa Bay FL
Hunter, rabbeting will work fine as long as you leave space for expansion and contraction. Think like a raised panel door. In fact modern versions use something like little rubber balls in the joint to prevent sloppiness.
Looking forward to seeing the completed project.

Sent from my SM-G930T using Tapatalk
 
OP
J

jimreed2160

Well-known member
Joined
Aug 7, 2016
Messages
3,589
Location
Tallahassee FL
Hunter--Nice cabinet design. I would def rabbet also. What will you be using? Plywood? Beadboard? T&G?

There are different strategies for attaching back panel to prevent blowout. Depends on the material used but the theory is to take account of wood movement when attaching.
 

hunterguy86

Well-known member
Joined
Jan 22, 2012
Messages
168
Location
Central Texas
Hunter--Nice cabinet design. I would def rabbet also. What will you be using? Plywood? Beadboard? T&G?


There are different strategies for attaching back panel to prevent blowout. Depends on the material used but the theory is to take account of wood movement when attaching.


I was planning on doing everything out of southern yellow pine. I don't want to use plywood at all except for maybe drawer bottoms.


Sent from my iPhone using Tapatalk
 

EOC_Jason

Well-known member
Joined
Jun 25, 2012
Messages
11,388
Location
Bentonville, AR
I used a piece of thin sanded plywood for the back when I was converting this piece for a friend. I forgot the thickness (I can measure the leftover in the garage) it's somewhere around 1/8" thick maybe? Light enough where you aren't adding unnecessary weight to the piece. That is all pine (including the plywood).

Though if you are building it all from the ground up, I guess why not go with something thicker and make it more solid...
 

Attachments

  • 20180101_144658.jpg
    20180101_144658.jpg
    142.9 KB · Views: 54
  • 20180101_164338.jpg
    20180101_164338.jpg
    140.9 KB · Views: 52
OP
J

jimreed2160

Well-known member
Joined
Aug 7, 2016
Messages
3,589
Location
Tallahassee FL
Hunter--I agree with you on the no plywood thing. Last few projects of mine had shiplap. I got 4" furring strips and split them thinner with my bandsaw. Then I shiplapped the edges with a handplane and installed them with the finished side in. It was easy and the backs are lightweight. And the backs look great from the front.
 
OP
J

jimreed2160

Well-known member
Joined
Aug 7, 2016
Messages
3,589
Location
Tallahassee FL
Knob

I attached the knob this morning. Finally finished with tavern table.
 

Attachments

  • DSCN5538.jpg
    DSCN5538.jpg
    134.7 KB · Views: 57
  • DSCN5542.jpg
    DSCN5542.jpg
    138.2 KB · Views: 51
  • DSCN5540.jpg
    DSCN5540.jpg
    138.2 KB · Views: 50

turbowoodworker

Well-known member
Joined
Mar 18, 2012
Messages
3,522
Location
Apex NC
Outside of the plywood ideas, the simplest would be well spaced shiplap or T&G. The gaps add interest/ focal points without seeing the wall behind it. This would be the more traditional way of closing the back.

Remember that the back adds significant stability against racking, depending on size. So while 1/8th in ply will close the back, it is not very strong. That may not matter for a narrow piece like yours.

Also remember to let that big box lumber dry and aclimate to your shop a couple of weeks before and after dimensioning.

Rick
 
OP
J

jimreed2160

Well-known member
Joined
Aug 7, 2016
Messages
3,589
Location
Tallahassee FL
What's the story on that little stool in the corner?

Well thanks for noticing. That little stool is one of my first furniture projects. I made it for my mom when I was a teen, so it is an antique now. An original design made from scrap construction lumber, it has held up well. I cut the top with my bandsaw and drilled the mortise holes with an expansion auger bit I bought. My mom loved the thing but then she was my biggest cheerleader. She was very small and liked to sit on it by the hearth and poke at the fire.
 

Attachments

  • DSCN5543.jpg
    DSCN5543.jpg
    139 KB · Views: 58
  • DSCN5545.jpg
    DSCN5545.jpg
    133 KB · Views: 60
  • DSCN5544.jpg
    DSCN5544.jpg
    143 KB · Views: 57
  • DSCN5548.jpg
    DSCN5548.jpg
    135.8 KB · Views: 63
OP
J

jimreed2160

Well-known member
Joined
Aug 7, 2016
Messages
3,589
Location
Tallahassee FL
Another project finished

Loyal readers may remember my postings from a month or two ago about a pigeonhole box I acquired. I found it many decades ago and have been traveling with it on the projects list for awhile. The box looks English from about 1890. It is 36 inches wide by 18 inches tall by 12 inches deep, has four full length slots, two half length slots and two drawers with nice hand cut dovetails. The box itself is mahogany that has open hand cut dovetails on the corners. Of course I picked it up for about $20 because it needed repair. Someone pried open the door and broke a corner off of it. And the doors flapped with the breeze. I repaired the door corner and trim years ago and started working on fastening them a few months ago.

My new desk needed the storage so I resumed the project. Today's task was to attach the backer/door stop. Three screws took care of that. The bonus is that I got to use my new taper drills. I added a ground off wood screw on one of the doors for the new magnetic catch. Easy project and now I can organize my desk better. Next up is a keyboard drawer.
 

Attachments

  • DSCN5552.jpg
    DSCN5552.jpg
    134.7 KB · Views: 57
  • DSCN5553.jpg
    DSCN5553.jpg
    137.2 KB · Views: 62
  • DSCN5549.jpg
    DSCN5549.jpg
    139.8 KB · Views: 60
  • DSCN5554.jpg
    DSCN5554.jpg
    141.2 KB · Views: 55
  • DSCN5550.jpg
    DSCN5550.jpg
    145.7 KB · Views: 61
  • DSCN5555.jpg
    DSCN5555.jpg
    134.8 KB · Views: 54
  • DSCN5551.jpg
    DSCN5551.jpg
    130.9 KB · Views: 60
OP
J

jimreed2160

Well-known member
Joined
Aug 7, 2016
Messages
3,589
Location
Tallahassee FL
Shop fun

So I was playing in the shop today and discovered something neat. I have several of these Archimedean drills. They have square tapered chucks and I never bothered to get some of those to use. But I was cleaning up and found this hex drill bit. On a lark, I jammed it into the chuck and drilled a hole. WOW! It seems that the physics of the thing keeps the hex bit firmly seated and this thing is a joy to use. It drills both ways and does it quickly.

Sometimes you just need to play in the shop.
 

Attachments

  • DSCN5582.jpg
    DSCN5582.jpg
    126.7 KB · Views: 48
  • DSCN5579.jpg
    DSCN5579.jpg
    138.7 KB · Views: 53
  • DSCN5578.jpg
    DSCN5578.jpg
    135.6 KB · Views: 51
  • DSCN5576.jpg
    DSCN5576.jpg
    133.3 KB · Views: 52

rrich1

Well-known member
Joined
Oct 7, 2015
Messages
793
It's finally done! Wife is very happy with it. I need to tweak a handle though as it's slightly off. cd8f96a73827722ac31d51d6913a7fc2.jpgc0ea387f910473a4824fd803857e5565.jpga2f98eb196a7de70989d024aede5894f.jpg14f7b19cdc24630706f8f78413eddbb5.jpg

Sent from my Pixel XL using Tapatalk
 

Attachments

  • a2f98eb196a7de70989d024aede5894f.jpg
    a2f98eb196a7de70989d024aede5894f.jpg
    76.5 KB · Views: 1
  • c0ea387f910473a4824fd803857e5565.jpg
    c0ea387f910473a4824fd803857e5565.jpg
    116.3 KB · Views: 0
  • 14f7b19cdc24630706f8f78413eddbb5.jpg
    14f7b19cdc24630706f8f78413eddbb5.jpg
    60.6 KB · Views: 0
  • cd8f96a73827722ac31d51d6913a7fc2.jpg
    cd8f96a73827722ac31d51d6913a7fc2.jpg
    113.5 KB · Views: 2

rrich1

Well-known member
Joined
Oct 7, 2015
Messages
793
Double post
Sent from my Pixel XL using Tapatalk
 
Last edited:
To avoid these ads, REGISTER NOW!
Top Bottom