You might be applying too much pressure. Ease up a bit.Everything seemed to be square the last time I did it. The wood just seemed to shift a bit in the clamps even with cauls.
Sent from my iPhone using Tapatalk
Sent from my Pixel XL using Tapatalk

You might be applying too much pressure. Ease up a bit.Everything seemed to be square the last time I did it. The wood just seemed to shift a bit in the clamps even with cauls.
Sent from my iPhone using Tapatalk
That's why I use biscuit joints.Everything seemed to be square the last time I did it. The wood just seemed to shift a bit in the clamps even with cauls.
Sent from my iPhone using Tapatalk
Everything seemed to be square the last time I did it. The wood just seemed to shift a bit in the clamps even with cauls.
That's why I use biscuit joints.

Can someone explain why so many use orbital sanders for finishing flat panels instead of flat reciprocating sanders? The only real answer I've gotten so far is it is less fatiguing.
The type that oscillates back and forth and typically takes standards sheets cut into thirds for example.Can you be more specific what you mean by "flat reciprocating sanders" ???
jons--Welcome to the ww thread. Good to note that your grandfathers were also ww and you followed in their footsteps. It does get into your blood. Good luck acquiring your tools and don't forget to add a few handplanes.
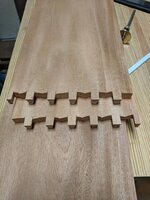
Observations on T&G joints
I don't want to argue the strength issue because T&G joints are generally not appropriate for glue ups. They really shine in NON glue situations because they provide lots of shear strength while allowing seasonal movement of the wood.
But T&G can be used for glue ups. In fact, late 19th century factory furniture panels were often T&G with glue but that was probably more for alignment than for strength. And late 19th century furniture should probably not be studied for fine woodworking techniques.
I like the biscuit idea for alignment and often use it myself. But I really like to glue and plane.
Clamping pressure is a good place to look. Optimal clamp pressure depends on your glue technique and the particular wood you are using. Moisture content affects it also. Do some tests on scrap wood. The objective is to clamp the wood tightly without forcing too much glue squeezeout. These days I let the glue soak for a few minutes longer than in days of old. I also use much less pressure than I did. My joints (glue joints only) seem to be getting better with age.
Can someone explain why so many use orbital sanders for finishing flat panels instead of flat reciprocating sanders? The only real answer I've gotten so far is it is less fatiguing.
Thanks
Frank
My thanks to rlitman for the detailed answer to my question.
")
I'd like some advice. I have both Minwax oil based wood stains & Watco Danish oils, in several tints each. In the Watco instructions it lists mineral spirits can be used as a step in surface prep. In the Minwax instructions it lists mineral spirits can be used to clean up. Can I assume from this that I can use mineral spirits to thin either or both of these tinted stains for a lighter colour? Both products also have a 'natural' which I assume is untinted, and can be mixed with tinted product for a lighter colour also.
What about BLO, denatured alcohol, or other oils such as tung or teak? Would any of these be unsafe to mix? As far as darkening, I'm assuming Rit dye can be added to both of these safely right?
Thanks in advance for sharing your experience with this.


actually now have some followup questions.
Does the 'natural' imply undyed/untinted for either the Minwax or the Watco?
If I mix the MS into a small batch of either stain, will it result in a lighter colour, or do you have to wipe the thinner after application of 'full strength' stain? or will it just mess things up? For the danish oil, would mixing plain tung oil or MS be more effective in terms of predictability or controllability?
Thanks again for the info.
For anyone interested in mastering dovetails.


actually now have some followup questions.
Does the 'natural' imply undyed/untinted for either the Minwax or the Watco?
If I mix the MS into a small batch of either stain, will it result in a lighter colour, or do you have to wipe the thinner after application of 'full strength' stain? or will it just mess things up? For the danish oil, would mixing plain tung oil or MS be more effective in terms of predictability or controllability?
Thanks again for the info.
Chi--I only have experience with Minwax. Thinning the stain with MS just means less pigment. But it is applied as a brush on, wipe off stain so the project usually gets flooded with pigment anyway. You can wipe it on with a rag but that does not make it a lot lighter. As I said, the only way I have found is to saturate the wood with MS and then wipe on small amounts of stain. When the wood is full of MS, the stain is less likely to penetrate. Lighter results are best achieved by using a lighter color of Minwax.
Oil finishes in natural have an amber finish so you will have a subtle tint to the wood with just those. Also, as Jim suggested you can apply mineral spirits before you apply the finish to dilute the pigments as you apply the oil finish of your color choice. That process is basically the same as making a homemade “wood conditioner” which is usually two parts of finish to six to eight parts MS which helps to reduce penetration of pigment or blotchiness in pine.
Another way to add color is to apply your oil finish in natural (or starting color) then apply cuts of shellac which comes in blondes to deep garnets to create the color shade of your choice.
Sent from my iPad using Tapatalk Pro


The pre stain helps to keep the wood from looking blotchy when the stain is applied.Hopefully one last question, what is the 'pre stain' that minwax sells? Is it just the oil base with no pigment?
The distinction you explained is exactly what I needed in terms of pigment vs dye. I was assuming a stain would have to be dye to be applied evenly. So what would be the process including the solvents needed if someone wanted to dye wood, ala electric guitars? This was some of my motivation in asking.
Very thorough clarification I want to thank all of you for the information.
Good points and you remind me of something else--drying time. Minwax needs time to dry. You can restain in a few hours to make it darker but should wait a day or two for final finishing. It depends on temperature and humidity. Finish too soon and your project will get sticky and take forever to dry. Let it dry completely and it can be ready to go in hours.
I always wait at least overnight. Then I smell the project. If you can smell the solvent, then your project needs more drying time. If it is dry to the touch and has very little smell, then it is ready for poly.
Hopefully one last question, what is the 'pre stain' that minwax sells? Is it just the oil base with no pigment?
The distinction you explained is exactly what I needed in terms of pigment vs dye. I was assuming a stain would have to be dye to be applied evenly. So what would be the process including the solvents needed if someone wanted to dye wood, ala electric guitars? This was some of my motivation in asking.
Very thorough clarification I want to thank all of you for the information.
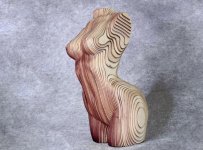
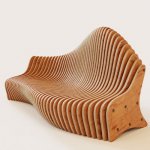
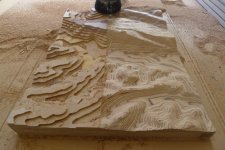
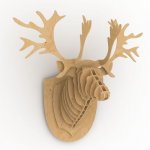
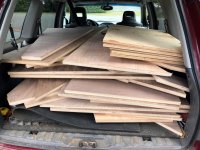
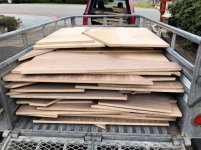
ALL: i'm getting ORGANIZED and i've got more than a little GOOD QUALITY SCRAPS to figure out what to make out of them. here's a good example I've got a couple trailers full of 1 inch oak and birch plywood (yes the pricey stuff) and i've got a few cabinets in mind with the bigger pieces and wondering what some of you might do with your scraps or decent size pieces?
here's a few ideas i've found of and looking for a few more that maybe I could use around my shop or house.