To avoid these ads, REGISTER NOW!

Woodworking 101--Tools and Tips

OP
J

jimreed2160

Well-known member
Joined
Aug 7, 2016
Messages
3,589
Location
Tallahassee FL
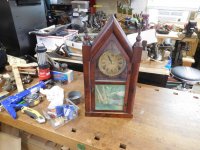
Clock project is finished!

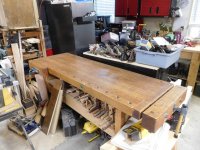
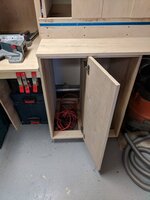
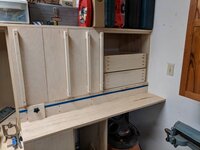
I got distracted installing the Gladiator cabinets and neglected my clock project. When I was straightening up the corner workbench yesterday, I found the project box and just could not find a convenient place to stash it. So it went on the new bench for more work.

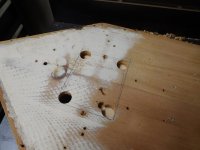
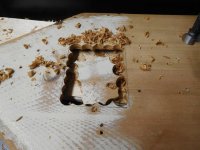
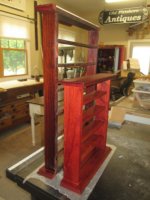
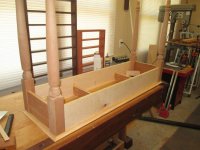
It became todays project. I finished the frame and mounted the clockworks pretty quickly. Then I needed to make an access hole on the back. Just thinking about the last square hole made me sweat and I knew I could do better. The rotozip tool was a bust so I went old school and just drilled a bunch of holes using a forstner bit. After some cleanup work with the chisel, it was done.

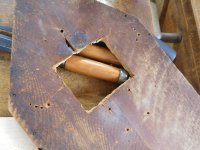
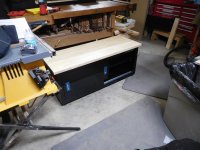
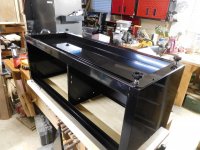
I remounted the back using the original cut nails and moved this item inside. It feels good to get this one off the list. Bonus is that the shop is getting much easier to work in and things are speeding up.
 

Attachments

  • DSCN7211.jpg
    DSCN7211.jpg
    135.2 KB · Views: 42
  • DSCN7212.jpg
    DSCN7212.jpg
    148.7 KB · Views: 40
  • DSCN7214.jpg
    DSCN7214.jpg
    150.5 KB · Views: 45
  • DSCN7215.jpg
    DSCN7215.jpg
    149.6 KB · Views: 46
  • DSCN7217.jpg
    DSCN7217.jpg
    154.7 KB · Views: 52
To avoid these ads, REGISTER NOW!

raskal

Well-known member
Joined
Aug 16, 2005
Messages
290
Location
British Columbia
Quick question, I'm thinking about getting a Planer.

I'm curious why you feel you need carbide blades?

I have a Dewalt 735 and feel that the steel blades do well and are cheap (which is important when I hit a staple in the wood). I have zero complaints with steel blades and not sure what carbide would do better.
 

sawduststeve

Well-known member
Joined
Oct 7, 2016
Messages
2,137
Location
Havering-Atte-Bower,London/Essex boarders, England
SCOTTSGT,

Spiral cutter blocks are the flavour of the moment, I think the Festool planers have them, and without doubt they are very good, but the expensive option.

My shop planer has a 350mm two cutter block, and it has been just fine for the last 30 odd years, only steel knifes, but kept sharp.One pair on ,one pair sharp on the shelf, and cheap to sharpen or buy.
Buy the Dewalt, and see how you go,for home use I'm sure you will be more than happy.

good luck
Steve:beer:
 
OP
J

jimreed2160

Well-known member
Joined
Aug 7, 2016
Messages
3,589
Location
Tallahassee FL
New floor

OK. Not exactly woodworking, but it IS in the shop. I have a thread in the Gallery where I post pictures of the new Gladiator cabinet upgrades in my workshop. Today I put a floor in a small area to match the cabinets. It was a quick install and turned out very nice.
 

Attachments

  • DSCN7230.jpg
    DSCN7230.jpg
    157.3 KB · Views: 72

rrich1

Well-known member
Joined
Oct 7, 2015
Messages
793
Got a lot of work done today.

I initially planned to do my leg levelers from the bottom like may people do online. After trying to level them by lifting the cabinet and repeating this without a lot of success I decided to flip them around. Instead of carriage bolts I used bolts with a head I can use a wrench on. This allowed me to put the cabinet down and leave a level on top and adjust accordingly. Much easier and faster this way. I plan to have drawers in there so it always accessible.

Next I jointed and ripped a 2x4 for the back supports for the plywood top. I attached the back support for the right cabinet and cut the top. I overhung the front for door fronts to be pretty flush. I still need to attach the right side support, miter table support, and left cabinet support.

I then measured for the height of the miter saw table. I then used some scrap pieces of plywood and made the side supports. I cut the top to fit and veneered the front. The other day I bought a dust collection port and at the time it seemed huge. Now that it is in I wish I would have bought two. Now that I think about it I never even measured left to right to even remotely center it. Now my OCD is going to kick in. I bought some mesh from ACE yesterday and glued it in between the dust port and plywood. I then attached a flexible dust hose that I bought for it to wrap around. Since I don't have a stationary dust collection I think I have a clever idea to attach it. More on that later. I then attached a front support for the miter table section.

Up next is to make a shelf for the drill press to sit on. Then I can make a top and finsih all the rear supports.IMG_20180621_210002.jpegIMG_20180621_210814_189.jpgIMG_20180622_150600_008.jpegIMG_20180622_150600_007.jpegIMG_20180622_150600_009.jpeg

Sent from my Pixel XL using Tapatalk
 

ScottsGT

Well-known member
Joined
Jan 1, 2014
Messages
4,883
Location
Lake Wateree, SC
Why carbide? Honestly? I have no idea other than reading about longevity and how smooth they cut. I have zero experience with a planer or a jointer. Seems that using these tools will eliminate a lot of frustrations I'm having with the quality of the wood available to me.
 

BMR24

Well-known member
Joined
Oct 2, 2017
Messages
234
Location
Rocky Mountains Colorado
I'd go with the dewalt planer, you can use it as is and upgrade to carbide blades later if you think you need to. You might be happy with the steel ones though which would save you some money for other tools
 

rrich1

Well-known member
Joined
Oct 7, 2015
Messages
793
I quickly made the shelf for the drill press and moved it in to see what it's like. I'll make the top piece tomorrow morning. IMG_20180623_002854.jpg

Sent from my Pixel XL using Tapatalk
 
OP
J

jimreed2160

Well-known member
Joined
Aug 7, 2016
Messages
3,589
Location
Tallahassee FL
rrich--Looking good. Interesting mash up. Very clever to combine DP and chop saw. As front facing tools, they are very similar and should play together well.
 

ScottsGT

Well-known member
Joined
Jan 1, 2014
Messages
4,883
Location
Lake Wateree, SC
I'd go with the dewalt planer, you can use it as is and upgrade to carbide blades later if you think you need to. You might be happy with the steel ones though which would save you some money for other tools

Well, this was my plan. Guy finally got back in touch last night and he already sold it. Back to the Cutech idea unless another Dewalt comes up for a good price.
 

ez-duzit

Well-known member
Joined
Jun 24, 2013
Messages
5,096
Location
Marina del Rey
...thinking about getting a Planer...I have to be able to move/store all tools out of the way...I want a really good portable...

I'd rethink this.

A really good thickness plane has such a small footprint compared to other shop machines. And it is a simple matter to place one on a rolling base.

Mine is an early Delta 13" that is just excellent and produces NO snipe, unlike a lot of these portable units. I suspect a good used one can be purchased for the price of a new inferior unit.

You can see how compact it is, shown with its infeed and outfeed tables folded down, just to the right of the hydraulic press.


ScottsGT

Well-known member
Joined
Jan 1, 2014
Messages
4,883
Location
Lake Wateree, SC
Yea, just started thinking I'm going to put off jumping on these two items until I finish my garage reorganization project. I just might have my storage area needed if I play my cards right.
 
OP
J

jimreed2160

Well-known member
Joined
Aug 7, 2016
Messages
3,589
Location
Tallahassee FL
Bench day

My project work is slow because of the heat, so I seized the opportunity today to clear off the clutter and give my workbench its annual coat of BLO. The mixture is 70/30 turp to BLO and is applied VERY lightly. It keeps the top slick enough to move things around easily. Bonus is that it makes the shop smell great for about a week.
 

Attachments

  • DSCN7246.jpg
    DSCN7246.jpg
    156.4 KB · Views: 78
  • DSCN7252.jpg
    DSCN7252.jpg
    155.3 KB · Views: 78

rrich1

Well-known member
Joined
Oct 7, 2015
Messages
793
I was able to do a little bit in the garage before our plans today. I got the rest of the rear supports cut and put up. Next I tackled the drill press. I attached the base of the press to the shelf. Next I measured for the hole and slot for the pole to go through the top. Drilled the hole and cut the slot on the table saw. To get it all put in I had to take out the shelf and attach the top first. Then I placed the shelf and base in. I had to take the base off the drill press and place the pole back in. IMG_20180623_110859.jpg

Sent from my Pixel XL using Tapatalk
 
OP
J

jimreed2160

Well-known member
Joined
Aug 7, 2016
Messages
3,589
Location
Tallahassee FL
Bench

Sometime over ten years ago, a work buddy and I both purchased DeWalt contractors saws. It is always nice to have a ww buddy at work. Anyway, mine has been sitting on its original stand all these years and I decided it needed an upgrade. So HD came along with another of those sales and I bit. Still working out the details, but by the time I mount this saw firmly, it will be about the same height but much sturdier--2 lb frame vs 87 lb cabinet.

The big decision is direction of mounting. If mounted on the end with extra base behind saw, then I have lots of flat surface for junk. If mounted on one end with extra base to the left, then I have room to also mount router table. I like that plan better right now. Will do some mock ups to see which config works best.
 

Attachments

  • DSCN7264.jpg
    DSCN7264.jpg
    127.6 KB · Views: 88
  • DSCN7263.jpg
    DSCN7263.jpg
    143.9 KB · Views: 88
  • DSCN7262.jpg
    DSCN7262.jpg
    152 KB · Views: 87
To avoid these ads, REGISTER NOW!
OP
J

jimreed2160

Well-known member
Joined
Aug 7, 2016
Messages
3,589
Location
Tallahassee FL
Chris--Good tool idea. Points down means easier to grab and less chance for a random stick. Points up means that you can see which one to grab next. I like your points up plan because it seems to be the most efficient way.
 
OP
J

jimreed2160

Well-known member
Joined
Aug 7, 2016
Messages
3,589
Location
Tallahassee FL
Contractors saw

I was able to spend time today and mount the DeWalt saw on the new Husky workbench. Decided to use it in this configuration and see how it works. The plywood base is only clamped to the bench so it is easy to move about when necessary.

The new bench is much sturdier than the original stand and I like the storage space. Shop vac is now connected to the saw and I think I will move it to the floor in the rear. Then I will have room for my router table. Bonus here is that I uncovered my unused shoulder vise.
 

Attachments

  • DSCN7287.jpg
    DSCN7287.jpg
    155.5 KB · Views: 89
  • DSCN7285.jpg
    DSCN7285.jpg
    151.3 KB · Views: 88
  • DSCN7284.jpg
    DSCN7284.jpg
    148.9 KB · Views: 92
  • DSCN7283.jpg
    DSCN7283.jpg
    155 KB · Views: 81
  • DSCN7249.jpg
    DSCN7249.jpg
    154.6 KB · Views: 88

rrich1

Well-known member
Joined
Oct 7, 2015
Messages
793
Weekend progress.

I got the new drawer slides got the last sliding door hung. I cut a piece of plywood for the door for one of the bottom cabinets. The one to the right will be a long wood off cut holder. Just to the left will have the door and be filled with drawers. I'm thinking glue stuff in one drawer and after that will be small trays for some Durham boxes I have coming. Those will hold all my small bolts, washers, nuts, etc.

Under the drill press I will have more drawers for stuff like my drill accessories and grinding stuff. Depending how it goes the Durham boxes will go there instead.

Last night and today I got 3 of the four vertical door fronts on. I am still deciding on what to use as pulls. I'd like to get the pulls as close to the front of the slides as possible if not over them. If over them I'll make some homemade pulls and glue them on with Brad's.

I put the top on the whole cabinet and started to clean up a little bit. So much stuff in my way on the floor and just getting the few things up there has helped a lot already.

Up next is finishing the last door front and clear coating all the new additions. At some point I need to get the miter saw actually screwed down. I'll do that after I put clear on the t track piece.ebb8518e227ae2ad945f19c2ddd9e219.jpgce8c77748712368995435581b98ce84e.jpgbc475c31a0c0354a70ebdc22e2eb1e8f.jpg6d3cf9401759c404d06c9c82932eaf79.jpg075a5ca9cba5f3e21cd454a2864bb97e.jpg9c507bb1e8e686e138b56b68e4b8f0c3.jpg174a81bf9b2adf77e3b5a57e878a865d.jpg

Sent from my Pixel XL using Tapatalk
 

Attachments

  • ce8c77748712368995435581b98ce84e.jpg
    ce8c77748712368995435581b98ce84e.jpg
    63.2 KB · Views: 0
  • ebb8518e227ae2ad945f19c2ddd9e219.jpg
    ebb8518e227ae2ad945f19c2ddd9e219.jpg
    86.4 KB · Views: 0
  • 174a81bf9b2adf77e3b5a57e878a865d.jpg
    174a81bf9b2adf77e3b5a57e878a865d.jpg
    93.9 KB · Views: 0
  • bc475c31a0c0354a70ebdc22e2eb1e8f.jpg
    bc475c31a0c0354a70ebdc22e2eb1e8f.jpg
    56.4 KB · Views: 0
  • 9c507bb1e8e686e138b56b68e4b8f0c3.jpg
    9c507bb1e8e686e138b56b68e4b8f0c3.jpg
    71.2 KB · Views: 0
  • 075a5ca9cba5f3e21cd454a2864bb97e.jpg
    075a5ca9cba5f3e21cd454a2864bb97e.jpg
    63.5 KB · Views: 0
  • 6d3cf9401759c404d06c9c82932eaf79.jpg
    6d3cf9401759c404d06c9c82932eaf79.jpg
    66.3 KB · Views: 0
OP
J

jimreed2160

Well-known member
Joined
Aug 7, 2016
Messages
3,589
Location
Tallahassee FL
rrich--Wow! Good progress on your unit. I would leave the miter saw as is and not fasten it down. I don't think it needs it and portability is a plus. Sometimes I have a job here on the homeplace and find it on the floor cutting trim.
 

rrich1

Well-known member
Joined
Oct 7, 2015
Messages
793
Jim: thanks. I want to screw it down so I can get those repeatable cuts.

I got the last door front made and installed. I have the home made handles in glue up as well. They will be made of maple to match they plywood. It's three pieces of wood glued together. Ill rip them and round the edges over. Screwing them in at the ends.

I also made two sander holders for the left sliding drawer. I am torn on how to do the pad storage. I was thinking either one vertical flat storage for each sander since they have different hole patterns or one big vertical storage that spans from the front to the back with labeled divideds, like a filing cabinet. 688bedc68c820beca64d664490f25195.jpg2daeeb3369b473e713024786a925ab92.jpgb31a505549e06defe8314ecebeb96c96.jpg

Sent from my Pixel XL using Tapatalk
 

Attachments

  • b31a505549e06defe8314ecebeb96c96.jpg
    b31a505549e06defe8314ecebeb96c96.jpg
    73.1 KB · Views: 0
  • 2daeeb3369b473e713024786a925ab92.jpg
    2daeeb3369b473e713024786a925ab92.jpg
    72.8 KB · Views: 0
  • 688bedc68c820beca64d664490f25195.jpg
    688bedc68c820beca64d664490f25195.jpg
    67.2 KB · Views: 0

rrich1

Well-known member
Joined
Oct 7, 2015
Messages
793
Homemade door pulls are made and installed. Still need to be sanded and clear coated along with the doors. 8de0beea26c2aa4425d31198db961324.jpgbdafb5df0b86dfbe658fd3c50e2a5e5c.jpg

Sent from my Pixel XL using Tapatalk
 

Attachments

  • bdafb5df0b86dfbe658fd3c50e2a5e5c.jpg
    bdafb5df0b86dfbe658fd3c50e2a5e5c.jpg
    52.4 KB · Views: 0
  • 8de0beea26c2aa4425d31198db961324.jpg
    8de0beea26c2aa4425d31198db961324.jpg
    60.3 KB · Views: 0

rrich1

Well-known member
Joined
Oct 7, 2015
Messages
793
Ez- a few reasons. 1. I used pin nails to help secure the door and glue. It helps to cover them up/at least draw the eye away. 2. I wanted an equal pull with the slides for ease of use and so that it wouldn't create a weak point. 3. A small handle I thought would just look off. This way I can grab from anywhere and get a hold of the handle to open it.

Sent from my Pixel XL using Tapatalk
 

rrich1

Well-known member
Joined
Oct 7, 2015
Messages
793
Small break from the miter station today. There are two things keeping from this cabinet being completely finished. 1. The drawers need to be made and 2. Magnets in the doors and carcass to keep the doors shut as they slightly hang away from the case.

If you recall a few weeks ago I screwed up the first drawer front. Well today I decided to try the second door. I still need to cut my replacement front to length and width. This one turned out much better. Orientation is correct and dovetails didn't turn out too bad. A few over cuts with the saw but it's fine.

These drawers are going to look killer with shellac applied!3499c3d9e2901752227e147cba69aa1d.jpg8aa41672e1ff7a63f9a0bb909db61098.jpge0e37e981943c022c707bfc3858ab737.jpg

Sent from my Pixel XL using Tapatalk
 

Attachments

  • 3499c3d9e2901752227e147cba69aa1d.jpg
    3499c3d9e2901752227e147cba69aa1d.jpg
    68.2 KB · Views: 0
  • 8aa41672e1ff7a63f9a0bb909db61098.jpg
    8aa41672e1ff7a63f9a0bb909db61098.jpg
    89.9 KB · Views: 0
  • e0e37e981943c022c707bfc3858ab737.jpg
    e0e37e981943c022c707bfc3858ab737.jpg
    67.8 KB · Views: 0

rrich1

Well-known member
Joined
Oct 7, 2015
Messages
793
Drawers are all cut and dry fit. I routed a dado for the bottoms and cut a hole for the finer pulls. I sanded the inside of the first drawer and put on a coat of sanding sealer and glued it up. I apparently need more 12" clamps.

I also managed to get the sanding pad storage completed. I managed to have enough space to put two Sanders on top of them allowing for more unexpected storage. 84390e4e639f6685d72c005e811ed6ef.jpgf30a88b5ff438a300ebb8568d3f2359d.jpg8251eea37b2473aff1f08ba3998ab758.jpg77108aeaa44cf137aed2f10250e2d030.jpg

Sent from my Pixel XL using Tapatalk
 

Attachments

  • 84390e4e639f6685d72c005e811ed6ef.jpg
    84390e4e639f6685d72c005e811ed6ef.jpg
    80.6 KB · Views: 0
  • f30a88b5ff438a300ebb8568d3f2359d.jpg
    f30a88b5ff438a300ebb8568d3f2359d.jpg
    105.7 KB · Views: 0
  • 8251eea37b2473aff1f08ba3998ab758.jpg
    8251eea37b2473aff1f08ba3998ab758.jpg
    70.2 KB · Views: 0
  • 77108aeaa44cf137aed2f10250e2d030.jpg
    77108aeaa44cf137aed2f10250e2d030.jpg
    72.6 KB · Views: 0
OP
J

jimreed2160

Well-known member
Joined
Aug 7, 2016
Messages
3,589
Location
Tallahassee FL
rrich--Nice progress shots. Having everything together should make your shop work more efficient. And the nice wood selection will provide some eye candy for inspiration.
 

Autonomous

Well-known member
Joined
Dec 26, 2015
Messages
66
That's a beautiful setup. I have been busy with the new baby and meet garage shop looks like a tornado went through it. It's chaos. I'll keep reading for inspiration and look forward to some free time someday soon.

Sent from my Pixel XL using Tapatalk
 
OP
J

jimreed2160

Well-known member
Joined
Aug 7, 2016
Messages
3,589
Location
Tallahassee FL
Auto--My tools went into storage for 16 years while I raised children. I picked back up the day the youngest turned 18 and came off the payroll. No regrets. Spend time with family.
 

rrich1

Well-known member
Joined
Oct 7, 2015
Messages
793
Auto- naps are free time. I have two (6 and 4) with our last on the way. Trying to get as much in before he/she arrives.

Last night I got the two upper drawers installed in the miter station. Above them will be smaller shelving for my Durham metal storage boxes. I have room for 2 shelves but might be able to squeeze in a third. They are tight fitting but I can still get them out.

I also planed down 3 of the 4 drawers and got them fitted. Still need sanding and finish. I'll plane the last one tonight after work. 34bc397e36f86da43b9dc16ec9c2f48c.jpg194f02eea1f0bc6d527d2afedbbd6d16.jpg040893abd7ab96ab075ca9e35a710930.jpg

Sent from my Pixel XL using Tapatalk
 

Attachments

  • 34bc397e36f86da43b9dc16ec9c2f48c.jpg
    34bc397e36f86da43b9dc16ec9c2f48c.jpg
    69 KB · Views: 0
  • 040893abd7ab96ab075ca9e35a710930.jpg
    040893abd7ab96ab075ca9e35a710930.jpg
    95.3 KB · Views: 0
  • 194f02eea1f0bc6d527d2afedbbd6d16.jpg
    194f02eea1f0bc6d527d2afedbbd6d16.jpg
    63.1 KB · Views: 3

turbowoodworker

Well-known member
Joined
Mar 18, 2012
Messages
3,529
Location
Apex NC
Here are a couple of small projects recently completed.

I made a couple of display shelves from scrap padauk left over from another project. They are designed to hold signed baseballs and a hockey puck collection for my 9 yo son's birthday.
 

Attachments

  • IMG_0809.jpg
    IMG_0809.jpg
    70.2 KB · Views: 54

turbowoodworker

Well-known member
Joined
Mar 18, 2012
Messages
3,529
Location
Apex NC
Next you may recall from earlier posts my barnwood and distressed /antiqued coffee table project. Well I thought we needed a sofa table of similar design so here ya go.

Again the technique for finishing is stain, layers of old or extra paint, finish color, scuffing wear spots, then clear coat. The barnwood is the Varathane weather accelerator followed by lacquer and polyurethane.
 

Attachments

  • IMG_0764.jpg
    IMG_0764.jpg
    135 KB · Views: 39
  • IMG_0771.jpg
    IMG_0771.jpg
    96.9 KB · Views: 39
  • IMG_0781.jpg
    IMG_0781.jpg
    86.6 KB · Views: 38
  • IMG_0807.jpg
    IMG_0807.jpg
    146.5 KB · Views: 40
  • IMG_0812.jpg
    IMG_0812.jpg
    69.6 KB · Views: 43

turbowoodworker

Well-known member
Joined
Mar 18, 2012
Messages
3,529
Location
Apex NC
I even got my 6 yo in the act. Well, she actually inserted herself by asking me to build her a table for her room. She wanted it round and she wanted to help.
It is finished in white as well but the top is glued up clear pine.
 

Attachments

  • IMG_0770.jpg
    IMG_0770.jpg
    147.7 KB · Views: 41
  • IMG_0777.jpg
    IMG_0777.jpg
    92 KB · Views: 44
To avoid these ads, REGISTER NOW!
Top Bottom