OP
jimreed2160
Well-known member
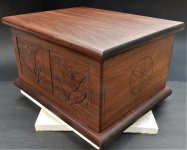
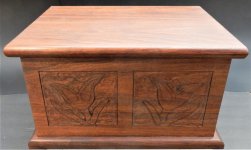
That's a cool box, Bob. My guess is that you will appreciate having them all together when you work on your next project.

Thanks Jim, as you and others have pointed out, a lot of woodworking projects can be completed without a giant shop and a huge investment in equipment.That's a cool box, Bob. My guess is that you will appreciate having them all together when you work on your next project.
Thank you PP, that is definitely my first NIFTY award.Bob... you have just won the elusive, the rare, the prized... NIFTY award.


Does anyone sell a 3 HP or better router with a plunge kit?
The highest HP I can find with the kit is 2 1/4.
Maybe all the manufactures think if you need a high horse power router you'll just buy a dedicated plunge router.
I currently own 5 routers and I never bought any of them based on their rated horsepower.
What are you going to use it for or why do you think for some reason you need a 3 hp router?
OK
If you really feel you need a 3+ hp router - Triton makes a decent one
https://www.amazon.com/dp/B00779ND0Q/?tag=atomicindus08-20
Does anyone sell a 3 HP or better router with a plunge kit?
The highest HP I can find with the kit is 2 1/4.
Maybe all the manufactures think if you need a high horse power router you'll just buy a dedicated plunge router.
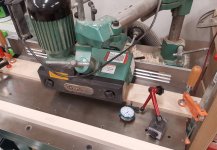
 Been wanting a big planer forever and finally did it.
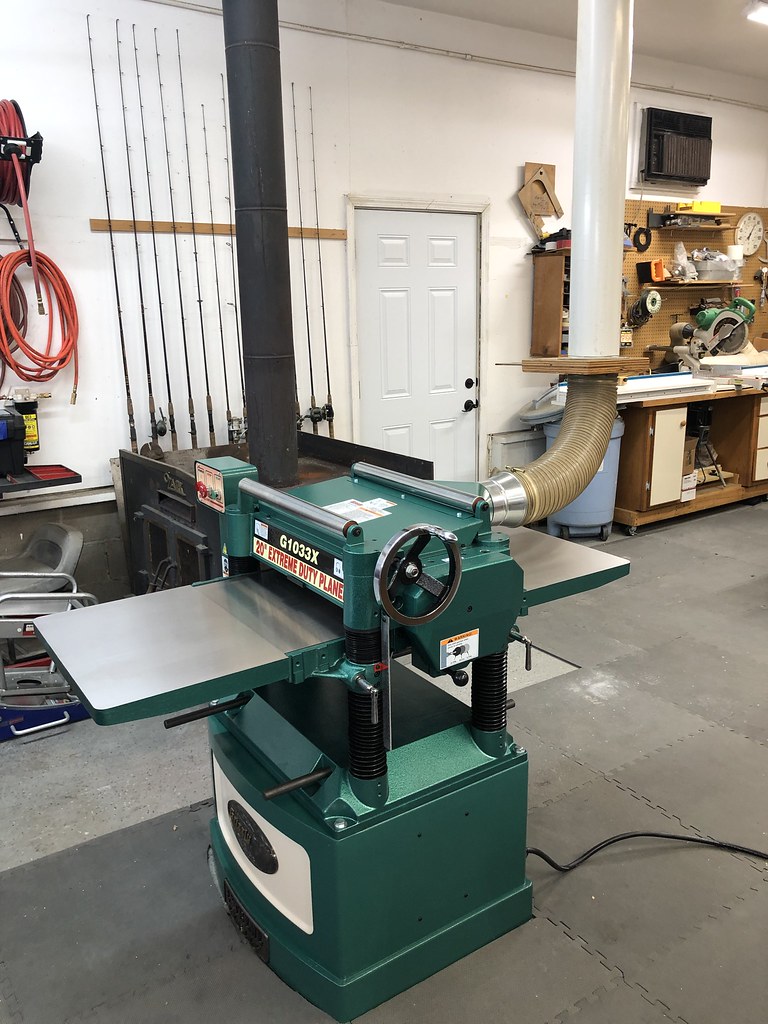


So I splurged.

Can I bring by some walnut to plane out? I'm in S'dale
Nice iron. Maybe Santa will bring you some more Bessie clamps.
nice planer. got one this spring. you'll like it. it needs the grizzly DIY QA check. Make sure the feed rollers are set correctly and they don't "bite" the board. Also, the motor belts.
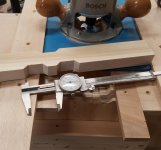
wixey digital height gauge installs easily, too.
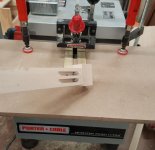
You are thinking right. The larger the bit, the slower the speed you should have and more horsepower available makes it easier for the motor to push through the knots.It's for my SIL he does a lot of slab table projects, he has a jig he sets his router on that runs over the slabs that smooth’s them out.
I'm thinking he could use a larger bit that would cover more area per pass if he had a more powerful router.
Belts good. Not 100% sure about the bed rollers though. They are barely above the bed but seems like they might be too high still. Haven't put the feeler gauges to them yet. Getting a tiny bit of snipe. Easily sanded out but would love to get rid of it completely.
I saw the Wixey height gauges. You get the 12" and cut it down?
Yeah, my rollers were way off. they would grab the board, left and slam it back down. I had snipe at both ends and a gouge from where it would hit the edge of the infeed table.
wr550 for the planer, 700 for the saw. didn't cut them. sawdust under the display cover is my only complaint. my father-in-law mounted them on me when i was away for a week on a biz trip. research how other people did them and pick a way that works for you. pretty easy to fabricobble it up.
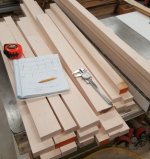
Jar--Good start on the bench. Is that maple?