turbowoodworker
Well-known member
TwoBytes,
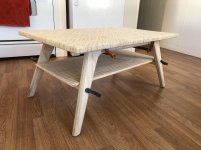
That looks like it was a fun project well executed. Nice work.
That looks like it was a fun project well executed. Nice work.

You’ll need a slight gap between double doors, but not between cabinets. The way that hinge operates, it swings the inside corner of the door away from the frame before the outside. So double doors may interfere if they start out touching, but doors that back against each other will not.
When fully open, that hinge swings the door out and over the adjacent door. I think it may have just enough to accommodate a 3/4” thick door.
perfect, thanks for the clarification.
LOL! My first thought was you were building thi for a Scouting bridge for the Webelo to Scout crossover.
Have you thought about making some caps for the top of the posts? That’s going to hold water and promote rot.
Very nice work!
 It all started because I needed to order more 5x30 Dominos and 1 1/4” Kreg screws. Looked both of them up and found both on AWD! The 1,800 pack of Dominos MSRP for $100 but got for $80 because the box was damaged. The 5,000 count of screws MSRP for $80 and I got for $20 because of damaged packaging also. But the best was the CT MIDI I for $575 - damaged packaging. Just like the quick clamps and vac adapters. Now I’m spending my free time when I’m not buried in engineering work quarantined at home looking at WHD. Definitely recommend it after buying the FS3000 guide rail for cheap off there a few months back.
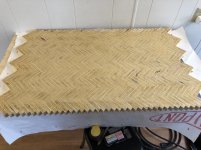
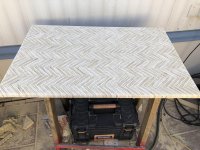
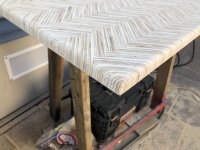
Applied some Formica brand PREMIUMfx Midnight Stone Etchings Laminate on my torsion box out feed table. The box is a little deeper than most but I have plans to store some stuff inside. I will say don’t be like me and use the high VOC contact cement in your basement. I had to open the doors and use a large fan to **** the air out. I was super nervous about applying the laminate and trimming it with the router but it was really super easy. Definitely recommend it. Oh and I got the Laminate from the big box for $20 for a 4x8 sheet because of a small damage on the corner.
Sent from my iPhone using Garage Journal


I saw someone on reddit made Homer Simpson’s spice rack! It looks kinda fun so I gave it a shot!


you even got the knot!


That's very cool but how did you decide where to nail it with brads and where to rely on glue alone? I'd be very apprehensive about cutting or routing anything with brad nails unless I was certain they were far away from any cutting blade or bit.