To avoid these ads, REGISTER NOW!

Between 265 & 485 SQ/FT Woody's Works Garage

Workspaces sized between 265 and 485 squarefeet.
OP
D

Denwood

Well-known member
Joined
Sep 22, 2014
Messages
4,224
Location
Thunder Bay, Ontario, Canada
Matias, nice to hear from you. I have a collection of motion sensors including several generations of Smarthings, Fibaro, Hue (awesome!!), and Ecolink. Ecolink is a zwave motion sensor using CR123A (larger lithium) cells that do last a long time as I've yet to replace any of them (2 years +). They are as reliable as the Hue sensors for me.

My shop is largely unheated so the ST sensors on my garage door and man door do not last long in the cold...like 6-8 months tops.

Despite the Covid lockdowns, we did manage to graduate my youngest from Grade 6 to an all French highschool. This was one of my favorite pics taken early in the summer during the outdoor graduation ceremony :)

camp2020_1.jpg


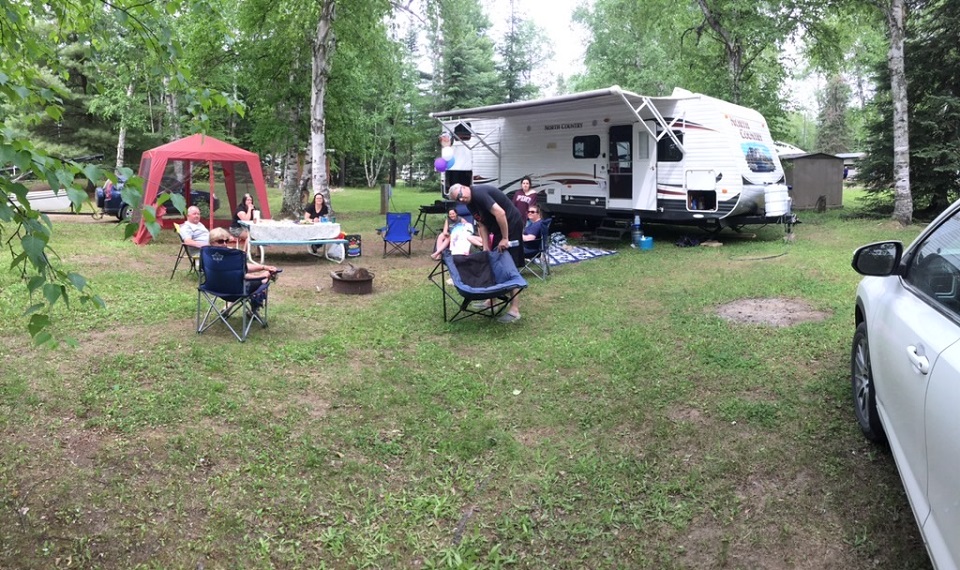
The summer has seen us out at camp pretty much every weekend. This is a rather lame picture, but it gives you an idea. Other than LED light upgrades, new speakers and a main slide out floor repair, I tried to enjoy the summer on the lake. We made some new friends and thoroughly enjoyed the experience...so next year we'll add a few decks and an outdoor screen house.
camp2020_2.jpg


Camp was pretty awesome as we enjoyed outdoor gatherings with family, sailing and boating on the lake. My youngest daughter and I went for many late night walks along the lake shore to find frogs and the occasional turtle laying eggs as it turned out. I have to admit this is the first time my lifetime actually observing this live. We took a quick pic and left her alone :)

camp2020_3.jpg


Not really much to post about in the shop as it was limited to a massive clean up, and then repair work on the aging CRV. I did a radiator and thermostat last weekend. Time for a new car, so I'm looking long and hard at EV options as the town runabout vehicle.

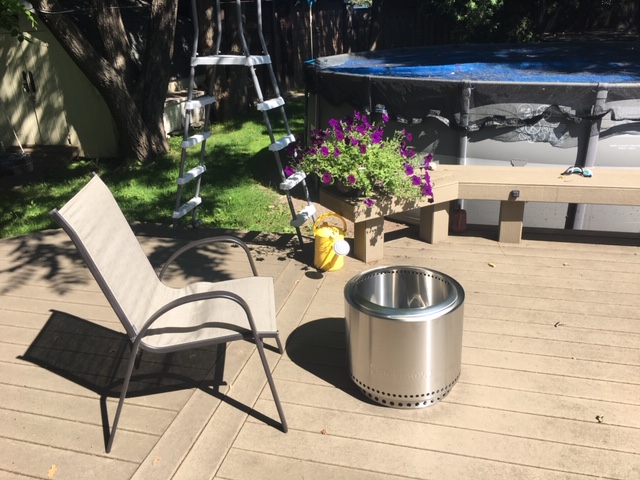
Just a random observation on one product that I really liked this summer. I was intrigued by "smokeless" fire pits so ordered up the Solo stove for use at camp and at home as well. It's a stainless steel fire pit with draft air and secondary burn that actually works. I've taken a pic of it beside a deck chair for scale.
camp2020_4.jpg


I took this screen grab from a video, but it does indeed work quite well, even with green wood. You can see the secondary burn happening via preheated air entering via the top ring of air supply holes. This image was taken burning green leaves and branches that fell out of our backyard butternut tree during a wind storm this summer...with near zero smoke. It works almost as well as our high efficiency fireplace with secondary burn. Someone just needs to figure out a way to have heat radiating more efficiently now...
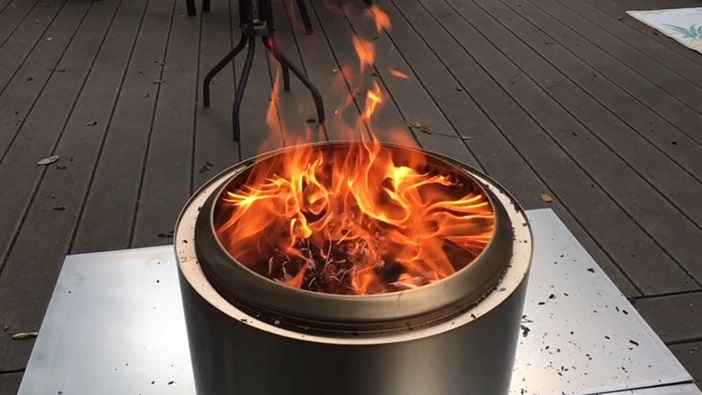
camp2020_5.jpg


The only downsides are a little less radiated heat, (I think I'll try a steel heat dome a few feet above), and less visual appeal as you don't see the coals so much. It does generate about 90% or more less smoke than a comparable fire though :)

Oh, and after cancelling an Ikea kitchen order that dragged out 2 months over the early Covid lockdowns, I re-ordered yesterday for our basement. They are saying 1 week to delivery so we'll see.
 
Last edited:
To avoid these ads, REGISTER NOW!
OP
D

Denwood

Well-known member
Joined
Sep 22, 2014
Messages
4,224
Location
Thunder Bay, Ontario, Canada
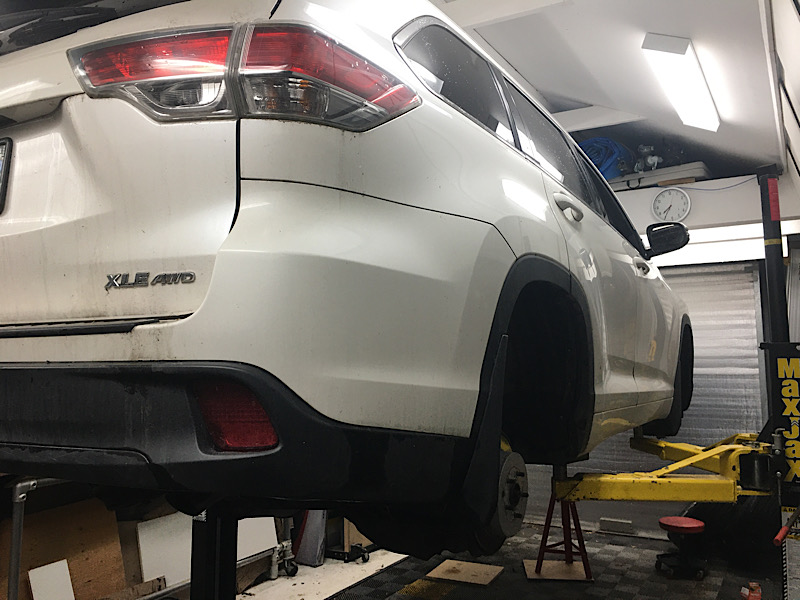
highlander2020_10_21.jpg


For Service tracking:
2014 Highlander oil change - 5w20 synthetic - 124 286 kms.
2014 Highlander brake fluid flush - 1L Dot3 - 124 286 kms.
2014 Highlander winter tire changeover - 124 286 kms

Needs a wash..ha.
 
Last edited:

BoilermakerFan

Well-known member
Joined
Apr 17, 2006
Messages
2,188
Location
Indianapolis, Indiana
Winter tire switch? Oy! It's too early for that!

And thanks for sharing your opinion of the Solo Stove fire pit. I almost jumped on the Kickstarter for it, but decided to pass. I've been kicking around buying one from time to time. I'm still on the fence but only because I love being able to see the coals and roasting food over them.
 
OP
D

Denwood

Well-known member
Joined
Sep 22, 2014
Messages
4,224
Location
Thunder Bay, Ontario, Canada
Boiler, Temps are dipping below 0C here regularly now..so snow and ice sadly is upon us.

If you like coals, don't bother with the Solo stove. Good for urban use, maybe skip it if you're a campfire purist.

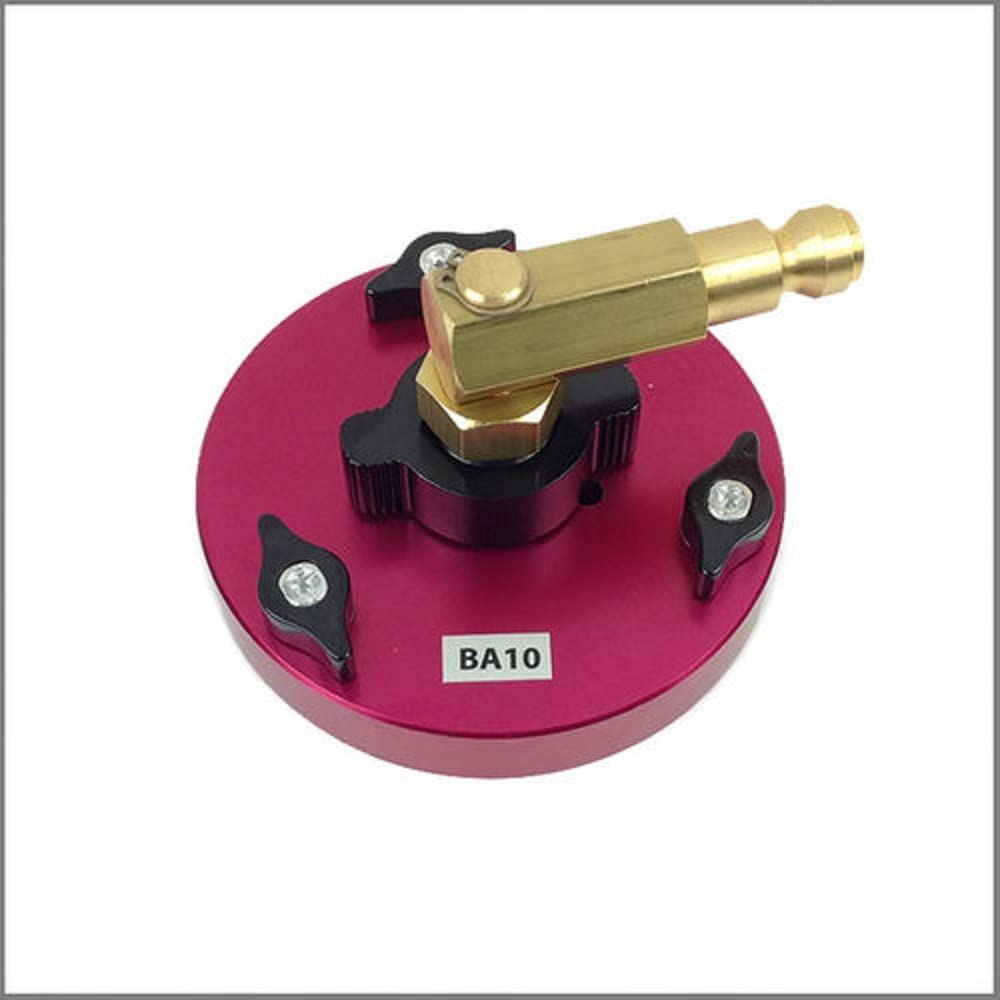
On another note, I purchased a cap for use with my Motive bleeder system that would fit our 2014 Highlander. At $83 CAD, it was definitely not cheap. That said, it was worth every penny as a very well designed tool done with CNC aluminum, anodized parts etc. The Motive bleeder has a generic cap which is basically useless as it leaks everywhere, and cannot really establish a good seal.

I purchased the Motive system with a custom cap for my Audi A3, and now have added the amazon part for the Toyota...both work flawlessly and make for really easy brake fluid flushes.

The Motive system allows you to pressurize the brake system at the reservoir. It's not as good IMHO as the two person pump and bleed if you've opened up the brake system, but it is the shizzel for doing brake fluid flushes. I made the mistake of running air into the ABS system of my Audi a few years back which required about 3 hours of bleeding over several hoist sessions using a laptop to energize the ABS system. This time on the Toyota, I back lit the motive container with a light so I could make sure the reservoir did not run dry!! At the end of the process, I did allow the Motive reservoir run dry, and then kept the system pressurized with a slow bleed until the fluid level in the car's reservoir was exactly at the correct fill line.

crv2019service3.jpg


Here's the cap in question...a very nice part. Not only does it clamp securely, but the o-ring'd projection under the cap is adjustable from the top (wing nut looking thing).

motive_toy.jpg


Since I've been following a schedule of brake fluid flushes every 2-3 years, and lubing the caliper pins etc. once a year, any brake issues related to caliper seizing etc. have gone away. Rust in the caliper and seized pins have been behind many of the issues I've encountered historically...solved by adhering to the above. I'm also a bit of stickler when it comes to having solid pedal feel which also get's addressed with fluid change, assuming your flex lines are ok.
 
Last edited:

Matias

Well-known member
Joined
Feb 28, 2015
Messages
616
Location
Finland
Matias, nice to hear from you. I have a collection of motion sensors including several generations of Smarthings, Fibaro, Hue (awesome!!), and Ecolink. Ecolink is a zwave motion sensor using CR123A (larger lithium) cells that do last a long time as I've yet to replace any of them (2 years +). They are as reliable as the Hue sensors for me.

My shop is largely unheated so the ST sensors on my garage door and man door do not last long in the cold...like 6-8 months tops.

Thanks a lot for the advice Dennis, I'll have to check that Ecolink, as the Hue ones have been the most reliable up-to-date.

Despite the Covid lockdowns, we did manage to graduate my youngest from Grade 6 to an all French highschool. This was one of my favorite pics taken early in the summer during the outdoor graduation ceremony :)

That's a very nice pic! I suppose French is spoken around? I lived in France for many years, so French is no problem, but I think sometimes the Canadians speak it funnily? :D Just kidding :)

The summer has seen us out at camp pretty much every weekend. This is a rather lame picture, but it gives you an idea. Other than LED light upgrades, new speakers and a main slide out floor repair, I tried to enjoy the summer on the lake. We made some new friends and thoroughly enjoyed the experience...so next year we'll add a few decks and an outdoor screen house.

That seems nice and the trailer seems quite big actually :thumbup: That's real vacation, can't do anything around the house or garage when you're there.

BTW, regarding that beautiful cap and that brake bleeding system. Some years ago I went the cheapskate route. I bought a car tire valve with a 90 degree bend, and a used cap for the brake reservoir. Installed the valve on the cap:

20121122_ilmaus_CIMG1493.JPG


Then a made a hose which I connected to the front tire and to the cap, so the pressure in the tire kept the pressure "constant", usually enough to bleed the brakes.

20121122_ilmaus_CIMG1500.JPG
'

Later on I used a spare tire, so that I didn't need to use the one in the car...

But I think next when I'll get a new car I'll just buy a cap like you have, and maybe get that system too, seems quite nice and easy to use.

I hope you get a nice early winter with just enough cold to have snow and beautiful landscape, but not that slushy mush you get near 0C.
 
OP
D

Denwood

Well-known member
Joined
Sep 22, 2014
Messages
4,224
Location
Thunder Bay, Ontario, Canada
Matias, there is Quebecois French, and then what's spoken in France :) Apparently it doesn't go over so well in France. That said, Canada is officially a bilingual country so the kids will have definite advantages in the job market by doing French immersion at school :)

On the pic, it was one of the few I've taken over the last few years with something other than my iphone, namely a Sony RX100 that normally collects dust. My two Canon Mk2 with L series lenses all went with the business sale :-( Either way, it's nice to play in Lightroom with a pic that has some pixels behind it!

The trailer is 30ft long, so more than adequate as a weekend bunk house :) There are four of us (trailers) out there in the family so every night sees a family campfire and good cheer. The kids have a blast.

You definitely did a nice job on your "ghetto" bleeder. The Motive can be duplicated with a cheap pressure sprayer and some bits like you did. It's nice to have the fluid forced in under pressure so there is no chance the system runs dry. I still like the two person pump and bleed method for a quick bleed.

We'll likely have snow on the ground in a few weeks. I'm not a fan of the freezing slush/thaw stuff either.
 
OP
D

Denwood

Well-known member
Joined
Sep 22, 2014
Messages
4,224
Location
Thunder Bay, Ontario, Canada
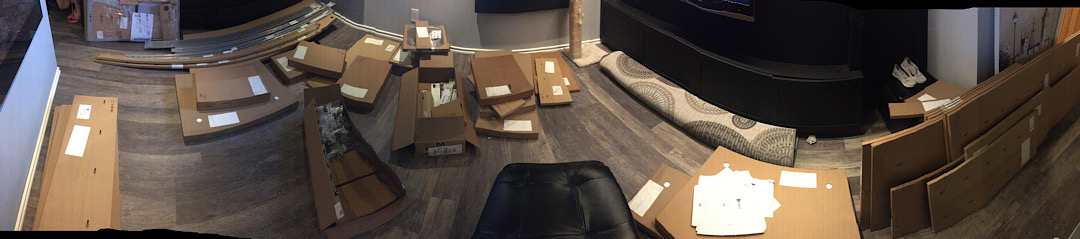
I’ve been yakking a bit about taking the basement theatre project up a notch by finishing a small adjoining kitchen / entertaining area. After looking around at various options, we decided to go with IKEA as a trial for a larger upstairs kitchen. 74 pieces arrived by truck on Saturday miraculously complete and with no damage. This included a 96” counter, trim
pieces etc which were all packed exactly as you’d find them at IKEA except for two small boxes with hinges, led bits etc. I ordered every thing including black anthracite counter, lighting, fixtures etc all based off the design done with IKEA’s design tool. Very slick process and stupidly cost effective IMHO.

I inventoried everything first:

ikea20201.jpg


We also built up a few cabinets.

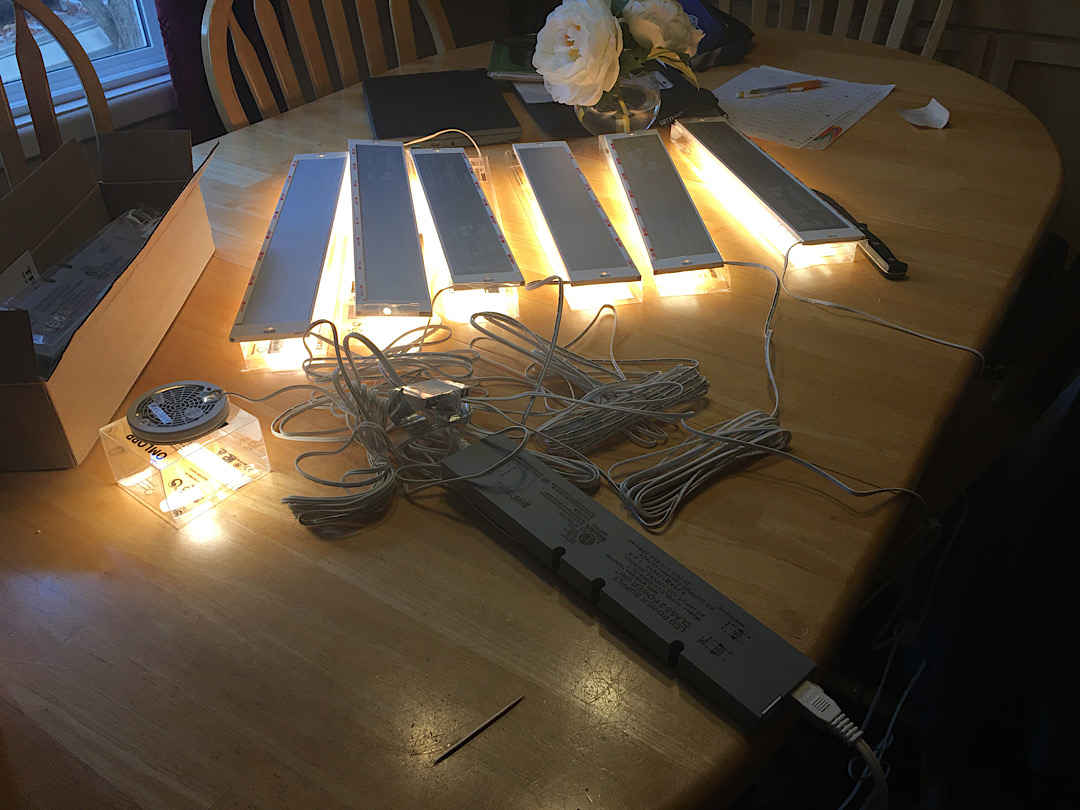
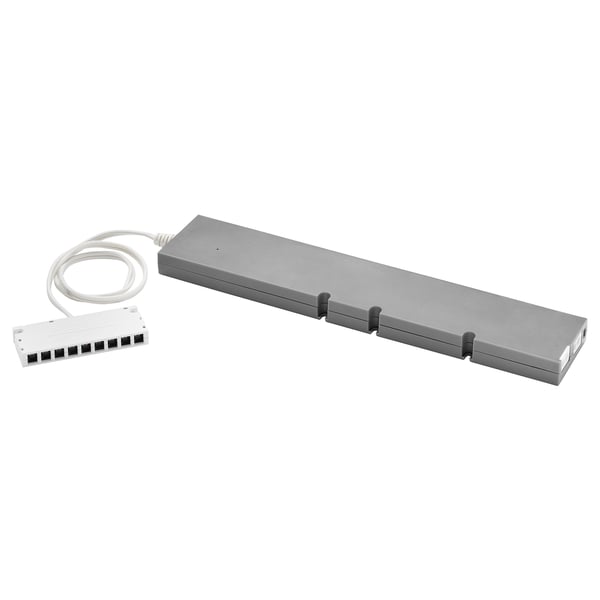
Today I sorted the LED lighting and found to my absolute and utter surprise that the LED power supply supports a wireless switch, but also integrates with zero fuss to Smarthings after a 5 second reset. Crazy, as I did zero research...it just works! Now for those of you into automation a LED controller with Zigbee support and cost effective LED systems (many of the ikea led lights use this controller) for $25 CAD is quite reasonable.

TRÅDFRI DRIVR/WRLS CNTRL 30 W GRAY NA
Driver for wireless control
Article number: 603.426.61
$25.00

So this means that all of my theater automation, lighting motion sensors etc can integrate seamlessly with the kitchen. The gray box in the foreground is what you plug everything into. You can turn off and on using a conventional switch, but you can also dim and control via your Smartthings automation hub.

ikea20202.jpg


Now I need to sort some crown moulding so I can set the upper cabinet cabinet heights from the ceiling.

After assembling a few cabinets I’m very impressed by the simplify and quality control on hardware and component machining etc. That said, the feet and snap on toe kick are a bit hokey, so I’ll likely just frame a base. IKEA cabinets all hang off the wall so I’m guessing their engineers don’t figure the feet don’t need to be super stable.

More to come.
 
Last edited:

Arclitgold

Well-known member
Joined
Dec 20, 2017
Messages
317
Re: Woody's Works Garage - rebirth!

Yeah a new post!! Can’t wait to see how this turns out!


Sent from my iPhone using Tapatalk
 
OP
D

Denwood

Well-known member
Joined
Sep 22, 2014
Messages
4,224
Location
Thunder Bay, Ontario, Canada
Hawk, not as much as my wife :) Arclit, it begins:

ikea_2020_10_27.jpg


Not sure if I'll make many cabinet boxes after doing these. Not only are the boxes quick to assemble, well engineered and inexpensive, but the pull out drawers and hardware are very nicely done. Again, as a first run for the upstairs (larger) kitchen, I ordered Maximera pull out systems for each base cabinet. It took a bit to assemble the first one, but again, I'm impressed with the engineering and cost to performance ratio.

Some of you may recall that I built some custom cabinets for the theatre and office area, including torsion box counters. They were not cheap to make, nor was the process quick. Will they outlast the IKEA made of 3/4 birch ply and maple door frames? Sure...but how many houses keep their "old" cabinets during a reno?
 
Last edited:

wasfast

Well-known member
Joined
Apr 10, 2014
Messages
874
Location
San Diego CA
I agree with your sentiments about building your own cabinets and also the IKEA boxes + hardware. IKEA has a cheap (poor quality)reputation from MANY (like 30) years ago but their cabs are good and part of a full system of accessories. You can never build the boxes for what you pay for them retail. I've installed 3 of the floating bath cabs also and they are excellent.
 

BoilermakerFan

Well-known member
Joined
Apr 17, 2006
Messages
2,188
Location
Indianapolis, Indiana
Boiler, Temps are dipping below 0C here regularly now..so snow and ice sadly is upon us.

If you like coals, don't bother with the Solo stove. Good for urban use, maybe skip it if you're a campfire purist.

I'm leaning towards the BioLite CampStove. You can see the coals and you gain additional benefits.
 
OP
D

Denwood

Well-known member
Joined
Sep 22, 2014
Messages
4,224
Location
Thunder Bay, Ontario, Canada
Was, as I've progressed along with some Maximera (pull out drawers) the engineering continues to impress. I like that every drawer face is completely adjustable for alignment. The whole filler panel thing was stressing me out (this is my first kitchen from a bare room) but after a few Youtube vids I get it. Now I'm having fun.

Boiler, I wish I would have seen the Biolite Firepit first. For secondary burn air, the Solo uses convection and secondary combustion air preheating by the fire itself, which likely results in a cleaner burn. That said, the Biolite gives up some efficiency, but you get the visual on the coals, and likely a lot more radiant heat via the grill. The tradeoff is you that you to have blow secondary burn air in via their battery charged add-on, and likely the secondary combustion air is not as well pre-heated. You also need a fire mat underneath. I would take the tradeoffs, particularly is the Biolite product is half the price of the Solo.
 

nicholam77

Well-known member
Joined
Dec 18, 2016
Messages
2,678
Location
Minneapolis, MN
Good to see you posting again, Dennis. Very interesting about the IKEA wireless controller.

How does it show up in SmartThings? A generic Zigbee dimmer switch? Please let us know if it is reliable with SmartThings after you've had a chance to use it for a bit... I'm looking for under-cabinet kitchen lights as well, and have always been put off by the price of Hue light strips and similar.
 
OP
D

Denwood

Well-known member
Joined
Sep 22, 2014
Messages
4,224
Location
Thunder Bay, Ontario, Canada
Nichol, I tried to add the TRÅDFRI LED controller to the HUE hub and it was not detected. Smartthings detected the device a few seconds after I pressed the reset button. It shows up in the IDE as:

Type: LAN Hue Dimmable
bulbId: 42
manufacturer: IKEA of Sweden
model: TRADFRI Driver 30W

They are very fast to react to motion sensors, and after a week or so have proven 100% reliable. They are miles cheaper than HUE led, but I believe have no provision for RGB. That said, the LED light is warm, and they dim perfectly. At $25 for the 30 watt controller, a "bargain" in the automation world.

tradfri-driver-for-wireless-control-gray__0619625_PE689212_S5.JPG


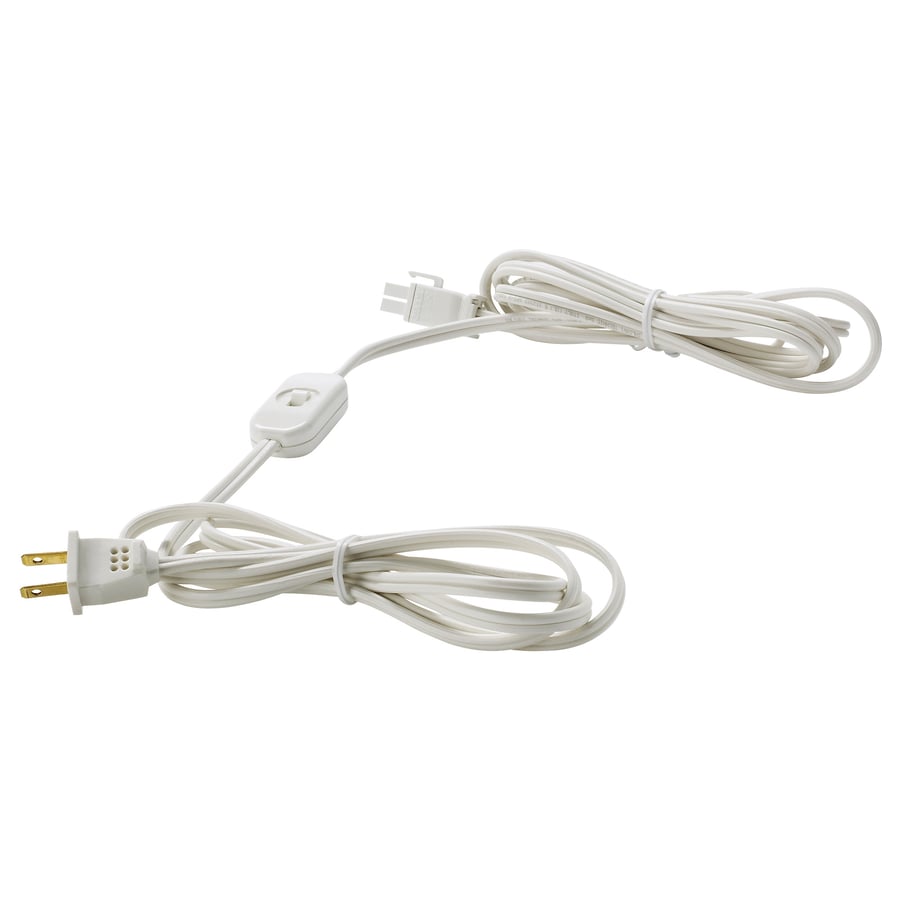
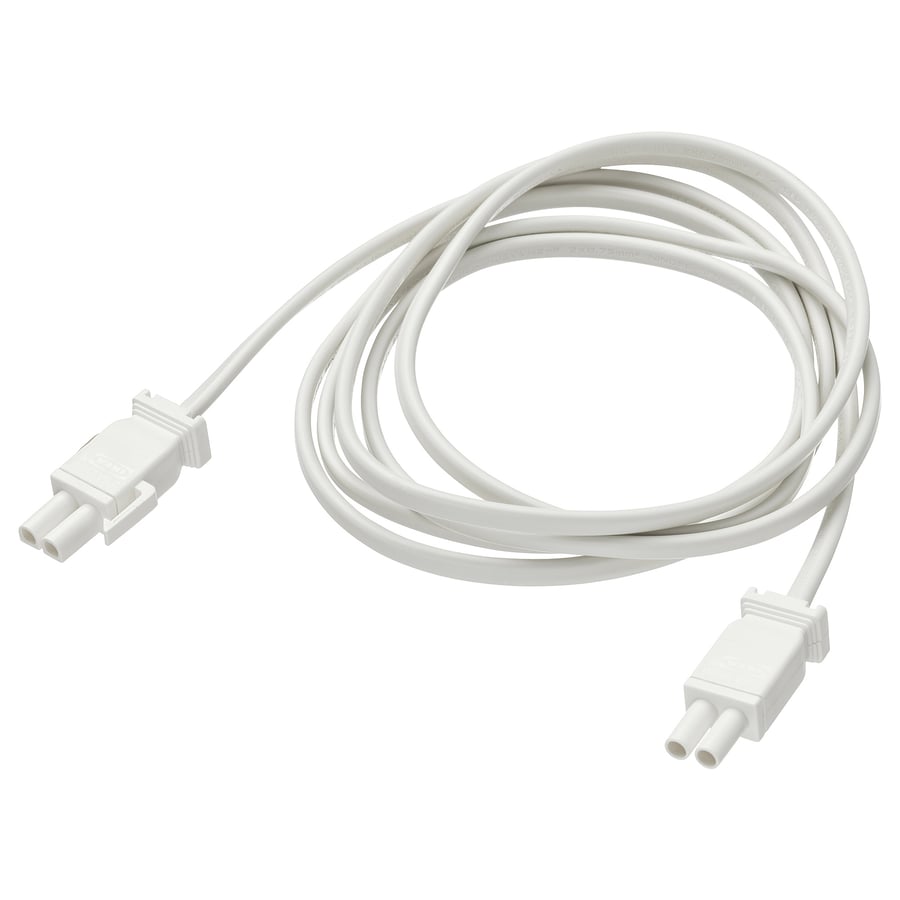
You need to order an AC power cable and/or interlink connectors if you want to daisy chain a few controllers with just one power cord.

ansluta-power-supply-cord__77429_PE199012_S5.JPG


ansluta-intermediate-connection-cord__0605992_PE681957_S5.JPG


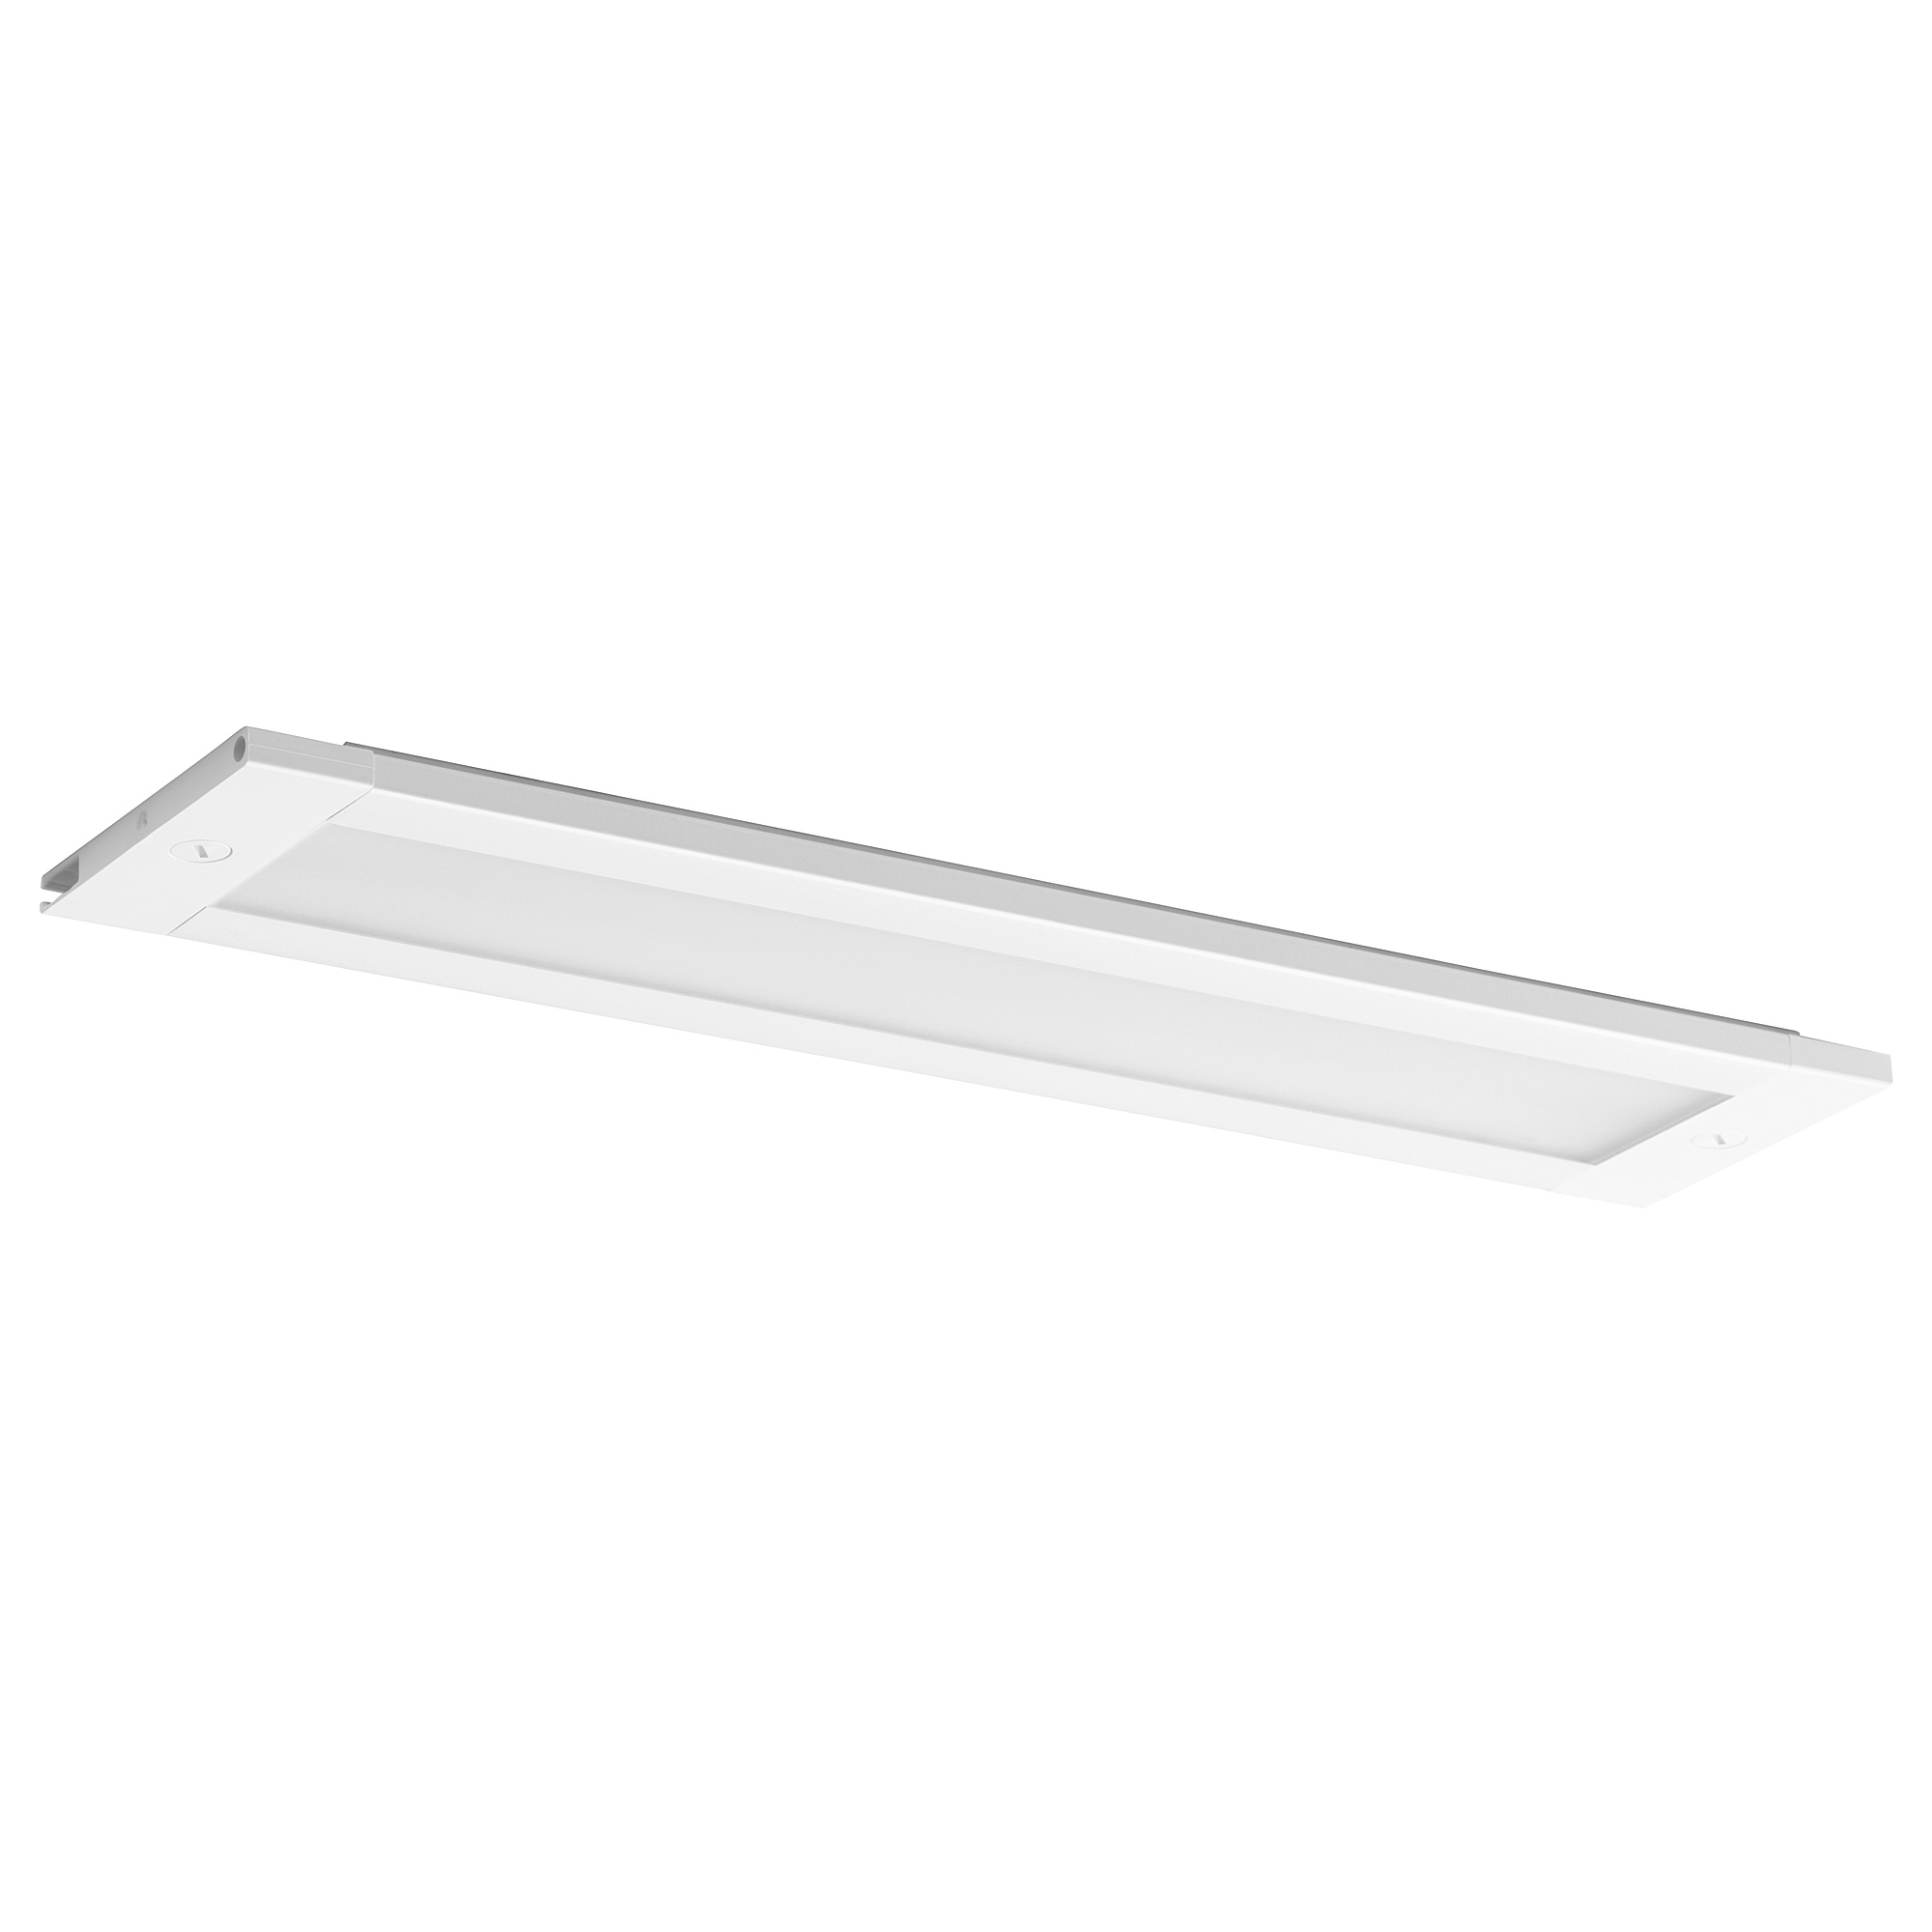
The LED lights I'm using are the Stromlinje which are mounted in a low profile case. They are not super cheap, but come with a decent length of wire that plugs into the controller via some slick little connectors, and have a decent CRI of 90. 12, 15 and 18" lengths.

stroemlinje-led-countertop-light-white__0561200_PE662725_S5.JPG


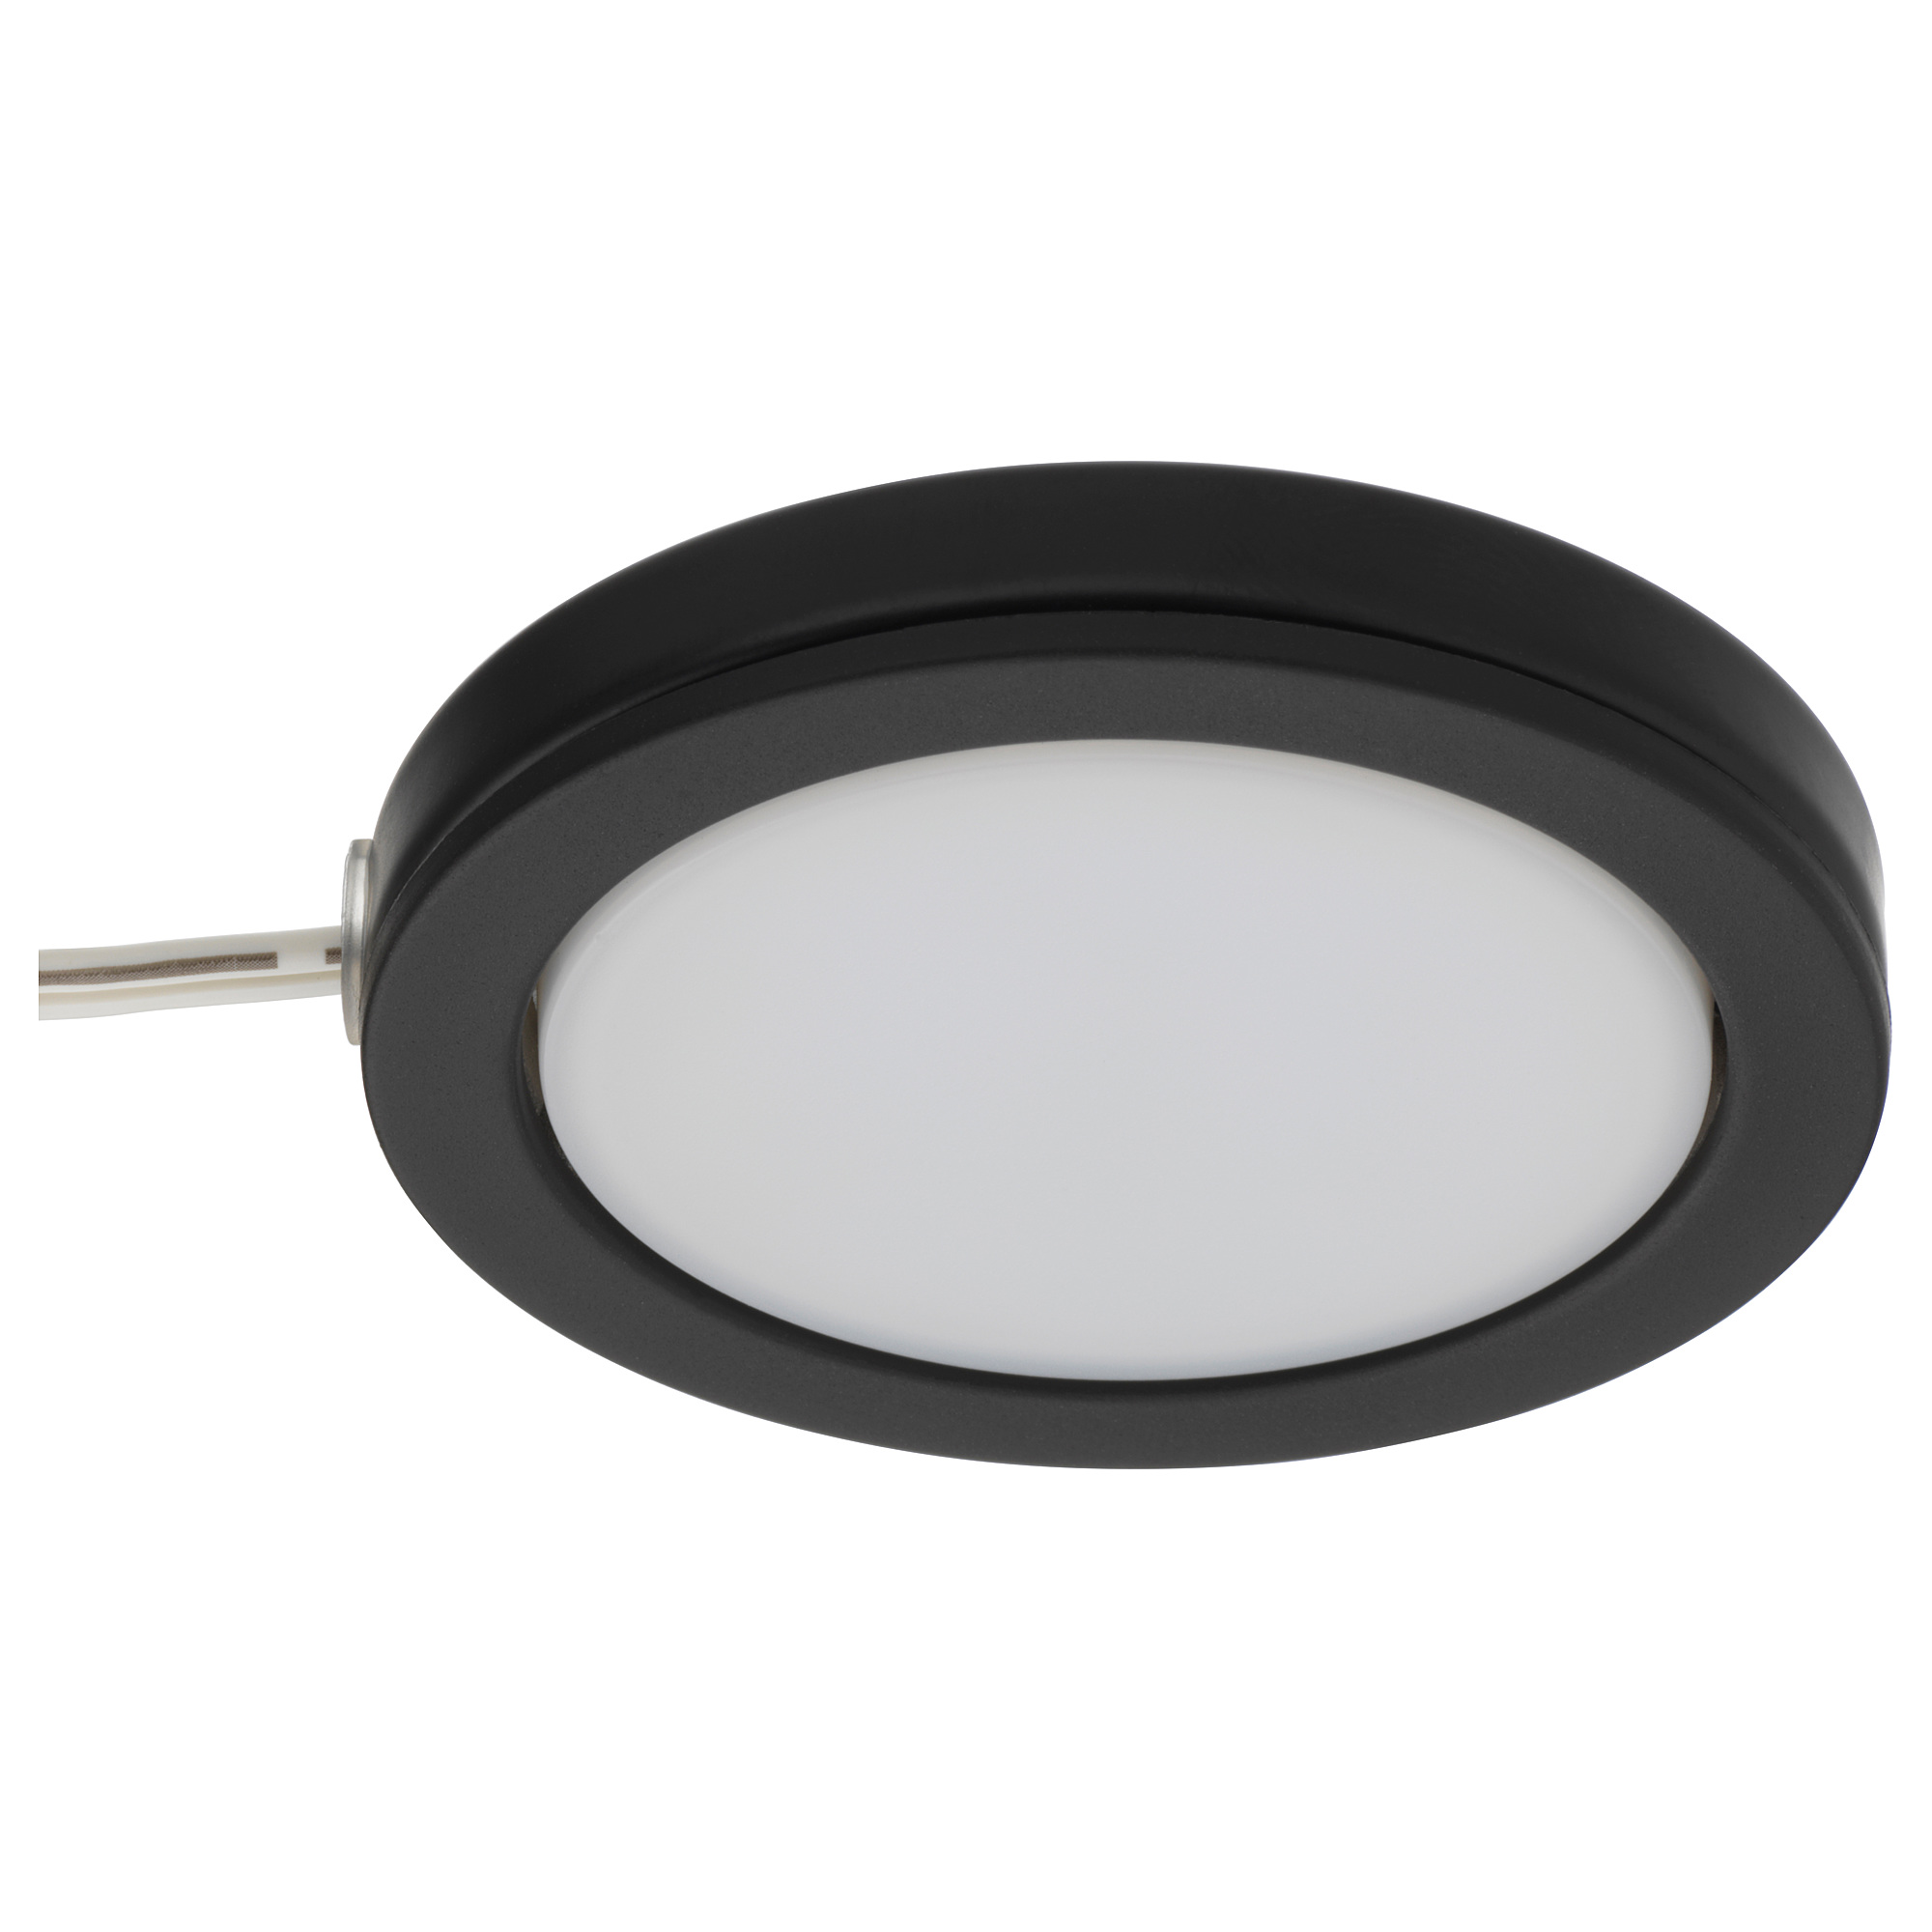
I've also got one of the OMLOP spots that plug in like anything else. They are a decent light for $10:

omlopp-led-spotlight-black__0606481_PE682371_S5.JPG


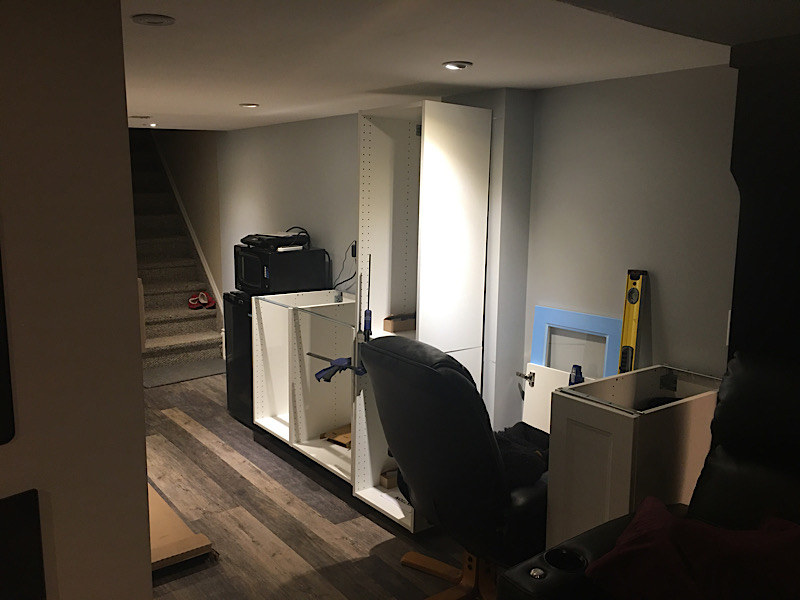
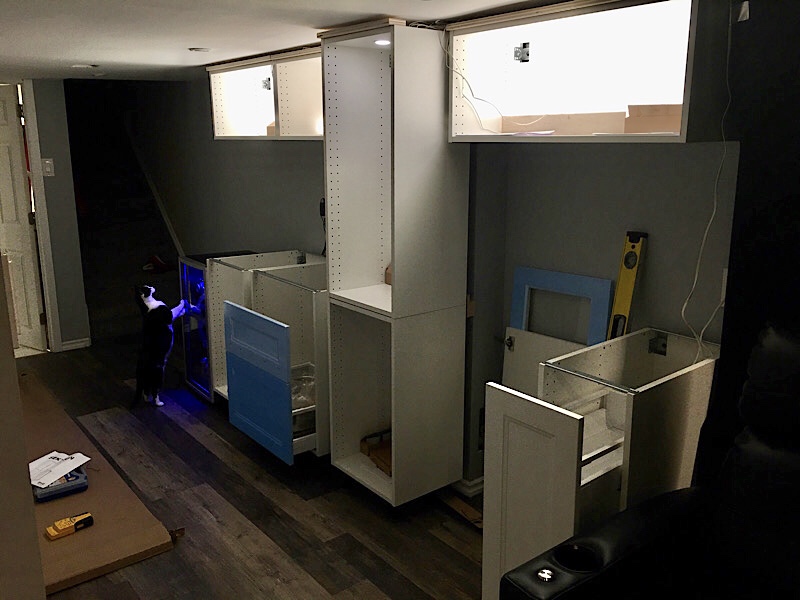
Here's where we're at as of today:

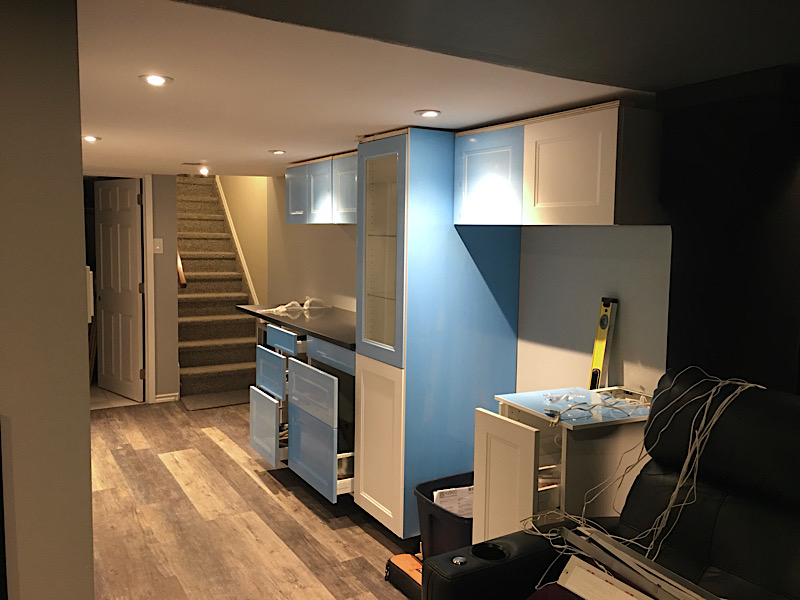
ikea2020_10_30.jpg


You can see our rescue "Magnus the lover boy" checking out the new wine cooler..ha. I'll have to sort a floating end gable to accommodate the cooler.

In the middle of the project there is plumbing stack there that protrudes out from the wall about 8 inches. Rather than notching the counter, we decided to hide it using two wall cabinets stacked. I ordered an extra leg kit, and drilled the bottom cabinet (which is actually a 15" deep upper cabinet) to accommodate the adjustable feet. All IKEA cabinets hang off a slick rail system so the legs are just there for extra stability. The rack system is very nicely designed and makes hanging the cabinets an easy one person job.

The right side of the "kitchen" will be a study nook, and the left side will have sink. You can see a few of the Maximera pull out sliding drawer kits are installed. It took a few minutes to sort them out, but again nicely designed. I preinstalled 3/4" birch ply strips on the uppers as a base for the crown moulding. It's easier to do this before hanging the cabinets so you can fasten from above, hiding your screws.
 
Last edited:

Arclitgold

Well-known member
Joined
Dec 20, 2017
Messages
317
Re: Woody's Works Garage - rebirth!

Wow. Looking fantastic!


Sent from my iPhone using Tapatalk
 

Matias

Well-known member
Joined
Feb 28, 2015
Messages
616
Location
Finland
Looking great Dennis! I put Ikea cabinets in the garage, and I'm still super satisfied with them. I also hid a huge ventilation pipe like you, but cut it inside the cabinet :) Are you going to put handles or use the push-mechanism?

So all of the lights can be controlled via the ikea controller via smartthings? I remember something that the controllers were not controllable by Hue, but the lights are. Not sure if it's correct anymore. I have some Ikea lights controlled by Hue, because they were really cheap compared to Hue ones. They were with the GU10 connection. They've been working fine for over a year or two.
 
OP
D

Denwood

Well-known member
Joined
Sep 22, 2014
Messages
4,224
Location
Thunder Bay, Ontario, Canada
Arclit, thanks. We've made some more progress so I'll post up some pics. I had to fish a receptacle (lower) for the bar fridge and do some plumbing. Not in a big panic to finish so I'm taking my time.

Matias, now that is interesting on the GU10s. I literally just ordered six of them to replace the Home Depot Ecosmart (****!) lights that I was using in the basement kitchen. Two of six HD lights have failed (GU10), and the rest lose connections to the hub all the time. I think HD has stopped sellling them which if true is a good decision. I'll post my thoughts on the IKEA GU10s, but for sure they are 1/2 the price of the HUE lights. Regardless, it's reassuring to hear that they've been reliable for you. I put cabinets from Home Depot in my shop, and they've been ok..but there is no question that the IKEA stuff is a few notches up in quality with regard to precision and hardware. I do like their rail system a lot for installation.

The TRÅDFRI LED controller (30watt) was not found by my HUE hub, but was identified pretty much instantly by the SmartThings V2 hub. So yes, the IKEA LED lights are being controlled and dimmed just fine in SmartThings. I've already added the LED controller to my SmartThings theatre automation scenes (turns off kitchen LED lights when screen is lowered) and have them triggered just fine by the Ecolink zwave motion sensor used in the basement kitchen area.

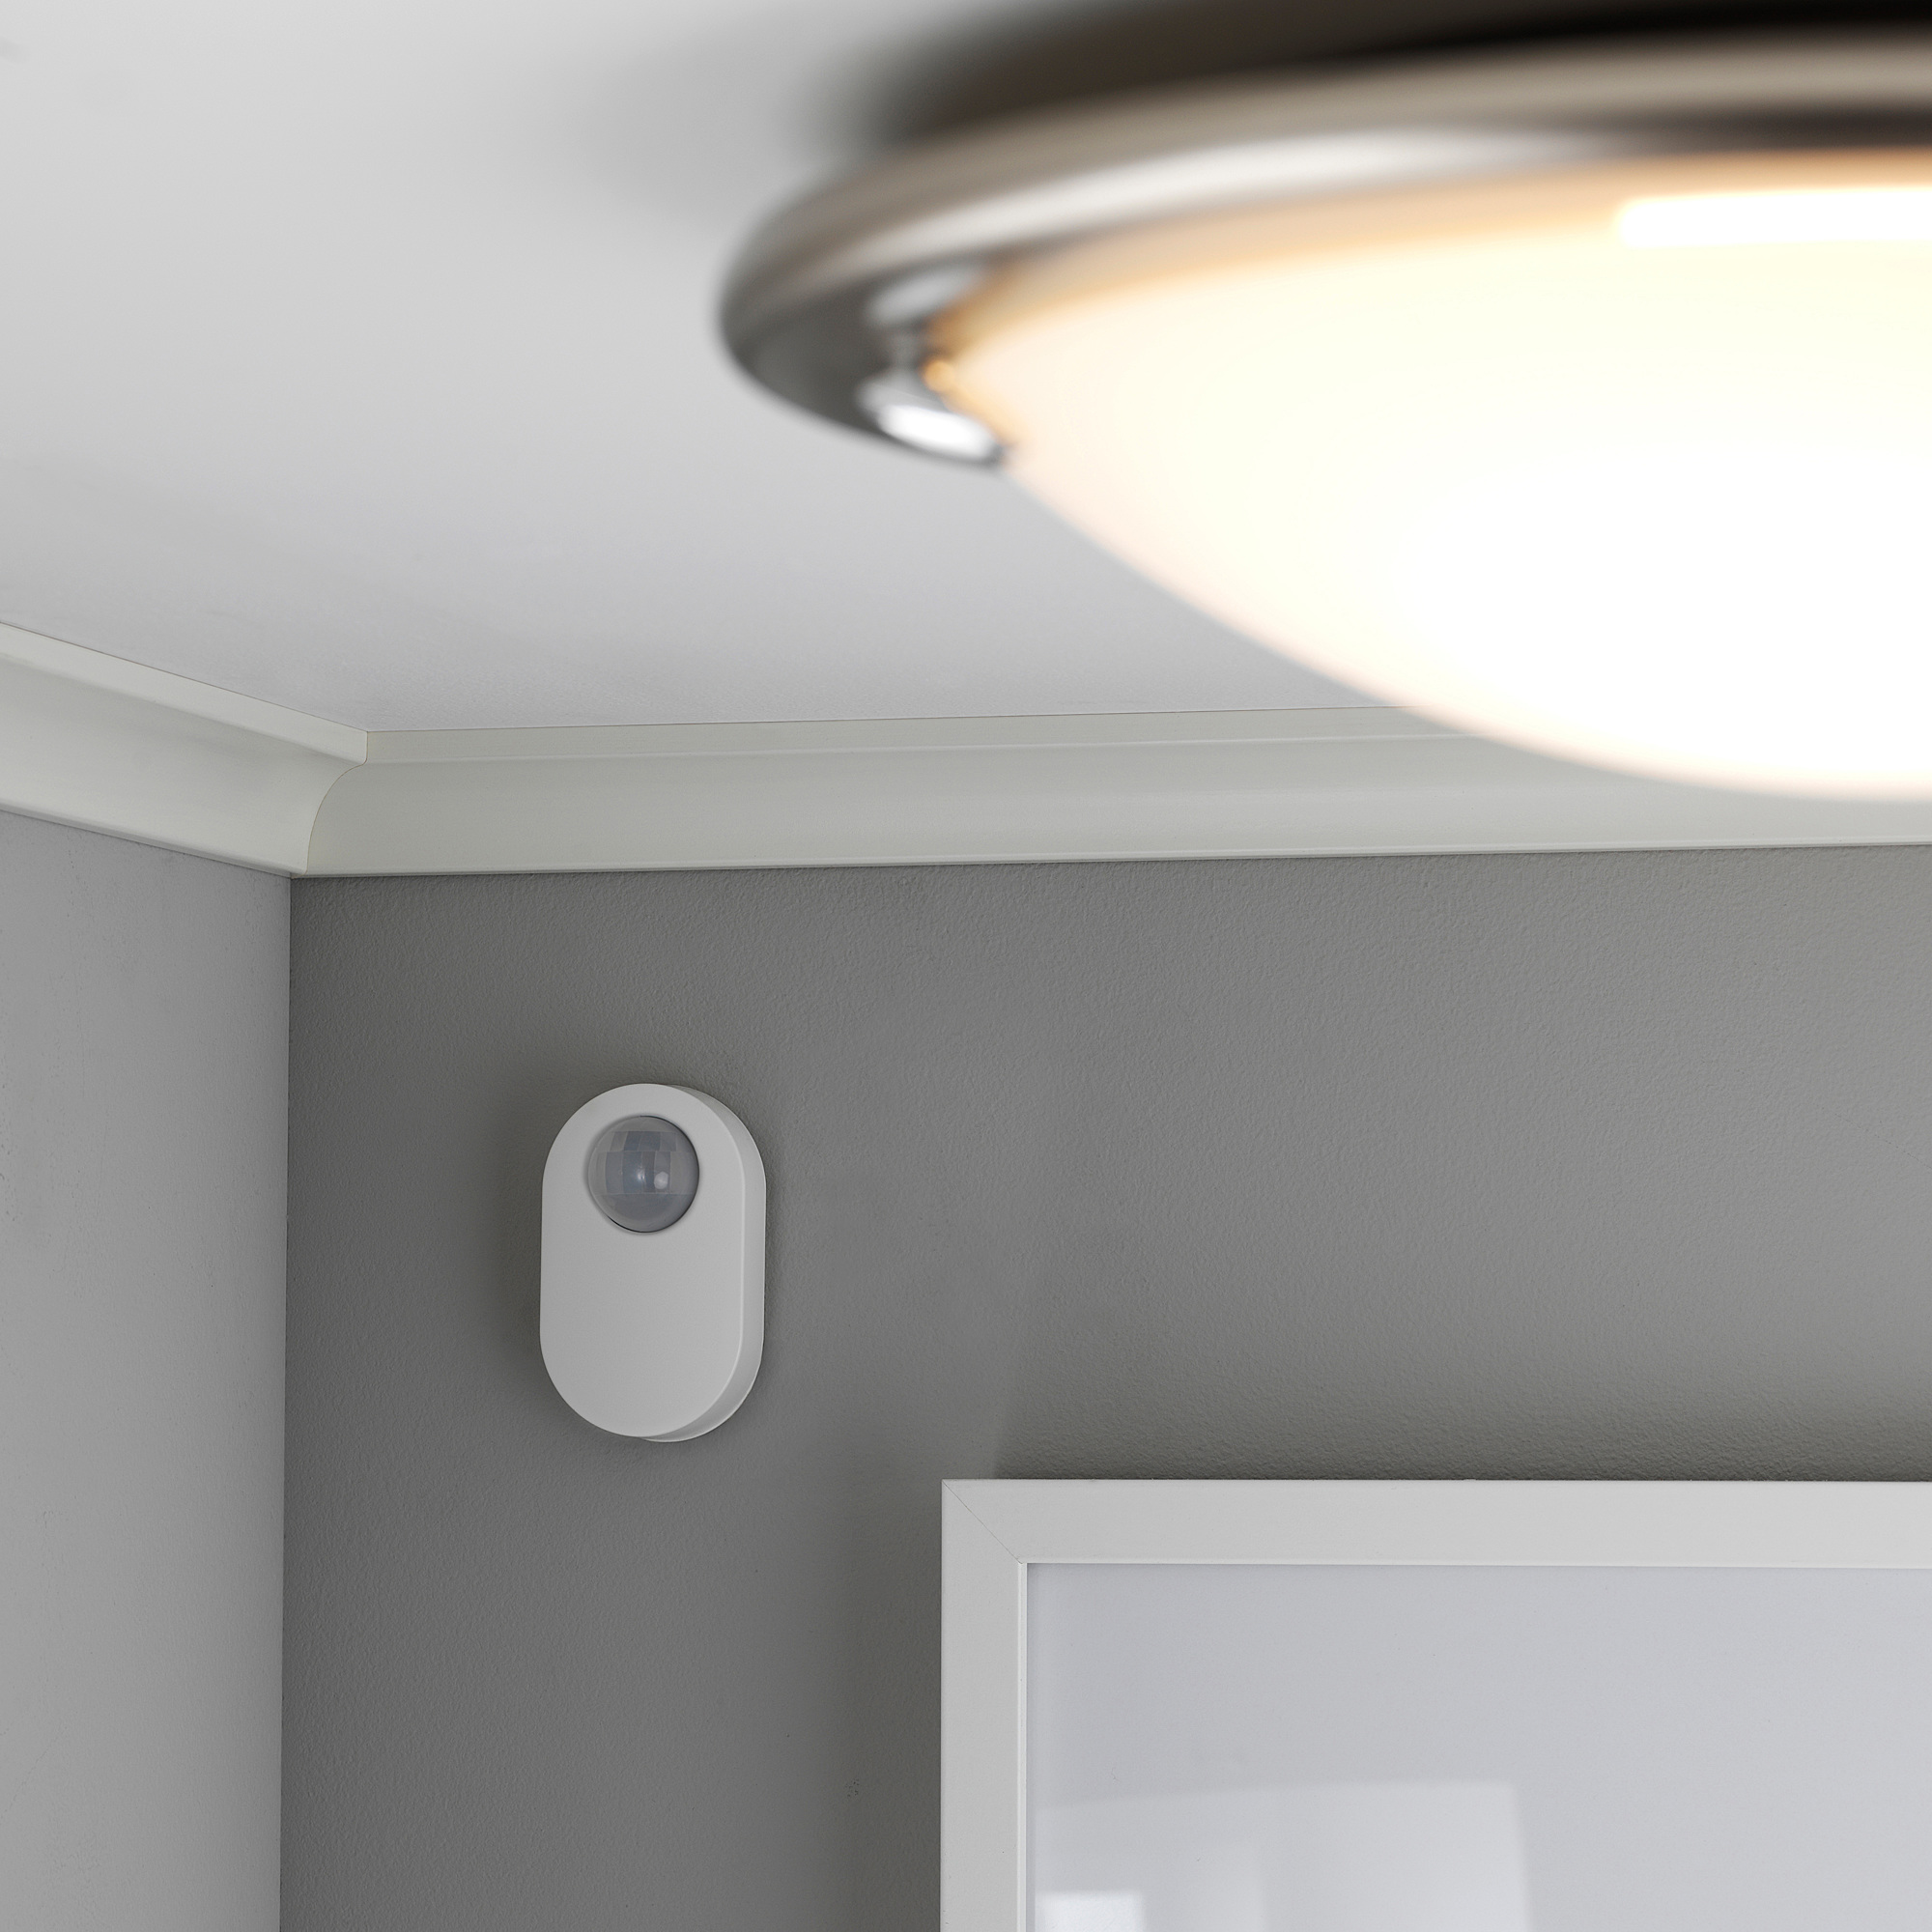
I've also ordered IKEA's TRÅDFRI motion sensor as again, it's a bargain in the automation world (if it works ok) for $14.

tradfri-wireless-motion-sensor-white__0882578_PE687011_S5.JPG
 
Last edited:

Matias

Well-known member
Joined
Feb 28, 2015
Messages
616
Location
Finland
Thanks for the info! Now that I have a motionsensor in the garage, I would like to update the lighting. Ikea leds seem the way to go. I'll wait for your experiences on the motion sensor. If it works, it could be used for specific lighting situations, or some fun stuff ie. controlling machines by hand gestures etc.

Yep, I also liked the railing system, it was so easy to install. Also the cabinets were assembled really fast, with the door hinge mechanism just popping in place.
 
OP
D

Denwood

Well-known member
Joined
Sep 22, 2014
Messages
4,224
Location
Thunder Bay, Ontario, Canada
Matias, I was a bit skeptical on the door hinges with the "snap in" installation, but they are solid. The fact that soft close is built in to both door hinges and slides is a nice touch too.

I did confirm via the SmartThings IDE that the TRÅDFRI 30 watt LED driver is indeed using local control. This means no web access required by the hub to automate them if you're using the built in lighting smart app...and very fast response to motion.
 
To avoid these ads, REGISTER NOW!
OP
D

Denwood

Well-known member
Joined
Sep 22, 2014
Messages
4,224
Location
Thunder Bay, Ontario, Canada
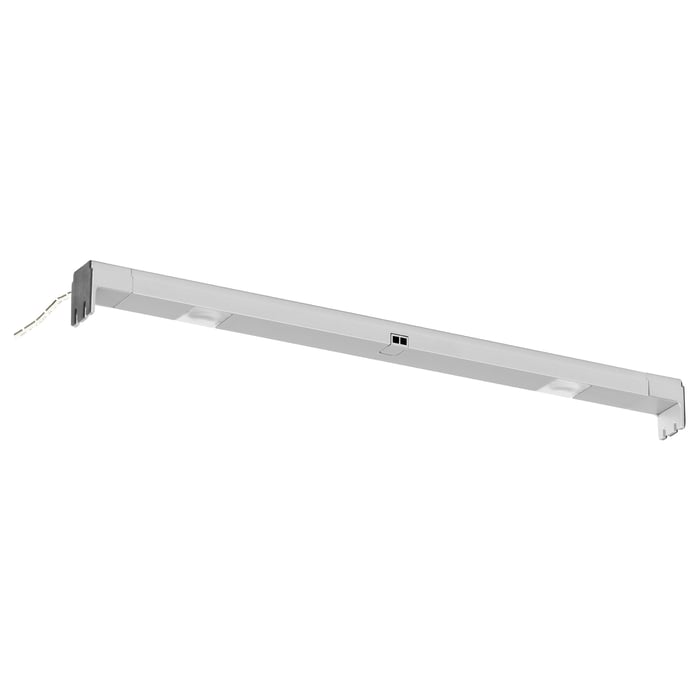
You're welcome Nich. I've now got two of the TRÅDFRI LED 30watt drivers connected to SmartThings and they respond pretty much instantly to the motion sensors as everything is "local" control with the hub. I added a few of the IKEA drawer LED lights to the collection which also connect to the LED driver. More on those later as they use a pretty slick proximity sensor to trigger on/off when you open a drawer or cabinet.

omlopp-led-light-strip-for-drawers-aluminium-colour__0369405_PE550940_S5.JPG
 
OP
D

Denwood

Well-known member
Joined
Sep 22, 2014
Messages
4,224
Location
Thunder Bay, Ontario, Canada
This pic shows the newly installed IKEA TRADFIR GU10 bulbs. They survived my first test which is to power them off physically with the switch for about 30 minutes, then make sure they stay attached to the SmartThings hub and automate correctly after. I had no issues joining them to the SmartThings hub directly, however you do need to cycle power to them six times to reset them, then add using the + -> Brands -> IKEA -> Lighting method with the new SmartThings app. I did not have to bring the bulbs close to the ST hub which is a floor above and across the house.

You would be very hard pressed to tell them from HUE bulbs with regard to lumens, color temp (about 3000K) etc. They are however 1/4 (on sale for $7.19 CAD) the price of a plain white HUE GU10 bulb.

I've got some cover panels on the cabinets installed, so progress is steady. Everything references off that center "stack", so the work flows out from that area. The MAXIMERA drawer units are all assembled..and I like them. Aluminum drawer side panels, fully adjustable faces, and soft close hardware set them apart from the other options we looked at, particularly given their price. I need to find a good spot to install the two LED drivers, and route all the wire from the 9 LED light panels in the kitchen cabinetry.

ikea_2020_11_05.jpg
 
Last edited:

tab2

Well-known member
Joined
Apr 9, 2009
Messages
381
Location
Boston
Interesting timing that I opened this thread and we're talking about Ikea. We can use the PAX system for our master closet and come in under $1,400. While it definitely won't not be the same quality and look as 3/4 prefinished walnut plywood, it will be less cost and certainly time.

Did you look at it in the store before making the commitment? I am too much of a cynic to not get my hands on it first.
 
OP
D

Denwood

Well-known member
Joined
Sep 22, 2014
Messages
4,224
Location
Thunder Bay, Ontario, Canada
Tab, the nearest store (in Canada) is about 8 hours drive, however we did have a look about 3 years ago at the US store in Minneapolis which is a bit closer. My wife is basing her decisions 100% based on aesthetics, but mine is based more on design/quality control etc. She definitely has a preference for white, so for me that means that a foil door etc. makes more sense than building in maple/birch and painting everything. We looked at a number of other manufacturers locally but I wasn't happy with what I was seeing vs the price. So yes, the boxes are a combination of MDF/chip material, but the finish is good, and attention to consistent quality seems very high. The finish we chose was matte white, which I would not necessarily recommend as it already shows a propensity for showing finger smudges etc. It makes sense to use matte as the room adjoins a theatre room, however for a high wear kitchen, I would not use it.

Another thing that I realize now is that the IKEA planning software has some intelligence as it matches up drawer profiles, and includes bits that you would never even know you needed, particularly with respect to the pull out drawer systems. I would have gone crazy in the store trying to figure that out with an IKEA rep (which I believe is why they want you to arrive at the store with an online plan already done). In other words, I'd 100% recommend using the online design tool, and letting that do the ordering for you. I'd also watch this video and add some cover panels to your design separately if required...which I did. Kode does an excellent job in his Youtube channel showing you how the cover panel system works, and how to deal with fitting them, scribing to uneven walls etc.

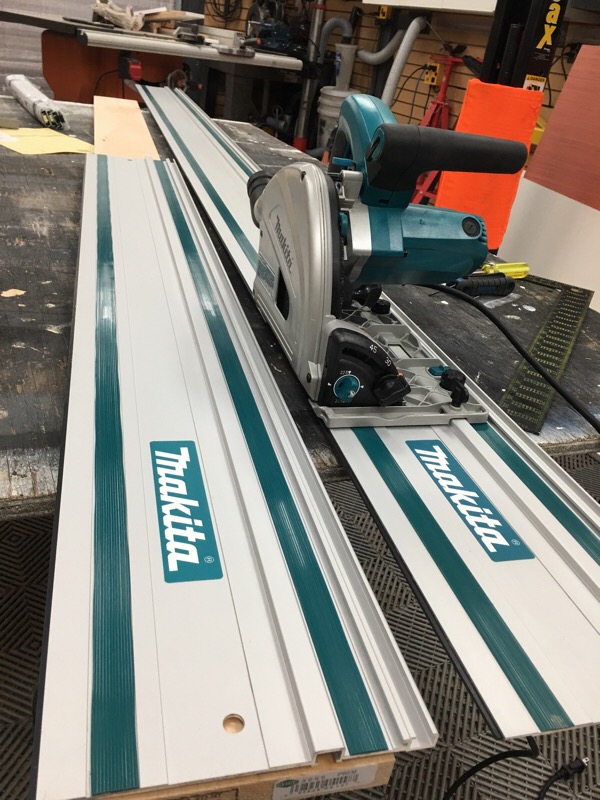
The blue plastic cling on the finished surfaces is bit of a PITA, but it does work very well to protect the surfaces during construction. I've also found that my Makita track saw makes flawless cuts, leaving the plastic cling in place (face down) on the cover panels. If doing a lot of this type of work, you'd be nuts not to have a track saw setup. It makes trimming cover panels, counters etc. super fast, virtually dustless and more importantly, free of chip out. I use the 10ft and 5ft tracks all the time in my shop. The fact that you don't have to run finished panels over a table saw means less risk of damaging the finish..the track 100% protects the panel which can be safely secured on a protected surface.

track1.jpg


Our total cost for this kitchen, including our 13% tax, shipping, all hardware, pulls, sink, fixtures, countertops etc. was about $3300 CAD ($2500 USD) which is easily $2-3K less than the other quotes we got. To be honest, the idea of using materials that are more sustainable does appeal to me, particularly as most kitchens are just demo'd anyway when they fall out of style.

I'm being quite careful to trim this installation out with cover panels, skirting, crown molding, integrated lighting etc. and once done, I suspect wife approval will be very high. This means we'll likely go the same route for the main kitchen upstairs.

So far the IKEA LED lighting is easily the same quality as the Philips HUE stuff I've used (which is bulletproof), but it's about 1/3 the cost.
 
Last edited:

tjpavlov

Well-known member
Joined
May 18, 2012
Messages
1,280
Location
Providence, RI
Drives, have you ever looked at some of the companies that make doors and drawers for Ikea boxes? Semihandmade.com is one. They make custom doors to fit Ikea cabinet boxes.
 
OP
D

Denwood

Well-known member
Joined
Sep 22, 2014
Messages
4,224
Location
Thunder Bay, Ontario, Canada
Tj, I’ll definitely look at those options for the upstairs kitchen..I was aware of these companies.

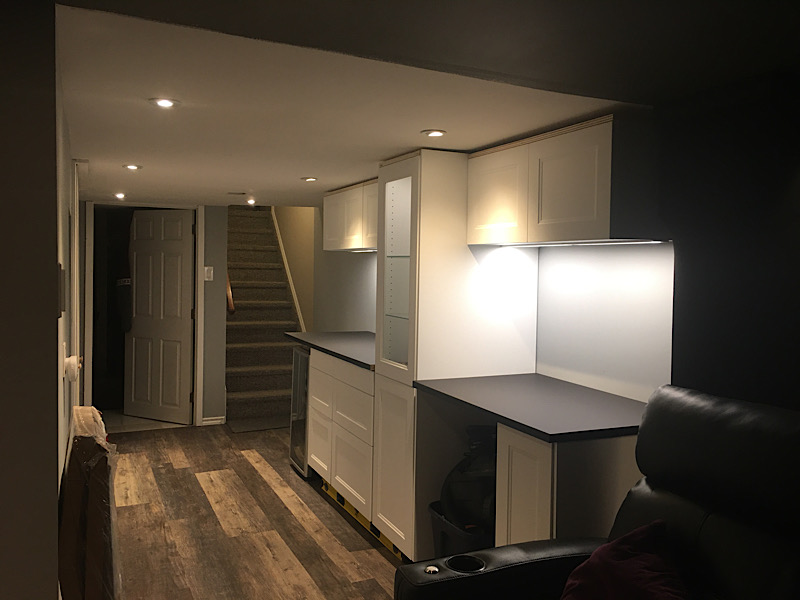
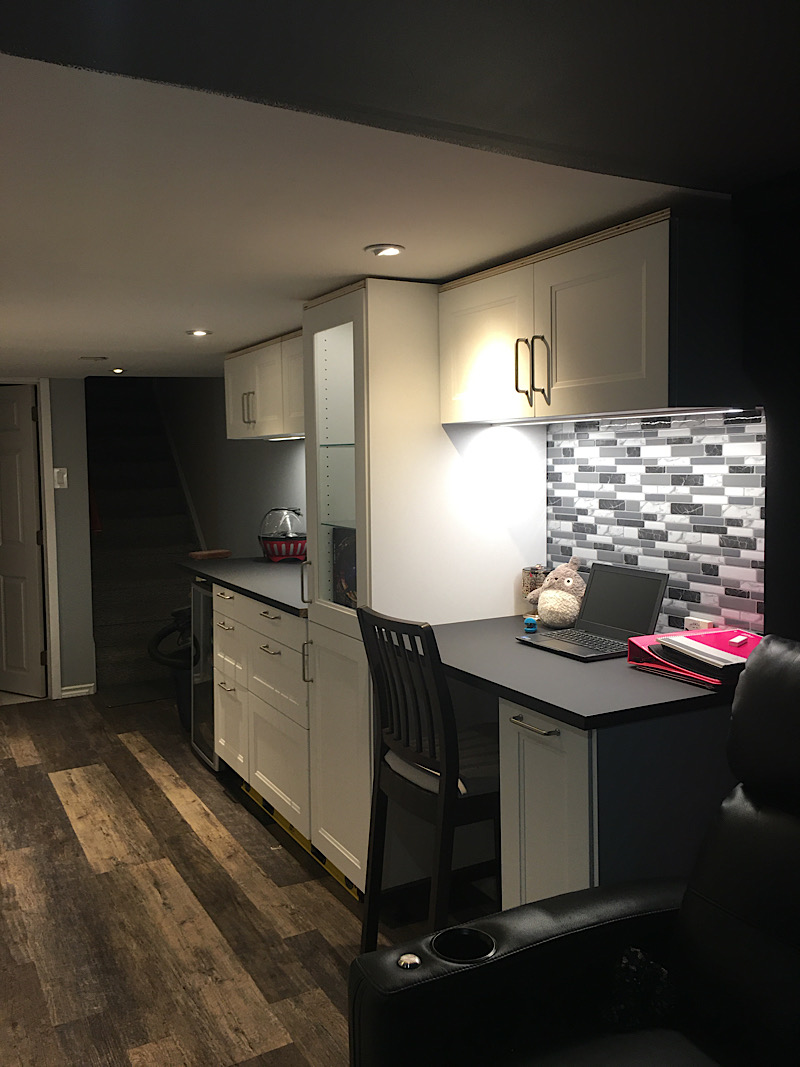
I got the LED lights all installed and routed, counters cut and all cabinets fixed in place. I didn’t realize until today that the under counter lights all come with coupler connectors and alignment dowels so that four of the 15” undercounter units are nicely sistered to each other and supplied by just one harness at the end..and you can choose which end as the LED unit end caps are mirror images of each other. It’s a slick design. We’ll definitely need some back splash treatment and I’m leaning in the stacked stone direction. I figure it will be a good acoustic diffuser given proximity to the 11.2 channel Atmos theater sitting adjacent...

ikea2020110702.jpg


ikea2020110701.jpg


Next up is the gable end over the bar fridge, crown molding, toe kick, and upper cabinet skirting. The sink plumbing is done so that can go in as well. Wife approval factor is very high :)
 
Last edited:

Matias

Well-known member
Joined
Feb 28, 2015
Messages
616
Location
Finland
That's starting to look very good! Completely understand the wife's approval.

Argh, just looked at some tracksaws as I need to cut some panels, but then decided I won't be cutting much after that, so will have to make do without. Then coming here makes me doubt my decision :)
 
OP
D

Denwood

Well-known member
Joined
Sep 22, 2014
Messages
4,224
Location
Thunder Bay, Ontario, Canada
DJ, thanks :)

Matias , I use my track saw about as much as my table saw. I don't have room for a 12ft run out table, so the track saw is used anytime I need a precise cut, or to break down 4x8 sheets. Any smaller repetitive cuts I do on the table saw. I find all kinds of uses too for sizing down doors, closet doors, trimming deck boards and used it as well for my trailer floor repair as it was the right tool for that job too. If you do invest in one, you won't be sorry..you will use it :)

It's interesting to see how adding the small aesthetic details (like crown molding and kick plates) really bring a project together. This one is turning out to be fun :)

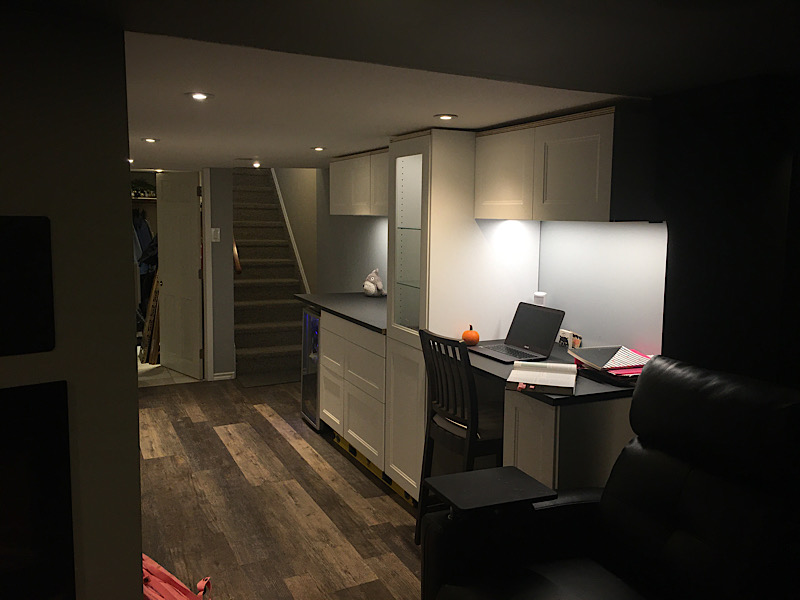
My daughter assembled the "tall" chair we ordered for the desk nook all by herself and took it upon herself to move into the (unfinished) space already. It's a bit quieter downstairs so gives her an away space for exam studies..

ikea20201108.jpg
 

Bob Heine

ALLIANCE MEMBER
Joined
Oct 24, 2009
Messages
10,709
Location
Boca Raton, Florida
Argh, just looked at some tracksaws as I need to cut some panels, but then decided I won't be cutting much after that, so will have to make do without. Then coming here makes me doubt my decision :)
Matias , I use my track saw about as much as my table saw. I don't have room for a 12ft run out table, so the track saw is used anytime I need a precise cut, or to break down 4x8 sheets. Any smaller repetitive cuts I do on the table saw. I find all kinds of uses too for sizing down doors, closet doors, trimming deck boards and used it as well for my trailer floor repair as it was the right tool for that job too. If you do invest in one, you won't be sorry..you will use it :)
Matias, Dennis is right about the track saw. I just bought a Wen track saw, two 55" tracks and a pair of clamps for $186 US. I decided to buy it after reading a review of a similar saw from Peter Millard, a devout Festoool tracksaw owner. It seems even a cheap track saw is a very useful tool.

I checked tool sources in Finland and it looks like the Wen is available for €119 at this site:
https://www.ubuy.fi/en/search/index...cut-sidewinder-circular-track-saw/store/store
 

Matias

Well-known member
Joined
Feb 28, 2015
Messages
616
Location
Finland
Matias , I use my track saw about as much as my table saw. I don't have room for a 12ft run out table, so the track saw is used anytime I need a precise cut, or to break down 4x8 sheets. Any smaller repetitive cuts I do on the table saw. I find all kinds of uses too for sizing down doors, closet doors, trimming deck boards and used it as well for my trailer floor repair as it was the right tool for that job too. If you do invest in one, you won't be sorry..you will use it :)
Matias, Dennis is right about the track saw. I just bought a Wen track saw, two 55" tracks and a pair of clamps for $186 US. I decided to buy it after reading a review of a similar saw from Peter Millard, a devout Festoool tracksaw owner. It seems even a cheap track saw is a very useful tool.

I checked tool sources in Finland and it looks like the Wen is available for €119 at this site:
https://www.ubuy.fi/en/search/index...cut-sidewinder-circular-track-saw/store/store

Dennis, it's the small details that move the project from work in progress to finished. That's a nice area for the daughter. We have same kind of nook and chair in our kitchen, and our kids use that place all the time.

Both, it's actually after reading your thread Bob that I went out and started looking at track saws ;) I don't have a table saw, but I do like the idea of a track saw especially because of that missing piece in my tool section. I'll check that review above. I also remember seeing a youtube video on creating your own track, will have to check that out also, as I suspect that after cutting these boards, the need for it next time might be next summer...
 
OP
D

Denwood

Well-known member
Joined
Sep 22, 2014
Messages
4,224
Location
Thunder Bay, Ontario, Canada
Bob, agree 100% :)

Matias, a bit busy with paid work this week, but hopefully we'll polish off a few more details this week.

Nick, the five footer is used about 90% more than the 10ft, but no question for 4x8 sheet break down it's the shizzle!
 

swimrr

Well-known member
Joined
Aug 6, 2015
Messages
102
Location
Vancouver, BC
Woody, thanks for all the updates. If I haven't mentioned it before, I greatly appreciate learning from your thread and picking up invaluable tips. We need to do our kitchen so I'll be following your progress closely, especially as I don't see any better valued DIY options than IKEA.

I've been humming and hawing about getting a circular saw for a while now. A couple of Youtube videos convinced me that the convenience over my small table saw would make it well worth it. But after a few more Youtube videos and I ended up buying a cordless Milwaukee jig saw as I want to install some stair skirts and figured it can make the small cuts needed. My only regret now is that I didn't buy it earlier. For some reason I thought they were of limited use but the versatility can't be beat. I've used my new jig saw more in a week than my other saws in a year. And now, my next saw will have to be a circular saw with a good track.

With respect to your brake bleeder, I have one that I've only ever used for creating the pressure needed to bleed the brakes, as I've been unsure about how to clean the container and all the hoses after filling it with brake fluid. What process do you use to clean it to ensure the brake fluid doesn't cause any deterioration in the bottle and hoses? It wasn't cheap and I'd like it to last a while.

Thanks again for all the updates. I'm just one of many that appreciate you sharing your wisdom and making our DIY's better!
 
OP
D

Denwood

Well-known member
Joined
Sep 22, 2014
Messages
4,224
Location
Thunder Bay, Ontario, Canada
Swim, I'd consider a jig saw essential kit as there are many jobs (like cutting a sink into a counter, or plumbing relief into cabinets) that are difficult without it. I almost always use a small hole saw at the corners (or drill bit if it's a square edge cut) with the jigsaw to make the corners pretty :)

A track saw is not quite the same animal as a circular saw because the track saw is usually a plunge saw, where the circular saw cut depth is a fixed adjustment. I have both, and pretty much only use the circular saw for demolition these days, and track saw for just about anything else. That said, you can buy a circular saw and use it with a clamped fence to get straight cuts. The only downside really is convenience, dust control, and cut quality. Before the track saw, I used a plain old circular saw and clamped fence to break down 4x8 sheets. Once in smaller pieces, it's the table saw for repetitive, accurate cuts. It's hard to beat the combination of setup speed and accuracy with a decent table saw. I found my small/portable table saw mostly useless so invested in a larger Ridgid table saw a few years back. The dust management on the track saw is nearly perfect, and on the table saw (it has an enclosed base and 4" dust port) is pretty good as well just using my Ridgid 14 gallon shop vac and Dust Deputy cyclone.

On the brake bleeder, I just gravity drain the pressure vessel, hoses and wipe them down. Nothing special. No issues.
 
Last edited:

loganb

ALLIANCE MEMBER
Joined
Dec 29, 2011
Messages
5,654
Location
Omaha, NE
Dennis, do you have any creative solutions for storing your track saw tracks? I struggle with what to do with my nine footer.
Stolen from another forum somewhere...maybe FOG but this is what I'm planning to do when I eventually get the 9' track

Screenshot_20201112-131319_Google.jpeg

Sent from The Garage Journal mobile app
 
OP
D

Denwood

Well-known member
Joined
Sep 22, 2014
Messages
4,224
Location
Thunder Bay, Ontario, Canada
Log, that works :)

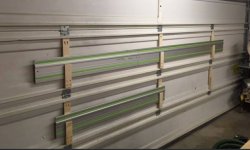
TJ, I've just got the two tracks racked at the back of the shop. It's worked well and was simple to execute.

20201112_1.jpg


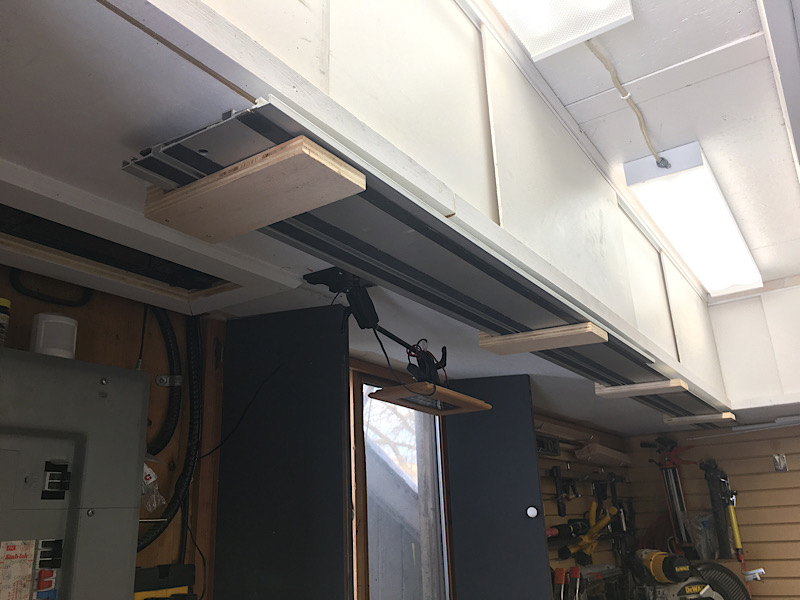
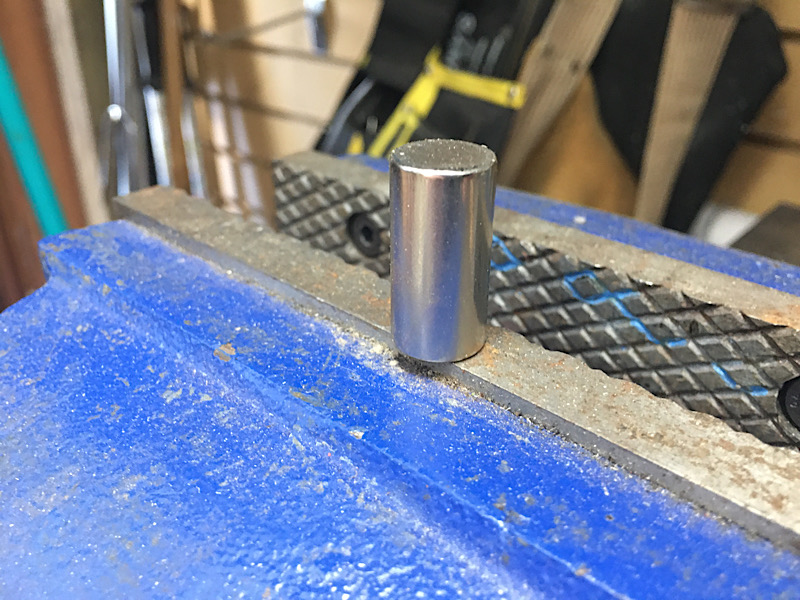
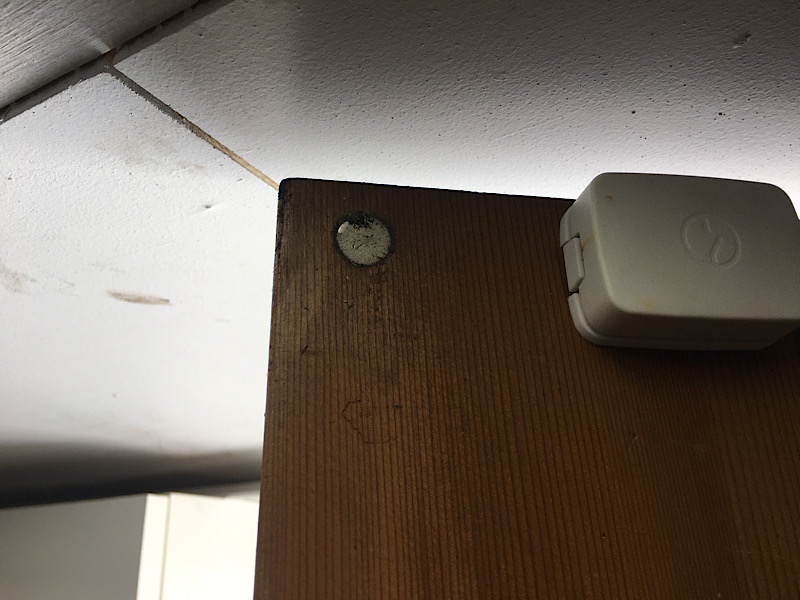
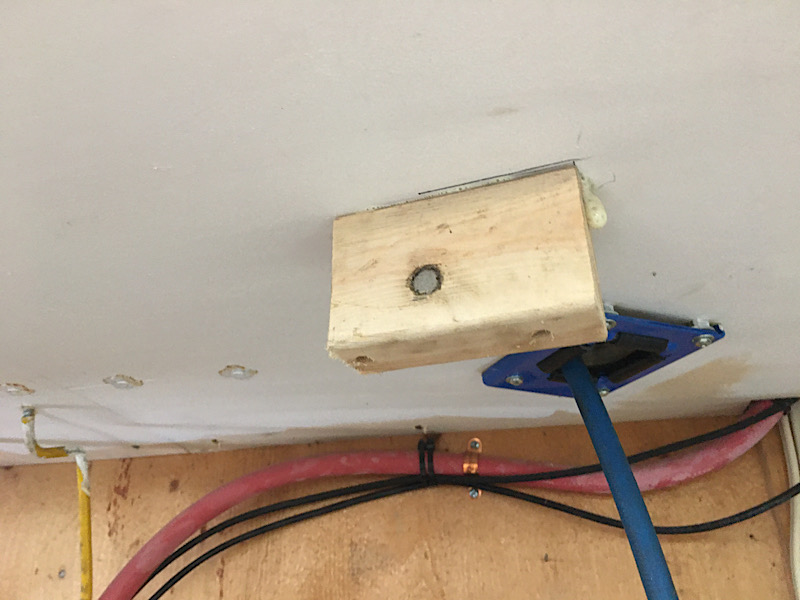
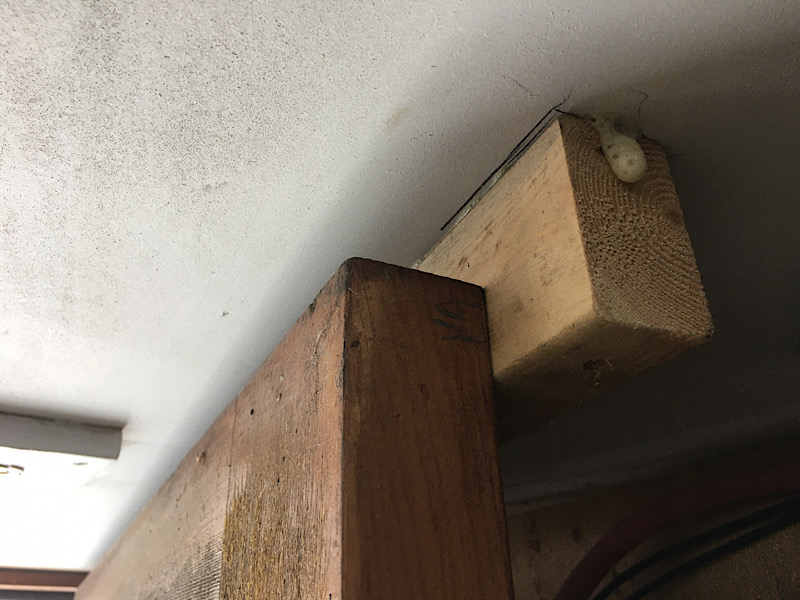
While I was taking that pic, I was reminded of my favorite garage hack of 2020, namely the magnetic door "stop" that holds the man door open when the roll up door is open on the other side of the shop on a windy day. This works awesome using two (strong) magnets and about 10 minutes with a drill and a few screws. Just make sure you install them in the correct orientation :)

These are rare earth magnets around 1 1/4" long and 1/2" in diameter.

20201112_2.jpg


Drilled and pressed one magnet into the door at the top with a bit of urethane glue.

20201112_3.jpg


Corresponding block on my overhead storage with the same type of magnet drilled and pressed in, again with urethane glue.

20201112_5.jpg


The door is held open quite securely, but is "defeated" with a mild pull. Hard to beat the simplicity.

20201112_4.jpg


Both the door stop and track storage work because I have the lower storage at the back of the shop (this is a pic before I added those bits) about 6 1/2' feet up. I also have my miter saw stand (about six feet long) hung from the rear LVL beam that forms the base of the storage loft. Every inch is used on this small 16x24 :)

rd5.jpg
 
Last edited:
OP
D

Denwood

Well-known member
Joined
Sep 22, 2014
Messages
4,224
Location
Thunder Bay, Ontario, Canada
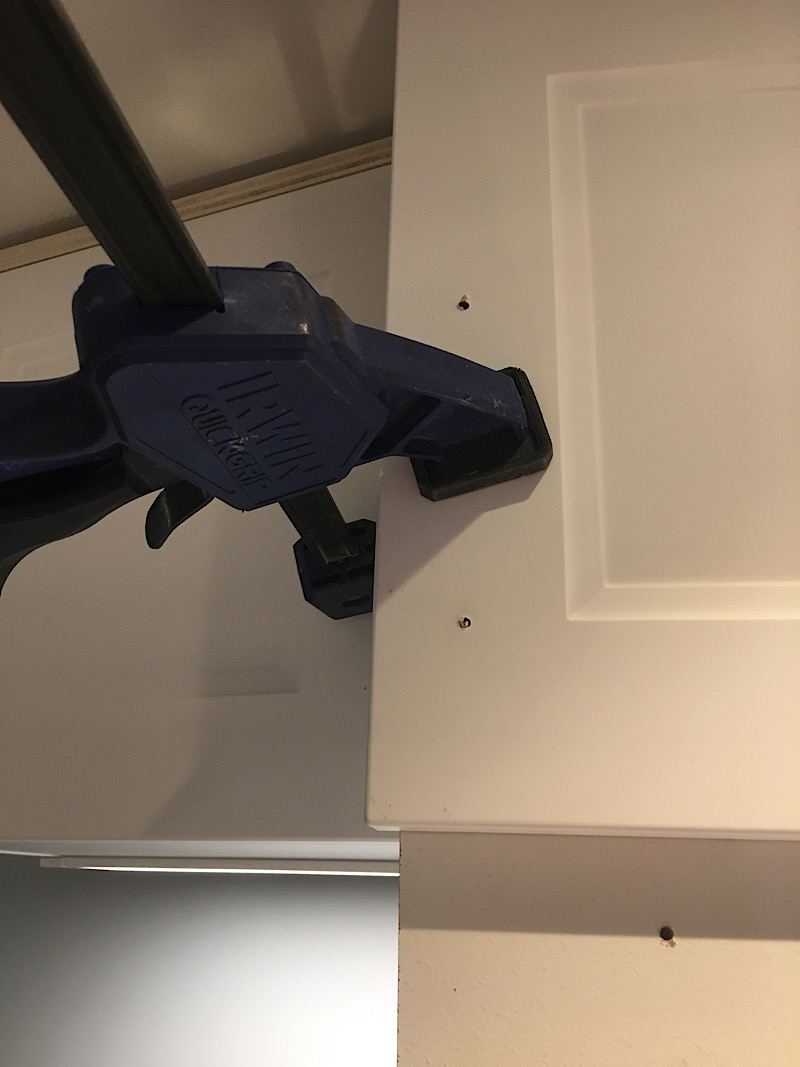
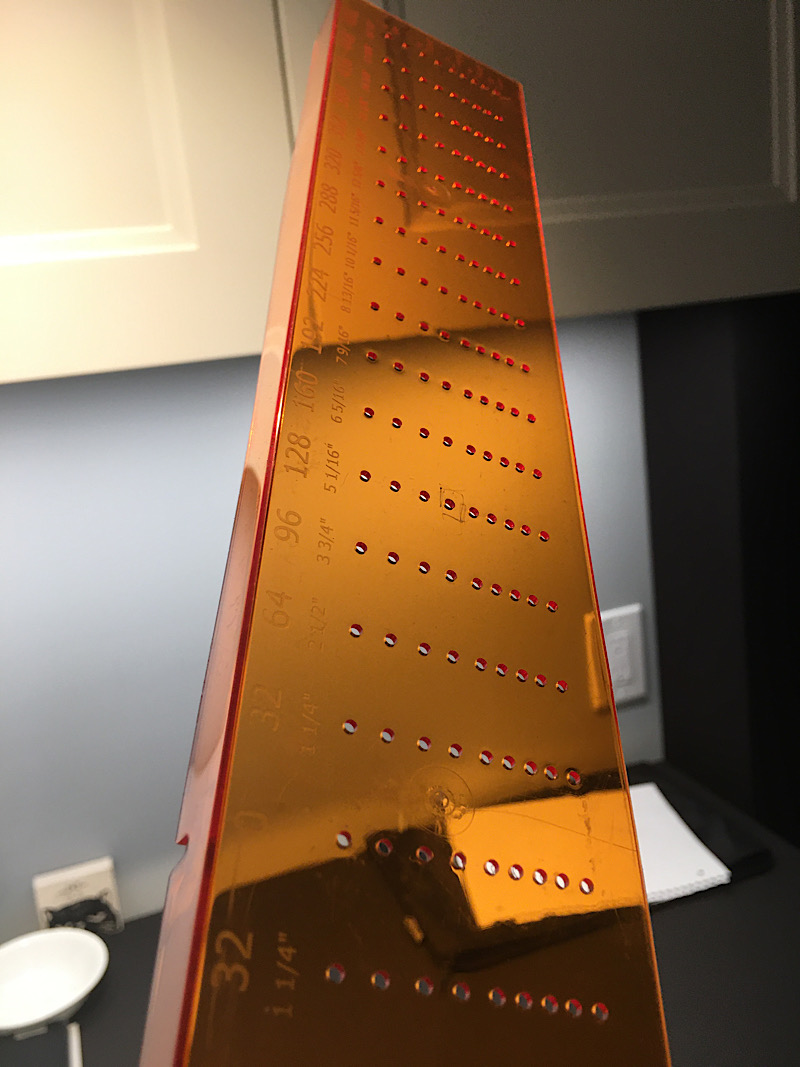
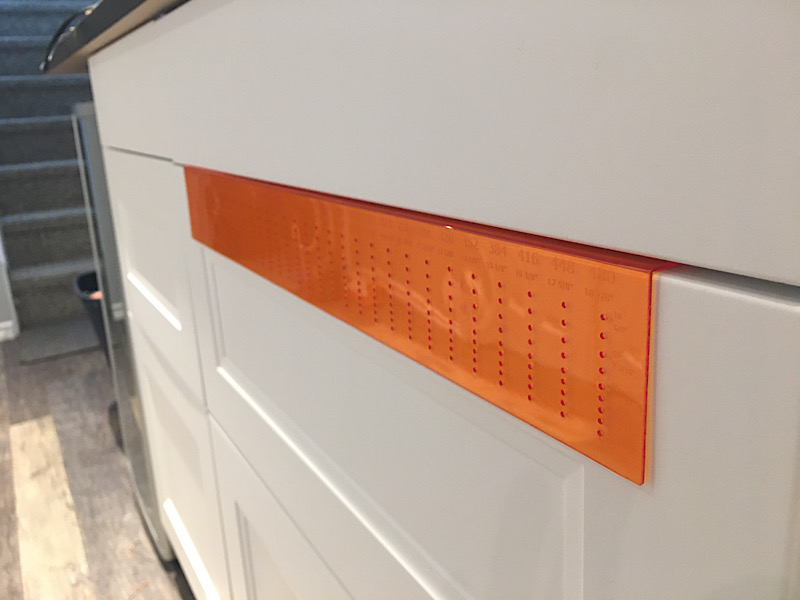
When it comes to drilling pull hardware holes with IKEA cabinets, you need to drill them yourself. A mistake on a finished cabinet can be a bit expensive, so this FIXA template is $3 well spent. With some hardware mounted I moved on to some back splash experimentation.

Clamping a back plate keeps the hole clean on both sides of the door.
20201114_1.jpg


A simple template that works very well.
20201114_2.jpg


20201114_3.jpg


More progress...
20201114_4.jpg
 
To avoid these ads, REGISTER NOW!
Top Bottom