camarotoolman
Banned
Old solid core doors make realy good tops, also if make some plywood doors, it hides all the junk under the top and looks alot better.


Old solid core doors make realy good tops, also if make some plywood doors, it hides all the junk under the top and looks alot better.
Onesight1
That's a very clever idea the way you constructed the removable melamine top! Great looking and functional.
Onesight1
That's a very clever idea the way you constructed the removable melamine top! Great looking and functional.
Onesight1,
Nice bench and I agree with Lineman88 with the great idea on the removable top.
Looks like it is heavy enough to handle most work.
I really like the color selection as well.
I might have been tempted to cut another piece for the bottom shelf (for all the same reasons!)


I found this site while searching for ideas for my workbench shelf (unfortunately, after I was already finish). Signed up initially to view some of the pictures. Now that I'm finish, I figured I'd post mine.
[
I'm still not finished.
Thanks,
Courtney

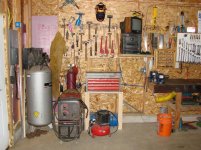

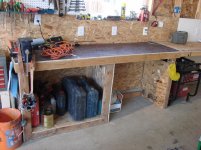
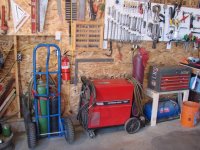

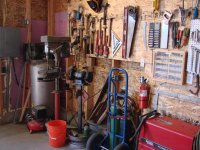
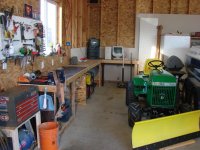
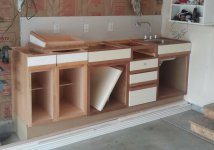
I had a 10 ft work bench and it was ok but now what i really wanted. after i built the garage 2 years ago i put the bench where it was but after looking at pictures of benches here i tore it down a week ago. The main bench is done but i will make some shelves in the future and add some 3/4 plywood to the top with a 1x6 board on the facing just to make it look good. I still need to insulste the wall behind the bench and finish sheet rocking it and install more peg board to keep things organized better/ mechanical,plumbing,electrical, carpentery. At the present time i am off work recovering from 2 shoulder surgerys. And i need to get back to work and make some extra money to pay for 3 surgerys since last Sept. I also had my nose and throat operated on so money to finish garage will be slow in comming this year. hope you enjoy the pictures. the first 2 pictures are of the old bench.
All done. But not without a little excitement. ha!!
Heres the area that drove me crazy. This was around noon today...

In process.....

I've moved this table dozens of times to clean under it. I guess I moved it one too many. Whoops!!!

Now its a thousand times better. I'm really happy how it turned out. The bench literally doesn't wobble a millimeter. Its absolutly rock solid, (which is exactly what I was trying to do)
Like I mentioned in the other post, I plan on doing a hutch w/ pegboard and getting rid of the one thats there now. That will clean up the cords and the power strip, give me a good full length shelf, and give me a place to mount proper lighting

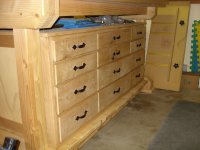
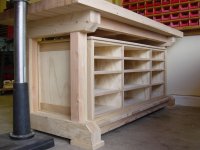
There are some great workbenches shown here, along with great ideas. Here's one I started yesterday, although not completed yet. When complete, it will be 6' x 2' and 33" high. The area above the workbench top and recessed under the girt will contain several bins for small parts. All of the material has been in my barn for years, so it was time to put this stuff to good use. My orignal plan was to use 3/4" plywood for the top, but that may change because I have a salvaged solid core door that is just shy of 2" thick. The area below is framed for a lower shelf.
The back legs are 4x6 treated pine, while the front legs are 4x4 cedar post. Everything else is 2x4's, except for the top front and back braces, which are 2x6's. It's all assembled with with deck screws and lag bolts. This is a very easy build and should last many years with any abuse you want to throw at it.


Work in progress....
Stole the angled leg idea from this board, Cobra i think,
10 feet long 41 inches high 29 inches deep.
2 x 8's are overkill but were left over bracing from my home build. The tops are butchers block from IKEA 2x $28 a couple of coats of poly and screw the tops down ..Done deal..the green stain theme of the garage is to compliment my British Racing Green Aston Martin that I am going to win in the lottery


3/4" "cabinet grade" plywood from Home Depot (was about $35 for the 4' x 8' sheet) Then stained first with an Antique Walnut (soaks up lot of the brown) then Red Mahogany, then some varnish.
Matches the island:
That top is nicer than what I have on my dining room table. You're actually going to do work on that.


Work in progress....
I had posted this in the other thread also. Top is 3\8 plate. Legs are 3x3x114"
This was dangerous. Trying to flip a 600 pound table over by myself


I had posted this in the other thread also. Top is 3\8 plate. Legs are 3x3x114"
This was dangerous. Trying to flip a 600 pound table over by myself
awesome table though!!!