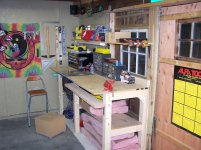
I spent a couple days researching (mainly reading this thread over and over) before I decided to build my bench.
I've been told that your fist, at your side, should rest on the top of the work bench. I measured that to be about 28" (I'm about 5'6" on a good day, when the planets are aligned and the gravitational pull is at its greatest). Working with the saw horses I have with a 3/4" piece of plywood I measured that work surface to be 30" and I liked that working height so I went with it.
I didn't want to spend a ton of money to build this but I came across a web page of a guy who built some work benches out of old
bed frames. I also noticed "Seb" did the same thing in this thread. I was talking with the old man about work bench ideas and mentioned old bed frames. "I've got a bunch of those in the garage. They're yours if you want em." Sure... he always seems to have everything.
I bring the bed frames home and start planning. Turns out I didn't have to cut much. Only had to make four cuts. I found four pieces that would be the legs of the bench, measured 28" uncut. The long (width) pieces were about 69"... didn't have to cut those. The depth pieces I had to cut. I needed a top and a bottom for each side, 19.5" long. Altogether the frame of the workbench was 6' W x 28" H x 20" D.

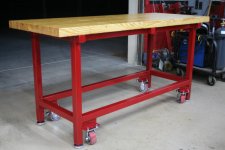
I decided to borrow an idea from my brother-in-law when he made his bench. He made the top with 2x4's standing on end, glued and screwed together. Nice and strong. So, I wanted a bench height of 30" I was going to use 2x4's on end for the top and then I would put a 3/4" of plywood for the working surface with a 3" lip all the way around. I welded the top at 25.75" from the floor so when I put in the 2x4's and the 3/4" top it would be 30".

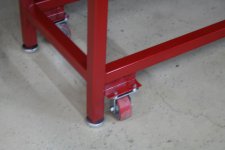
When the frame was all welded together it wasn't perfectly square even though we were checking as we pieced it together. We hadn't welded any angle braces to the back yet. The old man is full of ideas... suggested we took a ratchet strap and we went from the lower right front corner to the upper left back corner, tightened it up and made it square. Welded the cross braces in the back and all was good in the world.
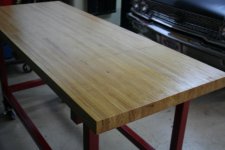
Even though the top depth was 20" the area where the 2x4's would sit was 19.5" because of the curve on the inside corner of the angle iron and the thickness of it as well... that was perfect for 13 2x4's. The last one had to be coaxed in, but it was a perfect fit. I then lag bolted the 2x4's to the frame from the bottom at each corner.
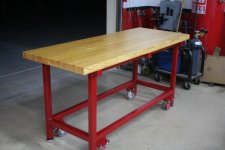
Quick coat of primer and then a coat of flat black spray paint... done. It's actually heavier than I expected, which is a good thing. Now I just need to mount my vise.

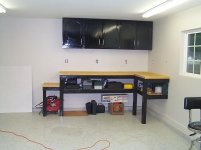
Overall work surface: 6'6" wide x 26" deep
Bottom shelf: 6' wide x 19.5" deep
Working height: 30"
Total money spent: $55 on wood
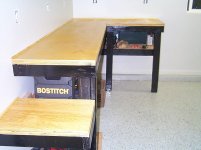
Now the question is... do I paint the top white? My wife suggested if I do paint it white to use the left over "furniture paint" we have. It's suppose to be a little tougher. What do you guys think?


")


 ). How did you hide the holes from the handles? Or was it stainless inside the door also? I see holes on the edge - were the doors attached there?


 project..