To avoid these ads, REGISTER NOW!

Workbench build, with or without built-in toolbox

cohen

Member
Joined
Jan 29, 2018
Messages
11
Location
Charleston, SC
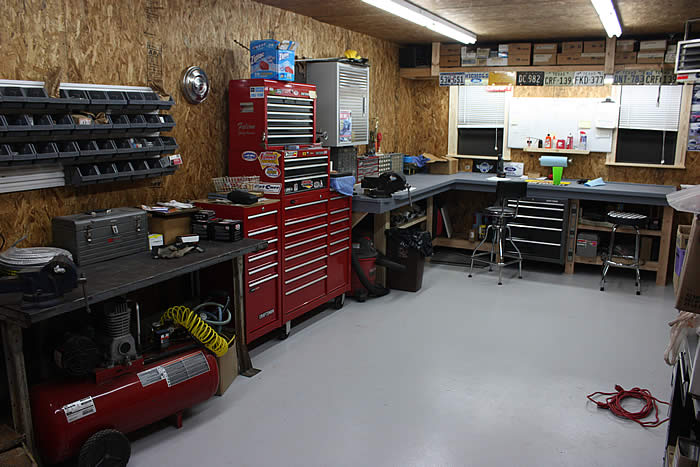
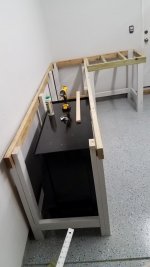
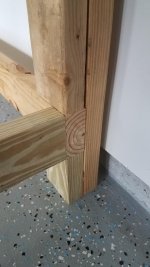
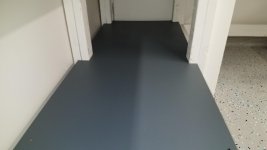
Looking at building a new garage workbench for a 19x21' area. Sketched up some plans for a 10'x5' L shape, 24" deep on longer section and 30" deep on shorter section. Seeing what people's thoughts are that have done this before.

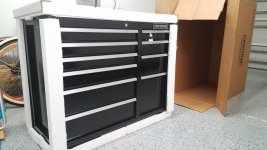
Originally wanted to get a small toolbox to roll under it for some drawer space but then ended up with the 41" 10 drawer rolling toolbox that was on sale since the Sears by me is closing..

I was pretty set on having that size workspace but I don't want to have it 10' long plus have the 41" toolbox next to it. So now I am unsure on if I want to build the toolbox into the workbench like I have seen some members here do or cut the workbench short (basically in half on the long side). A pro would be I can consider the toolbox top, part of the workable space but still have it mobile to move around garage. But after being loaded up not sure how much I will really be moving it around.


**EDIT job completed, pics in Post 18
 

Attachments

  • 20180702_215613.jpg
    20180702_215613.jpg
    135.6 KB · Views: 249
  • 20180701_123440.jpg
    20180701_123440.jpg
    142.3 KB · Views: 219
  • 20180702_212528.jpg
    20180702_212528.jpg
    145.9 KB · Views: 296
Last edited:
To avoid these ads, REGISTER NOW!

jonshonda

Well-known member
Joined
Jul 17, 2017
Messages
4,731
Location
Wisconsin
I would def build it in!

I had initially planned to build in the Snap On box I got (which is a 24" deep I think), but took the easy way out and just did the workbench the same depth and height as the box, so when the box was next to the bench they matched up.

Well....I really don't like how shallow the bench is. 24" fills up too fast for me and working on larger projects I feel too cramped. When I get some free time I plan to build it into the bench and increase the depth well over 30", prob 34-36". I will also remove the casters and set the box right onto wooden supports for a cleaner look.
 

Falcon67

Well-known member
Joined
Jun 11, 2009
Messages
18,371
Location
Merkel, TX
I would 100% build that in. I did similar with a smaller unit, very handy as part of the bench. I have a bunch more box that stands alone and has been that way for a while.

Bench9.jpg


Inside8.jpg
 

toolferone

Well-known member
Joined
Feb 27, 2016
Messages
93
Location
Raleigh, NC
My toolboxes are on wheels, but They have been in the same spot for 15 years. The only time I move them is to clean behind them or if I drop something. I say build it in. You will not regret the longer top.
 
OP
C

cohen

Member
Joined
Jan 29, 2018
Messages
11
Location
Charleston, SC
It does look really clean when built in, are you building a support under it or just setting it on the garage floor? Hard to tell in the pictures.
 

jimreed2160

Well-known member
Joined
Aug 7, 2016
Messages
3,589
Location
Tallahassee FL
I would build it in. You can make the workbench a part of the top or have the top float so you could move the bench. It depends on how sturdy you need the top to be. I have six mobile boxes in my garage and only two benches left as the one you picture. Those benches are great and easy to build with construction lumber and plywood. But over time you will discover that the storage is poor and you will miss the extra storage space that drawers provide.

As you guessed, the boxes are pretty heavy once they get loaded. Mine do not move much but the wheels are appreciated. If you build a top with a 4" overhang the toolboxes become quite functional. Once I began replacing the table benches in my workshop with toolboxes and drawers, I finally began to get organized. Good luck with your project.
 

bdbecker

ALLIANCE MEMBER
Joined
Nov 18, 2015
Messages
5,543
Location
Iowa
I think you should consider 30" deep for both sections. As others have mentioned, much shallower than that, and the utility of the work surface becomes compromised. Depending on what you store next to the end of the long section, you could use the dead space behind the tool chest as storage for long items like a drywall square or level, or for long stock items like all-thread or tubing. Heck, if the height allows, you could build a low profile platform on fixed casters for the tool chest to sit on, and pull the whole unit out like a gigantic drawer to access storage area on the backside of the chest.
 
OP
C

cohen

Member
Joined
Jan 29, 2018
Messages
11
Location
Charleston, SC
Went for it with the built in toolbox, thank you for the advice and pictures. Will post more pictures when completed. Need to start a new thread for my entire garage build...
 

Attachments

  • 20180710_224041.jpg
    20180710_224041.jpg
    149.7 KB · Views: 351
  • 20180710_224115.jpg
    20180710_224115.jpg
    62 KB · Views: 267
  • 20180708_191328.jpg
    20180708_191328.jpg
    57.5 KB · Views: 269
Last edited:

ScottsGT

Well-known member
Joined
Jan 1, 2014
Messages
4,883
Location
Lake Wateree, SC
I would bring that box as far forward as you could get it. I'd make it flush with the top 2X4. Even the width of the top board will limit your access to the back of the top drawer some.
 

Rbreddin

Well-known member
Joined
Jun 16, 2012
Messages
73
Location
Alpharetta, GA
looks good.
If you have the time, it might be a better idea to extend that end board over so that it also bears on the stub post (last picture)

agree with the others, you want the handles to be proud of all framing
 
To avoid these ads, REGISTER NOW!

camaro77

Active member
Joined
May 12, 2018
Messages
29
Location
rhode island
these are great looking benches where is everyone getting the feet for the bottom of the legs? going to be starting my build very soon
 
OP
C

cohen

Member
Joined
Jan 29, 2018
Messages
11
Location
Charleston, SC
Haven't made much progress over past couple weeks with friends/family in town. Just need to get the tops done now, thinking 3/4" plywood or MDF for cost and see how they last.

I left the toolbox where it was in the bench, didn't seem like it would be an issue getting things from the back of the top drawers.
 

Attachments

  • 20180719_185250.jpg
    20180719_185250.jpg
    116.8 KB · Views: 147
  • 20180716_205130.jpg
    20180716_205130.jpg
    149.9 KB · Views: 148
Last edited:
OP
C

cohen

Member
Joined
Jan 29, 2018
Messages
11
Location
Charleston, SC
these are great looking benches where is everyone getting the feet for the bottom of the legs? going to be starting my build very soon

I think most just sit on the base of whatever you are building. One of my earlier posts shows a close up of the corner where I put 2 2x4's together and are sitting on the floor. It looks like @Tarmy may have some leveling swivel mounts?
 
OP
C

cohen

Member
Joined
Jan 29, 2018
Messages
11
Location
Charleston, SC
Final: happy with the way it came out.
 

Attachments

  • 20180730_204126.jpg
    20180730_204126.jpg
    135.3 KB · Views: 185
  • 20180730_204158.jpg
    20180730_204158.jpg
    60.2 KB · Views: 134

n20junkie

Well-known member
Joined
Aug 22, 2010
Messages
538
Location
Grand Island, NY
Depends on the size of the shop and what your storing in that box.

My main box is on wheels and I do roll it to the work i’m doing. Special tools and stuff used mainly at the bench I can see being built in.
 

CoogarXR

Well-known member
Joined
Jan 11, 2016
Messages
6,845
Location
Ohio
Good choice. My old bench just had shelves, and it turned into a dusty junk-catcher. When I saw how many here were building over rolling boxes, I decided to be on the lookout for some rollers for myself. When I found the legendary Lowes Waterloo boxes for $50 each, I bought two and built my electronics bench around them:

attachment.php
 

Alchase

Well-known member
Joined
Jan 2, 2016
Messages
187
Location
Harrah, Oklahoma
Good choice. My old bench just had shelves, and it turned into a dusty junk-catcher. When I saw how many here were building over rolling boxes, I decided to be on the lookout for some rollers for myself. When I found the legendary Lowes Waterloo boxes for $50 each, I bought two and built my electronics bench around them:

attachment.php

Nice!

Can you give a quick description on what you have installed either side of the TV?
 

CoogarXR

Well-known member
Joined
Jan 11, 2016
Messages
6,845
Location
Ohio
Nice!

Can you give a quick description on what you have installed either side of the TV?

Here's a link to the thread where I described it.

The top is a test fixture of sorts. It has a 19" LCD in the center, with the input jacks connected to the patch plate on the left (there is also a tiny hole where the remote signal passes through). It is flanked by two 4" LCD monitors too. Why? Because I had them in my parts bin, lol. And it's nice to be able to test multiple streams simultaneously. I used plexiglass to cover each of the monitors, with back-painted black trim.

There is a large server power supply inside the cabinet to provide 12v and 5v to the banana jacks (this also provides power to the ancillary video devices). There are 4 4-ohm speakers wired to a terminal plate for testing audio devices. I can pair them up in series or parallel if I need 2 or 8 ohm loads too.

Across the bottom from left-to-right I have a SD-Card video player, it has 4 HDMI ports, a VGA port, a component and composite output too. This provides test videos for when I do burn-in testing on TVs. The second white device is also a SD player but it only has VGA and composite. I use this one for stills and test patterns. Then on the right is a small amplifier that I use to test speakers.

There is a fan on each end of the cabinet to pull air from the nearby AC vent through the cabinet interior for cooling.

I have a couple blank plates in there for future expansion. I might add a variable power supply at some point. The monitor on the back wall is just for security cameras. And of course the trusty Tektronix scope on the right. There is also a PC in the rack to the right (not pictured), but that's what's displaying on the LCD (Will Ferrell's "You're Welcome America")


attachment.php

attachment.php
 
To avoid these ads, REGISTER NOW!
Top Bottom