1/2 Cup
Member Emeritus
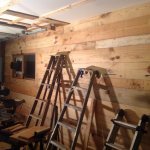
Sub, your wall cladding is coming along nicely.


Like Steve said, the wall is really starting to come together. So what's the plan for the bridge?
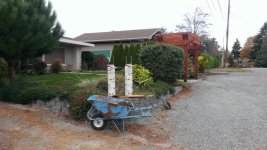
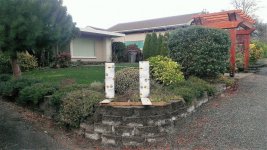
Sub: great pics of the car and your garage history yesterday!! I'd like to see pics of your rock wall and good to see you are able to find material just on your property to build it. make sure it's safe enough so that mischeivious kids can't tip it over on themselves.
nice use of old cement and looking forward to seeing a Sub built bridge too.
your garage wall really is looking nice and another great use of free materials.
have a great day (Soda free if you can)!!

Nice job!
Do you plan on sealing the boards or leaving them raw?
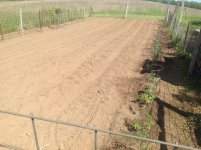
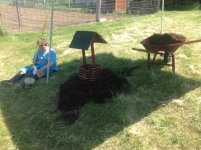
Sub: not sure this will do the job cause i don't know your soils around your creek or how permanent you'd like the bridge to be, but I'd dig at least 2 holes on each side about 3 or 4 foot deep and put some sonotubes filled with cement in them and some brackets on top to hold beams or old timbers. you could maybe drive down some 3/4 inch 10 foot rebar into the ground inside the sonotubes if the ground is really soft on top to maybe keep the sonotubes there for many years to come.
here's a small example of what i'm doing for my little address stand/sign and maybe your bridge won't have to be rebuilt every time it floods and all you'll have to do is maybe replace some gravel or dirt.
i really wish I had the property you do, but I know my bride wouldn't survive yet out in the country cause she likes a lot of the comforts of the city.
Sub: great pics of the car and your garage history yesterday!! I'd like to see pics of your rock wall and good to see you are able to find material just on your property to build it. make sure it's safe enough so that mischeivious kids can't tip it over on themselves.
nice use of old cement and looking forward to seeing a Sub built bridge too.
your garage wall really is looking nice and another great use of free materials.
have a great day (Soda free if you can)!!
Sub: good to see you survived the first signs of sunshine in your part of the world and looks like your grass mowing is a full time job. nice looking rock wall too.
if you want to put BLO (boiled linseed oil) on your raw wood it gives it sort of a vintage look as it turns the wood a bit darker and maybe try it on a scrap piece first to see if you like it.
also just an FYI. dispose of rags with stain or BLO into a metal covered bin or hang to dry on a clothes line cause they can self combust and have burnt down many a member's garage or house.
have a great day and good to have you back!!
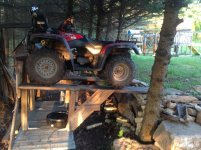
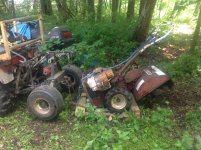
So is the 4x4 not in the pics? BTW, I love it. It looks like it was put together out of mostly scraps. Very cool use of existing materials. Ingenious.
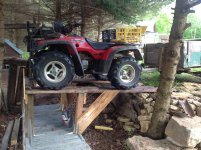
couple of Pics of the service station being used,
the ATV just to test it out that it holds the weight just fine, Didn't budge a bit from what I could tell.
I added a side step short 4x4 to the long 1x9 angled from the top deck to the bottom to give me a step for getting on/off the ATV and trimed up some branches from the pine trees as well.

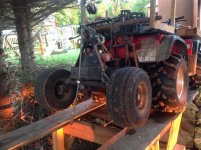
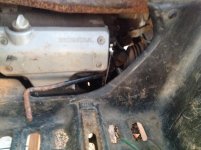
Then the Mower out there for a oil change before I went and got the yard mowed.
getting the mower up and on the board's was a bit more of a chore than the ATV I'll need to make the approach a bit smoother as the mower doesn't like the bumps as much but still drive out there and hop off place the oil catch pan and drop the plug and oil change simple and easy!

thanks for viewing.
Just got caught up on your thread sub. Can't believe I was so far behind.
Looking great on your property. Love the clad garage wall.
cheers GB
Very nice. Love it!
Ok I'm caught up...
Just spent a couple of hours reading from the start and I have to say you have a great space there.. Nice to see an old building getting a new life..
Love the pallet wall but then again I'm bias (I have one too)
And finally Great parenting.. You can tell by the smiles they are having fun.. just enough thrills to make it exciting but not enough to make it too dangerous.. love it.
Watching with interest what you do next..
So is the 4x4 not in the pics? BTW, I love it. It looks like it was put together out of mostly scraps. Very cool use of existing materials. Ingenious.
Sublime, there are a lot of cool cars on this forum, but I think your charger is my fav.
So, as I said I really like this. Is it worth your while to make something that you can put under the deck and use it to slide the deck out from under the tractor?

If you ever miss working on your driveway, let me know. You can drop by and help me with mine.
Did the drag smooth it out well? I've never tried that. If the driveway gets soft, what about dropping baseball sized rocks, busted cement in it while it is soft?