
You are using an out of date browser. It may not display this or other websites correctly.
You should upgrade or use an alternative browser.
You should upgrade or use an alternative browser.
ZMotorsports Shop Projects 2.0
- Thread starter zmotorsports
- Start date
TimeWarpF100
Well-known member
Nice as always! Looks like a pete and repeat to lines I did last week for big N. Not only are lines similar but I have the Rigid bender and the Mastercool flaring tool . . I have Rigid benders up to 1/2"As I was trying to get this completed Thursday night I found that the driver's side front brake hose was corroded to the rigid line and I fought for over 45-minutes to separate them before the fitting snapped at the bulkhead fitting for the brake hose. My local NAPA was closed by this time so it had to wait until Friday morning.
My wife and I took our son and DIL to breakfast Friday morning as we wouldn't see them New Year's Eve so on the way home we stopped by NAPA and I purchased a 40" length of 3/16" brake line. I then had to spend 3 hours clearing snow AGAIN from my driveway. This was the second time in two days and was getting old. All I could think about was how much time I was wasting clearing snow when I could have had this truck done and back to the owner.
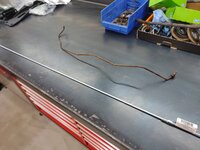
New 3/16" brake line at the ready. Time to duplicate the old line, less the broken fitting.
I started by marking the first bend, then the second and so on.
Until all of the bends were duplicated and then measuring for length of the last leg so the flare could be made.
Tubing cut and deburred in preparation for the flare. I also cut the fitting off of the old line so I could use the shorter OEM fitting.
I used my Mastercool flaring tool for this job.
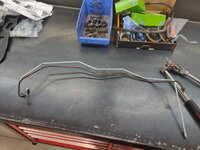
Line completed with fitting installed and ready to snake back into the chassis.
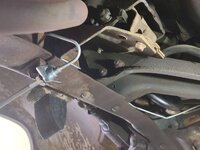
Rather than put a union in the line I opted to go all the way up to the proportioning valve to avoid any more potential leak points.
Brake line completed and installed. Brake lines bled and all new brake fluid throughout the truck.





OP
zmotorsports
ALLIANCE MEMBER
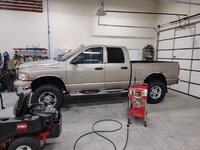
Had a gentleman bring me a 2005 Dodge 2500 a couple of nights ago. Main customer complaint was that it was hard to get out of Park. I've done a few of these where the problem was in the column at the key tumbler.
Pretty clean truck with only 160k miles on it and appears to be his baby.
This pawl is usually the culprit as it blocks the shift lever from coming out of the Park position.
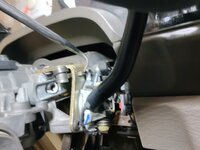
When the key tumbler assembly is turned it moves this horizontal mechanism which in turn moved the pawl out of the way from the lever. The grease usually gets hard and/or collects dirt causing this mechanism to fail to slide. This usually requires a quick cleaning and new lubrication and you are good to go.
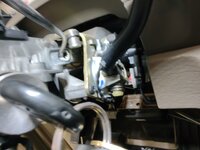
Pawl retracted with the turning of the key thus moving it below the plane to allow the shift lever to move past it.

After discovering that there was nothing wrong with the key tumbler interlock I remembered these also having a brake interlock so went there next. I could feel and hear it clicking with the depression of the brake pedal but thought I would pop the small solenoid off the shift cable to verify full release. Sure enough, it was also working properly.

At this point I realized it was nothing in the column and thought I would take the shift cable out of the equation by popping it off at the transmission and the shifter in the column moved freely. This led me to realize the problem must be in the transmission itself. Maybe something binding with the parking pawl or the rooster comb/detent assembly. Unfortunately the valve body has to come down on these 48RE transmissions because the shift linkage is above the valve body.
Time to rack the truck.

I started by removing the TTVA (Transmission Throttle Valve Assembly) from the shift shaft and the side of the transmission case and laid it aside. No need to unplug it just prop it next to the driveshaft out of the way. Removed the shift lever and then dropped the pan. Oil was dark and needed to be changed but not terrible. Minimal and normal sludge in the pan.
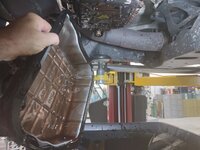
Next item was to drop the filter.

Now removing the fasteners holding the valve body to the case.

Valve body out and on the bench. Also the accumulator piston and spring removed as they usually fall out anyways when the valve body is removed.

Stay tuned for more.....
Pretty clean truck with only 160k miles on it and appears to be his baby.
This pawl is usually the culprit as it blocks the shift lever from coming out of the Park position.
When the key tumbler assembly is turned it moves this horizontal mechanism which in turn moved the pawl out of the way from the lever. The grease usually gets hard and/or collects dirt causing this mechanism to fail to slide. This usually requires a quick cleaning and new lubrication and you are good to go.
Pawl retracted with the turning of the key thus moving it below the plane to allow the shift lever to move past it.
After discovering that there was nothing wrong with the key tumbler interlock I remembered these also having a brake interlock so went there next. I could feel and hear it clicking with the depression of the brake pedal but thought I would pop the small solenoid off the shift cable to verify full release. Sure enough, it was also working properly.
At this point I realized it was nothing in the column and thought I would take the shift cable out of the equation by popping it off at the transmission and the shifter in the column moved freely. This led me to realize the problem must be in the transmission itself. Maybe something binding with the parking pawl or the rooster comb/detent assembly. Unfortunately the valve body has to come down on these 48RE transmissions because the shift linkage is above the valve body.
Time to rack the truck.
I started by removing the TTVA (Transmission Throttle Valve Assembly) from the shift shaft and the side of the transmission case and laid it aside. No need to unplug it just prop it next to the driveshaft out of the way. Removed the shift lever and then dropped the pan. Oil was dark and needed to be changed but not terrible. Minimal and normal sludge in the pan.
Next item was to drop the filter.
Now removing the fasteners holding the valve body to the case.
Valve body out and on the bench. Also the accumulator piston and spring removed as they usually fall out anyways when the valve body is removed.
Stay tuned for more.....
OP
zmotorsports
ALLIANCE MEMBER
Continuing on.
This is what I found. The detent ball was loose fitting in the bore which also resulted in the rooster comb being worn severely.

With the rooster comb out of the way and the spring behind the detent ball removed you can see the extreme wear in the detent bore. I have rebuilt a few of these 47RH, 47RE and 48RE transmissions and have not run across this yet. However, with a quick Google search I discovered that this is very common. I ordered a repair kit that comes with a new rooster comb, seals and a bullet style of detent which uses the length of the bore vs. just the opening and appears to be a permanent fix for this issue. I tried my local dealer but the rooster comb cannot be purchased separately from the valve body so this was the next best option.

I forgot how clean my tools get after being treated to ATF due to the detergents in automatic transmission fluid. I don't think they've been this clean in years.
The secondary item the owner wanted me to check were his front suspension. Evidently he had it worked on late last year and they told him it needed ball joints on driver's side and he didn't trust them. Sure enough there was some significant play in the driver's side ball joints. I propped up the driver's side slightly with my modified pole jack to keep fluids in the differential and prevent them from coming out past the inner seals.
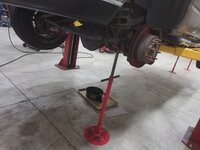
Noticed that the brake pads were also shot. He definitely got all the use out of these.

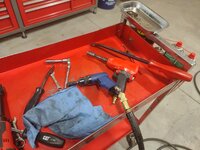
My stubby 1/2" drive impact has sure come in handy the last couple of jobs. Maybe I should have bought one of these sooner.
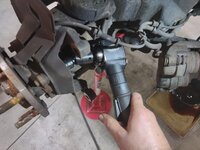
Grabbed the air hammer to break the corrosion and get the unit bearing/axle shaft assembly out of the housing and knuckle. I also got to use the attachment from my Secret Santa.

Unit bearing and axle shaft assembly removed and set aside.

Knuckle removed and resting on the pole jack which now gives me access to the ball joints for replacement.

While standing at the solvent tank cleaning parts and before closing up the shop for the evening I had to snap a picture of the mountains at sunset. Looking out the east side of my shop at the west face of the Wasatch Mountains and they were glowing as the sun was piercing through the clouds. The picture really doesn't do it justice.

Thanks for looking. More to come once parts arrive. Unfortunately the truck is now taking up valuable space on my lift.
This is what I found. The detent ball was loose fitting in the bore which also resulted in the rooster comb being worn severely.
With the rooster comb out of the way and the spring behind the detent ball removed you can see the extreme wear in the detent bore. I have rebuilt a few of these 47RH, 47RE and 48RE transmissions and have not run across this yet. However, with a quick Google search I discovered that this is very common. I ordered a repair kit that comes with a new rooster comb, seals and a bullet style of detent which uses the length of the bore vs. just the opening and appears to be a permanent fix for this issue. I tried my local dealer but the rooster comb cannot be purchased separately from the valve body so this was the next best option.
I forgot how clean my tools get after being treated to ATF due to the detergents in automatic transmission fluid. I don't think they've been this clean in years.
The secondary item the owner wanted me to check were his front suspension. Evidently he had it worked on late last year and they told him it needed ball joints on driver's side and he didn't trust them. Sure enough there was some significant play in the driver's side ball joints. I propped up the driver's side slightly with my modified pole jack to keep fluids in the differential and prevent them from coming out past the inner seals.
Noticed that the brake pads were also shot. He definitely got all the use out of these.
My stubby 1/2" drive impact has sure come in handy the last couple of jobs. Maybe I should have bought one of these sooner.
Grabbed the air hammer to break the corrosion and get the unit bearing/axle shaft assembly out of the housing and knuckle. I also got to use the attachment from my Secret Santa.
Unit bearing and axle shaft assembly removed and set aside.
Knuckle removed and resting on the pole jack which now gives me access to the ball joints for replacement.
While standing at the solvent tank cleaning parts and before closing up the shop for the evening I had to snap a picture of the mountains at sunset. Looking out the east side of my shop at the west face of the Wasatch Mountains and they were glowing as the sun was piercing through the clouds. The picture really doesn't do it justice.
Thanks for looking. More to come once parts arrive. Unfortunately the truck is now taking up valuable space on my lift.
Last edited:
Bigblue&Goldie
Well-known member
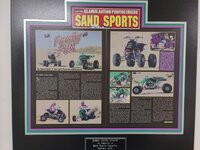
Nice view! I'd love it if you could find a way to scan in a copy of your Sand Sports article.....
OP
zmotorsports
ALLIANCE MEMBER
Ryan, I took a picture of the plaque. I hope this works. Thank you for your interest and for taking the time to follow along.
bggrnchvy
Well-known member
Continuing on.
This is what I found. The detent ball was loose fitting in the bore which also resulted in the rooster comb being work severely.
With the rooster comb out of the way and the spring behind the detent ball removed you can see the extreme wear in the detent bore. I have rebuilt a few of these 47RH, 47RE and 48RE transmissions and have not run across this yet. However, with a quick Google search I discovered that this is very common. I ordered a repair kit that comes with a new rooster comb, seals and a bullet style of detent which uses the length of the bore vs. just the opening and appears to be a permanent fix for this issue. I tried my local dealer but the rooster comb cannot be purchased separately from the valve body so this was the next best option.
I forgot how clean my tools get after being treated to ATF due to the detergents in automatic transmission fluid. I don't think they've been this clean in years.
The secondary item the owner wanted me to check were his front suspension. Evidently he had it worked on late last year and they told him it needed ball joints on driver's side and he didn't trust them. Sure enough there was some significant play in the driver's side ball joints. I propped up the driver's side slightly with my modified pole jack to keep fluids in the differential and prevent them from coming out past the inner seals.
Noticed that the brake pads were also shot. He definitely got all the use out of these.
My stubby 1/2" drive impact has sure come in handy the last couple of jobs. Maybe I should have bought one of these sooner.
Grabbed the air hammer to break the corrosion and get the unit bearing/axle shaft assembly out of the housing and knuckle. I also got to use the attachment from my Secret Santa.
Unit bearing and axle shaft assembly removed and set aside.
Knuckle removed and resting on the pole jack which now gives me access to the ball joints for replacement.
While standing at the solvent tank cleaning parts and before closing up the shop for the evening I had to snap a picture of the mountains at sunset. Looking out the east side of my shop at the west face of the Wasatch Mountains and they were glowing as the sun was piercing through the clouds. The picture really doesn't do it justice.
Thanks for looking. More to come once parts arrive. Unfortunately the truck is now taking up valuable space on my lift.
I just ordered a set of EMF balljoints to replace my 2nd set of XRFs in my '06 Dodge. Not a good thing to be so proficient at what should be a far between task. The fixed pin upper joint design, at least at this size, just isn't up to the task. The 05+ Superduty D60 stuff is so much physically larger than the 03-12 Dodge AAM9.25.
I put a thin film of copper antiseize all around the mating surfaces of the unit hub to knuckle and on the splines and it all seems to come apart without a muss or fuss.
Clean work going on there at your shop.
Bigblue&Goldie
Well-known member
That article is awesome! I used to LOVE Sand Sport and Hot VW's as a kid! That's something you and your son will never forget!
Some of my good friends had a really cool family Sand Sport spread in their rails. They all had matching paint jobs which really stood out. They had a killer pic of all 3 of them ripping across a bowl together. Like you, they displayed it on a plaque and keep it in the shop. Good memories of an awesome era in the dunes!
Some of my good friends had a really cool family Sand Sport spread in their rails. They all had matching paint jobs which really stood out. They had a killer pic of all 3 of them ripping across a bowl together. Like you, they displayed it on a plaque and keep it in the shop. Good memories of an awesome era in the dunes!
OP
zmotorsports
ALLIANCE MEMBER
I just ordered a set of EMF balljoints to replace my 2nd set of XRFs in my '06 Dodge. Not a good thing to be so proficient at what should be a far between task. The fixed pin upper joint design, at least at this size, just isn't up to the task. The 05+ Superduty D60 stuff is so much physically larger than the 03-12 Dodge AAM9.25.
I put a thin film of copper antiseize all around the mating surfaces of the unit hub to knuckle and on the splines and it all seems to come apart without a muss or fuss.
Clean work going on there at your shop.
Thank you. Like you, on all ball joints and unit bearing replacements I apply a very, very thin coat of anti-seize to several of the components. I'm a big proponent of anti-seize on most things however, due to living here in Northern Utah.
Thanks for stopping by and checking out my projects.
OP
zmotorsports
ALLIANCE MEMBER
That article is awesome! I used to LOVE Sand Sport and Hot VW's as a kid! That's something you and your son will never forget!
Some of my good friends had a really cool family Sand Sport spread in their rails. They all had matching paint jobs which really stood out. They had a killer pic of all 3 of them ripping across a bowl together. Like you, they displayed it on a plaque and keep it in the shop. Good memories of an awesome era in the dunes!
Thanks Ryan. I've been blessed to have been able to have several of our vehicles that we've built featured in various magazines and my son has been a part of them all, whether street rods or sand toys. I don't think he even realizes just how rare that is as he just looks at his childhood as "normal".
Like when we were at the car show back on Labor Day and he pointed to the yellow '36 Ford coupe and said to his wife "hey we built that car". It was so matter of factly spoken that is was just a normal conversation to him. His wife on the other hand was dumbfounded and couldn't believe he didn't mention some of the things we had built over the years. To him it was just a normal childhood and he's so humble about it all.
As for the Sand Sports Magazine, I subscribed and was an avid reader for a couple of decades and always dreamed of having a rail or quads in their magazine. I don't necessarily miss the sand dunes but I sure do miss building the sand toys. Even when I was building chassis, whether it was a complete chassis or back-halfing a Banshee OE frame, each one was different and unique and I loved that creative factor of trying to make things look aesthetically pleasing while also being completely functional and robust at the same time.
Mike: I look at GJ everyday, sometimes several times a day, and I always look for your posts. I actually have yours on my "watch" list! I am so impressed with your talents and attention to detail. It is no wonder that people trust you and want you to work on their "stuff". Plus, I really like your property. Very nice and Well kept. You are a busy guy and your wife gets credit too, it takes 2!!
OP
zmotorsports
ALLIANCE MEMBER
Mike: I look at GJ everyday, sometimes several times a day, and I always look for your posts. I actually have yours on my "watch" list! I am so impressed with your talents and attention to detail. It is no wonder that people trust you and want you to work on their "stuff". Plus, I really like your property. Very nice and Well kept. You are a busy guy and your wife gets credit too, it takes 2!!
Thank you very much. I am flattered by your comments and yes, my wife is special and deserves probably more credit than I do for putting up with me. She is awesome and I am so blessed that she chose me to create the life we have. I don't know what I would be without her.
MrPink
Well-known member
Mike, you do awesome work for sure!
Boosted1
Well-known member
Add me to the list of those that check your thread for updates everyday.
So enjoyable seeing the level of skill and attention to detail on both the job and the work environment you maintain.
Kudos and thanks for sharing.
So enjoyable seeing the level of skill and attention to detail on both the job and the work environment you maintain.
Kudos and thanks for sharing.
Been watching your building project, garden, drainage, your work in the shop. It's all very impressive. It's clear you don't like hack-jobs.  Loved your explanation about ring & pinion adjustments a while back. I have over hundred of such under my belt, from small cars to tractor trailers and all kinds of equipment - plenty of modified 4x4 trucks with gear ratios higher than 5 for snow crawling (tiny pinions) needing much care Much of it without any instructions or specs to speak of. It's a precision job not to be taken lightly for optimal outcome. Way too many techs don't to it right. You could write the book - I enjoyed it and learned a thing or two.
I am happy to see you are settled in your new beautiful home and shop - and your work is always inspiring and professional- so please continue to share Mike!
As a side note; I could be wrong but looking at your your pics it looks like you are not wearing gloves during repairs. It took me months to get used to wearing nitril gloves but I got over it. I use them all the times now. The word on the street is - they keep the big "C" away. Grease, oils and whatever we are dealing with during repair is nasty stuff for our bodies. Stay safe.
Regards from Iceland.
Loved your explanation about ring & pinion adjustments a while back. I have over hundred of such under my belt, from small cars to tractor trailers and all kinds of equipment - plenty of modified 4x4 trucks with gear ratios higher than 5 for snow crawling (tiny pinions) needing much care Much of it without any instructions or specs to speak of. It's a precision job not to be taken lightly for optimal outcome. Way too many techs don't to it right. You could write the book - I enjoyed it and learned a thing or two.I am happy to see you are settled in your new beautiful home and shop - and your work is always inspiring and professional- so please continue to share Mike!
As a side note; I could be wrong but looking at your your pics it looks like you are not wearing gloves during repairs. It took me months to get used to wearing nitril gloves but I got over it. I use them all the times now. The word on the street is - they keep the big "C" away. Grease, oils and whatever we are dealing with during repair is nasty stuff for our bodies. Stay safe.
Regards from Iceland.
Monza Harry
Well-known member
I can see from his pics' that finding them in his size is hard, very hard, I can't find them for me and his hand looks to be even bigger. My wedding ring is a 14 and should have been plus another 1/2 bigger back then but age makes it ok now. XL gloves tear trying to put them on. HarryBeen watching your building projects... so please continue to share Mike!
As a side note; I could be wrong but looking at your your pics it looks like you are not wearing gloves during repairs. It took me months to get used to wearing nitril gloves but I got over it. I use them all the times now. The word on the street is - they keep the big "C" away. Grease, oils and whatever we are dealing with during repair is nasty stuff for our bodies. Stay safe.
Regards from Iceland.
I use XL and it took some doing getting used to them, but I really like using them now. Quick search on Amazon came up with some XXL/2XL options, I also got one hit for 3XL medical gloves - with at least one reviewer stating they truly are 3XL. Perhaps there is something out there you could use.I can see from his pics' that finding them in his size is hard, very hard, I can't find them for me and his hand looks to be even bigger. My wedding ring is a 14 and should have been plus another 1/2 bigger back then but age makes it ok now. XL gloves tear trying to put them on. Harry
lilscorpion
Well-known member
Thanks Ryan. I've been blessed to have been able to have several of our vehicles that we've built featured in various magazines and my son has been a part of them all, whether street rods or sand toys. I don't think he even realizes just how rare that is as he just looks at his childhood as "normal".
Like when we were at the car show back on Labor Day and he pointed to the yellow '36 Ford coupe and said to his wife "hey we built that car". It was so matter of factly spoken that is was just a normal conversation to him. His wife on the other hand was dumbfounded and couldn't believe he didn't mention some of the things we had built over the years. To him it was just a normal childhood and he's so humble about it all.
To be able to provide such a “normal” childhood is an amazing thing. Coolest part is you may get to do it again someday as grandpa.
Finallygotit
ALLIANCE MEMBER
I have been using the 3X nitrile gloves from McMaster and they are truly 3X. I can put on 2X gloves but if my hands are the least bit moist, it's a struggle......I also got one hit for 3XL medical gloves - with at least one reviewer stating they truly are 3XL. Perhaps there is something out there you could use.

OP
zmotorsports
ALLIANCE MEMBER
Mike, you do awesome work for sure!
Add me to the list of those that check your thread for updates everyday.
So enjoyable seeing the level of skill and attention to detail on both the job and the work environment you maintain.
Kudos and thanks for sharing.
Thanks guys. I really appreciate the comments and thank you for following along on my projects thread.
OP
zmotorsports
ALLIANCE MEMBER
Been watching your building project, garden, drainage, your work in the shop. It's all very impressive. It's clear you don't like hack-jobs.
I am happy to see you are settled in your new beautiful home and shop - and your work is always inspiring and professional- so please continue to share Mike!
As a side note; I could be wrong but looking at your your pics it looks like you are not wearing gloves during repairs. It took me months to get used to wearing nitril gloves but I got over it. I use them all the times now. The word on the street is - they keep the big "C" away. Grease, oils and whatever we are dealing with during repair is nasty stuff for our bodies. Stay safe.
Regards from Iceland.
Thank you for your comments and for following along.
I don't wear nitrile gloves much. I'm not a fan of gloves in general but depending on the task at hand I keep nitrile gloves handy and wear them on occasion. I keep them on the side of my toolbox so they're within easy reach.

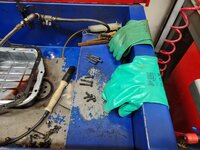
I do wear gloves any time I have my hands in the solvent tank however. I keep these gauntlet style of nitrile gloves ready at the solvent tank.
OP
zmotorsports
ALLIANCE MEMBER
To be able to provide such a “normal” childhood is an amazing thing. Coolest part is you may get to do it again someday as grandpa.
Thanks Matt. I am looking forward to the grandpa thing when it happens.
OP
zmotorsports
ALLIANCE MEMBER
I didn't work in the shop Saturday or Sunday. Not that I was trying to avoid it, but after working for a while on Friday night until the wife arrived home from work I was able to get a few things done then Saturday we filled up the coffee mugs, double checked the tire pressures on the Jeep and headed off for a nice Saturday drive. Ended up putting a couple hundred miles on the Jeep sightseeing up around the canyons to the east of us and ended up in Evanston, WY. We saw some deer, elk and a moose during our drive.
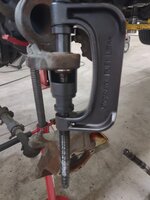
Friday morning I grabbed the adapter for the Snap-on BJP1 ball joint press for the 2500/3500 Dodge trucks that I needed. Friday afternoon I pressed the bad ball joints out and the new ball joints in to the 2005 Dodge 2500 truck.


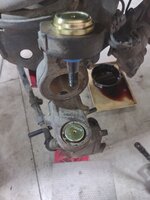
Knuckle installed and unit bearing bore cleaned and ready to accept the axle shaft and unit bearing.

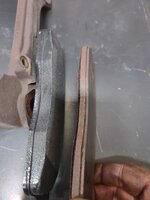
New brakes ready for installation as well. The owner definitely got all of the life out of these brake pads.
Thanks for looking.
Friday morning I grabbed the adapter for the Snap-on BJP1 ball joint press for the 2500/3500 Dodge trucks that I needed. Friday afternoon I pressed the bad ball joints out and the new ball joints in to the 2005 Dodge 2500 truck.
Knuckle installed and unit bearing bore cleaned and ready to accept the axle shaft and unit bearing.
New brakes ready for installation as well. The owner definitely got all of the life out of these brake pads.
Thanks for looking.
signcrafter
Well-known member
- Joined
- May 9, 2012
- Messages
- 12,532
Got to take a break from the shop every once in a while. Sounds like a nice relaxing enjoyable drive with the wife.
Mike, have you ever done a 2015(pretty sure 2011 to 2016 or even newer would be the same) F250/350 front axle track bar ball joint on the with your BJP1? I got a used UJP1 kit, same kit as the BJP1 but missing all the specialty adapters. I've been adding them as needed and snap on has a good list of which adapters for what application. Except nothing for this one since it's not for the track bar and not a traditional ball joint on the knuckle. Just wondering if you might know which adapters work the best to press it out and the new one in? I measured the outer lip of the new ball joint and it's 2.305". So would need a cup with ID just bigger then 2.305 to press the old out and then a cup with an OD the same size or just smaller then 2.305 to press the new in. I did one on a friend's truck earlier this and got it to work with what I have and a socket if I remember right. But have to do my own now and would like to order some more adapters to make the job easier but not sure exactly which ones to order. Thanks.
Mike, have you ever done a 2015(pretty sure 2011 to 2016 or even newer would be the same) F250/350 front axle track bar ball joint on the with your BJP1? I got a used UJP1 kit, same kit as the BJP1 but missing all the specialty adapters. I've been adding them as needed and snap on has a good list of which adapters for what application. Except nothing for this one since it's not for the track bar and not a traditional ball joint on the knuckle. Just wondering if you might know which adapters work the best to press it out and the new one in? I measured the outer lip of the new ball joint and it's 2.305". So would need a cup with ID just bigger then 2.305 to press the old out and then a cup with an OD the same size or just smaller then 2.305 to press the new in. I did one on a friend's truck earlier this and got it to work with what I have and a socket if I remember right. But have to do my own now and would like to order some more adapters to make the job easier but not sure exactly which ones to order. Thanks.
OP
zmotorsports
ALLIANCE MEMBER
Got to take a break from the shop every once in a while. Sounds like a nice relaxing enjoyable drive with the wife.
Mike, have you ever done a 2015(pretty sure 2011 to 2016 or even newer would be the same) F250/350 front axle track bar ball joint on the with your BJP1? I got a used UJP1 kit, same kit as the BJP1 but missing all the specialty adapters. I've been adding them as needed and snap on has a good list of which adapters for what application. Except nothing for this one since it's not for the track bar and not a traditional ball joint on the knuckle. Just wondering if you might know which adapters work the best to press it out and the new one in? I measured the outer lip of the new ball joint and it's 2.305". So would need a cup with ID just bigger then 2.305 to press the old out and then a cup with an OD the same size or just smaller then 2.305 to press the new in. I did one on a friend's truck earlier this and got it to work with what I have and a socket if I remember right. But have to do my own now and would like to order some more adapters to make the job easier but not sure exactly which ones to order. Thanks.
Sorry, I have not done one of those using the BJP1 ball joint press. The last Ford track bar with the press in bushings that I replaced was my BIL's F-250 and for that I removed the track bar and pressed the bushings out and back in using the hydraulic press.
signcrafter
Well-known member
- Joined
- May 9, 2012
- Messages
- 12,532
No worries, thought you may have ran into one with all the work you do. This setup has a bushing on the upper end by the frame and then a ball joint pressed into a bracket on the axle. You have to press the ball joint out while on the vehicle. There's not a ton of room. I got it on the last one I did but he had a 6" lift so it gave a little more clearance to get the BJP in there. Mine is stock so will be more of a fight.Sorry, I have not done one of those using the BJP1 ball joint press. The last Ford track bar with the press in bushings that I replaced was my BIL's F-250 and for that I removed the track bar and pressed the bushings out and back in using the hydraulic press.
Was looking at snap on's website and looks like most adapters are backordered anyway so I'll just have to make do. I was going to pick up astro pneumatic's big nasty air hammer to upgrade my old weak one also but that's not in stock either.
Thanks
Mike, I was just going through the write up you did for building a surg tank for your RV. What thickness aluminum did you use? My tank has developed a small crack on one seam and due to the age I am thinking of just building a new tank rather than trying to weld the seam. Great write up as usual.
OP
zmotorsports
ALLIANCE MEMBER
Mike, I was just going through the write up you did for building a surg tank for your RV. What thickness aluminum did you use? My tank has developed a small crack on one seam and due to the age I am thinking of just building a new tank rather than trying to weld the seam. Great write up as usual.
Dan, I used .125" thick aluminum for the surge tank.
Thanks. Thought that might be the size.Dan, I used .125" thick aluminum for the surge tank.
OP
zmotorsports
ALLIANCE MEMBER
You're welcome Dan.
I thought all of the Country Coach surge tanks were steel with the sight glass? Is yours plastic?
I thought all of the Country Coach surge tanks were steel with the sight glass? Is yours plastic?
Last edited:
OP
zmotorsports
ALLIANCE MEMBER
Monday night I wrapped up the front end of the Dodge 2500. Reassembled the driver's side hub assembly, brakes and then replaced the brakes on the passenger's side.

Tires/wheels reinstalled and torqued in place.

While I was under the truck last week giving it a quick inspection as per the owner's request, I found where the catalytic converter had been resting on the crossmember. I shot a quick video of the rattling sound it was making by tapping on the exhaust system and sent it to the owner asking if wanted me to address that as well. He said he usually just turns up the radio but would like me to see about correcting the vibration/rattle from the exhaust.
I dropped the crossmember and slightly enlarged two holes allowing the crossmember to catalytic converter to clear by about 1/4"-5/16" now. More than enough and no chance of them coming in contact again. Personally, I don't know how the owner lived with that, just moving it from one bay to the other drove me crazy listening to that.

All of the parts cleaned, dried and ready for reassembly once the parts arrive. They were supposed to be here last night but now when I check the tracking number it merely states "no information available at this time". Hope they didn't lose the dang package.

I had brought the OPE into the shop just before the Dodge truck came into the shop so I figured I had about another hour or so until the wife got home from work so I would continue on with the post-season service on the mowers.
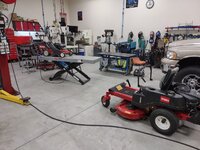
Removed the blade and cleaned the underside of the deck. It wasn't too awfully bad this year. My guess would be because the lawn was much more dry when mowing this past season with the water restrictions than in previous years where the grass had more moisture in it.

Touched up the edge of the blade and balanced before reinstalling.
I also had a few parts that I had been waiting on since I ordered them in September arrive over the weekend for the 21" Snapper walk-behind mower. Now I can finish up the walk-behind mower and then move over to the rider and prep them for the upcoming season.
Come on spring!!!! Can't wait to mow my lawn again.
Tires/wheels reinstalled and torqued in place.
While I was under the truck last week giving it a quick inspection as per the owner's request, I found where the catalytic converter had been resting on the crossmember. I shot a quick video of the rattling sound it was making by tapping on the exhaust system and sent it to the owner asking if wanted me to address that as well. He said he usually just turns up the radio but would like me to see about correcting the vibration/rattle from the exhaust.
I dropped the crossmember and slightly enlarged two holes allowing the crossmember to catalytic converter to clear by about 1/4"-5/16" now. More than enough and no chance of them coming in contact again. Personally, I don't know how the owner lived with that, just moving it from one bay to the other drove me crazy listening to that.
All of the parts cleaned, dried and ready for reassembly once the parts arrive. They were supposed to be here last night but now when I check the tracking number it merely states "no information available at this time". Hope they didn't lose the dang package.
I had brought the OPE into the shop just before the Dodge truck came into the shop so I figured I had about another hour or so until the wife got home from work so I would continue on with the post-season service on the mowers.
Removed the blade and cleaned the underside of the deck. It wasn't too awfully bad this year. My guess would be because the lawn was much more dry when mowing this past season with the water restrictions than in previous years where the grass had more moisture in it.
Touched up the edge of the blade and balanced before reinstalling.
I also had a few parts that I had been waiting on since I ordered them in September arrive over the weekend for the 21" Snapper walk-behind mower. Now I can finish up the walk-behind mower and then move over to the rider and prep them for the upcoming season.
Come on spring!!!! Can't wait to mow my lawn again.
Finallygotit
ALLIANCE MEMBER
Mike, I think you need to get out more.Come on spring!!!! Can't wait to mow my lawn again.

Last edited:
OutlawDrifter
Well-known member
You beat me to the winter service Mike!
Everytime I walk in the shop I look at the X724 Deere and move on, haha
I did pickup the filter and oil, and have a new set of blades coming. Two seasons with my rough ground and occasional sandstone rock that comes to the surface is tough on blades.
Everytime I walk in the shop I look at the X724 Deere and move on, haha
I did pickup the filter and oil, and have a new set of blades coming. Two seasons with my rough ground and occasional sandstone rock that comes to the surface is tough on blades.
OP
zmotorsports
ALLIANCE MEMBER
You beat me to the winter service Mike!
Everytime I walk in the shop I look at the X724 Deere and move on, haha
I did pickup the filter and oil, and have a new set of blades coming. Two seasons with my rough ground and occasional sandstone rock that comes to the surface is tough on blades.
I'm quite late on my post-season OPE service Marc. Usually I get to them immediately after the last mow around mid-November and after servicing the coach and putting it to bed for the winter. However, this year we still had one more trip just before Thanksgiving and then I serviced the coach after that. Then immediately jumped full bore into customer/side jobs so I am way behind and embarrassed by that.
Monza Harry
Well-known member
I'm quite late on my post-season OPE service Marc. Usually I get to them immediately after the last mow around mid-November and after servicing the coach and putting it to bed for the winter. However, this year we still had one more trip just before Thanksgiving and then I serviced the coach after that. Then immediately jumped full bore into customer/side jobs so I am way behind and embarrassed by that.
OH Mike [palm to face emoji here] you only have ~4 months to prepare how will you get it done in time
 ] LOL! I still have the leaves on my lawn (typically about 20 standard garbage pails worth, Oh and I don't even have any leaf bearing trees!) one tree was still about half full of it's leaves and I was working until dark every night, then it seemed that every time I was able [weekends] to vacuum them up it rained or the leaves were soaking wet and or frozen. Oh well they will still be there when spring finally springs forth.
Thanx for enduring our [Ok my] harassment and for sharing! Harry
OP
zmotorsports
ALLIANCE MEMBER
OH Mike [palm to face emoji here] you only have ~4 months to prepare how will you get it done in time
Thanx for enduring our [Ok my] harassment and for sharing! Harry
I hope it isn't 4 months. Last couple of years I think I was mowing by mid-late March so that is what I'm hoping for. Based on that timeline it should hopefully only be about 8-10 more weeks.

jbmatth
Well-known member
It must be that time of year, I have the last of my parts arriving today to do my mower maintenance, my excuse is that the cobra has been on the lift for 3 months now.
JB
JB
OP
zmotorsports
ALLIANCE MEMBER
It must be that time of year, I have the last of my parts arriving today to do my mower maintenance, my excuse is that the cobra has been on the lift for 3 months now.
JB
JB, I kept getting email notifications stating that one or more parts were delayed by the manufacturer. I placed the order on September 13, 2021 and just received the order on Saturday January 8, 2022. I guess I should be thankful I received them at all.
At least you have a good excuse, I don't even have that.
OP
zmotorsports
ALLIANCE MEMBER
Arrived home from work yesterday afternoon to find the box of parts that I have been waiting for on the doorstep. It's about time, this truck has been taking up valuable space on my lift for nearly a week now.
Anyways, I was able to finish up the 2005 Dodge 2500 last night.
Rooster comb/bullet kit from Central Valve Bodies arrived. Donny Lester is who I believe created the bullet for these many years ago and that is who I purchased the kit from off of eBay.

Kit comes with the bullet and spring to replace the ball and spring detent that damages the very outermost area of the bore. It also comes with a new rooster comb as the one in this truck had excessive wear in the area at the Park position. Also came with a new seal, washer and e-clip.

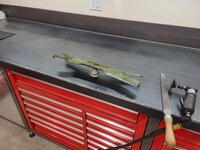
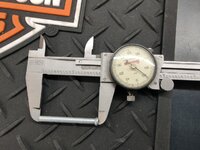
Saw this little trick on YouTube where a guy used a piece of 3/16" brake line to create a means of holding the bullet and spring in the bore while lining everything up to install the rooster comb. Pretty slick trick and since I had about a 6" length of 3/16" brake line left over from the square body I did a couple of weeks ago I thought I'd give it a try. Works fantastic. Figured I needed just under 2" long length of tubing.
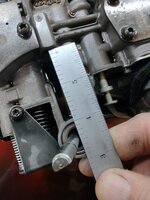
Ended up just shy of 1.9".
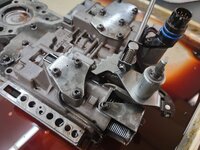
Newly made tool holding the bullet and spring in the bore.

Next this allowed me to ensure the throttle valve lever was properly aligned with the stop and the manual valve was aligned to accept the lever from the rooster comb.

Next set the rooster comb in place and when everything is lined up press downward and it pushed the piece of tubing off the detent bullet and the rooster comb takes its place. Then use a magnet to grab the tubing from under the rooster comb and finish assembling the rooster comb with seal, washer and e-clip.

Don't forget to install the parking lever before stabbing the valve body back into the transmission. I also applied a small amount of Sil-glyde to the o-rings on the electrical connector to aid in assembling through the bore in the case without tearing or damaging the o-rings.
I lubed up the accumulator piston with some petroleum jelly and put it in the bore and then the accumulator spring in place on the valve body then it is ready to install.

More pictures to follow.....
Anyways, I was able to finish up the 2005 Dodge 2500 last night.
Rooster comb/bullet kit from Central Valve Bodies arrived. Donny Lester is who I believe created the bullet for these many years ago and that is who I purchased the kit from off of eBay.
Kit comes with the bullet and spring to replace the ball and spring detent that damages the very outermost area of the bore. It also comes with a new rooster comb as the one in this truck had excessive wear in the area at the Park position. Also came with a new seal, washer and e-clip.
Saw this little trick on YouTube where a guy used a piece of 3/16" brake line to create a means of holding the bullet and spring in the bore while lining everything up to install the rooster comb. Pretty slick trick and since I had about a 6" length of 3/16" brake line left over from the square body I did a couple of weeks ago I thought I'd give it a try. Works fantastic. Figured I needed just under 2" long length of tubing.
Ended up just shy of 1.9".
Newly made tool holding the bullet and spring in the bore.
Next this allowed me to ensure the throttle valve lever was properly aligned with the stop and the manual valve was aligned to accept the lever from the rooster comb.
Next set the rooster comb in place and when everything is lined up press downward and it pushed the piece of tubing off the detent bullet and the rooster comb takes its place. Then use a magnet to grab the tubing from under the rooster comb and finish assembling the rooster comb with seal, washer and e-clip.
Don't forget to install the parking lever before stabbing the valve body back into the transmission. I also applied a small amount of Sil-glyde to the o-rings on the electrical connector to aid in assembling through the bore in the case without tearing or damaging the o-rings.
I lubed up the accumulator piston with some petroleum jelly and put it in the bore and then the accumulator spring in place on the valve body then it is ready to install.
More pictures to follow.....
OP
zmotorsports
ALLIANCE MEMBER
Prior to installing the valve body I figured I would check the band adjustments. With 164k it couldn't hurt. Both front and rear bands were pretty close.
Here is the rear band adjustment.

Front band anchor.

Front band adjustment on the outside of the case.

After the valve body is installed and torqued to spec. I installed the new filter and then the pan and buttoned everything up.

Everything back together, fluids filled and back from a road test and ready for the owner to pick up.
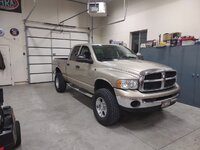
Thanks for looking.
Here is the rear band adjustment.
Front band anchor.
Front band adjustment on the outside of the case.
After the valve body is installed and torqued to spec. I installed the new filter and then the pan and buttoned everything up.
Everything back together, fluids filled and back from a road test and ready for the owner to pick up.
Thanks for looking.