To avoid these ads, REGISTER NOW!

ZMotorsports Shop Projects 2.0

To avoid these ads, REGISTER NOW!

SilverJimmy

Well-known member
Joined
Apr 14, 2012
Messages
1,755
Location
Prescott/Flagstaff, AZ
I’m sure you’ve said before, but with 200+ pages to search asking is probably quicker! On your fab table I seem to remember you modified the ViseGrip clamps, but what are the slide clamps, and could you give us rookies a refresher on your system/setup? TIA!
 
OP
Z

zmotorsports

ALLIANCE MEMBER
Joined
Oct 20, 2009
Messages
21,598
Location
Northern Utah
I’m sure you’ve said before, but with 200+ pages to search asking is probably quicker! On your fab table I seem to remember you modified the ViseGrip clamps, but what are the slide clamps, and could you give us rookies a refresher on your system/setup? TIA!

Sorry Jimmy, I tried to go back through and find where I modified the Bessey F-clamps but I couldn't find it.

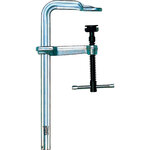
I purchased some Bessey F-Clamps like in the picture below.
fclamp2.jpg


I then cut the ends off a little and machined some 5/8" shoulder bolts similar to the Vice-Grip clamps and welded the ends to the bolts. The bolt slip into the 5/8" holes in the table and allow quick adjustments when fixturing and jigging on the fabrication table.

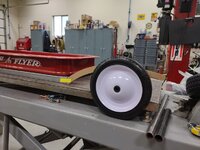
They can easily be used for a multitude of fixturing setups from the Radio Flyer wagon in my above posts where the components are clamped directly to the table or using other items such as angle plates or 1-2-3 blocks.
fclamp1.JPG

Sorry I couldn't find the post(s) where I modified the F-Clamps.
 

SilverJimmy

Well-known member
Joined
Apr 14, 2012
Messages
1,755
Location
Prescott/Flagstaff, AZ
So the 5/8 bolts are threadless? They just slip into the holes in the table and then the slight sideways thrust locks them into the table? My fab table is a steel drop 1 1/2“ thick by 2’x4’ and I got a Milwaukee Mag drill from my dad. Just thinkI got this might be a good project and make setups a bit more precise. Photos of your clamp and table details would probably help my comprehension a bit!
 
OP
Z

zmotorsports

ALLIANCE MEMBER
Joined
Oct 20, 2009
Messages
21,598
Location
Northern Utah
So the 5/8 bolts are threadless? They just slip into the holes in the table and then the slight sideways thrust locks them into the table? My fab table is a steel drop 1 1/2“ thick by 2’x4’ and I got a Milwaukee Mag drill from my dad. Just thinkI got this might be a good project and make setups a bit more precise. Photos of your clamp and table details would probably help my comprehension a bit!

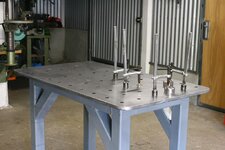
I don't have pictures of my table handy but I do remember someone asking earlier so I know there are some pictures in this thread. My fabrication table measures 32"x 60" by 32" high and is made of 1/2" thick plate on top of 2" square tube frame. I have the .625" holes drilled on a 12" grid if memory serves.

You are correct, the 5/8" bolts are shoulder bolts and then I've cut the threads off so I just use the shoulder to lock into the holes. If you have access to a MAG drill this is an easy mod. Personally, I never thought I would ever have holes in my fabrication and for many years I swore I wouldn't. However, after adding a few a couple of years ago I have found instances where they are handy. So I guess I have to eat a little crow on that one. :LOL:
 
OP
Z

zmotorsports

ALLIANCE MEMBER
Joined
Oct 20, 2009
Messages
21,598
Location
Northern Utah
I didn't get much done on the wagon last night as I had a little milling job to do. Sorry, forgot to take pictures of that though but it was nothing special, just had to mill some thickness off of a Cummins feeler gauge tool.

As I walked into the shop I didn't like the look of the front frame horns on the wagon however. They were too thick at the front so I made some alterations and actually cut them down so I can transfer the pattern to some 14-gauge P&O. I cut about a 1/4" off the entire outer line so that when I assemble the pieces I can use outside corner joints and create a nice corner radius once metal finished. The arch was trimmed down to 1" so by the time I stack a 12-gauge strip on top and bottom it will come out to 1.250" to match the rest of the chassis. I then narrowed the front 6 inches or so narrowing it to around .800" roughly then added a rounded tip.

I mocked it back up in place and taped it there to glance at while I went about milling.
rf16.jpg

As I was walking around the shop stopping to glance at it while the mill was doing its thing I noticed it just wasn't sitting right. I then realized the frame horns/tips were too high above the ground and axle centerline. If you look it appears that the arched frame will sit approx. 3" above the axle centerline which is just too high for my liking. I trimmed a little off the contact point softening the angle with the frame to bring the front tips down and BINGO! That was the ticket. Now it roughly sits approx. an inch or so above centerline which looks much more aesthetically pleasing to the eye. The front horns will also be pinched inward a small amount giving the tire/wheel assembly plenty of room to turn in an arc without contacting. This will also allow me to design in the proper axis inclination angle (sometimes referred to as Kingpin inclination angle) as well as caster and then finally when it comes time for the steering supports on the knuckles I will design in the correct Ackermann angle, you know for that high speed sidewalk~ing. :ROFLMAO: Safety third.....
rf17.jpg


I like that design MUCH better and will now only be slightly above the axle, it flows much more gooder. This should also be a good platform to serve as the pivot for the handle which will allow a solid mounting point and allow to connect the tie rods to for the steering joints.
 

WoodsTruck

Well-known member
Joined
Jan 12, 2013
Messages
1,037
Probably something like this.
I've got a contractor that has an antique table with the inverted J-hooks but I don't remember what those are called.
 

Attachments

  • b6f202568771dc3f182d0e2af1f41f43.jpg
    b6f202568771dc3f182d0e2af1f41f43.jpg
    95.8 KB · Views: 78

jbmatth

Well-known member
Joined
Jun 3, 2013
Messages
5,696
Location
Northern Ok.
Mike, Just a thought, the connection from the main frame to the horns seems to be too sharp of an angle for the flowing lines of the horn. Adding a bit of a reverse radius at the beginning of the cardboard before transitioning it to the arch of the horns would help it smoothly transition a bit better. Now, this is just my thoughts but wanted to share, feel free to put me in my place if you don't agree and I'll continue to bow down to the master at work. :)
JB
 
OP
Z

zmotorsports

ALLIANCE MEMBER
Joined
Oct 20, 2009
Messages
21,598
Location
Northern Utah
Mike, Just a thought, the connection from the main frame to the horns seems to be too sharp of an angle for the flowing lines of the horn. Adding a bit of a reverse radius at the beginning of the cardboard before transitioning it to the arch of the horns would help it smoothly transition a bit better. Now, this is just my thoughts but wanted to share, feel free to put me in my place if you don't agree and I'll continue to bow down to the master at work. :)
JB

Yeah, I'm not 100% certain on the transition yet but thanks JB.

I was more concerned about getting the front of the frame horns profile and height determined before I start actually cutting steel. An actual '32 chassis does have a bit of a swoopiness to it but this will be a little more dramatic due to the smaller size of the chassis and limitations of the flat wagon tub.
 
OP
Z

zmotorsports

ALLIANCE MEMBER
Joined
Oct 20, 2009
Messages
21,598
Location
Northern Utah
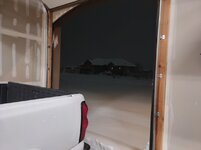
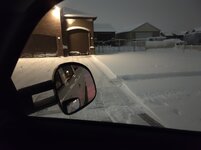
Woke up to this **** this morning. It started snowing yesterday afternoon around 4~ish and hasn't stopped. Had about 6 inches where the wind hadn't blown it and we're supposed to get another 4-7 today. I was only able to clear the main drive from the house garage before work at 5am so I'll have about the same to remove in the main drive when I get home tonight plus the side yard and back yard will have close to a foot by then. That's gonna be fun to throw three times. 🤬

I'm ready for spring.
feb1.jpg

feb2.jpg

feb3.jpg

feb4.jpg
 

signcrafter

Well-known member
Joined
May 9, 2012
Messages
12,605
We getting the same Mike. Only got about 3 inches last night but in another hour or two round two hits and will be snowing till thursday afternoon. Calling for 15 to 18 total. I was going to head back to iowa today but will hang around so the wife doesnt have to deal with snow removal. Thankfully iowa isnt getting it like wisco so I wont have to do snow removal there when I get back.
 
OP
Z

zmotorsports

ALLIANCE MEMBER
Joined
Oct 20, 2009
Messages
21,598
Location
Northern Utah
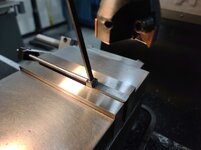
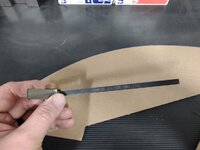
I forgot to post pictures of when I was milling down the Cummins feeler gage the other night so I snapped a few pictures of the setup last night before I broke it down.

The correct thickness feeler gage that I need to set the Jacobs Compression Brake on my ISL is not currently available and I've been watching for a used or new one on eBay for several months now with no luck. Also the Cummins/Jacobs feeler gages are very expensive at around $85 at the low end for an aftermarket one and upwards of $160 for an actual Cummins tool from the local Cummins dealer. I put a $50 limit on myself while trying to locate a used one in good condition. As I was growing nearer to the time of needing it and unable to acquire the tool I figured I would just fabricate one and move on, but I really wanted the actual proper tool.

I luckily stumbled across a Cummins tool a few weeks ago on eBay, however, it was the incorrect thickness but it was only $25 and new in package. I'm not sure if the seller didn't know what he had or just obtained them at a discount and wanted to pass that savings along to others. Either way it was too good a deal to pass up and figured I could machine it down to the .090" thickness that I need but I worried the harness may not be conducive to machining. I thought I'd roll the dice for $25.

I set it up in the mill vise and used a multi-cutter facing mill and was surprised that with light cuts (.015") it actually machined quite nicely. It took a bit of time to go from the .276" down to .090" but it was well worth the effort for the results as the finish turned out very nice.
feelergage.jpg

feelergage1.jpg

feelergage2.jpg


Thanks for looking.
 

Mr.zippy

Well-known member
Joined
Apr 27, 2020
Messages
2,225
Location
Wyoming
I hear ya on the snow Mike. Been brutal for us over the mountains from Ogden this winter. Nice job on the check gauge….with my memory, I would have to scratch the new measurement number over the incorrect number. it’s nice to see well done tool rehabs!
 
OP
Z

zmotorsports

ALLIANCE MEMBER
Joined
Oct 20, 2009
Messages
21,598
Location
Northern Utah
1677084927136.png

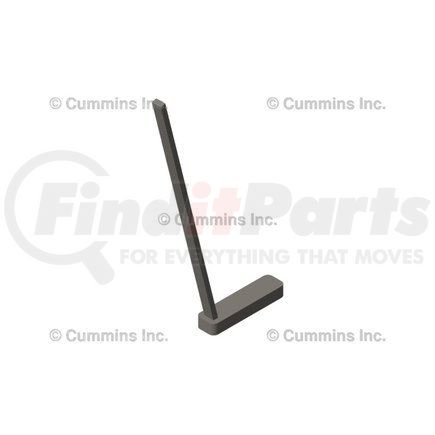
Wait...... $160 dollars for that from Cummins?!?!?! They are mighty proud of that feeler gage, aren't they? GEESH........
:beer:


Yes they are Dan.

Here is a link to a OEM Cummins feeler gage.

Stupid money for sure.
 

Scuderia-F1

Well-known member
Joined
Feb 9, 2011
Messages
1,198
Location
Stockholm, Sweden
I forgot to post pictures of when I was milling down the Cummins feeler gage the other night so I snapped a few pictures of the setup last night before I broke it down.

The correct thickness feeler gage that I need to set the Jacobs Compression Brake on my ISL is not currently available and I've been watching for a used or new one on eBay for several months now with no luck. Also the Cummins/Jacobs feeler gages are very expensive at around $85 at the low end for an aftermarket one and upwards of $160 for an actual Cummins tool from the local Cummins dealer. I put a $50 limit on myself while trying to locate a used one in good condition. As I was growing nearer to the time of needing it and unable to acquire the tool I figured I would just fabricate one and move on, but I really wanted the actual proper tool.

I luckily stumbled across a Cummins tool a few weeks ago on eBay, however, it was the incorrect thickness but it was only $25 and new in package. I'm not sure if the seller didn't know what he had or just obtained them at a discount and wanted to pass that savings along to others. Either way it was too good a deal to pass up and figured I could machine it down to the .090" thickness that I need but I worried the harness may not be conducive to machining. I thought I'd roll the dice for $25.

I set it up in the mill vise and used a multi-cutter facing mill and was surprised that with light cuts (.015") it actually machined quite nicely. It took a bit of time to go from the .276" down to .090" but it was well worth the effort for the results as the finish turned out very nice.
feelergage.jpg

feelergage1.jpg

feelergage2.jpg


Thanks for looking.
Seems like you scored yourself a great tool for very reasonable money & also got to show some proper craft. 👌🏼
 
To avoid these ads, REGISTER NOW!
OP
Z

zmotorsports

ALLIANCE MEMBER
Joined
Oct 20, 2009
Messages
21,598
Location
Northern Utah
I wasn't able to get into the shop last night for anything other than to check on things and make sure the temps in the RV bay were holding. We've had some very cold temps here along the Wasatch Front over the past few weeks and yesterday's storm was a record breaker. The old record for most snowfall from single storm was 11.7" measured at the Salt Lake International Airport and yesterday we had 14" mid-day and it was still snowing, haven't heard a final tally yet but it broke the old record.

I blew the snow off the driveway before work yesterday and then when I arrived home in the afternoon commenced clearing the side drive and back yard. Three hours later I was finally able to step foot into the shop and check on the temps. :rolleyes:

We had a good 6+ inches at our home with drifts of around 12-14 inches up against the house garage door and shop doors as the storm came blowing in hard from the north. After clearing the snow I was pleased to find the shop holding temps not only in the shop at around 51~ish degrees but also the RV bay which has stayed well above freezing (38-41 degrees at the coldest points around the overhead door and far wall.

I will admit that this isn't the most snow we've had at our current home as I remember the winter of 2019 when our neighbor had his skidsteer out stacking up snow in the cul-de-sac but 6+ inches in a 12 or so hour period is quite a lot for us here in the valley. I shouldn't complain because I saw on the news that areas south of us got some lake effect snow and has nearly 2' in the same time frame so I'll be content with my 6 or so inches that I had to clear. :whistle: I did notice when I pulled into the neighborhood yesterday afternoon that my neighbor was moving some snow around with his skidsteer but nothing like 2019, just cleaning up a bit better than the city plows did.

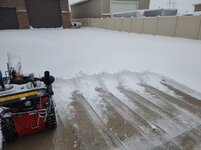
Here you can see where I cleared the main drive before work where it had nearly melted off throughout the day and the area along the side yard where I just cleared and could open the gates.
feb1.jpg

Next tackling the back yard.
feb2.jpg

Here we had a bit of drifting with spots 10-12 inches and a small strip between here and the shop where there was about 2-4 inches but most was quite deep and I have to throw it three times before it is off the concrete. You can also see where it is stacked up against the shop doors with a 14 inch or so drift.
feb3.jpg

This area where it has been thrown three times is not only deep but dense making full width passes impossible. I had to take 6-8 inch swaths in order to keep the snowblower moving forward.
feb4.jpg

After approx. 3 hours of work I could finally get into the shop to check on things.
feb5.jpg


When leaving for work I hit the button for the 3rd bay garage door and it popped and jumped as it was frozen to the ground. Luckily it came free but I thought I had better ensure the main garage door wasn't frozen for when the wife leaves for work about a half hour after I leave. Sure enough it was frozen worse than the larger 3rd bay door and the damn thing jumped time before I could hit the button again. 🤬

I had to grab the ladder then go out into the shop to grab my literature as I couldn't remember how to program the limits on the LiftMaster opener. After about 15 minutes of setting up the ladder between the Jeep and the wife's Acura, reprogramming the limits, testing the door's limits several times and putting the ladder away I was able to leave for work knowing the wife wouldn't have any issues getting out of the garage.
 

OutlawDrifter

Well-known member
Joined
Jan 20, 2015
Messages
3,921
Location
KS
Frozen doors are no fun Mike!

Looks like you had quite a bit of snow to move, my best friend up in Sioux Falls is currently dealing with a similar situation.
 
OP
Z

zmotorsports

ALLIANCE MEMBER
Joined
Oct 20, 2009
Messages
21,598
Location
Northern Utah
Frozen doors are no fun Mike!

Looks like you had quite a bit of snow to move, my best friend up in Sioux Falls is currently dealing with a similar situation.

Marc, I kicked myself because I knew the main door was frozen when the 3rd bay door popped and jolted open. What I should have done at that point is walked up to it and shook it to pop the bottom loose before I hit the button. In my haste I didn't thoroughly think it through and just assumed with it being closer to the house wall it wouldn't have been frozen. However, now thinking about it with it being a wider door (18') vs. the 3rd bay door (9') it would have more surface area along the bottom to freeze down more solidly. Instead I hit the button thinking it would just pop free like the 3rd bay but instead it jumped time resulting in more work to correct the issue and more importantly, to ensure the wife wouldn't have an issue when she left for work. I guess that was a lesson learned, hopefully.
 

LXCam

ALLIANCE MEMBER
Joined
Apr 23, 2013
Messages
19,356
Location
AZ
I got part of that blizzard too early yesterday.

At least 5mph winds and two flakes of snow.....I could’a died 🥺


Lol. Actually we were having 35-50 mph winds and the snow was dumping around 4:30. I thought for certain it’d be a shitshow getting back home as the forecast called for snow most of the day. I was floored when I got home and the south facing driveway and yard didn’t have a single flake on it.

I don’t envy you this time of year Mike, that’s for damn sure.
 
OP
Z

zmotorsports

ALLIANCE MEMBER
Joined
Oct 20, 2009
Messages
21,598
Location
Northern Utah
BooHoo Cam. How terrible that must have been. :ROFLMAO:

In all honesty, I shouldn't complain because although it ***** at the time clearing the snow at least we had snow this year to clear and should have water to keep my lawn green throughout the summer. The past two summers now we've been on extremely tight water restrictions and they were late to turn the secondary water on and early to turn it off. I don't see the water limits increase this year because you know how government works, they NEVER implement something and then go back and lift those restrictions. That's just NOT how they operate, but that's a whole other issue. 🤬

That being said, I have played with my nozzles over the past couple of years and feel I have my zones and volume dialed in for the best use of the water that we are allocated. It would be nice if we could at least get it turned on at the normal time and go through the entire season before they turn it off but time will tell. The building boom has been in full swing here and with all the new developments I don't see the restrictions being lifted but the increased snowfall this winter will definitely help.
 

WoodsTruck

Well-known member
Joined
Jan 12, 2013
Messages
1,037
You could double end that blower. Send it out when the weather gets better to clear the Sunday drivers before you launch that Camaro for canyon runs.
 
OP
Z

zmotorsports

ALLIANCE MEMBER
Joined
Oct 20, 2009
Messages
21,598
Location
Northern Utah
I don’t know Mike, but when you have more concrete than a Walmart parking lot, you may need something a touch bigger for snow removal!

This ^^^^^^^^^!!!!!!!!!!!!! And you are not getting any younger my friend.

:beer:

Person with mad fab skills could mount that to an RV ... just saying :D

You guys are hilarious.

And your right Dan, I'm not getting any younger so thank you soooooo much for pointing that little tidbit of information out. Really made my Friday my friend. :LOL:
 
OP
Z

zmotorsports

ALLIANCE MEMBER
Joined
Oct 20, 2009
Messages
21,598
Location
Northern Utah
20+ inches overnight into today. Plowed from 6 am until 3 pm with 2 hours off for a meeting at the plant.

One of my favorite views:

IMG_4046.JPG

I had to turn the heated seat off after a couple of hours.

While that would be nice Pat, that would be the exact definition of WAY OVERKILL for my property. My neighbor has offered to come over with his skid steer and clear it on multiple occasion but I just can't take him up on it as I hate owing anyone anything.
 

Finallygotit

ALLIANCE MEMBER
Joined
Jul 6, 2013
Messages
4,113
Location
Tucson, AZ
You guys are hilarious.

And your right Dan, I'm not getting any younger so thank you soooooo much for pointing that little tidbit of information out. Really made my Friday my friend. :LOL:
You're welcome Mike. It just a small service that I provide. ;)

Seriously, how about adding a nice 4 foot two stage thrower to your tractor?

41D4Nj1XJlL._AC_.jpg

:beer:
 
OP
Z

zmotorsports

ALLIANCE MEMBER
Joined
Oct 20, 2009
Messages
21,598
Location
Northern Utah
You're welcome Mike. It just a small service that I provide. ;)

Seriously, how about adding a nice 4 foot two stage thrower to your tractor?

41D4Nj1XJlL._AC_.jpg

:beer:

I have to admit, over the past month or so I have actually been looking at smaller John Deere riding tractors that I can use for both a mower during summer months and then put a snowblower attachment on for the winter months.

However, I have a few issues with this scenario, first it's another expense and I'm getting tired of spending money lately. Secondly, I love my Toro ZTR mower and don't necessarily want to change to another mower and lastly, I really don't think the snowblower attachments blow the snow any further than my Toro 28" snowblower. It throws it easily 35-45 feet depending on depth, moisture content and wind and from what I've seen from a few neighbor's riding mowers with snowblower attachments, they really don't throw the snow any further than my setup so I wouldn't really be gaining anything. I would have to step up to a larger riding tractor, like maybe the X350 or even the X570 but doubt they would be much, if any, better than what I have as far as snow removal. If I were to look at the 1-Series they don't even start at under about $16k for just the tractor and that is much more than needed for lawn or snow removal for my 3/4 acre yard.

For my size property, I think I have about the best solution my budget and storage limitations will allow so I have come to accept that snow removal just flat will take time away from shop time. I think once retired it will be less of an issue because I can get on the snow immediately each morning, well after my morning coffee at least ;) , and not have to wait until after work when it's getting dark and colder.
 
To avoid these ads, REGISTER NOW!
Top Bottom