To avoid these ads, REGISTER NOW!

ZMotorsports Shop Projects 2.0

OP
Z

zmotorsports

ALLIANCE MEMBER
Joined
Oct 20, 2009
Messages
21,476
Location
Northern Utah
That certainly *****. How is that system pressure regulated mike? Also why do I have a vague recollection of you having the ability of monitoring pressure before and after the filters or was that a conversation we had.

Cam, I am only monitoring the fuel pressure before the injection pump and after the filters.

To be honest, any pressure is good because in stock configuration on the supply side of the injection pump the system was under vacuum, no pressure at all, so any pressure I am able to supply it with is a good thing and ensures the injection pump is getting fuel. In stock form the lift pump only ran for about 30-seconds or until the engine started, whichever occurred first. The factory lift pump also only provided about 4-5 PSI for that initial startup, then the injection pump's suction side is what drew fuel up from the tank, through both filters and the check valve in the OEM lift pump, most of which has now been bypassed. It's not like on the Cummins "B" motors that have a constant supply pressure from a continuous running lift pump. This is why I feel many CAPS pumps failed prematurely in RV's was due to either restricted filters (dirty fuel or just neglect) and the inability to deliver the proper amount of fuel to the injection pump OR, the fuel lines, fittings or filters allowing air intrusion into the system resulting in cavitation and thus destroying the CAPS injection pump. That is probably why I was so **** about changing my filters annually before the FASS installation was to be certain I was never starving the injection pump. By installing a positive pressure fuel delivery system (FASS) it should eliminate the possibility of starving the injection pump and prolong the life plus the added benefit of polishing the fuel for a cleaner fuel upon delivery to the injection pump.

I waffled on installing multiple gauges (either side of filters) and having multiple transducers but opted against it for the simple reasoning that more fittings could lead to potentially more leaks and failure points without really providing me with any more important data than a single gauge would give me and that is that the injection pump is receiving fuel. I felt like just seeing a decrease in fuel pressure from the cockpit would give me the data I needed to suggest I had a filter becoming plugged. Granted, on the RV forums I am seeing people not changing their filters until they are much, much lower pressures but that little drop in pressure was enough to cause me to ponder whether or not I had a filter with a restriction due to debris. Turns out not to be the case and I worried for nothing. :unsure:
 
To avoid these ads, REGISTER NOW!
OP
Z

zmotorsports

ALLIANCE MEMBER
Joined
Oct 20, 2009
Messages
21,476
Location
Northern Utah
First task last night was to hang the awesome illuminated sign that my son and DIL made me for Father's Day.

My DIL made the graphics and lettering then they lined the shadow box with LED's and provided a controller to activate as well as change modes and/or colors. Pretty cool. I hung it on my bragging wall.
sign1.jpg

I played with the settings a bit.....
sign2.jpg

and settled on the setting that allows the colors to scroll.
sign3.jpg

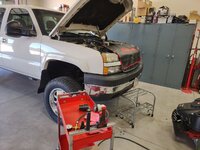
Next I shifted gears and pulled the truck in the shop to pressure test the CAC and related piping. The new roll-around step stool is sure nice after only using it a few times now.
shop1.jpg

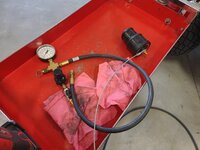
I used my Kent Moore pressure tester connected into the hot pipe coming off the turbo.
shop2.jpg

Everything tested good so I put the truck back together, checked a few fluids and parked it back in the house garage. She sure needs a good wash job though. We've had rain every couple of days here for the last few weeks and just doesn't seem worth while to shine her up just to get rained on the next day.
shop3.jpg

Lastly, I moved on to cleaning the mower decks. I started with the Snapper 21" walk-behind mower. Not terrible but it needed a cleaning. As long as winter lasted this year and as anxious I was for it to end so I could start mowing my lawn, it's hard to believe that I've already mowed probably 24-28 times this year.
mower1.jpg

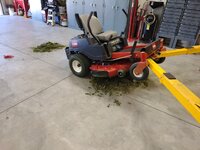
Then I moved over to the Toro ZTR mower. I thought I'd try lifting the front end this time vs. disconnecting and pulling the deck out from under the chassis. To be honest, even with pulling the deck being a bit of a pain to get the pins lined up going back under it, I think it was still easier than crawling around under it on a creeper trying to get in every nook and cranny. I also ordered some new mulching blades that I am going to give a try to. These are just the factory Toro blades that came with the mower and I have been less than impressed the latter part of last year and so far this year.
mower2.jpg

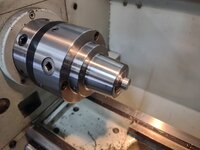
Before closing up the shop while waiting for the wife to get home I thought I'd knock out a couple of items for my grandson's wagon project. I started with machining two threaded bosses that will be welded into the rear axle as mounting pads.
rf149.jpg

Two mounting bosses completed.
rf150.jpg

I also dug through my metal drops and found enough material to machine four threaded bungs for mounting the body to the frame. When I was fabricating the chassis I machined four .625" holes in the chassis corresponding to the original holes in the bottom of the tub so I need four threaded bungs to accept 1/4"-20 button head screws that will bolt the tub to the chassis under the upholstery. Those will be next then I can move the chassis over to the fabrication table for some welding.

Thanks for looking.
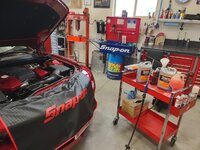
 
OP
Z

zmotorsports

ALLIANCE MEMBER
Joined
Oct 20, 2009
Messages
21,476
Location
Northern Utah
I've been having some speaker issues in our 2006 Silverado 2500HD over the past couple of years now. I lost one initially, then another that works half the time last fall and just recently lost another completely, leaving me with one and a half working speakers. Now GM didn't put the greatest speakers in their lower and entry level trucks to begin with and I generally don't have the radio on much these days but when the wife rides with me she likes to listen to the radio. Also, I'm not the stereo nut that I was when I was younger and don't need the high output amplifier, woofers and everything else that take up valuable space. As I age when I do listen to the radio in my vehicles I just want a nice clean and crisp sounding output.

My son upgraded his speakers a while back so I followed his lead and ordered some Kicker speakers to replace the failing/failed OEM ones. They arrived a couple of days ago so yesterday I washed the truck on the way home from work then pulled the truck in the shop and commenced replacement of the speakers.


After running a chamois over the truck I threw a few tools on the cart and began removing door panels.
st1.jpg

I started with the driver's side rear as that was the last speaker to fail and I was questioning whether or not the rear speakers were correct after talking with the salesman. Started by removing my window crank.
st2.jpg

This tool shows a LOT of wear but I haven't used it in years.
st3.jpg

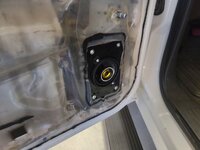
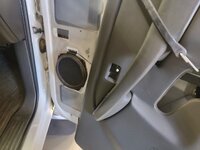
Door panel removed and I can now remove the OEM speaker. The speakers are a little different compared to the OEM but the adapter bracket they sent looks like it will fit.
st4.jpg

Not that I feel confident the speakers will work I can open them without fear of having to return them. One of the rears mounted to the new adapter bracket and ready for installation.
st5.jpg

As I am installing the speaker I noted the connector was quite loose and the added wiring from the pigtail adapter didn't help the situation so I zip-tied the wiring a bit to keep the connector from bouncing around in the door. This will become even more important and evident when I get to the passenger's front door.
st6.jpg

New Kicker CS series speaker installed and tested before reinstalling the door panel.
st7.jpg

With the driver's side completed (front door as well) it was time to move over to the passenger's side front door. I used a bungee cord to hold the door panel so I didn't have to completely remove the wiring harness. I hate disturbing some of those locking tabs in I don't have to. The OEM speakers were 6.5" and the Kicker speakers I am replacing them with are Kicker 6-3/4" DS which should work well with the OEM stereo head unit.
st8.jpg

Passenger side front door back together.
st9.jpg

Only one door left, passenger rear, and the job is complete.
st10.jpg

That's it for the installation of my new Kicker speaker in our truck. A pretty simple job and I did a little cleaning around the interior door perimeter while the door panels were off.

I also found a plastic retaining tab in the passenger's side front door that I reinstalled and zip-tied the wiring. This was an important find because I have had a slight rattle noise that I have been unable to find for about a year now. When the wife and I go for drives I have her tear the glovebox apart, ashtray and everything else I can think of wondering where the noise was coming from. It wasn't consistent and took a certain set of bumps to duplicate. All I know is that it was coming from the passenger side but I'll be damned if I could locate it, until last night that is. :D
 
OP
Z

zmotorsports

ALLIANCE MEMBER
Joined
Oct 20, 2009
Messages
21,476
Location
Northern Utah
Just about the time I was finishing up and cleaning the windows the wife arrived home from work. She wanted to listen to it so we went for a little drive before dinner.

The truck cleaned up and ready to back out of the shop.
st11.jpg

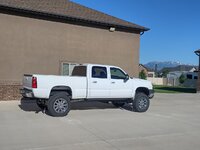
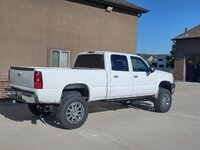
Outside and glistening. I snapped a few outdoor shots of the ole' girl.
st12.jpg

st13.jpg

st14.jpg


For a 17+ year old truck I am still very pleased with how she looks and runs.

As for my noise from the passenger side, it is GONE. I took both test laps, one is very bumpy and the other at speed and never heard the noise at all so I feel confident that connector which was bouncing around inside the door was the issue. One less thing to drive me up the wall. :ROFLMAO:

Thanks for looking.
 

OutlawDrifter

Well-known member
Joined
Jan 20, 2015
Messages
3,898
Location
KS
Thanks Marc. I still have a set of rear inner wheelwells to install and hoped to get to them last night but didn't have time. I've had them sitting on the shop floor for several months now and I really need to get them installed and quit tripping over them and moving them around. :cool:

I've added those to a couple of the pickups that have run through my herd, they definitely add a nice finishing touch.
 

Firstram

Well-known member
Joined
May 16, 2017
Messages
1,393
Death wobble is a wild experience. I think it places right up there next to base jumping if you're looking for an adrenaline rush. At one point I probably had a full set of brown underwear in the drawer. My xj had it bad for years. But what do you expect when a broke kid is adding all the wrong parts in the wrong order? Never broke anything, but I went into a median more than once.
The worst part is looking ahead knowing you're about to hit something that will set it off!
 

Dodge

Well-known member
Joined
Feb 8, 2008
Messages
557
Location
Illinois
Funny you mentioned that you have the rear liners. When I looked at your pictures of your truck, I thought to myself, "That is a good looking truck, just needs rear wheel liners!" And you had them all along!! More pictures after install, please
 
OP
Z

zmotorsports

ALLIANCE MEMBER
Joined
Oct 20, 2009
Messages
21,476
Location
Northern Utah
Funny you mentioned that you have the rear liners. When I looked at your pictures of your truck, I thought to myself, "That is a good looking truck, just needs rear wheel liners!" And you had them all along!! More pictures after install, please

I will post up some pics when done. To be honest, I've put it off and put it off worrying about how it would look with the black inner fenders and white paint seeing as how there is a pretty good gap between the tire and wheelwell. I touched up the paint in the wheelwell when I first bought the truck back in 2009 but it is getting chipped and couldn't decide whether to touch it back up white again, black it out with bed-liner, which is what we did on my son's 2002 LB7 and it looks great, or install plastic inner fenders. :unsure: I caved and bought the inner fenders. :ROFLMAO:
 

lugnut71

Well-known member
Joined
Feb 14, 2013
Messages
1,898
Location
Wyoming
I think you made the right choice, installing rears on every newer gmc / chevy that comes thru my shop. I think it looks better black, probably because it matches the front.
 
OP
Z

zmotorsports

ALLIANCE MEMBER
Joined
Oct 20, 2009
Messages
21,476
Location
Northern Utah
I drove the Camaro yesterday because I wanted to get the rear end warm and drain/refill with the GM fluid. As I was driving home it was the first day it's been warm enough to need the A/C but I noticed quite quickly that I was only getting cool air from the passenger side and ambient from the driver's. I figured I'd throw the gauges on it when I got home and give it a look-see.


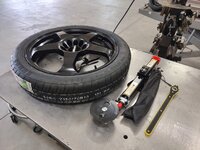
As I pulled in the driveway I noticed I had a delivery. My spare tire for the Camaro had arrived. They suspended optioning out the Fifth Gen's with spares and instead supply them with a stupid little air compressor and a tube of Fix-A-Flat. :rolleyes: Personally, I don't feel comfortable traveling without a spare tire in a car/truck so upon some research I found a kit put together by Modern Spare. Funny enough Modern Spare is located right here in Ogden, Utah. The kit comes with a scissor jack, handle, lug wrench and the tire/wheel consist of a nice forged 19" aluminum wheel with a highway rated Kumho 135/70R19 tire, not one of those little donut setups. It actually looks like a quality unit and will sit in the provided trunk space over the battery and only raising the floor cover in the trunk by about a half an inch.
cam1.jpg

After unboxing the spare tire I shifted gears and hung the gauges on the A/C system to see what it looked like. Sure enough it was a bit low on refrigerant. I ended up adding just over half a can of R134 to get my pressures up and dash discharge air blowing around 43-degrees.
cam2.jpg

Next, I raised the car and got the rear differential fluid draining. Also, I figured with the car racked I'd go ahead and replace the coolant as well as engine oil/filter and give everything a good once over so she's ready for summer miles and smiles. I reached for my new 2013 Camaro FSM and looked up capacities and torque spec's for drain plugs, etc. I also got to use my new pen. :cool:
cam3.jpg

Valvoline oil, Napa Gold filter and the AirLift cooling system at the ready.
cam4.jpg

After the rear differential fluid is drained, I moved forward to let the engine oil drain while I refilled the rear differential.
cam5.jpg

I refilled the rear diff. with the GM Limited Slip fluid that's been sitting on my shelf for a while now.
cam6.jpg

With the rear differential fluid replaced, oil filter replaced and engine oil drain plug torqued in place I refilled the engine with oil and started the coolant drain/refill.
cam7.jpg

When I purchased the car and had the dealership pull the service history, I was informed that the coolant and engine oil was just replaced a couple of months before he traded the car in and there wasn't but a few hundred miles on the car before we purchased it. That being said, I don't necessarily like taking the word of others on things like this because well, they're salesman and can say whatever they want on a used car knowing I'll most likely never see them again especially being an out of state buyer.

I had picked up several extra gallons of distilled water anticipating having to do a full flush if the coolant looked questionable. Well as soon as I pulled the petcock from the radiator, I was already pleasantly surprised with what I was seeing coming out. But just to be sure I grabbed my refractometer and checked the coolant.
cam8.jpg

Stay tuned for more of the Camaro's service.
 
OP
Z

zmotorsports

ALLIANCE MEMBER
Joined
Oct 20, 2009
Messages
21,476
Location
Northern Utah
With the refractometer showing it was like new coolant I reached for my test strips as a double check.
cam9.jpg

Everything was testing like fresh coolant so I felt comfortable just moving forward with a drain/refill vs. a full flush which really wouldn't do anything more. I prefer to do drain/refills earlier in the coolant's life vs. waiting until it begins deteriorating and then doing multiple drains and refills but that's just me.
cam10.jpg

cam11.jpg

cam12.jpg

Moving on to the refill process, I connected the AirLift to the radiator and pulled the cooling system down into a vacuum.
cam13.jpg

I then sucked a couple of gallons of new coolant/distilled water back into the cooling system and topped off the reservoir bottle after evacuating all of the old coolant from that.
cam14.jpg

That concludes the Camaro's night in the shop.

Thanks for looking.
 

Bob Heine

ALLIANCE MEMBER
Joined
Oct 24, 2009
Messages
10,709
Location
Boca Raton, Florida
Mike, thanks for the information on the spare setup. Our Cadillac has the pump and Fix-A-Flat kit and it gives me the creeps. That spare setup is about the price of one tire for our Cadillac or your Camaro. When a tire goes flat at speed I doubt that stuff will fix anything but a pinhole. Even if AAA is close by, you're going to be stuck for a long time before they show up with a flatbed to drive you home or the nearest tire store with your brand and size tire in stock. Here comes the "You'll have to replace the set/pair" pitch.
 
To avoid these ads, REGISTER NOW!
OP
Z

zmotorsports

ALLIANCE MEMBER
Joined
Oct 20, 2009
Messages
21,476
Location
Northern Utah
Thanks for the comments guys.


Friday night after arriving home from work I thought I'd throw the new spare and scissor jack in the car in case we were able to go for a drive this weekend. Usually on Friday afternoons I give the yard the full treatment, edge, trim and mow. However, Friday night was also our city's annual car show and our kids were planning on going and we wanted to see them. I waffled on putting either the car or the Jeep in the show but all afternoon we had a hellacious wind storm and I wasn't even sure I wanted to go and stand around in it. Technically, the Jeep would be a better candidate for the show because it has been completely built from the ground up but the Camaro would be more suited to show. I also didn't think a bone stock car would be that impressive to be worth of putting in a car show so we opted to just go, walk around and enjoy the show.

spare1.jpg

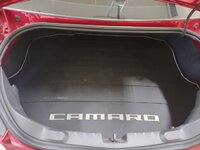
With the small air compressor and foam block removed, I noticed that there was actually a small block and mounting pad already in place in the trunk for the scissor jack to snap into. From my research I found that there was an actual spare tire option available for these Fifth Gens but only for a few years. It has been difficult to find out much information about them as there weren't many sold and they are now discontinued. I did discover that there was an optional battery cover that isolated the battery from anything coming in contact with it and I've been looking for several months for one to pop up on eBay but nothing, until last week. I found one from a wrecking yard in PA and it should be here this week sometime. Until then I wrapped the lug wrench and jack handle in a towel and snapped the scissor jack into position before installing the spare tire.
spare2.jpg

With the spare tire in place I could reinstall the factory cover and the new hold down center that was included in the spare tire kit.
spare3.jpg

In the description of the spare tire kit from Modern Spare it does state that if choosing to mount the spare in the factory location and with the 19" wheel there will be a small lift of the factory cover but it was only about half an inch or so and didn't seem to bother anything, especially once the carpet and rubber mat were reinstalled.
spare4.jpg

With the carpet and rubber mat installed the small height difference is undetectable and it looks completely factory.
spare5.jpg

When the wife got home from work we headed over to the local car show and saw our kids and grandson. As soon as we arrived at the car show about 5:30 the wind quit and it turned out to be a great evening. Although the burn out competition is something I can do without. Something about hearing an engine bouncing off the rev limiter while smoking the tires just screams immaturity to me.

My wife had gotten some sunglasses for our grandson and he sported them like a champ as we wandered around the car show. The sound of the idiots in the background doing the burnout competition didn't seem to bother him and he just chilled as we wandered around. We saw some friends at the car show and were able to show off our grandson and in was a nice evening hanging out with the kids.
max1.jpg


Thanks for looking.
 
OP
Z

zmotorsports

ALLIANCE MEMBER
Joined
Oct 20, 2009
Messages
21,476
Location
Northern Utah
Saturday morning after my coffee on the deck I went out and commenced my lawn work.

I ordered some new blades for the ZTR and they arrived Saturday morning while I was sitting on the deck enjoying my coffee. I ran out to the shop and installed them before commencing my lawn mowing duties and I was less than impressed. I had heard nothing but good about the Oregon Gator G5 mulching blades so I thought I give them a try in an attempt to rid myself of the clumps at each turn with our Toro Timecutter ZTR. Turns out the new Gator blades not only leave clumps at the turns but also down each row as well. That required even more cleanup or "fluffing" of the grass with the leaf blower to disperse the grass clippings.

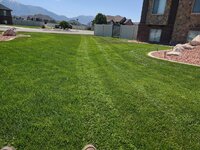
Here you can see with half the front lawn mowed the path of clippings that the blades left behind.
lawn.jpg

Same here in the back yard with only two passes.
lawn1.jpg

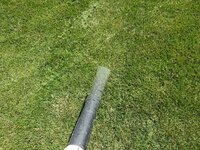
After completing the mowing I had to walk the entire lawn with the leaf blower to disperse the clippings or they mat down and turn the grass yellow in spots.
lawn2.jpg

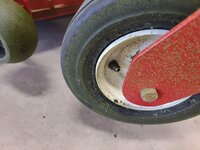
Just as I was finishing up I turned and must have hit the curbing wrong because my right caster tire went flat. At first I thought I merely popped the bead but I have never had that happen before. I parked the mower in the shop and figured I'd look at it on Sunday as the wife and I were running late for her family reunion on Saturday afternoon.

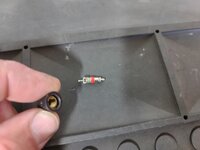
Yesterday the wife and I thought we'd go for a nice drive so while she was getting ready in the morning I went and washed then vacuumed her Acura and while I was checking the tire pressures on her car and the Camaro I thought I'd hurry and reseat the bead on the mower so it was ready to mow on Monday afternoon. Well, I wasn't expecting to find what I did. Looks like I hit the curb at just the exact angle to snap the valve stem off. I removed the cap and the end of the valve stem came off with it and left the core halfway installed. At first glance I thought the core had come unthreaded but then noticed the end of the valve stem was still in the plastic cap.

I'll have to stop and pick up a new valve stem on the way home.
mower1.jpg

mower2.jpg

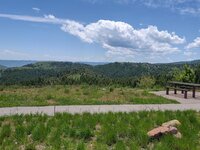
Our drive on Sunday turned out to be a nice relaxing drive. We headed up Logan Canyon and up towards Bear Lake (Garden City). At the top of the pass there is a small rest area so we pulled in to stretch out legs and check out the view. Looking down onto the lake and surrounding mountains.
drive1.jpg

drive2.jpg

Unfortunately the car was getting plastered with bugs.
drive3.jpg

As we were driving from Garden City north towards Montpelier, ID we drove into a small rainstorm so now the car definitely needs a wash job. :rolleyes: Oh well, we need to wash the bugs off anyways and that's why we bought it was to drive and enjoy. Rain or shine.

Thanks for looking.
 

OutlawDrifter

Well-known member
Joined
Jan 20, 2015
Messages
3,898
Location
KS
That suprises me about the blades Mike. I have run them on 2 different mowers with great results, I don't use the mulching kit however. The hard surfacing extends the life of the blades significantly for my rough country yard, and they really throw the grass.
 
OP
Z

zmotorsports

ALLIANCE MEMBER
Joined
Oct 20, 2009
Messages
21,476
Location
Northern Utah
That suprises me about the blades Mike. I have run them on 2 different mowers with great results, I don't use the mulching kit however. The hard surfacing extends the life of the blades significantly for my rough country yard, and they really throw the grass.

It surprised me as well Marc. I have heard nothing bad and all good with the research that I had done on various blades and the Gator G5's were spoken very highly of. I was so excited to throw them on Saturday morning and figured my clumping issues would be a thing of the past.

Before everyone jumps on the bandwagon to lecture me about not mowing wet grass, I can confirm that although in years past there were a few times when I mowed in the afternoon on the same day as watering in the early morning hours, that is not the case this year. This year I have altered my schedule so that I don't mow on afternoons where I've watered earlier and I am still mowing every 3-4 days. When I mowed Saturday late morning the grass was completely dry and had not been watered since Wednesday morning so this issue is not wet grass related.

I will say however, that my lawn is so much denser and thicker than it was even two years ago let alone six plus years ago with the front lawn we started with and the back and side yard in which we put in. The OE Toro mulching blades have done an excellent job up until last year when I started experiencing clumping issues on the turns. This year it seemed to get slightly worse so I started looking at other blade options when the Gator G5's kept popping to the top of the list. I even tried mowing another notch higher over the past few months but it really didn't help all that much.

I am at a loss to what is causing my clumping and excessive clippings other than my lawn is just so dense and thick. I hate to go to mowing every other day but that may be the only way to get away from the heavy clippings.
 

mmsheb

Well-known member
Joined
Mar 30, 2008
Messages
365
Location
Wisconsin
Mike - I hear your frustration. I can't imagine questioning anything you do, but is there a right and wrong way to install them and, if so, have you confirmed they are installed incorrectly?
 
OP
Z

zmotorsports

ALLIANCE MEMBER
Joined
Oct 20, 2009
Messages
21,476
Location
Northern Utah
So here are a few pictures of the blade swap. I took a few additional pictures thinking I would be doing a very positive review based on everything else I had read and heard.


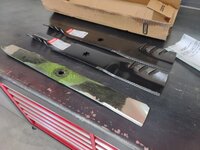
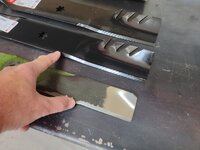
The new Oregon Gator G5 blades compared to the Toro OEM mulching blade.
blade1.jpg

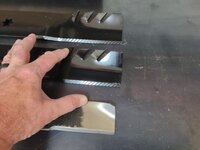
Second noticeable difference is the length of the actual cutting edge. The Gator blade's cutting edge is nearly 2 inches longer than the Toro blade.
blade2.jpg

The first noticeable difference is the rear upward rake which is about three times the length and higher pitch compared to the OE Toro blade. According to my reading, this serrated rear rake is designed into the blade to provide superior lifting of the grass compared to most mulching blades. In theory this is supposed to keep the grass suspended longer and therefore allow the blades to chop the clippings into finer particles which lay down into the grass and dissolve quicker and more thoroughly as well as they are supposed to result in more defined striping of the grass. I can honestly say after blowing the clumps with the leaf blower, that I do think the clippings are in fact finer in comparison with the OE Toro blade and the striping is a bit more defined compared to the OE Toro blades.
blade3.jpg

I double checked the balance of the blades before installation and they were spot on.
blade4.jpg

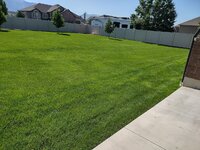
I took a few pictures of the grass before mowing to show the density and thickness of the lawn.
blade5.jpg

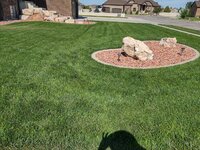
The front lawn may even be a bit thicker and more dense than the back lawn at this point. Although I struggled bringing the front lawn back from the previous owner's poor installation and water coverage, I think I have it dialed in now and the lawn is thriving.
blade6.jpg

Here after one pass with the walk-behind mower and one pass with the ZTR I am only removing about an inch to an inch and a quarter at a time by mowing every 3-4 days which is supposedly ideal. I am keeping the lawn longer than in the past as well at over 3 inches. At our last place I mowed it closer to 2 inches and although I thought it looked good being shorter, I can actually see a difference by keeping it a bit longer now as it seems to appear healthier as well as more dense.
blade7.jpg
 
Last edited:

OutlawDrifter

Well-known member
Joined
Jan 20, 2015
Messages
3,898
Location
KS
I am keeping the lawn longer than in the past as well at over 3 inches. At our last place I mowed it closer to 2 inches and although I thought it looked good being shorter, I can actually see a difference by keeping it a bit longer now as it seems to appear healthier as well as more dense.

Longer grass takes less water to sustain in my experience. I used to mow at 3" and now keep my grass at 4", tolerates the dry conditions much better. Unfortunately we haven't had a measurable rain in almost a month now, my grass is going dormant again at this point and turning brown, normally that doesn't happen until the end of July, and then we get a second run in September when things start to cool back down. Being on rural water, it would cost a small fortune to irrigate the 2.5 acres I mow :eyecrazy:. So I've learned to live with the fact I get about 2.5 months of nice yard.

Your yard looks amazing by the way!


I'm surprised the factory Toro blades don't have a higher kick up in the back. Are they a specific mulching blade vs. a high lift?
 
OP
Z

zmotorsports

ALLIANCE MEMBER
Joined
Oct 20, 2009
Messages
21,476
Location
Northern Utah
Longer grass takes less water to sustain in my experience. I used to mow at 3" and now keep my grass at 4", tolerates the dry conditions much better. Unfortunately we haven't had a measurable rain in almost a month now, my grass is going dormant again at this point and turning brown, normally that doesn't happen until the end of July, and then we get a second run in September when things start to cool back down. Being on rural water, it would cost a small fortune to irrigate the 2.5 acres I mow :eyecrazy:. So I've learned to live with the fact I get about 2.5 months of nice yard.
Your yard looks amazing by the way!


I'm surprised the factory Toro blades don't have a higher kick up in the back. Are they a specific mulching blade vs. a high lift?

Thanks Marc, and I completely agree, the longer grass does help with water requirements. I hated raising the mower decks a few years ago from 2 inches, but I can honestly say now that I don't think my yard would be as healthy as it is if I would have continued with the shorter length cuts. Cutting the grass a little longer really helped the last couple of years with our drought situation and allowing our grass to continue to fill in and be healthy.

The Toro blades came with the factory optioned mulching kit that I bought at the time I purchased the mower. They are nowhere near as high pitched or raked as the Gator however, they did a very nice job from day one. It wasn't until our lawn really thickened up last year that I was becoming a bit disenchanted with them.
 

MadeByMiller

Well-known member
Joined
Dec 29, 2018
Messages
1,230
Location
Rapid City, SD
Mike, that's a bummer about the new blades not performing as you expected. Did you notice any difference in the clipping dispersal in response to speed changes e.g. slowing mow speed resulting in less clumping? I'm no mowing expert, but I recognize that as you say, you're following the rules of thumb and it's surprising to see those results. I wonder if a call to Gator would be worth your time, as clearly the new blades made things worse and they may be able to lend some expertise to your conditions.

Worst case, you could start bagging the clippings...
 
OP
Z

zmotorsports

ALLIANCE MEMBER
Joined
Oct 20, 2009
Messages
21,476
Location
Northern Utah
Mike, that's a bummer about the new blades not performing as you expected. Did you notice any difference in the clipping dispersal in response to speed changes e.g. slowing mow speed resulting in less clumping? I'm no mowing expert, but I recognize that as you say, you're following the rules of thumb and it's surprising to see those results. I wonder if a call to Gator would be worth your time, as clearly the new blades made things worse and they may be able to lend some expertise to your conditions.

Worst case, you could start bagging the clippings...

Austin, I not only varied the RPM but also the deck height and saw little to no change in the clumping. Tonight I am going to try to remove the mulching baffles from beneath the deck and if that doesn't net me the results I want I think I'll go back to the OEM Toro blades.

I'm not a fan of bagging clippings so that's not an option.

Thanks.
 

Bob Heine

ALLIANCE MEMBER
Joined
Oct 24, 2009
Messages
10,709
Location
Boca Raton, Florida
Mike, I think you're on the right track removing the mulching baffles. If you are mowing that often with very thick grass, it might help to let the relatively small clippings fly rather than being turned into a green slurry that is deposited as a stripe.
 
OP
Z

zmotorsports

ALLIANCE MEMBER
Joined
Oct 20, 2009
Messages
21,476
Location
Northern Utah
So last night I did some extensive testing and proving, if you want to call it that.

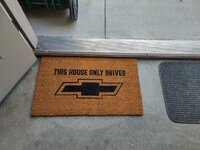
First off when I arrived home was to put out the new welcome mat my wife bought me. We couldn't decide where to put it so it now resides at the back door of the house garage.
mat.jpg

I then proceeded to fix my front caster wheel on the Toro ZTR mower. I stopped yesterday and picked up a package of valve stems.

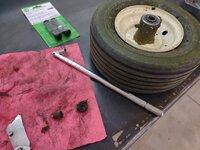
The broken valve stem removed.
mower1.jpg

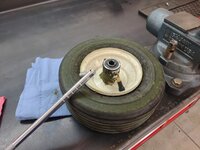
New valve stem installed and a quick wipe of the bead of the wheel.
mower2.jpg

Evidently, I didn't wipe the wheel bead well enough. Upon airing up it leaked like crazy on the backside. 🤬 Time to deflate and clean the bead of the tire and the sealing surface of the wheel a little better.
mower3.jpg

After getting the tire to seal and not leak at the bead I reinstalled it, put a couple of pumps of grease in each of the casters and checked the balance of the OEM Toro blades before reinstalling them.
mower4.jpg

The were both still perfectly balanced even after 20+ mows this spring so far.
mower5.jpg

The Gator G5 blades removed for the first test and the OEM Toro mulching blades reinstalled.
mower6.jpg

Now to move on to the actual testing process.
 
OP
Z

zmotorsports

ALLIANCE MEMBER
Joined
Oct 20, 2009
Messages
21,476
Location
Northern Utah
For the initial part of the test I went back to the OEM Toro mulching blades with the mulching kit/baffles still in place. I figured this would be the easiest place to start as it not only will go back to a baseline but also it was simply a matter of swapping the blades.

Now to be fair to the test I must preface by stating that last night's mow was not the same as Saturday morning's mow in the fact that on Saturday the length being cut off the grass was just over an inch and last night I was removing just under an inch as it was just shy of 3-days growth. The lawn was dry as it had not been watered since Sunday morning around 2am.

The results using the OEM Toro blades was excellent. Absolutely no clumping at the turns and especially no clumping down the rows like I was getting on Saturday with the Gator blades. I remained cutting at 3" height to keep the test consistent with Saturday's, although I did make some adjustments to heights, engine RPM and travel speed throughout the mow on Saturday. I went around the perimeter and mowed about 3/4 of the lawn with the Toro blades.

As you can see the results were excellent with no remnants remaining anywhere to be seen.
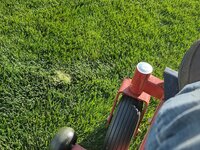
lawn1.jpg

Same here, nothing detected and this is the thickest part of the back yard.
lawn2.jpg

This is probably the thickest part of the front yard and where I generally get some clumping along the sidewalk and driveway.
lawn3.jpg

I then pulled the mower back into the shop, raised the front end up and swapped the Oregon Gator G5 blades back onto the mower. I thought about removing the baffles at this point but to add value to my testing I thought I'd made several passes with the baffles first. This was the result, not as much clumping as Saturday by any means as the length of the grass was a little less but I still immediately got small clumps on the turns. I noted that I was not getting any down the long runs however.
lawn4.jpg

A bit of clumping on the turns in the back yard as well. Even with the shorter grass I continued to get clumping with the Gator blades and baffles installed.
lawn5.jpg


To continue the testing and add as much value as I could, even though a bit more work, I once again brought the mower into the shop, raised the front end and removed the steel baffles from under the fabricated deck of the Toro Timecutter SS4250 mower.

Upon returning to the finish the job and the last half a dozen passes in both the front and back yards I remained getting clumping upon each turn. Nothing on the long runs but on every turn I was getting much smaller clumps than Saturday, but clumping none the less.

lawn6.jpg

More small clumps with the Gator G5 blades and no baffles. Granted, I was still running the side discharge block-off as I wanted the tests to be relevant, plus I don't like blowing the grass out the side anyways.
lawn7.jpg

After blowing the mower off I grabbed my leaf blower and commenced "fluffing" my grass and blowing the clippings off the drive and sidewalk. I actually had very little "fluffing" last night as the piles were isolated to just the area I used the Gator blades on and the piles were much, much smaller than on Saturday.

Finished front yard.
lawn8.jpg

The side yard only was mowed with the OEM Toro blades as it was small enough that I didn't think it would add much value to breaking up for the test. However, it is still a fine looking section of grass. I wish that tree would do as well as the ones in the back yard however.
lawn9.jpg

Back yard after completion.
lawn10.jpg


Now on to my results.

I learned three things during this test.

First, the Gator G5 blades are not working with the combination of my lawn and mower. That is now definitive and turned out to be an expensive lesson. The OEM Toro mulching blades seem to work with the optioned mulching kit installed.

Second, I saw absolutely no difference using the Gator G5 blades with the mulching baffles installed vs. removed. This one actually surprised me because while doing a lot of reading on lawn care forums and yard tractor forums over the past several days there were very strong opinions on the matter of mulching baffles being used with the Gator G5 blades. I think I can put that to bed, at least when using a Toro ZTR and the side discharge blocked.

Third, lastly and maybe the most important factor is the grass length. In the spring of this year I thought I had it figured with ensuring the grass wasn't wet during the mow but that didn't seem to make quite the difference as actual grass length. I found that the length to be cutting off should be at an inch or less to achieve clumpless mowing. Anything over that inch mark will result in clumps at least at the turns using the OEM Toro mulching blades but an inch or just under is the sweet spot for my lawn and mower combination.

That wasn't exactly what I wanted to discover as now it means if I want the yard to look its best and actually be less work in the long run, I need to throw another mowing cycle per week in there somewhere.

So that concludes my test and review of the Gator G5 blades which resulted in a big fail. After dinner last night I returned to the shop and reinstalled the baffles under the deck of the mower in preparations for the next mow.

If you've stayed with me, thanks for letting me ramble and work through my dilemma.
 

OutlawDrifter

Well-known member
Joined
Jan 20, 2015
Messages
3,898
Location
KS
I know it doesn't fit your mowing program Mike, but I wonder what it would have looked like with the side discharge blockoff removed.

My JD X724 with the 62" deck (3 blade) will throw the grass clippings 6+ feet with the side discharge chute raised and the G5's. I wonder if its a case of not enough material or too much when turning at the ends that makes it drop the clumps?
 
To avoid these ads, REGISTER NOW!
Top Bottom