To avoid these ads, REGISTER NOW!

ZMotorsports Shop Projects 2.0

Johnno

Well-known member
Joined
Jul 17, 2017
Messages
90
Location
East Granby, Ct
Mike the stand is looking great. Cant wait to watch it all come together.
I have had the same problem with my FM receiver now for years. I was getting ready to move it all to the other side of my shop and hope it works better. Any chance you can show us a pic of the new antenna?
 
To avoid these ads, REGISTER NOW!
OP
Z

zmotorsports

ALLIANCE MEMBER
Joined
Oct 20, 2009
Messages
21,627
Location
Northern Utah
Mike the stand is looking great. Cant wait to watch it all come together.
I have had the same problem with my FM receiver now for years. I was getting ready to move it all to the other side of my shop and hope it works better. Any chance you can show us a pic of the new antenna?

Thank you.

The antenna is nothing more than a plastic encapsulated wire type of bipole antenna. I figured for the price I'd give it a try and it worked perfectly. Like you, I had moved my stereo around a little thinking it would help and it would but short term. Then I'd play with the wiring and that would help, short term. I think most all of that was somewhat of a placebo effect because it would sound better for a night or two.

I even went to the extent of taking the cover off the receiver and double checking all of my grounds the other night as well as the ground to the receptacle thinking maybe I lost a ground to that. Nope. Everything checked out fine, it's just the make-shift antenna was the culprit.

After installing the cheap (inexpensive) bipole antenna I discovered the reception has never been so crisp and clear.

Here is the antenna that my wife purchased for me from Amazon.

I located it alongside one of my air drops down to the back of the receiver on the shelf and the antenna itself is above the window on the east side of my shop.
 

JCQuick

Well-known member
Joined
Nov 29, 2008
Messages
4,933
Location
Apopka Fla.
So, I have to back up and punt a bit from a previous personal project.

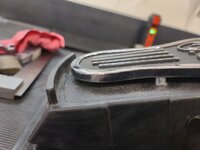
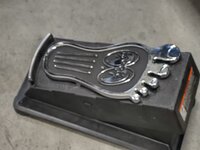
I walked out into the shop Saturday morning with coffee in hand with plans to knock out the welds on the leg's threaded plates and move on to welding the legs to the stand's top. However, I got everything ready on the TIG welder and realized that when I modified my foot pedal a few weeks ago with the Mooneyes gas pedal I did something that I regretted. Not wanting to remove it, because I think it's kinda cool, I went about remedying the issue.


I hadn't used the TIG welder since making the custom modification to my TIG pedal so I didn't realize the issue I had created until I sat down to strike an arc, then the issue was realized instantly. I don't know about others, but I rely on that lip at the end of my TIG pedal greatly to move the pedal around where needed. I use the heel of my shoe to drag the pedal where I need it and it happens almost unconsciously and is like second nature. Well, when I installed the Mooneyes gas pedal it now sits at the same height at that raised lip at the heel of the pedal and now my foot just slips over the lip. That is NOT going to work for me. 🤬
tig11.jpg

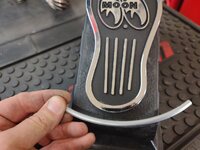
Not handling defeat well, I grabbed the TIG pedal and gave it some thought. I then measured the lip's thickness which was approx. .250" thick. I figured I would fabricate a small riser for that lip to raise it slightly above the added gas pedal. I also grabbed some scrap 14-gauge sheet steel from the metal drop drawer and marked out .500" depth in which to cut.
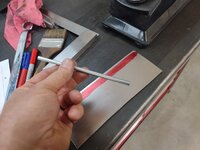
tig12.jpg

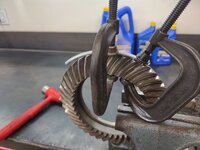
Without wanting to spend a ****-ton of time on this modification I quickly looked around to see what I had within easy reach that was roughly the same radius as the TIG pedal's heel lip. I remembered I still had an old Dana 44 ring gear and it was almost exact. I clamped the O1 drill rod to it and began to form the radius.
tig13.jpg

Matches almost perfect.
tig14.jpg

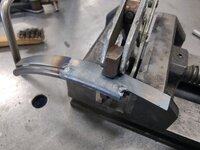
I then welded the two strips of 14-gauge sheet metal to the rod leaving it slightly long on either end.
tig15.jpg

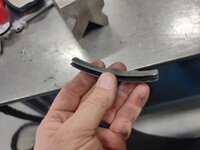
Once welded, I metal finished the piece and cut to length.
tig16.jpg

Ready for installation.
tig17.jpg

The part was just snug enough that it didn't go on easy nor will fall off easily. I applied a bit of glue to the underside and tapped it into place.
tig18.jpg

I also removed the Mooneyes gas pedal and trimmed the threaded bosses down just a bit moving the gas pedal closer to the TIG pedal's surface and also creating a bit taller heel lip.
tig19.jpg

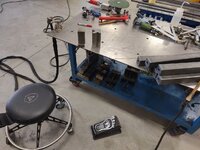
I then proceeded to test it out and it works perfectly. Now I can get back to doing what I started out first thing in the morning. Side job #1 for the day completed.
tig20.jpg


Once being happy with how the TIG pedal turned out and actually fixed my design flaw from the modification, I knocked out the threaded bases for the lathe stand's legs in no time and while they cooled, I could turn my attention to side job #2 for the morning.

For the past 7+ years now I have tolerated my shop's stereo receiver being meh on FM. It has sounded static"y" almost constantly on several of the channels I like to listen to. About two years ago the Optimus receiver that I had at the last shop crapped out and at first thought I contemplated going with something more "modern" and getting with the times.

However, I just loved that old school receiver and me being old school myself I stuck with the same thing and found an exact replacement about the same era as the one I had originally. At first, I thought that this may address my static problem and maybe it was the receiver all along. But nope. The new to me receiver was plagued with the same static issues. I used some speaker wire and mechanics wire to act as a make-shift antenna and it did help quite a lot. Although, I found myself working and as the day or evening went on the static would slowly return and I'd find myself walking to the shop's radio, reaching behind and "tweaking" the wires and it would improve slightly, for a bit. This has been the daily routine for the past 7+ years now and my son just accepted it as normal SOP's for the shop when we'd have the tunes playing.

Well, the past few weeks it has gotten much, much worse and I finally did some research and found a rather inexpensive bipole antenna on Amazon and decided to give it a try. It arrived Friday night and the wife brought it out to me as I was finishing up mowing the lawns. Saturday morning while the legs were cooling after welding I decided to quickly install the antenna and it sounds freakin' amazing.

I cannot believe I tolerated that static for as long as I did. It had become just a standard practice to walk to the radio and move the wires until the static went away and go back to work. I didn't realize just how bad that bothered me until I worked for the entire day Saturday with crystal clear and static free tunes in the shop. It gave the whole shop a completely different "feel" if you can understand.

So once the tunes were fixed, I cranked the stereo up and just enjoyed the day. Work even seemed to flow better as I cut and welded along and didn't really get distracted by anything. Funny how something so simple can get under one's skin so badly and not even be realized until it is remedied.
What no pictures of said antenna . i did read far enough before do that sorry i have a few of those antennas never worked well for me plus i hated the look
 
Last edited:
OP
Z

zmotorsports

ALLIANCE MEMBER
Joined
Oct 20, 2009
Messages
21,627
Location
Northern Utah
What no pictures of said antenna . i did read far enough before do that sorry i have a few of those antennas never worked well for me plus i hated the look

Sorry, didn't take a picture of the antenna hung on the wall above the window.

I had mixed emotions on it due to it being so inexpensive, but I thought I'd give it a try. So far this style of bipole antenna is working great for my application. Even my son commented on how great the stereo sounded when he stopped by a couple nights ago.
 
OP
Z

zmotorsports

ALLIANCE MEMBER
Joined
Oct 20, 2009
Messages
21,627
Location
Northern Utah
Made a lot of progress on the lathe stand last night.

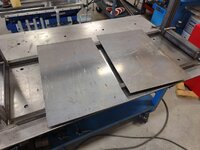
For the shelves, I dug through my materials and found some left over .125" P&O plate from a bumper project. This will work great for the shelves on the left side and won't need much structural support underneath.
stand51.jpg

The two shelves cut and deburred. Ready to make the notches for the corners and weld in place.
stand52.jpg

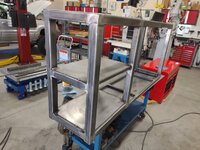
Lower shelf notched and resting in place.
stand53.jpg

Both shelves welded in place.
stand54.jpg

The stand has been wiped down with wax & grease remover, then sanded with a DA and wiped down again.
stand55.jpg

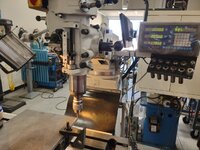
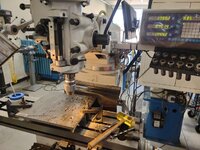
I then moved over to the .500" thick mounting plates to begin drilling them. Edge finder used to locate 0/0.
stand56.jpg

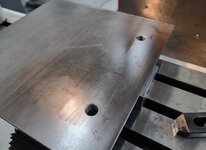
Holes drilled and chamfered in the tailstock mounting plate.
stand57.jpg

Tailstock mounting plate completed.
stand58.jpg

Then the same process was performed on the headstock mounting plate.
stand59.jpg

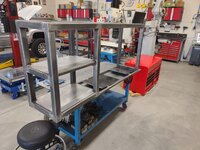
After a thorough cleaning of the shop, this is where I left off for the evening.
stand60.jpg


At this point the stand is ready for paint. The next steps will involve breaking down the existing lathe stand and moving equipment around to make the swap.


Thanks for looking.
 
OP
Z

zmotorsports

ALLIANCE MEMBER
Joined
Oct 20, 2009
Messages
21,627
Location
Northern Utah
Very nice work on the lathe stand.
You really do pro level fab work!

Thank you. That means a lot because I always feel as though I am lagging in my fabrication skills for some reason. I see stuff people are doing online and I am in awe of the skill level at much of it and keep trying to up my game, but often times I feel that I fall short.
 

ntsqd

Well-known member
Joined
Jan 22, 2005
Messages
1,035
Location
Lower left coast
We're all playing that game, you're not alone. I try to learn from anyone doing things that I never even thought of. That "cross pollination" lifts up all of us.

Seeing the plate set-up on the mill I'm reminded of a trick that I learned at the vintage racecar shop. Set up the larger 2 pairs of strap clamps on their side on the surface grinder's magnetic chuck (kiss them first with a file to knock off any burrs at the serrated end) and just take a clean-up pass over them. Then flip them over and do it again. Now they are all the the same height and can be used as blocks with larger plates to stand them off the mill table. We had two complete strap clamp sets that were all done at the same time. We didn't shoot for them to be any particular dimension, just that they were all the same.

A surface grinder isn't a common power tool in a home shop, but they can usually be had for a reasonable amount used. Once you have one your use of it will grow exponentially as you figure out how to best use it. It is one of those tools that you won't use a lot, but when you do use it the results will be far better than any other option. Those ops that you did in the mill trying to make things exactly even or some exact dimension become much simpler with a surface grinder. Add in a Spindex and now you can grind things round to pretty exact dimensions.

An example would be when I had to machine some Mark Williams billet steel differential bearing caps for an 8.8 that badly stretched it's caps. MW doesn't leave any flat surface to index off of to machine the ends of the caps. They're expecting people to use a con-rod bearing cap grinder to hit the required dimension. I made two circular stand-offs on the lathe. These fit into the SHCS counter-bore and indexed on those flats. I got them as close to the same length as I could, but them I set them up on the surface grinder and made them exactly the same length. I didn't mind all of the work that went into making those two stand-offs because I later got to use them again to do the same thing to some MW Dana 60 bearing caps.
 
OP
Z

zmotorsports

ALLIANCE MEMBER
Joined
Oct 20, 2009
Messages
21,627
Location
Northern Utah
We're all playing that game, you're not alone. I try to learn from anyone doing things that I never even thought of. That "cross pollination" lifts up all of us.

Seeing the plate set-up on the mill I'm reminded of a trick that I learned at the vintage racecar shop. Set up the larger 2 pairs of strap clamps on their side on the surface grinder's magnetic chuck (kiss them first with a file to knock off any burrs at the serrated end) and just take a clean-up pass over them. Then flip them over and do it again. Now they are all the the same height and can be used as blocks with larger plates to stand them off the mill table. We had two complete strap clamp sets that were all done at the same time. We didn't shoot for them to be any particular dimension, just that they were all the same.

A surface grinder isn't a common power tool in a home shop, but they can usually be had for a reasonable amount used. Once you have one your use of it will grow exponentially as you figure out how to best use it. It is one of those tools that you won't use a lot, but when you do use it the results will be far better than any other option. Those ops that you did in the mill trying to make things exactly even or some exact dimension become much simpler with a surface grinder. Add in a Spindex and now you can grind things round to pretty exact dimensions.

An example would be when I had to machine some Mark Williams billet steel differential bearing caps for an 8.8 that badly stretched it's caps. MW doesn't leave any flat surface to index off of to machine the ends of the caps. They're expecting people to use a con-rod bearing cap grinder to hit the required dimension. I made two circular stand-offs on the lathe. These fit into the SHCS counter-bore and indexed on those flats. I got them as close to the same length as I could, but them I set them up on the surface grinder and made them exactly the same length. I didn't mind all of the work that went into making those two stand-offs because I later got to use them again to do the same thing to some MW Dana 60 bearing caps.


I've been keeping an eye open for a nice smaller 6x12 or 12x18 surface grinder locally but haven't seen one that isn't all clapped out. It's not something I'm exerting much energy to find right now, but I've been "somewhat" looking for a little bit. My main hesitation is that I just don't care for the mess they make. Other than that, I'd love to have one in my shop.

Unfortunately, I have a lot of tools that don't get used a lot, but when they're needed nothing else fits the bill quite right. I'm sure that isn't a common theme either.
 

ntsqd

Well-known member
Joined
Jan 22, 2005
Messages
1,035
Location
Lower left coast
I put mine out in the Tuff Shed where all of the other grinding, sawing, and blasting tools are, just for that reason. Unlike a bench or pedestal grinder I don't find that it makes a huge mess, but it is a grinder......
 
OP
Z

zmotorsports

ALLIANCE MEMBER
Joined
Oct 20, 2009
Messages
21,627
Location
Northern Utah
When it comes to improving our skillsets and talents, I had a thought the other day after a brief conversation that I had with someone who reached out to me on social media. Then Anders @Scuderia-F1 and I had some exchanges back and forth about a similar topic.


Here are my thoughts; having a network of people that do exceptionally high-quality work gives many of us a target to aspire to and therefore makes us all strive for that next level of workmanship. No one knows everything, so the fact that we can continue to learn from other like-minded people in our trades helps us unilaterally to improve our skillsets.

I can't speak for others, but I have no formal schooling or training in my trade. I have learned most everything the hard way, by trial and error. Unfortunately, most of it by error. ;)

I had a gentleman reach out to me a few days ago about my welding. While he was very complimentary, to me it was hard to hear because like I mentioned, I have no formal schooling or training. When I see what people are doing as far as their welds on social media, there are times I feel so inadequate and like I will never get to "that" level. Then I have to remind myself that we are all on this journey, and it is a "journey". It is not about the destination as long as we focus and apply ourselves to the continual learning and continuous improvement mindset. I explained that I am far from the best welder, but I am not afraid to try different things and over the many years of doing this, I have formed some conclusions of what works and what hasn't.

I think the same goes with most other aspects of my skills, I've kept those habits and/or tips that have worked and discarded the rest and just chalked them up to an expensive lesson learned. :bounce: I am certain there are others here that may feel the same way.

If we were to look back of where each of us began this journey and what our skills consisted of then and were honest with ourselves, I think we would see vast improvements as we've traveled our paths to where we are now.

I hope that connects with you guys and comes across the way I want it to. I am certain I learn as much if not more from the creative and talented members here than I think you guys learn from me. I think the moment we feel we've "arrived" or think we know everything is when we quit learning and that is something I hope never happens to me. Granted there are things that I've done that I have strong feelings about and lessons I've learned that I am stubborn to let go, but there is so much more I still want to learn and so much further I want to take my skillset.
 

zanyad

ALLIANCE MEMBER
Joined
Apr 26, 2018
Messages
2,956
Location
NE Ohio
When I see what people are doing as far as their welds on social media, there are times I feel so inadequate and like I will never get to "that" level. Then I have to remind myself that we are all on this journey, and it is a "journey".
Don't forget that social media always presents a curated view of a person's life and work. The poster may not show the boogers on the other side of the piece, or the twenty pieces it took to get it right.
If we were to look back of where each of us began this journey and what our skills consisted of then and were honest with ourselves, I think we would see vast improvements as we've traveled our paths to where we are now.
That's also a very good thing to keep in mind. I see that with my children too: things that seem obvious to me as an adult are most definitely not obvious to a child. Our skills are the same way, and it's a good reminder to keep that perspective.

Also, I think your focus on continual improvement, while admirable, can also lead you to underestimate your skill at a task: you tend to see the 1 tiny warts and not the unblemished acre.
 

ntsqd

Well-known member
Joined
Jan 22, 2005
Messages
1,035
Location
Lower left coast
I'm hearing what you're saying.

I have a good friend who is nearly the same. He is minimally trained in his profession and he is good at it because he continues to learn and work to be better at it. He is also the guy who can break an anvil in a sandbox using a rubber mallet. I learn a lot from him, and only rarely is it how not to do something.

I've another friend who just retired from his 4x4 vehicles services business, partly to concentrate on some of the paying racing ventures that have come his way. You long time NORRA or MDR racers, if you ever saw the late 60's blue 4x4 Suburban competing in the early days, he was crucial to it's initial build & development. I learn a lot from him too.

Both of these guys could easily be degreed Mechanical Engineers, but neither really wants to. They're happy doing what they do and learning how to do it better.

Zanyad reminds me of a saying that I've oft repeated, probably even here. No idea who said it first.
"The difference between an amateur and a professional is that while both know where the mistakes are, only the amateur points them out."
In a way, this is sort of an indictment of both amateurs and professionals. Why not fix those mistakes?
 
OP
Z

zmotorsports

ALLIANCE MEMBER
Joined
Oct 20, 2009
Messages
21,627
Location
Northern Utah
Don't forget that social media always presents a curated view of a person's life and work. The poster may not show the boogers on the other side of the piece, or the twenty pieces it took to get it right.

That's also a very good thing to keep in mind. I see that with my children too: things that seem obvious to me as an adult are most definitely not obvious to a child. Our skills are the same way, and it's a good reminder to keep that perspective.

Also, I think your focus on continual improvement, while admirable, can also lead you to underestimate your skill at a task: you tend to see the 1 tiny warts and not the unblemished acre.

I agree that those welders or fabricators on social media usually only show their best welds, not the dozen or so practice ones to get to that point or the ones that got scrapped. Personally, I use their money shots to drive my improvement plan.

I can relate to the focus being on the wart and not the unblemished acre. I think that's me in a nutshell, I don't focus as much on the good results as I do the areas that I feel need improvement. Not sure if that's a good thing or bad, just that I feel I seem to do that much more than sit back and say, "that turned out freakin' awesome." It's more like looking past all of the good-looking welds and focusing on the one that looks like ****..

Zanyad reminds me of a saying that I've oft repeated, probably even here. No idea who said it first.
"The difference between an amateur and a professional is that while both know where the mistakes are, only the amateur points them out."
In a way, this is sort of an indictment of both amateurs and professionals. Why not fix those mistakes?

Not sure where I fall then, I know where the flaws are at and work to correct them or improve upon them, but I don't go pointing them out. I have many on here that do that for me..... :dunno:

I do think that there is a fine line between confidence and arrogance, and I don't want to slip over that line to the arrogance side. While I am confident in many things I do, I know I'm not perfect and don't ever want to come across as arrogant. I feel that is when the learning stops.
 

MXmaniac

Active member
Joined
Aug 14, 2008
Messages
35
Location
Independence, OR
When it comes to improving our skillsets and talents, I had a thought the other day after a brief conversation that I had with someone who reached out to me on social media. Then Anders @Scuderia-F1 and I had some exchanges back and forth about a similar topic.


Here are my thoughts; having a network of people that do exceptionally high-quality work gives many of us a target to aspire to and therefore makes us all strive for that next level of workmanship. No one knows everything, so the fact that we can continue to learn from other like-minded people in our trades helps us unilaterally to improve our skillsets.

I can't speak for others, but I have no formal schooling or training in my trade. I have learned most everything the hard way, by trial and error. Unfortunately, most of it by error. ;)

I had a gentleman reach out to me a few days ago about my welding. While he was very complimentary, to me it was hard to hear because like I mentioned, I have no formal schooling or training. When I see what people are doing as far as their welds on social media, there are times I feel so inadequate and like I will never get to "that" level. Then I have to remind myself that we are all on this journey, and it is a "journey". It is not about the destination as long as we focus and apply ourselves to the continual learning and continuous improvement mindset. I explained that I am far from the best welder, but I am not afraid to try different things and over the many years of doing this, I have formed some conclusions of what works and what hasn't.

I think the same goes with most other aspects of my skills, I've kept those habits and/or tips that have worked and discarded the rest and just chalked them up to an expensive lesson learned. :bounce: I am certain there are others here that may feel the same way.
If we were to look back of where each of us began this journey and what our skills consisted of then and were honest with ourselves, I think we would see vast improvements as we've traveled our paths to where we are now.

I hope that connects with you guys and comes across the way I want it to. I am certain I learn as much if not more from the creative and talented members here than I think you guys learn from me. I think the moment we feel we've "arrived" or think we know everything is when we quit learning and that is something I hope never happens to me. Granted there are things that I've done that I have strong feelings about and lessons I've learned that I am stubborn to let go, but there is so much more I still want to learn and so much further I want to take my skillset.

This is so well said. I’m closer to your son’s age and am at a different point in my journey as a practitioner of the mechanical arts, and I really admire your approach.

There’s a small circle of influencers that I really look up to in this realm. Guys like you, Tom Lipton, and Robin Renzetti come to mind. To me, the common themes are humility and a relentless quest to learn new skills (even while already operating at such a high level). You guys show that it’s a lifetime of reading, thinking, and doing that leads to such positive outcomes in your projects.

“Perfection is not attainable, but if we chase perfection, we can catch excellence.” -Vince Lombardi
 

Scuderia-F1

Well-known member
Joined
Feb 9, 2011
Messages
1,198
Location
Stockholm, Sweden
Thank you. That means a lot because I always feel as though I am lagging in my fabrication skills for some reason. I see stuff people are doing online and I am in awe of the skill level at much of it and keep trying to up my game, but often times I feel that I fall short.
Rest assured Mike, that your fab skills are on point. Lathe stand coming out nicely. 👌🏼
 
OP
Z

zmotorsports

ALLIANCE MEMBER
Joined
Oct 20, 2009
Messages
21,627
Location
Northern Utah
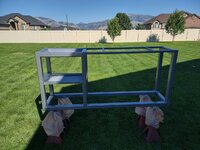
My son came over last night, so I had him help me carry the lathe stand outside and put it up on jack stands.


After being primed.
stand61.jpg

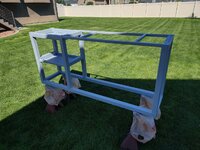
Then the color went on. I used the same Rustoleum Hammered Grey paint that I used on the other workbenches in my shop.
stand62.jpg

And before closing up shop for the night, we carried it back inside.
stand63.jpg


Thanks for looking.
 
To avoid these ads, REGISTER NOW!
OP
Z

zmotorsports

ALLIANCE MEMBER
Joined
Oct 20, 2009
Messages
21,627
Location
Northern Utah
You might think Mike is showing you his new lathe stand, but secretly he wants you to see his lawn in the background. ;)

Looks great Mike! (the stand and the lawn)


I didn't plan it that way, but it's nice when things work out Vincent. :ROFLMAO:

However, I'm a bit stressed out about my lawn right now. I have discovered that the weed that I have been trying to eradicate for the past year or so in a couple of sections is actually Bermuda grass. 🤬

I have spent hours researching and talking to a couple local landscaping and lawn care people over the past few weeks and it sounds like any of the commercially available products advertised to kill Bermuda grass, merely slow it at best. One guy told me he had spent a couple thousand dollars testing several products and none of them got rid of it completely, merely slowed it and some really didn't do anything. Sounds like the only success that I heard about was using an herbicide containing Glyphosate in late fall/early winter when temps drop below about 75-degrees. Then wait until things start coming out of hibernation in the spring to make absolutely certain I killed it. Then once determined that the Bermuda grass has been killed, I can cut out and replace those areas.

To say I am not happy about all of the effort I have put into my yard only to have to kill a section is a HUGE understatement. At this point, being our forever home, I don't want to let it spread any further and would rather kill it and deal with it now vs. waiting until I have more to deal with. Fortunately, it is only in a couple of areas in the backyard so I should be able to just hit those areas and kill it.

When we had our family reunion a couple weekends ago, both my wife and I had received multiple comments about our property, specifically the lawn and how thick and green it was. I didn't want to point out the areas that I was not happy with but I also kept people away from them. :oops:

I heard later that my brother-in-law was asking my wife how I get my lawn looking so nice and she mentioned that I "fluff" it after every mow. When he asked what "fluffing" was, evidently my son went into a lengthy diatribe about my mowing habits and how I fluff the lawn afterwards. I heard that there was a joke made that I would be out "fluffing" the lawn in the dark for hours after everyone left that night. :dunno: I didn't realize my lawn care process was so funny, but I guess to some it is. :headscrat Oh well, the proof I guess is in the pudding, or one might say I find the juice is worth the squeeze. ;)


I about gasped when I didn't see a tarp covering the beloved grass! :D The lathe stand looks great... as well as the rest of the shop!


Thanks Duker. I figured the small amount of overspray on the lawn would just get the tips and be mowed on tomorrow anyways, so no need to tarp it and stress the grass under the tarp. ;)

Thanks for the comments and for following along.
 

SilverJimmy

Well-known member
Joined
Apr 14, 2012
Messages
1,775
Location
Prescott/Flagstaff, AZ
Stand looks very good, I’m just having a hard time understanding how the 1/2” plates attach the lathe to the stand. I’m sure once installed the beauty in the simple design will be obvious, just can’t see it yet myself! I also installed a lift onto my lathe but mine is very crude….
 
OP
Z

zmotorsports

ALLIANCE MEMBER
Joined
Oct 20, 2009
Messages
21,627
Location
Northern Utah
Stand looks very good, I’m just having a hard time understanding how the 1/2” plates attach the lathe to the stand. I’m sure once installed the beauty in the simple design will be obvious, just can’t see it yet myself! I also installed a lift onto my lathe but mine is very crude….

Sterling, the mounting plates will be welded to the top rectangular frame. I haven't welded them in yet because I want to make absolutely certain that the bolt pattern is drilled correctly and also that I space them the correct distance apart, head to tail. I took pretty decent measurements, but I want to test fit before final welding. For that I will test fit them to the lathe and then tack them in place, lift the lathe back off and final weld them.

When I painted the stand I painted it upside down with the intent of not getting paint on the top of the framework where the lathe will bolt. That way the lathe's chip tray will sit solid on top of bare metal and the lathe will sit on top of the chip tray. I don't want paint between the surfaces as that can wear and eventually cause clearance between the lathe and the stand.
 

SilverJimmy

Well-known member
Joined
Apr 14, 2012
Messages
1,775
Location
Prescott/Flagstaff, AZ
What will you put on that bare metal for a preservative to keep rust from forming during the high humidity of our western monsoon weather? An amazing thing I learned while working as a steam plant mechanic was the sealer we used on the turbine. The turbine at Navajo Generating Station was a GE Super Critical Turbine, meaning that it operated at 1000 PSI and 1000 degrees! (If my memory is correct, that was over 35 years ago!) The only thing sealing the cast steel turbine shell was a brushed on coating of Boiled Linseed Oil. The GE engineers told us the the BOL allowed the steel shell to move as needed while the halves were being bolted together and also kept them from developing any surface rust. And when I say bolted, picture 3-1/2- x 4’ studs everywhere you could fit them! Those studs had 10 threads per inch and they all had to be stretched the the exact length the engineer specified!
I’m sure you have a plan for this, just thought you’d find this interesting!
 
OP
Z

zmotorsports

ALLIANCE MEMBER
Joined
Oct 20, 2009
Messages
21,627
Location
Northern Utah
What will you put on that bare metal for a preservative to keep rust from forming during the high humidity of our western monsoon weather? An amazing thing I learned while working as a steam plant mechanic was the sealer we used on the turbine. The turbine at Navajo Generating Station was a GE Super Critical Turbine, meaning that it operated at 1000 PSI and 1000 degrees! (If my memory is correct, that was over 35 years ago!) The only thing sealing the cast steel turbine shell was a brushed on coating of Boiled Linseed Oil. The GE engineers told us the the BOL allowed the steel shell to move as needed while the halves were being bolted together and also kept them from developing any surface rust. And when I say bolted, picture 3-1/2- x 4’ studs everywhere you could fit them! Those studs had 10 threads per inch and they all had to be stretched the the exact length the engineer specified!
I’m sure you have a plan for this, just thought you’d find this interesting!

That's interesting. I don't think I would have thought of boiled linseed oil for that.

I wasn't planning anything that deep, just a quick swipe with WD-40. Seems to work on other stuff and doesn't leave an obstructive film behind to interfere with a solid connection between the components. We've used it for similar applications at work with great results such as between electric motors and mounting bases, etc.
 

RickP

Well-known member
Joined
Jan 15, 2013
Messages
1,559
Location
Annapolis, MD
Sounds like the only success that I heard about was using an herbicide containing Glyphosate in late fall/early winter when temps drop below about 75-degrees.
Oh man, I feel your pain dealing with Bermuda grass -- that stuff grows naturally in the soil everywhere around my house.

A former lawn care guy (who I trust) gave me his quick-n-dirty way of eradicating it: mark the area where it's actively growing, kill all the grass in that area with Roundup (glyphosate), and spread grass seed 3 days later. When the old grass roots die, the new grass will start growing and you'll have your lawn back by spring. Good luck with it...
 
OP
Z

zmotorsports

ALLIANCE MEMBER
Joined
Oct 20, 2009
Messages
21,627
Location
Northern Utah
I certainly don't envy having to move a lathe. I'd be interested to see how you do it.

It's not too terrible to move Keith as I have moved it twice now already in the past ten years. Once from the old shop to the new house garage and then from the attached garage to the new shop once it was completed. I sling it around the bed and use the engine hoist.


Oh man, I feel your pain dealing with Bermuda grass -- that stuff grows naturally in the soil everywhere around my house.

A former lawn care guy (who I trust) gave me his quick-n-dirty way of eradicating it: mark the area where it's actively growing, kill all the grass in that area with Roundup (glyphosate), and spread grass seed 3 days later. When the old grass roots die, the new grass will start growing and you'll have your lawn back by spring. Good luck with it...

Thanks Rick. That is similar to what I have been told. Mark the areas, kill it using whatever flavor of weed killer you like, as long as it has glyphosate, and then wait until dead and start over.

That being said, a couple of people told me something that I didn't know, or at least probably would have had I read the instructions more thoroughly, and that is to wait until the ambient temperatures are below about 75-80 degrees before killing as that is when the glyphosate works best. That is why they recommended waiting until fall but before the grass goes dormant.

They then suggested that if I really wanted to ensure it was dead, to wait until spring when things start greening up to make sure it doesn't turn green. It sounds like the Bermuda grass will come out of hibernation and start greening up before the regular grass does. If it does green again, they said to hit it again as it's trying to come out of hibernation. They said more than likely a fall kill will be enough but if I really wanted to make sure then I should wait. Once the regular grass in the areas I didn't kill starts to green and nothing going on with the area that was killed, then I can cut it out and start over. That will more than likely be the path I take.

I do have one more family bar-b-que here in a few weeks so I think I will wait until that is over then kill those spots and pray I get it all. Best case scenario I figure, I will be able to cut the old out and put fresh sod down by sometime in the April to early May timeframe and have my yard back to pristine again by first part of July, if all goes as planned.
 
OP
Z

zmotorsports

ALLIANCE MEMBER
Joined
Oct 20, 2009
Messages
21,627
Location
Northern Utah
Last weekend while welding my lathe stand together I ran out of MIG wire and had to switch to my backup roll. I have been using Pinnacle wire for at least 20 or so years now with excellent results and my local welding supply store carries it in stock. On several of the off-road racing forums that I used to participate in, the wire most of the high-end builders liked was the Lincoln L-56 MIG wire. Some of the guys that I admired their work swore by it, but I hadn't been able to justify the approx. 240% markup from what I pay for the Pinnacle, and I have not been displeased with the results from the Pinnacle which made it even harder to justify.

When I went to replace the spare spool of wire earlier this week I thought maybe I would check pricing again and if they had equalized maybe I'd give the Lincoln L-56 a try. Nope, a 33-pound spool of -6 in .030" of Pinnacle was $75.24 from my local supplier and the Lincoln L-56 in the same .030" ER70S-6 in a 33-pound spool was $191.04. I did find it a little less expensive online from a couple of welding suppliers at around $173-$179, but then by the time you add in the freight it was back up to where my local store quoted me.

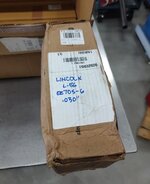
I was going to stop and grab a spool of Pinnacle on my way home from work earlier in the week but then after dinner Monday night I was browsing checking prices and I ran across a new unused and new in box spool of the Lincoln L-56 on eBay for $75. I thought I'd make a reasonable offer to bring it down with freight to what I'd pay for the Pinnacle and see if the seller would accept. Sure enough, so I bought it and it arrived yesterday afternoon.

l561.jpg


l562.jpg


I'm sure it will be a while before I get a chance to try it, but next time I switch spools I should have a good test to see if it's worth the price compared to what I've been using.
 

SilverJimmy

Well-known member
Joined
Apr 14, 2012
Messages
1,775
Location
Prescott/Flagstaff, AZ
Where do you think the Bermuda grass came from, mixed into some sod or maybe from someone’s shoes? I seem to remember reading somewhere that shoes spread lots of weeds. I’ve never tried to have a lawn, it’s just to dry here in Northern Arizona to justify the water and the effort of that battle!
 

LXCam

ALLIANCE MEMBER
Joined
Apr 23, 2013
Messages
19,372
Location
AZ
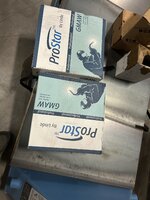
Any experience with Prostar Mike? It’s all my local Linde had in stock in .030 n .035. I’ve never used it and am slightly apprehensive. But it wasn’t all that expensive, list was $102 and my price was $61. Cheap enough to walk away if I don’t like it I suppose.
IMG_8462.jpeg
 
OP
Z

zmotorsports

ALLIANCE MEMBER
Joined
Oct 20, 2009
Messages
21,627
Location
Northern Utah
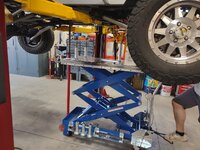
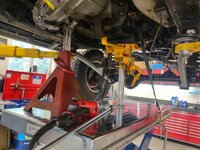
Tried out the new AGA Tools lift table last night. I didn't have this job in mind when I bought the table and have done this type of job many times before by just removing the transfer case, then using the transmission jack to remove the transmission, but I figured what the hell, I have the lift table so I may as well give it a try and see if we can pull the transfer case and transmission as a married unit vs. separately.


I did have to chuck up the transmission head adapter in the lathe and removed about .150" from the diameter so it would fit into my particular transmission jack head, which I just pulled off of my NAPA telescoping transmission jack.
seal1.jpg

With the pole jack holding the output of the TC just long enough to drop the crossmember, we were able to easily position the AGA Tools lift table into place under the transfer case and transmission assembly.
seal2.jpg

Table raised up to capture the pan of the transmission and then strapped the assembly to the table.
seal3.jpg

Removed the last couple of bell housing bolts and the transmission assembly was pushed back from the engine.
seal4.jpg

At that point I used the handheld cable release to slowly lower the assembly as we watched to ensure everything was disconnected and nothing was hanging up.
seal6.jpg

Once the table was in the fully collapsed position, we rolled it out from under the Jeep and had all kinds of room to work.
seal7.jpg

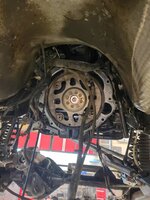
Flex plate ready to be removed.
seal8.jpg

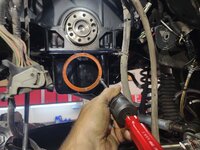
And there's the source of the leak. The rear main seal, which meant I now owe my son lunch. :bounce: We had a small wager on what we'd find as the source of the leak. He thought it would be the rear main and even had already purchased a Fel-Pro replacement. Me on the other hand just couldn't see a new 1-piece seal leaking already and figured it just had to be something else. My gut was telling me maybe an oil galley plug wasn't properly sealed or something other than a rear main seal simply because they seal so much better than the old 2-piece seals. I told my son conventional wisdom would of course suspect the rear main, but I was going against conventional wisdom this time.

Well, I was wrong and he was right. Oh well, I still win because I got to hang out in the shop working with my son which I miss so much lately. So I get to spend time in the shop with him AND take him to lunch tomorrow. Win/Win.
seal9.jpg

Seal removed.
seal10.jpg


That was it for the night so he could get home to his family, and we'll pick up where we left off.

Thanks for looking.
 

Jarhead0408

Well-known member
Joined
Apr 1, 2012
Messages
5,814
Location
Who knows?
You know Mike, as a kind of a side-bet, I’ll ask myself as I read along: “I wonder if he’ll take the easy way out this time.”

Happy to see that’s not the case and you’ll be doing the fall kill as well as the spring verification. It’s always satisfying to see the thoroughness and consistency in what you do. This thread frequently comes to mind as I’m engaged in my own pursuits and is a reminder to stick to a standard while my sons watch and help.

By the way, what kind of grass DO you have for your lawn?


-John
 
OP
Z

zmotorsports

ALLIANCE MEMBER
Joined
Oct 20, 2009
Messages
21,627
Location
Northern Utah
Where do you think the Bermuda grass came from, mixed into some sod or maybe from someone’s shoes? I seem to remember reading somewhere that shoes spread lots of weeds. I’ve never tried to have a lawn, it’s just to dry here in Northern Arizona to justify the water and the effort of that battle!

I'm not sure where it came from Sterling. I have asked myself that multiple times, because as a general rule, I don't just let people walk on my lawn willy nilly. :ROFLMAO:

What's especially odd is that this is at the furthest back area of my yard, where not even I spend a lot of time and no one really goes in that area, except me. The one guy I talked to asked about the quality of the yard before I put the lawn in and when I told him it was all weeds with some grass where the original owner "tried" to plant lawn seed, he seemed to think it was already there and just took a while to come up through the new sod and spread enough that I detected it. If I'm really honest with myself, I think I noticed it probably at least 4 years or so ago in a very small area and just kept thinking that when my lawn was treated it would go away, not knowing what it was exactly.

Then a couple of years ago when I noticed it wasn't going away and spreading, I began watching it more closely. A few weeks ago it finally got to me enough to start doing some research and talking to some local people.
 
OP
Z

zmotorsports

ALLIANCE MEMBER
Joined
Oct 20, 2009
Messages
21,627
Location
Northern Utah
Any experience with Prostar Mike? It’s all my local Linde had in stock in .030 n .035. I’ve never used it and am slightly apprehensive. But it wasn’t all that expensive, list was $102 and my price was $61. Cheap enough to walk away if I don’t like it I suppose.
IMG_8462.jpeg

I'm sorry Cam, I do not have any firsthand experience with ProStar. Being from Linde however, I would think it would be pretty good stuff, but that's only a hunch. We bought some absolute garbage at work about 20 or so years ago and after determining it was a wire issue, that is when I reached out to my local welding supply store and began to realize not all materials were created equal when it came to welding wire.

They had been carrying the Pinnacle as their premium line and suggested I try it, which I did. We have been using it ever since at work and I started using the same at my home shop about the same time. Later the Lincoln L-56 has been the only other wire I have ever actually wanted to try. I have been so pleased with the Pinnacle, that has been my standard in which I compare others to so I am anxious to see how much better the Lincoln L-56 wire will be, if it is any better at all. :dunno:
 

RickP

Well-known member
Joined
Jan 15, 2013
Messages
1,559
Location
Annapolis, MD
Where do you think the Bermuda grass came from, mixed into some sod or maybe from someone’s shoes? I seem to remember reading somewhere that shoes spread lots of weeds. I’ve never tried to have a lawn, it’s just to dry here in Northern Arizona to justify the water and the effort of that battle!
I asked that exact question at the farm store where I buy grass seed. They said it's usually in the native soil already, and the seeds are sometimes just dormant for a while.
They then suggested that if I really wanted to ensure it was dead, to wait until spring when things start greening up to make sure it doesn't turn green. It sounds like the Bermuda grass will come out of hibernation and start greening up before the regular grass does. If it does green again, they said to hit it again as it's trying to come out of hibernation. They said more than likely a fall kill will be enough but if I really wanted to make sure then I should wait. Once the regular grass in the areas I didn't kill starts to green and nothing going on with the area that was killed, then I can cut it out and start over. That will more than likely be the path I take.
That's exactly what I did, before hearing about the quick way. It was the only way to get both the early season and late season invasive grasses I had here. That method should work well for you (although I can tell you that staring at brown grass for months is not fun...)

BTW, my local flavor of Bermuda grass grows like wire along the ground, and it stays dormant until later in the summer here. YMMV - yours might be a different variety.
 
To avoid these ads, REGISTER NOW!
Top Bottom