To avoid these ads, REGISTER NOW!

ZMotorsports Shop Projects 2.0

To avoid these ads, REGISTER NOW!
OP
Z

zmotorsports

ALLIANCE MEMBER
Joined
Oct 20, 2009
Messages
21,627
Location
Northern Utah
Grandkids will do that to you every time Mike! Goodness, that boy is growing fast!

Yes, I'm finding out that when he shows up, nothing else really matters. He's growing like a weed and very much a chatterbox. He is talking so much and such a curious little guy. He wanders around the shop and if I give him a wrench or ratchet, he goes around looking for something to use them on. I love watching how his mind works and how he figures things out. He walked right over to our riding mower and grabbed the gas cap and said "gas". Then walked to the gas cans next to the mowers and said "fill it". He just amazes me.

Hard to believe he's only 19 months old as much as he's talking and how plainly he is speaking and putting words together. It's obvious just how much his parents are working with him.
 
OP
Z

zmotorsports

ALLIANCE MEMBER
Joined
Oct 20, 2009
Messages
21,627
Location
Northern Utah
Nice work Mike!

This guy isn't gonna know what to do with himself by the time you're done. That truck won't be the same one he dropped off.

Looking forward to the Jeep work coming up!!


Thanks Keith. I hope he's pleased when he picks it up because I don't think he's been pleased with the texts and phone calls about all the things I found that he wasn't planning on. Hopefully he forgets about the bill once he drives away and is happy with the way it handles and feels.

Yeah, stay tuned for the Jeep project coming up soon. Both axles are getting regeared along with LSD's in both and a truss being added to the front axle.
 
OP
Z

zmotorsports

ALLIANCE MEMBER
Joined
Oct 20, 2009
Messages
21,627
Location
Northern Utah
LOL...the complexity of a project is defined by how light the Tool Box is and how many Air Hoses and Extension Cords go to the project.

That's what kills me Pat, this is far from a complex job, just removing parts to get to the ball joints. I didn't feel like I was getting that many tools out, until I stood back and looked. :ROFLMAO:
 
OP
Z

zmotorsports

ALLIANCE MEMBER
Joined
Oct 20, 2009
Messages
21,627
Location
Northern Utah
Wow Mike! If the front end is this bad, I wonder what else is lurking behind?

:beer:

I'm not really seeing anything else at this point Dan. There are a few oil leaks but nothing bad enough that the owner wants any work done on.

With all new fluids and now a fresh front end I think he will be ok for a while at least.

I do feel bad because I think the guy he purchased the truck from was not honest and made some claims that I don't see validated, which is unfortunate.
 

humpty

Well-known member
Joined
Dec 4, 2008
Messages
547
Location
Minneapolis, MN
Hey Mike!

In seeing your process of removing u-joints I just wanted to share a tool I have that I have thoroughly enjoyed.

I had always used the same method until I bought the u-joint puller from Tiger Tools. It really makes disassembly a dream.

I also bought their socket press which has also been super handy. Their stuff isn't cheap but it is nice stuff and Canadian made.

As always I enjoy your posts.
 
OP
Z

zmotorsports

ALLIANCE MEMBER
Joined
Oct 20, 2009
Messages
21,627
Location
Northern Utah
Hey Mike!

In seeing your process of removing u-joints I just wanted to share a tool I have that I have thoroughly enjoyed.

I had always used the same method until I bought the u-joint puller from Tiger Tools. It really makes disassembly a dream.

I also bought their socket press which has also been super handy. Their stuff isn't cheap but it is nice stuff and Canadian made.

As always I enjoy your posts.


Thanks. I've seen the Tiger Tool but to be honest my ball joint press has never failed me, or even using a standard bench vise for that matter so it's been hard to justify another tool to do the same job that I already have a tool for.

Thanks for following along.
 

Scuderia-F1

Well-known member
Joined
Feb 9, 2011
Messages
1,198
Location
Stockholm, Sweden
Thanks Keith. I hope he's pleased when he picks it up because I don't think he's been pleased with the texts and phone calls about all the things I found that he wasn't planning on. Hopefully he forgets about the bill once he drives away and is happy with the way it handles and feels.

Yeah, stay tuned for the Jeep project coming up soon. Both axles are getting regeared along with LSD's in both and a truss being added to the front axle.
He might feel a bit "hurt" right now, but boy, will he like his new to him truck. It'll finally drive properly and that's all what it is about.
 
OP
Z

zmotorsports

ALLIANCE MEMBER
Joined
Oct 20, 2009
Messages
21,627
Location
Northern Utah
He might feel a bit "hurt" right now, but boy, will he like his new to him truck. It'll finally drive properly and that's all what it is about.

I completely agree Anders. I found out long ago that the cost is secondary to the client feeling good about what they just paid for.

I remember back when I was in high school and selling auto parts after school for a local auto parts store and wrenching on the side, doing side work to buy tools and pay for my addiction to cars and wanting to get into racing. I was reading and trying to learn everything I could about the industry and trying to go above and beyond the norm. This was in the mid-80's and I started doing tune-ups back then and found myself being pretty good at them. I dove deep however, down into the belly of what made the engines sing, well beyond merely spark plugs and wires which was the "standard" tune-up sold at about every ignition tune-up shop on about every corner for $39.95. I was learning to read vacuum gauges, secondary voltages, etc. and was finding a lot of areas people were missing. Especially carburetor issues and even work distributor shaft bushings causing the ignition to fluctuate.

I remember a friend of mine's dad bringing his 70's Wagoneer to me with because he had just paid the local tune-up shop the required fee and it didn't run any better. I remember digging deep into that one and ended up finding a vacuum leak at the transmission modulator as it had the GM TH400 automatic transmission with the 401 V8 engine. I also discovered the distributor was worn severely and after not being able to find one other than new, I drove the bushings out and replaced them as well as did some fine tuning on the carburetor.

When he came to pick it up he was sticker shocked and I felt bad but tried to explain everything I had done to it but he was pissed and not really listening to me at that point. However, about six months later he brought another car to me and said he wanted me to give it a once over, he had just helped his sister purchase this early 70's Pontiac Ventura (Nova) for his niece and it wasn't running right. That's when he told me his old Wagoneer was running perfectly and had never run so good as when he got it back from me.

I kind of felt vindicated and realized it was worth doing the job right and not trying to bend to what someone only wanted to spend when my integrity as a mechanic was at stake. I have tried to incorporate that into each and every job and realize that doing the job correctly isn't always the popular, or inexpensive, way to do things, but also not to just throw parts at things. I want to know how things work so I can properly diagnose and repair things.

I hope this young man really appreciates how his truck drives afterwards and realizes just how bad it was.
 
OP
Z

zmotorsports

ALLIANCE MEMBER
Joined
Oct 20, 2009
Messages
21,627
Location
Northern Utah
I only had a couple of hours in the shop last night, but I think I made the most of it and was able to get quite a lot accomplished.

I picked up the new outer dust shields/seals for the axle tubes so I started by cleaning the rust and corrosion off of the outer tubes at the C's. The new style seals are a redesigned seal which presses into the outer C.
sd91.jpg

Cleaned and ready to accept the dust seal.
sd92.jpg

Redesigned dust seal at the ready as well as a driver.
sd93.jpg

Dust seal installed.
sd94.jpg

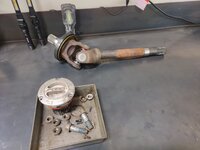
Then it was back to the workbench to install the new U-joints. Driver's side joint replaced and preparing to be greased.
sd95.jpg

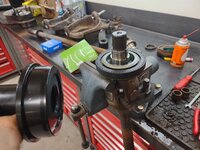
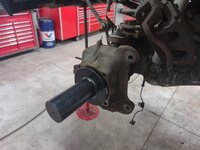
The outer hub seal ready to be driven onto the stub shaft. I have seen people do this without the special driver, but they usually end up damaging the seal. This seal turns internally and if not driven on properly it will fail in short order.
sd96.jpg

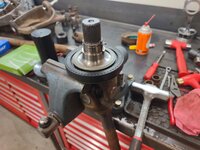
I have also learned that when driving these seals on, don't get a case of tinker-itis by using a small hammer. Grab a mini-sledge and drive it home in a few hits, otherwise you will damage the seal with dozens of lesser blows from a smaller hammer.
sd97.jpg

Seal installed and turns smoothly.
sd98.jpg

Driver's shaft is set aside and ready to be installed.
sd99.jpg

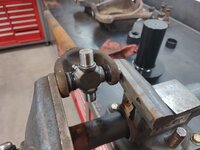
Next was to repeat the process on the long axle shaft (passenger's side). I showed pressing the U-joint into the shaft here just using a standard bench vise. If the cap bores are cleaned and everything lined up, pressing the caps in really don't require any special tools as a regular vise will work perfectly. However, the C-clamp style of press does make it nice. ;)
sd100.jpg


Stay tuned for more to follow...
 
OP
Z

zmotorsports

ALLIANCE MEMBER
Joined
Oct 20, 2009
Messages
21,627
Location
Northern Utah
Continuing on.

Then it was a repeat to get the passenger's side axle shaft prepped for installation by greasing the U-joint and installing the outer hub seal.
sd101.jpg

With the axle shafts prepped and set aside, I turned my attention back to the knuckles.
sd102.jpg

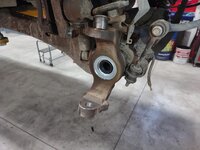
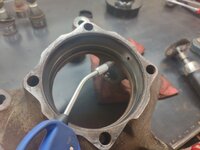
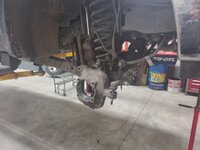
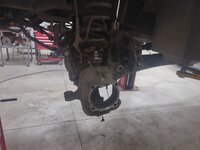
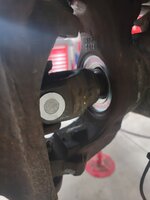
Before pressing the lower ball joints into the knuckles, I gave them a thorough cleaning of all corrosion and blowing through this vacuum port for the locking hubs to ensure it is not plugged with debris.
sd103.jpg

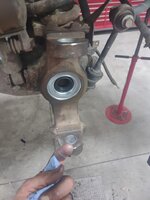
Whomever replaced the unit bearings drove a tapered chisel between the bearing and the knuckle which resulted in burrs being raised around the bearing's mating surface. That is never a good thing to do to remove bearings. Drive them from the backside if they don't easily come out. I took a flat file and knocked the burrs down so the mating surface is flat and true.
sd104.jpg

Also cleaned off the bosses on the backside where the unit bearing nuts tighten against the knuckle.
sd105.jpg

With the ball joints installed in the knuckles and the knuckles ready to install, I applied a thin layer of anti-seize around the tapered bores of the C's. When I say thin layer, I mean very thin. I apply a small amount and then smear it around with my finger and actually end up removing a vast majority of it and only leaving a very thin film behind, but it is enough to aid in removal next time. I also would encourage people not to leave open cans of anti-seize lying around the shop and to be cautious when applying as any debris can be transferred to these tightly machines surfaces and actually do more harm than good if the tapers cannot tighten properly.

I remember walking into a shop many years ago and there was open bottle of anti-seize with just a long acid brush sticking out the top. There was a mechanic working at the bench grinding and sparks were going everywhere, including right into the open bottle of anti-seize. Then another mechanic walked over grabbed the filthy bottle of anti-seize and walked back to truck and slathered that **** all over the tapers before stabbing the knuckle back into place. I was a bit shocked as the careless attitude towards the machined tapers but by the casual nature I figured that was a normal practice. I made the decision that sure as hell wasn't going to be the normal practice of mine, ever.
sd106.jpg

Passenger side knuckle installed. The torque sequence on these is to torque the lower ball joint to 35 ft/lbs, then the upper ball joint to 70 ft/lbs, then back to the lower ball joint to 140-160 ft/lbs. Once the ball joints were torqued to spec, a cotter pin was installed through the upper castle nut. I then greased the ball joints.
sd107.jpg

Passenger side completed and ready to receive the axle shaft and bearing.
sd108.jpg

Repeated the process on the driver's side.
sd109.jpg


That was all the time I had last night but I felt like I got quite a bit done.

Thanks for looking.
 
OP
Z

zmotorsports

ALLIANCE MEMBER
Joined
Oct 20, 2009
Messages
21,627
Location
Northern Utah
I also received a couple of packages via the big brown truck.

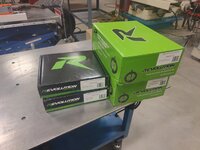
The gears arrived last night for the Jeep coming into the shop next.
gear1.jpg

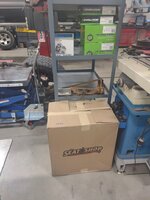
The gears were placed on the mobile shelf along with the other parts that arrived last week. I think I am only waiting on the rear LSD now and I should have all the parts. Also, the new front seat material for my son's Duramax arrived so we can get that into the shop and freshen up his front seats as soon as I have some time.
gear2.jpg


Thanks for looking.
 

Jgaz

Well-known member
Joined
Dec 16, 2016
Messages
1,759
Location
AZ
If your current customer complains about the cost of your very through rebuild refer him to this thread.
Many of the steps you are doing on his truck, such as cleaning the bosses for the unit bearing bolts, MIGHT be done by the average mechanic while working on his own vehicle. These extra steps very likely won’t be done when he’s trying to “beat the book”.

I always went with your ”do it right” policy while doing side work and let the customer complain if they wanted. I also did not use cheap parts.
Some customers didn’t return for a second visit and that was alright. Most were like your Grand Wagoner customer and realized that in the long run they got a good deal.

Thanks for all the pics. Seal drivers for the win!
 
OP
Z

zmotorsports

ALLIANCE MEMBER
Joined
Oct 20, 2009
Messages
21,627
Location
Northern Utah
If your current customer complains about the cost of your very through rebuild refer him to this thread.
Many of the steps you are doing on his truck, such as cleaning the bosses for the unit bearing bolts, MIGHT be done by the average mechanic while working on his own vehicle. These extra steps very likely won’t be done when he’s trying to “beat the book”.

I always went with your ”do it right” policy while doing side work and let the customer complain if they wanted. I also did not use cheap parts.
Some customers didn’t return for a second visit and that was alright. Most were like your Grand Wagoner customer and realized that in the long run they got a good deal.

Thanks for all the pics. Seal drivers for the win!

Thank you. I don't suspect it will be a difficult conversation when he picks the truck up. I have stayed in contact with him via phone calls and texts throughout the job, so he is well aware of all of the things I have found. I also have kept the failed parts to show him if he has any doubt but I don't think that will be an issue. I haven't done a lot of work for him in the past but wouldn't be opposed to doing more for him in the future when time allows.

What I would like more in an outcome is that he is so pleased with how the truck performs afterwards that he keeps a closer eye on things and doesn't let them get to this point in the future. My whole goal is to educate him along the way to what a nice smooth and reliable vehicle is like so that it makes him want to take better care of it, at least better than the previous owner. Actually, I would like that for everyone if I'm being honest. I hate seeing people waste money and time because they have neglected something.
 

ntsqd

Well-known member
Joined
Jan 22, 2005
Messages
1,035
Location
Lower left coast
While he probably doesn't doubt your findings and suggestions, his seeing just how bad those worn-out parts are might just be huge to his understanding of how bad it was.

I too, put one of those Listle inspection cover tools in my cart. This thread has cost me some well spent money!
 

ScepterToad

Well-known member
Joined
Nov 9, 2023
Messages
357
What do you think of those revolution gears Mike? I checked on them this morning and they seem to have both Timken and Koyo bearing sets. I also checked other brands I've looked at previously and was shocked that Yukon and Allstate (Texas) don't seem to have gear sets available any more (or at least right now).
 
OP
Z

zmotorsports

ALLIANCE MEMBER
Joined
Oct 20, 2009
Messages
21,627
Location
Northern Utah
What do you think of those revolution gears Mike? I checked on them this morning and they seem to have both Timken and Koyo bearing sets. I also checked other brands I've looked at previously and was shocked that Yukon and Allstate (Texas) don't seem to have gear sets available any more (or at least right now).

Keith, I have had great results from the Revolution gearsets and master rebuild kits. From about 2011 through about 2022 I was using Yukon and had no failures or issues, that is until my Jeep's rear pinion failed using Yukon gears. Upon a deep inspection my son noticed a manufacturing issue that I feel may have led to the failure. Since then I have been using Revolution with great results.

I don't want to give Yukon a bad name or badmouth them because I installed a lot of gears in that 10-11 years using exclusively Yukon and only had one failure. Keep in mind I was running 5.38 Yukon gears for 90k miles with a lot of off-road and everyone recommended using 5.38 gears due to the small pinion contact, but I never had an issue with the several sets I installed.

I'm surprised the Yukon kits are not available as they have had the Jeep market almost cornered for the past several years and seemed to be in stock at most every off-road supplier around. I did have to order these Revolution gears as they were not in stock and had to be drop shipped from the manufacturer. Although that was not a huge delay, only a couple of days.
 
To avoid these ads, REGISTER NOW!

ScepterToad

Well-known member
Joined
Nov 9, 2023
Messages
357
Keith, I have had great results from the Revolution gearsets and master rebuild kits. From about 2011 through about 2022 I was using Yukon and had no failures or issues, that is until my Jeep's rear pinion failed using Yukon gears. Upon a deep inspection my son noticed a manufacturing issue that I feel may have led to the failure. Since then I have been using Revolution with great results.

I don't want to give Yukon a bad name or badmouth them because I installed a lot of gears in that 10-11 years using exclusively Yukon and only had one failure. Keep in mind I was running 5.38 Yukon gears for 90k miles with a lot of off-road and everyone recommended using 5.38 gears due to the small pinion contact, but I never had an issue with the several sets I installed.

I'm surprised the Yukon kits are not available as they have had the Jeep market almost cornered for the past several years and seemed to be in stock at most every off-road supplier around. I did have to order these Revolution gears as they were not in stock and had to be drop shipped from the manufacturer. Although that was not a huge delay, only a couple of days.
Thanks for the info!

I went back to the Yukon website and they are in fact available. I was looking in the wrong place. :dunno:
 

ntsqd

Well-known member
Joined
Jan 22, 2005
Messages
1,035
Location
Lower left coast
The guy about to re-gear my '70 Wagoneer told me that Dana-Spicer is getting back into selling gear-sets. No idea how fast this will penetrate the market or what their coverage and available ratios will be. Would be nice if I can get a second, somewhat rare ratio Dana ring & pinion for the Wagon, but they'll likely be Yukon or Motion.
 
OP
Z

zmotorsports

ALLIANCE MEMBER
Joined
Oct 20, 2009
Messages
21,627
Location
Northern Utah
The guy about to re-gear my '70 Wagoneer told me that Dana-Spicer is getting back into selling gear-sets. No idea how fast this will penetrate the market or what their coverage and available ratios will be. Would be nice if I can get a second, somewhat rare ratio Dana ring & pinion for the Wagon, but they'll likely be Yukon or Motion.


Spicer gears have been available, but they are somewhat less "readily available" as not stocked at most of the places I order from. The last set of Spicer gears I used was about 6 years ago in a Dodge 2500 that the owner only wanted Spicer gears used. Took me a bit to get them but they were available and I had to pay full price to get them.

To be honest, I think there are really only a handful of manufacturers who are making all the gearsets and then rebranding/reboxing them.

I do know the Revolution gears that I have been using are made in Korea and not the same factory as the Yukon. I used to use Richmond almost exclusively when I was racing but that was several decades ago and not certain they are not made by one of the common import manufacturers now. The Motion gears I used on a couple of older squarebody GM's a few years ago seemed like they were packaged exactly like the Yukon, but that's not necessarily a 100% tell tale sign.

To be honest, I have only had one issue in the last 11+ years of using the Yukon brand and that has been the ONLY one I had issues with so I hate to condemn a brand based on one outlier. I guess I should be happy that failure was on my own vehicle vs. a client's.
 
OP
Z

zmotorsports

ALLIANCE MEMBER
Joined
Oct 20, 2009
Messages
21,627
Location
Northern Utah
Well, I guess I can quit worrying about if the owner of the Super Duty thinks I'm spending too much time or money on it. I just got off the phone with his business partner who called saying he is impressed with everything I am doing to this truck that we would like me to do the same to his. He would like to get on my waiting list as he would like me to go through his 2002 Silverado 2500HD Duramax and perform the same tasks, all fluids, filters and thorough inspection as well as address some suspension issues he is having.

I told him it may be quite some time as my list is long but he said he would wait as he has not been impressed with the shop he's been using.
 

bugnut

ALLIANCE MEMBER
Joined
Jul 14, 2012
Messages
4,110
Location
Central Ohio
Well, I guess I can quit worrying about if the owner of the Super Duty thinks I'm spending too much time or money on it. I just got off the phone with his business partner who called saying he is impressed with everything I am doing to this truck that we would like me to do the same to his. He would like to get on my waiting list as he would like me to go through his 2002 Silverado 2500HD Duramax and perform the same tasks, all fluids, filters and thorough inspection as well as address some suspension issues he is having.

I told him it may be quite some time as my list is long but he said he would wait as he has not been impressed with the shop he's been using.

Mike, this is validation of your efforts and methods, plus it is the type of recommendation that businesses can't buy. GREAT work.
 

aka Larry

Well-known member
Joined
May 2, 2012
Messages
8,153
Location
Eastern, NC
Excellent work and outstanding write up as usual. I appreciate your efforts to document the things you do so we can all see what it is you are doing.

This X 1000%. I'd say most people can't appreciate the extra time and effort it takes to document things, more especially to the level Mike does. I think I've said it before, I think he would made an exceptional instructor.
 
OP
Z

zmotorsports

ALLIANCE MEMBER
Joined
Oct 20, 2009
Messages
21,627
Location
Northern Utah
Excellent work and outstanding write up as usual. I appreciate your efforts to document the things you do so we can all see what it is you are doing. As others have stated, it would be nice if all shops performed to this level. Heck, even half would be a major improvement it seems.

Thank you very much. I appreciate the comments and thank you for continuing to follow along on my projects and work. I find it sad that in this world more shops and/or mechanics don't go that extra little bit to provide better service to their clients. Unfortunately, most are ONLY in it for a paycheck. While the pay is an important aspect of anything we do, it shouldn't be the only reason we do certain things or form certain behaviors.


Mike, this is validation of your efforts and methods, plus it is the type of recommendation that businesses can't buy. GREAT work.

Thank you Joel. I appreciate that. Although I no longer have my business, I still perform each job the way I would work on my own vehicles and it is nice to see some people willing to pay for that extra touch.

This X 1000%. I'd say most people can't appreciate the extra time and effort it takes to document things, more especially to the level Mike does. I think I've said it before, I think he would made an exceptional instructor.

Thank you Vincent. I appreciate your comments and for your support as well as trust in me.
 
OP
Z

zmotorsports

ALLIANCE MEMBER
Joined
Oct 20, 2009
Messages
21,627
Location
Northern Utah
Getting close on the Super Duty but didn't quite have enough time last night to completely finish it.

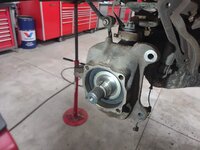
I started by applying a thin layer of grease around the bore of where the outer hub seal presses into as well as greased the ID of the dust seal in the outer axle tube, then slid the axle shaft in until it mated with the side gear and pushed it into the knuckle as far as I could by hand. I then grabbed the driver and drove it in the remaining half inch or so.
sd111.jpg

With the seal driven into the proper depth, I could turn to the unit bearing and backing plate installation.
sd112.jpg

View of the redesigned dust seal with the axle shaft.
sd113.jpg

Applied a few drops of Loctite on each stud before placing the bearing and backing plate in place.
sd114.jpg

Unit bearing in place. Note the ABS sensor wire is on top of the backing plate here. I noticed this before installing the rotor as I was locating the sensor wire along the knuckle, axle tube back to the connector. I then tucked it under the dust shield where it should be.
sd115.jpg

Torquing the unit bearing nuts to 133 ft/lbs.
sd116.jpg

ABS sensor wire ran back along the axle tube and control arm back to the connector and all OEM fasteners in place holding the wire in location.
sd117.jpg

Brake caliper now installed and the caliper bolts torqued to 166 ft/lbs.
sd118.jpg

More to follow....
 
OP
Z

zmotorsports

ALLIANCE MEMBER
Joined
Oct 20, 2009
Messages
21,627
Location
Northern Utah
Continuing on.

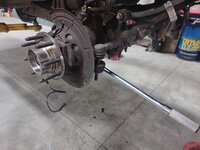
With the outer axle ends both completed it was time to turn my attention to the tie rod and remove the failed tie rod ends. Again, corrosion played a role in delaying the process. I had soaked them a few nights ago with Kroil which helped, but I still had to break them lose. Once they started coming out I was releived, although they still required assistance to fully remove. I took several measurements before disassembly so I could get the toe pretty close upon reinstallation.
sd119.jpg

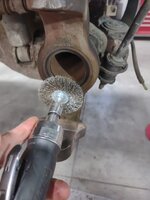
One tie rod removed. I then ran a wire wheel inside the center link to clean up the threads.
sd120.jpg

Before installing the new outer tie rod, I applied anti-seize to the inside of the center link as well as the threads on the outer tie rod to aid in assembly. I got the left side adjusted to the spec I had noted previously and then repeated the process to the right side outer tie rod.
sd121.jpg


Before installing the tie rod I figured I would replace the steering stabilizer which arrived yesterday as the OEM one had leaked all of the fluid from it. It is also a bit more accessible without the tie rod in place. I also filled the front differential while the tie rod was not blocking the fill plug on the cover. While I was at it I filled the rear differential so all of the fluids are refilled less the transmission fluid. I sure like these soft sided gear oil bottles. I wasn't sure I'd like them when they first hit the market a few years ago but I much prefer them now. When I ordered the fluids for this job, a couple quarts came in the old style of bottle and a few in the soft sided bottles. Must have been some leftover stock.
sd122.jpg


I think all I have remaining is to install the tie rod, make some toe adjustments and fill with transmission fluid and last thing on my notes is to clean up the battery terminals, then this job should be complete.
 

Jgaz

Well-known member
Joined
Dec 16, 2016
Messages
1,759
Location
AZ
Mike, I see above where you mentioned your “notes”, is this the only way you keep track of things that need to be done later?

I use a white board in my shop religiously but my shop is small enough to see the board from everywhere.

When I was building data collection vehicles at work (mostly prototypes) I used to tape a “to do” list on the driver's door and also used tags on some components. The tags were like a “remove before flight”
type of idea.
i was often accused of being annul, but anyone following me on a weekend or another shift never complained.
 

ScepterToad

Well-known member
Joined
Nov 9, 2023
Messages
357
Coming together nicely Mike!

Interesting that the ABS line was on top of the little "finger" on the dust shield. I've only ever seen them under. In your experience are they typically on top? Or do different manufacturers do it differently?
 
OP
Z

zmotorsports

ALLIANCE MEMBER
Joined
Oct 20, 2009
Messages
21,627
Location
Northern Utah
Mike, I see above where you mentioned your “notes”, is this the only way you keep track of things that need to be done later?

I use a white board in my shop religiously but my shop is small enough to see the board from everywhere.

When I was building data collection vehicles at work (mostly prototypes) I used to tape a “to do” list on the driver's door and also used tags on some components. The tags were like a “remove before flight”
type of idea.
i was often accused of being annul, but anyone following me on a weekend or another shift never complained.

As you've seen in my thread, I like notes and most all are just handwritten.

When I take a vehicle in, I start with a standard legal pad and write down the pertinent information. Name of client, make/model/year of vehicle, mileage and then anything specific the owner requested. Many of my past clients want me to do an inspection while I have the vehicle in the shop so if that is the case, I pull out a checklist from my file cabinet and put it on a clipboard on my workbench. I have a 23-point inspection checklist that I have made and modified over the years that I use when doing an inspection. I am old school as I actually like checklists because they reduce the opportunity to forget or overlook things, a checklist is that reminder. When doing the inspection I make notations on the checklist using a "but then more detail on the legal pad of exactly the corrective actions needed.

When this information is presented to the owner, I give recommendations on what needs to be done now and what can wait and have a code system for marking the items. An "X" means the owner declined service and an "O" means they want to defer the repair to a later time. A small check mark means the repair was authorized and then a parts list can be made lower on the page.

When the repair is completed a large check mark is placed next to the smaller check mark. To me seeing two check marks means the repair was authorized and completed both.

I also track time that I work on various tasks each night and I write down what I did and how long I worked on it, just brief descriptions and time, not novels. :bounce: I use this for my own reference so I can reflect back on each night's work, but more importantly I use this information for billing when the time comes for me to write up an invoice for the work. I find it is so much easier to go back over a few nights records and add up the actual hours spent on a vehicle vs. at time of writing an invoice trying to remember how much time each night as I would usually end up screwing myself by under-billing, this prevents that from happening and I can had actual documentation from the very night I did the work.

When the job is completed and returned to the client, all the paperwork is attached together and filed in my filing cabinet for future reference. This way I can refer back to my original notes if/when needed for any future work. When I had my speed shop, I performed a purge each year at tax season and only kept recent paperwork immediately on hand in my filing cabinet, anything else went into a bank box and stored for later reference. I no longer keep things long term now that I no longer have my speed shop so I just clean out my filing cabinet once or twice a year and keep my notes in my ledgers, which I don't throw away. Those are usually more for specification, etc. I think I've shown some of those in past photos where I refer back to my ledger for things like gear installs and such.


As for lists on large projects or builds, I do that as well. I will have them in various stages and my son will joke that when "the list" comes out we must be getting close. :ROFLMAO: When doing the initial fabrication of the build the big stuff is pretty easy to remember as there is a flow to the work. However, as the fabrication nears the final details is when the list is generated. This helps me to remember to do those little details that cannot be forgotten before breaking down for paint and/or finish work. Things such as making sure various studs are welded to the interior for routing wiring harness as there are areas I don't like to use through-holes, small mounting brackets for various components, etc. These are the small details that can make or break a build and therefore justify being on the list so they are not forgotten.

Then when it comes to final assembly, much of the work is evident and must flow so no list is really needed. That is, until it comes down to the final details of the final assembly which is again where "the list" is generated and items are checked off as completed.

WOW! This really is a simple process and doesn't take up any time at all, but when I write it out it seems quite extensive and time consuming. :headscrat I've been utilizing and fine tuning this process over the past three and half decades now and never really wrote it out before so it almost seems a bit overwhelming, but it's very quick and simple for the most part.
 
OP
Z

zmotorsports

ALLIANCE MEMBER
Joined
Oct 20, 2009
Messages
21,627
Location
Northern Utah
Coming together nicely Mike!

Interesting that the ABS line was on top of the little "finger" on the dust shield. I've only ever seen them under. In your experience are they typically on top? Or do different manufacturers do it differently?


Thanks Keith.

As I mentioned in the captions, the ABS line was incorrect in the picture as it was above the backing plate. As I set the unit bearing in place and attached the sensor I didn't have enough hands to tuck it under while starting the studs into the knuckle. Before completing and installing the rotor I tucked the wiring under the backing plate where it belongs.
 

fouckhest

Well-known member
Joined
Jul 24, 2013
Messages
1,952
Location
Greer, SC
WOW! This really is a simple process and doesn't take up any time at all, but when I write it out it seems quite extensive and time consuming. :headscrat I've been utilizing and fine tuning this process over the past three and half decades now and never really wrote it out before so it almost seems a bit overwhelming, but it's very quick and simple for the most part.

Mike - as always, thank you for this level of detail, it is really great to hear and as much more of a rookie to intermediate at many things, it is good to hear/read that a good old fashion list is still relevant. I have personally struggled to decide if I like the white board or as of recently it was easier to stand near my car and make notes on the windshield so it is right in front of me rather than referring back to the white board that is over by my welding table.

One thing I was curious about during this specific project you've been working on, but made me think back to other project, (more on the fabrication side), how do you handle consumables? I've struggled with how to approach this with things like welding as I would eventually like to start taking on side projects.
 

ScepterToad

Well-known member
Joined
Nov 9, 2023
Messages
357
Thanks Keith.

As I mentioned in the captions, the ABS line was incorrect in the picture as it was above the backing plate. As I set the unit bearing in place and attached the sensor I didn't have enough hands to tuck it under while starting the studs into the knuckle. Before completing and installing the rotor I tucked the wiring under the backing plate where it belongs.
Thanks Mike! I must have read the caption wrong....sorry about that.
 

LXCam

ALLIANCE MEMBER
Joined
Apr 23, 2013
Messages
19,372
Location
AZ
@fouckhest

I don’t know how Mike accounts for consumables but I swore to myself long ago two thing would happen if I were to open another performance shop. One, cameras would be recording 100% of the time. And two, there would be a dedicated trash can for consumables.

That way in the end it’d be a here ya go, that’s exactly what that took.
 
OP
Z

zmotorsports

ALLIANCE MEMBER
Joined
Oct 20, 2009
Messages
21,627
Location
Northern Utah
Mike - as always, thank you for this level of detail, it is really great to hear and as much more of a rookie to intermediate at many things, it is good to hear/read that a good old fashion list is still relevant. I have personally struggled to decide if I like the white board or as of recently it was easier to stand near my car and make notes on the windshield so it is right in front of me rather than referring back to the white board that is over by my welding table.

One thing I was curious about during this specific project you've been working on, but made me think back to other project, (more on the fabrication side), how do you handle consumables? I've struggled with how to approach this with things like welding as I would eventually like to start taking on side projects.


Thank you Mike. Glad the long explanation was helpful and I'm really glad I didn't lose you from following along with that lengthy diatribe. :ROFLMAO:

As for consumables, it's a mixed bag of sorts and not a one size fits all answer, but I'll try to give you the cliff note version. ;)

I have calculated expenses for "normal usage" of things like brake cleaner, shop rags, utilities, welding gasses, TIG rod/MIG wire, gas cups, clear protective lenses for welding helmets, safety glasses, grinding discs, cutoff wheels, and pretty much all other small and non-frequent purchases to operate a small shop all into my hourly shop rate. That way I don't necessarily have to focus on the minor details and can just focus on work. When I ran my speed shop it was actually a little easier calculate because I tracked them a bit better as I had some consumables separated in my records and could add them up either annually or quarterly (when I did my taxes) and make adjustments as needed.

Now that I no longer keep that detailed of records and do more personal projects and less client-based jobs in my shop, I use kind of a SWAG (Scientific Wild *** Guess) approach. It's like a WAG (Wild *** Guess) only with a little more science or data behind it. :bounce:

This year I have upped my hourly rate slightly from what it has been over the past few years to compensate for not only where I feel my skillset should be priced, but also to adjust for cost of supplies.

Now that being said, there are some jobs that are heavily ladened with certain consumable usage or somewhat bespoke purchases needed to complete a certain job. If I am doing a lot of welding for example, I will add in a "shop supplies" charge to compensate depending on gas and fillers used. Or if I am doing a machining job and a certain tool such as a gear cutter is needed, then it is billed (at least partially) to the specific job. If a client brings me a part or something that is extremely dirty because they didn't want to take the time to clean it first, then I will add shop supplies charge because it will expedite the rate at which I will need to replace my solvent. Things like that I address on a case-by-case scenario and charge accordingly, but for the most part normal supply usage is calculated into my hourly rate.

I still may be underselling myself, but I feel I make a decent amount doing side work when I choose to take on. Not getting rich by all means but extra income is nice, and I feel I provide at least as good if not better service and workmanship than people can get elsewhere. The only drawback to some of my clients is the wait time as not having my business now, I find myself wanting to focus more on my own assets and only take on side work when and if I have time. Some clients are ok with that, others not so much so they may be forced to go elsewhere if I can't drop what I'm doing and get them in, but that's a whole other topic.

I hope that kind of answers your question. Thanks again for continuing to follow along.
 
Last edited:
To avoid these ads, REGISTER NOW!
Top Bottom