To avoid these ads, REGISTER NOW!

ZMotorsports Shop Projects 2.0

ScepterToad

Well-known member
Joined
Nov 9, 2023
Messages
340
Mike, with as particular as you are, have you looked at the clear bras for the Camaro? I can't imagine its a cheap process, but I also imagine your time isn't cheap either.
 
To avoid these ads, REGISTER NOW!
OP
Z

zmotorsports

ALLIANCE MEMBER
Joined
Oct 20, 2009
Messages
21,477
Location
Northern Utah
@D.F.B seems to have his **** together when it comes to detailing and he likes this stuff, maybe worth a whirl?
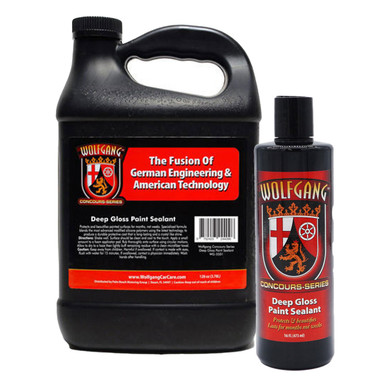
The BOSS line from Griot's also gets rave reviews:
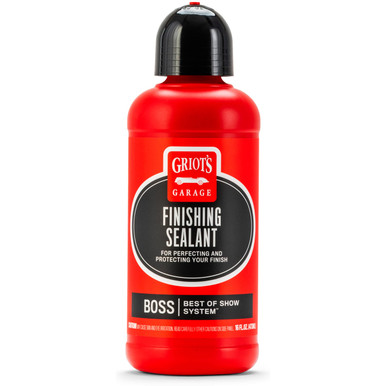
Otherwise, what's your sealant of choice?

Have not really used a lot of sealants over the years, I generally apply a mild polishing compound a couple times a year and call it good. However, with the water spot issue on the Camaro I think I'll use the Meguiar's Ultimate that I have used a couple of times and really liked. Seems to provide good protection and gives the paint a nice depth.

On my Harley's I always used Carnaba wax, but it was on a smaller canvas and did a great job making the color POP!
 

Duker

Well-known member
Joined
Sep 25, 2010
Messages
10,868
Location
Livingston, TX
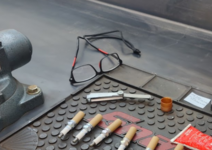
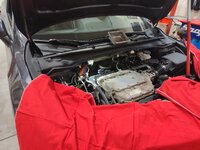
My DIL brought her 2013 RDX over last night so my son and I could replace the spark plugs that have been sitting on the bench for a couple of months as we had an open spot in the shop. My grandson was able to run around the shop and touch and play with all kinds of things and just have a blast. I gave him an air blow gun and he walked around pretending to spray stuff off. As we were changing out the spark plugs in bank 2, which is at the front of the car, my son held him up and he helped me pull on the ratchet and remove the ignition coils. He just wants to help so bad he can't stand it. I asked him if he wanted to help and he came running from the front of the shop to the front of the car saying "yes, yes". :lol:


Supplies laid out and first ignition coil removed on Bank 1, rearmost bank.
rdx1.jpg

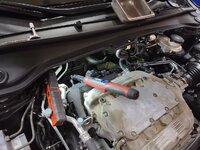
Not terrible access to be honest. Nice relatively large void between the head and the firewall in which to work. Seeing back there was the hardest part, much of it had to be done by feel.
rdx2.jpg

Torquing the plugs to spec., then reinstalling the coils and plugging everything in.
rdx3.jpg

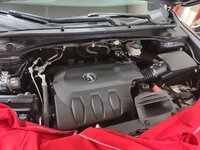
After the plugs were replaced in the front bank, Bank 2, the cover was reinstalled and that pretty much completed this quick job.
rdx4.jpg

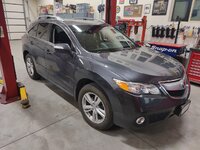
Ready to go.
rdx5.jpg


Thanks for looking.
I like Mike's terminology.... from now on my reading glasses will be known as supplies! :D

1737478573293.png
 
OP
Z

zmotorsports

ALLIANCE MEMBER
Joined
Oct 20, 2009
Messages
21,477
Location
Northern Utah
I like Mike's terminology.... from now on my reading glasses will be known as supplies! :D

1737478573293.png


I hadn't picked up on that Duke. I had them around my neck but didn't actually need them while removing the spark plugs, just for inspecting them. However, while I was leaning over the core support to remove the plugs, the glasses kept getting caught on things, so I got pissed and took them off in a huff and threw them on the bench. Forgot they were there when I snapped the picture I guess. :bounce:
 

customh

Well-known member
Joined
Feb 18, 2013
Messages
562
Location
East Bethel, MN
Thanks Travis. Not convinced the ceramic path is the one for me. Hard headed and stuck in my old ways I guess.
That's why I rec'd the first Griot's 3-in-1 product. Allows you to dip your toe in the water of that world without the expense/critical application process. You'd easily get a year of protection out of it with the limited amount of miles you put on.

Again, old school Keith. Not a fan of those either. Bad experience with the one on our coach and I swore I'd never have another one.
I put Xpel on our (the wife's) new family hauler on the leading edge of the hood and fenders, side mirrors, door edges, sills, and door handle cups. Skipped the front bumper/grill. I, too dislike the install on the hood/fenders and will stick to common paint-to-human interaction areas in the future. Unless you go the @olsenmotorsports route and know "the guy(s)" and are willing to pay the price to do the whole vehicle and the vehicle is worth that to you it's not the silver bullet that people make it out to be. At least not if you pay attention to the details.
 

Wiz02

Well-known member
Joined
Jul 13, 2007
Messages
2,399
Location
Southeastern PA
That's why I rec'd the first Griot's 3-in-1 product. Allows you to dip your toe in the water of that world without the expense/critical application process. You'd easily get a year of protection out of it with the limited amount of miles you put on.


I put Xpel on our (the wife's) new family hauler on the leading edge of the hood and fenders, side mirrors, door edges, sills, and door handle cups. Skipped the front bumper/grill. I, too dislike the install on the hood/fenders and will stick to common paint-to-human interaction areas in the future. Unless you go the @olsenmotorsports route and know "the guy(s)" and are willing to pay the price to do the whole vehicle and the vehicle is worth that to you it's not the silver bullet that people make it out to be. At least not if you pay attention to the details.
I would disagree with your Expel assessment. I had Expel installed on my new corvette in 2008 as soon as I could, after picking it up at the dealership and had it replaced last summer.

I didn't wrap the entire car, just front fascia, hood, headlights, door "handles", rockers and rear fenders the first time around and did the same the second time around.

The installers were amazed as they couldn't find any paint chips at all. My only mistake is that I didn't have PPF installed on the windshield.

As far as I'm concerned PPF is definitely a silver bullet, preserving the paint and making detailing easier. I got my money's worth.
 

ntsqd

Well-known member
Joined
Jan 22, 2005
Messages
997
Location
Lower left coast
Snowball has some sort of clear coating that is peeling off of the hood. It does not appear to be an actual clear coat of paint, but rather something that was applied afterwards. Not impressed, but short of sanding on the hood not able to get it off until it sloughs off. As I don't like glossy hoods anyway I've been pondering a wrap in flat body color for that hood. No skulls or other carp, just flat body color. Unfortunately that has to wait until the coating is all gone or the wrap will look really odd.
 

olsenmotorsports

Well-known member
Joined
Apr 13, 2013
Messages
764
Location
Chicago, IL
That's why I rec'd the first Griot's 3-in-1 product. Allows you to dip your toe in the water of that world without the expense/critical application process. You'd easily get a year of protection out of it with the limited amount of miles you put on.


I put Xpel on our (the wife's) new family hauler on the leading edge of the hood and fenders, side mirrors, door edges, sills, and door handle cups. Skipped the front bumper/grill. I, too dislike the install on the hood/fenders and will stick to common paint-to-human interaction areas in the future. Unless you go the @olsenmotorsports route and know "the guy(s)" and are willing to pay the price to do the whole vehicle and the vehicle is worth that to you it's not the silver bullet that people make it out to be. At least not if you pay attention to the d

Clear bra and ceramic coatings are the best inventions ever for the do it and forget it crowd. I remember the old days of waxing every 6 months. Grateful that is a thing of the past!

As far as partial I wouldn’t do it. You either do the whole car or none of it if the car is a long term hold. The PPF has UV protection, It will not fade at the same ratio as paint will (we are assuming lots of time in the sun). So when you take it off there is a noticeable difference. As far as all the online horror stores of PPF. That is just inferior products or bad installs. Do it with confidence I say. Protect your investment.

If you dont keep your cars, drive the F out of it and who cares!
 
Last edited:

D.F.B

Well-known member
Joined
Aug 2, 2023
Messages
1,603
Location
Australia
Have not really used a lot of sealants over the years, I generally apply a mild polishing compound a couple times a year and call it good. However, with the water spot issue on the Camaro I think I'll use the Meguiar's Ultimate that I have used a couple of times and really liked. Seems to provide good protection and gives the paint a nice depth.

On my Harley's I always used Carnaba wax, but it was on a smaller canvas and did a great job making the color POP!
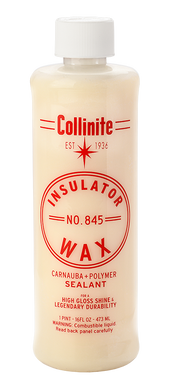
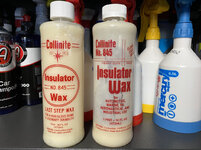
If you are old school, I would highly recommend checking out Collinite 845. This is super old school, but still has a place in the modern era. Not only does it create a super slick and glossy surface, its pretty durable too. The key is to apply it thinly, less is more.


IMG-7544.jpg

oct209.jpg
 

Scuderia-F1

Well-known member
Joined
Feb 9, 2011
Messages
1,198
Location
Stockholm, Sweden
Clear bra and ceramic coatings are the best inventions ever for the do it and forget it crowd. I remember the old days of waxing every 6 months. Grateful that is a thing of the past!

As far as partial I wouldn’t do it. You either do the whole car or none of it if the car is a long term hold. The PPF has UV protection, It will not fade at the same ratio as paint will (we are assuming lots of time in the sun). So when you take it off there is a noticeable difference. As far as all the online horror stores of PPF. That is just inferior products or bad installs. Do it with confidence I say. Protect your investment.

If you dont keep your cars, drive the F out of it and who cares!
THIS!!! I'm the most old school hard headed guy there ever was. But my OCD craves and needs the absolutely latest when it comes to detailing stuff as only the very best will do. If it's not top notch it's ****.
 
OP
Z

zmotorsports

ALLIANCE MEMBER
Joined
Oct 20, 2009
Messages
21,477
Location
Northern Utah
Continued on the detailing last night on our Fifth Gen.


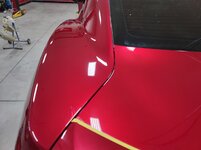
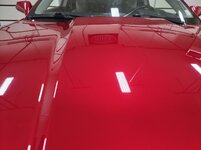
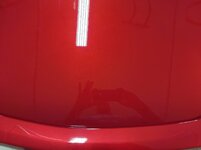
This section of the hood had the most water spots etched into the clear. This is after a little work with my step #2 Finesse-It polish and yellow wool pad. I'm liking the results so far.
cam21.jpg

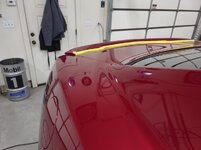
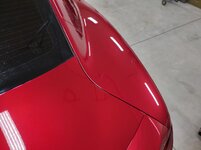
This corner of the trunk and rear quarter had a few spots, but nothing like the hood. They are gone now as well.
cam22.jpg

This quarter didn't really have any water spots but had a couple of very fine micro-scratches that I missed last year when I did the full paint correction, so I focused on those and eliminated them.
cam23.jpg

With the Finesse-It and yellow wool pad step completed it was time to turn to my new favorite third step of my 3-step paint correction process, the 3M blue foam pad and Perfect-It Ultra-Fine Machine Polish.
cam24.jpg

cam25.jpg

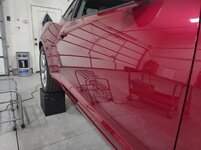
Passenger's rear quarter and sail panel completed with the final step.
cam26.jpg

Trunk and driver's rear quarter with the same 3rd step treatment.
cam27.jpg

Hood completed.
cam28.jpg

cam29.jpg

And that's where I called it for the night and closed up the shop.
cam30.jpg


The polishing is complete and ready to go on to the wax/sealant. I think I'll also put a coat of polish on the wheels, then clean glass, doorjambs and give the interior a good vacuuming and detail before setting her back down on the ground.

All in all, I think she looks pretty good for a 12-year-old car with 65k on the clock. Hoping the wife and I get a bit more time this summer to enjoy it. We only put about a thousand miles on her last year as we just got too busy to take those Sunday drives. I want to change that this year as I love our Sunday drives.

Thanks for looking.
 
Last edited:
OP
Z

zmotorsports

ALLIANCE MEMBER
Joined
Oct 20, 2009
Messages
21,477
Location
Northern Utah
Paint looks great. Reminds me that I still need to replace my stolen rotary buffer and get the boat buffed and ready for this spring.

Thanks.

When I had my speed shop, several of my clients had me polish out their boats before the beginning of boating season. It wasn't necessarily a service I advertised, or even enjoyed for that matter, but one I did perform for a few of my better clients. I even completely rebuilt a wrecked Cruisers Cabin Cruiser with twin 454's for my brother around 2000. It was only about a year old boat that he bought wrecked with very low hours and usage, almost new. Although he did quite a bit of the teardown work before he turned it over to me, the majority of the work I took on. It had twin 7.4 liter (454's) engines w/Bravo III's, and one engine tore loose from the mounts and damaged one of the outdrives during the accident. While rebuilding, I reinforced the motor mount locations with some wood and multiple layers of resin and overlaid glass, then formed steel U-bends over the rails and bolted through the structure for mounting both engines.

I hauled that boat back and forth about a dozen times over the course of about 4 months between my home shop and my parent's farm where I had access to my dad's tractor to use for lifting engines in and out. With the engines out I replaced the damaged accessories and added my own custom touches by painting the valve covers and air cleaners to match the boat and during the rebuild of the Bravo III outdrives, I sent the cases out to be polished by my local polisher, not sure I would recommend doing that to anyone unless they are willing to spend countless hours maintaining the surface. My brother didn't spend as much time keeping it clean as I would have liked to see so I should have so looking back I should have painted the outdrives to match the boat vs. polishing. That boat took the better part of 4 months to rebuild but turned out awesome. Fortunately, the exterior damage was isolated to the areas above the beltline so no real damage to the lower hull, other than my brother nor I liked the bright blue color of the stripe. While repairing and painting the upper portion, I painted over the hideous Smurf blue color with a metallic turquoise, which I also painted the engine components.

I think I may have mentioned a time or two how much I hate working on boats... :unsure: If not, let me reiterate, I hate working on boats. :LOL: However, the money was good and my clients were very loyal, plus I actually really liked taking them to that next level. With that large of a canvas, the finished results were very often quite rewarding, money aside. A couple clients actually had me modify their trailers to incorporate removable sides to make detailing easier for both them as well as myself. After the fabrication work was completed, they would rent a slip for a couple of weeks while I had their trailers sandblasted and I repainted them after doing the fabrication work. I only did this to about 3 trailers that I can recall. As I'm sure you are aware, most boat manufactures just stick them on whatever trailers they contract with to supply, so there are a lot of areas for improvement in the trailers themselves. I actually liked customizing their trailers to match their boats and adding some unique and custom touches. Although I hated working on them, I do feel like they paralleled the customizing aspect and especially the mission statement of our shop.
 
OP
Z

zmotorsports

ALLIANCE MEMBER
Joined
Oct 20, 2009
Messages
21,477
Location
Northern Utah
Worked a bit later than usual last night but was able to pretty much complete the work on our Camaro, less the wheels, which I will clean and add a coat of polish to over the weekend before covering the ole' girl back up until the weather clears.

Final step of wax/sealant applied and the color really pops.
cam31.jpg

cam32.jpg

cam33.jpg

cam34.jpg

cam35.jpg

cam36.jpg

cam37.jpg

cam38.jpg

cam39.jpg

cam40.jpg

The exterior is pretty much complete and about the best clarity I think I can get without actually stepping down to color sanding. The car does have a few small chips in the paint, but fortunately no dents.

A few more pictures of the final detail to follow.
 
OP
Z

zmotorsports

ALLIANCE MEMBER
Joined
Oct 20, 2009
Messages
21,477
Location
Northern Utah
The last of the pictures of the Camaro for the time being. Sorry for all the pictures.

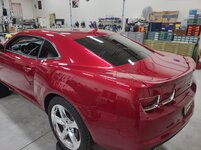
After the final application of wax/sealant and all of the glass cleaned.
cam41.jpg

cam42.jpg

I then turned my attention to the interior and doorjambs.
cam43.jpg

cam44.jpg

Although the exterior makes me smile, opening a door or popping the trunk or hood and seeing definitive details between paint and trim really are pleasing to my eye. At car shows one of my pet peeves were always doorjambs and/or hood or trunk seams as that is where people generally cut corners or skimp out on during their detailing.
cam45.jpg

cam47.jpg

cam48.jpg

Final overall shots.
cam49.jpg

cam50.jpg

cam46.jpg


Just as I was about to close up the shop, the wife came out to check on me and I was sitting on the stool just staring at it. She said, "I thought you weren't going to treat this car like the street rod?" I asked what she meant, this is nowhere near as custom as the street rod or our Chevelle and she said "it has turned out so nice I know you don't want to take it out of the shop now and we bought this car to drive." I guess I'll have to prove her wrong and just drive the **** out of it this year. 😜


Thanks for looking.
 
OP
Z

zmotorsports

ALLIANCE MEMBER
Joined
Oct 20, 2009
Messages
21,477
Location
Northern Utah
Beautiful Mike!! Just curious about the blocks the car is sitting on?


Thank you. The blocks (Race Ramps) just help get the car up to a more comfortable working height. They are kind of a pain to get the tires/wheels up 12" because I have to do it in a couple of stages, but sure makes certain tasks much more pleasurable.
 
To avoid these ads, REGISTER NOW!

Xti04

Well-known member
Joined
Nov 11, 2016
Messages
2,366
Thanks.

When I had my speed shop, several of my clients had me polish out their boats before the beginning of boating season. It wasn't necessarily a service I advertised, or even enjoyed for that matter, but one I did perform for a few of my better clients. I even completely rebuilt a wrecked Cruisers Cabin Cruiser with twin 454's for my brother around 2000. It was only about a year old boat that he bought wrecked with very low hours and usage, almost new. Although he did quite a bit of the teardown work before he turned it over to me, the majority of the work I took on. It had twin 7.4 liter (454's) engines w/Bravo III's, and one engine tore loose from the mounts and damaged one of the outdrives during the accident. While rebuilding, I reinforced the motor mount locations with some wood and multiple layers of resin and overlaid glass, then formed steel U-bends over the rails and bolted through the structure for mounting both engines.

I hauled that boat back and forth about a dozen times over the course of about 4 months between my home shop and my parent's farm where I had access to my dad's tractor to use for lifting engines in and out. With the engines out I replaced the damaged accessories and added my own custom touches by painting the valve covers and air cleaners to match the boat and during the rebuild of the Bravo III outdrives, I sent the cases out to be polished by my local polisher, not sure I would recommend doing that to anyone unless they are willing to spend countless hours maintaining the surface. My brother didn't spend as much time keeping it clean as I would have liked to see so I should have so looking back I should have painted the outdrives to match the boat vs. polishing. That boat took the better part of 4 months to rebuild but turned out awesome. Fortunately, the exterior damage was isolated to the areas above the beltline so no real damage to the lower hull, other than my brother nor I liked the bright blue color of the stripe. While repairing and painting the upper portion, I painted over the hideous Smurf blue color with a metallic turquoise, which I also painted the engine components.

I think I may have mentioned a time or two how much I hate working on boats... :unsure: If not, let me reiterate, I hate working on boats. :LOL: However, the money was good and my clients were very loyal, plus I actually really liked taking them to that next level. With that large of a canvas, the finished results were very often quite rewarding, money aside. A couple clients actually had me modify their trailers to incorporate removable sides to make detailing easier for both them as well as myself. After the fabrication work was completed, they would rent a slip for a couple of weeks while I had their trailers sandblasted and I repainted them after doing the fabrication work. I only did this to about 3 trailers that I can recall. As I'm sure you are aware, most boat manufactures just stick them on whatever trailers they contract with to supply, so there are a lot of areas for improvement in the trailers themselves. I actually liked customizing their trailers to match their boats and adding some unique and custom touches. Although I hated working on them, I do feel like they paralleled the customizing aspect and especially the mission statement of our shop.
I dont typically have super nice things because life has taught me that no matter how hard I try to take care of it, someone else will destroy it for me. My boat is different though. Always wiped down and dried, kept cleaned and waxed. I get a lot of compliments for people who stop by the shop about how clean the exterior is and how nice it looks. Its laborious and tough to keep it clean. Water is so hard here that it still spots up no matter how much I try to combat it. I could not imagine trying to keep polished outdrives clean. I bet they looked awesome though! With my trailer it has removable fenders which is nice for getting down the sides and bottom, and if I ever get a wild hair my boat repair friend would let me use his lift and stands to go nuts polishing the bottom to my hesrts content. Camaro turned out great and the attention to detail really shows.
 
OP
Z

zmotorsports

ALLIANCE MEMBER
Joined
Oct 20, 2009
Messages
21,477
Location
Northern Utah
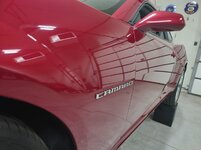
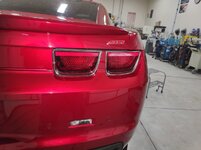
Mike, question, when it comes to buffing the paint, what do you do around emblems and letters like the Camaro letters on the side of the car?

:beer:

Dan, I usually just go around the emblem's outer perimeter with a wrap or two of masking tape. The main goal is twofold, first, to prevent the compound from getting into the emblem where it is difficult to remove and shows up like a sore thumb when it dries, and secondly, it minimizes the buffing wheel from grabbing the edges and pulling it into the paint while spinning.

Other than that, I really don't know what else to do short of removing them which really isn't practical. When I've painted cars, the emblems are one of the last items to go back on after all cutting and buffing has been completed.
 
OP
Z

zmotorsports

ALLIANCE MEMBER
Joined
Oct 20, 2009
Messages
21,477
Location
Northern Utah
I dont typically have super nice things because life has taught me that no matter how hard I try to take care of it, someone else will destroy it for me. My boat is different though. Always wiped down and dried, kept cleaned and waxed. I get a lot of compliments for people who stop by the shop about how clean the exterior is and how nice it looks. Its laborious and tough to keep it clean. Water is so hard here that it still spots up no matter how much I try to combat it. I could not imagine trying to keep polished outdrives clean. I bet they looked awesome though! With my trailer it has removable fenders which is nice for getting down the sides and bottom, and if I ever get a wild hair my boat repair friend would let me use his lift and stands to go nuts polishing the bottom to my hesrts content. Camaro turned out great and the attention to detail really shows.

Thank you. Growing up my parent's didn't have much money, but for the most part my dad took pretty good care of what he did have. I think that stuck with me more than I realize. I've never had new vehicles and all have been owned second or third hand and had to be "brought back", usually from neglect. This has been a double edge sword as the pricing allowed me to be able to purchase such things, but then they require so much more time to get to where I want them to be.

I have never had new or even newer things, but I have always tried to keep them nice, although nice is quite subjective. I would say I haven't always purchased "nice things", but after owning them for a while I have made them into nice things once again. My wife often tells people that the only reason we can afford and do some of the things we do is because of my skillset. I have mentioned before that I became a mechanic so I could drive nice things and do so on my not so high salary. I told the wife last night when she came out to the shop that the next time I put off something of ours to accommodate someone else to punch me in the nuts. That is exactly what happened to the Camaro last summer. I didn't get the water spots off the car soon enough from returning from a weekend trip because I had someone's vehicle in the shop that needed my attention first. THAT choice of mine created all this work. I have no one to blame but myself as it was my decision and choice, but I don't want to ever to that again.

I know I like to make money in the shop, but keeping our stuff clean is relatively inexpensive and just requires some time so I have no excuse for my behavior. The coach is something I feel I do a great job of keeping clean, but I need to focus more on the daily drivers to carry that same behavior over more routinely. I feel keeping them clean really does pay off in the long run and is something I need to put more emphasis on.

When we had our snowmobiles, I had a LOT of chrome and polished aluminum on, as well as custom paint. They always looked amazing as I took the time to detail them after each trip, much like your boat. I got a lot of compliments while sitting on the mountain and some even joked that I had them air lifted to the mountain because they were always so clean. I took great care to keep them that way and I think my son does a good job of keeping his stuff nice as well so I hope that rubbed off on him. 😜
 

aka Larry

Well-known member
Joined
May 2, 2012
Messages
8,099
Location
Eastern, NC
With the engines out I replaced the damaged accessories and added my own custom touches by painting the valve covers and air cleaners to match the boat and during the rebuild of the Bravo III outdrives, I sent the cases out to be polished by my local polisher, not sure I would recommend doing that to anyone unless they are willing to spend countless hours maintaining the surface. My brother didn't spend as much time keeping it clean as I would have liked to see so I should have so looking back I should have painted the outdrives to match the boat vs. polishing. That boat took the better part of 4 months to rebuild but turned out awesome. Fortunately, the exterior damage was isolated to the areas above the beltline so no real damage to the lower hull, other than my brother nor I liked the bright blue color of the stripe. While repairing and painting the upper portion, I painted over the hideous Smurf blue color with a metallic turquoise, which I also painted the engine components.

C'mon Mike. Don't tease us about your work on brother's boat w/o pics! I know they weren't digital back then, but we'll make do with a scanned, low-res copies. ;)
 
OP
Z

zmotorsports

ALLIANCE MEMBER
Joined
Oct 20, 2009
Messages
21,477
Location
Northern Utah
C'mon Mike. Don't tease us about your work on brother's boat w/o pics! I know they weren't digital back then, but we'll make do with a scanned, low-res copies. ;)


I'm sorry Vincent, I don't think I have any of the rebuild process. I remember it being hot as hell, I was covered in fiberglass dust and resin for most of the duration and just wanted to get it done, plus, it was a freakin' boat, so I wasn't necessarily happy about the situation. :bounce: I may have a picture or two of the engines sitting on stands in my shop, but I'll have to see if my brother has any pictures of it after we finished it.
 

aka Larry

Well-known member
Joined
May 2, 2012
Messages
8,099
Location
Eastern, NC
I remember it being hot as hell, I was covered in fiberglass dust and resin for most of the duration and just wanted to get it done, plus, it was a freakin' boat, so I wasn't necessarily happy about the situation. :bounce:

You probably didn't know, but I worked in the FRP business for 13 years so I'm familiar with the resin, styrene, and all the itchy dust. We built large custom tanks (up to 14' diameter) and piping systems mostly for the pulp and paper industry. I worked in the drafting department so I didn't have a lot of hands-on experience, but I did work in the shop on occasion (in safety and QA) enough to know what you're talking about.
 
OP
Z

zmotorsports

ALLIANCE MEMBER
Joined
Oct 20, 2009
Messages
21,477
Location
Northern Utah
You probably didn't know, but I worked in the FRP business for 13 years so I'm familiar with the resin, styrene, and all the itchy dust. We built large custom tanks (up to 14' diameter) and piping systems mostly for the pulp and paper industry. I worked in the drafting department so I didn't have a lot of hands-on experience, but I did work in the shop on occasion (in safety and QA) enough to know what you're talking about.

My hat is off to you Vincent. I worked with that **** enough to know I didn't like working with that ****. :LOL: I also remember my brother trying to explain the application of gelcoat to me when he asked me to finish off the boat. I didn't even let him finish the recap of how it is "supposed" to be applied when I stopped him and said, F**K that, I know paint and if you want me to do it, I'm using paint, urethane to be precise. I knew enough about gelcoat to know it continuously dies back and needs to be polished a LOT to retain its shine.

The cracks and breaks were repaired using standard fiberglass resin, sheets and shredded strands, then filed flat and a skim coat of fiberglass reinforced filler, then glazing putty to fill fine scratches and pinholes, just like any other body work. I finished things off with 2X primer and 400 grit sanding. I had to divide the sprays into sections to prevent dry spray by using various compartment and seams as breaking points for masking hard lines. I also set up a very primitive scaffolding array using whatever my dad had around the farm that would make and OSHA inspection cringe in order to hang out over the boat and spray it. The walkways along the sides and up on the bow were treated with textured paint, like used on GM Blazer tops and Ford Bronco tops to create that rough "grippy" appearance, then paint followed by clearcoat were applied.

I remember when he sold that boat to upsize, from the beltline up and the turquoise stripe still looked like the day I sprayed it, yet the rest of the hull needed attention. Never been a fan of gelcoat and I hate working with fiberglass. Am I fairly good at working with fiberglass? Yes, but I despise it. :evil:
 

bigdave_185

Well-known member
Joined
Feb 14, 2021
Messages
443
Location
Utah
Pardon @zmotorsports over the course of you cleaning up the car you said “polish the wheels”. Did gm not put a clear coat finish on those wheels? They shine like chrome in your photos
 
OP
Z

zmotorsports

ALLIANCE MEMBER
Joined
Oct 20, 2009
Messages
21,477
Location
Northern Utah
Pardon @zmotorsports over the course of you cleaning up the car you said “polish the wheels”. Did gm not put a clear coat finish on those wheels? They shine like chrome in your photos

Dave, the wheels from GM were painted silver. Back about a year ago when I did the paint correction, I sent my wheels to a shop in CA that polished the curb rash out from the previous owner and then triple chrome plated the wheels. So, they are in fact chrome and don't need polish in the aluminum sense, but I do need to give them a thorough cleaning and add some chrome polish to them while it is up on blocks and easy to access. I think I just used the terminology of "polish" as a general term in this case.
 
OP
Z

zmotorsports

ALLIANCE MEMBER
Joined
Oct 20, 2009
Messages
21,477
Location
Northern Utah
Well hell, it was nice having a small refrigerator in the shop while it lasted.

About a year and a half ago, the wife and I went to a charity golf tournament where we assisted for a local children's hospital. I don't golf, so I was not there for the golfing, let me just throw that out there. I went along to help the wife and to be able to spend time with her and it was for a good cause. Whilst we were there, I grabbed $20 worth of raffle tickets and we ended up being drawn for a flat screen TV as well as this small 1.7 cu/ft. countertop refrigerator. The refrigerator was decorated in Monster Energy garb and seeing as I am not necessarily an energy drink fan, I tore all of the wrap off and just had a plain refrigerator. It was kind of nice to have one in the shop, but to be honest, I generally just grab a drink when I'm leaving the house and heading to the shop anyways so it was there for when visitors came by mostly.

I noticed the other night after the wife came out to the shop and I turned the radio off, that it was short cycling when it kicked on. I opened the door and noticed a lot of moisture inside the glass and thought maybe it was going through a defrost cycle and didn't give it any more thought.

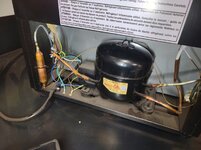
Well, last night I wasn't planning on working in the shop because we had a viewing to go to so I was just tidying up a few things while waiting for the wife to get home and I noticed it short cycled again. Now I knew something was awry so I grabbed my meter and flashlight and dug into the back of the refrigerator.


I also noted that this has the R600 refrigerant in it and I don't have the ability to charge that at work or my shop so I immediately thought to myself if it is more than a relay or capacitor then it's pretty much junk. Unfortunately, I think most of these small import countertop refrigerators are junk anyways, but that's another topic altogether.
fridge1.jpg

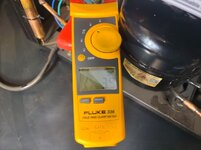
I pulled the cover away from the thermal overload and relay to access the wiring and threw an amp clamp on it. Upon plugging it in, the current jumped to 4.2 amps, then settled to 3.9 until the start circuit opened in the relay. At first glance I didn't think 4 amps was high, until I read the ID tag on the back and the specs are 1.6 amps. Well, that's a problem. :lol:
fridge2.jpg

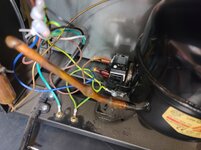
In order to do my due diligence in troubleshooting, I thought I just wanted to double check the start relay as well as the thermal protector. Granted, the compressor was getting power so I knew these were not the issue, but wanted to double check anyways.
fridge3.jpg

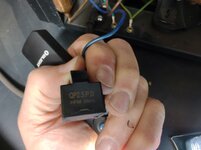
Start relay tested ok, and while it was off I thought I'd check to make sure either the start or run windings in the motor were neither open nor shorted. All windings tested fine, nothing shorted or open between the windings nor ground. This was confirming my initial suspicion of the compressor motor after the first test with the amp clamp.
fridge4.jpg

Thermal protector tested good as well, which was a given seeing as how no current would have flowed if it were bad.
fridge5.jpg


Well ****, after looking up a compressor and seeing the cost more than double what a new refrigerator costs, I think this is junk. Oh well, it was nice having a refrigerator in the shop while it lasted. I just can't bring myself to buy another one right now as it's more of a want than a need.
 
OP
Z

zmotorsports

ALLIANCE MEMBER
Joined
Oct 20, 2009
Messages
21,477
Location
Northern Utah
I have one of the small refrigerators in my garage. It is over 27 years old. Going strong. You never know about these things. Some last a long time, some don't???? As for the brand badge on mine, it is a Kenmore.

Yeah, the older stuff seems to just keep on going and going compared to the new junk available today.

We had the original dishwasher in our last home for 26 years and never an issue. In that same 26 years we replaced our original water heater @ 17 years and the replacement was still in there when we sold the house 9 years later. In our new home we have already replaced the water heaters twice in the 8 short years we've lived here and the appliances all at least once. I've replaced the dishwasher twice in the time we've lived here. To say I am less than impressed with much of anything being made lately is a huge understatement.
 

plain2car

Well-known member
Joined
Nov 27, 2008
Messages
514
Location
Gilbert, Arizona
Mike, the camaro is looking fantastic!.... DFB would be very proud. I wanted to get your thoughts or opine on a few posts back about the race ramps. I am looking into doing something to help with working on my truck (lowered) IE: oil changes and cleaning in general. I would like to know your thoughts on the race ramps compared to the 2x4 wood wheel forms? also would you elaborate on your process to get the car onto the ramps? thank you for taking time to answer a medial question(s)... ;)
 
OP
Z

zmotorsports

ALLIANCE MEMBER
Joined
Oct 20, 2009
Messages
21,477
Location
Northern Utah
Mike, the camaro is looking fantastic!.... DFB would be very proud. I wanted to get your thoughts or opine on a few posts back about the race ramps. I am looking into doing something to help with working on my truck (lowered) IE: oil changes and cleaning in general. I would like to know your thoughts on the race ramps compared to the 2x4 wood wheel forms? also would you elaborate on your process to get the car onto the ramps? thank you for taking time to answer a medial question(s)... ;)

Thank you and thank you for following along.

I contemplated on building some 2x4 cribs to use but it's that four letter word I don't care for, "wood". :ROFLMAO:

That being said, I had a coupon for Summit Racing and have been eyeing these blocks for a few years now so I rolled the dice and gave them a shot. Overall impression is I like them, once the car is up on them that is. I wanted something relatively small and compact and these fit the description for me better than sections of 2x4 cribbing that I would have to store as these are not something that I see myself using very often. I would say for specific jobs such as the polishing of the car they work fantastic to get the car up off the floor of the shop enough to make working on the exterior comfortable.

I also see myself in the future building more custom vehicles and for long term builds I think these will work great, which was also a factor in my choice to go with these. They are very light, yet strong so storing them next to my floor jacks is simple and they stack nicely and take up much less space than say a 2x4 cribbing or similar height.

For the majority of the mechanical work I do on vehicles I much prefer using the 2-post lift, but polishing paint out can be cumbersome working around the columns and arms of the lift so being out in the open floor space is much better in my opinion. I can also see it being nice when getting to the mock up phase of building a car to have the car at a somewhat elevated height so these will work great when that time comes.

As for getting them up on the blocks, neither of my floor jacks, 2-ton low profile or 3-ton standard, will get the chassis up high enough to clear the bottom of the tires of the blocks in one motion. When I had it on jackstands last year doing the paint correction, I didn't like the way the jackstands intersected the suspension components of the car. With both the front and rear suspensions being independent in design, the jackstands end up being on a suspension component at a very slight angle even when the full curb weight of the car is sitting on them and that makes me anxious. To clear the front lower valance of the car I used my low profile 2-ton floor jack to grab the crossmember and raise it up high enough to place my 3-ton under it slightly outboard of center on the lower A-arm, then raise enough to put the block under one side, then repeat on the other.

With the front end up on the Race Ramps, I turned my attention to the rear end. I remember from last time that with the front end elevated it lowers the rear bumper valance so low that neither of my floor jacks fit under it without contacting the paint. Last time I ended up driving up onto some 2x6 blocks to get the rear end high enough that with the front end elevated I could then get under the rear with a floor jack. However, this time I came into the rear by going just in front of the rear tire and contacting the suspension attachment point, raising one side up enough to get a Race Ramp under, then repeat on the other side. All in all it worked great and although I didn't time it, I would say the car was sitting fully on all four Race Ramps in less than 10-minutes. To me 10-minutes is a small price to pay for a week or so worth of comfort while working on the car, but that is just my opinion. Ten minutes is a bit longer than merely using traditional jack stands, but I felt much better about how the car was positioned and sitting for the past week being on the tires and not sitting on the suspension with a slight angle of the suspension components making contact with the jackstands.

I hope that is what you were inquiring about and hope that was helpful.

Do I like the Race Ramps? Yes, they are well made, light, easy to stack and store and are able to support 1500-pounds each which is more than adequate for most vehicles less mid-size 3/4 or 1-ton pickup trucks.
 

plain2car

Well-known member
Joined
Nov 27, 2008
Messages
514
Location
Gilbert, Arizona
Mike, THANK YOU!! I appreciated your very pointed and perfect answer(s). My thoughts were the same related to the ramps (which I am leaning towards). I have a little bit more room under for the floor jack, but I still need more clearance to set them under tires. Your answer helped with the "how" to set up. now!! if I can just get that summit discount!!! :p. I was wanting your perspective due to alot of people using the cribs.... although I think the cost of them would be close or more compared to the race ramps... :sneaky:.
 
OP
Z

zmotorsports

ALLIANCE MEMBER
Joined
Oct 20, 2009
Messages
21,477
Location
Northern Utah
Mike, THANK YOU!! I appreciated your very pointed and perfect answer(s). My thoughts were the same related to the ramps (which I am leaning towards). I have a little bit more room under for the floor jack, but I still need more clearance to set them under tires. Your answer helped with the "how" to set up. now!! if I can just get that summit discount!!! :p. I was wanting your perspective due to alot of people using the cribs.... although I think the cost of them would be close or more compared to the race ramps... :sneaky:.

You're welcome.

You touched on something I thought about after I posted, and that was the cost of lumber vs. the Race Ramps. The wood style cribbing utilizes quite a few 2x4's so I can't see them being all that much less expensive than the Race Ramps to be honest. The Race Ramps are just so stinking light and maneuverable compared to a heavy wood cribbing setup.

Now for setup, I forgot to mention this, but they do make stackable 6" blocks that would still net the full 12" overall height. I looked at those specifically for ease of setup as well as being an option on either 6" high or the full 12" height, however, in the end overall cost won out as they were about $50 more per set for the stackable version vs. the 12" tall ones.
 

bigdave_185

Well-known member
Joined
Feb 14, 2021
Messages
443
Location
Utah
I must have missed the sending them off to get chrome finished. They do look unique and very amazing!

I think I have met you in person twice but I’m not sure if your guys realize how tall @zmotorsports is. I’m average size and I think Mike is in the 6’5” range? I totally understand the block idea and getting things up to a height that doesn’t mean bending at the hips.
Blocks look excellent to me.


I do think I have seen a version of those blocks that have a ramp option? Could you drive back of car onto ramps and then lift the front maybe ? Not that your process was flawed in any way just thinking through text
 

meathooker

Well-known member
Joined
Dec 10, 2013
Messages
254
Location
Iowa
I never gave it time to see if it would be better when I retired. Last day at work was Feb. 28 and was in Az by mid March.
how do you like az? I’ve been there twice and don’t see the appeal, but as I get older more and more of my friends are buying second homes there
 
To avoid these ads, REGISTER NOW!
Top Bottom