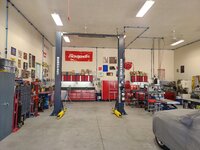
To avoid these ads, REGISTER NOW!

ZMotorsports Shop Projects 2.0

OP
Z

zmotorsports

ALLIANCE MEMBER
Joined
Oct 20, 2009
Messages
21,464
Location
Northern Utah
Yeah buddy!! Awesome trip to some beautiful country side

Thanks Dave.


Looks like you had a nice get a way Mike. I check your thread every morning to see any updates and have learned that if Mike is missing for a week that usually means we will get some nice pictures Monday morning!

Thank you Scott, I appreciate the comments and you taking the time to follow along on my thread. Glad I haven't bored you to stay away. :bounce:

Looks like you and your wife had a great trip.

Thank you Aaron. Yes, it was a fun and relaxing trip. I knew what I had awaiting me at home as far as work so I made extra certain to enjoy the time away knowing I had a busy weekend coming up when we returned.

Mike, looks like a great trip. Thanks for the travelogue. And oh by the way, congrats on the new tool (lift).

Thanks Joel.
 
To avoid these ads, REGISTER NOW!

signcrafter

Well-known member
Joined
May 9, 2012
Messages
12,497
Thanks Dave.


Thank you Scott, I appreciate the comments and you taking the time to follow along on my thread. Glad I haven't bored you to stay away. :bounce:


Thank you Aaron. Yes, it was a fun and relaxing trip. I knew what I had awaiting me at home as far as work so I made extra certain to enjoy the time away knowing I had a busy weekend coming up when we returned.


Thanks Joel.
Bore me? It doesn't matter what you are doing Mike I still read about it due to your attention to detail and great explanation. Learn something new every time you post, even if it's something I'm not interested in or don't see myself ever doing. Also have a few times I can remember where I ran into a similar situation some time later and remembered a post by Mike doing the same job and have gone back to review your posts to see WWMD, what would Mike do. When I wake up and have my coffee I scan free parking and general tools to see if anything catches my eye and then click on this thread to see any updates. And to be a little selfish, I do get a little sad when there are no updates for the week. LOL. But glad you get to get away and have some down time to recharge!
 
OP
Z

zmotorsports

ALLIANCE MEMBER
Joined
Oct 20, 2009
Messages
21,464
Location
Northern Utah
So with the new lift installation completed last night I guess I will introduce the latest addition to my humble little shop.


Wanting to step up to a 12k pound lift from my previous Ammco 10k pound lift was not a super high priority as the Ammco lift did everything I needed it to and threw at it over nearly 15-years of ownership. However, as I mentioned earlier, with heavier trucks I worried about those rear arms being overloaded with the longer trucks being rear biased. The second issue was finding a lift that would meet all of my requirements as far as being able to go low enough to grab the majority of the vehicles I work on yet still be able to support the weight of the heavier ones.

After much research and back and forth with numerous questions I was impressed with Bendpak's willingness to answer my questions to my satisfaction. I know there are reviews for so many manufacturers and most all have pro's and con's associated with them so one clear hands down winner is rather subjective. Although I am not a 2-post lift virgin having owned one for nearly 15 years now, I wanted to see what was being heavily used in the automotive repair shops in my area and ask a few of them for their likes and dislikes as far as various features.

Several of the businesses that I talked with specialize in light duty pickup trucks ranging up to the 1-ton duallies and everything down to full-size SUV's and many of them had the standard profile arms and the mechanics and shop owners really liked them. Then a couple of businesses work on a wide range of vehicles like I do, but they have low profile 7k-10k lifts for the vast majority of their work and one or two 10k or 12k for the larger pickup trucks so they have different lifts for different vehicles. Not something that is really an option for me so finding one that will do all and still offer the safety and other features I was wanting led me to the Bendpak 12APX lift.

It has the triple telescoping arms front and rear that allow the option of loading heavier trucks in the symmetrical configuration yet still allow enough ground clearance to swing the arms under say a small to mid-size sedan and load onto the lift in the asymmetrical configuration. I also wanted wider spaced columns to allow for a bit more drive-thru clearance and allow me to open doors and not hit mirrors as easily as I did on my Ammco lift, which was a bit on the tight side.

When I finally decided on a model and reached out to ensure the lift was in stock I was told about 5-7 business days once the order is placed to deliver it. I reached out to my cousin to see if I could have it delivered to his repair shop as he has a forklift to unload it. With a destination arranged, I placed the order. I was sent an email confirmation stating the order was placed with the warehouse, this was on a Tuesday, two weeks before the wife and I were to leave on vacation so I was thinking it would be delivered approx. Tuesday or Wednesday before we left for vacation, perfect.

The next day (Wednesday) I recieved another email stating the warehouse had pulled the order it was shipping that day with an approx. delivery date of the following Tuesday but the driver would call 24-hours before delivering to confirm. I called my cousin to let him know it would probably be the following Tuesday and he said he'd text me when it arrived and I could come and get it.

On Thursday, only 2-days after placing the order, I was heading home when I received a text from my cousin's son with a picture showing it sitting on their forklift stating "looks like it arrived early". Holy ****, less than 24-hours after leaving the warehouse in California it arrived.

I hauled *** home, hooked up my utility trailer and ran to his shop to get it.
del1.jpg

Fortunately I only had about a mile to go from my cousin's shop to my home because I don't think this loading configuration would have been OSHA approved. :ROFLMAO:
del2.jpg

I backed the trailer into the shop and immediately began unboxing so I could get it on the floor before we left for vacation. I have to say, the packing was impressive. I remember my Ammco lift coming much the same way as far as being bolted together using a welded fixture to mount the top of one column and the base of the other, then the same at the other end, but my Ammco was just shrink wrapped and the rest of the components came on a separate pallet.

This thing was all contained on one skid, banded together with everything intact. The other thing I noticed right away was the 1/4" plywood along the lengths of the columns to avoid scratches and damage. At first I was worried because maybe the plywood would have scratched the powder coating on the columns, but once I removed the plywood from the exterior, I noticed they also had a couple of wraps per linear foot of shrink wrap on the columns themselves before securing the plywood. This extra step protected the finish perfectly. I know cosmetics aren't the biggest reason we buy lifts, but I still want them to look good after years of service and really don't want to put something in my shop that was all scratched or dinged up right from the beginning. When I sold my Ammco, the guy was impressed it looked as good as it did for being nearly 15-years old. I explained it wasn't used dozens of times a day like I'm sure his were, but he assured me that it was more than that and he could tell it was well cared for regardless how much or how little it was used. That made me feel good knowing it was recognized and would be appreciated by the new owner.


un1.jpg

The height adapters on this lift are solid vs. the hollow ones for my Ammco 10k pound lift. These are heavy and not something I want to drop on my foot when handling. This lift came with the frame style cradles but I also ordered the telescoping threaded flat pads as I feel those do a better job of being able to adjust height front to rear on the vast majority of the vehicles I work on when the height is between the sizes of the solid adapters.
un2.jpg

This lift also came with a 5 HP pump assembly vs. the 2 HP on my Ammco. In addition the cylinders are larger on this lift, being a 12k pound lift. I knew right away that this lift will be a bit slower having to move more fluid, but I didn't buy it for the speed so time will tell how much slower it is.
un3.jpg

Everything else was packaged just as well and sorted very neatly. Personally, I feel a lot can be said about the pride taken by a manufacturere of anything in how they package their product. If they don't have pride in the product, it will show in how it's packaged for delivery. This was very well packed right down to each nut and bolt. Another thing I noticed was the size of the equalizing cables compared to my 10k pound lift.
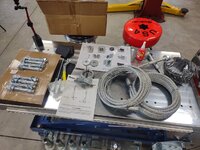
un4.jpg

The arms are massive as the innermost sliding section is the size of the outer tube on my last lift.
un5.jpg

The overhead beam was also thicker material and much heavier with larger cable sheaves.
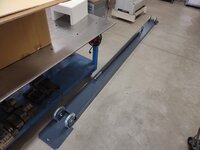
un6.jpg

The shrink wrap removed and ready to lift off the trailer.
un7.jpg

The arms didn't want to come out of the channel so I would have to unload the columns first, then slide the arms out the top of each column. This actually worked out well because I used the placement of the arms in each column as ballast to adjust as I was strapping each column to lift off the trailer with my engine hoist. I was doing this alone and the last thing I wanted to do was injure myself and prove my wife right that I needed help. :bounce:
un8.jpg


Stay tuned for more pictures.
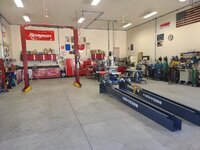
 
OP
Z

zmotorsports

ALLIANCE MEMBER
Joined
Oct 20, 2009
Messages
21,464
Location
Northern Utah
Continuing on with the unboxing and unpackaging of the new Bendpak 12APX 2-post lift.

The columns are now ready to sling and lift off the trailer.
un9.jpg

Before doing so, I removed the metal frame that was bolted to the base and wanted to check for flatness of the base. I have seen some with quite a lot of deflection from the welding process and I can say that I was impressed to find less than .045" across the entire base, and these were massive bases.
un10.jpg

Removing the first from the trailer.
un11.jpg

I was able to slide the arm still inside the column a little to aid in balancing the column.
un12.jpg

Once one column was on the ground, I removed the rear arm using the engine hoist. These arms are heavy and massive.
un13.jpg

The second column perfectly balanced and being removed by myself.
un14.jpg

I had just sat the last column on the shop floor when the wife arrived home from work. She would NOT have been happy with me had she witnessed unloading them.
un15.jpg


And that is where the columns have sat for the past week and a half until we arrived home from vacation.

Thanks for looking.
 
Last edited:
OP
Z

zmotorsports

ALLIANCE MEMBER
Joined
Oct 20, 2009
Messages
21,464
Location
Northern Utah
Above I described the teardown and sale of the old Ammco 10k lift last Friday. I was spent after a long day of disassembly posted it for sale Friday night having a buyer come and get it Saturday morning.

My son had planned on coming over Saturday to help me for a while but he and his family had a barbeque in the afternoon so it wasn't going to be a long day. The plan for the day was to at least get the columns stood in place and the holes drilled for anchoring.

As soon as the guy pulled his trailer out with the Ammco lift on it, we moved the two new columns roughly into position and with the help of the buyer of my old lift, we dead lifted the columns upright and walked them into place. I had some tape applied to the floor where I "thought" I wanted them, but once we got them standing I made a slight alteration to the placement for its final resting place.
bp1.jpg

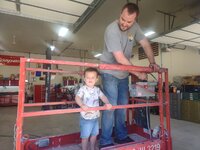
My DIL and grandson came over shortly after and he had to go for a ride in the scissor lift so his dad obliged.
bp2.jpg

He loves cars, trucks and especially any kind of construction equipment so this was exciting.
bp3.jpg

With the columns now where I was happy, we used a chalk line to lay out some lines for aligning and ensuring our measurements.
bp4.jpg

We then drilled some 1/2" pilot holes followed by the 3/4" holes to depth.
bp5.jpg

After vacuuming and blowing the holes out thoroughly, the anchors were driven in to where they were almost against the base plate.
bp6.jpg

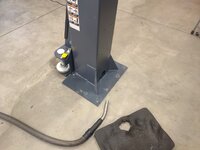
This allowed for just a little "wiggle" room to adjust the columns as needed. Side to side my floor is dead nuts level so no shimming was required in this plane.
bp7.jpg

However, due to the floor having to slope slightly to meet code I did have to add a couple of shims to the rear of the columns to bring them plumb.
bp8.jpg

With all of the holes drilled, anchors driven in place and shims installed as needed, that is where we quit for the day being early Saturday afternoon.
bp9.jpg

My son was planning on coming by Monday night after work to resume where we had left off, but me being me, I couldn't wait. So Sunday morning after coffee on the deck I headed out to the shop to commence work on the lift. My thinking was I would get everything ready for my son to come by Monday and help, especially because I knew I couldn't lift that big *** top beam by myself and the fact that my wife was watching me like a hawk to make sure I didn't do anything stupid, at least by her definition, but I just wanted to get it done and the shop back to "work mode".

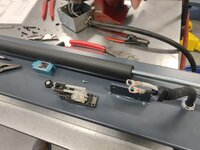
I heaved the top beam up onto the welding table so I didn't have to work on it on the floor and realized this was going to be too heavy for me to lift up onto the scissor lift by myself. I figured I would get the overhead safety switch wired in and then maybe call it a day. I like to add terminal rings when connecting wires to switches when possible. I had to just touch these across the belt sander to make them narrow enough to fit into the screw pockets on the microswitch.
bp10.jpg

Stay tuned for more.
 
OP
Z

zmotorsports

ALLIANCE MEMBER
Joined
Oct 20, 2009
Messages
21,464
Location
Northern Utah
Continuing on with Sunday's work.

Wires connected to microswitch.
bp11.jpg

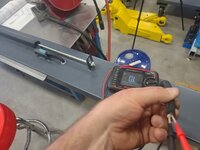
Microswitch installed into position and arm adjusted, then tested to ensure the switch will be Normally Closed when the rod is hanging and goes open when the bar is pushed up towards the top beam.
bp12.jpg

Closed when pulled away from top beam. Test confirmed.
bp13.jpg

At that point a smart person would have said that's enough for the day and wait for help. But I guess I have never claimed to be smart, just impatient. I moved the scissor lift over near the welding table, turned the welding table parallel with the scissor lift and thought I would try to lift "half" the weight of the top beam and slide it up onto the scissor lift and walk it up until balanced. That way technically I am not lifting the beam by myself. Once I got the beam on my shoulder there was no turning back because I couldn't figure out how to set it back down so I was committed to getting it on the scissor lift.

Once on the scissor lift I began negotiating the lift around in the shop and squaring up with the columns. The wife saw what I was doing through the kitchen window and came running out to inform me I was a stubborn idiot, like I needed her to confirm that. :rolleyes:
bp14.jpg

I raised the scissor lift up and moved the top beam into position between the columns. I still hadn't tightened the anchor bolts because I figured if I needed to tweak the columns one way or the other to align the bolt holes that would give me some wiggle room. Glad I did because I was off by about half a bolt hole so I had to move slightly to drop the bolts into place.
bp15.jpg

With the top beam in place, I could also verify that my fan would not come in contact as I had expected to have to shorten the pedestal and bring the fan closer to the ceiling, but it easily cleared by several inches. I also turned the fan on to run for a bit to make sure there would be no weird buffering of the air as it passed by the top beam. Nothing heard and all looked good. Again, here a smart person would have called it quits for the day. But nope.
bp16.jpg

With the top beam solidly mounted, I turned my attention to torquing the base anchors to spec.
bp17.jpg

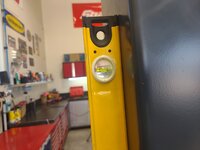
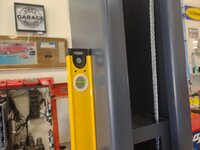
Then one final check on the plumb of the columns. Looks good front to rear.
bp18.jpg

Dead nuts level side to side. I can live with that.
bp19.jpg

I refilled my water and thought for a second about calling it a day seeing as how the kids were coming over for dinner Sunday night. But I was already hot and sweaty so I figured I would just push on to the next step.
bp20.jpg

Stay tuned for more.
 
OP
Z

zmotorsports

ALLIANCE MEMBER
Joined
Oct 20, 2009
Messages
21,464
Location
Northern Utah
With a couple of hours before the kids came over for dinner, I figured I would run the hydraulics and electrical. By the time I got those done, I figured what the hell, may as well pull the cables and get them into place.

bp21.jpg

With the hydraulic hoses ran, cables hanging and electrical ready to connect, I thought I would call on the wife to assist me mounting the hydraulic pump and reservoir. I was able to lift it into place and have her start a couple of bolts. Once that was mounted, I connected the electrical only to determine I needed one more strain relief for the safety switch wire and didn't have one on hand. Dangit, that is where I quit for the day on Sunday afternoon.
bp22.jpg

Monday after work I swung by my local electrical supply house on the way home and grabbed another strain relief for the cord from the safety switch. I was just completing the electrical when my son arrived after getting off work. While he was changing into work clothes I connected the safety release handle and adjusted the cable, then wrapped that part up. At that point I had my son help me put hydraulic fluid in the reservoir, then power everything up and bleed the hydraulic system. I adjusted the equalizing cables to where there was about the same amount of thread showing through on each one at least to get me close.
bp23.jpg

After bleeding the air and topping off the hydraulic fluid, we moved the arms into place. I really like these arm restraints as they engage 360-degrees to lock the arms into position whereas my old lift, and most of the lifts on the market, use a gear section that engages with some teeth on the lower part of the arm and only engage in approx. 30-40 degrees for locking. Now while I had never had an issue with mine moving, I do like the fact that these engage with more contact to prevent arm movement. The release levers easily release the arms to move when above ground level and when at ground level the female cups lift to allow full range of motion from the arms. Time will tell, but so far I like how smooth and effortless these are to position.
bp24.jpg

All four arms in place, set screws tightened to lock the release cups to the release shafts and tested.
bp25.jpg

After a couple of cycles to ensure the fluid is bled of any air, I wanted to make sure the cables were adjusted side to side properly and they were dead nuts on just by having a few threads protrude through the end of the nuts. The locks snapped simultaneously with each notch.
bp26.jpg

At that point I was almost to the point of quitting for the evening but since I had my son's help I asked that he help me lift the air hose reel into place if I hurried and drilled & tapped a few holes.

By the time we closed up the shop for the evening the lift installation was complete, including the mounting of the hose reel, the paper towel dispenser and ensuring everything was working as it should.
bp27.jpg


That concludes the installation of my new Bendpak 12APX 2-post lift.

Thank you for following along. I plan on doing a full review once I get some time behind me using this lift as well.
 

SilverJimmy

Well-known member
Joined
Apr 14, 2012
Messages
1,679
Location
Prescott/Flagstaff, AZ
Thanks Mike! I just had to call my buddy who’s the local NAPA Tools & Equipment guy. I have a Challenger 10k lift on order, supposed to ship August 15th right after the shop is finished enough to allow me to install it and not be in the way of the crews. We discussed whether the 12APX would be a better fit for what my shop will be used for or if the one ordered will be best. We both agreed that in this case, for me, I don’t need to “Be Like Mike”! Overkill is not called for!
Thanks again for trying to help me spend my money!
 
OP
Z

zmotorsports

ALLIANCE MEMBER
Joined
Oct 20, 2009
Messages
21,464
Location
Northern Utah
Thanks Mike! I just had to call my buddy who’s the local NAPA Tools & Equipment guy. I have a Challenger 10k lift on order, supposed to ship August 15th right after the shop is finished enough to allow me to install it and not be in the way of the crews. We discussed whether the 12APX would be a better fit for what my shop will be used for or if the one ordered will be best. We both agreed that in this case, for me, I don’t need to “Be Like Mike”! Overkill is not called for!
Thanks again for trying to help me spend my money!

Hey I tried Sterling. Ya can't fault me for trying to help you unload some cash. :ROFLMAO:

The Challenger 10k is a great lift, very similar to my old Ammco 2N1 made by Hennessy Corp. It should serve you well, mine did for many years and still would had this not floated to the surface as far as shop equipment. I was fortunate to have been able to get what I paid for my old Ammco lift just by taking care of it and someone else seeing the value in a well-cared for piece of equipment, even with some age on it.
 

SilverJimmy

Well-known member
Joined
Apr 14, 2012
Messages
1,679
Location
Prescott/Flagstaff, AZ
I’ve had an ALM 7k two post in my existing last two shops for over 25 years and it has always done everything I’ve asked it to do, so going to a 10k will be a bigger jump for me than what you just did, so I’m thinking I might have been “overthinking“ this and it would have been “OverKill”!
 
OP
Z

zmotorsports

ALLIANCE MEMBER
Joined
Oct 20, 2009
Messages
21,464
Location
Northern Utah
I’ve had an ALM 7k two post in my existing last two shops for over 25 years and it has always done everything I’ve asked it to do, so going to a 10k will be a bigger jump for me than what you just did, so I’m thinking I might have been “overthinking“ this and it would have been “OverKill”!

I'm certain a 10k will work perfectly for you Sterling. I've just found myself a little uneasy on a few larger and longer trucks lately and with my grandson running around the shop more and more I don't want to take any chances. Plus as I get nearer to retirement I'm trying to knock some of these later in life "wants" before retirement sneaks up on me where I'll be on a more fixed income. Also, so I can have more time to enjoy them and try to wear them out in my later years. :thumbup:
 

SilverJimmy

Well-known member
Joined
Apr 14, 2012
Messages
1,679
Location
Prescott/Flagstaff, AZ
That old man Father Time keeps telling me I better get busy cuz he and I have an appointment coming sooner than later. I can hear him whisper in my ear, “Do it now, cuz there might not be later…” I’ve already outlived my mother and a bunch of friends and my father and grandfather got to early their 80’s and 90’s, so, clocks a ticking!
 

Atlascycle

Well-known member
Joined
Aug 9, 2008
Messages
247
Location
Fremont, Ne
Mike,
it is nice to hear I am not the only one that gets a lecture from my Wife about doing "Sketchy ****" and Being stubborn and not waiting for help, I bit me in the mouth a couple of months ago, was moving our generator from our shed to a built in on our deck, 9k Generator trying to push it up ramps on our deck stairs, my feet slipped out from underneath me and face planted into the top support bar and chipped a front tooth. I still catch hell on that one.

Jason
 
OP
Z

zmotorsports

ALLIANCE MEMBER
Joined
Oct 20, 2009
Messages
21,464
Location
Northern Utah
Mike,
it is nice to hear I am not the only one that gets a lecture from my Wife about doing "Sketchy ****" and Being stubborn and not waiting for help, I bit me in the mouth a couple of months ago, was moving our generator from our shed to a built in on our deck, 9k Generator trying to push it up ramps on our deck stairs, my feet slipped out from underneath me and face planted into the top support bar and chipped a front tooth. I still catch hell on that one.

Jason

Ya know Jason, I don't think that we think it's always "sketchy ****" at the start of such projects or tasks. :unsure: Many times we think it through (sometimes not long enough though) and it starts out as a solid plan and as said plan unfolds it turns into sketchy **** all by itself. :ROFLMAO:
 

plain2car

Well-known member
Joined
Nov 27, 2008
Messages
514
Location
Gilbert, Arizona
I am young enough that my mind still writes checks that my old(er) body is in NNOOOO WAAAYY! going to be able to cash! :ROFLMAO:. Mike as again .. you are a treat to read and your descriptions and explanations are what we always need and desire. A couple questions if I may....
1- how do you like the rapid air lines? positives, negatives (cost?) review?
2- what do you use for a compressor regulator and dryer?
I have a 60gal compressor and looking to make it more user friendly... ;) for some reason I have gone through 2 regulators in 5yrs ??? :unsure::mad:.
thank you for your time :beer:
 
To avoid these ads, REGISTER NOW!

tarbellb

Well-known member
Joined
Apr 17, 2011
Messages
5,777
Location
Oregon
Excellent write up on the new lift, congrats on the new emgear!

Interested to hear what you used for shimming? I second guess some of my shim decisions on those larger surface area situations
 

Xti04

Well-known member
Joined
Nov 11, 2016
Messages
2,357
Thats exactly how my lift went together Mike minus having a scissor lift available for the top beam work. Engine hoist to bring it inside off trailer and assist in standing it up, and the rest is all cake after the columns are in place. Always fun to get new equipment.
 
OP
Z

zmotorsports

ALLIANCE MEMBER
Joined
Oct 20, 2009
Messages
21,464
Location
Northern Utah
I am young enough that my mind still writes checks that my old(er) body is in NNOOOO WAAAYY! going to be able to cash! :ROFLMAO:. Mike as again .. you are a treat to read and your descriptions and explanations are what we always need and desire. A couple questions if I may....
1- how do you like the rapid air lines? positives, negatives (cost?) review?
2- what do you use for a compressor regulator and dryer?
I have a 60gal compressor and looking to make it more user friendly... ;) for some reason I have gone through 2 regulators in 5yrs ??? :unsure::mad:.
thank you for your time :beer:

Thank you for the kind words and for continuing to follow along on my thread.

As for air lines, I didn't end up using RapidAir, I used one called Aircom but they are pretty much identical. The reason I chose Aircom was because my local air compressor/supply house (Maddox Air Compressor) sells Aircom and although I purchased three of their full shop kits, I figured if I need a onesie or twosie part, I could run to my local store and grab what I needed vs. having to order something and wait or have to buy more than what I needed.

The air pressure regulator and water separator that I am using is just a standard model from Parker that I purchased from the above compressor supply store, Maddox Air Compressor, that is just a few miles from my home. I had the same one at my last shop for 25 years but I did buy a new one when I moved into the new shop 8 years ago.


Mike, would love more info on your shop air setup and air lines, air distribution, etc

Also, how did you shim the new lift, pre installation to level it and get it plumb?

I used the Aircom air supply system. I ended up purchasing and using nearly every bit of three kits to fully plumb my shop and one dual manifold drop into the RV bay. I show the full installation of the air system in my actual shop build if you want to check those pictures out.

As for shimming the columns, I just used my 4' level and a prybar under the base to raise it enough to slide a shim or two under then double check. Once the top beam was installed and I began torquing the anchors down I just kept checking with the level to ensure nothing was moving. Nothing really scientific, just pretty basic.
 
OP
Z

zmotorsports

ALLIANCE MEMBER
Joined
Oct 20, 2009
Messages
21,464
Location
Northern Utah
Excellent write up on the new lift, congrats on the new emgear!

Interested to hear what you used for shimming? I second guess some of my shim decisions on those larger surface area situations

Thank you. Shims were provided in the packaging from Bendpak. They were nice and large diameter "C" cut steel shims that slid under the base and around the anchor bolt which allowed a good amount of surface area when tightening everything down.

Thats exactly how my lift went together Mike minus having a scissor lift available for the top beam work. Engine hoist to bring it inside off trailer and assist in standing it up, and the rest is all cake after the columns are in place. Always fun to get new equipment.

That's how we did the first lift in the last shop, plus the same way we broke it down and loaded it on the trailer to haul to the new place back in late 2016, then reassembled it in July 2017 in the new shop. Using an engine hoist seems to be the most common method from what I can gather as most people nor shop don't have a forklift at their disposal. The first lift all three times were done on ladders, but I'm not getting any younger and with my son just getting done with his physical therapy from his foot injury earlier this year, I really didn't want to risk either of us getting injured. I called a couple of local rental places and was going to rent a scissor lift, then I ran into my neighbor who does construction on the side and asked him if he knew anyone who has one for rent and he told me he would loan me his. I told him I didn't want to borrow it, but I would rent it. I do NOT like borrowing things because then I'm obligated to that person and I have found out over the years that this is a good way to get burned and ruin relationships so I pay my own way regardless. I told him I would contact one of these other places and make arrangements to have one delivered and he then threw out a very reasonable number to rent it for the week while they are on vacation and he was able to drive it over that night.

My wife wants me to buy a scissor lift, which I would also like, but it's not quite as high up on the priority list right now. Maybe after I get around to building myself a car hauler trailer, I may save up and start looking.
 
OP
Z

zmotorsports

ALLIANCE MEMBER
Joined
Oct 20, 2009
Messages
21,464
Location
Northern Utah
Last night upon arriving home I just had a couple last minute things to tidy up on the new lift before running around the lawns and before the wife got home from work.

I installed my hook that I catch the overhead air hose with to keep it from being a trip hazard onto the lift, this was just a simple task of drilling and tapping a couple of 10-32 holes to screw the shop made hook to that I removed from my old lift. I also keep a foam kneeling pad hanging on it so I have one within easy reach and to save the knees. I really should have used a kneeling pad much earlier in my career, but I sure do make use of them now. :oops:

I then made a label to put on the hydraulic reservoir. I may need to make another as it's a little off plumb. :ROFLMAO:
bp28.jpg

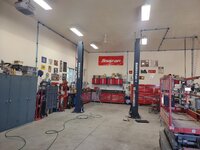
Next I gave the shop a thorough sweeping and cleaning to get rid of all of the debris and remnants from the lift installation and decided to move the Camaro back over into the center of the shop so I had both doors clear as I have some work to do on my son's vehicles plus Ouray prep on our Jeep coming up.
bp29.jpg

Covered the car and then mowed the lawn.
bp30.jpg

When we returned from vacation I noticed I had a dry spot just off the shop apron that I hadn't had in the past so I wondered what changed. As I was mowing the lawn I wondered if I had a strainer on the sprinkler head plugged. After putting the mowers away I pulled the strainer and sure enough, pretty plugged with garbage from our secondary water system.
lawn1.jpg

Washed, blown off with compressed air and ready to reinstall.
lawn2.jpg


After cleaning the other 7 or so strainers on that zone, I went out to the street and pulled the main filter for the secondary sprinkler system and gave it a thorough cleaning as well. Although, it really wasn't as bad as it usually is by mid-season. :headscrat
 

Duker

Well-known member
Joined
Sep 25, 2010
Messages
10,863
Location
Livingston, TX
bp27.jpg


That concludes the installation of my new Bendpak 12APX 2-post lift.

Thank you for following along. I plan on doing a full review once I get some time behind me using this lift as well.
Very nice Mike! I have the Bendpak XPR-12CL and it has taken everything I have thrown on it including my wife's zero turn!
IMG_7335.JPEG
Of course, Mike's shop is pristine and organized and I am still trying to get mine in shape! Always good to see your shop to get me off my A$$ and out there working!
 
OP
Z

zmotorsports

ALLIANCE MEMBER
Joined
Oct 20, 2009
Messages
21,464
Location
Northern Utah
Very nice Mike! I have the Bendpak XPR-12CL and it has taken everything I have thrown on it including my wife's zero turn!
IMG_7335.JPEG
Of course, Mike's shop is pristine and organized and I am still trying to get mine in shape! Always good to see your shop to get me off my A$$ and out there working!

I don't know Duke, you may be overloading that thing a bit. :ROFLMAO:

Glad to hear you have had a good experience with your Bendpak. I went to a couple of local shops that do a wide range of automotive work and none of them had anything but good to say about their Bendpak lifts. I was somewhat skeptical because I had read a bit of negativity on the internet, but when speaking to people who used them all day, everyday, I heard nothing negative first hand.

To be honest, I think with any lift manufacturer there are going to be people who like to complain just to complain and while some may have legitimate issues, some just like to ***** about anything and everything. Those kinds of people really spoil the pool of information available, which is why I went to shops and talked to the owners and mechanics and got first hand information.

I briefly looked at a couple of other manufacturers, being anxious about making the decision to sell my Ammco lift which had never given me a moments problem or issues in nearly 15-years, but I have been impressed with the fact that Bendpak has made and continues to make improvements over the years to their lifts by taking feedback from their customers and incorporating that feedback into future models. I can already see a couple of improvements or design alterations in my 12APX compared to a couple 12APX lifts that I saw that are only a year or two old. Product improvement seems to be a constant thing, and I like to see that no matter the industry.

I would also like to point out that I have not actually had a vehicle on my new Bendpak yet so all of my previous comments are solely based on what I have seen or experienced during the shipping, unboxing and setup phases. I was thinking I would do a full review of my new lift once I have some actual time under my belt using it.


OK, I'm off my high horse now. Back to our regularly scheduled program. :bounce:
 
Last edited:

SilverJimmy

Well-known member
Joined
Apr 14, 2012
Messages
1,679
Location
Prescott/Flagstaff, AZ
My wife wants me to buy a scissor lift
I think you’d use one more than you realize once you get one. Detailing your motorhome will be so much easier and with all the concrete you have around your home and shop much of that maintenance would be not only easier but safer too! Someday I might have one in my shop but for now my rolling stairs reach about 80% of my high stuff and as a bonus climbing stairs is supposed to be good for you!
 
OP
Z

zmotorsports

ALLIANCE MEMBER
Joined
Oct 20, 2009
Messages
21,464
Location
Northern Utah
I think you’d use one more than you realize once you get one. Detailing your motorhome will be so much easier and with all the concrete you have around your home and shop much of that maintenance would be not only easier but safer too! Someday I might have one in my shop but for now my rolling stairs reach about 80% of my high stuff and as a bonus climbing stairs is supposed to be good for you!

The motorhome cleaning and detailing is the main reason she wants me to get one. She cringes each time we return from vacation and she sees me going up and down the ladder dozens and dozens of times washing the coach. She may have a point, I just can't justify the hit to the bank account right now. I know I would use one quite a bit once I had one in the shop, but I really want to build myself a tilt deck car hauler trailer worse at this point. Just saving pennies now.
 

signcrafter

Well-known member
Joined
May 9, 2012
Messages
12,497
The motorhome cleaning and detailing is the main reason she wants me to get one. She cringes each time we return from vacation and she sees me going up and down the ladder dozens and dozens of times washing the coach. She may have a point, I just can't justify the hit to the bank account right now. I know I would use one quite a bit once I had one in the shop, but I really want to build myself a tilt deck car hauler trailer worse at this point. Just saving pennies now.
Come on Mike this is GJ, you know that you need a scissor lift to use for the trailer build. And now that we know a scissor lift is in the future you might as well make that trailer a drop deck so it goes down flat on the ground to load the scissor lift. But now thinking about it maybe a boom lift would be better for you. If you get a 65 footer you can park it at the front of the coach and be able to run the boom out and get both sides, rear, and front without ever having to move the lift. And, if you ever need to get to the roof of your house or shop the boom lift would be great to have. OK, maybe you need a scissor and boom lift. :ROFLMAO:

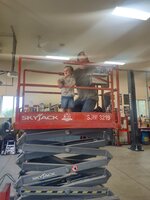
Took the daughter to work with me a few weeks ago for the day. It was a little windy that day.

KIMG20250611_125152087.JPGKIMG20250611_125154456.JPG
 

4 FN 27

ALLIANCE MEMBER
Joined
Oct 19, 2015
Messages
4,635
Location
Minnesnowta
The motorhome cleaning and detailing is the main reason she wants me to get one. She cringes each time we return from vacation and she sees me going up and down the ladder dozens and dozens of times washing the coach. She may have a point, I just can't justify the hit to the bank account right now. I know I would use one quite a bit once I had one in the shop, but I really want to build myself a tilt deck car hauler trailer worse at this point. Just saving pennies now.

Come on Mike this is GJ, you know that you need a scissor lift to use for the trailer build. And now that we know a scissor lift is in the future you might as well make that trailer a drop deck so it goes down flat on the ground to load the scissor lift. But now thinking about it maybe a boom lift would be better for you. If you get a 65 footer you can park it at the front of the coach and be able to run the boom out and get both sides, rear, and front without ever having to move the lift. And, if you ever need to get to the roof of your house or shop the boom lift would be great to have. OK, maybe you need a scissor and boom lift. :ROFLMAO:

Took the daughter to work with me a few weeks ago for the day. It was a little windy that day.

KIMG20250611_125152087.JPGKIMG20250611_125154456.JPG

I have Scissor Lift...not sure, climbing "in and out" of the Lift or climbing up and down a Ladder, which is worse???

I use a long handle Brush all summer long then just before the Motorhome/Trailer goes in the corner for the winter I do the fine washing using the Lift. I will suggest renting one before you buy. But they do come in handy for all sorts of projects.
 
OP
Z

zmotorsports

ALLIANCE MEMBER
Joined
Oct 20, 2009
Messages
21,464
Location
Northern Utah
Once you get the tilt trailer built, you could use it to transport the scissor lift to all the people that would want to borrow it! Or, they could just borrow the lift and trailer! Win win!

Oh you're hilarious. I don't loan nor rent tools or equipment out so that would not be a win/win.


Come on Mike this is GJ, you know that you need a scissor lift to use for the trailer build. And now that we know a scissor lift is in the future you might as well make that trailer a drop deck so it goes down flat on the ground to load the scissor lift. But now thinking about it maybe a boom lift would be better for you. If you get a 65 footer you can park it at the front of the coach and be able to run the boom out and get both sides, rear, and front without ever having to move the lift. And, if you ever need to get to the roof of your house or shop the boom lift would be great to have. OK, maybe you need a scissor and boom lift. :ROFLMAO:

Took the daughter to work with me a few weeks ago for the day. It was a little windy that day.

KIMG20250611_125152087.JPGKIMG20250611_125154456.JPG

I have too many hours in a boom lift to count and that would be the furthest from my choices for my needs. They have their place, but not for what I am looking to use it for, plus I don't have the room to store such a lift.
 
OP
Z

zmotorsports

ALLIANCE MEMBER
Joined
Oct 20, 2009
Messages
21,464
Location
Northern Utah
I have Scissor Lift...not sure, climbing "in and out" of the Lift or climbing up and down a Ladder, which is worse???

I use a long handle Brush all summer long then just before the Motorhome/Trailer goes in the corner for the winter I do the fine washing using the Lift. I will suggest renting one before you buy. But they do come in handy for all sorts of projects.

That is the process I use now Pat, long lambs wool pad on a pole but I generally use the ladder to chamois the coach. I am fine with the process I use now, but the wife is the one pushing me. I can see the benefits of a scissor lift around my home and shop due to the ceiling height and roof heights, we have several at work and use the **** out them at work and I would definitely benefit from one, but it's far from a priority at home right now.
 
OP
Z

zmotorsports

ALLIANCE MEMBER
Joined
Oct 20, 2009
Messages
21,464
Location
Northern Utah
I’m actually pretty lucky on the scissor lift front, rumor has it someone might want to store theirs in my new shop….

Yeah Sterling, if Cam is willing to store his at your place I would definitely take advantage of the opportunity. I used my contractors for several weeks after my shop was completed as he didn't need it at the next jobsite yet. It was a Godsend for running all of my air lines and misc. accessories in the shop.
 
OP
Z

zmotorsports

ALLIANCE MEMBER
Joined
Oct 20, 2009
Messages
21,464
Location
Northern Utah
Last night I officially marked the new lift installation off the "to do" list as it is completed.

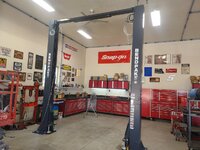
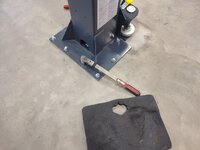
I arrived home and lubed the inside corners of the columns as well as the cables and sanded down the last two holes that I had to fill from the previous lift's anchor bolts and gave the shop one last sweep before moving on to the next job.

I plan on posting a video showing the unboxing and highlights of the installation and then maybe in a couple of months I will do a full review once I have some time under my belt with the new lift.

bp31.jpg


Thanks for following along.
 
To avoid these ads, REGISTER NOW!
Top Bottom