To avoid these ads, REGISTER NOW!

ZMotorsports Shop Projects 2.0

signcrafter

Well-known member
Joined
May 9, 2012
Messages
12,409
I have a similar conversation with people pertaining to what is highlighted above Scott.

While I'm not the world's best automotive diagnostician, I try to educate people that the code that is set is merely the closest one that matches an existing condition(s) or set of parameters and also that the ECM is ONLY interpreting the data it is receiving, it is up to the mechanic to methodically think through said data and perform a proper diagnosis, nothing more. The codes aren't magic like the numbskulls at the parts stores try to convince people they are as if anyone who reads a code can just replace a part and be a self-proclaimed mechanic. I also explain that parts stores exist to sell parts, nothing more.

All that being said, I have also discovered, especially over the past couple of decades, that the vast majority of the time when dealing with electrical diagnostics, the problem can be traced back to a connection or wiring issue much more often than a failed part, I would say 80% of the time it is a wiring issue. So, with that knowledge, why is it that the first reaction by most people to start throwing parts at something. I have had more issues over the past few years in particular be traced down to wiring issues and not necessarily a failed part. If I were a gambling man and headed to Las Vegas, would I throw money down on a 20% bet or an 80% bet? :unsure:

These days I go into a diagnosis with the mindset that I am going to find a wiring or connection issue and I am correct approx. 8 out of 10 times. I also continue to use the 4 C's, Condition, Cause, Correction and the most important one, CONFIRM. If I can't confirm the repair I go back to step one.

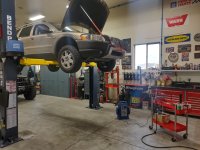
I still am not 100% certain that the intake duct IS the culprit here, but I can confirm that it is in fact A problem. However, by looking at all of the new parts on this car, it appears as though a parts bomb was tossed at it with no real diagnosis. I did review the fuel trims and O2 sensor data, but it was skewed because of it being in open loop and with the warmer temps of the shop, it really went into closed loop relatively quick and didn't run as poorly as the owner's description. I think I may park it outside after getting it put back together to confirm, but I also noted it appears to have a leaking water pump and I really don't want coolant all over my shop apron. :rolleyes: At this point I'm not sure how much or how deep he wants me to go into this as he is perfectly capable of replacing a water pump, so I guess that's another conversation, but it's ******* coolant in my shop.
I too have found wiring to be a vast majority of issues Mike. That is why it digs at me when someone calls me to tell me they need a part changed because the code said it was bad. The other thing is aftermarket part quality. Once you start throwing a bunch of parts at it without diagnosing it and then decide to call someone to diagnose it, now you have added a bunch of new variables to the problem. You can have brand new junk parts and also you don't know how the repair was done so have to question the installation also. Not trying to put anyone down for trying to fix their own vehicles but it took me many years of learning and screwing up to know how to do things even half right. It's better for everyone if you can get the vehicle in the state it is when it starting having the issue in my opinion.
 
To avoid these ads, REGISTER NOW!
OP
Z

zmotorsports

ALLIANCE MEMBER
Joined
Oct 20, 2009
Messages
21,436
Location
Northern Utah
I too have found wiring to be a vast majority of issues Mike. That is why it digs at me when someone calls me to tell me they need a part changed because the code said it was bad. The other thing is aftermarket part quality. Once you start throwing a bunch of parts at it without diagnosing it and then decide to call someone to diagnose it, now you have added a bunch of new variables to the problem. You can have brand new junk parts and also you don't know how the repair was done so have to question the installation also. Not trying to put anyone down for trying to fix their own vehicles but it took me many years of learning and screwing up to know how to do things even half right. It's better for everyone if you can get the vehicle in the state it is when it starting having the issue in my opinion.


AMEN brother.
 
OP
Z

zmotorsports

ALLIANCE MEMBER
Joined
Oct 20, 2009
Messages
21,436
Location
Northern Utah
So I have a question for the electronicticians of the bunch.

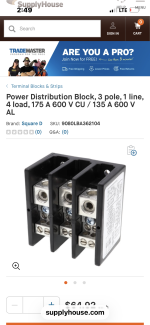
I have been collecting parts and pieces to begin work on my car trailer and I am planning on mounting my battery under the deck and having a junction block or box in which to run a battery cable to, then branch off of that junction block to the hydraulic pump as well as the winch. What have you guys used that is a good quality junction block that can handle upwards of a few hundred amps yet be somewhat weather protected? Probably not 100% weather sealed, but enough to keep road spray and debris off of the actual terminals.

Any links or suggestions would be greatly appreciated. I have used a few standard junction blocks on various RV's, but they are usually in a compartment or an area not in direct contact with road spray.

I've been looking at some from various generic sites by searching images and nothing is really exciting me. I would like to hear from the group of what you've had good results with.


Thank you.
 

ntsqd

Well-known member
Joined
Jan 22, 2005
Messages
985
Location
Lower left coast
When I ran the camper battery charging cables for our pop-top camp I wanted to be able to tap into those cables for the OBA compressor. I used one of these under the truck: https://www.bluesea.com/products/2017/Dual_PowerPost_-_Two_3_8in-16_Studs that was nearly a decade ago and I've not had any trouble with it.
2017.jpg


My default has become to first look at deep water marine vendors/mfgs for 12VDC power & charging solutions. Mostly that is Blue Sea Systems and BEP Marine. You pay the 'marine tax' on them, but they work and live long lives and that's worth a lot more to me.
 
OP
Z

zmotorsports

ALLIANCE MEMBER
Joined
Oct 20, 2009
Messages
21,436
Location
Northern Utah
When I ran the camper battery charging cables for our pop-top camp I wanted to be able to tap into those cables for the OBA compressor. I used one of these under the truck: https://www.bluesea.com/products/2017/Dual_PowerPost_-_Two_3_8in-16_Studs that was nearly a decade ago and I've not had any trouble with it.
2017.jpg


My default has become to first look at deep water marine vendors/mfgs for 12VDC power & charging solutions. Mostly that is Blue Sea Systems and BEP Marine. You pay the 'marine tax' on them, but they work and live long lives and that's worth a lot more to me.

Thanks Thom. I saw some similar to those, but I like the ones you showed a little better. I would like to find one that has multiple studs or branches like a buss bar where I can join the battery cable to one stud and have 2-3 studs coming off for branches to various components and the icing on the cake would be to have the option to add a couple hundred amp fuse to the buss. Do you know of anything that would meet those requirements by chance?
 
OP
Z

zmotorsports

ALLIANCE MEMBER
Joined
Oct 20, 2009
Messages
21,436
Location
Northern Utah
Thanks. The last one you linked was the one I was looking at just now, but they don't appear to have the weather protection I am after.

Thanks Thom, I'm still researching. Just like to have everything on hand when I pull the trailer into the shop.
 

ntsqd

Well-known member
Joined
Jan 22, 2005
Messages
985
Location
Lower left coast
I put the one under the truck on the backside of one of the cab mounts. Just being out of any direct spray has kept it remarkably clean and dry. I tried to use those supplied boots and gave up very quickly as they just didn't fit where the cables needed to go.
I have a 285 series high amp breaker mounted next to it, and it functions fine. There is no grit in the manual make/break button & lever to inhibit their free movement. We don't normally see quite the weather that you do, but I have taken that truck into some fairly nasty weather and mud. I think using the cab mount to shield it from the worst has worked out to be a good idea.
 

ntsqd

Well-known member
Joined
Jan 22, 2005
Messages
985
Location
Lower left coast
We had some high current test contacts at my former employer like that. They were a PITA the second and later times that you wanted to R&R the fine strand cable that we used. I ended up designing some lugs similar to what are now called "ferrules" that we crimped onto the cables. With their silver plating they ran about $2 each when ordered by the 100.
 

signcrafter

Well-known member
Joined
May 9, 2012
Messages
12,409
Mike google car audio distribution block or car audio fuse blocks. I haven't played around with that stuff in years but they make all shapes and sizes and most have a plastic cover. There were some that had rubber seals where the wires went in if I remember right. I have a few boxes of amplifier power wires and distribution blocks somewhere but buried in bins and no clue what where.

Maybe something like this if that's what you're thinking, https://www.waytekwire.com/product/...LVbJen9xTOMX9jF7U4tleUQbJQqrwSEMaAo0jEALw_wcB

Another option that I've done with a dump trailer before is a weatherproof junction box and you can mount any distribution setup you want in it. I used a bigger one and drilled the holes I needed and used grommets for the wires. Had the trailer harness coming from truck ran into it and then wires out to lights and battery.


CGarage

Well-known member
Joined
Nov 23, 2018
Messages
3,028
Location
United States/Switzerland
My default has become to first look at deep water marine vendors/mfgs for 12VDC power & charging solutions. Mostly that is Blue Sea Systems and BEP Marine. You pay the 'marine tax' on them, but they work and live long lives and that's worth a lot more to me.


Agree very much with this. Blue Sea Systems is top quality. Also Ancor Marine may have something.
 

Xti04

Well-known member
Joined
Nov 11, 2016
Messages
2,338
Its funny how that volvo didnt post a lean code. I have seen so many leaky intake boots especially on all the Euro cars I work on, that there is almost always a lean code for the unmetered air or an underboost code if its post turbo. For Euro parts I have been using FCP Euro for parts for several years now with great success and they even include OEM parts in addition to selling the same parts made by the OEM vendors.
 
OP
Z

zmotorsports

ALLIANCE MEMBER
Joined
Oct 20, 2009
Messages
21,436
Location
Northern Utah
Mike, they make power distribution blocks in all kinds of configurations. And it’s be easy enough to seal it. What size wire and or stud size do you want. I’ve got a hell of a collection of these and if one suites your needs, it’s yours bud.

IMG_6921.png

Thanks Cam, I very much appreciate the offer. I use those quite extensively in the industrial field, but my experience has been similar to Thom's when it comes to refitting the cables/wiring after the initial installation. I'm looking for more of something with a stud or studs so I can use lugs on the cables. To keep it clean and simple was just planning on using a single isolated stud for positive and another for negative and land multiple lug ends on the studs, but just not finding what I'm looking for to seal it up after the connection is made. :headscrat


We had some high current test contacts at my former employer like that. They were a PITA the second and later times that you wanted to R&R the fine strand cable that we used. I ended up designing some lugs similar to what are now called "ferrules" that we crimped onto the cables. With their silver plating they ran about $2 each when ordered by the 100.

Similar experience here Thom. First time no problem, but after that the strands get spread out and flattened and are more problematic to remove and install.


https://ceautoelectricsupply.com/waterproof-power-distribution-centers/

Middle of the page has some solutions from Tony at CE Auto Electric. This has been my go to supplier on electrical stuff for years.

Thanks Marc. I'll give those a look, they're quite similar to the Bussman sealed panels or junction blocks I've used in the past.


Mike google car audio distribution block or car audio fuse blocks. I haven't played around with that stuff in years but they make all shapes and sizes and most have a plastic cover. There were some that had rubber seals where the wires went in if I remember right. I have a few boxes of amplifier power wires and distribution blocks somewhere but buried in bins and no clue what where.

Maybe something like this if that's what you're thinking, https://www.waytekwire.com/product/...LVbJen9xTOMX9jF7U4tleUQbJQqrwSEMaAo0jEALw_wcB

Another option that I've done with a dump trailer before is a weatherproof junction box and you can mount any distribution setup you want in it. I used a bigger one and drilled the holes I needed and used grommets for the wires. Had the trailer harness coming from truck ran into it and then wires out to lights and battery.


Thanks Scott, I'll check them out. I've purchased from Waytek in the past with good results.
 
OP
Z

zmotorsports

ALLIANCE MEMBER
Joined
Oct 20, 2009
Messages
21,436
Location
Northern Utah
Its funny how that volvo didnt post a lean code. I have seen so many leaky intake boots especially on all the Euro cars I work on, that there is almost always a lean code for the unmetered air or an underboost code if its post turbo. For Euro parts I have been using FCP Euro for parts for several years now with great success and they even include OEM parts in addition to selling the same parts made by the OEM vendors.

Agreed. No lean codes, in fact I didn't find any codes. However, the owner sent me a printout of a scan he did just prior to him bringing it to me and it showed a P0101 which is a MAF out of range. That kind of makes a little sense.

I'm still not 100% the air intake duct is the entire problem, but it was a big piece of the problem with the several leaks it had. I did see one on FCP Euro's website. It was OEM but they just showed it as available, not in-stock so I questioned the speed of obtaining one, plus the shipping would be added to that.
 
OP
Z

zmotorsports

ALLIANCE MEMBER
Joined
Oct 20, 2009
Messages
21,436
Location
Northern Utah
Well I did some sketchy **** last night and I'm paying for it today as my shoulder is killing me and I didn't sleep for ****.

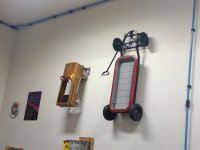
I figured I had better get the toys hung on the wall because if the wife came home and found me with a ladder she'd hang me. :bounce:

Brackets mounted to the wall after measuring the difference in size between the wagon and the pedal car and coming up with locations for each one.
wall21.jpg

The pedal car was a breeze, but that wagon was heavy as hell and awkward as hell.
wall22.jpg

I had moved the belt/disc sander, the drill press and the bench grinder out of the way a little to make room for the ladder.
wall23.jpg

Everything moved back into place. It gave me an opportunity to thoroughly sweep under each one as they haven't been moved for nearly 9 years now.
wall24.jpg

wall25.jpg

wall26.jpg

I waffled for a few days over where in the shop to hang them, but finally decided that although I feel very confident in the mounting brackets and hardware, IF they were to fall, at least over the machining area they would hit heavy metal equipment. If I mounted them anywhere else in the shop and one fell, it could potentially hit one of our vehicles or worse, a paying client's vehicle and be much more difficult and expensive to repair. So over the machining equipment they went.

Thanks for looking.
 
OP
Z

zmotorsports

ALLIANCE MEMBER
Joined
Oct 20, 2009
Messages
21,436
Location
Northern Utah
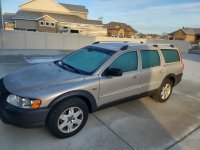
As for the 20+ year old Volve, believe it or not, my local Volvo dealer in Salt Lake City had one in stock. :oops:

I was pleasantly surprised and after a drive I had an OEM intake to turbo duct in my hand.
xc11.jpg

xc12.jpg

Same exact part # as the original even.
xc13.jpg

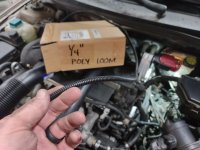
I also replaced the poly loom on a couple of wires that were exposed due to the crumbling loom.
xc14.jpg

A little cleanup in the general area as well.
xc15.jpg

Then reassembly can begin.
xc16.jpg

This small flex head 1/4" drive ratchet sure comes in handy at times. I don't use it a lot, but when it comes out of the toolbox, it serves its purpose.
xc17.jpg

Duct reinstalled. I didn't like the fact that one of the hoses didn't have a clamp, so I dug through my used stuff and found a constant tension clamp to install.
xc18.jpg

Upon starting it still run a little rough, but smoothed out. Looking at the throttle angle it idled a little high during warm-up.
xc19.jpg

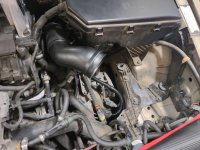
Then as the coolant temp climbed and it went into closed loop, the throttle angle dropped and settled down.
xc20.jpg


I didn't get a test drive because the kids and grandson stopped by so it was time to close up the shop for the evening.

Thanks for looking.
 

WoodsTruck

Well-known member
Joined
Jan 12, 2013
Messages
1,025
It's nice when parts are available.
Any reason to give it another smoke test to see if anything else pops up?
 
To avoid these ads, REGISTER NOW!

WoodsTruck

Well-known member
Joined
Jan 12, 2013
Messages
1,025
Do the O2 sensors get abused and soot up when the air/fuel ratio is messed up enough to cause runability issues until the engine gets up to a certain temp?
 
OP
Z

zmotorsports

ALLIANCE MEMBER
Joined
Oct 20, 2009
Messages
21,436
Location
Northern Utah
I appreciate everyone's input on the electrical components I was inquiring about.

I was able to find pretty much what I was looking for, although not exactly. Maybe exactly what I'm looking for doesn't exist and I was just being overly optimistic that I'd find them.

While I was able to find a buss style of sealed housing, it wasn't rated for high enough amperage so I ended up ordering a couple of single stud style junction blocks in which to connect the battery cable to, then two branches, one to each the hydraulic pump and one to the winch by using two single Eaton/Bussman AMG/Mega fuse blocks with lids that appear to be "somewhat" weather protected, although not what I could call weatherproof, but better than nothing.

I was also able to order some 4/0 to 3/8" lugs and a couple of posts to use as remote connection points in the event a battery failure.

Once the order arrives I think I will have everything needed to pull the trailer into the shop and begin some mods. With not knowing the exact length of 4/0 cable needed, I will have to order that once I get an amount figured out or will source it locally if possible.


Again, I appreciate the input from all of you it was very helpful.

Thank you.
 

LXCam

ALLIANCE MEMBER
Joined
Apr 23, 2013
Messages
19,171
Location
AZ
Mike, does that model have adaptive learning and if so maybe reset it and try again.

Edit, that model does and a battery disconnect will clear them. I don't know if you've already done that of course but thought I'd toss that out bud. Could be she learned some bad habits from her leaky days. :p123
 
Last edited:
OP
Z

zmotorsports

ALLIANCE MEMBER
Joined
Oct 20, 2009
Messages
21,436
Location
Northern Utah
Mike, does that model have adaptive learning and if so maybe reset it and try again.

I'm not sure Cam, I am not well versed on these Volvo's and still learning their idiosyncrasies. I want to smoke test it again, and although I fixed the three major leaks on the intake duct, I'm not 100% convinced there aren't any others adding to the issue, there's not much room down behind the engine so I may rack it and try looking from the underside tonight.

Unfortunately, this is the downside of having a car in the shop that has had multiple hands on it and a lot of parts thrown at it.
 

rd65

Well-known member
Joined
Sep 29, 2017
Messages
2,796
Location
Granite Falls, WA
I appreciate everyone's input on the electrical components I was inquiring about.

I was able to find pretty much what I was looking for, although not exactly. Maybe exactly what I'm looking for doesn't exist and I was just being overly optimistic that I'd find them.

While I was able to find a buss style of sealed housing, it wasn't rated for high enough amperage so I ended up ordering a couple of single stud style junction blocks in which to connect the battery cable to, then two branches, one to each the hydraulic pump and one to the winch by using two single Eaton/Bussman AMG/Mega fuse blocks with lids that appear to be "somewhat" weather protected, although not what I could call weatherproof, but better than nothing.

I was also able to order some 4/0 to 3/8" lugs and a couple of posts to use as remote connection points in the event a battery failure.

Once the order arrives I think I will have everything needed to pull the trailer into the shop and begin some mods. With not knowing the exact length of 4/0 cable needed, I will have to order that once I get an amount figured out or will source it locally if possible.


Again, I appreciate the input from all of you it was very helpful.

Thank you.
What about making something using a Pelican/Apache waterproof case?
 

ntsqd

Well-known member
Joined
Jan 22, 2005
Messages
985
Location
Lower left coast
I recall seeing a good ole boy's 4WD swamp buggy or something like that which had the ECU inside a Tuperware that was screwed to the inner fender. The wiring harness came out of the side with huge glob of clear silicone to seal it to the Tuperware. It was not a nice looking assembly, but I'm betting that it did keep the water out. Always wondered what his penalty was for stealing one of his wife's Tuperware containers......
 
Last edited:
OP
Z

zmotorsports

ALLIANCE MEMBER
Joined
Oct 20, 2009
Messages
21,436
Location
Northern Utah
It might be a decent gambit to replace the ugly gob of clear silicone with water-tight cord grips in the side of something like a Tuperware or a waterproof project box as a means of water-proofing an isolated stud or bussbar.

Thom, Thom, Thom, have you not paid attention to my thread at all? Do you think I could strap a Tupperware box under one of my vehicles? :bounce:


Waterproof project box.

You can buy project boxes from Mouser and DigiKey, as an example.


Hell yeah, that is what I was looking for. They had a nice smaller sized one that should work perfectly to house a junction block.

Thank you.
 
OP
Z

zmotorsports

ALLIANCE MEMBER
Joined
Oct 20, 2009
Messages
21,436
Location
Northern Utah
I hope everyone had a great weekend.

Still not 100% confident I had all of the air leaks addressed on the Volvo, I got back after it after arriving home from work Friday night. I could still see a small trail of smoke when I hooked it up to my smoke machine so I racked it to see if I could see any better from the bottom. Turns out I couldn't. There is so much **** in the way with this being an AWD vehicle, that I could barely see the turbo from the bottom, let alone reach it to move things about.
xc21.jpg

I got thinking it through and wondered if the wastegate diaphragm was torn, if that could be the source of the intake leak, so I hooked up my pressure tester to put a few pounds of pressure to it in order to simulate some boost pressure and see if it held.
xc22.jpg

It held perfectly.
xc23.jpg

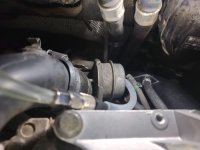
Still seeing a trace of smoke, I figured I would just start removing parts and testing one at a time until I discovered the source of the leak. It sure looked like it was coming from the wastegate, but I then moved the OTE (Over the Engine) tube and saw a tear in the boot. Hmmm, could this be it?
xc24.jpg

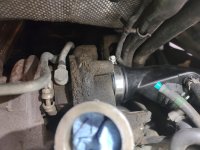
With the wastegate removed and out on the bench along with the hot pipe from the turbo, I got no more smoke. OK, now I can feel confident going back with one component at a time and I confirmed it wasn't the new intake tube that I just installed. That is sure what it looked like, even with a mirror. Turns out the boot at the compressor side discharge was leaking and the smoke was directed right at the new tube I installed and as the smoke hit it and went around it, it definitely looked as though the new tube was leaking. What a PITA this was.
xc25.jpg

New tube reinstalled, AGAIN and testing with the addition of each component to confirm nothing is leaking.
xc26.jpg

Then I could reinstall the wastegate and connect the rod as well as reinstall the heat shield.
xc27.jpg

I used a couple of tools that I don't use nearly as much as I probably should. The small 1/4" head flex ratchet that I installed the 3/8" drive into a few years ago and my Blue-Point stubby flex head ratcheting wrenches. I am running out of space so I don't have these in my normal drawers and therefore I find myself not using them as much as I probably should, so I need to fix that. :unsure:
xc28.jpg

Heat shield reinstalled as well as the O2 sensor wiring routed properly where it should be.
xc29.jpg

Cleaning as I go and then I reinstalled the hot pipe after thoroughly cleaning the boots and repositioning the clamps so that the one is above the tear and preventing a leak. One last smoke test before installing the airbox and verifying with the scanner.
xc30.jpg


Stay tuned for more.
 
OP
Z

zmotorsports

ALLIANCE MEMBER
Joined
Oct 20, 2009
Messages
21,436
Location
Northern Utah
Continuing on with the Volvo.

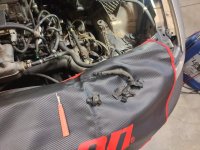
When I removed the airbox I saw a lot of wires where the poly loom had deteriorated over the past 309k miles and 20+ years and seeing all of those sharp edges and places for wires to chafe, I couldn't put it back together without addressing that.
xc31.jpg

Here's a little tip or trick for removing poly loom, get a clothing pick tool as they work great for getting under the poly loom and cutting without damaging any wire insulation. Last time I bought a lot of about half a dozen for a few bucks off of eBay and they work well and last quite a while. They're cheap so if I lose or break one, no big deal and grab another.
xc32.jpg

Much of the poly loom is deteriorated severally and what was still in place was cut away.
xc33.jpg

Last of the poly loom removed and discarded.
xc34.jpg

New 1/2" and 3/8" poly loom installed and routed back in the factory locations.
xc35.jpg

Ready to accept the airbox, but first one more final smoke test.
xc36.jpg

Final smoke test to ensure there are no more leaks.
xc37.jpg

I have now verified with high confidence that the vacuum leaks are corrected. I had to keep going back through my 4 C's as I was getting to the "confirm" step and I couldn't confirm I had no more leaks, so back to the start again with addressing the "condition".
xc38.jpg

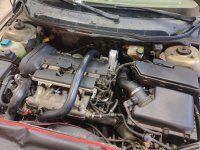
Engine bay reassembled and car is running great.
xc39.jpg

When the client brought me the car it stated all along that it was much worse when cold, so to really test it, I parked it outside overnight so I could let it get cold soaked and then give it a try. It started right up on Saturday morning, idled up around 1200-1400 at high idle, then idled right down to about 1000 RPM and finally settling on a nice stable ~750 RPM with excellent acceleration from idle up. No more hesitation or stumbling just at tip in.
xc40.jpg


The owner didn't come and pick it up until Sunday morning so that gave me another day to let it sit outside and get cold soaked for another 24-hours to ensure it was running properly. Owner picked it up Sunday morning and seemed to be pleased.

Thanks for watching.
 
OP
Z

zmotorsports

ALLIANCE MEMBER
Joined
Oct 20, 2009
Messages
21,436
Location
Northern Utah
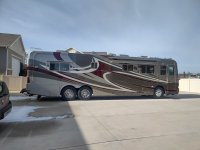
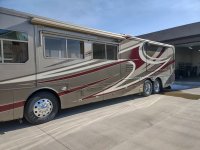
Saturday morning after breakfast with the boys, I returned home to begin cleaning of the coach after all of the work I've done on it and especially the RV/storage bay that was filthy. There was so much **** and soot that fell off the coach and the floor was a mess.

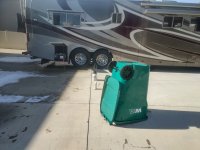
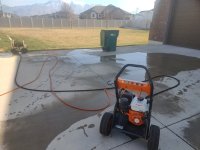
It was also supposed to be in the mid-50's on Saturday so I figured it would be the perfect day to pull the coach out as well as hit the garbage cans with the pressure washer as they too were filthy. I also wanted to test and confirm the air system on the coach was holding.
jan1.jpg

Batteries were also sprayed with battery cleaner and washed off.
jan2.jpg

Garbage cans cleaned and allowed to dry upside down for an hour or so.
jan3.jpg

Engine bay also got hit and received a good cleaning. I should have cleaned it before I put it to bed for the winter, but when we returned from our September trip, I thought we were going to get one more trip in for the year in October, but that turned out not to be the case.
jan4.jpg

Nice to see the ole' girl out in the sun again.
jan5.jpg

jan6.jpg

jan7.jpg


Once the floor in the RV bay was swept, I grabbed the leaf blower and gave it a final once over before backing the coach into the bay and plugging her back in.

I can report that the air system is tighter than it's been in quite some time and I felt like it was relatively tight before. We usually only drop around 18-20 PSI overnight when we stop for the evening in a campground. Once I level the coach say around 3 or 4 pm in the afternoon and shut it down, it will only drop off around 18-20 pounds by the time I fire it back up the next morning to leave camp. The last trip in September last year I noted it was dropping closer to 40 PSI overnight, so I knew I had a small leak somewhere that needed attention.

I shut it down Saturday around 2pm when I backed it into the shop and when I checked on it Sunday after noon (approx. 24-hours later) it had only lost about 12-15 PSI, so I am very pleased with that.

Thanks for looking.
 
OP
Z

zmotorsports

ALLIANCE MEMBER
Joined
Oct 20, 2009
Messages
21,436
Location
Northern Utah
I would sure as hell hope he was pleased!
I believe you mentioned the owner was quite mechanically inclined. If so, he should realize the time (hours) spent on diagnoses and verification and reach deep into his wallet.

Yes, he worked as a mechanic before retiring a few years ago and I think he knows and understands the process. But even so, it took me longer to go through this one than I thought it would. This one kind of kicked my **** a bit, but I did learn quite a bit.
 
OP
Z

zmotorsports

ALLIANCE MEMBER
Joined
Oct 20, 2009
Messages
21,436
Location
Northern Utah
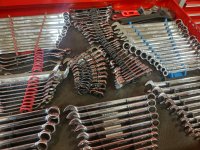
The owner of the Volvo called me Sunday morning asking if he could pick up the car, so after breakfast and while I waited for him to come and get it, I thought I would move a few tools around in order to make room for all my ratchets in the ratchet drawer as well as see if I could make room for the stubby flex-head Blue-Point ratchets. I got to thinking that if they are more readily and easily accessible, then I would probably use them more often. Being pretty much out of room in my toolbox, I moved things around to gain any little fraction of an inch that I could and then grabbed some solid stranded electrical wire and made a red and black spiral winding in which I could use for the stubby wrenches. There is no way I could utilize the molded cases that I had them in prior.
tools1.jpg

tools2.jpg

tools3.jpg

tools4.jpg

I also shuffled a few pliers around and "restacked" them to keep the most used ones easiest to access.
tools5.jpg

A couple of minor "adjustments" to the socket drawer as well.
tools6.jpg


That should tie me over for a while. I am really out of room in my toolbox. :unsure:
 
To avoid these ads, REGISTER NOW!
Top Bottom