To avoid these ads, REGISTER NOW!

ZMotorsports Shop Projects 2.0

OP
Z

zmotorsports

ALLIANCE MEMBER
Joined
Oct 20, 2009
Messages
21,461
Location
Northern Utah
Check that beast of a housing out. Do you need to do the center section as well or did it come with the dif, ring and pinion installed......just add axles kinds of deal?

Cam, I just purchased a blank/empty housing. I will install my own components. From carrier, to axle shafts to ball joints.

Mike
 
To avoid these ads, REGISTER NOW!

macgyver

Well-known member
Joined
Feb 13, 2008
Messages
45
Location
Big Bear Lake
I hope you are using their ball joints!! The best out there. We regularly replace ball joints of all makes for Jeeps and nothing holds up as well.


Cam, I just purchased a blank/empty housing. I will install my own components. From carrier, to axle shafts to ball joints.

Mike
 
OP
Z

zmotorsports

ALLIANCE MEMBER
Joined
Oct 20, 2009
Messages
21,461
Location
Northern Utah
I hope you are using their ball joints!! The best out there. We regularly replace ball joints of all makes for Jeeps and nothing holds up as well.

Yep.

Although I have also had excellent results with the Synergy ball joints. Last set I had went nearly 100k miles.

Mike
 
OP
Z

zmotorsports

ALLIANCE MEMBER
Joined
Oct 20, 2009
Messages
21,461
Location
Northern Utah
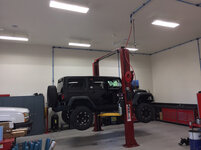
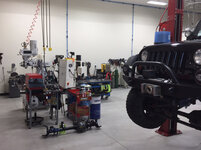
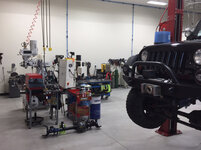
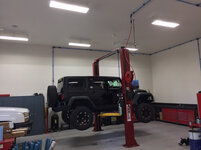
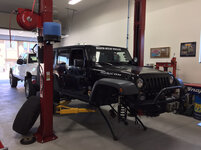
I never thought I would be able to have a shop where I could have two full-size vehicles in it, let alone two full-size vehicles end to end and another full-size vehicle in the next bay AND a fully complimented machine and fabrication section all in the same shop and a bay next door to house the coach and bikes. Yes, three decades of working your *** off definitely pays off to acquire one's dream.
8c9731c24e8b96564a2ef3f2758d866d.jpg

2a873ed15ef10138c3e3bfc88c939a29.jpg

2dd88dcaf653519442abd696d2f5a5a5.jpg

608a9c18c6e4e36ffc0a6ddc2fc2a13d.jpg

And my new ProRock 44 awaiting assembly.
07192a0e04750f541784256741ae7337.jpg

Lots to do this weekend.

Mike


Sent from my iPhone using Tapatalk
 

Attachments

  • 07192a0e04750f541784256741ae7337.jpg
    07192a0e04750f541784256741ae7337.jpg
    666.2 KB · Views: 0
  • 608a9c18c6e4e36ffc0a6ddc2fc2a13d.jpg
    608a9c18c6e4e36ffc0a6ddc2fc2a13d.jpg
    730.3 KB · Views: 0
  • 2dd88dcaf653519442abd696d2f5a5a5.jpg
    2dd88dcaf653519442abd696d2f5a5a5.jpg
    760.1 KB · Views: 0
  • 2a873ed15ef10138c3e3bfc88c939a29.jpg
    2a873ed15ef10138c3e3bfc88c939a29.jpg
    679.5 KB · Views: 0
  • 8c9731c24e8b96564a2ef3f2758d866d.jpg
    8c9731c24e8b96564a2ef3f2758d866d.jpg
    746.6 KB · Views: 0
Last edited:

LXCam

ALLIANCE MEMBER
Joined
Apr 23, 2013
Messages
19,202
Location
AZ
Alright Mike, so what ya got planned to stuff in that beauty?
 

slodat

ALLIANCE MEMBER
Joined
Feb 6, 2010
Messages
3,682
Location
Central-ish, WA
Mike, those photos really drive home the whole point of what you built! Excellent! As I near getting my shop dialed in I know the feeling. Enjoy it!

Steven
 
OP
Z

zmotorsports

ALLIANCE MEMBER
Joined
Oct 20, 2009
Messages
21,461
Location
Northern Utah
Alright Mike, so what ya got planned to stuff in that beauty?


Nothing too much more than I have under it now. I will be installing my components from my OEM axle. My 5.38 gears, my ELocker, my RCV shafts, my Rock Crawler tie rod, my Teraflex HD adjustable trac bar and will be adding a Teraflex HD adjustable drag link.

Mike


Sent from my iPhone using Tapatalk
 
OP
Z

zmotorsports

ALLIANCE MEMBER
Joined
Oct 20, 2009
Messages
21,461
Location
Northern Utah
Mike, those photos really drive home the whole point of what you built! Excellent! As I near getting my shop dialed in I know the feeling. Enjoy it!

Steven


Thank you Steven. It was quite a feeling to stand back and admire the number of vehicles in the shop and available space I still have.

Your shop is really turning out amazing Steven and I hope you have similar experience and can stand back and be proud and happy at what you have accomplished.

Mike


Sent from my iPhone using Tapatalk
 

shortykorte

Well-known member
Joined
Sep 1, 2014
Messages
8,039
Location
Tallahassee, Fl
So if I'm reading this right, plenty of space so bring your vehicles over. LOL.
Remember Mike you put in a lot of effort, thought and time into your place and it shows.


Sent from my iPhone using Tapatalk
 
OP
Z

zmotorsports

ALLIANCE MEMBER
Joined
Oct 20, 2009
Messages
21,461
Location
Northern Utah
Mike if I could ask a favor? When you install the gears set and check the mesh, will you document the procedure? Thanks!

Sure. Maybe this would even be a good video to do.

I think in my first shop projects thread I have some documentation of doing some gear installations but I can't remember. Either way I can document it again.

Mike
 
OP
Z

zmotorsports

ALLIANCE MEMBER
Joined
Oct 20, 2009
Messages
21,461
Location
Northern Utah
So if I'm reading this right, plenty of space so bring your vehicles over. LOL.
Remember Mike you put in a lot of effort, thought and time into your place and it shows.


Sent from my iPhone using Tapatalk

Thanks Shorty. I set this shop up quite similar to my last shop with the exception of size. I feel very fortunate to have been able to build this shop from the ground up EXACTLY the way I wanted it. When the wife and I were on our new home search adventure, our realtor kept trying to find us a house on the right amount of property with an existing shop. He mentioned that we would get more bang for our buck buying existing vs. building a shop from the ground up. I completely agreed with him based off of the small bump in appraised value my last shop added to the sale price, BUT I also kept telling him that my shop didn't exist anywhere except in my head so just find the house and the property and I will take care of the shop. Yes I know I spent more money building it from the ground up, but it is exactly what I wanted and I didn't have to go back and gut an existing detached garage or add on to one and then settle for something not quite what I wanted.

There was still a lot of work and definitely more money spent on this one but in the end I think all of the thought and hard work paid off as it is perfect as far as I am concerned.

Thanks again for the comments Shorty.

Mike
 
Last edited:

larry_g

Well-known member
Joined
Apr 28, 2007
Messages
16,893
Location
oregon
Thanks Shorty. I set this shop up quite similar to my last shop with the exception of size. I feel very fortunate to have been able to build this shop from the ground up EXACTLY the way I wanted it. When the wife and I were on our new home search adventure, our realtor kept trying to find us a house on the right amount of property with an existing shop. He mentioned that we would get more bang for our buck buying existing vs. building a shop from the ground up. I completely agreed with him based off of the value my last shop added to the sale price, BUT I also kept telling him that my shop didn't exist anywhere except in my head so just find the house and the property and I will take care of the shop. Yes I know I spent more money building it from the ground up, but it is exactly what I wanted and I didn't have to go back and gut an existing detached garage or add on to one and then settle for something not quite what I wanted.

There was still a lot of work and definitely more money spent on this one but in the end I think all of the thought and hard work paid off as it is perfect as far as I am concerned.

Thanks again for the comments Shorty.

Mike

That post should be quoted in all the threads by the new guys asking how big, layout, and other generic questions. Those of us who have had the chance to own more than one shop and figure out what is needed for our own personal style of work and what supports our skills are fortunate to know what we want. Could I make your shop work for me, without a doubt. Would I build it from a clean sheet, no. I always cringe when I see welding and fab equipment next to machine tools.

lg
no neat sig line
 

SiGmA_X

Well-known member
Joined
Aug 13, 2005
Messages
1,111
Location
Portland, OR
Thanks Roman. It's great to have a shop to be working in again.

These Balance Masters are not what I would call common with large trucks as they can be a bit pricey. I just want my coach to ride and handle the absolute best it can which is why after researching these I installed them and have been very pleased.

That being said, I still balance each of my tires/wheels independent of each other as I feel this in conjunction with the balance rings I get the absolute best balance I can. I also run a product called CrossFires that equalize tire pressures between the inner and outer duals. I love these things as they also help to compensate for road crown on duals.

Mike
Hi Mike, good to know. I read a couple posts on an RV forum about balance rings and balance beads, etc. and came across a tire manufactures opinion too. It sounds like something not in the tire is the best option as the tire isn't designed to be exposed to internal elements outside of air.

Was your Balance Master failure covered by warranty? For around $1,500 for a set for the RV, I would hope they last a long time and stand by the warranty. Then again, $1.5k is a drop in the bucket in the RV world lol.

You definitely have a nice amount of room in the shop! I love it. I bet you do too! Another couple decades and I hope to have a similar setup, but the next bay over would be machine equipment and 4 posts for car storage vs an RV :3gears:

Keep up the good work, sir!

Roman
 

C_F

ALLIANCE MEMBER
Joined
Jan 21, 2005
Messages
9,675
Location
Utah...SNOW BLOWS!
I love those interior shots of the shop, I wouldn't know what to do with myself if I had that much space. I've got to do something about that one day. :)
 
OP
Z

zmotorsports

ALLIANCE MEMBER
Joined
Oct 20, 2009
Messages
21,461
Location
Northern Utah
Hi Mike, good to know. I read a couple posts on an RV forum about balance rings and balance beads, etc. and came across a tire manufactures opinion too. It sounds like something not in the tire is the best option as the tire isn't designed to be exposed to internal elements outside of air.


Was your Balance Master failure covered by warranty? For around $1,500 for a set for the RV, I would hope they last a long time and stand by the warranty. Then again, $1.5k is a drop in the bucket in the RV world lol.


You definitely have a nice amount of room in the shop! I love it. I bet you do too! Another couple decades and I hope to have a similar setup, but the next bay over would be machine equipment and 4 posts for car storage vs an RV :3gears:


Keep up the good work, sir!


Roman


Not covered by warranty Roman. They are 17 years old so I feel they held up well. I had these on my last coach and transferred them to this one ten years ago.

Mike


Sent from my iPhone using Tapatalk
 
OP
Z

zmotorsports

ALLIANCE MEMBER
Joined
Oct 20, 2009
Messages
21,461
Location
Northern Utah
I love those interior shots of the shop, I wouldn't know what to do with myself if I had that much space. I've got to do something about that one day. :)


Thanks. I hope I still have a fair amount of room after the last of the items are moved in and put away.

Working in the shop tonight while the wife was out I stood back to take in how nice it was to have three full size vehicles in the shop and still have room to move around and work. My son was at the welding bench welding and I was working on my Jeep on the lift. Awesome father and son time in the shop.

Mike


Sent from my iPhone using Tapatalk
 
OP
Z

zmotorsports

ALLIANCE MEMBER
Joined
Oct 20, 2009
Messages
21,461
Location
Northern Utah
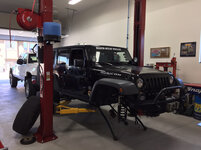
Started on my ProRock 44 project today. Great way to spend a Saturday, in the shop wrenching on Jeeps.[emoji106]

Steering, axle shafts, unit bearings and knuckles removed and ready to drop the axle.
2ad3523406c37ccbf6f6a05074958cfd.jpg

My 5.38:1 gears look great after about 73k driven miles and another 22k~ish towed miles over the past six years.
7d44352220aa9eb098197d98bbd9fd0f.jpg

OEM axle housing out from under the Jeep after dissembling it.
85a5c82a2d864a782138bf85430d3f27.jpg

Test fitting the carrier in the new ProRock housing. These ProRock housing are the bomb but every one I have built seems to need the caps clearanced a bit to clear the carrier and/or the coil for the locker.
401fd5235a46a40c64a018b0d29c6aed.jpg

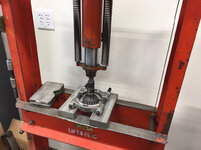
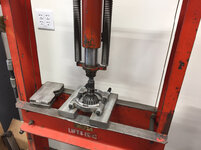
Pressing the bearings off of the pinion.
6b026228a73ff2b1f68fb4ae8f6eb4b4.jpg

Pulling the carrier bearings.
f92f787a24adaf8ccfc58a90d794262a.jpg

Carrier bearings off and preparing to install the new bearings.
572307936437bf85745f0afb6b7e52c1.jpg

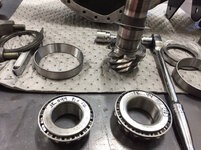
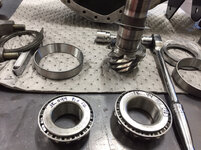
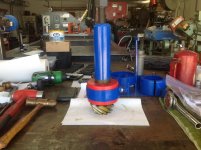
Bearing heater at the ready and my "set-up" bearings ready for use. I had to dig through some boxes in my basement to find my box of setup bearings. Boy will I be glad to have everything organized in the shop where I don't have to hunt for everything.
09b9559357a213c58bf6092eace747f8.jpg

Case spreader installed and ready to start assembly.
fda4deec8fd2a6e19582679b54bc6574.jpg

Pinion cleaned and ready for mock-up. I am going to start with the same .041" pinion shim that I removed from my previous setup and see where it lands after painting up the gears.
e4223183b3bb87d89a5e30710a4fc2e7.jpg

More to come. Thanks for looking.

Mike


Sent from my iPhone using Tapatalk
 

Attachments

  • 2ad3523406c37ccbf6f6a05074958cfd.jpg
    2ad3523406c37ccbf6f6a05074958cfd.jpg
    768.9 KB · Views: 1
  • e4223183b3bb87d89a5e30710a4fc2e7.jpg
    e4223183b3bb87d89a5e30710a4fc2e7.jpg
    834.1 KB · Views: 0
  • fda4deec8fd2a6e19582679b54bc6574.jpg
    fda4deec8fd2a6e19582679b54bc6574.jpg
    813.9 KB · Views: 0
  • 09b9559357a213c58bf6092eace747f8.jpg
    09b9559357a213c58bf6092eace747f8.jpg
    695.5 KB · Views: 0
  • 7d44352220aa9eb098197d98bbd9fd0f.jpg
    7d44352220aa9eb098197d98bbd9fd0f.jpg
    706.9 KB · Views: 0
  • 85a5c82a2d864a782138bf85430d3f27.jpg
    85a5c82a2d864a782138bf85430d3f27.jpg
    727.9 KB · Views: 0
  • 401fd5235a46a40c64a018b0d29c6aed.jpg
    401fd5235a46a40c64a018b0d29c6aed.jpg
    846 KB · Views: 0
  • 6b026228a73ff2b1f68fb4ae8f6eb4b4.jpg
    6b026228a73ff2b1f68fb4ae8f6eb4b4.jpg
    768.6 KB · Views: 1
  • f92f787a24adaf8ccfc58a90d794262a.jpg
    f92f787a24adaf8ccfc58a90d794262a.jpg
    136.8 KB · Views: 1
  • 572307936437bf85745f0afb6b7e52c1.jpg
    572307936437bf85745f0afb6b7e52c1.jpg
    845.3 KB · Views: 14
Last edited:

fnieto

Well-known member
Joined
Aug 27, 2013
Messages
1,401
Location
Tucson,Arizona
Awesome work Mike. Years back I rebuilt the front axel and third member on my 40 and also installed an ARB air locker. I used the plasma table to make a jig that is very handy for this type of work. The pinion puller is a must when setting up correct shims.
 

Attachments

  • IMG_0131.jpg
    IMG_0131.jpg
    138.2 KB · Views: 305
  • IMG_0110.jpg
    IMG_0110.jpg
    143.4 KB · Views: 291

fnieto

Well-known member
Joined
Aug 27, 2013
Messages
1,401
Location
Tucson,Arizona
Here is my pinion gear heater, its made by Viking LOL. My wife was out running errands at the time hehehe.
 

Attachments

  • IMG_0113.jpg
    IMG_0113.jpg
    138.4 KB · Views: 242
To avoid these ads, REGISTER NOW!
OP
Z

zmotorsports

ALLIANCE MEMBER
Joined
Oct 20, 2009
Messages
21,461
Location
Northern Utah
Awesome work Mike. Years back I rebuilt the front axel and third member on my 40 and also installed an ARB air locker. I used the plasma table to make a jig that is very handy for this type of work. The pinion puller is a must when setting up correct shims.


Nice Paco. Great looking setup.

Looks like we have similar taste in bearing pullers.[emoji108]

Mike


Sent from my iPhone using Tapatalk
 
OP
Z

zmotorsports

ALLIANCE MEMBER
Joined
Oct 20, 2009
Messages
21,461
Location
Northern Utah
Here is my pinion gear heater, its made by Viking LOL. My wife was out running errands at the time hehehe.


For ring gears and small engine or motorcycle heads I actually use an electric hot plate and an IR temp gun to keep an eye on temps. I don't dare use my wife's oven. I'm too afraid of her.[emoji15]

Mike


Sent from my iPhone using Tapatalk
 

C_F

ALLIANCE MEMBER
Joined
Jan 21, 2005
Messages
9,675
Location
Utah...SNOW BLOWS!
I like that bearing puller! I have a P/S pulley puller that is that same basic style, which works slick. I'm going to have to snag one like yours. That's right, you just cost me some money. :D

Regarding your box of "set-up" bearings, what are they used for? Do you not press on the bearings you will be running, then shim accordingly from there? I've set up a few differentials in years past, but I am far from being a pro at it, so I'm just curious.
 
OP
Z

zmotorsports

ALLIANCE MEMBER
Joined
Oct 20, 2009
Messages
21,461
Location
Northern Utah
I like that bearing puller! I have a P/S pulley puller that is that same basic style, which works slick. I'm going to have to snag one like yours. That's right, you just cost me some money. :D

Regarding your box of "set-up" bearings, what are they used for? Do you not press on the bearings you will be running, then shim accordingly from there? I've set up a few differentials in years past, but I am far from being a pro at it, so I'm just curious.

My set-up bearings have a few thousandths taken off the I.D. so they are a snug slip fit into position. Much better than all of that pressing of bearings. Once I get the pinion depth and carrier shimmed side to side along with preloads I remove my setup bearings and replace with new bearings and press everything together for final installation.

On the outer pinion bearing I also use my bearing heater for final installation as I hate beating on bearings.

Mike
 

shortykorte

Well-known member
Joined
Sep 1, 2014
Messages
8,039
Location
Tallahassee, Fl
In order to learn, the setup bearings are standard bearings with material removed by you or others
or manufactured as setup bearings from the get go?


Sent from my iPhone using Tapatalk
 

C_F

ALLIANCE MEMBER
Joined
Jan 21, 2005
Messages
9,675
Location
Utah...SNOW BLOWS!
My set-up bearings have a few thousandths taken off the I.D. so they are a snug slip fit into position. Much better than all of that pressing of bearings. Once I get the pinion depth and carrier shimmed side to side along with preloads I remove my setup bearings and replace with new bearings and press everything together for final installation.

On the outer pinion bearing I also use my bearing heater for final installation as I hate beating on bearings.

Mike
Okay, that makes sense. That would be easier overall, than pulling & reinstalling your new bearings a few times until the final fit is achieved. A smart man, you are! :)
 
OP
Z

zmotorsports

ALLIANCE MEMBER
Joined
Oct 20, 2009
Messages
21,461
Location
Northern Utah
In order to learn, the setup bearings are standard bearings with material removed by you or others
or manufactured as setup bearings from the get go?


Sent from my iPhone using Tapatalk


Shorty, my set up bearings are good used or new bearings that I personally removed a few thousandths from the ID. Sorry, I should have been more specific.

Mike


Sent from my iPhone using Tapatalk
 
OP
Z

zmotorsports

ALLIANCE MEMBER
Joined
Oct 20, 2009
Messages
21,461
Location
Northern Utah
Okay, that makes sense. That would be easier overall, than pulling & reinstalling your new bearings a few times until the final fit is achieved. A smart man, you are! :)


Thanks but I can't take credit for that. My long time friend and mentor taught me that little trick many, many years ago.

I sure miss that guy.

Mike


Sent from my iPhone using Tapatalk
 
OP
Z

zmotorsports

ALLIANCE MEMBER
Joined
Oct 20, 2009
Messages
21,461
Location
Northern Utah
Few pictures from tonight's work. I was able to get the gears setup and ready for final assembly tomorrow night.

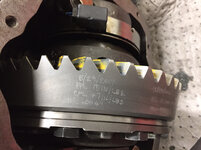
First attempt with same shims as my old housing. Pinion was a bit shallow.
2b0680829ce8e71aff0d4d5afeeb24a1.jpg

Fifth time with drive and coast sides looking good. Ended up having to run about .005" more shims on pinion resulting in the pinion being deeper into the ring gear. I then adjusted the carrier shims to get my backlash to .007".
b68b4c90c80fbbfe6ddaf63ebd45307f.jpg

My notes.
d563c64fd599377be9f0849bfd18b0a2.jpg

Only took me five times together and apart adjusting shim thicknesses until I landed on the correct combination.

**Okay, on edit (now that I have some time) I will give a brief explanation/description of the procedure(s) that I use.

A couple of things to remember, first although a pinion depth tool is great to have, you can get just as good of results without it by using the tooth contact method. I have a nice pinion depth tool and find myself rarely using it.

I always try to shoot for pinion depth first then backlash before I worry about the "ideal" contact patch. What you want with pinion depth is to center the contact pattern between the face and root of the tooth, which would be top to bottom, rather than between the toe and heel. The face and root is what determines pinion depth. As you can see by my first picture above, the contact pattern is near the face, or top, of the tooth indicating that the pinion is too shallow and needs to be deeper towards the axle centerline.

When first setting up I use the OEM shim pack as a starting point. If I need to change, from there I will also make a large change (between approx. .010"-.015") and see where I land before going to small increments of .004"-.006" and less. This will help you determine where to start sneaking up on it. If you make a large change and still not centered then you will need to make more, if you make a large change and then go to the other extreme, at least you know you need to be somewhere in the middle and can then make smaller changes and sneak up on it.

Once pinion depth is reached then start dialing in the backlash which will take care of the toe to heel placement of the pattern. This is where experience comes into play on moving the ring gear side to side and knowing approx. how much it will change backlash readings. As a general rule I start with the formula that .010" in shim thickness one side or the other will change the backlash around .006"-.007" but each can be different.

One last note, when setting up used gears focus more on the coast side rather than the drive side for pattern. New gears I use both the drive and coast sides for references. Also keep in mind that the "ideal" pattern that you see in articles are hard (and in some instances impossible) to achieve so get your pinion depth set properly between the face and root most importantly then work on backlash which will center between toe and heel.

Lastly pinion bearing preload specifications. Each axle may have somewhat different spec's but as a general rule of thumb I use the specification of 15-18 in/lbs of rotating torque on new bearings and around 8-10 in/lbs. on used bearings. Carrier or side bearing preload is hard to measure on anything other than drop-in style carriers but must be tight enough to not have any slop side to side under heavy load or adverse wear and/or damage will occur. I insist on using a case spreader to spread the case a few thousandths then install the carrier with shims being snug then I know when I remove the case spreader the carrier preload is adequate. An OTC case spreader was one of the first major expense tools that I purchased about 25 years or so ago when I first started doing gear sets.

I hope this helps those of you who are contemplating tackling a gear installation.

Mike


Sent from my iPhone using Tapatalk
 

Attachments

  • 2b0680829ce8e71aff0d4d5afeeb24a1.jpg
    2b0680829ce8e71aff0d4d5afeeb24a1.jpg
    861.3 KB · Views: 9
  • b68b4c90c80fbbfe6ddaf63ebd45307f.jpg
    b68b4c90c80fbbfe6ddaf63ebd45307f.jpg
    837.4 KB · Views: 0
  • d563c64fd599377be9f0849bfd18b0a2.jpg
    d563c64fd599377be9f0849bfd18b0a2.jpg
    702.6 KB · Views: 2
Last edited:

Ohmthis

Well-known member
Joined
Jan 20, 2013
Messages
3,021
Location
Outside of Louisville KY
Mike that's the part I'd like to learn. I understand what the whims are for and how the gears should mesh. It's just the process of getting there. I've never really looked up on how to set them up, so it's mainly my own fault. I've never had a reason to learn, but it's still not an excuse (at least to me anyways). Thanks for the write ups, they do make my wheels turn.
 

zkdiesel

Well-known member
Joined
Oct 6, 2013
Messages
8,389
Location
chicagoland cornfields
How many sets of bearings you have?
Have a whole 22" wide tool box door dedicated to them! At least 10 different sets all zip tied together and id tags wired to them
 
OP
Z

zmotorsports

ALLIANCE MEMBER
Joined
Oct 20, 2009
Messages
21,461
Location
Northern Utah
Mike that's the part I'd like to learn. I understand what the whims are for and how the gears should mesh. It's just the process of getting there. I've never really looked up on how to set them up, so it's mainly my own fault. I've never had a reason to learn, but it's still not an excuse (at least to me anyways). Thanks for the write ups, they do make my wheels turn.

You are very welcome.

Setting up gears is not rocket science but you have to methodically think it through by the pattern because a change to one component will definitely change another. After you do a few you can get a feel for how much a change in pinion depth will change backlash, etc.

From there it is mainly an investment of time because it takes some practice. I can also tell when I haven't done one for a while it takes me a bit to get in "the zone" setting one up. By about the third time making changes to this one last night the wife came home and called me in for dinner but I was making progress and didn't want to stop because I was on a roll.:lol:

I used to set up 3-4 a month for people back when I was racing. Then over the past 6 or so years I was setting up 4-6 a year in Jeeps but I haven't done any for the past year now due to the whole moving and being without a shop but I am ready to get back into some more.

At my last shop I had a box with shim assortments but I want to set up one of my new Durham compartmentalized drawers with all of my assortment of shims in this shop so they are within easy reach.

Mike
 
OP
Z

zmotorsports

ALLIANCE MEMBER
Joined
Oct 20, 2009
Messages
21,461
Location
Northern Utah
How many sets of bearings you have?
Have a whole 22" wide tool box door dedicated to them! At least 10 different sets all zip tied together and id tags wired to them

Not quite as many as you sounds like.

I have ones for the GM 10 and 12-bolts, Ford 9-inchers, GM 14-bolt, several versions of the Dana 44, Dana 30 and the Chrysler 8.25 which are popular in Jeeps. Some I did like you and zip-tied them together and others written on in Sharpie in a gearset box that I keep in a cupboard.

I think that is about it. Just ones that I seemed to do the most over the years. The singles here and there I have done I haven't done enough to get a good quality setup bearing yet nor been able to justify buying a set to make into setup bearings.

I think I may make one of my drawers in my under workbench toolboxes specifically for setup bearings so they are within easy reach, then my assortment of shims in a compartmentalized drawer.

Mike
 
Last edited:

zkdiesel

Well-known member
Joined
Oct 6, 2013
Messages
8,389
Location
chicagoland cornfields
Not quite as many as you sounds like.

I have ones for the GM 10 and 12-bolts, Ford 9-inchers, GM 14-bolt, several versions of the Dana 44, Dana 30 and the Chrysler 8.25 which are popular in Jeeps. Some I did like you and zip-tied them together and others written on in Sharpie in a gearset box that I keep in a cupboard.

I think that is about it. Just ones that I seemed to do the most over the years. The singles here and that I have done I haven't done enough to get a good quality setup bearing yet nor been able to justify buying a set to make into setup bearings.

I think I may make one of my drawers in my under workbench toolboxes specifically for setup bearings so they are within easy reach, then my assortment of shims in a compartmentalized drawer.

Mike
Yep, I've setup at least 100 diffs over the years. All shins are arranged by outside od and in different tybberware containers or small cardboard boxes if they fit perfect to stand on end. Know I have setup bearings for Dana 30,35,44,60,70,80,110
Then popular ford 10.25/10.5, 9", 8.8, then the standard Chevy stuff. Have a few Toyota pinion bearing sets,
The Danas and where you NEED it as every adjustment is a press on/off a bearing for any adjustment in carrier or pionion
Luckily enough I just get boss to buy brand new timkens for my setup bearings
Avoid using China junk as they aren't close enough to quality bearings for accurate measurements

Your right about getting in the zone, defiantly struggle at first two shots at pinion depth if I haven't done one in a month or more but by third hit you got depth spot in and already know where your carrier shims gonna be at. If it's only a week between gear jobs it goes easy peasy usually. At work my guys strip down the axles for me then I'll come do headset then they will either install the third memeber, or put in the axles/brakes/driveshaft and cover for me. I have the specialty life lol
 
Last edited:
OP
Z

zmotorsports

ALLIANCE MEMBER
Joined
Oct 20, 2009
Messages
21,461
Location
Northern Utah
Yep, I've setup at least 100 diffs over the years. All shins are arranged by outside od and in different tybberware containers or small cardboard boxes if they fit perfect to stand on end. Know I have setup bearings for Dana 30,35,44,60,70,80,110
Then popular ford 10.25/10.5, 9", 8.8, then the standard Chevy stuff. Have a few Toyota pinion bearing sets,
The Danas and where you NEED it as every adjustment is a press on/off a bearing for any adjustment in carrier or pionion
Luckily enough I just get boss to buy brand new timkens for my setup bearings
Avoid using China junk as they aren't close enough to quality bearings for accurate measurements

I agree about not buying junk bearings. I have used Timken and SKF for the most part for setup bearings. If a person plans on doing a few then you can usually justify purchasing new ones as they aren't really that expensive.

Mike
 

lugnut71

Well-known member
Joined
Feb 14, 2013
Messages
1,898
Location
Wyoming
First of all I really enjoy all your threads, I have rebuilt several diffs. over the years, I remember 20 some years ago I came up with the idea of using an emery wheel on a die grinder to make a set up bearing. Thought I invented something, next month I was reading a 4 wheel drive magazine and they were doing a rebuild and did the same thing, lol ! I use a 1/2" piece of keystock across the carrier bosses and measure off of that to check pinion depth. I also check carrier bearing preload with pinion out or ring gear not installed . So I am not rotating both of them . Cant remember the brand, maybe spicer , but used to buy ring and pinion sets, and those ones had a like a +3 or a -5, etched on the pinion head, and you just added or subtracted that amount from the original shim .
 
OP
Z

zmotorsports

ALLIANCE MEMBER
Joined
Oct 20, 2009
Messages
21,461
Location
Northern Utah
First of all I really enjoy all your threads, I have rebuilt several diffs. over the years, I remember 20 some years ago I came up with the idea of using an emery wheel on a die grinder to make a set up bearing. Thought I invented something, next month I was reading a 4 wheel drive magazine and they were doing a rebuild and did the same thing, lol ! I use a 1/2" piece of keystock across the carrier bosses and measure off of that to check pinion depth. I also check carrier bearing preload with pinion out or ring gear not installed . So I am not rotating both of them . Cant remember the brand, maybe spicer , but used to buy ring and pinion sets, and those ones had a like a +3 or a -5, etched on the pinion head, and you just added or subtracted that amount from the original shim .

Thank you for your comments, I'm glad you enjoy my threads.

As for the setup bearings, they are nothing special like you mentioned, just takes a few minutes to turn them into setup bearings but well worth the effort in time and effort saved.

As for preload settings, I forgot to mention or assumed it was common knowledge, that the pinion bearing preload should be checked without the carrier installed. Just checking the pinion only as your readings will be skewed by also turning the carrier. That being said, I like to add about 6-8 in/lbs or so to the pinion number once the carrier is installed as a rough number to know I have carrier preload.

I do like using my depth gauge but have found I use it less and less as once you get to reading patterns you can get the same results. I have machined a few other supports for other axles that my depth kit didn't support but basically what you are shooting for is axle centerline then the number stamped on the pinion and correct shims to get to that point. The ones that have plus or minuses or letters engraved usually require looking up in a FSM to find the legend and retrieve the spec's.

Mike
 
Last edited:
OP
Z

zmotorsports

ALLIANCE MEMBER
Joined
Oct 20, 2009
Messages
21,461
Location
Northern Utah
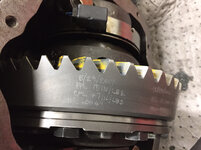
Finished the gears up today and engraved all of the spec's before installing the cover.
9cb6cab6a64fd0a9ac9ec125eacebaaf.jpg

Mike


Sent from my iPhone using Tapatalk
 

Attachments

  • 9cb6cab6a64fd0a9ac9ec125eacebaaf.jpg
    9cb6cab6a64fd0a9ac9ec125eacebaaf.jpg
    745.2 KB · Views: 2
Last edited:
To avoid these ads, REGISTER NOW!
Top Bottom