To avoid these ads, REGISTER NOW!

ZMotorsports Shop Projects 2.0

OP
Z

zmotorsports

ALLIANCE MEMBER
Joined
Oct 20, 2009
Messages
21,441
Location
Northern Utah
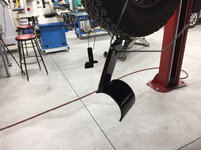
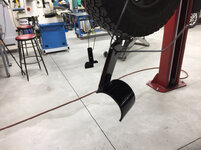
Mike, another great job. Is that black (looks like nylon/canvas?) wrapped up on the tow bar a rock shield of some kind? I have never flat towed anything so I learning and filing this away in my memory for later use!


Sent from my iPad using Tapatalk Pro

Thanks Duke. Yes, the mesh that is rolled up is fastened to the stinger of the towbar. It is also made by Roadmaster and marketed as their Tow Defender. It is designed to help with rock chips. I towed my first several Jeeps well over 100k miles combined and can count on one hand and have fingers left over how many actual rock chips I got.

This Jeep has been my Achilles heel of rock chips so I tried the mesh a few years ago and it helped but didn't eliminate them totally. I finally found the source and it turned out to be the Jeep rather than the coach flipping up rocks. I remedied that a few years ago but seeing as how I want as much protection as possible I continue to run the Tow Defender even though with my experience it actually benefits quite marginally.

Thanks for following along Duke. Your place is sure coming along nicely. I'm happy for ya bud.
 
Last edited:
To avoid these ads, REGISTER NOW!

Duker

Well-known member
Joined
Sep 25, 2010
Messages
10,861
Location
Livingston, TX
Thanks Duke. Yes, the mess that is rolled up is fastened to the stinger of the towbar. It is also made by Roadmaster and marketed as their Tow Defender. It is designed to help with rock chips. I towed my first several Jeeps well over 100k miles combined and can count on one hand and have fingers left over how many actual rock chips I got.


This Jeep has been my Achilles heel of rock chips so I tried the mess a few years ago and it helped but didn't eliminate them totally. I finally found the source and it turned out to be the Jeep rather than the coach flipping up rocks. I remedied that a few years ago but seeing as how I want as much protection as possible I continue to run the Tow Defender even though with my experience it actually benefits quite marginally.


Thanks for following along Duke. Your place is sure coming along nicely. I'm happy for ya bud.


Thanks Mike, I keep trying to talk my wife into the possibility of travel via trailer or motorhome but she hasn’t warmed up to the possibility.......yet.....

I appreciate the comments on my shop. While it is coming along the pace is way to slow for my liking. Your thread keeps the fire lit under my a$$ to keep moving forward as I see how much you are enjoying yours.


Sent from my iPad using Tapatalk Pro
 
OP
Z

zmotorsports

ALLIANCE MEMBER
Joined
Oct 20, 2009
Messages
21,441
Location
Northern Utah
I pulled the Jeep in the shop tonight to start my next upgrade or mod.

The JK’s seem to have a pretty anemic steering gearbox, specifically the sector shaft. The sector shafts have been known to shear off when running larger than OEM tires/wheels and getting them bound up when off-road. That is pretty much enough to ruin your day of fun.

For the ultimate in strength and steering ability off-road a full hydraulic system is the cats meow. Seeing as how full-hydro is not DOT approved the next best option and a very common option at that is the hydro-assist setup. This design taps into the power steering gearbox and feeds hydraulic pressure to a double acting cylinder that has one end connected to the tie rod assembly and the other end to a bracket on the axle. This is a very good setup for those running large tires/wheels and frequently engage the front lockers and still allows very good steering. It is also less stressful on the gearbox and frame as it splits the forces between the gearbox itself and the hydraulic cylinder on the axle, actually placing more force right at the axle and tie rod and less on the gearbox. In my personal opinion this is probably the best setup for tires over 37” in diameter who wheel their rigs hard. However, also In my opinion this is the most expensive and has multiple potential failure points, as in hydraulic lines although failures are not very common.

The next setup is PSC’s new upgraded steering box. PSC advertises this setup for up to 37” tires but again in my opinion 37’s are on the bubble depending on how you wheel and if your front axle is locked or not, although I have heard of a few people even running 40’s with just the upgraded gearbox.

I am only running 35” tires and seriously doubt I will ever step up to 37’s so I wanted something that mainly addressed the weak sector shaft but if I can get a bit better steering performance at the same time it’s a bonus. For my situation I feel this PSC upgraded gearbox will be the best bang for the buck and give me exactly what I am looking for.

To compare spec’s, the difference between an OEM Jeep JK/JKU steering gearbox and the PSC are as follows; the OEM has a 70mm piston and the PSC has an 80mm piston. The OEM sector shaft is a scant 35mm in diameter vs the PSC’s 45mm sector shaft, that is 30% larger. Basically the PSC gearbox closely resembles the Dodge 2500/3500 steering gearbox.

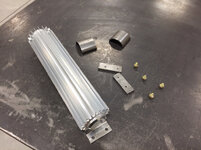
So there is the “why” behind my upgrade now let’s get to the actual upgrade. One more upgrade I thought I would do while I have the system open and fluid drained is to add a power steering cooler to the return line. I purchased a Derale 12” oil cooler a few years ago for a different project but never used it. I will be looking for a place to mount that while I’m under the Jeep.

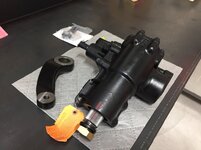
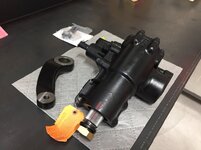
Here is the PSC Big Bore XD that will reside under my 2011 Jeep Wrangler
8cd6d3f0bb275b09c63137e83201168f.jpg

Before spinning any wrenches, I used my oil evacuation tank and pulled as much fluid out of the reservoir that I could. I figured this would be less “potential” fluid that would end up on my floor.

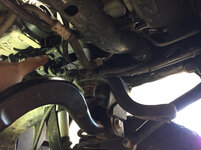
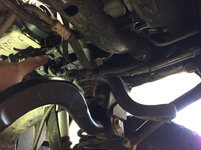
I removed my JKS steering gearbox support system then removed the steering column connection (where I’m pointing) then I can focus on removing the actual gearbox.
a4c1810c43faa7f79ac3ed136d19792b.jpg

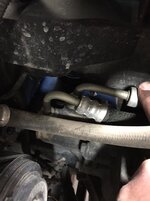
Here are the two power steering lines that need to be removed. The one I am pointing to is the pressure line.
3a42c8742a5b51bc193e4d5a086c8a52.jpg

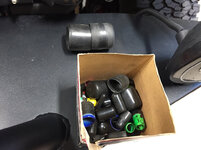
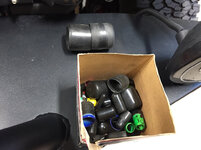
I have collected a pretty good assortment of plastic caps and plugs over the years for situations like this. These are o-ring fittings so I capped each one after removing from the gearbox to minimize the mess and oil running down the frame.
56f656ac121277156bfebf2145da5d14.jpg

OEM gearbox out and on the bench next to the new PSC unit ready to go under the Jeep.
5a2f1667a727e87ac1e6986fd72b7b73.jpg

20c5018145c8e82cbc0bd41a5daaeb3b.jpg

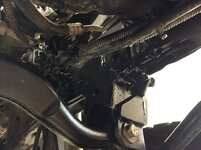
Before closing up the shop for the night I cut the mounting block off of the frame from my JKS gearbox support as well as a tab from beefed up trac bar bracket. I blended the ground weld and sprayed some Eastwood Extreme chassis paint on the area to allow it to dry overnight.
a585d9428b47a5a2f93563850faac304.jpg

Today was so nice I was able to work in the shop with the roll up doors open for the first day of the year. Freakin’ awesome!

Thanks for looking.
 

Attachments

  • a585d9428b47a5a2f93563850faac304.jpg
    a585d9428b47a5a2f93563850faac304.jpg
    715.4 KB · Views: 0
  • 20c5018145c8e82cbc0bd41a5daaeb3b.jpg
    20c5018145c8e82cbc0bd41a5daaeb3b.jpg
    717.4 KB · Views: 0
  • 5a2f1667a727e87ac1e6986fd72b7b73.jpg
    5a2f1667a727e87ac1e6986fd72b7b73.jpg
    661.6 KB · Views: 1
  • 56f656ac121277156bfebf2145da5d14.jpg
    56f656ac121277156bfebf2145da5d14.jpg
    739.6 KB · Views: 1
  • 8cd6d3f0bb275b09c63137e83201168f.jpg
    8cd6d3f0bb275b09c63137e83201168f.jpg
    730.8 KB · Views: 1
  • a4c1810c43faa7f79ac3ed136d19792b.jpg
    a4c1810c43faa7f79ac3ed136d19792b.jpg
    737.5 KB · Views: 0
  • 3a42c8742a5b51bc193e4d5a086c8a52.jpg
    3a42c8742a5b51bc193e4d5a086c8a52.jpg
    725.8 KB · Views: 1
Last edited:

nbruno

Well-known member
Joined
Feb 12, 2014
Messages
213
I pulled the Jeep in the shop tonight to start my next upgrade or mod.

The JK’s seem to have a pretty anemic steering gearbox, specifically the sector shaft. The sector shafts have been known to shear off when running larger than OEM tires/wheels and getting them bound up when off-road. That is pretty much enough to ruin your day of fun.

For the ultimate in strength and steering ability off-road a full hydraulic system is the cats meow. Seeing as how full-hydro is not DOT approved the next best option and a very common option at that is the hydro-assist setup. This design taps into the power steering gearbox and feeds hydraulic pressure to a cylinder that has one end connected to the tie rod assembly and the other end to a bracket on the axle. This is a very good setup for those running large tires/wheels and frequently engage the front lockers and still allows very good steering. It is also less stressful on the gearbox and frame as it splits the forces between the gearbox itself and the hydraulic cylinder on the axle, actually placing more force right at the axle and tie rod and less on the gearbox. In my personal opinion this is probably the best setup for tires over 37” in diameter who wheel their rigs hard. However, also In my opinion this is the most expensive and has multiple potential failure points, as in hydraulic lines although failures are not very common.

The next setup is PSC’s new upgraded steering box. PSC advertises this setup for up to 37” tires but again in my opinion 37’s are on the bubble depending on how you wheel and if your front axle is locked or not, although I have heard of a few people even running 40’s with just the upgraded gearbox.

I am only running 35” tires and seriously doubt I will ever step up to 37’s so I wanted something that mainly addressed the weak sector shaft but if I can get a bit better steering performance at the same time it’s a bonus. For my situation I feel this PSC upgraded gearbox will be the best bang for the buck and give me exactly what I am looking for.

To compare spec’s, the difference between an OEM Jeep JK/JKU steering gearbox and the PSC are as follows; the OEM has a 70mm piston and the PSC has an 80mm piston. The OEM sector shaft is a scant 35mm in diameter vs the PSC’s 45mm sector shaft, that is 30% larger. Basically the PSC gearbox closely resembles the Dodge 2500/3500 steering gearbox.

So there is the “why” behind my upgrade now let’s get to the actual upgrade. One more upgrade I thought I would do while I have the system open and fluid drained is to add a power steering cooler to the return line. I purchased a Derale 15” oil cooler a few years ago for a different project but never used it. I will be looking for a place to mount that while I’m under the Jeep.

Here is the PSC Big Bore XD that will reside under my 2011 Jeep Wrangler
8cd6d3f0bb275b09c63137e83201168f.jpg

Before spinning any wrenches, I used my oil evacuation tank and pulled as much fluid out of the reservoir that I could. I figured this would be less “potential” fluid that would end up on my floor.

I removed my JKS steering gearbox support system then removed the steering column connection (where I’m pointing) then I can focus on removing the actual gearbox.
a4c1810c43faa7f79ac3ed136d19792b.jpg

Here are the two power steering lines that need to be removed. The one I am pointing to is the pressure line.
3a42c8742a5b51bc193e4d5a086c8a52.jpg

I have collected a pretty good assortment of plastic caps and plugs over the years for situations like this. These are o-ring fittings so I capped each one after removing from the gearbox to minimize the mess and oil running down the frame.
56f656ac121277156bfebf2145da5d14.jpg

OEM gearbox our and on the bench next to the new PSC unit ready to go under the Jeep.
5a2f1667a727e87ac1e6986fd72b7b73.jpg

20c5018145c8e82cbc0bd41a5daaeb3b.jpg

Before closing up the shop for the night I cut the mounting block off of the frame from my JKS gearbox support as well as a tab from beefed up trac bar bracket. I blended the ground weld and sprayed some Eastwood Extreme chassis paint on the area to allow it to dry overnight.
a585d9428b47a5a2f93563850faac304.jpg

Today was so nice I was able to work in the shop with the roll up doors open for the first day of the year. Freakin’ awesome!

Thanks for looking.
Mike, I wish I had the inclination to document my work as well as you do. Always fun to follow along.

Sent from my SM-G930V using Tapatalk
 

Attachments

  • 8cd6d3f0bb275b09c63137e83201168f.jpg
    8cd6d3f0bb275b09c63137e83201168f.jpg
    99.3 KB · Views: 1
  • 20c5018145c8e82cbc0bd41a5daaeb3b.jpg
    20c5018145c8e82cbc0bd41a5daaeb3b.jpg
    102.6 KB · Views: 1
  • 5a2f1667a727e87ac1e6986fd72b7b73.jpg
    5a2f1667a727e87ac1e6986fd72b7b73.jpg
    84.2 KB · Views: 1
  • 56f656ac121277156bfebf2145da5d14.jpg
    56f656ac121277156bfebf2145da5d14.jpg
    114.5 KB · Views: 1
  • 3a42c8742a5b51bc193e4d5a086c8a52.jpg
    3a42c8742a5b51bc193e4d5a086c8a52.jpg
    98.3 KB · Views: 1
  • a585d9428b47a5a2f93563850faac304.jpg
    a585d9428b47a5a2f93563850faac304.jpg
    107.3 KB · Views: 1
  • a4c1810c43faa7f79ac3ed136d19792b.jpg
    a4c1810c43faa7f79ac3ed136d19792b.jpg
    108.8 KB · Views: 0
OP
Z

zmotorsports

ALLIANCE MEMBER
Joined
Oct 20, 2009
Messages
21,441
Location
Northern Utah
Mike, I wish I had the inclination to document my work as well as you do. Always fun to follow along.

Sent from my SM-G930V using Tapatalk

Thanks Nate. I hope to add this installation as another video to my channel as well as soon as I finish it up.

Thanks for following along.
 
OP
Z

zmotorsports

ALLIANCE MEMBER
Joined
Oct 20, 2009
Messages
21,441
Location
Northern Utah
I finished up the PSC gearbox installation tonight and started coming up with a plan for mounting the Derale oil cooler.

7636c805c9ad99b8d8354bb86065f178.jpg

df63ef0206b06db4d65763c9a08a17e0.jpg

I think I have a plan for mounting the power steering cooler.
f373ef5fa2aaf816d5415b5be5b3686f.jpg

Thanks for looking.
 

Attachments

  • f373ef5fa2aaf816d5415b5be5b3686f.jpg
    f373ef5fa2aaf816d5415b5be5b3686f.jpg
    726.5 KB · Views: 0
  • df63ef0206b06db4d65763c9a08a17e0.jpg
    df63ef0206b06db4d65763c9a08a17e0.jpg
    735.8 KB · Views: 1
  • 7636c805c9ad99b8d8354bb86065f178.jpg
    7636c805c9ad99b8d8354bb86065f178.jpg
    733.5 KB · Views: 3
Last edited:
OP
Z

zmotorsports

ALLIANCE MEMBER
Joined
Oct 20, 2009
Messages
21,441
Location
Northern Utah
I only had about an hour to work in the shop tonight so I fabbed up the mounting brackets for my power steering oil cooler.

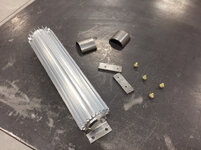
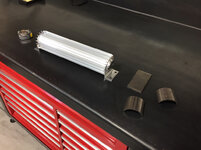
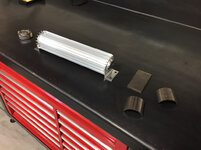
Here’s what I started with, a 3” long piece of 2.250” diameter x .120” wall tubing that I cut in half lengthwise to saddle over the 2” diameter cross member and two pieces of 1/4” flat strap.
e1065382be8b37840730f7bbedbef30f.jpg

Saddles welded to tabs after drilling and tapping the tabs to match the coolers bolt pattern.
758fd28c1040b7aa221bff537e698505.jpg

5daeca65a76bca13841d604f362b48af.jpg

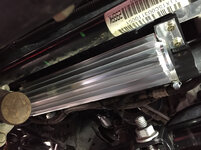
Mounted to the oil cooler.
76d95df25947f7f8ad26fe090a57a366.jpg

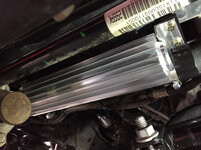
Oil cooler mocked into position.
7ef781350f0a4554b8ff00c8a12ebedd.jpg

5c63c14aba5ed861e905498bd1a967a8.jpg

Bead blasted, painted and ready for installation.
84863d3f3dcde54a50722bebc9374417.jpg

Thanks for looking.
 

Attachments

  • 84863d3f3dcde54a50722bebc9374417.jpg
    84863d3f3dcde54a50722bebc9374417.jpg
    702.9 KB · Views: 1
  • 5c63c14aba5ed861e905498bd1a967a8.jpg
    5c63c14aba5ed861e905498bd1a967a8.jpg
    787.8 KB · Views: 1
  • 7ef781350f0a4554b8ff00c8a12ebedd.jpg
    7ef781350f0a4554b8ff00c8a12ebedd.jpg
    699.3 KB · Views: 0
  • 5daeca65a76bca13841d604f362b48af.jpg
    5daeca65a76bca13841d604f362b48af.jpg
    805 KB · Views: 0
  • 758fd28c1040b7aa221bff537e698505.jpg
    758fd28c1040b7aa221bff537e698505.jpg
    775.3 KB · Views: 0
  • e1065382be8b37840730f7bbedbef30f.jpg
    e1065382be8b37840730f7bbedbef30f.jpg
    805.8 KB · Views: 0
  • 76d95df25947f7f8ad26fe090a57a366.jpg
    76d95df25947f7f8ad26fe090a57a366.jpg
    785 KB · Views: 0
Last edited:
OP
Z

zmotorsports

ALLIANCE MEMBER
Joined
Oct 20, 2009
Messages
21,441
Location
Northern Utah
I finished up my PSC Big Bore XDII power steering gearbox and steering cooler tonight. I test drove it and I am very pleased with the results after only a short 16-18 mile drive. Tomorrow our Jeep club is going on our monthly club run so I’ll see how it does. The run won’t be technical but I should get a decent feel for it being aired down.

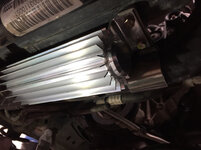
Oil cooler is fastened in place, that’s not going anywhere.
139d812d2d362c5a1eb8375d7e1e68e6.jpg

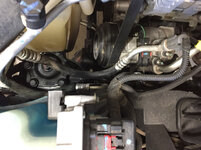
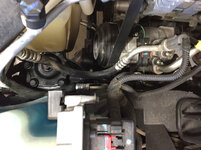
I reinstalled the engine coolant reservoir back into place and here you can see the gearbox nestled down between the engine coolant reservoir and windshield washer fluid reservoir.
17c8c210a98a8614b33df6a46f130ba4.jpg

Another shot of the oil cooler fastened to the crossmember.
f1b28f02760ba6f52e3dfd6574b8adcf.jpg

Shot of my Jeep after the road test and cleaning up mess/putting tools away.
7bef640125886dd02e8976d638e74775.jpg

The video of the installation is uploaded to my YouTube channel for anyone who wants to check it out.

Thanks for looking.
 

Attachments

  • 7bef640125886dd02e8976d638e74775.jpg
    7bef640125886dd02e8976d638e74775.jpg
    672.8 KB · Views: 0
  • f1b28f02760ba6f52e3dfd6574b8adcf.jpg
    f1b28f02760ba6f52e3dfd6574b8adcf.jpg
    760.1 KB · Views: 0
  • 17c8c210a98a8614b33df6a46f130ba4.jpg
    17c8c210a98a8614b33df6a46f130ba4.jpg
    763.2 KB · Views: 0
  • 139d812d2d362c5a1eb8375d7e1e68e6.jpg
    139d812d2d362c5a1eb8375d7e1e68e6.jpg
    787.4 KB · Views: 0
Last edited:

NASTYZEN

Well-known member
Joined
Jun 11, 2010
Messages
2,823
Location
St-Colomban,Que. Canada
My oldest Son just got a jeep like yours. I have to make sure not to show him this thread and give him all kinds of expensive idea's.:)
Nice job on the steering box install. Hope you don't have issues with other things in the system down the line from it that haven't been upgraded..
 
OP
Z

zmotorsports

ALLIANCE MEMBER
Joined
Oct 20, 2009
Messages
21,441
Location
Northern Utah
My oldest Son just got a jeep like yours. I have to make sure not to show him this thread and give him all kinds of expensive idea's.:)
Nice job on the steering box install. Hope you don't have issues with other things in the system down the line from it that haven't been upgraded..

Thanks Claude. The whole Jeep thing is quite addictive. JEEP, Just Empty Every Pocket.:willy_nil

As for everything downstream of my steering box, that has already been upgraded. Trac bar, drag link, tie rod, tie rod ends, axle, pretty much everything and the gearbox was the last component so I hope to have built in a nice safety margin for reliability.

Tell you son I hope he enjoys his Jeep and with your abilities to help him, I'm sure he will build some cool components for it.:thumbup:

Thanks for stopping by and checking on things Claude, always a pleasure to have you check out my projects.
 
OP
Z

zmotorsports

ALLIANCE MEMBER
Joined
Oct 20, 2009
Messages
21,441
Location
Northern Utah
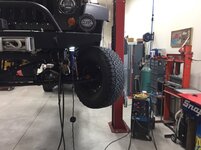
While I had the Jeep in the shop on the lift I thought I would address one “potential” issue. On an RV site a while back there was a thread where a guy had his Jeep JK come loose from his coach due to a towbar connection point failure.

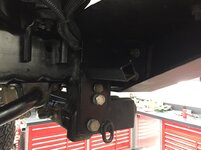
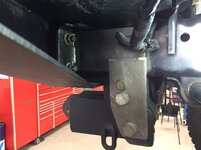
On the underside of the Jeep JK frame is a sub-frame box welded perpendicular to the frame rail at the front. This box is constructed of 10-gauge steel and where the manufacturer mounted a plastic skid. This sub-frame is what I connected my tow bar crossmember to that I fabricated about 7 years ago. When I fabricated my front winch bumper I tied it directly into the frame rails where the winch would pull as well as my recovery points. At that time I also welded a couple of tabs connecting those sub-frame boxes to the frame rails. I routinely inspect my Jeep’s tow bar connection points, crossmember, safety chain connection points as well as hitch on the coach to ensure safety and I have especially been keeping an eye on it since seeing the failure on the internet. If memory serves he was running a Blue Ox towbar mount.

While I was looking things over with the Jeep on the lift last week I came up with a plan to tie my tow bar crossmember directly to the frame just to ensure I never have a similar issue.

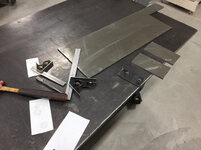
Cutting a couple pieces of 1/4” plate.
fdaa3e31ad0d4bffca1344addcce1d3a.jpg

Doing layout on materials.
1b2c4eb4461c2d3c8a9503fa901b972b.jpg

I had to put a slight bend in the plate to allow enough room for the fasteners to clear.
0fe8e30e5c108a13f898afa6c742679b.jpg

I then had to get a bit creative and clamp the pieces to an angle plate while tack welding the pieces together.
48518b5048c4b48cc9d1b3ca77aa0800.jpg

da79e725cce7eafdeb2fb1e53d2ab2c6.jpg

f192f87951b1ada71ec731a6afbd1d12.jpg

Mocked the components up for fitment.
a6fdeeed91b7ba88540b740121f61a8f.jpg

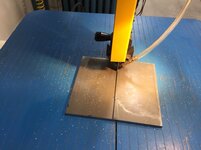
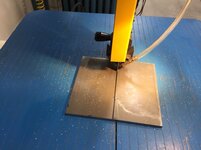
While mocking up the parts I realized I needed to remove a very small amount for clearance. Rather than grinding the small amount off I opted to run the edge through the vertical bandsaw. I love this Birmingham vertical bandsaw and how easily it is to control and remove such small amounts.

Here I removed a sliver of .015”, plus the .035" wide blade for a total of .040" off of the piece.
27602fc229ee31cd2ef47f4258bb08d0.jpg

f524c2dec3f8d31e6beef6afe03ab922.jpg

e14e1bdabe93b681f42356a6aba9061a.jpg

I’ve mentioned this before but I subscribe to the theory of the 7 P’s; Proper Prior Planning Prevents Piss Poor Performance. When I built my shop I made sure to put several 50-amp receptacles around the shop so I could merely roll my welders around and plug it to different areas without having to run extension cords, so glad I did. I moved my welder over to the other side of the shop and plugged in so I could tack the brackets together while bolted in place on the Jeep frame.
9ff2c3b07636520b9dff7c211ed64188.jpg

I then moved back to the fabrication table and finished welding the brackets together.
4620e9a0a947d462eae563bbc8f6d9c9.jpg

I beadblasted and painted the brackets before final installation.
f1d750ce54d362ef1668efc68f61ff92.jpg

dae0d8127c13a663a2b779dd84390647.jpg

One thing I did during mock up was to insert some .045” shims under the brackets at the front frame points so upon final assembly with the shims removed and tightened the brackets would preload a small amount tying the towbar crossmember to the frame.

Thanks for looking.
 

Attachments

  • fdaa3e31ad0d4bffca1344addcce1d3a.jpg
    fdaa3e31ad0d4bffca1344addcce1d3a.jpg
    825.1 KB · Views: 0
  • dae0d8127c13a663a2b779dd84390647.jpg
    dae0d8127c13a663a2b779dd84390647.jpg
    655.4 KB · Views: 0
  • f1d750ce54d362ef1668efc68f61ff92.jpg
    f1d750ce54d362ef1668efc68f61ff92.jpg
    700.7 KB · Views: 0
  • 1b2c4eb4461c2d3c8a9503fa901b972b.jpg
    1b2c4eb4461c2d3c8a9503fa901b972b.jpg
    703.7 KB · Views: 0
  • 0fe8e30e5c108a13f898afa6c742679b.jpg
    0fe8e30e5c108a13f898afa6c742679b.jpg
    733 KB · Views: 0
  • 48518b5048c4b48cc9d1b3ca77aa0800.jpg
    48518b5048c4b48cc9d1b3ca77aa0800.jpg
    789.7 KB · Views: 0
  • da79e725cce7eafdeb2fb1e53d2ab2c6.jpg
    da79e725cce7eafdeb2fb1e53d2ab2c6.jpg
    786.1 KB · Views: 0
  • f192f87951b1ada71ec731a6afbd1d12.jpg
    f192f87951b1ada71ec731a6afbd1d12.jpg
    605.2 KB · Views: 0
  • a6fdeeed91b7ba88540b740121f61a8f.jpg
    a6fdeeed91b7ba88540b740121f61a8f.jpg
    717.8 KB · Views: 0
  • 27602fc229ee31cd2ef47f4258bb08d0.jpg
    27602fc229ee31cd2ef47f4258bb08d0.jpg
    671.7 KB · Views: 0
  • f524c2dec3f8d31e6beef6afe03ab922.jpg
    f524c2dec3f8d31e6beef6afe03ab922.jpg
    637.3 KB · Views: 0
  • e14e1bdabe93b681f42356a6aba9061a.jpg
    e14e1bdabe93b681f42356a6aba9061a.jpg
    916.3 KB · Views: 0
  • 9ff2c3b07636520b9dff7c211ed64188.jpg
    9ff2c3b07636520b9dff7c211ed64188.jpg
    712 KB · Views: 0
  • 4620e9a0a947d462eae563bbc8f6d9c9.jpg
    4620e9a0a947d462eae563bbc8f6d9c9.jpg
    819.5 KB · Views: 0
Last edited:

nbruno

Well-known member
Joined
Feb 12, 2014
Messages
213
While I had the Jeep in the shop on the lift I thought I would address one “potential” issue. On an RV site a while back there was a thread where a guy had his Jeep JK come loose from his coach due to a towbar connection point failure.

On the underside of the Jeep JK frame is a sub-frame box welded perpendicular to the frame rail at the front. This box is constructed of 10-gauge steel and where the manufacturer mounted a plastic skid. This sub-frame is what I connected my tow bar crossmember to that I fabricated about 7 years ago. When I fabricated my front winch bumper I tied it directly into the frame rails where the winch would pull as well as my recovery points. At that time I also welded a couple of tabs connecting those sub-frame boxes to the frame rails. I routinely inspect my Jeep’s tow bar connection points, crossmember, safety chain connection points as well as hitch on the coach to ensure safety and I have especially been keeping an eye on it since seeing the failure on the internet. If memory serves he was running a Blue Ox towbar mount.

While I was looking things over with the Jeep on the lift last week I came up with a plan to tie my tow bar crossmember directly to the frame just to ensure I never have a similar issue.

Cutting a couple pieces of 1/4” plate.
fdaa3e31ad0d4bffca1344addcce1d3a.jpg

Doing layout on materials.
1b2c4eb4461c2d3c8a9503fa901b972b.jpg

I had to put a slight bend in the plate to allow enough room for the fasteners to clear.
0fe8e30e5c108a13f898afa6c742679b.jpg

I then had to get a bit creative and clamp the pieces to an angle plate while tack welding the pieces together.
48518b5048c4b48cc9d1b3ca77aa0800.jpg

da79e725cce7eafdeb2fb1e53d2ab2c6.jpg

f192f87951b1ada71ec731a6afbd1d12.jpg

Mocked the components up for fitment.
a6fdeeed91b7ba88540b740121f61a8f.jpg

While mocking up the parts I realized I needed to remove a very small amount for clearance. Rather than grinding the small amount off I opted to run the edge through the vertical bandsaw. I love this Birmingham vertical bandsaw and how easily it is to control and remove such small amounts.

Here I removed a sliver of .015”.
27602fc229ee31cd2ef47f4258bb08d0.jpg

f524c2dec3f8d31e6beef6afe03ab922.jpg

e14e1bdabe93b681f42356a6aba9061a.jpg

I’ve mentioned this before but I subscribe to the theory of the 7 P’s; Proper Prior Planning Prevents Piss Poor Performance. When I built my shop I made sure to put several 50-amp receptacles around the shop so I could merely roll my welders around and plug it to different areas without having to run extension cords, so glad I did. I moved my welder over to the other side of the shop and plugged in so I could tack the brackets together while bolted in place on the Jeep frame.
9ff2c3b07636520b9dff7c211ed64188.jpg

I then moved back to the fabrication table and finished welding the brackets together.
4620e9a0a947d462eae563bbc8f6d9c9.jpg

I beadblasted and painted the brackets before final installation.
f1d750ce54d362ef1668efc68f61ff92.jpg

dae0d8127c13a663a2b779dd84390647.jpg

One thing I did during mock up was to insert some .045” shims under the brackets at the front frame points so upon final assembly with the shims removed and tightened the brackets would preload a small amount tying the towbar crossmember to the frame.

Thanks for looking.
Smart move Mike. That crash bar, if not tied into the bumper is a definite weak link as a tow point. Once again, nice work.

Sent from my SM-G930V using Tapatalk
 

Attachments

  • 1b2c4eb4461c2d3c8a9503fa901b972b.jpg
    1b2c4eb4461c2d3c8a9503fa901b972b.jpg
    100.4 KB · Views: 0
  • 0fe8e30e5c108a13f898afa6c742679b.jpg
    0fe8e30e5c108a13f898afa6c742679b.jpg
    99.7 KB · Views: 0
  • 48518b5048c4b48cc9d1b3ca77aa0800.jpg
    48518b5048c4b48cc9d1b3ca77aa0800.jpg
    133.3 KB · Views: 0
  • da79e725cce7eafdeb2fb1e53d2ab2c6.jpg
    da79e725cce7eafdeb2fb1e53d2ab2c6.jpg
    126.3 KB · Views: 0
  • f192f87951b1ada71ec731a6afbd1d12.jpg
    f192f87951b1ada71ec731a6afbd1d12.jpg
    78.5 KB · Views: 0
  • a6fdeeed91b7ba88540b740121f61a8f.jpg
    a6fdeeed91b7ba88540b740121f61a8f.jpg
    99.3 KB · Views: 0
  • 27602fc229ee31cd2ef47f4258bb08d0.jpg
    27602fc229ee31cd2ef47f4258bb08d0.jpg
    84.7 KB · Views: 0
  • f524c2dec3f8d31e6beef6afe03ab922.jpg
    f524c2dec3f8d31e6beef6afe03ab922.jpg
    72.7 KB · Views: 0
  • e14e1bdabe93b681f42356a6aba9061a.jpg
    e14e1bdabe93b681f42356a6aba9061a.jpg
    138.1 KB · Views: 0
  • 9ff2c3b07636520b9dff7c211ed64188.jpg
    9ff2c3b07636520b9dff7c211ed64188.jpg
    111 KB · Views: 0
  • 4620e9a0a947d462eae563bbc8f6d9c9.jpg
    4620e9a0a947d462eae563bbc8f6d9c9.jpg
    137.3 KB · Views: 0
  • fdaa3e31ad0d4bffca1344addcce1d3a.jpg
    fdaa3e31ad0d4bffca1344addcce1d3a.jpg
    104.7 KB · Views: 0
  • f1d750ce54d362ef1668efc68f61ff92.jpg
    f1d750ce54d362ef1668efc68f61ff92.jpg
    91.5 KB · Views: 0
  • dae0d8127c13a663a2b779dd84390647.jpg
    dae0d8127c13a663a2b779dd84390647.jpg
    86 KB · Views: 0
To avoid these ads, REGISTER NOW!
OP
Z

zmotorsports

ALLIANCE MEMBER
Joined
Oct 20, 2009
Messages
21,441
Location
Northern Utah
I have my cousin’s ‘97 TJ in the shop building him a rear bumper and tire carrier.

He asked me to fabricate one for his Jeep in the fall of 2016 but we were hot in the middle of house hunting and I was not taking on any more work in my shop at the time.

His Jeep bumper was on my white board since my shop completion and every time he comes over the first thing he does is walks to the white board to see where it’s at in the lineup.

I called him last week and told him I was finally ready for him to bring me his Jeep seeing as how he has patiently waited for me to get my shop up and running.

OEM bumper cover removed.
3e9e0011b3a61e5230bf3c1794b2e069.jpg

Frame mounts in place.
033f686370cb183a6b34b224290d5e10.jpg

I usually start with plate and build out the center section but I had a piece of 2”x5”x.188” U-channel kicking around that would be perfect for this.

Prior to welding the U-channel to the frame mounts I opted to mount the D-ring tabs. I like to tie them in directly in line and to the frame mounts so I cut a 3/4” wide by 1.5” long opening and welded them from the back side as well as the outside. I also had to cut two small slits to clear the hitch mounting brackets.
1e0a497ba3bdcf927aef537b1a403387.jpg

Ready to weld through the channel after tack welding the D-ring tab on.
61bc0b00a7700d106ffc40b4a7f5dae2.jpg

59daa5766dacf94628d7aeeb49d4bd88.jpg

D-ring tab welded from the outside afterwards.
891c02f108c51f8d0e8bfca201140dd6.jpg

Frame mounts welded to the U-channel.
df46ff842086820c86dc6bc407a050be.jpg

Once the D-ring tabs and frame mounts are welded I needed to add a 1” filler piece to the top to fill the gap between the bumper and body.
aba7275a63b5c88abd48fc64c03ff7a0.jpg

36b3e4d441b2ea799b7fcffead500ec6.jpg

f39c259a619ff72a4a57bfc967b221d2.jpg

5ee7aa9d7f4f790153d78124e46ea783.jpg

Weld blended and bumper bolted into position.
78bd5e31cd5c712b0067df4206d9c434.jpg

a80c8e5b1736b393b0082c87d6110116.jpg

I then made some cardboard templates for the outer ears of the bumper and transferred them to some .125” plate. Here I have them nested and ready to cut.
d18e3a88fe8572f5259f2be994f7724d.jpg

Outer ears tack welded into place. The gap between the upper and lower is exactly 3” due to tapering the bottom upwards.
ee0fc65786ce2cd01eebc7cfae51bfa6.jpg

82618d459bc138067f7acbeece366f4c.jpg

cadb8155ab8512acf864003bd7151601.jpg

Next task will be to make some cardboard templates of the areas to fill in between the upper and lowers, then transfer to steel plate and weld into place. After the bumper itself is completed I will move on to the swing away tire carrier.

Thanks for looking.
 

Attachments

  • 3e9e0011b3a61e5230bf3c1794b2e069.jpg
    3e9e0011b3a61e5230bf3c1794b2e069.jpg
    739.9 KB · Views: 0
  • df46ff842086820c86dc6bc407a050be.jpg
    df46ff842086820c86dc6bc407a050be.jpg
    705.3 KB · Views: 0
  • aba7275a63b5c88abd48fc64c03ff7a0.jpg
    aba7275a63b5c88abd48fc64c03ff7a0.jpg
    806.4 KB · Views: 0
  • 59daa5766dacf94628d7aeeb49d4bd88.jpg
    59daa5766dacf94628d7aeeb49d4bd88.jpg
    723.6 KB · Views: 0
  • 36b3e4d441b2ea799b7fcffead500ec6.jpg
    36b3e4d441b2ea799b7fcffead500ec6.jpg
    754.9 KB · Views: 0
  • 891c02f108c51f8d0e8bfca201140dd6.jpg
    891c02f108c51f8d0e8bfca201140dd6.jpg
    667.1 KB · Views: 0
  • 61bc0b00a7700d106ffc40b4a7f5dae2.jpg
    61bc0b00a7700d106ffc40b4a7f5dae2.jpg
    750.7 KB · Views: 0
  • 1e0a497ba3bdcf927aef537b1a403387.jpg
    1e0a497ba3bdcf927aef537b1a403387.jpg
    700.3 KB · Views: 0
  • 033f686370cb183a6b34b224290d5e10.jpg
    033f686370cb183a6b34b224290d5e10.jpg
    676.7 KB · Views: 0
  • f39c259a619ff72a4a57bfc967b221d2.jpg
    f39c259a619ff72a4a57bfc967b221d2.jpg
    787.6 KB · Views: 0
  • 5ee7aa9d7f4f790153d78124e46ea783.jpg
    5ee7aa9d7f4f790153d78124e46ea783.jpg
    753 KB · Views: 0
  • 78bd5e31cd5c712b0067df4206d9c434.jpg
    78bd5e31cd5c712b0067df4206d9c434.jpg
    735.6 KB · Views: 0
  • a80c8e5b1736b393b0082c87d6110116.jpg
    a80c8e5b1736b393b0082c87d6110116.jpg
    693.6 KB · Views: 0
  • d18e3a88fe8572f5259f2be994f7724d.jpg
    d18e3a88fe8572f5259f2be994f7724d.jpg
    763.9 KB · Views: 0
  • ee0fc65786ce2cd01eebc7cfae51bfa6.jpg
    ee0fc65786ce2cd01eebc7cfae51bfa6.jpg
    715.7 KB · Views: 0
  • 82618d459bc138067f7acbeece366f4c.jpg
    82618d459bc138067f7acbeece366f4c.jpg
    727.7 KB · Views: 0
  • cadb8155ab8512acf864003bd7151601.jpg
    cadb8155ab8512acf864003bd7151601.jpg
    733 KB · Views: 0
Last edited:
OP
Z

zmotorsports

ALLIANCE MEMBER
Joined
Oct 20, 2009
Messages
21,441
Location
Northern Utah
Looks like another fun project.


Yeah, kind of a fun one. I’ve built a few bumpers for JK’s and a couple front bumpers for ZJ’s but this is my first TJ rear bumper.

It’s always fun to do something new rather than the same thing over and over.

Thanks for stopping by my projects thread and checking out what I’m working on.
 
Joined
Jun 30, 2011
Messages
1,080
Location
AZ
I just finished up a swing away bumper / carrier on an XJ for a friend. He wanted it down and dirty like his Jeep, lol.

The frame was not rigid enough to use those D rings on the bumper. I used one of those axle spindle kits for the pivot swing. Are you using a kit or designing your own?
 

LXCam

ALLIANCE MEMBER
Joined
Apr 23, 2013
Messages
19,179
Location
AZ
Very nice as always Mike. I'm almost finished with installing air conditioning and a 4" lift on a tj. Today will get those two projects at 100% and get me going on the winch install that needs to be one-off'd like your bumper. So now I'm in line with the same question for the D rings, fabbed or store bought? And if you bought those, where'd ya get them :)


Keep up the great work and thanks, Cam
 
OP
Z

zmotorsports

ALLIANCE MEMBER
Joined
Oct 20, 2009
Messages
21,441
Location
Northern Utah
Did you purchase those D ring tabs or make them?

They look extremely beefy.


I was wondering the same thing. They look like they were water jet cut.


I just finished up a swing away bumper / carrier on an XJ for a friend. He wanted it down and dirty like his Jeep, lol.


The frame was not rigid enough to use those D rings on the bumper. I used one of those axle spindle kits for the pivot swing. Are you using a kit or designing your own?


Very nice as always Mike. I'm almost finished with installing air conditioning and a 4" lift on a tj. Today will get those two projects at 100% and get me going on the winch install that needs to be one-off'd like your bumper. So now I'm in line with the same question for the D rings, fabbed or store bought? And if you bought those, where'd ya get them [emoji4]


Keep up the great work and thanks, Cam


Thanks for the comments guys.


The D-ring tabs are purchased components as is the spindle mount for the swing away tire carrier. I usually purchase those items from either AtoZ fabrication or Ruffstuff Specialties. They are similarly priced and quick shipping. I will just watch to see prices as I near a project as they occassionally have either free shipping or slightly marked down sales. These D-ring mounts came from Ruffstuff Specialties and were $20/each. These are very nice components, actually a bit nicer than the ones from AtoZ, very similar to the Ballistic Fabrication ones I purchased years ago for my JKU bumpers as far as finish.


I could definitely machine these components as well as the spindle kits but for the cost it almost negates the time required.


Thanks again for the comments and for following along guys.
 
Last edited:
OP
Z

zmotorsports

ALLIANCE MEMBER
Joined
Oct 20, 2009
Messages
21,441
Location
Northern Utah
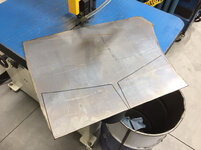
I was able to get a little more work done on the TJ bumper tonight. Merely filling in panels.

Using my CAD abilities. Cardboard Aided Design.[emoji12]
c7557da611a124a2bd353f4aa373280f.jpg

Transferred to .125” P&O sheet.
a8c16c50e5201039990c41905c03e3a4.jpg

Tacked into place. Both sides are identical so mirror images side to side.
406330c2b21e6de7fce788d0e991a226.jpg

A few of the welds prior to knocking them down and blending.
c27ec083c9331be8d7ed78e4da2997ef.jpg

c272196879a471b5d97ff7efd0d71676.jpg

d323ae013eb217711d31f30c7e354422.jpg

Bumper itself is welded.
9ac584e41ed5ee1e637bd0206ae8c160.jpg

Next up is to locate where the spindle will be for the carrier then remove the bumper and blend in preparation for fabbing the carrier.

Thanks for looking.
 

Attachments

  • c7557da611a124a2bd353f4aa373280f.jpg
    c7557da611a124a2bd353f4aa373280f.jpg
    732.7 KB · Views: 0
  • a8c16c50e5201039990c41905c03e3a4.jpg
    a8c16c50e5201039990c41905c03e3a4.jpg
    743.7 KB · Views: 0
  • 406330c2b21e6de7fce788d0e991a226.jpg
    406330c2b21e6de7fce788d0e991a226.jpg
    706.9 KB · Views: 0
  • c27ec083c9331be8d7ed78e4da2997ef.jpg
    c27ec083c9331be8d7ed78e4da2997ef.jpg
    684.4 KB · Views: 0
  • c272196879a471b5d97ff7efd0d71676.jpg
    c272196879a471b5d97ff7efd0d71676.jpg
    702 KB · Views: 0
  • d323ae013eb217711d31f30c7e354422.jpg
    d323ae013eb217711d31f30c7e354422.jpg
    856.8 KB · Views: 0
  • 9ac584e41ed5ee1e637bd0206ae8c160.jpg
    9ac584e41ed5ee1e637bd0206ae8c160.jpg
    714.7 KB · Views: 0
Last edited:
OP
Z

zmotorsports

ALLIANCE MEMBER
Joined
Oct 20, 2009
Messages
21,441
Location
Northern Utah
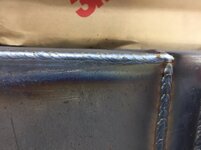
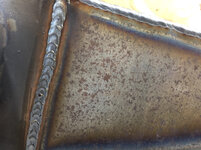
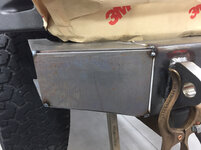
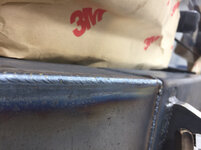
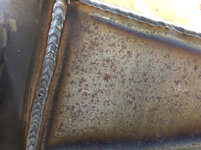
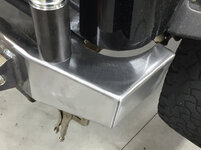
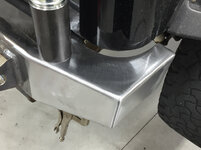
I metal finished the bumper tonight and measured for the spindle placement. Next up is the tire carrier fabrication.

c6c3c785521d02f6d45d95e50e8259b0.jpg

60969f46b5f0542e3495fe2ea620bd9f.jpg

dc9ecf605eae6e3a86bdee2845ab1c9e.jpg

689bee5ec19d70b92bf46d74f7940a0c.jpg

Thanks for looking.
 

Attachments

  • c6c3c785521d02f6d45d95e50e8259b0.jpg
    c6c3c785521d02f6d45d95e50e8259b0.jpg
    703.7 KB · Views: 0
  • 60969f46b5f0542e3495fe2ea620bd9f.jpg
    60969f46b5f0542e3495fe2ea620bd9f.jpg
    625.2 KB · Views: 0
  • dc9ecf605eae6e3a86bdee2845ab1c9e.jpg
    dc9ecf605eae6e3a86bdee2845ab1c9e.jpg
    644.4 KB · Views: 0
  • 689bee5ec19d70b92bf46d74f7940a0c.jpg
    689bee5ec19d70b92bf46d74f7940a0c.jpg
    652.8 KB · Views: 0
Last edited:

4 FN 27

ALLIANCE MEMBER
Joined
Oct 19, 2015
Messages
4,635
Location
Minnesnowta
Mike I have worked with some of the best metal finishers around...and you would give them a run for their money. Nice!!!
 
OP
Z

zmotorsports

ALLIANCE MEMBER
Joined
Oct 20, 2009
Messages
21,441
Location
Northern Utah
Mike I have worked with some of the best metal finishers around...and you would give them a run for their money. Nice!!!

Thank you Pat, I'm flattered.

I've seen some pretty impressive metal finishing work and I don't quite feel like I'm there yet. Maybe one day when I grow up my fabrication skills will come around. :beer:

Thanks for checking in on my projects Pat.
 

yaidunno

Well-known member
Joined
Feb 10, 2011
Messages
1,336
Location
WI
Looks like you've been staying busy Mike! The bumper is coming along nicely.
 
To avoid these ads, REGISTER NOW!
Top Bottom