To avoid these ads, REGISTER NOW!

ZMotorsports Shop Projects 2.0

To avoid these ads, REGISTER NOW!
OP
Z

zmotorsports

ALLIANCE MEMBER
Joined
Oct 20, 2009
Messages
21,441
Location
Northern Utah
All good guesses guys.

The answer was already mentioned but you'll have to stay tuned for when the work actually begins.

I'm thinking about even doing a multi-part video series on my YouTube channel but haven't given it that much thought yet, still trying to get my son's Jeep done then I have two other Jeeps coming in before I can begin work on my next project.
 

GRN96WS6

Well-known member
Joined
Dec 23, 2012
Messages
2,248
Location
SOMD
This is like YouTube click bait!

This is all a ploy to keep the thread alive! [emoji23][emoji23]
 

customh

Well-known member
Joined
Feb 18, 2013
Messages
562
Location
East Bethel, MN
The combo of a diesel repower being mentioned along with the "black jeep" verification is enough to tell the story for me. The theory is already too prolific not to be true.
 

jbmatth

Well-known member
Joined
Jun 3, 2013
Messages
5,689
Location
Northern Ok.
I'm going to join the LS voters, that box looks really similar to this one that housed an LS3:
attachment.php


Compared to Mike's photo:
7dd7570bfe1ecf286ad6b330fcf4c588.jpg

Notice the red writing on the top, the style in which the box is constructed as well as the wood framing on the pallet. Just a guess though. :bounce:

Although Mike could be going nuts and doing an LTx swap. An LT4 would be plenty of power to bounce up a few rocks if needed.

JB
 

Attachments

  • LS3 Crate.jpg
    LS3 Crate.jpg
    18.4 KB · Views: 1,180
  • 7dd7570bfe1ecf286ad6b330fcf4c588.jpg
    7dd7570bfe1ecf286ad6b330fcf4c588.jpg
    79.6 KB · Views: 0
OP
Z

zmotorsports

ALLIANCE MEMBER
Joined
Oct 20, 2009
Messages
21,441
Location
Northern Utah
The combo of a diesel repower being mentioned along with the "black jeep" verification is enough to tell the story for me. The theory is already too prolific not to be true.

I'll give this much away, no oil burner for me in the Jeep.

Thanks for following along for the ride.
 
OP
Z

zmotorsports

ALLIANCE MEMBER
Joined
Oct 20, 2009
Messages
21,441
Location
Northern Utah
I'm going to join the LS voters, that box looks really similar to this one that housed an LS3:

Notice the red writing on the top, the style in which the box is constructed as well as the wood framing on the pallet. Just a guess though. :bounce:

Although Mike could be going nuts and doing an LTx swap. An LT4 would be plenty of power to bounce up a few rocks if needed.

JB
Thanks for stopping by JB. You are correct those two boxes are in fact very similar. I would say a close resemblance indeed.
 
OP
Z

zmotorsports

ALLIANCE MEMBER
Joined
Oct 20, 2009
Messages
21,441
Location
Northern Utah
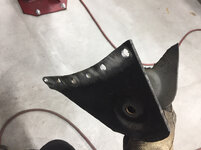
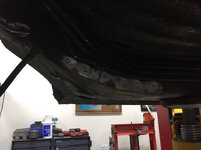
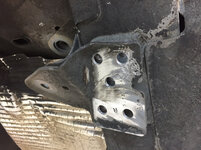
A little more work done on my son’s WJ last night. The tasks for the evening were to remove the rear suspension mounts on the framerails.

I started on the right rear upper mount by drilling out the factory spot welds and popping the mount loose with the air hammer.
8fce99053a25418222bf61c2b19e2c9e.jpg

Next I moved on to the lower mount where I again drilled out factory spot welds then a very small cut along the outside edge with the plasma cutter and the lower mount popped right off.
3c987ef3e5e4519235e8521f4dca3039.jpg

150649e1e68f071814b7b01465611aee.jpg

Driver’s side rear removed the same way.
fd5a7e2ee7164ba126fcc1ceb3c84efd.jpg

All four rear mounts removed.
1675f0d46f622f0a160ab4d865cac506.jpg

Lastly I breathed over them with a 3” Roloc disk and the rear was done.
0820811dc1308a6051952bc34a63731e.jpg

17785b99d1aa50ec66fc044a70350604.jpg

d5bc20400a93c4aeff23016a616c1fe7.jpg

I worked a little later than usual last night as we’ve had a bit of a cool down this week and it was pleasant and not so stinkin’ hot. A couple pictures from outside.
f54f9728cb6b9e367b3013dda8a2d870.jpg

8f9a202daa490fa7454815000e1ffecd.jpg

Thanks for looking.
 

Attachments

  • 8fce99053a25418222bf61c2b19e2c9e.jpg
    8fce99053a25418222bf61c2b19e2c9e.jpg
    826.8 KB · Views: 0
  • 8f9a202daa490fa7454815000e1ffecd.jpg
    8f9a202daa490fa7454815000e1ffecd.jpg
    616.9 KB · Views: 0
  • f54f9728cb6b9e367b3013dda8a2d870.jpg
    f54f9728cb6b9e367b3013dda8a2d870.jpg
    681.5 KB · Views: 0
  • d5bc20400a93c4aeff23016a616c1fe7.jpg
    d5bc20400a93c4aeff23016a616c1fe7.jpg
    793.9 KB · Views: 0
  • 17785b99d1aa50ec66fc044a70350604.jpg
    17785b99d1aa50ec66fc044a70350604.jpg
    785.2 KB · Views: 0
  • 0820811dc1308a6051952bc34a63731e.jpg
    0820811dc1308a6051952bc34a63731e.jpg
    607.4 KB · Views: 0
  • 1675f0d46f622f0a160ab4d865cac506.jpg
    1675f0d46f622f0a160ab4d865cac506.jpg
    710.9 KB · Views: 0
  • fd5a7e2ee7164ba126fcc1ceb3c84efd.jpg
    fd5a7e2ee7164ba126fcc1ceb3c84efd.jpg
    627.5 KB · Views: 0
  • 150649e1e68f071814b7b01465611aee.jpg
    150649e1e68f071814b7b01465611aee.jpg
    606.4 KB · Views: 0
  • 3c987ef3e5e4519235e8521f4dca3039.jpg
    3c987ef3e5e4519235e8521f4dca3039.jpg
    720.8 KB · Views: 0
Last edited:

Firstram

Well-known member
Joined
May 16, 2017
Messages
1,391
Yesterday I gave the Jeep a major detailing including blowing all of the dust out of the interior

Reminds me of my youth.
In 1992 I was driving a '72 El Camino which wasn't great but it was a solid driver and it was mine. It was filled with beach sand so I pulled it around back to blow it out. I opened both doors, grabbed the 1" hose and fired up the diesel 185. Along with the sand it instantly sent the headliner out the passenger door!
I'm smarter now.

Enjoying your thread, keep up the great work.
 

Ohmthis

Well-known member
Joined
Jan 20, 2013
Messages
3,018
Location
Outside of Louisville KY
Reminds me of my youth.
In 1992 I was driving a '72 El Camino which wasn't great but it was a solid driver and it was mine. It was filled with beach sand so I pulled it around back to blow it out. I opened both doors, grabbed the 1" hose and fired up the diesel 185. Along with the sand it instantly sent the headliner out the passenger door!
I'm smarter now.

Enjoying your thread, keep up the great work.

HA HA!!!!! Man that made me laugh!!!!
 

yaidunno

Well-known member
Joined
Feb 10, 2011
Messages
1,336
Location
WI
I'm guessing the WJ is getting treated to some long arms? If so, what setup are you planning on going with? Sorry if I missed it earlier in the thread. Looks like its coming along nicely!
 
OP
Z

zmotorsports

ALLIANCE MEMBER
Joined
Oct 20, 2009
Messages
21,441
Location
Northern Utah
I'm guessing the WJ is getting treated to some long arms? If so, what setup are you planning on going with? Sorry if I missed it earlier in the thread. Looks like its coming along nicely!

Yes, it will have a long arm suspension. No kit, we're building it all in house. He did buy the springs from either Clayton or Iron Rock Off-Road, I can't remember which, but other than that and shocks we're building everything from scratch.
 
OP
Z

zmotorsports

ALLIANCE MEMBER
Joined
Oct 20, 2009
Messages
21,441
Location
Northern Utah
Reminds me of my youth.
In 1992 I was driving a '72 El Camino which wasn't great but it was a solid driver and it was mine. It was filled with beach sand so I pulled it around back to blow it out. I opened both doors, grabbed the 1" hose and fired up the diesel 185. Along with the sand it instantly sent the headliner out the passenger door!
I'm smarter now.

Enjoying your thread, keep up the great work.

Yeah, you have to be somewhat careful with the air pressure but for fine silt/dirt it works great to clean the interior before a good vacuuming. Areas like up between the roll bar padding and the roof you would never be able to get clean without a little air and that area is one of my pet peeves.

Thanks for following along and checking on my projects.
 
OP
Z

zmotorsports

ALLIANCE MEMBER
Joined
Oct 20, 2009
Messages
21,441
Location
Northern Utah
We finished up the side frame stiffeners tonight and ready to move forward with getting the crossmember welded in and the truss on the rear axle so we can measure for the rear upper and lower links. Then cut, bend, fishmouth and weld the links.

Sides prepped and ready for final fitment and welding.
b7e5ef915c8c11d89346b983bff53948.jpg

Frame stiffeners done and metal finished/blended.
b26188f2cd7ac75c7b1365219f2e4b62.jpg

847f6415bf27e8fa4a85686ae31f9ed4.jpg

e29b4a409ea1b0e23d84f53c76c9234a.jpg

f3ba4975ebccf7fe53aba1ca75e413c6.jpg

fec83d4380af6db3c48270886befc8a2.jpg
 

Attachments

  • fec83d4380af6db3c48270886befc8a2.jpg
    fec83d4380af6db3c48270886befc8a2.jpg
    755.1 KB · Views: 0
  • f3ba4975ebccf7fe53aba1ca75e413c6.jpg
    f3ba4975ebccf7fe53aba1ca75e413c6.jpg
    690.7 KB · Views: 0
  • e29b4a409ea1b0e23d84f53c76c9234a.jpg
    e29b4a409ea1b0e23d84f53c76c9234a.jpg
    757.9 KB · Views: 0
  • 847f6415bf27e8fa4a85686ae31f9ed4.jpg
    847f6415bf27e8fa4a85686ae31f9ed4.jpg
    799.2 KB · Views: 0
  • b26188f2cd7ac75c7b1365219f2e4b62.jpg
    b26188f2cd7ac75c7b1365219f2e4b62.jpg
    762.5 KB · Views: 0
  • b7e5ef915c8c11d89346b983bff53948.jpg
    b7e5ef915c8c11d89346b983bff53948.jpg
    745.2 KB · Views: 0
To avoid these ads, REGISTER NOW!
OP
Z

zmotorsports

ALLIANCE MEMBER
Joined
Oct 20, 2009
Messages
21,441
Location
Northern Utah
How many BB's on the scalp, down the shirt and in the ears?

Nice work Mike!

Funny you should mention that Pat. I had a couple of burn spots on my stomach and two on my arm that got through my welding jacket. My wife was giving me **** about my shirt with the burn holes in it and it being ready for the trash but I told her I may as well continue to wear the same one while I'm doing the overhead welding otherwise I'll just ruin more shirts.

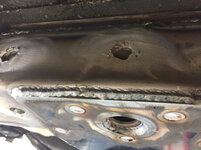
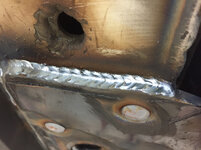
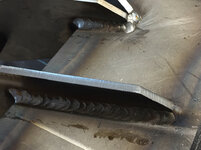
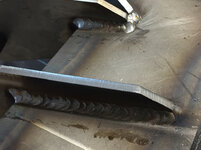
My welds didn't turn out anywhere near as good as I had hoped for. The thin sheet metal and the multi-layers of sheet metal with seam sealer and paint/undercoating made it difficult to get good and consistent welds. On the couple that did turn out decent, those were the ones that I had hot BB's rolling down my arms but didn't stop because I had a good bead going.:lol_hitti

Now to move onto the heavier gauge steel and MM251 welder for the suspension components.
 
OP
Z

zmotorsports

ALLIANCE MEMBER
Joined
Oct 20, 2009
Messages
21,441
Location
Northern Utah
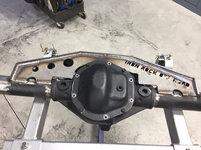
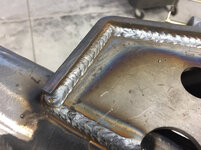
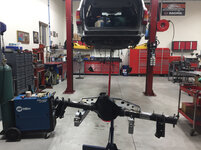
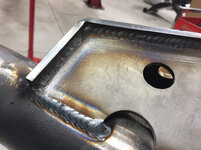
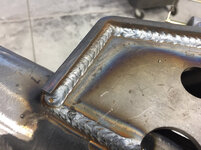
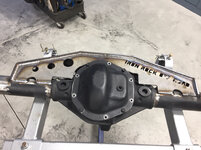
Here are a few pictures from tonight’s work on my son’s WJ. He cut most of the brackets and tabs off last night we then finished cleaning up the rear axle housing tonight before welding the Iron Rock Off Road truss on.

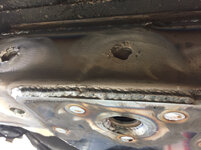
I finished welding the triangulated 4-Link crossmember in while my son did some grinding and metal finishing on the axle housing. I really don’t care for overhead welding much.
e292830cd7bdb0c427da89629038c621.jpg

c7e306f114906ad9d85b6f277edc11de.jpg

0682cdf4f369589e6597876537babde7.jpg

a5eb8e0755cb96895ffef2288ec95fe5.jpg

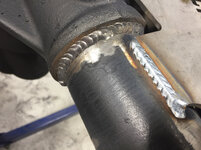
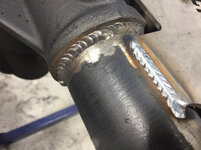
I also decided to weld the axle tubes into the center section while we were at this point.
440f080ed3daf03b5a2b8752812718df.jpg

Bare housing ready for welding.
c66c9448acbf4d74f882f2118e41832b.jpg

Axle truss welded in place.
4a3c1ac83b40e1ab2042ea0b3373a600.jpg

79ef2852b4de24a0cdf272fa49950d20.jpg

94861f777d5d798c6a70dfa9a54ae4bc.jpg

b8fb920f728e5a62718550b90c8cb0b3.jpg

02fcb8d91d8826fb4905c288b59ac845.jpg

43f1a649d7848f237f1cec8e738d1847.jpg

I swept up the floor and called it a night.
4e31a7d56f795523c8b33a403b4db1e7.jpg

Hopefully tomorrow night I can get the spring buckets and upper control arm mounts welded on the axle then it is ready to mock into position under the Jeep and start building suspension links.
 

Attachments

  • c7e306f114906ad9d85b6f277edc11de.jpg
    c7e306f114906ad9d85b6f277edc11de.jpg
    771.1 KB · Views: 0
  • 0682cdf4f369589e6597876537babde7.jpg
    0682cdf4f369589e6597876537babde7.jpg
    768.5 KB · Views: 0
  • a5eb8e0755cb96895ffef2288ec95fe5.jpg
    a5eb8e0755cb96895ffef2288ec95fe5.jpg
    735.4 KB · Views: 0
  • 440f080ed3daf03b5a2b8752812718df.jpg
    440f080ed3daf03b5a2b8752812718df.jpg
    701.8 KB · Views: 0
  • 4e31a7d56f795523c8b33a403b4db1e7.jpg
    4e31a7d56f795523c8b33a403b4db1e7.jpg
    770.3 KB · Views: 0
  • 43f1a649d7848f237f1cec8e738d1847.jpg
    43f1a649d7848f237f1cec8e738d1847.jpg
    798 KB · Views: 0
  • 02fcb8d91d8826fb4905c288b59ac845.jpg
    02fcb8d91d8826fb4905c288b59ac845.jpg
    746 KB · Views: 0
  • b8fb920f728e5a62718550b90c8cb0b3.jpg
    b8fb920f728e5a62718550b90c8cb0b3.jpg
    760.7 KB · Views: 0
  • 94861f777d5d798c6a70dfa9a54ae4bc.jpg
    94861f777d5d798c6a70dfa9a54ae4bc.jpg
    795.4 KB · Views: 0
  • 79ef2852b4de24a0cdf272fa49950d20.jpg
    79ef2852b4de24a0cdf272fa49950d20.jpg
    824.6 KB · Views: 0
  • 4a3c1ac83b40e1ab2042ea0b3373a600.jpg
    4a3c1ac83b40e1ab2042ea0b3373a600.jpg
    738.5 KB · Views: 0
  • c66c9448acbf4d74f882f2118e41832b.jpg
    c66c9448acbf4d74f882f2118e41832b.jpg
    785 KB · Views: 0
  • e292830cd7bdb0c427da89629038c621.jpg
    e292830cd7bdb0c427da89629038c621.jpg
    857.6 KB · Views: 0
Last edited:
OP
Z

zmotorsports

ALLIANCE MEMBER
Joined
Oct 20, 2009
Messages
21,441
Location
Northern Utah
Very nice welding!

Thank you. I been out of practice for a while but it felt good to get behind the hood and make sparks again. Unfortunately, welding is a deteriorating skill and I could tell that I haven't welded in a while, it took a bit to get back into the rhythm.

Thanks for stopping by and checking on my projects.
 
OP
Z

zmotorsports

ALLIANCE MEMBER
Joined
Oct 20, 2009
Messages
21,441
Location
Northern Utah
Thanks for the update Mike! Looks like someone is going to have some 4-wheeling fun!

Thanks Robert, I know he is almost as excited to get it back on the road and in use as I am. I can't start on my next project until he gets his done so we are both somewhat motivated at this point.:bounce:

Thanks for checking in on my thread Robert.
 
OP
Z

zmotorsports

ALLIANCE MEMBER
Joined
Oct 20, 2009
Messages
21,441
Location
Northern Utah
What is the axle/diff/gear setup going to be? Wheel/tires? Going to be a DD, trail, both, or?

Justin, he will be using this as his daily driver/weekend wheeler. The axles are Dana 44's from a Jeep JKU. The rear is out of a 2016 that had less than a hundred miles on it and the front is my original D44 housing from the front of my 2011 JKUR. It already has the sleeves/gussets installed. The gear ratio will be 4.56:1 with Ten Factory chromoly axle shafts front/rear, Eaton Truetrac rear carrier and OEM ELocker in the front. Wheels are 17x8.5 Method's running 33" BFG KO2's.
 

yaidunno

Well-known member
Joined
Feb 10, 2011
Messages
1,336
Location
WI
Nice work on the truss. Did the WJ originally come with the 44A rear end? Both my 99 and 04 had the aluminum centers. Sounds like it will be a very capable rig once you guys are finished with it!
 
OP
Z

zmotorsports

ALLIANCE MEMBER
Joined
Oct 20, 2009
Messages
21,441
Location
Northern Utah
Nice work on the truss. Did the WJ originally come with the 44A rear end? Both my 99 and 04 had the aluminum centers. Sounds like it will be a very capable rig once you guys are finished with it!

Yes, it came equipped from the factory with the 44A (aluminum center section). Both of my '96 ZJ's also had the 44A and I wheeled them quite a lot and never had an issue. Maybe because it was always in the back of my head and I drove accordingly with that in mind but in all of the years I had them I never had any drivetrain issues to speak of.

As soon as he pulled the OE axles from his WJ he had several people who wanted them so they were the first things gone and out of the shop, which made me happy.

It should turn out to be a very reliable and worthy trail rig and daily driver when she's done. He plans on getting the drivetrain done this round and put some miles on it then sometime over the winter tackle the front and rear bumpers so by spring it is ready to hit the trails.
 

C_F

ALLIANCE MEMBER
Joined
Jan 21, 2005
Messages
9,675
Location
Utah...SNOW BLOWS!
That axle truss sure makes it look super stout! Much stronger than a lot of the lifted trucks that used to run around here in the 80's with trusses that were clamped to the axle tubes with u-bolts. :lol:
 
OP
Z

zmotorsports

ALLIANCE MEMBER
Joined
Oct 20, 2009
Messages
21,441
Location
Northern Utah
That axle truss sure makes it look super stout! Much stronger than a lot of the lifted trucks that used to run around here in the 80's with trusses that were clamped to the axle tubes with u-bolts. :lol:

Yep, I remember those. I think they were made by a company called Rhino truss if memory serves. I always preferred the more subtle ones for the front axles that used either .625" or .750" rod and were tensioned into the C and pulled against the bottom of the carrier. They seemed to work to prevent from flex and were clean and simple looking, not gawdy or bulky like the clamp on Rhino truss.

Personally I don't think this rear axle really needs the support that this truss is providing but we needed somewhere to attach the upper control arm brackets for the triangulated 4-link and this truss will provide that support to weld the tabs to.
 
OP
Z

zmotorsports

ALLIANCE MEMBER
Joined
Oct 20, 2009
Messages
21,441
Location
Northern Utah
I didn’t get much time behind the helmet tonight after mowing my lawns but I was able to get the upper control arm mounts welded onto the truss.

454f4f979521ed4dcac54722abf3a030.jpg

c626a61cfd95e9c0a36a086682002954.jpg
 

Attachments

  • c626a61cfd95e9c0a36a086682002954.jpg
    c626a61cfd95e9c0a36a086682002954.jpg
    714.9 KB · Views: 0
  • 454f4f979521ed4dcac54722abf3a030.jpg
    454f4f979521ed4dcac54722abf3a030.jpg
    722.2 KB · Views: 0
Last edited:

Pressingonward

Well-known member
Joined
Mar 9, 2016
Messages
522
Location
SW WA
Hi Mike,

I'm enjoying seeing your progress on your son's Jeep. One question - how are you figuring out the linkages for the axles? Is the information on what works best out there and readily available, or are you designing it from scratch as well as fabricating?
 

shortykorte

Well-known member
Joined
Sep 1, 2014
Messages
8,039
Location
Tallahassee, Fl
Nice axle stand Mike. Looks high dollar. Lol. Definitely looks like it’s coming in real handy for this project.


Sent from my iPhone using Tapatalk
 

stinkity stoink

Well-known member
Joined
Apr 8, 2007
Messages
735
Location
New Jersey
Mike, are you using some kind of method to make sure the axle doesn’t twist from all the welding ? Not criticizing, just trying to learn.
Great work and thanks for posting !!
 
To avoid these ads, REGISTER NOW!
Top Bottom