To avoid these ads, REGISTER NOW!

ZMotorsports Shop Projects 2.0

OP
Z

zmotorsports

ALLIANCE MEMBER
Joined
Oct 20, 2009
Messages
21,441
Location
Northern Utah
Hi Mike,

I'm enjoying seeing your progress on your son's Jeep. One question - how are you figuring out the linkages for the axles? Is the information on what works best out there and readily available, or are you designing it from scratch as well as fabricating?


We’re not reinventing the wheel or anything on this build. We’re just using a manufactured crossmember and will then fabricate the links to place the axle in the correct place in the opening. I like the way the crossmember places the links fairly close so there won’t be much anti-squat. Much like my JKU and it rides and wheels fantastic.

Thanks for stopping by my projects thread.


Sent from my iPhone using The Garage Journal mobile app
 
To avoid these ads, REGISTER NOW!
OP
Z

zmotorsports

ALLIANCE MEMBER
Joined
Oct 20, 2009
Messages
21,441
Location
Northern Utah
Nice axle stand Mike. Looks high dollar. Lol. Definitely looks like it’s coming in real handy for this project.


Sent from my iPhone using Tapatalk


Thanks Shorty. Yeah, the stand is definitely coming in handy. I even commented to my son the other night how I wish I would have taken the time to built it many years (and many axles) ago.

I appreciate you following along Shorty.


Sent from my iPhone using The Garage Journal mobile app
 
OP
Z

zmotorsports

ALLIANCE MEMBER
Joined
Oct 20, 2009
Messages
21,441
Location
Northern Utah
Mike, are you using some kind of method to make sure the axle doesn’t twist from all the welding ? Not criticizing, just trying to learn.
Great work and thanks for posting !!


The key when doing this much welding on an axle is to not camp out on it and get all of the welding done in a short time. Move around a lot so the forces are opposite and let it cool between.

Thanks for checking out my projects.


Sent from my iPhone using The Garage Journal mobile app
 
OP
Z

zmotorsports

ALLIANCE MEMBER
Joined
Oct 20, 2009
Messages
21,441
Location
Northern Utah
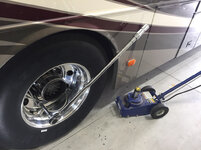
During our last RV trip I happened to notice I had a little oil residue coming out from under a few of my lugnut covers which led me to suspect a drive axle flange gasket must be leaking.

I began by thinking I could just remove the center cap and pull the axle shaft but it has those stinkin’ little tapered split bushings on the studs. This meant having to remove the outer drive wheel to allow me to get in behind the flange and strike with a hammer to shock the bushings loose.
b5bb5657b6e55574a9ddad4782a9b77b.jpg

Axle shaft removed. Look at how much RTV was used whenever this job was done last. I bought the coach with 55k miles and it now has 120k but I prefer to use the correct gaskets vs merely RTV, although I’ve used RTV in a pinch but just not that damn much.
595e94a599a4b9a85f680e60a6473d2a.jpg

Gasket I picked up from my local heavy truck supply house (Six States Distributors).
93417d71506e6c663468375fbd9e4bd1.jpg

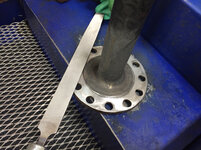
These flanges get burrs or little dings on the outer circumference when trying to remove the spilt bushings. I recommend using a flat mill file to knock the highs down and ensure the sealing surface is perfectly flat.
6d15757af335ad4418cb9bca2e01dcc0.jpg

Check for flatness.
44d7623e520352373d191850be08e224.jpg

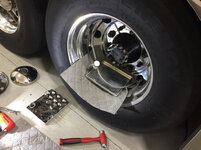
I also breathe across the belt sander with the split bushings to deburr them.
7a74b2801f00450930a8ea0199f6ee07.jpg

Reassembling and using a deep chrome socket to tap the split bushings into place.
689ee49c5d16df7912cf1d7404501cb1.jpg

Drive flange nuts torqued to 70 ft/lbs.
8ced641e0793d9cd33b448737aaaf66e.jpg

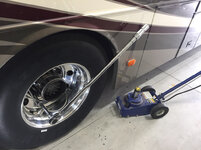
Torquing the lugnuts to 450 ft/lbs.
0d39071bcf0a2f423c21b5bac422ef07.jpg

Done.
4f611e3e1af1458755c438d6903c855b.jpg


Sent from my iPhone using The Garage Journal mobile app
 

Attachments

  • 595e94a599a4b9a85f680e60a6473d2a.jpg
    595e94a599a4b9a85f680e60a6473d2a.jpg
    969 KB · Views: 2
  • 93417d71506e6c663468375fbd9e4bd1.jpg
    93417d71506e6c663468375fbd9e4bd1.jpg
    833.9 KB · Views: 0
  • 6d15757af335ad4418cb9bca2e01dcc0.jpg
    6d15757af335ad4418cb9bca2e01dcc0.jpg
    899.2 KB · Views: 0
  • 44d7623e520352373d191850be08e224.jpg
    44d7623e520352373d191850be08e224.jpg
    785.3 KB · Views: 0
  • b5bb5657b6e55574a9ddad4782a9b77b.jpg
    b5bb5657b6e55574a9ddad4782a9b77b.jpg
    754.8 KB · Views: 0
  • 689ee49c5d16df7912cf1d7404501cb1.jpg
    689ee49c5d16df7912cf1d7404501cb1.jpg
    826.1 KB · Views: 0
  • 8ced641e0793d9cd33b448737aaaf66e.jpg
    8ced641e0793d9cd33b448737aaaf66e.jpg
    853.7 KB · Views: 0
  • 0d39071bcf0a2f423c21b5bac422ef07.jpg
    0d39071bcf0a2f423c21b5bac422ef07.jpg
    710.8 KB · Views: 0
  • 4f611e3e1af1458755c438d6903c855b.jpg
    4f611e3e1af1458755c438d6903c855b.jpg
    716.5 KB · Views: 1
  • 7a74b2801f00450930a8ea0199f6ee07.jpg
    7a74b2801f00450930a8ea0199f6ee07.jpg
    767.8 KB · Views: 1
Last edited:

customh

Well-known member
Joined
Feb 18, 2013
Messages
562
Location
East Bethel, MN
***** when those "quick" jobs turn out to be a few hours.
Where do you get your absorbent mats? Looking for a reasonably priced vendor to get them at work. Fastenal and Uline charge crazy prices.

EDIT: Uline isn't so bad. Watching the Saturday Tour video- you're loving teasing your crate aren't you?
 
Last edited:
OP
Z

zmotorsports

ALLIANCE MEMBER
Joined
Oct 20, 2009
Messages
21,441
Location
Northern Utah
***** when those "quick" jobs turn out to be a few hours.
Where do you get your absorbent mats? Looking for a reasonably priced vendor to get them at work. Fastenal and Uline charge crazy prices.

EDIT: Uline isn't so bad. Watching the Saturday Tour video- you're loving teasing your crate aren't you?

Travis, I was purchasing the absorbent pads from our local Grainger but then my local NAPA ended up matching then beating the price so I started buying from them. I use them somewhat conservatively though because they are a bit pricey.

Thanks for watching the video and "yes", I am enjoying the little teasers on the big brown box until I get time to actually start the project. Currently I'm merely trying to get all of my ducks in a row and collect the other items that may be needed for the project so when I actually do start I'm not waiting on parts and can roll right through it.
 
OP
Z

zmotorsports

ALLIANCE MEMBER
Joined
Oct 20, 2009
Messages
21,441
Location
Northern Utah
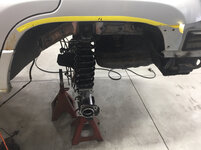
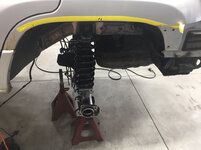
We mocked the rear axle under my son’s WJ tonight using plumb bobs to center it in the wheelwell openings fore and aft as well as side to side in order to locate the lower spring pads.

Passenger side.
4d61ef8d6e29fea4ddc861d3d1f86e00.jpg

Driver side.
d89552ada6f4ac36b7c60fd86bc77aa7.jpg

While we were lying under it we discussed a plan for the sway bar as well as limiting strap placement and upper & lower link angles.

The lower links will require about a 10-15 degree bend to hit both front and rear bushings at the correct angles. The upper links will pretty much be a straight shot with only a slight angle of the fishmouth.
 

Attachments

  • 4d61ef8d6e29fea4ddc861d3d1f86e00.jpg
    4d61ef8d6e29fea4ddc861d3d1f86e00.jpg
    665.2 KB · Views: 0
  • d89552ada6f4ac36b7c60fd86bc77aa7.jpg
    d89552ada6f4ac36b7c60fd86bc77aa7.jpg
    672.5 KB · Views: 0

customh

Well-known member
Joined
Feb 18, 2013
Messages
562
Location
East Bethel, MN
Travis, I was purchasing the absorbent pads from our local Grainger but then my local NAPA ended up matching then beating the price so I started buying from them. I use them somewhat conservatively though because they are a bit pricey.

Went with these from ULINE at work and just got them in today. NAPA looked more expensive so went with these. Just tried one out (it seemed to do its job) on a leaking forklift that is waiting on me to remove the power steering pump again. Just got it back together with new bearings in the motor like we talked about and the seal on the pump takes a ****. Figures.

We mocked the rear axle under my son’s WJ tonight using plumb bobs to center it in the wheelwell openings fore and aft as well as side to side in order to locate the lower spring pads.
This is the part of building that makes me anxious and I'd want some education and assistance with. Looking good!
 
OP
Z

zmotorsports

ALLIANCE MEMBER
Joined
Oct 20, 2009
Messages
21,441
Location
Northern Utah
Went with these from ULINE at work and just got them in today. NAPA looked more expensive so went with these. Just tried one out (it seemed to do its job) on a leaking forklift that is waiting on me to remove the power steering pump again. Just got it back together with new bearings in the motor like we talked about and the seal on the pump takes a ****. Figures.


This is the part of building that makes me anxious and I'd want some education and assistance with. Looking good!

Thanks Travis. Like I mentioned I use the absorbent pads rather conservatively. If I have a "gusher" I will use a drip tray or pan so I can merely dump the oil and then wash it out and it's good to go. If I have a slow leaker or like yourself, something I'm waiting on parts and don't want to have a puddle, I will merely throw a pad down. I also make sure to use my pads completely. If I have one that is barely dribbled on I will put it on the side of my clean stack so I can reuse it rather than toss it and grab another next time. I will also use the half-used ones if I need to wipe up a spill or something before tossing in the trash. I also like that they are perforated so if I have a small job I can merely rip one in half and only have to use a half a pad.

As for my son's Jeep, this has been a learning experience for him as well. I've done these in the past but he was either younger or didn't have quite the interest as he does now that we are working on his Jeep.:bounce:

That being said, the biggest thing to keep in mind is not only placement of the axle itself but also clearance of other items. In this case the fuel tank will be rather close. Luckily because it is a long arm suspension the upward travel of the axles will be somewhat straight vertical and not in an arc as it would be with a short arm suspension. I hope that makes sense.

We will be performing a tank lift mod but that will be a bit further down the road when he is fabricating his rear bumper. For now we want to get the suspension and drivetrain wrapped up and back on the road for testing.

Thanks for checking in Travis.
 

Yarz

Well-known member
Joined
Sep 11, 2013
Messages
121
Location
Tarentum PA
With the pictured torque wrench (I'm guessing about 3' long) you'd only need 150 pounds on the end of it.
 

jbmatth

Well-known member
Joined
Jun 3, 2013
Messages
5,689
Location
Northern Ok.
The 3/4" drive torque wrench we use at work will go up to I think 800 ft-lbs of torque or thereabouts. When we have to torque stuff higher than that we use a hy-torc (hydraulic torque wrench) that I've used up to nearly 10,000 ft-lbs. but there is at least one model that'll go up to 130,000 ft-lbs.

JB
 
OP
Z

zmotorsports

ALLIANCE MEMBER
Joined
Oct 20, 2009
Messages
21,441
Location
Northern Utah
I'm still stuck on 450 ft/lbs for lug nuts. How does one apply that much torque. I must be a weakling.:headscrat

Shorty, my Proto 3/4" torque wrench goes up to 600 ft/lbs and with the length it doesn't take as much as you'd think, especially when you a bit on the heavy side to begin with.:lol_hitti
 
OP
Z

zmotorsports

ALLIANCE MEMBER
Joined
Oct 20, 2009
Messages
21,441
Location
Northern Utah
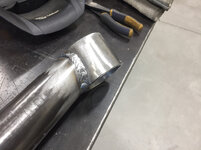
I machined some 1”-14 tube adapters for my son’s rear suspension links tonight.
18671c75cb7acc3820e42cbc952fcd9f.jpg

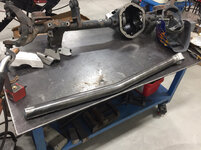
Next my son and I repositioned the rear axle under the WJ and measured for the lower links. The lowers required a 10-degree bend as the frame end and axle end were in slightly different planes.
bd2705ecac49544dcde90ab71fbb9223.jpg
 

Attachments

  • bd2705ecac49544dcde90ab71fbb9223.jpg
    bd2705ecac49544dcde90ab71fbb9223.jpg
    663.5 KB · Views: 0
  • 18671c75cb7acc3820e42cbc952fcd9f.jpg
    18671c75cb7acc3820e42cbc952fcd9f.jpg
    825.1 KB · Views: 0
Last edited:

Supergluid

New member
Joined
Sep 24, 2018
Messages
1
Location
Woodstock
Have a question I am building a buggy and I used a cavalier motor and trans now having a hard time finding someone to build me shift cable's can someone point me in the right direction thanks
 

BuffettFan

Well-known member
Joined
Jul 11, 2017
Messages
10,908
Location
Central Illinois
Mike,
I have had very good luck with removing the tapered bushings by using an air hammer on the end of the axle shaft, right in the center.
Usually only takes a couple of 1 to 2 second bursts and they pop right out.
Beats pulling a wheel off!

Terry
 

racer-john

Well-known member
Joined
Apr 1, 2008
Messages
1,461
Location
Newmarket, ON Canada
Back on post number 1447 did you post some pictures?

Passenger side.


Driver side.

if so they didn't show.
Love your work and details, don't respond much but always drop in to see to see what you're up to.
Cheers :)
 
OP
Z

zmotorsports

ALLIANCE MEMBER
Joined
Oct 20, 2009
Messages
21,441
Location
Northern Utah
Back on post number 1447 did you post some pictures?

Passenger side.


Driver side.

if so they didn't show.
Love your work and details, don't respond much but always drop in to see to see what you're up to.
Cheers :)

Thanks for following along.

Yes, in post 1447 I posted a couple of pictures of the rear JK axle under my son's WJ mocked into position.
 
To avoid these ads, REGISTER NOW!
OP
Z

zmotorsports

ALLIANCE MEMBER
Joined
Oct 20, 2009
Messages
21,441
Location
Northern Utah
They did not show up on your post 1447.:confused:

That's weird. I wonder if anyone else is having issues seeing them as I just checked and they were showing up fine when I looked. I also used the same GarageJournal app that I have used on the other pictures so I wonder why some are showing and some aren't.:confused:
 

memphisnate

Well-known member
Joined
Jan 8, 2010
Messages
398
Location
Memphis, TN
That's weird. I wonder if anyone else is having issues seeing them as I just checked and they were showing up fine when I looked. I also used the same GarageJournal app that I have used on the other pictures so I wonder why some are showing and some aren't.:confused:
They are showing up for me.
 

racer-john

Well-known member
Joined
Apr 1, 2008
Messages
1,461
Location
Newmarket, ON Canada
That's weird. I wonder if anyone else is having issues seeing them as I just checked and they were showing up fine when I looked. I also used the same GarageJournal app that I have used on the other pictures so I wonder why some are showing and some aren't.:confused:
| could't see them on "firefox" but over here on "google chrome" they showed up including some that I didn't know were posted. :shocking:
 

racer-john

Well-known member
Joined
Apr 1, 2008
Messages
1,461
Location
Newmarket, ON Canada
Quote:
Originally Posted by zmotorsports View Post
That's weird. I wonder if anyone else is having issues seeing them as I just checked and they were showing up fine when I looked. I also used the same GarageJournal app that I have used on the other pictures so I wonder why some are showing and some aren't.

| could't see them on "firefox" but over here on "google chrome" they showed up including some that I didn't know were posted. :shocking:
 
OP
Z

zmotorsports

ALLIANCE MEMBER
Joined
Oct 20, 2009
Messages
21,441
Location
Northern Utah
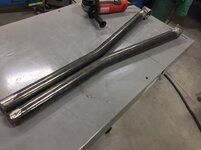
Welded up the lower rear links for my son’s WJ project tonight.
dc93cc117270b8079f086759861aedd3.jpg

872058b0c8b50392d343042b1563b0fd.jpg

0324eea822f5abeae4060da6f87cbfc7.jpg

7203acedd2ae3053a2f207e0b68b9f5c.jpg

Then a couple brackets.
f2ee5393db5aac0fd34cd50c4ae33513.jpg

ef672f9a6bb9219a5ea282340cedae26.jpg
 

Attachments

  • dc93cc117270b8079f086759861aedd3.jpg
    dc93cc117270b8079f086759861aedd3.jpg
    665.7 KB · Views: 0
  • 0324eea822f5abeae4060da6f87cbfc7.jpg
    0324eea822f5abeae4060da6f87cbfc7.jpg
    786.3 KB · Views: 0
  • 7203acedd2ae3053a2f207e0b68b9f5c.jpg
    7203acedd2ae3053a2f207e0b68b9f5c.jpg
    658.4 KB · Views: 0
  • f2ee5393db5aac0fd34cd50c4ae33513.jpg
    f2ee5393db5aac0fd34cd50c4ae33513.jpg
    786.7 KB · Views: 0
  • ef672f9a6bb9219a5ea282340cedae26.jpg
    ef672f9a6bb9219a5ea282340cedae26.jpg
    798.7 KB · Views: 0
  • 872058b0c8b50392d343042b1563b0fd.jpg
    872058b0c8b50392d343042b1563b0fd.jpg
    668.1 KB · Views: 4

4 FN 27

ALLIANCE MEMBER
Joined
Oct 19, 2015
Messages
4,635
Location
Minnesnowta
Mike do you or did you cross drill the tube so you can plug weld the Fitting in too (and weld it all around as you already did)?

We always did this on our 4-Link Bars and Wheelie Bars.

Nice as always Mike!!!
 

Attachments

  • IMG_6806.jpg
    IMG_6806.jpg
    93.5 KB · Views: 101
OP
Z

zmotorsports

ALLIANCE MEMBER
Joined
Oct 20, 2009
Messages
21,441
Location
Northern Utah
Mike do you or did you cross drill the tube so you can plug weld the Fitting in too (and weld it all around as you already did)?

We always did this on our 4-Link Bars and Wheelie Bars.

Nice as always Mike!!!


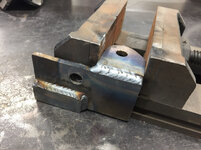
Pat, yes, I drilled through the tubing 180-degrees apart for rosette (plug) welds as well as the outside perimeter. I drilled 1/2” holes about 3/4” from the end of the tube, pretty much in the middle of the tube adapter. If you look closely at the second picture you can see where I blended the rosette weld flush with the tube so it won’t be noticeable after powder coating.

Like you I’ve made this a common practice whenever using tube adapters.

Thanks for the comments Pat and thanks for following along.


Sent from my iPhone using Garage Journal
 
Last edited:

Bigblue&Goldie

Well-known member
Joined
Mar 12, 2009
Messages
10,707
Location
AZ
I've seen it done 3 ways, and I've never witnessed a bung pull out, though I have seen the bung threads ripped out from having loose jamb nuts working the heim back and forth. Typically the shank of the heim fails before anything else. On high stress, non- disposable suspension items (trailing arms, a-arms, etc.) it's pretty standard practice to use clamping/pinch bungs.

1) Weld perimeter of bung
2) Weld perimeter and add rosette welds (what I typically do)
3) Weld perimeter of bung and then use a fish mouthed sleeve over the perimeter weld of the bung to the tubing . I've seen this mostly on IFS tie rods where thinner tubing is used and your tie rod is supposed to bend before taking out the steering rack or spindles.

This is a tie rod we bent that is just a tapped piece of 4130. In the background is the shock tower that is done similar to what I described in 3) (only picture I have handy to illustrate the idea).
zjsRFeQ.jpg


This is a trailing arm that uses a pinch bung (notice no jam nut)
cFPv6cs.jpg


This isn't my work (I wish it was), but it's a car I regularly race.
 
Last edited:
OP
Z

zmotorsports

ALLIANCE MEMBER
Joined
Oct 20, 2009
Messages
21,441
Location
Northern Utah
I've seen it done 3 ways, and I've never witnessed a bung pull out, though I have seen the bung threads ripped out from having loose jamb nuts working the heim back and forth. Typically the shank of the heim fails before anything else. On high stress, non- disposable suspension items (trailing arms, a-arms, etc.) it's pretty standard practice to use clamping/pinch bungs.

1) Weld perimeter of bung
2) Weld perimeter and add rosette welds (what I typically do)
3) Weld perimeter of bung and then use a fish mouthed sleeve over the perimeter weld of the bung to the tubing . I've seen this mostly on IFS tie rods where thinner tubing is used and your tie rod is supposed to bend before taking out the steering rack or spindles.

Thanks. I've only seen one threaded tube adapter pull out and the only explanation I can offer is that it was poor penetration of the weld by my observation. Very little fusion and cold weld.

I like to add the rosette weld for added peace of mind and insurance although I think the perimeter weld is sufficient.

I've used the fishmouthed outer tube on a couple of occasions on sand rails where the owner wanted me to use thinner wall tubing that I thought necessary for a steering or suspension component. Just added a fishmouthed sleeve for wall thickness and it also looked nice. Made the owner happy and covered my *** as far as the builder.:beer:

Thanks for posting and following along.
 
OP
Z

zmotorsports

ALLIANCE MEMBER
Joined
Oct 20, 2009
Messages
21,441
Location
Northern Utah
Those bung fitting ain't going anywhere.

Thanks Paco. I don't think so either but like I said, the rosette welds are just an extra step for insurance.

I appreciate you stopping by and checking out my projects. Good to see you back over here posting again. I enjoy following along on your projects.
 
OP
Z

zmotorsports

ALLIANCE MEMBER
Joined
Oct 20, 2009
Messages
21,441
Location
Northern Utah
Looking good Mike. I think you should come to MN sometime. All go to Pat's place and really solve the world's problems.

I think that sounds like an awesome idea Travis. I think between the three of us we could knock out most issues in a relatively short timeframe.:lol_hitti

Although Pat would have to mop up behind me as I wandered around his shop drooling, hell I don't think I would leave.:beer:
 
To avoid these ads, REGISTER NOW!
Top Bottom