To avoid these ads, REGISTER NOW!

ZMotorsports Shop Projects 2.0

bggrnchvy

Well-known member
Joined
Nov 14, 2011
Messages
590
Location
Pleasant Hill, CA
There was a builder of 4130 links for rock racing and then Ultra 4 that had a series of failures because the perimeter fillet welds broke and the bungs pulled out destroying 4 shocks at a time and taking out racers.

Adding rosettes solved the issue.

I won't build a welded link without.
 
To avoid these ads, REGISTER NOW!

customh

Well-known member
Joined
Feb 18, 2013
Messages
562
Location
East Bethel, MN
I think that sounds like an awesome idea Travis. I think between the three of us we could knock out most issues in a relatively short timeframe.:lol_hitti


Although Pat would have to mop up behind me as I wandered around his shop drooling, hell I don't think I would leave.:beer:


You might not leave. I know there's room to park the coach but can't remember what he's got for hookups. But hey who am I to invite you to a shop I have zero part in owning?!


Sent from my iPhone using The Garage Journal mobile app
 

4 FN 27

ALLIANCE MEMBER
Joined
Oct 19, 2015
Messages
4,635
Location
Minnesnowta
Looking good Mike. I think you should come to MN sometime. All go to Pat's place and really solve the world's problems.

I think that sounds like an awesome idea Travis. I think between the three of us we could knock out most issues in a relatively short timeframe.:lol_hitti

Although Pat would have to mop up behind me as I wandered around his shop drooling, hell I don't think I would leave.:beer:

You might not leave. I know there's room to park the coach but can't remember what he's got for hookups. But hey who am I to invite you to a shop I have zero part in owning?!

Come on down...all "Garage Journalites" are welcome...

Mike I have 50 Amp Hook-ups (2 extra), Water, Dump Station and you can park inside...full service RV stop...LOL...

No mop. We have Drool Cups.
 
OP
Z

zmotorsports

ALLIANCE MEMBER
Joined
Oct 20, 2009
Messages
21,477
Location
Northern Utah
Come on down...all "Garage Journalites" are welcome...


Mike I have 50 Amp Hook-ups (2 extra), Water, Dump Station and you can park inside...full service RV stop...LOL...


No mop. We have Drool Cups.


That’s awesome Pat. Inside RV parking with full hook-ups AND drool cups? That’s too good of an offer to refuse, I may have to take you up on it. [emoji12]
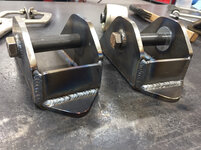
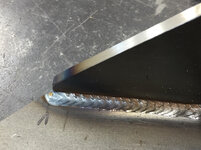

Sent from my iPhone using Garage Journal
 
OP
Z

zmotorsports

ALLIANCE MEMBER
Joined
Oct 20, 2009
Messages
21,477
Location
Northern Utah
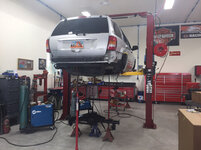
Today was quite productive. My son and I finished up the rear suspension links on his WJ and completed the frame mounts for the front suspension.

Started off by cutting the upper Link material once the length was determined.
9a7afd5a9cd092cd0764c37c751e34cf.jpg

Fishmouthed the axle end @ 5-degrees.
decf39e20b0fd76e70cdbce44c5d05d2.jpg

I then realized one link was about 1/8” longer than the other. Had to trim the long one. I sure do like this Baileigh BS210 band saw. Nice clean and consistent cuts every time.
8392c5a04d1a9b36e92b11fad201ca70.jpg

1ab1862c60708aab498f8bae079f83fd.jpg

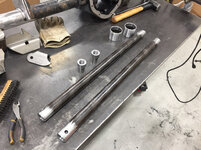
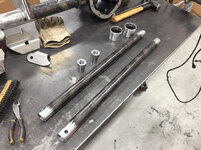
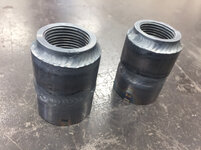
Then I chucked the frame ends of the links in the lathe and removed about .100” so the tube adapter would press in.
30cc420e5f68448eb59ebc6e1830154e.jpg

92472e2b5bfa5732d2fa95590a965d7b.jpg

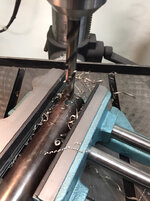
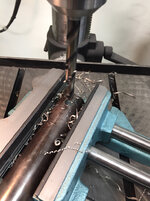
Cross drilling the tube for rosette welds.
15e3efc398a9edc4100bb3bb9f1dbe61.jpg

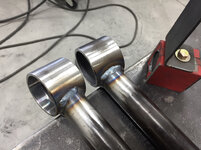
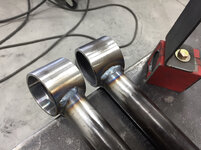
After wiping everything down with acetone the parts are ready to weld together.
cf3f51da1f5ef86e71214dc613893efd.jpg

Upper links welded.
2f120ae7b854e996e9a046c8ed475f2a.jpg

418fd0cdd9e26fbfbf2da50b54530785.jpg

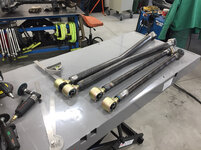
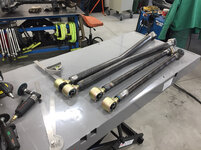
All rear links ready to mock into position.
c23cb9018168282d7249fa2d8b8bee4a.jpg

Rear links installed.
0e444e00d070d0777e9622c22f997444.jpg

Underneath shot.
154e4a8435eb65fb61d5bed702957585.jpg
 

Attachments

  • 30cc420e5f68448eb59ebc6e1830154e.jpg
    30cc420e5f68448eb59ebc6e1830154e.jpg
    687.7 KB · Views: 0
  • 92472e2b5bfa5732d2fa95590a965d7b.jpg
    92472e2b5bfa5732d2fa95590a965d7b.jpg
    97.9 KB · Views: 0
  • 15e3efc398a9edc4100bb3bb9f1dbe61.jpg
    15e3efc398a9edc4100bb3bb9f1dbe61.jpg
    772.2 KB · Views: 0
  • cf3f51da1f5ef86e71214dc613893efd.jpg
    cf3f51da1f5ef86e71214dc613893efd.jpg
    840.9 KB · Views: 0
  • 2f120ae7b854e996e9a046c8ed475f2a.jpg
    2f120ae7b854e996e9a046c8ed475f2a.jpg
    844.1 KB · Views: 0
  • 418fd0cdd9e26fbfbf2da50b54530785.jpg
    418fd0cdd9e26fbfbf2da50b54530785.jpg
    748.2 KB · Views: 0
  • c23cb9018168282d7249fa2d8b8bee4a.jpg
    c23cb9018168282d7249fa2d8b8bee4a.jpg
    767.2 KB · Views: 0
  • 154e4a8435eb65fb61d5bed702957585.jpg
    154e4a8435eb65fb61d5bed702957585.jpg
    687.9 KB · Views: 0
  • 1ab1862c60708aab498f8bae079f83fd.jpg
    1ab1862c60708aab498f8bae079f83fd.jpg
    841.2 KB · Views: 0
  • 8392c5a04d1a9b36e92b11fad201ca70.jpg
    8392c5a04d1a9b36e92b11fad201ca70.jpg
    908.5 KB · Views: 0
  • 9a7afd5a9cd092cd0764c37c751e34cf.jpg
    9a7afd5a9cd092cd0764c37c751e34cf.jpg
    829 KB · Views: 0
  • decf39e20b0fd76e70cdbce44c5d05d2.jpg
    decf39e20b0fd76e70cdbce44c5d05d2.jpg
    754.7 KB · Views: 0
  • 0e444e00d070d0777e9622c22f997444.jpg
    0e444e00d070d0777e9622c22f997444.jpg
    785.9 KB · Views: 0
Last edited:

Nlped

Well-known member
Joined
Feb 24, 2014
Messages
151
Location
Hayden AL
Looks fantastic! That’s going to be a nice rig!

What’s the scoop on the “BoX”?


Sent from my iPhone using Tapatalk
 
OP
Z

zmotorsports

ALLIANCE MEMBER
Joined
Oct 20, 2009
Messages
21,477
Location
Northern Utah
Looks fantastic! That’s going to be a nice rig!

What’s the scoop on the “BoX”?


Sent from my iPhone using Tapatalk


You’ll just have to wait and see. [emoji12]

As soon as my son’s WJ is back on the road I will unveil the big brown box.


Sent from my iPhone using Garage Journal
 
OP
Z

zmotorsports

ALLIANCE MEMBER
Joined
Oct 20, 2009
Messages
21,477
Location
Northern Utah
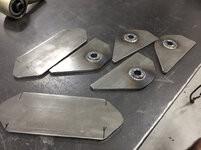
Next up was fabricating the front suspension mounts.

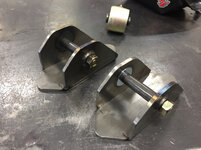
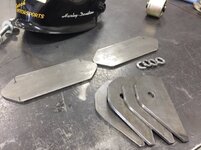
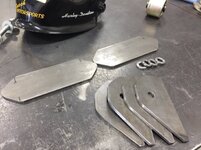
I cut the four side plates then bolted them together for grinding to ensure they are all symmetrical.
4702cdfa5520a09814f48268d5b1c49e.jpg

Base plates, side plates and bolt hole reinforcement washers cut and ready for welding
a20c983feffdb65fa8e1afee49260f1d.jpg

853b2855dd3a879ee2449fdf1e0b867d.jpg

710dd59e7b5a203e317a3917e839c9f7.jpg

439c81056fa1e48d4192bfff78f900ef.jpg

f86652ea025ee9c6a788912e78e5a458.jpg

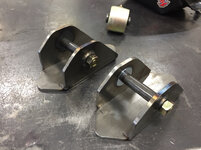
Mocked up, bolted together and ready for final welding.
01cef45f887c4b706f87c85f96f7b1bd.jpg

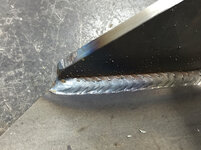
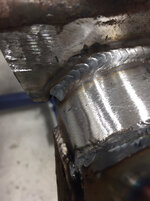
Welded.
6564b2fc851dcb7ab294fd6325f61830.jpg

8e7e799c38acff6082936533952049a4.jpg

7110c5cce2f17481522c56789d8b1115.jpg

e15ffe232c2c9aacf386c2543061d56b.jpg

9563ba8bcaaa792867d398fa93d48c8b.jpg

f6b5228a8395ee3e2b7d712ba8a4e996.jpg

81a04f86df26846604e37fe5918c763c.jpg

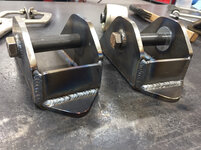
Completed and ready to weld onto the frame.
821a958e8dfb7864a505d92fb1d8bc1b.jpg

Thanks for looking.
 

Attachments

  • 853b2855dd3a879ee2449fdf1e0b867d.jpg
    853b2855dd3a879ee2449fdf1e0b867d.jpg
    800.2 KB · Views: 0
  • a20c983feffdb65fa8e1afee49260f1d.jpg
    a20c983feffdb65fa8e1afee49260f1d.jpg
    800.4 KB · Views: 0
  • 4702cdfa5520a09814f48268d5b1c49e.jpg
    4702cdfa5520a09814f48268d5b1c49e.jpg
    837.4 KB · Views: 0
  • 710dd59e7b5a203e317a3917e839c9f7.jpg
    710dd59e7b5a203e317a3917e839c9f7.jpg
    783 KB · Views: 0
  • 439c81056fa1e48d4192bfff78f900ef.jpg
    439c81056fa1e48d4192bfff78f900ef.jpg
    756.7 KB · Views: 0
  • f86652ea025ee9c6a788912e78e5a458.jpg
    f86652ea025ee9c6a788912e78e5a458.jpg
    749.6 KB · Views: 0
  • 821a958e8dfb7864a505d92fb1d8bc1b.jpg
    821a958e8dfb7864a505d92fb1d8bc1b.jpg
    736.7 KB · Views: 0
  • 81a04f86df26846604e37fe5918c763c.jpg
    81a04f86df26846604e37fe5918c763c.jpg
    774.2 KB · Views: 0
  • f6b5228a8395ee3e2b7d712ba8a4e996.jpg
    f6b5228a8395ee3e2b7d712ba8a4e996.jpg
    848.5 KB · Views: 0
  • 9563ba8bcaaa792867d398fa93d48c8b.jpg
    9563ba8bcaaa792867d398fa93d48c8b.jpg
    778.3 KB · Views: 0
  • e15ffe232c2c9aacf386c2543061d56b.jpg
    e15ffe232c2c9aacf386c2543061d56b.jpg
    755.5 KB · Views: 0
  • 7110c5cce2f17481522c56789d8b1115.jpg
    7110c5cce2f17481522c56789d8b1115.jpg
    803.3 KB · Views: 0
  • 8e7e799c38acff6082936533952049a4.jpg
    8e7e799c38acff6082936533952049a4.jpg
    782.8 KB · Views: 0
  • 6564b2fc851dcb7ab294fd6325f61830.jpg
    6564b2fc851dcb7ab294fd6325f61830.jpg
    727.6 KB · Views: 0
  • 01cef45f887c4b706f87c85f96f7b1bd.jpg
    01cef45f887c4b706f87c85f96f7b1bd.jpg
    795.4 KB · Views: 1
Last edited:

LXCam

ALLIANCE MEMBER
Joined
Apr 23, 2013
Messages
19,211
Location
AZ
Fantastic job as always Mike. How much longer do you think you two will need to wrap this up. I'm sure the boy is as anxious to get it dirty as we are to see what's in the box. ;)
 
OP
Z

zmotorsports

ALLIANCE MEMBER
Joined
Oct 20, 2009
Messages
21,477
Location
Northern Utah
Thanks Cam. I’m not gonna lie, this WJ project is dragging out longer than I expected it to. Only getting a couple of hours a night a few nights a week isn’t cutting it.

Trust me, I’m as ready to move on to my project as you are to see it but I want to get my son’s Jeep on the road first and not rush through the fabrication.

I appreciate you following along bud.


Sent from my iPhone using Garage Journal
 
OP
Z

zmotorsports

ALLIANCE MEMBER
Joined
Oct 20, 2009
Messages
21,477
Location
Northern Utah
Nice welding vise!


Thanks. It’s just an old Dayton that I picked up at an estate sale about ten years ago. Works very well for welding.

The one in the picture is a 6” one and I now have a smaller 4” version also for welding that I used on my drill press until I purchased my new Wilton quick release vise that I bought recently.
 
OP
Z

zmotorsports

ALLIANCE MEMBER
Joined
Oct 20, 2009
Messages
21,477
Location
Northern Utah
A few pictures from tonight’s work on my son’s WJ.

We relocated the spring buckets on the axle inboard 1-7/16” on each side as the JK frame is slightly wider than the WJ’s frame rails. Rather than use the aftermarket flat spring mounts my son wanted to keep the OEM front buckets so we merely cut them off, cleaned up the radius then welded them back on just closer to the center of the axle.

We also welded the Artec Industries track bar mount together and onto the axle. They sure make some nice components, excellent quality and fitment.

78dd0e99bb2567f6ce711f889b7b01ac.jpg

df1fa515003bc195c810a3e53f7992e1.jpg

e529e4978a81f81e838fb07b58283358.jpg

819791c26b009a054e15ceb0afbf9eaf.jpg

4442199a020b36b5d53d82aa7d7c3915.jpg

05e37230f3f23deb3581b322acf92c50.jpg

c81d3718e305301549be8f2062963b0b.jpg

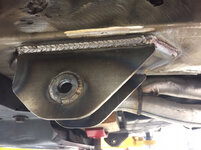
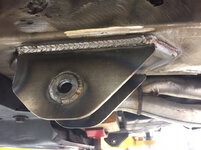
Lastly before closing up shop we welded the front suspension mounts onto the frame rails that we built a few nights ago.
14d27fd6e10c2519d7e0e0e4010b312e.jpg

324ed0494c47f1b4ffa98344b411d56e.jpg

f8a50b207db9fb795d6f0a2b521f33cf.jpg

Thanks for looking.
 

Attachments

  • 324ed0494c47f1b4ffa98344b411d56e.jpg
    324ed0494c47f1b4ffa98344b411d56e.jpg
    744.6 KB · Views: 1
  • f8a50b207db9fb795d6f0a2b521f33cf.jpg
    f8a50b207db9fb795d6f0a2b521f33cf.jpg
    842 KB · Views: 0
  • 14d27fd6e10c2519d7e0e0e4010b312e.jpg
    14d27fd6e10c2519d7e0e0e4010b312e.jpg
    752.1 KB · Views: 0
  • c81d3718e305301549be8f2062963b0b.jpg
    c81d3718e305301549be8f2062963b0b.jpg
    762.8 KB · Views: 0
  • 05e37230f3f23deb3581b322acf92c50.jpg
    05e37230f3f23deb3581b322acf92c50.jpg
    964.3 KB · Views: 0
  • 4442199a020b36b5d53d82aa7d7c3915.jpg
    4442199a020b36b5d53d82aa7d7c3915.jpg
    682.6 KB · Views: 0
  • 819791c26b009a054e15ceb0afbf9eaf.jpg
    819791c26b009a054e15ceb0afbf9eaf.jpg
    704.8 KB · Views: 0
  • e529e4978a81f81e838fb07b58283358.jpg
    e529e4978a81f81e838fb07b58283358.jpg
    684.3 KB · Views: 0
  • df1fa515003bc195c810a3e53f7992e1.jpg
    df1fa515003bc195c810a3e53f7992e1.jpg
    673.6 KB · Views: 0
  • 78dd0e99bb2567f6ce711f889b7b01ac.jpg
    78dd0e99bb2567f6ce711f889b7b01ac.jpg
    759.6 KB · Views: 0
Last edited:

shortykorte

Well-known member
Joined
Sep 1, 2014
Messages
8,039
Location
Tallahassee, Fl
Mike, I was wondering what method are you using to cut this plate?692bdb92dec15bc6ee489d33ccff2644.jpg

Also, I think I’m hearing a voice that keeps yelling “Let me out of this box”


Sent from my iPhone using Tapatalk
 

Attachments

  • 692bdb92dec15bc6ee489d33ccff2644.jpg
    692bdb92dec15bc6ee489d33ccff2644.jpg
    299 KB · Views: 1
To avoid these ads, REGISTER NOW!
OP
Z

zmotorsports

ALLIANCE MEMBER
Joined
Oct 20, 2009
Messages
21,477
Location
Northern Utah
Mike, I was wondering what method are you using to cut this plate?692bdb92dec15bc6ee489d33ccff2644.jpg

Also, I think I’m hearing a voice that keeps yelling “Let me out of this box”


Sent from my iPhone using Tapatalk


I’m cutting the lengths in my Baileigh BS210 horizontal bandsaw then cutting the contours out in my Birmingham 20" vertical bandsaw. All cuts are merely be hand, no water jet or laser like Pat has. [emoji41]

As for the voices, I’ve been hearing them as well. [emoji12]

Thanks for following along Shorty.
 

Attachments

  • 692bdb92dec15bc6ee489d33ccff2644.jpg
    692bdb92dec15bc6ee489d33ccff2644.jpg
    57 KB · Views: 1
Last edited:
OP
Z

zmotorsports

ALLIANCE MEMBER
Joined
Oct 20, 2009
Messages
21,477
Location
Northern Utah
you know how some people have nice artwork hanging in their house...
well - I have printed pics of Mike's welding on my wall!


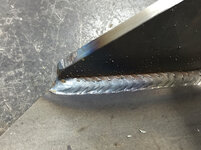
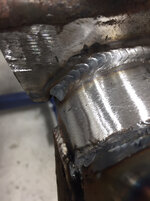
Thank you. I appreciate the kind words. Unfortunately my welds are one of those things I never seem to be quite pleased with. I don’t fabricate enough to really be able to get consistent looking welds. I know they are structurally sound but they just don’t have that uniformity and consistency that I try for.

Thank you for stopping by my projects thread and I commenting.
 

GRN96WS6

Well-known member
Joined
Dec 23, 2012
Messages
2,269
Location
SOMD
It’s just a little surface rust and it will get coated with POR-15 before going under the Jeep. POR-15 actually adheres better to surface rust than it does bare steel.
I guess I'm just used to you overdoing it! Haha POR15 is good stuff.
 

yaidunno

Well-known member
Joined
Feb 10, 2011
Messages
1,336
Location
WI
Nice progress on the WJ Mike! It looks to be moving right along now. Keep up the good work.
 
OP
Z

zmotorsports

ALLIANCE MEMBER
Joined
Oct 20, 2009
Messages
21,477
Location
Northern Utah
I guess I'm just used to you overdoing it! Haha POR15 is good stuff.

Thanks. I guess at some point ya just have to ask yourself if there is value added in a process or not. I didn't see any value added in beadblasting or grinding the buckets to accept the POR-15. My bad. I'll work on that.:bounce:

On a side note, Duplicolor came out with a rust converter that is "supposed" to be the same as POR-15 but less costly. Do NOT believe it and do NOT use it. My son tried it on his rear axle and it flat *****. He spent more time mechanically removing it than if he would have just spent a few bucks more on the POR-15 in the first place. I guess that's what we get for trying to save a few bucks. Lessen learned, stick with what we know works.
 

Ohmthis

Well-known member
Joined
Jan 20, 2013
Messages
3,021
Location
Outside of Louisville KY
Mike the Jeep parts are looking great! I understand about the weld appearance, I only weld a few times a month here at work and although they don’t look terrible (kinda like riding a bike, just clumsy) I wish they looked better. I’m really wishing to get my chores done at the new house (waiting on contractors *****!!!) so I can get the shop setup and play. Thanks for letting me live vicariously!
 
OP
Z

zmotorsports

ALLIANCE MEMBER
Joined
Oct 20, 2009
Messages
21,477
Location
Northern Utah
Mike the Jeep parts are looking great! I understand about the weld appearance, I only weld a few times a month here at work and although they don’t look terrible (kinda like riding a bike, just clumsy) I wish they looked better. I’m really wishing to get my chores done at the new house (waiting on contractors *****!!!) so I can get the shop setup and play. Thanks for letting me live vicariously!

Thanks for following along. Trust me I completely understand about waiting on contractors and getting a shop setup. I also know what it's like to have gaps in my welding. Sometimes like this project I weld/fabricate for a few weeks straight and other times I may go 4+ months before ever turning on a welder as most of the projects are wrenching. It takes me a little bit behind the hood before I get back into a rhythm of welding again.
 
OP
Z

zmotorsports

ALLIANCE MEMBER
Joined
Oct 20, 2009
Messages
21,477
Location
Northern Utah
Another great Saturday hanging out in the shop with my son working on his WJ.

943c692667e3d3f972f14ac5e4e5ac53.jpg

We beefed up the frame mounted trac bar bracket.
6aa95cce2d624b4ebdddc833f9ffa4bc.jpg

a4ff6e61af06c390e127305f65e103c4.jpg

Then finished welding the front suspension mounts to the frame rails.
066f7c4ddef644d49565f4f20b43a61d.jpg

94183582fc9853a074227954eec54d74.jpg

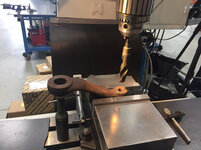
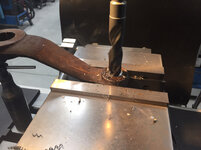
While we had the room we removed the pitman arm to drill it out to accept a slightly larger drag link end. Set it up in the mill and drilled to accept the new tapered sleeve.
c7ea4abe314075fb12ea18ededa931e1.jpg

799de71546f9f8a94429221cc3f64319.jpg

64c1fc58e87dad03e40a80f4af2a8f7c.jpg

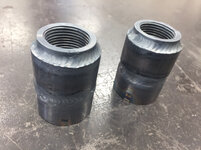
Lastly before closing up shop we welded and machined the tube adapters in preparation for building the front suspension links.
d3ff5dead764a3c06f02596e8340483c.jpg

3ced4f0936f62970d81f898fae631cc0.jpg

15165d700f7d1a6e9afa4836ee13f645.jpg

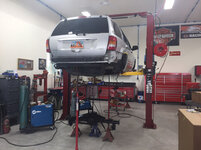
Before turning the lights out for the night we positioned the front axle under the Jeep and mocked the tires into place.
20eb7601f7d8e5a81b6b160d59f539ea.jpg

0c29a38ba12cd6eb67664fe877796b26.jpg

Thanks for looking.
 

Attachments

  • a4ff6e61af06c390e127305f65e103c4.jpg
    a4ff6e61af06c390e127305f65e103c4.jpg
    725.3 KB · Views: 0
  • 6aa95cce2d624b4ebdddc833f9ffa4bc.jpg
    6aa95cce2d624b4ebdddc833f9ffa4bc.jpg
    764.4 KB · Views: 0
  • 943c692667e3d3f972f14ac5e4e5ac53.jpg
    943c692667e3d3f972f14ac5e4e5ac53.jpg
    736.6 KB · Views: 0
  • 066f7c4ddef644d49565f4f20b43a61d.jpg
    066f7c4ddef644d49565f4f20b43a61d.jpg
    736.7 KB · Views: 0
  • 94183582fc9853a074227954eec54d74.jpg
    94183582fc9853a074227954eec54d74.jpg
    767.6 KB · Views: 0
  • c7ea4abe314075fb12ea18ededa931e1.jpg
    c7ea4abe314075fb12ea18ededa931e1.jpg
    707.7 KB · Views: 0
  • 799de71546f9f8a94429221cc3f64319.jpg
    799de71546f9f8a94429221cc3f64319.jpg
    673.5 KB · Views: 0
  • 64c1fc58e87dad03e40a80f4af2a8f7c.jpg
    64c1fc58e87dad03e40a80f4af2a8f7c.jpg
    644.7 KB · Views: 0
  • d3ff5dead764a3c06f02596e8340483c.jpg
    d3ff5dead764a3c06f02596e8340483c.jpg
    633.8 KB · Views: 0
  • 3ced4f0936f62970d81f898fae631cc0.jpg
    3ced4f0936f62970d81f898fae631cc0.jpg
    650.6 KB · Views: 0
  • 15165d700f7d1a6e9afa4836ee13f645.jpg
    15165d700f7d1a6e9afa4836ee13f645.jpg
    707.3 KB · Views: 0
  • 20eb7601f7d8e5a81b6b160d59f539ea.jpg
    20eb7601f7d8e5a81b6b160d59f539ea.jpg
    712.6 KB · Views: 0
  • 0c29a38ba12cd6eb67664fe877796b26.jpg
    0c29a38ba12cd6eb67664fe877796b26.jpg
    676.7 KB · Views: 0
Last edited:

cbacres

Well-known member
Joined
May 28, 2010
Messages
5,998
Location
SW Florida
Nice welding for being in the position that it is, I'm sure the lift helps tons with that. I find when welding on a vehicle, I need a third arm to support me:lol_hitti
 
OP
Z

zmotorsports

ALLIANCE MEMBER
Joined
Oct 20, 2009
Messages
21,477
Location
Northern Utah
Nice welding for being in the position that it is, I'm sure the lift helps tons with that. I find when welding on a vehicle, I need a third arm to support me:lol_hitti


Thanks. Out of position welding can be fun at times. I find placing a C-clamp aids in giving me something or someplace to brace myself to help as a steady rest.

Thanks for following along.
 

fnieto

Well-known member
Joined
Aug 27, 2013
Messages
1,401
Location
Tucson,Arizona
Nice work Mike, getting close...
Working along side your son is special. I miss this deeply as my son lives two (large) states away.
Comfort is king when welding in any position. It shows you where comfy as those beads are consistently purdy. Oh and those tube adaptors, I bet you used you positioner to TIG those. They also look great. Again, nice work amigo.
 
OP
Z

zmotorsports

ALLIANCE MEMBER
Joined
Oct 20, 2009
Messages
21,477
Location
Northern Utah
Nice work Mike, getting close...
Working along side your son is special. I miss this deeply as my son lives two (large) states away.
Comfort is king when welding in any position. It shows you where comfy as those beads are consistently purdy. Oh and those tube adaptors, I bet you used you positioner to TIG those. They also look great. Again, nice work amigo.

Thanks Paco. Yep, working in the shop with our kids is special. I figured I had better treasure it while it lasts as I have a feeling this next year is going to bring some major changes the zmotorsports household members.

As for the TIG welds on the tube adapters, yes, those were done with my M-K Products aircraft positioner. I'm still getting used to having both hands and both feet going while welding, not as easy as it looks, but they are getting better looking all the time. I just don't seem to get as much use out of it as I would have when building sand toys.

Thanks for stopping by and checking out my projects Paco.
 
OP
Z

zmotorsports

ALLIANCE MEMBER
Joined
Oct 20, 2009
Messages
21,477
Location
Northern Utah
On Friday afternoon my son sold his 2012 Harley Davidson Street Bob so we gained a small amount of space in the RV/storage bay as well as the mezzanine in the third bay of the attached garage from his accessories that went with it. After meeting the guy at the bank and the weather being somewhat better than it had been during the week I had my son help me blow the sprinkler system out for the season and then I went downstairs and blew/vacuumed the furnace out in preparation for the colder temps coming our way.

I love fall but I get depressed because I know winter is right around the corner and I HATE that white **** that falls on the ground and makes such a mess. I wish it would merely stay in the mountains and not on the valley floor where we have to shovel, plow and drive in it.:mad:
 
OP
Z

zmotorsports

ALLIANCE MEMBER
Joined
Oct 20, 2009
Messages
21,477
Location
Northern Utah
The Jeep's turning out great Mike.

Thanks Cam. This thing is turning out pretty sweet so far. My son's being pretty particular about this build. He's seen a couple of JK axle swaps into WJ's but they have been put together very crudely. Items such as not relocating the axle spring buckets and merely allowing the coil springs to flex over to seat into the buckets, having the axle not centered and the sway bar links that are too short are very common oversights on the axle swaps that he has seen on some of the Jeep sites. We're going for the total sleeper effect where it won't look as built as it really is and looks too nice to take off-road.:bounce:

As it is, no one offers a track bar that is the correct length we need to connect the WJ frame mount to the raised JK axle point. He is running Reid knuckles with the high steer feature so that complicates things a bit as well. We will have to fabricate the track bar and sway bar links in house to get the correct length and geometry but I think we can manage that.

Thanks for checking in and commenting Cam.
 

C_F

ALLIANCE MEMBER
Joined
Jan 21, 2005
Messages
9,675
Location
Utah...SNOW BLOWS!
I love fall but I get depressed because I know winter is right around the corner and I HATE that white **** that falls on the ground and makes such a mess. I wish it would merely stay in the mountains and not on the valley floor where we have to shovel, plow and drive in it.:mad:

I feel the exact same way about the white ****, I wouldn't mind it nearly as much if it just stayed in the mountains & rained down here.

The mods you guys are doing on the Jeep suspension are really looking great! I haven't commented in your thread much lately, mostly because I don't have much to say that these other guys haven't already said. :) But I do check in almost daily to see how your progress is going, and really appreciate how much detail you show and subsequent narration given, as always.
Looking forward to seeing how this project turns out! :thumbup:
 
OP
Z

zmotorsports

ALLIANCE MEMBER
Joined
Oct 20, 2009
Messages
21,477
Location
Northern Utah
I feel the exact same way about the white ****, I wouldn't mind it nearly as much if it just stayed in the mountains & rained down here.

The mods you guys are doing on the Jeep suspension are really looking great! I haven't commented in your thread much lately, mostly because I don't have much to say that these other guys haven't already said. :) But I do check in almost daily to see how your progress is going, and really appreciate how much detail you show and subsequent narration given, as always.
Looking forward to seeing how this project turns out! :thumbup:

Thank you. I appreciate the comments and thanks for following along. I am glad you find the content worth while.
 
OP
Z

zmotorsports

ALLIANCE MEMBER
Joined
Oct 20, 2009
Messages
21,477
Location
Northern Utah
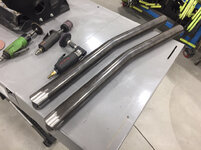
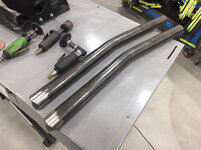
Last night I was able to get the lower links bent, cut and fishmouthed for the front suspension. Hopefully tonight I can get them welded and work on the front uppers.
5a4292ee49e053028369ec23af37b71e.jpg
 

Attachments

  • 5a4292ee49e053028369ec23af37b71e.jpg
    5a4292ee49e053028369ec23af37b71e.jpg
    688.4 KB · Views: 0
To avoid these ads, REGISTER NOW!
Top Bottom