
You are using an out of date browser. It may not display this or other websites correctly.
You should upgrade or use an alternative browser.
You should upgrade or use an alternative browser.
ZMotorsports Shop Projects 2.0
- Thread starter zmotorsports
- Start date
OP
zmotorsports
ALLIANCE MEMBER
The last round of parts turned out very nice Mike!
Going with Woods for drive shafts or someone else you know of?
Thank you, I appreciate the comments.
Yes, he will be going with Tom Woods driveshafts again. Been dealing with Tom even back when he was at Six States Distributors in Ogden before he went out on his own. I've been a dealer for him for about 10 years now and he's great to work with. I've put a lot of his driveshafts on a lot of various vehicles over the years.
My 2011 JKUR has the same driveshafts he built me back in 2012. They have just over 85k miles on them and probably another additional 25k towed miles behind our coach.
Thanks again for stopping by.
OP
zmotorsports
ALLIANCE MEMBER
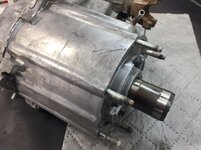
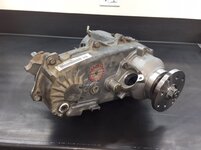
Pretty much completed my son’s NP231 transfer case tonight with the exception of the front input seal in which they shorted us in the kit.
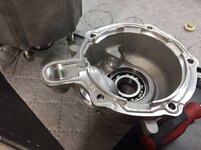
Removed the blind bearing in the back half of the case.

Look at how much beefier the Advance Adapter’s SYE mainshaft is compared to the OEM.

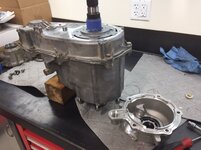
Shaft assembly with mode selector installed and ready to slide into case.

Cases assembled after a small bead of sealant applied and fasteners torqued to specification. Pump on the back half awaiting the tail cone which I just applied a small bead of sealant.
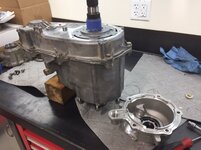
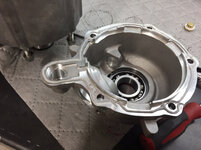
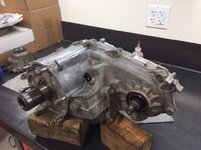
Assembled other than front yolk, rear output flange and input seal, which I will have to pick up tomorrow.
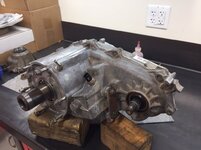

Thanks for looking.
Removed the blind bearing in the back half of the case.
Look at how much beefier the Advance Adapter’s SYE mainshaft is compared to the OEM.
Shaft assembly with mode selector installed and ready to slide into case.
Cases assembled after a small bead of sealant applied and fasteners torqued to specification. Pump on the back half awaiting the tail cone which I just applied a small bead of sealant.
Assembled other than front yolk, rear output flange and input seal, which I will have to pick up tomorrow.
Thanks for looking.
Attachments
-
 2b06c15331dcc8b21a43ddb4e6a5b392.jpg106.8 KB · Views: 0
 -
 b71f64be91501fe1e31820b6c9a05906.jpg126.9 KB · Views: 0
 -
 595ffcfa88e974523e6978514276e59f.jpg721 KB · Views: 0
 -
 e48bd1384f90a9d0b449e80949cd6ba5.jpg114 KB · Views: 0
 -
 9d153335ce3d505decf466c0934c34b1.jpg758 KB · Views: 0
 -
 c8d170015ed02c1bdf35ab8ec0b6c557.jpg798.6 KB · Views: 0
 -
 ecc7da07bf96392bbda2d81104f71677.jpg111.4 KB · Views: 0
Last edited:
JustinS
Well-known member
Mike thats going to a very capable rig when done!
OP
zmotorsports
ALLIANCE MEMBER
Mike thats going to a very capable rig when done!
Thanks, probably overbuilt a bit for what he will be putting it through. He is like I am and doesn't like beating on his vehicles but likes enjoying them both on and off road.
So many of the WJ's around here locally are cobbed together and severely beat on. He wants his to stand out not only in appearance but the manner in which it was built. I think he is on track.

Thanks for stopping by and checking in on the progress.
bmxdad
Well-known member
Is there a Jeep site this build is on?
OP
zmotorsports
ALLIANCE MEMBER
Is there a Jeep site this build is on?
Not to my knowledge. My son keeps telling me he is going to post it here but he hasn't yet. He isn't active on any Jeep forums any longer either, he got tired of all of the wanna-be's and their lame *** comments. You know, the guys that think they are the only real Jeepers because they buy their parts out of the junkyard and then half-*** their **** together and break down on the trail for bragging rights.

polexican23
Banned
am i the only one surprised that the cases were NOT gold leafed, painted or PC'd prior to reassembly.
Bigblue&Goldie
Well-known member
You know, the guys that think they are the only real Jeepers because they buy their parts out of the junkyard and then half-*** their **** together and break down on the trail for bragging rights.
God, I hate that crowed. I have a buddy like that who always wants me to go wheeling with him. I refuse. If your wheeler doesn't run well enough that you can't make to the trail without a trailer, I don't want to hear about how my paint looks too nice or I should wheel my **** harder. I have no interest in hanging out in the desert with you overnight because you half *** everything, maintain nothing, and abuse everything. And no, you can't borrow my tools or spare parts. I'll help anyone that made an effort to be prepared. I'm not helping Joe Blow Dipshit.
As a racer, I won't climb into an offroad vehicle that is cobbled together; it's either 100% prepped or I'm not your guy......and yes, I will make the changes I feel necessary if you want me to get in.
OP
zmotorsports
ALLIANCE MEMBER
am i the only one surprised that the cases were NOT gold leafed, painted or PC'd prior to reassembly.
Sorry to disappoint ya. He did spend nearly an hour just cleaning the case exterior as it was filthy. He spent some time at the solvent tank with a wire brush and it actually turned out quite well for just bare aluminum.
OP
zmotorsports
ALLIANCE MEMBER
God, I hate that crowed. I have a buddy like that who always wants me to go wheeling with him. I refuse. If your wheeler doesn't run well enough that you can't make to the trail without a trailer, I don't want to hear about how my paint looks too nice or I should wheel my **** harder. I have no interest in hanging out in the desert with you overnight because you half *** everything, maintain nothing, and abuse everything. And no, you can't borrow my tools or spare parts. I'll help anyone that made an effort to be prepared. I'm not helping Joe Blow Dipshit.
As a racer, I won't climb into an offroad vehicle that is cobbled together; it's either 100% prepped or I'm not your guy......and yes, I will make the changes I feel necessary if you want me to get in.
I couldn't agree more. When we were duning and racing I would look closely at the way a car was put together before I ever climbed in and if it was too bad I didn't even want to be in the same zip code with it.
One of the reasons I quit taking my welder and fabrication tools with me in our race trailer was because people knew I would have all of that **** in my trailer and that I would help them when I arrived. It bothered me to no end because I would have my **** in pristine condition or I wouldn't even load it at home yet others brought their junk to the dunes or track in the same degree of disrepair as it was previous trip or race.
Jeeping is a bit better but there are still those guys that think you get bonus points for breaking down on the trail or coming off the trail with body damage and I refuse to wheel with them or even associate with them.
Last edited:
shortykorte
Well-known member
Like they say, some have more money then they do sense.
A true accomplishment is building a rig that doesn’t break and driving smart so nothing is damaged. Just goes to show where society has progressed to, doing it wrong is right or the norm.
Sent from my iPhone using The Garage Journal mobile app
A true accomplishment is building a rig that doesn’t break and driving smart so nothing is damaged. Just goes to show where society has progressed to, doing it wrong is right or the norm.
Sent from my iPhone using The Garage Journal mobile app
As always everything is turning out top drawer.
I'm with you and BG, I stopped doing certain activities just because it became expected I'd fix someone's **** that wasn't running. It got to the point with boating an inlaw would bring their not running ski and expect me to get it running while I'm on vacation. I can't tell you how many times someone's pos stayed on the trailer or the beach for the entire time before they learned. And back when I tracked my street car, there were guys I would not run with period! It never failed they'd always end up in the gravel and I was not going to be next to them when they got in over their heads.
I'm with you and BG, I stopped doing certain activities just because it became expected I'd fix someone's **** that wasn't running. It got to the point with boating an inlaw would bring their not running ski and expect me to get it running while I'm on vacation. I can't tell you how many times someone's pos stayed on the trailer or the beach for the entire time before they learned. And back when I tracked my street car, there were guys I would not run with period! It never failed they'd always end up in the gravel and I was not going to be next to them when they got in over their heads.
OP
zmotorsports
ALLIANCE MEMBER
Like they say, some have more money then they do sense.
A true accomplishment is building a rig that doesn’t break and driving smart so nothing is damaged. Just goes to show where society has progressed to, doing it wrong is right or the norm.
Sent from my iPhone using The Garage Journal mobile app
I agree Shorty, build it right and drive it respectfully and you can drive it back home. Beat on it and it will leave you walking at the worst time. I’m not afraid to use my vehicles but I simply can’t flog on them. Like many others here I work too hard for the money to afford them and too hard to maintain them not to respect them. I also don’t like being around others who choose to beat on theirs, it’s just too hard to watch.
I also agree that as a society I think we’ve become disposable. It’s too easy to replace vehicles, homes, appliances and you name it. Hell many people even feel the same way about relationships.
Last edited:
OP
zmotorsports
ALLIANCE MEMBER
As always everything is turning out top drawer.
I'm with you and BG, I stopped doing certain activities just because it became expected I'd fix someone's **** that wasn't running. It got to the point with boating an inlaw would bring their not running ski and expect me to get it running while I'm on vacation. I can't tell you how many times someone's pos stayed on the trailer or the beach for the entire time before they learned. And back when I tracked my street car, there were guys I would not run with period! It never failed they'd always end up in the gravel and I was not going to be next to them when they got in over their heads.
Thanks Cam.
I’m pretty understanding when someone breaks down on the trail or at the track back when I was racing. I will be the first to jump in and assist. I will however be the last to help if someone is either being stupid and damaged their rig or they show up with their **** in disrepair expecting others to bail them out.
Last edited:
OP
zmotorsports
ALLIANCE MEMBER
Made a lot of progress on my son’s WJ today. It was awesome to be able to spend the entire day wrenching in the shop with him before he left to go be with his girlfriend. We had some great conversation and it was just an overall fantastic day.
I picked up the last two seals yesterday that we needed to finish the TC assembly. Input seal installed in the front housing and housing installed.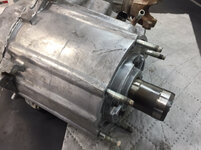
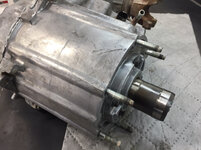
Transfer case completed and ready to install in the Jeep.

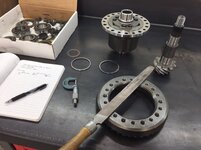
After we bolted the transfer case in we started on the rear axle by getting all of the parts set out, cleaned, inspected and ready for installation. He is installing 4.56:1 gears and I wanted my son to build the axles so I supervised and assisted when needed.


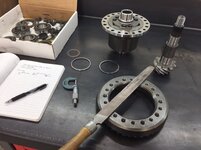
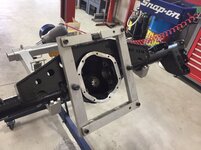
Removed the pinion bearing to see what the factory shim thickness was. After measuring the .050” shim we set it aside for using on the initial setup. At .050” this was the thickest of the past half dozen or so Dana 44’s that I’ve done.

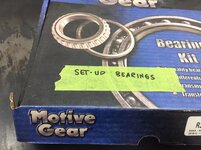
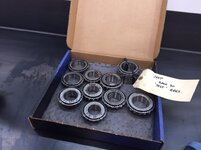
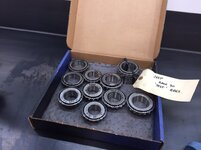
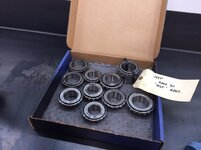
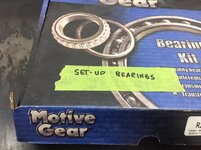
Time to get out the set-up bearings.

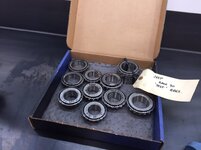
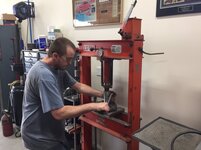
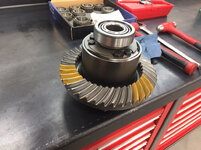
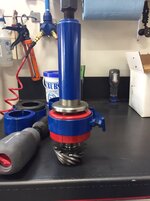
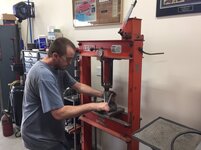
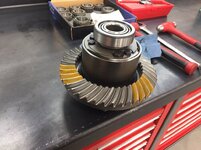
We pressed the ring gear onto the Eaton TrueTrac carrier and commenced to torque the ring gear bolts after applying red Loctite.

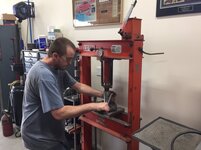
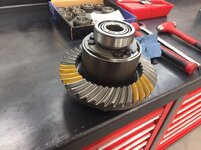
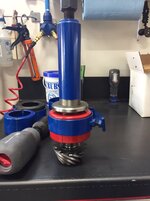
After the ring gear was installed we heated the carrier bearings and installed them so they could cool before needing to handle the carrier. One of the things I was trying to reiterate to my son is thinking through the process to alleviate waiting time and to keep the work flowing. By getting the carrier ready and it cooling we could focus on the pinion.

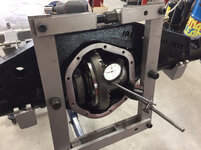
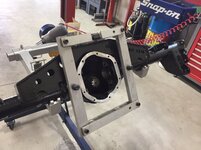
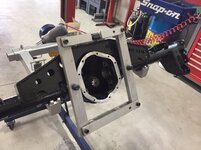
Case spreader installed, housing cleaned and pinion races removed.
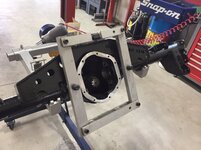
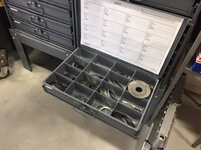
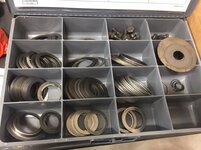
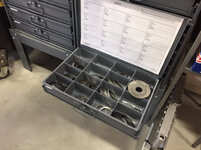
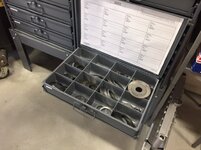
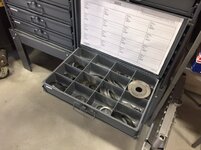
Time to get the assortment of shims standing by.

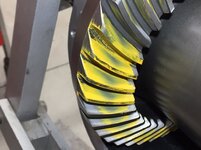
Ring gear painted with marking compound and ready for initial test.
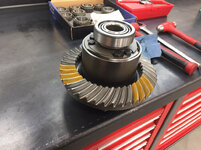
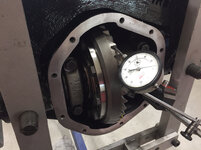
Pinion way too deep with the pattern too close to the flank. Backlash was also a bit tight at .003”.
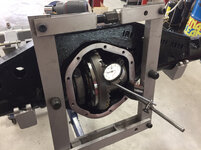
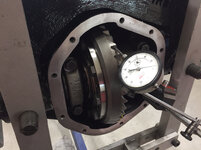
He took it all back apart and installed a .041” pinion shim that I had in my assortment.

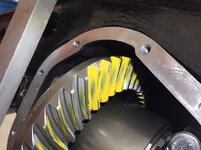
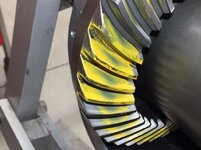
That turned out to be the ticket. A slight alteration to the carrier side shim packs and it netted us exactly what we were after. Beautiful wear pattern on both drive and coast sides with a backlash of .008”.
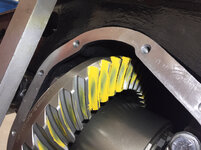

Engraved all of the specs on the ring gear. Ended up at 22 in/lbs of pinion bearing preload with an addition 8 in/lbs of carrier bearing preload after releasing the case spreader.

Buttoned everything up and installed the diff cover.
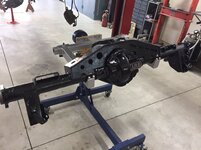
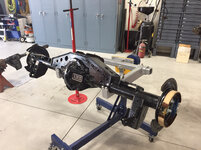
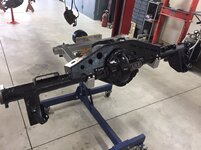
Lastly before closing up the shop for the afternoon we set the brake backing plates in place awaiting the axle shafts.
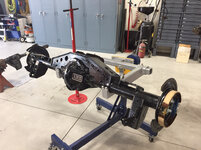
As soon as he gets the front axle housing painted with POR15 we can assemble it.
Thanks for looking.
I picked up the last two seals yesterday that we needed to finish the TC assembly. Input seal installed in the front housing and housing installed.
Transfer case completed and ready to install in the Jeep.
After we bolted the transfer case in we started on the rear axle by getting all of the parts set out, cleaned, inspected and ready for installation. He is installing 4.56:1 gears and I wanted my son to build the axles so I supervised and assisted when needed.
Removed the pinion bearing to see what the factory shim thickness was. After measuring the .050” shim we set it aside for using on the initial setup. At .050” this was the thickest of the past half dozen or so Dana 44’s that I’ve done.
Time to get out the set-up bearings.
We pressed the ring gear onto the Eaton TrueTrac carrier and commenced to torque the ring gear bolts after applying red Loctite.
After the ring gear was installed we heated the carrier bearings and installed them so they could cool before needing to handle the carrier. One of the things I was trying to reiterate to my son is thinking through the process to alleviate waiting time and to keep the work flowing. By getting the carrier ready and it cooling we could focus on the pinion.
Case spreader installed, housing cleaned and pinion races removed.
Time to get the assortment of shims standing by.
Ring gear painted with marking compound and ready for initial test.
Pinion way too deep with the pattern too close to the flank. Backlash was also a bit tight at .003”.
He took it all back apart and installed a .041” pinion shim that I had in my assortment.
That turned out to be the ticket. A slight alteration to the carrier side shim packs and it netted us exactly what we were after. Beautiful wear pattern on both drive and coast sides with a backlash of .008”.
Engraved all of the specs on the ring gear. Ended up at 22 in/lbs of pinion bearing preload with an addition 8 in/lbs of carrier bearing preload after releasing the case spreader.
Buttoned everything up and installed the diff cover.
Lastly before closing up the shop for the afternoon we set the brake backing plates in place awaiting the axle shafts.
As soon as he gets the front axle housing painted with POR15 we can assemble it.
Thanks for looking.
Attachments
-
 6391d1d151dc6c1450922e0a27b2c38e.jpg780.2 KB · Views: 0
 -
 d126abc50e3b43f1b42595682e9e4c73.jpg120.9 KB · Views: 0
 -
 374617587dc50d789cb7f69d55222394.jpg654.9 KB · Views: 0
 -
 0ce3ae6db7c9e972cdf4dd64ca0226ed.jpg735.8 KB · Views: 0
 -
 ec822675848fb38cd9580be256a63052.jpg746.8 KB · Views: 0
 -
 0cb7dea66867d86f679d4dcd41691deb.jpg776.1 KB · Views: 0
 -
 c788e0e89e07b15a9cb505c713088c75.jpg704.4 KB · Views: 0
 -
 9e94c89c02d14c92bed008647bbcd591.jpg133.5 KB · Views: 0
 -
 c4a786c9623f2d705632dca21cda4f6b.jpg107.6 KB · Views: 0
 -
 0059c9f4fe4bfd8467e8d13fe3c41e99.jpg92.2 KB · Views: 0
 -
 40a0481735982facf0666ef93f2153ab.jpg719.6 KB · Views: 0
 -
 101d0bc108ffd3912740ffa3c03a8787.jpg120.7 KB · Views: 0
 -
 cd6f7071898208f0fd40e664672e00af.jpg710.9 KB · Views: 0
 -
 be98d1a8261d60f42e8fae23a3d5ad67.jpg632 KB · Views: 0
 -
 f129cb0d258d2bf99fb84fccf749e5a3.jpg728.4 KB · Views: 0
 -
 136bf0d2fbc86c8ecfc0243ca4b4898f.jpg95.3 KB · Views: 0
 -
 aec3cbbdc4738da32fa33d3798dc07a9.jpg107.5 KB · Views: 0
 -
 ec3a6b2a7bbd20fa69f58511c44c97d6.jpg100.4 KB · Views: 0
 -
 0753dc0be6787df12de5bda6cca4a503.jpg106.7 KB · Views: 0
 -
 989515266c3a21d20af48e3275d1748b.jpg119.7 KB · Views: 0
 -
 cdf54e4a97edd5be454f33e216215bd4.jpg717.4 KB · Views: 0
 -
 881fdb5dcda4507f8fae1e3a868647cf.jpg830.4 KB · Views: 0
Last edited:
4 FN 27
ALLIANCE MEMBER
Made a lot of progress on my son’s WJ today. It was awesome to be able to spend the entire day wrenching in the shop with him before he left to go be with his girlfriend. We had some great conversation and it was just an overall fantastic day.
I picked up the last two seals yesterday that we needed to finish the TC assembly. Input seal installed in the front housing and housing installed.
Transfer case completed and ready to install in the Jeep.
After we bolted the transfer case in we started on the rear axle by getting all of the parts set out, cleaned, inspected and ready for installation. He is installing 4.56:1 gears and I wanted my son to build the axles so I supervised and assisted when needed.
Removed the pinion bearing to see what the factory shim thickness was. After measuring the .050” shim we set it aside for using on the initial setup. At .050” this was the thickest of the past half dozen or so Dana 44’s that I’ve done.
Time to get out the set-up bearings.
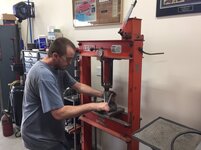
We pressed the ring gear onto the Eaton TrueTrac carrier at commenced to torque the ring gear bolts after applying red Loctite.
After the ring gear was installed we heated the carrier bearings and installed them so they could cool before needing to handle the carrier. One of the things I was trying to reiterate to my son is thinking through the process to alleviate waiting time and to keep the work flowing. By getting the carrier ready and it cooling we could focus on the pinion.
Case spreader installed, housing cleaned and pinion races removed.
Time to get the assortment of shims standing by.
Ring gear painted with marking compound and ready for initial test.
Pinion way too deep with the pattern too close to the flank. Backlash was also a bit tight at .003”.
He took it all back apart and installed a .041” pinion shim that I had in my assortment.
That turned out to be the ticket. A slight alteration to the carrier side shim packs and it netted us exactly what we were after. Beautiful water pattern on both drive and coast sides with a backlash of .008”.
Engraved all of the specs on the ring gear. Ended up at 22 in/lbs of pinion bearing preload with an addition 8 in/lbs of carrier bearing preload after releasing the case spreader.
Buttoned everything up and installed the diff cover.
Lastly before closing up the shop for the afternoon we set the brake backing plates in place awaiting the axle shafts.
As soon as he gets the front axle housing painted with POR15 we can assemble it.
Thanks for looking.










Nice work Mike...I mean supervision!!! LOL...
Love how you run m ore than one pattern on the Gears.
Attachments
-
 ec822675848fb38cd9580be256a63052.jpg112.2 KB · Views: 0
 -
 0ce3ae6db7c9e972cdf4dd64ca0226ed.jpg104.4 KB · Views: 0
 -
 40a0481735982facf0666ef93f2153ab.jpg118.9 KB · Views: 0
 -
 f129cb0d258d2bf99fb84fccf749e5a3.jpg119 KB · Views: 0
 -
 d126abc50e3b43f1b42595682e9e4c73.jpg120.9 KB · Views: 0
 -
 c788e0e89e07b15a9cb505c713088c75.jpg109.7 KB · Views: 0
 -
 6391d1d151dc6c1450922e0a27b2c38e.jpg135.7 KB · Views: 0
 -
 0cb7dea66867d86f679d4dcd41691deb.jpg131.7 KB · Views: 0
 -
 881fdb5dcda4507f8fae1e3a868647cf.jpg134.4 KB · Views: 0
 -
 ec3a6b2a7bbd20fa69f58511c44c97d6.jpg100.4 KB · Views: 0
 -
 136bf0d2fbc86c8ecfc0243ca4b4898f.jpg95.3 KB · Views: 0
 -
 0753dc0be6787df12de5bda6cca4a503.jpg106.7 KB · Views: 0
 -
 cd6f7071898208f0fd40e664672e00af.jpg99.4 KB · Views: 0
 -
 c4a786c9623f2d705632dca21cda4f6b.jpg107.6 KB · Views: 0
 -
 0059c9f4fe4bfd8467e8d13fe3c41e99.jpg92.2 KB · Views: 0
 -
 be98d1a8261d60f42e8fae23a3d5ad67.jpg85 KB · Views: 0
 -
 101d0bc108ffd3912740ffa3c03a8787.jpg120.7 KB · Views: 0
 -
 cdf54e4a97edd5be454f33e216215bd4.jpg119.7 KB · Views: 0
 -
 374617587dc50d789cb7f69d55222394.jpg91.9 KB · Views: 0
 -
 989515266c3a21d20af48e3275d1748b.jpg119.7 KB · Views: 0
 -
 9e94c89c02d14c92bed008647bbcd591.jpg133.5 KB · Views: 0
 -
 aec3cbbdc4738da32fa33d3798dc07a9.jpg107.5 KB · Views: 0
jeepinerdeep
Well-known member
First person I've ever seen put a Jeep axle together with the actual correct bearing tooling and housing spreader. Haha! ( Maybe myself included )
Looking great.
Looking great.
Last edited:
OP
zmotorsports
ALLIANCE MEMBER
Nice work Mike...I mean supervision!!! LOL...
Love how you run m ore than one pattern on the Gears.
Thanks Pat. I prefer to have at least two areas painted after checking runout.
Thanks for stopping by Pat.
OP
zmotorsports
ALLIANCE MEMBER
First person I've ever seen put a Jeep axle together with the actual correct bearing tooling and housing spreader. Haha! ( Maybe myself included )
Looking great.
Thank you. Not many people realize that there are specific tools that should be used for proper assembly. There’s more to it than dropping a carrier in and checking backlash. I appreciate the comments and for checking out my projects.
Bigblue&Goldie
Well-known member
Man, you are well equipped! The bearing warmer is cool, I've never seen one of those before. Setting up gears is right up your alley; the detail in your work really shows. I like how you took the time to engrave all your spec's.
OP
zmotorsports
ALLIANCE MEMBER
Man, you are well equipped! The bearing warmer is cool, I've never seen one of those before. Setting up gears is right up your alley; the detail in your work really shows. I like how you took the time to engrave all your spec's.
Thank you for the comments. I’ve built a lot of axles over the years and acquiring the proper tools was high on my priorities. Lucky to have a very understanding wife that knows how I feel about having the proper tools to do various jobs. Back in my racing days I did a lot of gear setups then about a ten year gap where I didn’t do too awful many and then the last eight or ten years I’ve been doing a lot of them again, a lot of Jeeps and off-road vehicles nowadays.
Thanks for checking out my projects.
Last edited:
fnieto
Well-known member
Nicely done Mike as usual.
Really enjoy seeing the father/son project come together. As for your specialty tools, well they not only save you big money but ensures the job is done correctly.
Nice job my friend.
Really enjoy seeing the father/son project come together. As for your specialty tools, well they not only save you big money but ensures the job is done correctly.
Nice job my friend.
Lots of good progress on the Jeep I see. Question, how does one know the correct amount of tension to put on using the case spreader? I see most guys are adding .003 per side for bearing preload, and encouraging it in place with a rubber mallet- obviously not the proper procedure. Are you some how able to measure roughly .006 spread?
polexican23
Banned
could open your own shop....er, nevermind.
Great work as always mike. Attention to detail is amazing.
Great work as always mike. Attention to detail is amazing.
That's it Mike. The next time I gotta do gears I'm coming up.
My thoughts exactly. I was going to say my Ford 8.8 was on its way to Utah, for Mike to rebuild. Love your excellent photos and explanation of the processes too. Thanks Mike, keep em coming.
Mike
OP
zmotorsports
ALLIANCE MEMBER
Nicely done Mike as usual.
Really enjoy seeing the father/son project come together. As for your specialty tools, well they not only save you big money but ensures the job is done correctly.
Nice job my friend.
Thanks Paco, I appreciate that, it coming along nicely. It's nice to see items getting crossed off the white board at this point.

OP
zmotorsports
ALLIANCE MEMBER
Lots of good progress on the Jeep I see. Question, how does one know the correct amount of tension to put on using the case spreader? I see most guys are adding .003 per side for bearing preload, and encouraging it in place with a rubber mallet- obviously not the proper procedure. Are you some how able to measure roughly .006 spread?
Bryan, proper carrier pre-load is hard or next to impossible to achieve by merely pounding in shims on the sides of the carrier bearings. I generally shoot for 7-10 in/lb increase from what the pinion bearing preload is. For example, on this one the PPL (pinion pre-load) was 22 in/lbs because of new bearings, used bearings will be slightly less, when we spread the case and installed the shims, we knew we had the proper amount when we released the case spreader pressure and we then had 30 in/lbs of preload on at the pinion. That was an increase of 8 in/lbs with the carrier installed and case relaxed.
Spreading the case can be measured by placing a magnetic dial indicator on either side and then expanding, although I must admit most of the time I merely go by feel on the case spreading. If memory serves I believe most manufactures say to spread approx. .015" for the preload shims to be installed. Then the final measuring is done by measuring the rotating torque after the tension from the case spreader is removed. On this one I must admit, the case spreader took much more force than normal due to the truss that was welded on the top.
I hope that answers your question and thank you for following along Bryan.
Last edited:
Finallygotit
ALLIANCE MEMBER
You have no idea how much I have learned about differentials in this post. 
Thanks Mike!

Thanks Mike!
OP
zmotorsports
ALLIANCE MEMBER
could open your own shop....er, nevermind.
Great work as always mike. Attention to detail is amazing.
Ha, ha. Been there done that. I never thought I would say this because I was not thrilled about closing down my business a couple of years ago when we were moving but I am very much enjoying not having to deal with customers that I don't want to and that whole sales tax collection and business property tax thing. I much prefer the option to work on friends stuff when I have time and not feel like I have to rush through my stuff to get to customer work.
I've had people ask me if I'm going to apply for another business license now that we are settled into the new home and shop, I don't think I am going to. I think once I get my projects done I will have just about enough side jobs that I want and not feel overwhelmed like I used to.
Bryan, proper carrier pre-load is hard or next to impossible to achieve by merely pounding in shims on the sides of the carrier bearings. I generally shoot for 7-10 in/lb increase from what the pinion bearing preload is. For example, on this one the PPL (pinion pre-load) was 22 in/lbs because of new bearings, used bearings will be slightly less, when we spread the case and installed the shims, we knew we had the proper amount when we released the case spreader pressure and we then had 30 in/lbs of preload on at the pinion. That was an increase of 8 in/lbs with the carrier installed and case relaxed.
Spreading the case is usually done more by feel than actually measuring anything. The measuring is done when with rotating torque after the tension from the case spreader is removed. On this one I must admit, the case spreader took much more force than normal due to the truss that was welded on the top.
I hope that answers your question and thank you for following along Bryan.
Thanks for the explanation Mike. I was wondering if it was more of a feel thing, guided by past experience. Your spreader tool probably took one look at the truss and said "put me back in the tool box!"
OP
zmotorsports
ALLIANCE MEMBER
That's it Mike. The next time I gotta do gears I'm coming up.
My thoughts exactly. I was going to say my Ford 8.8 was on its way to Utah, for Mike to rebuild. Love your excellent photos and explanation of the processes too. Thanks Mike, keep em coming.
Mike
Thanks guys, I appreciate the kind words. I know a lot of guys out there doing fine jobs on gear installs, however, I see so many that half *** their gear installs together or even take them to shops and pay top dollar that don't do them properly. I see it far too often from even members in our own Jeep club and don't really know the difference between a good gear install and a poor one until it is too late. I've ridden in a few that have growled pretty good and the owner just says "oh the shop said that was normal and you'll never get them setup like the factory." That is so sad to hear.
I appreciate the comments and for taking the time to follow along on my projects.
OP
zmotorsports
ALLIANCE MEMBER
You have no idea how much I have learned about differentials in this post.
Thanks Mike!
Thanks Dan, I appreciate that. I never thought setting up gears was anything people really cared about, they're not exactly the **** part of a build ya know.
You never see them once they are installed and the only time people think about them is when something goes to **** with them. Even back in high school I started setting up gears for buddies and really began to enjoy working with them and netting the rewards after the proper gear selection and installation, most were never interested in them but bolt on a new set of lights or big tires and they were drooling all over them. Even now in our local Jeep club I see the lift kits going on and tires/wheels and all of the comments about which ones are best and where to spend their money but as soon as I mention to install the proper gearing to get the mechanical leverage back that they are losing from the larger tires people's eyes glaze over and I've lost them. Get out on the trail and I see all too often someone with a stock JK running either 3.73 or worse 3.21 gears and they can't get out of their own way with 35" tires.

Gearing seems to be the last thing people think about. I then get comments like "how much would you charge me to do gears? It has to be cheap because I already spent all of my money on the tires, wheels, lift kit and OH yeah, lights." That is when IF they decided to do gears, they take it to the absolute cheapest shop they can rather than the best.
Sorry for rant, just one of my pet peeves.
OP
zmotorsports
ALLIANCE MEMBER
Thanks for the explanation Mike. I was wondering if it was more of a feel thing, guided by past experience. Your spreader tool probably took one look at the truss and said "put me back in the tool box!"
I'll admit Bryan, I was wondering if I was going to be able to spread it enough to even get the OEM shims in as a starting point. That truss made that housing rock solid. I put much more force on this one than I ever had in the past. Even my son said he wasn't comfortable going any further but I told him we have to spread it enough to get the proper preload or you're just throwing your money away. Under load that forces will try to push that ring gear away from the pinion and without the proper shims installed it will be successful and then the pinion is riding up near the face of the teeth where they are the weakest. You need them staying right where they are during setup and down in the meat of the gears.
Finallygotit
ALLIANCE MEMBER
...........Gearing seems to be the last thing people think about. I then get comments like "how much would you charge me to do gears? It has to be cheap because I already spent all of my money on the tires, wheels, lift kit and OH yeah, lights." That is when IF they decided to do gears, they take it to the absolute cheapest shop they can rather than the best.
Sorry for rant, just one of my pet peeves.
Mike, no worries. Trust me, I truly understand your pet peeve. You should see what I have to deal with.

Duker
Well-known member
You have no idea how much I have learned about differentials in this post.
Thanks Mike!
Going to second that comment.... I will probably never work on a rear end (except the one attached to my hips.... no comments on that one Cam!) but I love seeing the process especially when executed and described as well as this....
Sent from my iPad using Tapatalk Pro
OP
zmotorsports
ALLIANCE MEMBER
Going to second that comment.... I will probably never work on a rear end (except the one attached to my hips.... no comments on that one Cam!) but I love seeing the process especially when executed and described as well as this....
Sent from my iPad using Tapatalk Pro
Thanks Duke. I appreciate the comments. Thanks for checking in on my projects bud.
Great job on the diff assembly! I hate to think about all the ones I’ve done over the years. Guys I worked with would give me grief on how much time I spent setting them up. I never had one come back but rebuilt some they sent down the road in less than 20K miles. I never had to do any Dana axles until they moved production to Mexico. The pinion bearings would get loose due to the housing moving together, then the seal would leak. Ford tech school said we were no longer to use the spreader according to Dana. I always thought the Ford 9” was the best to set up. I hated the Spicer 135, the pinion nut torque was 900 ft/lb and if the rotational torque was off you had take back apart and sand the shim if it was loose and start over with new thicker shim if it was tight. Enjoy all your endeavors in your shop! I hope your son realizes what great things you’re teaching him!
csp
Well-known member
You had to heat setup bearings to install them? Or was the heater used for the real McCoy once the desired setup was determined?