To avoid these ads, REGISTER NOW!

ZMotorsports Shop Projects 2.0

OP
Z

zmotorsports

ALLIANCE MEMBER
Joined
Oct 20, 2009
Messages
21,476
Location
Northern Utah
Seeing as how we are now limited to only ten pics per post I will have to continue on.


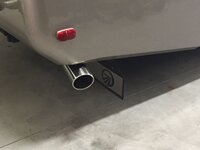
Here is the Aqua-Hot exhaust tip completed.
ex11.JPG

Engine exhaust tip installed and completed.
ex12.JPG


ex13.JPG


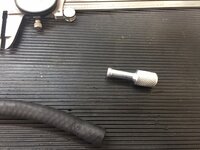
After completing the exhaust tips I had to block off a small hose but didn't want to merely use a bolt of some other generic plug so I quickly knocked out a small plug from a drop of .5" aluminum, especially seeing as how I already had chips on the lathe.

fuel1.JPG


fuel2.jpg

fuel3.jpg

Thanks for looking.
 
To avoid these ads, REGISTER NOW!
OP
Z

zmotorsports

ALLIANCE MEMBER
Joined
Oct 20, 2009
Messages
21,476
Location
Northern Utah
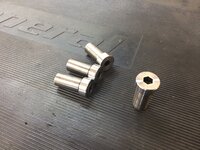
I also picked up some relatively inexpensive Vise Grip style of clamps to add to my collection of drop in style of clamps for my newly added holes in my fabrication table. I stopped by my local Bolt & Nut Supply and picked up some 5/8" shoulder bolts to use as the bases.

I cut the threads off of the bolts and then touched them up on the disc/belt sander along with a small chamfer.
clamp1.JPG

Test fitting in the fixturing holes on the fabrication table.
clamp2.JPG


clamp3.JPG


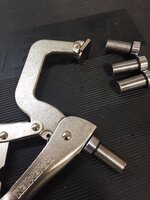
I will use 4 of these as the bases for the 4 clamps that I purchased and the remainder will work well as guides for clamping material up against as it will work well for aligning material.
clamp4.JPG

I machined the knurls off as well as flattened the face of the head. This also removed the coating for welding.

clamp5.JPG


clamp6.JPG

Next I marked and cut the stationary part of the clamp off.
clamp7.JPG


Three more clamps to cut and then I can move to the welding table.
clamp8.JPG


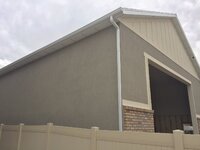
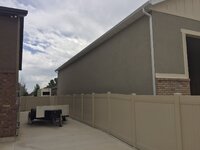
Just before closing up last night my neighbor's had completed their gutters and downspouts so I thought I'd shoot a couple of pictures. I think it turned out great and at least everything on my side of the fence is now complete. Upon talking to them last night they only have tape/mud on the sheetrock to complete, some plywood where they are installing pallet racking and then their garage door.
garage1.JPG

garage2.JPG

Thanks for looking.
 

LXCam

ALLIANCE MEMBER
Joined
Apr 23, 2013
Messages
19,204
Location
AZ
As always Mike, your projects are a winner!. And the neighbors shop looks great. I thought I remembered you saying they had planned on siding it with T111, thank gawd they didn't (if I recollect that correctly).
 
OP
Z

zmotorsports

ALLIANCE MEMBER
Joined
Oct 20, 2009
Messages
21,476
Location
Northern Utah
Nice work Mike! That plug is awesome!
Thanks Marc, I appreciate that.

As always Mike, your projects are a winner!. And the neighbors shop looks great. I thought I remembered you saying they had planned on siding it with T111, thank gawd they didn't (if I recollect that correctly).

Thank you Cam and thanks for continuing to check in on my projects.

As for the siding, yes, they mentioned putting up siding to me last year and I had to remind them what it states in the CC&R's for our subdivision. I think they were feeling me out on how I would react to siding. They were just one of the neighbors that were insistent on reminding me about the strict CC&R's when I started building my shop so kind of hypocritical if you ask me. Oh well, it's nearly done and it has turned out great and something I am proud to have next to our property. Even though we have no plans of selling, it shouldn't negatively affect the property value.
 
OP
Z

zmotorsports

ALLIANCE MEMBER
Joined
Oct 20, 2009
Messages
21,476
Location
Northern Utah
I was suffering from a head cold over the weekend so not much got done in the shop. However, just prior to being completely incapacitated, my son brought over a muffler from his mother-in-law's riding lawn mower that had broken. Evidently she hired someone to work on her riding mower last year and they did a half-assed job. They replaced the muffler but only bolted it on using the two manifold bolts and no other fasteners holding it in place so all of the weight was hanging on the manifold and the weld broke right in the HAZ.

muffler1.jpg

I clamped it in multiple places to hold everything rigid for welding while my son cut a small bracket out to mount using the other two mounting tabs so the muffler would be fully supported.
muffler2.JPG

Little jobs like that are kind of fun but I wished I would have felt better. I don't have any pictures of the completed and installed muffler but my son said it fit perfectly and was much better supported.

Thanks for looking.
 
OP
Z

zmotorsports

ALLIANCE MEMBER
Joined
Oct 20, 2009
Messages
21,476
Location
Northern Utah
Last week my wife and I took off for a few days of R&R and headed to Bryce National Park. It was a bit warmer than usual this time of year and a **** ton of people but all in all a great trip and everything ran perfectly. The evenings cooled down just enough to warrant getting out the fire pit and we were able to enjoy sitting around the fire for a couple of hours each night around dark.

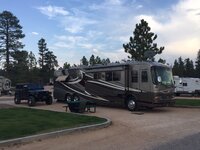
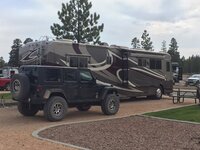
Our campsite at Ruby's Inn in their new lower section. This is the 3rd time we've stayed in this new section and although not up in the trees, I really like the wide and long sites. This year even the first couple of rows had grass to enjoy lounging on.
Bryce1.JPG

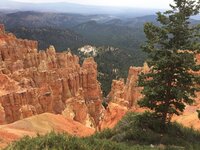
A few pictures of inside Bryce. We only spent one day inside of the park and the other days we were exploring some of our other favorite trails and sites around the Bryce NP area, which also include Cannonville, Tropic, Henrieville, Tropic Reservoir and Kodachrome Basin areas.
Bryce2.JPG


Bryce3.JPG

Bryce4.JPG

Bryce5.JPG

Tropic Reservoir.
Bryce6.JPG


Bryce7.JPG

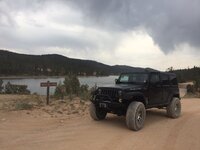
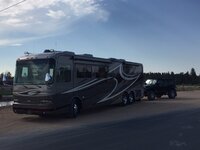
On the drive home we pulled off near a small pond to stretch our legs. There was a family of ducks playing on the pond that we watched for a bit and I thought I would snap a picture of the coach and Jeep before continuing on towards home.
Bryce8.JPG


Thanks for looking.
 
Last edited:

bigsteve2011

Well-known member
Joined
Jun 13, 2014
Messages
73
Location
Metro Detroit
My wife and I went to Bryce in November 2019 and it is by far my favorite place that I have been to.
If we both didn't have family in Michigan we would move out that way in a heartbeat.
Would also be sweet to have that nice of a Jeep out there too! (y)
 
OP
Z

zmotorsports

ALLIANCE MEMBER
Joined
Oct 20, 2009
Messages
21,476
Location
Northern Utah
I had a small machining project come through my shop door the other night from a local gentleman who is building a rock buggy. He is constructing a doubler transfer case from a NP203 and NP205. This is a common build or modification where people use the range box from a New Process 203 and the complete NP205 transfer case due to it being gear driven and a heavy duty cast iron case. The NP205 came with either an 80mm input bearing when it had a 10, 23 or 27 spline input or the larger 90mm input bearing which came with the 29, 31 or 32 splined input shaft. The smaller 80mm bores can be bored out to 90mm to accept the larger bearing and input shaft which is quite common. Several companies that build these boxes or modify them offer this service at a general machine shop rate but will also include shipping costs. This gentleman contacted me about boring out his case to accept the larger 90mm input bearing and he brought it by the other night and I was able to get it machined last night.

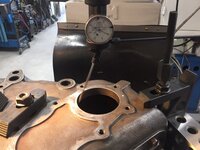
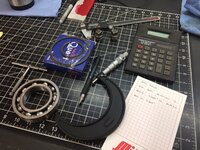
Taking some initial measurements of the bearing and determining a target diameter to bore the case to. The bearing measured 3.5425". For interference fits I generally use a .001" per inch of bore formula but where this didn't need to be a complete press fit and just needed to be snug I figured I would shoot for approx. .0005"-.0008" interference fit. This would give me a target bore of approx. 3.5417". I set my bore gauge to 3.5415" which would be .001" under the bearing diameter but I would try to come in on the high side of that by a few tenths.
np1.JPG

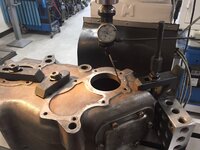
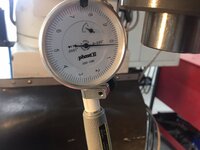
Setting up the case on the mill table. I used a center finder to get it close then swapped in my Blake coaxial tester to dial it in. I was able to get it to about a thou out.
np2.JPG


np3.JPG

Swapped over to my 3" Criterion boring head with my new Mesa insert attachment. It has been a while since I bored a precise hole so I took some preliminary measurements to get my feel back on my boring head.
np4.JPG

Landed at .0002" shy of my target. Perfect.
np5.JPG

The bearing required a slight tap to fully seat so a perfect fit for the application.
np6.JPG

Final notes as I tracked my numbers. Increasing by .050" at a time to get my feel back for my Criterion boring head. I was landing at approx. .0502" to .051" per pass. I am certain this has to do more with where I lined the marks up on the boring head vs. the boring bars actual accuracy.
np7.jpg


Thanks for looking.
 
Last edited:
To avoid these ads, REGISTER NOW!
OP
Z

zmotorsports

ALLIANCE MEMBER
Joined
Oct 20, 2009
Messages
21,476
Location
Northern Utah
Mike, I assume the case half was flat against the table? Great job!

I'll admit Ryan, my first response to this was "NOPE. I had a wrench lying under the case when I clamped it down.....here's your sign." Then I thought better of it, kind of.

Yes, I removed the plugs from the other side and ensured it was flat to sit against the mill table and the case is symmetrical in size so the bore is perpendicular to the spindle.

Thanks.
 

Bigblue&Goldie

Well-known member
Joined
Mar 12, 2009
Messages
10,732
Location
AZ
I'll admit Ryan, my first response to this was "NOPE. I had a wrench lying under the case when I clamped it down.....here's your sign." Then I thought better of it, kind of.

Yes, I removed the plugs from the other side and ensured it was flat to sit against the mill table and the case is symmetrical in size so the bore is perpendicular to the spindle.

Thanks.

Actually now that I think about it, the 205 case isn't split..... but you picked up what I was dropping! I couldn't recall what the opposing side looked like. I just saw a bunch of Teco clamps and was wondering if you swept the machined surface or were able to simply place it and clamp it.
 
OP
Z

zmotorsports

ALLIANCE MEMBER
Joined
Oct 20, 2009
Messages
21,476
Location
Northern Utah
I was able to put in some QST in the shop on Saturday as my wife had lunch plans with her sisters.

I started by servicing her Acura and then went to work polishing her headlights. I am embarrassed that I let them get as oxidized as I did before addressing them.

acura1.JPG

Driver's side was starting to oxidize but not as severely as the passenger's side. Here is the driver's side.
acura2.JPG

Passenger's side.
acura3.JPG

My 3M tools and supplies at the ready.
acura4.JPG

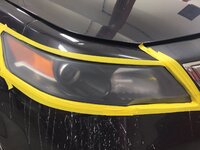
Masked around the perimeter to avoid scratching paint.
acura5.JPG

After hitting with 500-grit.
acura6.JPG

After 800-grit, just before going to the 1000 grit Trizac.
acura7.JPG

After 1000-grit, 3000-grit and first coat of polish.
acura8.JPG

After final coat of polish and unmasked. Fenders and hood also wiped down and ready for test drive.
acura11.JPG


Thanks for looking.
 
Last edited:
OP
Z

zmotorsports

ALLIANCE MEMBER
Joined
Oct 20, 2009
Messages
21,476
Location
Northern Utah
After parking the wife's Acura back in the house garage I decided to tackle a job that I have had on my white board for over a year and a half now, a cart for my tube roller. Up until now I have had it under my fabrication bench but it is a PITA to lift up from under the bench when needed so I find myself avoiding using it. I figured if it were more easily accessible I would use it more and actually move on to another project I want to complete.

I somewhat copied lis2323's tube roller cart from several years ago.

First order of business was to dig through my metal rack and locate some material. Using some 1-1/2"x .125" angle iron and 1.5" x .187" square tubing. The angle iron will be used for the base as well as the platform directly under the roller which it will bolt to. The square tube will be used for the spanners under the roller assembly and the ends of the base including the axle for the wheels.
tr1.JPG

After cutting some material to length and mocking up on fabrication table.
tr2.JPG

Drilling and chamfering 1/2" holes for mounting of the tube roller.
tr3.JPG

Angle iron and square tube mocked up under the roller to determine placement.
tr4.JPG

Located material to build the axle assembly. So far the only parts that I have had to purchase for this project were the two 6" wheels I purchased from my local Tractor Supply in April of 2020. I'm embarrassed to have put this project off as long as I have.
tr5.jpg

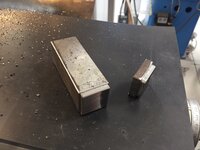
Machining a step in the square stock that will press into the square tube.
tr6.JPG

One cut off with the horizontal bandsaw at .5" in length and the other ready to be cut to size.
tr7.JPG

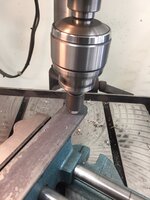
Both axle end pieces clamped in mill vise to machine to length and drill .5" hole for axle shafts.
tr8.JPG

Axle shaft holes drilled and chamfered.
tr9.JPG

Axle components ready to be welded.
tr10.jpg


Stay tuned for more progress.
 
OP
Z

zmotorsports

ALLIANCE MEMBER
Joined
Oct 20, 2009
Messages
21,476
Location
Northern Utah
Continuing on with my tube roller cart.

The 1/2"-13 x 2.5" bolts welded to the end caps.
tr11.JPG

Pressed into square tube for final welding.
tr12.JPG

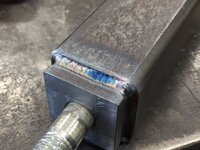
Axle TIG welded together.
tr13.JPG

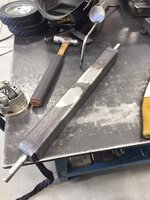
Axle completed and ready to be mocked back into position for the base.
tr14.JPG

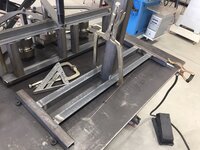
Cart base being welded together.
tr15.JPG

A couple of my welds.
tr16.JPG


tr17.JPG

tr18.JPG

Thanks for looking.
More pics to follow as I progress on the cart this week.
 

OutlawDrifter

Well-known member
Joined
Jan 20, 2015
Messages
3,898
Location
KS
Mike, we all have those projects that get put on the back burner. I've had all the components to do the AC in the '49 for a while now...about the same time frame as your project, maybe longer if I check some of the shipping dates on the components.

Nice progress so far, welds look great! A tubing roller is for sure something I would like to add to my shop.
 
OP
Z

zmotorsports

ALLIANCE MEMBER
Joined
Oct 20, 2009
Messages
21,476
Location
Northern Utah
Mike, we all have those projects that get put on the back burner. I've had all the components to do the AC in the '49 for a while now...about the same time frame as your project, maybe longer if I check some of the shipping dates on the components.

Nice progress so far, welds look great! A tubing roller is for sure something I would like to add to my shop.

Thanks Marc. It seems like there for a while when I first got into the new shop I was knocking these small projects out left and right. Lately they've slowed quite a bit and I've been having a hard time getting to them. I guess I need to re-commit myself to these.
 

Monza Harry

Well-known member
Joined
Dec 29, 2018
Messages
1,433
Location
Windsor ON
Mike if yellowed headlights bother that much I can send you mine, they look like they've been painted a pretty [NOT] pale yellow! Can I have them back for 5:30 AM tomorrow morning for work. I can send them out by midnight. LOL!!!!
That is a seriously nice looking roller you have there! What Brand can I ask? I'd like to add that I make inserts for feet on my things the same way you did your Axle mounts, I'm surprised you didn't just use axle bolts though, instead of welding those Hex Cap Screws in. Share your thoughts? Harry
 
OP
Z

zmotorsports

ALLIANCE MEMBER
Joined
Oct 20, 2009
Messages
21,476
Location
Northern Utah
Mike if yellowed headlights bother that much I can send you mine, they look like they've been painted a pretty [NOT] pale yellow! Can I have them back for 5:30 AM tomorrow morning for work. I can send them out by midnight. LOL!!!!
That is a seriously nice looking roller you have there! What Brand can I ask? I'd like to add that I make inserts for feet on my things the same way you did your Axle mounts, I'm surprised you didn't just use axle bolts though, instead of welding those Hex Cap Screws in. Share your thoughts? Harry

Yeah, yellowed headlights are one of my pet peeves, although I think I have so many it's hard to tell them apart any more. I feel they are a safety concern and I want my wife to have a safe and reliable car to drive at any time and not have to worry about it nor strain to see the road.

The tube roller I have is a Pro Tools (Model 3 I think). I purchased it from Trick Tools about ten or so years ago when I was building sand drag chassis and wanted to incorporate some rolled tubes rather than just bent tubes into my son's new drag bike. I've only used it for a few other projects and really like it but keeping it under the fabrication table makes it less than convenient for quick jobs so I find myself not using it unless for a larger job where I can justify digging it out. I hope having it on a cart that is more accessible will change that.

As for axle bolts, yes, that was a possibility but I just used what I had on hand at the time and after digging through my supply I found these two Grade 8 hex bolts that will work fine.


Mike, wrap those freshly polished clear headlights with a PPF ( paint protection film) and never touch them again. I put some precut expel brand on our 07’ Denali XL. After 190k miles I pealed it off before selling to reveal factory new headlamp housings. ALL of our cars have it now.( front end paint coverage too)

Yes, that is an option. I've cleared them as well but with our f**ked up roads around here with all of the construction they chip so easily I started just running a polisher around them every couple of years and calling it good. This time I neglected them a bit and had to get after them with sandpaper before polish.

Thanks for the comments guys and I appreciate you stopping by and checking out my various projects.
 
OP
Z

zmotorsports

ALLIANCE MEMBER
Joined
Oct 20, 2009
Messages
21,476
Location
Northern Utah
Nice welds

I wish I had that skill

Thank you. I never seem to be happy with my welds and always wish they were better. I feel they are solid and I have done enough destructive testing to know they are strong and I'm getting good penetration but I am never really pleased with the spacing and consistency. Welding is definitely a skill that requires a lot of practice and I don't seem to weld enough to really get as good as I want.

Thank you for checking out my projects.
 

Offcenter12

Well-known member
Joined
Feb 3, 2018
Messages
151
Location
Seattle
Wow! Between the Bryce Canyon photos and your level of craftsmanship examples I'm awestruck! Very nice all around. Glad to see I'm not the only one who writes everything down on those industrial tablets. Problem is when I discover one buried underneath whatever else accumulates in the garage I've forgotten what the notes were for. :unsure: Thank you for posting!

John
 
OP
Z

zmotorsports

ALLIANCE MEMBER
Joined
Oct 20, 2009
Messages
21,476
Location
Northern Utah
Wow! Between the Bryce Canyon photos and your level of craftsmanship examples I'm awestruck! Very nice all around. Glad to see I'm not the only one who writes everything down on those industrial tablets. Problem is when I discover one buried underneath whatever else accumulates in the garage I've forgotten what the notes were for. :unsure: Thank you for posting!

John

Thank you for the comments and for following along. I used to have many more of those graph tablets but the industrial supply/bearing house that I got them from is long gone and the supply house I use now doesn't provide them for their customers.

I have also found that I like to use the graph style journals for drawing and/or designing projects, but I use that more for projects that I may have to duplicate not the one-off jobs that may come through the door.
 
To avoid these ads, REGISTER NOW!
Top Bottom