To avoid these ads, REGISTER NOW!

ZMotorsports Shop Projects 2.0

OP
Z

zmotorsports

ALLIANCE MEMBER
Joined
Oct 20, 2009
Messages
21,497
Location
Northern Utah
Saturday I completed the production run of bushings for the client. I really lost my *** on this job however. I bid it at about an hour and a half plus materials. Ended up taking me 4 hours to machine 16 bushings, not including the night and a half I spent tweaking the lathe into tolerance. I generally don't do production runs of anything and just stick to the onesy-twosy items but I thought it would be easy money and I wanted to work on consistency. Oh well, I guess I have to look at it as a learning experience for the next one.


At least once I got going again on the bushings I knew the lathe was spot on and had more confidence in the outcome of each operation. So there is that.
bush1.JPG

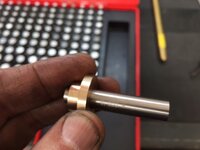
Parting off. I left them about .010" long so I could flip them around in a collet for the second operation and face to length but the parting actually produced a fairly decent finish.
bush2.JPG


The spec's called for a .400" bore.
bush3.jpg


And the .401" pin gage does not fit.
bush4.jpg

Making progress.
bush5.jpg


Collet chuck installed and the second operation being performed on all bushings to face to length and deburr the outer edge and bore.
bush6.JPG

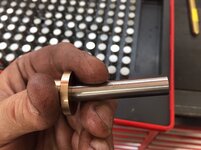
Seventeen bushings completed. The client requested a total of 16 but I had cut one just a few thousandths too short so I made up another one and I'll give him the seventeenth one in case he can use it as well.
bush7.JPG


Lastly cleaned up the lathe so it's ready for the next job, whatever that is.
bush8.JPG

Thanks for looking.
 
To avoid these ads, REGISTER NOW!
OP
Z

zmotorsports

ALLIANCE MEMBER
Joined
Oct 20, 2009
Messages
21,497
Location
Northern Utah
Yesterday morning after the wife and I returned from breakfast I went out to the shop and serviced the truck. I had this work scheduled for Saturday but that all changed with the lathe and bushing dilemma earlier in the week. I generally try not to work on Sunday's but in order to get my tasks completed that I have scheduled for this week I needed the truck marked off the white board.

truck1.JPG


Oil and filters used for the service.
truck2.JPG


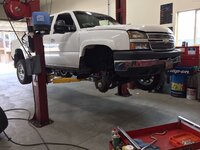
Tires rotated other than the passenger's front while I replace the fuel filter. Oil has been drained and suspension greased.
truck3.JPG

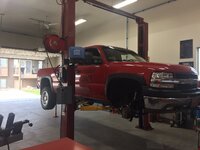
Checking it over after completion and road test. Also took a few minutes and cleaned the exhaust tip that had some road tar on it and was looking quite nasty.
truck4.JPG


Thanks for looking.
 
OP
Z

zmotorsports

ALLIANCE MEMBER
Joined
Oct 20, 2009
Messages
21,497
Location
Northern Utah
Yesterday upon returning home from work I ran around the front lawn as my son racked his 2002 Duramax so he could replace his front unit bearings. He detected a small amount of play last LOF service and then last Thursday evening when he did another LOF service he noticed that the wear had increased slightly. I picked up a couple of new unit bearings for him on Friday and last night he came over to replace them.

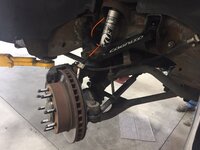
Truck racked and the front tires/wheels removed.
dmax1.JPG

Passenger side brake caliper removed and supported with an S-hook. Rotor removed and the four unit bearing bolts have been removed.
dmax2.JPG

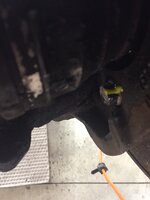
Passenger side completed. Unit bearings torqued to 133 ft/lbs, axle nut torqued to 177 ft/lbs and the brake caliper bracket to the knuckle torqued to 221 ft/lbs. Also ABS sensor wiring is routed in OEM location back to the connector on top of the frame rail.
dmax3.JPG

Driver's side coming apart next in the same fashion.
dmax4.JPG

Unit bearing bore and axle splines cleaned with stainless steel wire brush and a coating of Fluid Film applied to the bore prior to installation of the unit bearing.
dmax5.JPG

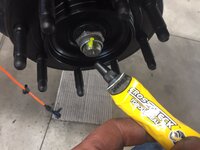
After the axle nut is torqued to 177 ft/lbs a small amount of Torque Seal is applied as an indicator.
dmax6.JPG

I also apply a small amount to the back of the unit bearing fasteners as well as brake mounting fasteners.
dmax7.jpg

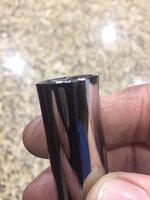
I noticed as we were torquing the unit bearings to spec that my socket slipped off. At first I thought I rounded the head of the fastener so I grabbed another socket from my toolbox and it was fine. Upon closer inspection of the Carlyle 15mm deep chrome 1/2" drive socket, I noticed it had broken and the end had flared. This is the first Carlyle tool that I have had fail on me. Kind of disappointing actually.
dmax8.JPG

dmax9.JPG

dmax10.JPG


Thanks for looking.
 
OP
Z

zmotorsports

ALLIANCE MEMBER
Joined
Oct 20, 2009
Messages
21,497
Location
Northern Utah
After my son left and I cleaned up the shop my wife arrived home to inform me that she had a rock chip in her new windshield in her Acura TL that we just replaced about two weeks ago. Son-of-a-b**ch. I am about sick of fixing freakin' rock chips from all of the piss poor roads and construction in our area.
acura1.JPG

acura2.JPG

Sometimes I feel as though I simply cannot get on top of my own vehicle's maintenance as it is something different each day.
 

Bodj Built

Well-known member
Joined
Feb 3, 2016
Messages
1,167
Location
Moorpark, CA
Mike, your son has a BEAUTIFUL duramax! I love the cat-eye trucks, but the early 2000s trucks takes the cake. While I know the unit hubs are weaker, I do love how simple and not messy they are to change out
 

gorilla

Well-known member
Joined
Dec 13, 2007
Messages
1,657
Mike tell me about torque seal? Is it like the yellow dots that use to be all over bolts on import motorcycles year ago? Is it to indicate that a fastener has moved?
 
OP
Z

zmotorsports

ALLIANCE MEMBER
Joined
Oct 20, 2009
Messages
21,497
Location
Northern Utah
Mike, your son has a BEAUTIFUL duramax! I love the cat-eye trucks, but the early 2000s trucks takes the cake. While I know the unit hubs are weaker, I do love how simple and not messy they are to change out

Thanks. You know, when GM first introduced the unit bearings into their 1500/2500/3500 trucks in 1988 I was PISSED. I couldn't believe GM could do that to me because I swore they were a cheap and weak alternative to the good ole' dual tapered bearing style. I even (said with tongue in cheek) switched brands for a while and went to that four letter brand.

When that didn't pan out and I couldn't drive one of those four letter vehicles any longer I went back to GM but an older solid axle design 1986 Chevrolet Suburban and commenced building it into the way a truck should have been built. ;)

After a few years of wrenching on these said unit bearing trucks and seeing as how well they were holding up and even seeing some desert racers started to use unit bearings I began to change my way of thinking. I realized that when these GM trucks were coming into my shop for repairs that the unit bearings were seldom, if ever, the issue with why they were in the shop and thought maybe I judged GM too harshly.

Now several decades later I love the design and can attest that they work well. My 2006 Duramax with 36" tires and over 100k miles now are still rolling on the OEM unit bearings. Besides most everything else on the road these days is also unit bearings so I guess I don't know **** after all.:unsure:
 
OP
Z

zmotorsports

ALLIANCE MEMBER
Joined
Oct 20, 2009
Messages
21,497
Location
Northern Utah
Mike tell me about torque seal? Is it like the yellow dots that use to be all over bolts on import motorcycles year ago? Is it to indicate that a fastener has moved?

Yes, this is similar to many motorcycle manufacturers that used it on suspension and braking components years ago. The one I use is Dykem Torque Seal or Torque Check (depends on how it's labeled) is more like a thin fast drying and complete drying toothpaste. I purchase them from McMaster Carr usually. When applied over a fastener it dries and if the fastener ever moves it cracks and breaks the seal giving a visual indication of the movement.

I generally use the Torque Seal on brake components and other items that are more critical whereas for larger fasteners such as suspension bolts on my Jeep I will use a paint pen like the Markal Paint Pens with the soft tip. These work exceptionally well for marking suspension bolts, steering bolts as they indicate the clocked position of a head of a fastener in relation to the bracket. I suppose you could use either product for either application but for some reason I use them for more specific applications.

We used them a lot on our race cars, snowmobiles, drag bikes and sand rails especially and then carried that over into our Jeeps. I don't use it on most of our daily drivers with the exception of brake components.
 

Bigblue&Goldie

Well-known member
Joined
Mar 12, 2009
Messages
10,746
Location
AZ
We used them a lot on our race cars, snowmobiles, drag bikes and sand rails especially and then carried that over into our Jeeps. I don't use it on most of our daily drivers with the exception of brake components.

We use orange Dykem Cross Check on our race cars also. It really helps to quickly identify issues with steering/suspension. The other benefit is it helps retain a nut on the threads if it comes loose. Back in the day it was common to use Loctite and then smear a dab of silicone on the threads, but most have moved to Cross Check as it does the same thing, but with the benefit of easily identifying a loose piece of hardware.
 

mmsheb

Well-known member
Joined
Mar 30, 2008
Messages
365
Location
Wisconsin
Do you use it in place of Loctite? Does it get applied to the threads before putting on the nut? Or only after the hardware is in place to identify when if it moves? Thanks. Mike
 
OP
Z

zmotorsports

ALLIANCE MEMBER
Joined
Oct 20, 2009
Messages
21,497
Location
Northern Utah
Do you use it in place of Loctite? Does it get applied to the threads before putting on the nut? Or only after the hardware is in place to identify when if it moves? Thanks. Mike

It is applied after the fastener is torqued to specification as an indicator of fastener movement and not in lieu of any thread locking chemical(s).
 

TimeWarpF100

Well-known member
Joined
Aug 21, 2010
Messages
6,784
Location
not here
Saturday I completed the production run of bushings for the client. I really lost my *** on this job however. I bid it at about an hour and a half plus materials. Ended up taking me 4 hours to machine 16 bushings, not including the night and a half I spent tweaking the lathe into tolerance. I generally don't do production runs of anything and just stick to the onesy-twosy items but I thought it would be easy money and I wanted to work on consistency. Oh well, I guess I have to look at it as a learning experience for the next one.


At least once I got going again on the bushings I knew the lathe was spot on and had more confidence in the outcome of each operation. So there is that.
bush1.JPG

Parting off. I left them about .010" long so I could flip them around in a collet for the second operation and face to length but the parting actually produced a fairly decent finish.
bush2.JPG


The spec's called for a .400" bore.
bush3.jpg


And the .401" pin gage does not fit.
bush4.jpg

Making progress.
bush5.jpg


Collet chuck installed and the second operation being performed on all bushings to face to length and deburr the outer edge and bore.
bush6.JPG

Seventeen bushings completed. The client requested a total of 16 but I had cut one just a few thousandths too short so I made up another one and I'll give him the seventeenth one in case he can use it as well.
bush7.JPG


Lastly cleaned up the lathe so it's ready for the next job, whatever that is.
bush8.JPG

Thanks for looking.
Nice little project! I would love to just do smaller projects vs the LARGE ones for my retirement years.
 

aka Larry

Well-known member
Joined
May 2, 2012
Messages
8,103
Location
Eastern, NC
Thanks. You know, when GM first introduced the unit bearings into their 1500/2500/3500 trucks in 1988 I was PISSED. I couldn't believe GM could do that to me because I swore they were a cheap and weak alternative to the good ole' dual tapered bearing style. I even (said with tongue in cheek) switched brands for a while and went to that four letter brand.

When that didn't pan out and I couldn't drive one of those four letter vehicles any longer I went back to GM but an older solid axle design 1986 Chevrolet Suburban and commenced building it into the way a truck should have been built. ;)

After a few years of wrenching on these said unit bearing trucks and seeing as how well they were holding up and even seeing some desert racers started to use unit bearings I began to change my way of thinking. I realized that when these GM trucks were coming into my shop for repairs that the unit bearings were seldom, if ever, the issue with why they were in the shop and thought maybe I judged GM too harshly.

Now several decades later I love the design and can attest that they work well. My 2006 Duramax with 36" tires and over 100k miles now are still rolling on the OEM unit bearings. Besides most everything else on the road these days is also unit bearings so I guess I don't know **** after all.:unsure:

Mike, I have no experience with unit bearings on a GM truck, but I can say that they **** on a track driven car. Lots of problems with them on the rear of the C5 Vettes. My experience was on the front of my '98 Cavalier Z-24. In street trim they did OK, but add in ANY negative camber and they would eat themselves in relatively short order. The OEMs were FAR better than ANY aftermarket versions though. I would go to the salvage yard to stock up because an OEM with 80K on it was much better than a brand new Timken version!
 
OP
Z

zmotorsports

ALLIANCE MEMBER
Joined
Oct 20, 2009
Messages
21,497
Location
Northern Utah
Nice little project! I would love to just do smaller projects vs the LARGE ones for my retirement years.

Thanks. I am to the point now that I would like to continue with small projects for people and keep the larger projects my own. I do have some larger projects that I want to get to but I think I'll save them for retirement.
 
OP
Z

zmotorsports

ALLIANCE MEMBER
Joined
Oct 20, 2009
Messages
21,497
Location
Northern Utah
Mike, I have no experience with unit bearings on a GM truck, but I can say that they **** on a track driven car. Lots of problems with them on the rear of the C5 Vettes. My experience was on the front of my '98 Cavalier Z-24. In street trim they did OK, but add in ANY negative camber and they would eat themselves in relatively short order. The OEMs were FAR better than ANY aftermarket versions though. I would go to the salvage yard to stock up because an OEM with 80K on it was much better than a brand new Timken version!

Thanks for the info as I don't really have any experience on the track with unit bearings Vincent. My unit bearing experience has been solely with OE level trim and the light duty trucks.

From my racing days I was using the old tried and true dual tapered bearing style wheel bearings and never really had an issue. However, that was not track racing it was straight line racing. :cool:
 
OP
Z

zmotorsports

ALLIANCE MEMBER
Joined
Oct 20, 2009
Messages
21,497
Location
Northern Utah
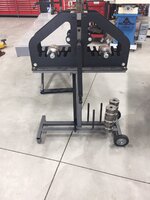
Last night I was able to finish up the cart for my tube roller as it's been sitting incomplete on the fabrication table for a couple of weeks now as I've addressed other priorities.

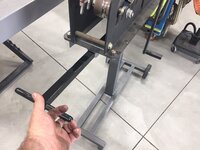
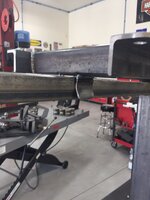
First items was to fabricate a guide for the handle. I took a piece of 1.5" square tubing, trimmed it to length and then cut one side off and flared the edges to guide the handle into the center as it is raised.
bender1.JPG

bender2.JPG

I noticed that the handle would slightly catch when raising so I took it to the disc sander and put a radius on the end.
bender3.jpg

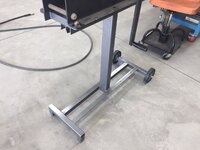
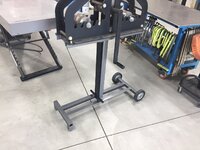
After the paint dried I bolted the tube roller to the cart permanently.
bender4.JPG


bender5.JPG

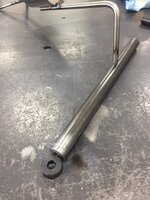
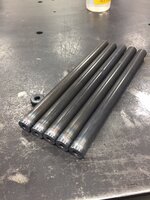
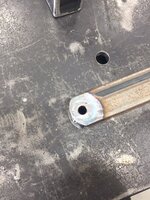
While I was waiting for the paint to dry I began machining the bungs to be used to bolt the die pegs to the base of the cart. These have a small step machined into them to fit into .750" tubing and accept a 1/4" socket head fastener.
bender6.JPG

One down, four more to go.
bender7.jpg

This should work.
bender8.jpg

Handle paint dried and installed as well as the handles and grips installed onto the handle.
bender9.JPG

bender10.JPG

More pictures to follow of the completion.

Thanks for looking.
 
OP
Z

zmotorsports

ALLIANCE MEMBER
Joined
Oct 20, 2009
Messages
21,497
Location
Northern Utah
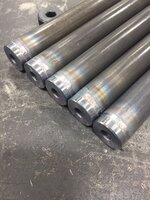
Prepping the bungs to be welded into the tubing. Scotchbrited the ends of the tubing and wiped everything down with acetone.
bender11.JPG

Slid up against a stop placed in the table and the 3rd hand holding it in place while also providing a good ground.
bender12.JPG

The 5 pegs for the dies completed.
bender13.JPG

bender14.JPG

bender15.JPG

Installed as a test fit.
bender16.JPG

Should work great and give me a little room to expand my die selection. Currently I have 3/4", 7/8" and 1" dies is all.
bender17.JPG


Now just need to remove the die pegs, paint them black to match the handle and this project is complete.

I've only been wanting to build a cart for this tube roller for about 5 or 6 years now so there obviously was no rush. :rolleyes:

Thanks for looking.
Mike
 
To avoid these ads, REGISTER NOW!
OP
Z

zmotorsports

ALLIANCE MEMBER
Joined
Oct 20, 2009
Messages
21,497
Location
Northern Utah
Very nice! I like the folding handle. I think some plastic plugs to cap off the front leg tube would really finish it off nice and keep the spiders from building webs inside - plugs

Thanks. I measured last night and have some plastic plugs/caps in my cart on McMaster Carr for this very reason, as well as some round plugs for the vertical die pegs. Hate to order just those couple of items from McMaster Carr so they're sitting there in my cart for when I place my next order.

Thanks for the comments.
 

MadeByMiller

Well-known member
Joined
Dec 29, 2018
Messages
1,230
Location
Rapid City, SD
Thanks. I measured last night and have some plastic plugs/caps in my cart on McMaster Carr for this very reason, as well as some round plugs for the vertical die pegs. Hate to order just those couple of items from McMaster Carr so they're sitting there in my cart for when I place my next order.

Thanks for the comments.
Oh of course, makes sense. I've been lurking for a long time on the forums, and your thread is always my favorite to read. I have a similar affliction when it comes to the details, however I'm not nearly as productive as you are. Thanks for the inspiration.
 
OP
Z

zmotorsports

ALLIANCE MEMBER
Joined
Oct 20, 2009
Messages
21,497
Location
Northern Utah
Oh of course, makes sense. I've been lurking for a long time on the forums, and your thread is always my favorite to read. I have a similar affliction when it comes to the details, however I'm not nearly as productive as you are. Thanks for the inspiration.

Thank you for the kind words. I'm glad you enjoy following along on my projects.
 

WoodsTruck

Well-known member
Joined
Jan 12, 2013
Messages
1,029
How about a small rubber bumper on the bottom of the handle so it doesn't crash into the main post chipping paint?
 

Bigblue&Goldie

Well-known member
Joined
Mar 12, 2009
Messages
10,746
Location
AZ
When that didn't pan out and I couldn't drive one of those four letter vehicles any longer I went back to GM but an older solid axle design 1986 Chevrolet Suburban and commenced building it into the way a truck should have been built. ;)

After a few years of wrenching on these said unit bearing trucks and seeing as how well they were holding up and even seeing some desert racers started to use unit bearings I began to change my way of thinking. I realized that when these GM trucks were coming into my shop for repairs that the unit bearings were seldom, if ever, the issue with why they were in the shop and thought maybe I judged GM too harshly.

Now several decades later I love the design and can attest that they work well. My 2006 Duramax with 36" tires and over 100k miles now are still rolling on the OEM unit bearings. Besides most everything else on the road these days is also unit bearings so I guess I don't know **** after all.:unsure:

I would've given my left nut for unit bearings today.....

I jumped in my old 1999 F-250 with 137k miles and headed to Yuma, AZ from Phoenix. Was literally about to pull off on my exit after 3.5hrs and my truck lurched right. I thought maybe I hit a rut in the asphalt from the heavy semi wear and tear. Then I started to heal a squeel. I was pissed because I thought it was coming from the new belt/tensioner/idler/compressor pulley that I replaced the other day prevenatively. Well, it turns out it was a damn conventional 2wd wheel bearing!

Luckily, I was at my storage lot at this point, so I was able to jack the truck up, pull the wheel, and assess the situation. I remembered I had my racing pit box in my Weatherguard box, so I knew I should have every tool to do a proper repair. Well....I pulled the dust cap and the outer part of the roller cage fell out with it! The bearing was toast.

I jumped in my employees truck and went and got all the parts and supplies needed (O'Reilly had everything, Napa had nothing). Pulled the cotter pin, which actually came out nice and easy. Went to remove the 27mm spindle nut with an 18" breaker bar and it was seized solid! "No problem".....I had an M18 grinder and a cutting disc! I cut enough to where I should've been able to chisel the nut off, but it wasn't budging! Cut more, and more, and more. Finally, I was able to get the nut off (see pic of remnants).

Cool, I damaged the threads, but should've been able to clean them up with a file. Went to yank the rotor off and the washers weren't budging! MOTHER F'r!!!!! I then went to town with the cutting disc, drill, and chisel in an attempt to split the washers. After 3 ****** *** Milwaukee bits and a storm rolling in on the horizon, I threw in the towel.

I realized if I did get those washers off there was a strong chance there was going to be more damage that I wouldn't be able to overcome. So here I sit in a crappy *** hotel with it storming like crazy outside. My uncle is bringing an equipment trailer to tow me home in the morning.

So......conventional vs unit bearings...... 2 caliper bolts, 4 unit bearing bolts, and I'd be back on the road. My last 4wd Super Duty had the unit bearings go 175k miles. I've only had this current one for about 15k miles, so I don't know if/when they've been replaced, or the quality of the parts? The truck was babied by an old guy and I had a stack of service records that came with it. I will say, that everything looked good 2 days ago when I was looking over the truck and contemplating doing the brakes as prevenative maintenance in the coming weeks......the irony.

In summary, I'll take unit bearings all day every day. Sorry for the long rant, but this thread came to mind. Believe it or not, I was actually very lucky as I was supposed to have been pulling about 10k lbs yesterday up north with my 2 daughters in the truck and I bailed on the trip.

Also....here's a pic of when my buddy's Chevy lost a unit bearing, so Mike can't give me too much **** for my Ford shitting the bed!
 

Attachments

  • 20210730_162703.jpg
    20210730_162703.jpg
    475.2 KB · Views: 106
  • 20201013_191621.jpg
    20201013_191621.jpg
    136.9 KB · Views: 108
  • 20210730_162705.jpg
    20210730_162705.jpg
    231.9 KB · Views: 107
Last edited:

WoodsTruck

Well-known member
Joined
Jan 12, 2013
Messages
1,029
I had just started my job in '99 and my boss was supposed to go to Canada for a week long trip. When he got back we had a project about 50 miles from the shop. We were to take the 2WD company truck. I noticed the front tire didn't sit quite right so after convincing the boss we would use my truck until we got back, we got our job done and returned. The axle nut had backed off and the only thing holding the front end together was the disc brake caliper bracket. Once it dawned on him that he had driven back from Canada that we he was a bit more appreciative of me calling BS on using the truck until it was fixed. Called and got parts from our fleet mechanic and I put it back together. Spooky stuff.
 

Bigblue&Goldie

Well-known member
Joined
Mar 12, 2009
Messages
10,746
Location
AZ
Thanks Cam, luckily we got it home this morning.....it pays having an uncle that is easily bribed by gas station pizza and a couple of Coors Lights! He's been in A LOT of sticky situations in his life, so every time I'm in a bind he's my go to. He's a contractor and has been burning the candle from both ends lately, so he said a good road trip was what he needed.
 
OP
Z

zmotorsports

ALLIANCE MEMBER
Joined
Oct 20, 2009
Messages
21,497
Location
Northern Utah
I apologize, I have a very large picture dump that will take the next several posts as I have had a long weekend of work on the Jeep. I had some routine maintenance items to do as well as a small upgrade that ended up creating a LOT of extra work that I wasn't planning on.

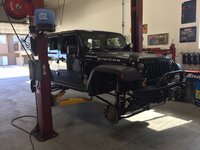
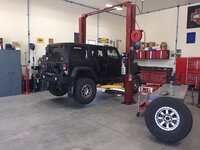
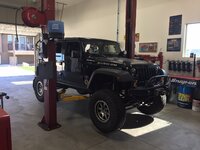
Jeep racked and ready to pull tires/wheels on Saturday morning.
jp1.JPG


jp2.JPG

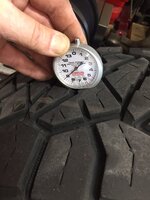
These 37" Nitto's are wearing quite well. I now have 36,500 driven miles on them and another approx. 13k flat-towed miles behind our coach and they still have between 8/32" and 9/32" with the spare that is being rotated in having slightly more.
jp3.JPG

jp4.JPG

jp5.JPG

jp6.JPG

jp7.JPG

jp8.JPG

Here is where the modifications started as a result of what I had going on in my head. I have been running 13" limiting straps at each rear corner for the past 4 or 5 years now ever since I installed my Fox 2.0 Performance Series shocks. These shocks have about a 10.6" travel and my shocks had approx. 1.5" more travel than I have been currently running with the 13" limiting straps. I moved things about with bumpstops when I went to the 37" tires after the LS swap so now I wanted to take full advantage of the entire shock and seeing as how I had to remove the shocks to rebuild them as part of my routine maintenance, I figured now is a good a time as any to get a bit more travel out of the rear axle. I ordered some 15" KarTek limiting straps which I figured would give me what I needed after they stretch a bit.

In anticipation of this extra travel I wanted to relocate my rear brake lines that run outside of the frame rails on Jeep JK's. I have seen people catch these brake lines with their rear sway bars and tear up the brake lines on the trail so I knowing I would have a bit more travel now I wanted to address this in the shop before I had an issue on the trail. This was part of the planned maintenance I knew I would be addressing at this time so no surprise here.

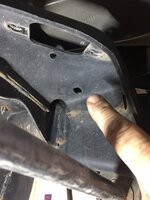
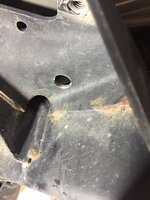
You can see how the OEM chose to run the rigid brake lines along the outside of the frame rail to a mounting bracket where the flexible brake line attaches. This 1" bracket and bulkhead fitting cause the brake lines to stand proud of the frame about 1/2" creating a perfect opportunity for it to get snagged on something. I haven't had any issues and upon inspecting during full stuff and droop with the rear axle I measured clearing by about 3/8" at the tightest location.
jp9.JPGjp10.JPG


More pics to follow.
 
Last edited:
OP
Z

zmotorsports

ALLIANCE MEMBER
Joined
Oct 20, 2009
Messages
21,497
Location
Northern Utah
Continuing on....

Upon removing the rear shocks here is where I wanted to relocate the brake bulkhead fitting to. This will be inboard of the frame rail and be fully protected from anything that could potentially catch on the brake lines. This hole needed to be enlarged to 5/8" for the bulkhead fitting.
jp11.JPG

A Unibit was the best option for enlarging this oblong shaped hole.
j12.JPG

Hole enlarged and ready to be deburred in preparation for some paint.
jp13.JPG

A view of the enlarged hole from the top, between the body and frame. This is also after applying some Eastwood epoxy chassis paint.
jp14.JPG

Bulkhead fitting in place with keeper. Brake fitting connected and line straightened to remain tucked inboard of the outside face of the frame but above the top of the frame.
jp15.JPG

jp16.JPG


This was the catalyst for the brake line modification. The longer limiting straps for the rear axle.
jp17.jpg

Here the passenger's side limiting strap is installed as well as the OEM brake line keeper drilled and installed into the top of the frame rail. This will prevent any vibrations of the brake line and thus eliminate the possibility of fatigue cracks at the fittings. If you looks to about the 10:00 position from the upper limiting strap bolt you can see the OEM brake line clip/keeper.
jp18.JPG

jp19.JPG

Driver's side completed in the same manner. This now gives me a full 10" of suspension travel in the rear of my Jeep.
jp20.JPG


More posts and pictures to follow.....
 
Last edited:
OP
Z

zmotorsports

ALLIANCE MEMBER
Joined
Oct 20, 2009
Messages
21,497
Location
Northern Utah
Continuing on......

Here you can see the underside of the driver's side rear shock mount where the flexible brake line now connects to the rigid brake line.
jp21.JPG

Here is the passenger's side. Also notice there is still plenty of slack in the rear differential vent line.
jp22.JPG


Now THIS is where the project took a turn that I hadn't planned on but had to make a decision on how to move forward.

Upon now having more droop from the longer limiting straps, I test fit the shocks back into location and noticed the rear axle was now drooped out about a half inch more than I have shock travel.:tantrum2:

I thought I had planned for each contingency and measured more than enough times. However, I think the limiting straps stretched a bit more than the 1/2" I had planned on. Now what to do???????

I could either put the shorter limiting straps back on and go about my day and have the same travel I had prior, which was a decent amount of travel, OR, I could take full advantage of a bit more travel and relocate my lower shock mounts further upwards. By moving the lower shock mounts upwards about an inch I could accomplish two things. First, I would be able to take full advantage of the longer limiting straps and end up having a full 10 inches of rear travel which is about the total travel limitations of the rear shocks. Secondly, by moving the shock mounts upwards would allow me to trim about an inch off of the bottom of the lower control arm mounting bracket giving me more clearance and less chance of getting it hung up on rocks. I have made contact with these lower control arm mounts on occasion but any additional clearance would definitely be beneficial.
jp23.JPG

Well, by looking at this pictures you can see what my decision was. Yep, cut the lower shock mounts off and move them up. However, even being as careful as possible to just cut the welds, this made the mount too shallow and the body of the shock eyelet now contacted the lower control arm mount and prevented the bolt to be installed properly. To correct this I would have to fabricate new shock mounts.
jp24.JPG

After mocking up some cardboard templates I began to cut some 3/16" steel plate for the mounts.
jp25.JPG

This should work to allow enough clearance to allow the shock eyelet to avoid contact with the mount as well as allow about an inch of bracket to be trimmed off.
jp26.JPG

Shock mounts welded in place.
jp27.JPG

Lower control arm trimmed and axle painted.
jp28.JPG


jp29.JPG


jp30.JPG


Still more to follow.......
 
Last edited:
To avoid these ads, REGISTER NOW!
Top Bottom