To avoid these ads, REGISTER NOW!

Between 265 & 485 SQ/FT Nick's Two-Car Detached Vdub Garage

Workspaces sized between 265 and 485 squarefeet.
OP
N

nicholam77

Well-known member
Joined
Dec 18, 2016
Messages
2,674
Location
Minneapolis, MN
No new tangible projects have been started, but I have a few things on the horizon.

One is my wife convinced me to do our kitchen counters. I've somewhat come to terms with the fact that we'll be in this house for a bit, so might as well make it the way we want it I guess. Measure guy comes this Tuesday.

To go with that, I have a few kitchen enhancement woodworking projects in mind... namely silverware drawer organizers and a wine bottle rack.


Second, I can feel Spring fast-approaching, and am trying to solidify my plans for the GTI. I keep wrestling with the overall cost, and which ECU tune to go with if I pull the trigger. It's hard to shop on paper for that sort of thing, I wish I could test drive them all haha.

I was leaning towards Unitronic because they are more timing-advance based instead of boost, and I thought long term maybe less boost would be better for the turbo, but I posted about it on GolfMk7 forums and everyone said Unitronic is weak and I'll regret it and now I'm second guessing.

My 2nd runner up was EQT via Cobb Accessport. It's more aggressive but apparently smooth and quality tune, even though they are a newer option.

Last up would be APR, maybe their low-torque file, since they've been in the game a long time and I can find a dealer near me. But I'm probably still thinking Unitronic or EQT (very different) just on account of being able to flash at home.

Aside from a tune itself, I need to price out parts and labor for potential clutch replacement.

And... I'm also thinking about replacing my stock struts and shocks with Bilsteins because they are failing after being on the lowering springs for 5 years. All this would really add up to be $$$ so I'm thinking I would attempt the suspension install myself.


Third, I've been continuing to refine the Hubitat and smart home code. The latest thing I've added is an integration for Roku. It can tell if it's playing or paused, what app is open, search for media, etc.

Currently I'm just using it to pause the Sonos in the kitchen when the Roku starts playing, and resume Sonos when the Roku gets paused. It's a constant battle in our house between me wanting to listen to music and my wife or kids wanting to watch TV, so often both things are playing at once until someone intervenes. This automation should help sort that out and make it a bit more mindless to switch between the two.


And lastly, I have a lot of garage projects in mind for when it finally warms up, including paint, replacing trim, replacing the door, fixing the insulation, painting the shed, building a Systainer "Sys-Port" storage cabinet, a french cleat system, etc.

That's a lot of stuff, but just a preview of some of the things I've been thinking about in the background.

🍻
 
To avoid these ads, REGISTER NOW!

bj383ss

Well-known member
Joined
Sep 29, 2011
Messages
3,166
Location
TX
Looking forward to all the projects Nick. My advice on the car. Go with the one that is the most reliable. It is your daily driver and you don't want it to be down. (gets down off of soapbox) On the shocks I highly recommend Bilstein's. The best $400 I have ever spent on a car. I don't know much about your car but I assume the front is struts and the rear? You will need to rent the tool for the struts. It's not that hard just time consuming.

Bret
 
OP
N

nicholam77

Well-known member
Joined
Dec 18, 2016
Messages
2,674
Location
Minneapolis, MN
Looking forward to all the projects Nick. My advice on the car. Go with the one that is the most reliable. It is your daily driver and you don't want it to be down. (gets down off of soapbox) On the shocks I highly recommend Bilstein's. The best $400 I have ever spent on a car. I don't know much about your car but I assume the front is struts and the rear? You will need to rent the tool for the struts. It's not that hard just time consuming.

Bret

Thanks Bret. I think all the major tunes for my platform are fairly reliable, and the truth is I have no idea which one is the *most* reliable. All I really have to go off of are other peoples anecdotal experiences on forums and such. And there’s probably trade offs, like I read even though the Unitronic tune is less likely to blow a turbo since it’s more timing-based, it can be pickier about fuel, leading to possible misfires etc. It’s really hard to predict what will be best for me without taking the plunge I think. Doing as much research as I can but of course every manufacturer says their tune is the best and each has its fan club. At least to my advantage I don’t beat on my car at all so even with the tune it would be driven with care unlike probably a lot of the kidz on the vw forums these days.

You are correct that my car is struts in the front shocks in the rear. These are the Bilsteins I’m looking at ($800!). I am glad to hear you like yours.


My stock suspension isn’t totally destroyed or anything but it’s pretty obvious especially in winter that it’s not damping as well as it should. It’s something I’ve been putting off correcting for a few years.
 

MadeByMiller

Well-known member
Joined
Dec 29, 2018
Messages
1,230
Location
Rapid City, SD
Ope!

769A75BE-4B51-47FB-AA6D-2A0AB726BE27.jpeg

It was a used Prusa i3 MKS+ for $299!! Looked like it was in a pawn shop or something.

I replied only 1 hr after it was posted, and shortly after it had been removed. Someone must have snapped it up. Makes sense at that price but I got my hopes up.

😭

On the plus side, internet is fixed and it’s smokin’ fast. 😎
Prusa still sells them brand new, you know...

Totally jealous of your internet upgrade, I'm jealous of your old internet speeds even!

Looking forward to seeing your projects commence.
 

jbrentd

Well-known member
Joined
Jul 8, 2015
Messages
1,039
Location
Northeast Oklahoma
When I get the timing chain jobs out of the way for my allroad and my son's A3, I was thinking about getting tune, as well. Need to do some research too, but APR has been good for me a couple times. Also was pleased with the GIAC tune on my K04'd B5.
 
OP
N

nicholam77

Well-known member
Joined
Dec 18, 2016
Messages
2,674
Location
Minneapolis, MN
Totally jealous of your internet upgrade, I'm jealous of your old internet speeds even!

Yeah, I had no problem with a 100 mbps connection for personal household use, but I often transfer large files back and forth to my work office so 1 gig will speed that up quite a bit.

I overnighted a new 16 port gigabit switch from Amazon, and got that set up. My main work computer is only showing ~ 250 mbps download for some reason, even though its upload is consistently ~ 940 mbps. Ping is 1 ms. Other computers have good download. Not sure what's going on but too lazy to trouble shoot that at the moment.

Do it.. both are relatively easy to build and make a suprising difference in a kitchen.

I will! I'm going to have to go back through your kitchen build to see what you did.

When I get the timing chain jobs out of the way for my allroad and my son's A3, I was thinking about getting tune, as well. Need to do some research too, but APR has been good for me a couple times. Also was pleased with the GIAC tune on my K04'd B5.

Sweet! I just googled GIAC for the mk7 and their stage 1 looks to be pretty mild. 91 pump gas only gets you +42 whp + 46 wtq, where other stage 1's are pushing closer to +80-100 whp or wtq.

So many options, I actually wish there was less out there to compare! Off the top of my head I can think of:

APR
Unitronic
GIAC
034
United Motorsport
Eurodyne
Revo
EQT
Integrated Engineering
Cobb OTS
Cobb Protuners like Sneeky, Stratified, etc

Those are just some of the big names but there's probably 20+ options for ECU tunes out there.

I think I've narrowed it down to Unitronic, EQT, or APR low-torque. All a bit different... ah... decisions! I want to have this sorted by summer-wheel-swap time to maximize fun in good weather. Either that or I'll just keep posting about it on GJ every few months and never actually do it :ROFLMAO:


Speaking of weather, we've had a string of above-freezing days, sunny, even hitting 40° F a few times. Finally the roads were dry and the ice gone. It was a beautiful afternoon yesterday when I took my daughter to swimming class. When we came out... I was shocked to see wet heavy windy snow!

IMG-0434.jpg

I should have known... I had finally gotten a car wash about 30min prior, which is the only true way to ensure immediate precipitation and sloppy roads.

IMG-0435.jpg
IMG-0436.jpg
IMG-0441.jpg

And then last night got a few inches of heavy, wet, and sticky. (The temptation to insert a Michael Scott 'that's what she said' GIF is strong... must... resist... 😬)

IMG-0447.jpg

It's still lightly snowing, and I see we have more possible on Wed / Thurs / Fri / Sat.

RIP my back. Again. 😩

🍻
 

isonic

Well-known member
Joined
Aug 1, 2018
Messages
213
Location
Ham Lake, MN
I don't know off the top of my head the difference in HP/ torque ratings of the MK7 and MK5 but my cousin has a MK5 that he is still running a stock clutch on a K04, APR high pressure fuel pump, and APR tune. He rips on it occasionally but I bet most of his driving is like you described. I think he did his K04 4 years ago.
 
OP
N

nicholam77

Well-known member
Joined
Dec 18, 2016
Messages
2,674
Location
Minneapolis, MN
I don't know off the top of my head the difference in HP/ torque ratings of the MK7 and MK5 but my cousin has a MK5 that he is still running a stock clutch on a K04, APR high pressure fuel pump, and APR tune. He rips on it occasionally but I bet most of his driving is like you described. I think he did his K04 4 years ago.

Nice.

Obviously I'm not speaking from personal experience (yet), but I think there's a pretty big difference in the gains on Mk5 vs Mk7. The latest 2.0T engine has a ton of headroom in the GTI, because they also use it for the R and the S3, and many other cars. The wheel torque gain from a simple stage 1 flash with no extra hardware can be upwards of +100 ft-lbs depending on the tuner. That being said, some people luck out or are able to ride out the stock clutch for awhile. It's kind of a combo of how you treat your car and dumb luck, because pretty much all the Mk7 stage 1 tunes are riding the stock clutch at its limits.

I want to have a replacement clutch planned out and on deck, but I also want to see how it goes and see if I can get away with it for awhile.
 

isonic

Well-known member
Joined
Aug 1, 2018
Messages
213
Location
Ham Lake, MN
Nice.

Obviously I'm not speaking from personal experience (yet), but I think there's a pretty big difference in the gains on Mk5 vs Mk7. The latest 2.0T engine has a ton of headroom in the GTI, because they also use it for the R and the S3, and many other cars. The wheel torque gain from a simple stage 1 flash with no extra hardware can be upwards of +100 ft-lbs depending on the tuner. That being said, some people luck out or are able to ride out the stock clutch for awhile. It's kind of a combo of how you treat your car and dumb luck, because pretty much all the Mk7 stage 1 tunes are riding the stock clutch at its limits.

I want to have a replacement clutch planned out and on deck, but I also want to see how it goes and see if I can get away with it for awhile.
You are right, I forgot about the massive gains of the MK7 2.0T. That MK5 I mentioned had S4 injectors as well.

It is a tough balance once you have kids in the mix. Back in the day I would do things to my vehicles that you can't do now. It was easy to make accomodations in my schedule for my project car, aka the daily driver, lol. The family isn't as accommodating.

I will say that if you do order a clutch I really liked the South Bend Stg II endurance clutch I had in my TDI. I daily'd that car for 7 years with it. I thought it brought the performance I needed without being a knee jerker to drive.
 

ebarker9

Well-known member
Joined
Oct 1, 2010
Messages
85
I asked a well reviewed local VW place about the clutch situation with a Stage 1 tune on my MK7 Golf R:

"Clutch slip will be inevitable. How long it lasts will depend on your driving habits and mileage on the car. If you don’t plan on going for big power you will be fine with a south Bend stage 2 clutch or the ECS tuning clutch kit is a good affordable unit. Highly recommend upgrading the bleeder block, and upgrading the rear main seal."
 

Xti04

Well-known member
Joined
Nov 11, 2016
Messages
2,342
I put a south bend stage 2 in my forester when I built the engine and it did great. A bit heavier under foot but not crazy and I beat on that clutch. Held up well and price was decent at the time.
 

jake28

Well-known member
Joined
Aug 28, 2018
Messages
488
Location
SF, CA
Hey @nicholam77
Re: Golf tunes, I’ve got 44,800 miles on my APR stage 1 high torque. Still on stock clutch. No slipping that I can detect, on what is purely a daily driver. I’m dainty with the gas pedal save for the occasional freeway on ramp.

The few times I’ve smelled the tell-tail signs of clutch pushed to its limit have been after hour-long stints of spirited driving above 4k on tight and twisty back roads.

No matter who you go with, you can meter the impact on your clutch and car with how you use your right foot. Choose one, flash, and go.

For my own purposes, I’m considering a lift kit on golf r. I’ve been in Lake Tahoe CA much of the winter. I’m sick of getting high centered.

D4DE391F-9477-4A9C-AA66-CFB35DF93ECE.jpeg

And should you care to complain about snow, that is an 8’ garage door, for perspective, next to what is normally a lawn.
C4E8D621-9CBA-4E4D-B944-3D8700B7FD3F.jpeg
 
OP
N

nicholam77

Well-known member
Joined
Dec 18, 2016
Messages
2,674
Location
Minneapolis, MN
It is a tough balance once you have kids in the mix. Back in the day I would do things to my vehicles that you can't do now. It was easy to make accomodations in my schedule for my project car, aka the daily driver, lol. The family isn't as accommodating.

Yeah... that is a factor. The main reason I was leaning towards more conservative. I know that's going to be my wife's #1 concern ("are you going to get stranded on the side of the road with the kids in the middle of winter?!?"). I have a sneaking suspicion she's not going to agree that the occasional on ramp pull is worth potential reduced reliability and several thousand dollars (if you count the clutch)... should be an interesting converstation :ROFLMAO:

I will say that if you do order a clutch I really liked the South Bend Stg II endurance clutch I had in my TDI. I daily'd that car for 7 years with it. I thought it brought the performance I needed without being a knee jerker to drive.
I asked a well reviewed local VW place about the clutch situation with a Stage 1 tune on my MK7 Golf R:

"Clutch slip will be inevitable. How long it lasts will depend on your driving habits and mileage on the car. If you don’t plan on going for big power you will be fine with a south Bend stage 2 clutch or the ECS tuning clutch kit is a good affordable unit. Highly recommend upgrading the bleeder block, and upgrading the rear main seal."
I put a south bend stage 2 in my forester when I built the engine and it did great. A bit heavier under foot but not crazy and I beat on that clutch. Held up well and price was decent at the time.

South bend is a popular choice for Mk7's, too. But as of now I'm *pretty* sure I'm committed to keeping a dual-mass flywheel setup. The car has already lost some refinement from my suspension and motor mount modifications, and I don't think I could live with single mass chatter. I've never driven one but it doesn't sound like something I'd be into. Fortunately there are a couple good options for dual-mass setups that allegedly feel OEM, albeit with a slightly heavier pedal (I don't mind that).

@ebarker9 1st off, nice R. I think I'd avoid ECS parts, but that's just me. There are so many clutch options for our cars. I wonder why the bleeder block needs to be upgraded? I drilled mine out and switched to a stainless clutch line. I've heard both ways on the rear main seal... some say replace with the iABED while you're in there, some report leaks with that, too, and say if the OEM is not leaking don't mess with it. Not sure what I'd do with that myself.

Hey @nicholam77
Re: Golf tunes, I’ve got 44,800 miles on my APR stage 1 high torque. Still on stock clutch. No slipping that I can detect, on what is purely a daily driver. I’m dainty with the gas pedal save for the occasional freeway on ramp.

The few times I’ve smelled the tell-tail signs of clutch pushed to its limit have been after hour-long stints of spirited driving above 4k on tight and twisty back roads.

No matter who you go with, you can meter the impact on your clutch and car with how you use your right foot. Choose one, flash, and go.

For my own purposes, I’m considering a lift kit on golf r. I’ve been in Lake Tahoe CA much of the winter. I’m sick of getting high centered.

Yeah, I remember you mentioned you're on the stock clutch still, but 44,800 miles is impressive. I haven't even cracked 40k on my car itself, yet. I feel confident I could manage it with driving style as long as I don't get unlucky — I think some just slip right away and there's nothing you can do about it.

Now that lift kit is something different!

I feel you on the snow... we don't have that much build up here, but definitely have to drive through conditions like that on occasion. My garage alley always gets ice ruts. Today was so bad, at the mouth of the ally the rut was almost 1 foot deep. I couldn't clear so I drove on the ice portion praying the car wouldn't slide off and slam the oil pan. I'm always scraping my underside along the middle channel of ice. It's painful. I've been wanting to get a subtle front lip for the bumper, but I'm sure it would get ripped off in one season. Also why I'll probably never do coilovers :ROFLMAO:

Good to see yours out in the snow, though! For being a low-to-the-ground compact they do pretty well, and I can only imagine what having the AWD is like.
 

ebarker9

Well-known member
Joined
Oct 1, 2010
Messages
85
1st off, nice R. I think I'd avoid ECS parts, but that's just me. There are so many clutch options for our cars. I wonder why the bleeder block needs to be upgraded? I drilled mine out and switched to a stainless clutch line. I've heard both ways on the rear main seal... some say replace with the iABED while you're in there, some report leaks with that, too, and say if the OEM is not leaking don't mess with it. Not sure what I'd do with that myself.

I haven't really looked into clutch options or the rear main seal. I have a Porsche as well, so "Rear Main Seal" sends a shudder down the spine. If I were to do an aftermarket clutch, I'd pretty much want a setup as close to stock as possible, or at least as close to how it is now. I did eliminate the "helper" clutch spring in my car right after I bought it and I also bought the clutch bleeder block, but have been too lazy to install it. The stock clutch feel on the car was basically non-existent. On the one hand, it was so mushy that it was hard to screw up, but the lack of feedback also made it really hard to get used to and not that enjoyable to drive.
 
OP
N

nicholam77

Well-known member
Joined
Dec 18, 2016
Messages
2,674
Location
Minneapolis, MN
I haven't really looked into clutch options or the rear main seal. I have a Porsche as well, so "Rear Main Seal" sends a shudder down the spine. If I were to do an aftermarket clutch, I'd pretty much want a setup as close to stock as possible, or at least as close to how it is now. I did eliminate the "helper" clutch spring in my car right after I bought it and I also bought the clutch bleeder block, but have been too lazy to install it. The stock clutch feel on the car was basically non-existent. On the one hand, it was so mushy that it was hard to screw up, but the lack of feedback also made it really hard to get used to and not that enjoyable to drive.

I've done pretty much every mod there is to help the "clutch feel", sans replacing the clutch :ROFLMAO:

— removed helper spring
— drilled out stock bleeder block and removed yellow dampener
— tried stainless steel braided clutch line
— tried a longer stainless steel braided clutch line and removed the "accumulator" swirl valve near the firewall
— ended up putting the swirl valve back in
— 3d printed clutch stop

I would recommend installing your bleeder block at the very least. That plus the pedal spring make the biggest differences, and looking back I'd probably leave it at that. Improved motor, trans, and dogbone mounts also help with take off but add some vibrations.

If you do end up tuning / getting a clutch, for OEM feel I'd look at clutches that keep the dual-mass flywheel. There's a DIY option that you can source the parts from FCP Euro that uses the pressure plate from the TTRS, a parts list can be found on the GolfMk7 forums. For out-of-the-box clutches take a look at Sachs, their SRE or "Sachs Performance" will hold Stage 1 or 1+ power levels, keep the dual-mass flywheel, and feel very OEM-like. That's the route I'm probably going to take if needed. There's another one called the RSR from HS Tuning that is apparently OEM-like and holds even more torque than the Sachs, which might be better for the R. From what I can tell, most of the other options out there use single-mass flywheels.

FWIW something like the Southbend may be completely livable, I've just never driven one.
 
OP
N

nicholam77

Well-known member
Joined
Dec 18, 2016
Messages
2,674
Location
Minneapolis, MN
Switching gears from the GTI, I did a small 3d print last night, some drill bit depth stops I found on Printables.

IMG-0460.jpg

Using my trusty print-in-the-front-right-corner method. :ROFLMAO:

I get a little bit of stringing, little fuzzies, on more intricate models. They clean off pretty easily so not too worried about it but I probably need some temperature or retraction tuning.

IMG-0466.jpg

It's a pretty cool model set consisting of collets and sleeves. Made for metric but with the right combos they work for imperial, too.

A quick test:

IMG-0461.jpg
IMG-0462.jpg

I am impressed with the design. They hug the bit in a concentric fashion so the actual stop surface stays 90° to the bit. Seem to hold in place pretty well. Fairly easy to setup, no allen key or finding the blue tape.

In other 3d printer news, my replacement "build plate" from Creality showed up in the mail. It is literally the spring steel textured plate and adhesive magnetic backer. Not the aluminum heated bed I had asked for. Might be some language translation issues. I waited 30 days for this delivery, so I am reluctant to go back to Creality and try to get it sorted.

I'm trying to decide if I should peel the existing magnetic backer off the aluminum plate. It's possible, but kind of messy. Then I could try to put the new one on myself (if there's no defects to the aluminum) and hopefully do a better job than the factory. Or I could just use the glass plate from my Ender 3 v2.

A little nervous to tackle that since I am able to print small parts just fine... but it should be addressed eventually.
 
OP
N

nicholam77

Well-known member
Joined
Dec 18, 2016
Messages
2,674
Location
Minneapolis, MN
I celebrated International Women's Day last night by attending an author's lecture on the life and work of Minnesota architect Elizabeth Close.

When she graduated MIT I think she was one of only thirteen accredited women architects in the United States at the time. She was essentially the first "Modern" architect in Minnesota. She specialized in residential homes, often with flat roofs (unheard of at the time in Minnesota residential architecture), redwood siding, and warm wood interiors. I know of a handful of her houses around the Twin Cities, and was able to go inside two of them on the Docomomo tour I went on last fall. I won't get into her life story, but it's fascinating,

a_life_in_modern_architecture.jpg


Getting sucked back into the 3d printer, I made the executive decision to peel off the existing magnetic backer material on the build plate.

IMG_0468.jpg

I heated the bed to aid in softening the adhesive, and it came off fairly easily.

Unfortunately, I didn't get a picture of what was causing the massive bump, but essentially it was just a piece of debris. Very obvious. And not a defect in the aluminum plate.

After 15min of rubbing with some isopropyl alcohol, the aluminum plate was clean.

IMG_0470.jpg

Instead of stick on the new adhesive backer and spring steel build plate that Creality shipped me under warranty, I've opted to use my Carborundum glass plate from my Ender 3 v2 for now.

With that in place, I auto-homed the machine and re-leveled the four corners.

It was better than before, but I can see the glass is not perfectly flat on the aluminum at the corners. There is a slight difference in height with the 'paper test' between the corners and the center origin point. I've ordered some additional bed clips to try pinning the glass at the corners instead.

But for now I dialed in my best guess for Z offset, and ran a new bed mesh probe.

Still probing a 4x4 pattern... not sure how to change that.

IMG_0473.jpg

New mesh in Octoprint Bed Visualizer:

new_mesh.png

Not perfect, but quite a bit more uniform than before.

0.26mm is the high spot — I assume ABL can compensate for that... but what should I realistically be shooting for, here?

I did not try to lower that back corner yet, but maybe that could get it slightly better. I think I'm going to wait until I get the new bed clips.

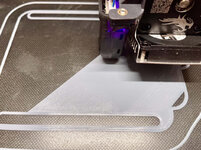
I went straight for a print, and even though I had set the Z offset with a piece of paper, it was way too close to the bed. Had to cancel (Octoprint doesn't let you live adjust the Z!) and print from the memory card instead.

Now I could tune the Z Offset on the fly.

IMG_0474.jpg

IMG_0475.jpg

It's a little hard to take a picture of the first layer with the print head in the way, but starting on the right it was a little bit squished, and after raising it a little bit everything was laying down really consistent, with no blobs, ridges, or bubbles.

I'm well into layer 2 now and things are looking pretty good.

This is the model I'm attempting to print:

thin-strip-jig.jpg

It's a waste-side thin rip jig.

It has a couple of pauses needed for embedded nuts and the bearing, so we'll see how it goes!

🍻
 
To avoid these ads, REGISTER NOW!
OP
N

nicholam77

Well-known member
Joined
Dec 18, 2016
Messages
2,674
Location
Minneapolis, MN
Another day, another snow storm.

Now on to the important stuff :ROFLMAO:

IMG-0498.jpg
IMG-0499.jpg

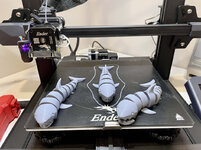
My first time printing one of these articulated print-in-place models. Aside from some less-than-perfect details in the teeth, it printed well.

My daughter liked it, so I have another one going now for my son who's napping at the moment!
 
OP
N

nicholam77

Well-known member
Joined
Dec 18, 2016
Messages
2,674
Location
Minneapolis, MN
Psst, don't tell the cult, but there was an order for an X1C placed today with the delivery address set to my house...

😲

Now you’re going to be able to lord over Creality and Prusa users! With the X1C coming you can’t possibly need two Prusas anymore… maybe you should just ship one of them to me 😉

(jokes aside that is very cool and congrats!)
 

MadeByMiller

Well-known member
Joined
Dec 29, 2018
Messages
1,230
Location
Rapid City, SD
😲

Now you’re going to be able to lord over Creality and Prusa users! With the X1C coming you can’t possibly need two Prusas anymore… maybe you should just ship one of them to me 😉

(jokes aside that is very cool and congrats!)
Thank you, thank you.

I would love to keep both Prusas (I also have an XL on preorder..) but I don't have the space. I think a buddy of mine in town is going to buy my old Prusa, unless you want to drive out here and pick it up!
 
OP
N

nicholam77

Well-known member
Joined
Dec 18, 2016
Messages
2,674
Location
Minneapolis, MN
I would love to keep both Prusas (I also have an XL on preorder..) but I don't have the space. I think a buddy of mine in town is going to buy my old Prusa, unless you want to drive out here and pick it up!

Nah, I was just kidding. Unless it's free, then I'd consider it 😁 . Otherwise I think I'll just keep living vicariously through you and @slodat :ROFLMAO:


In my latest efforts to not buy a Domino, I received this very nice gift from my in-laws for my birthday: the Peter Millard Loose Tenon Jig Plus.


If you've been following here long enough, you'll know I hacked together a similar thing before, but was never happy with the alignment of the joints.

My hope was these CNC'd flat pack jig would increase the precision.

TL ; DR, it did and it didn't.
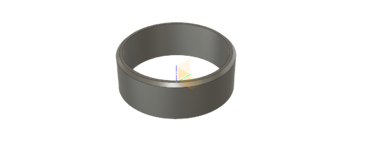
Since Peter Millard is on the metric system, he design the mortise guides for an 18mm guide bushing, which is near impossible to find in the U.S. for the Porter Cable style baseplate on my DeWalt plunge router.

So I made a simple 'sleeve' to go over a 5/8" O.D. bushing in Fusion 360.

De-Walt-18mm-Guide-Bush-v5.png
Had to clear some sharks out of the way to print it. I've been on a bit of a shark spree, made one for my girl, my boy, their cousin, and of course one for myself.

IMG-0508.jpg

IMG-0509.jpg

Of course this did not fit the first time, so I had to make 4 revisions before the I.D. was a snug fit.

IMG-0519.jpg

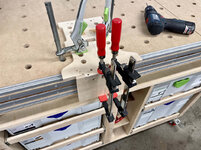
The jig is plywood and comes in two pieces which you are supposed to screw together. They CNC'd some pilot holes in one piece but not the mating piece. It's suggested to use the included threaded inserts to make the jig knock down so it can be stored flat, as well as used separate for mid-panel dominos.

The tricky thing is the two pieces need to be perfectly aligned. This process is my first complaint about the jig. This is what I did.

Clamped it together and used a 5mm brad point bit through the CNC'd 5mm guide holes to mark the mating piece.

IMG-0510.jpg

IMG-0512.jpg

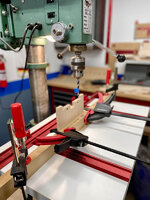
Then I widened the mating holes with a 1/4" bit on the drill press, which was a bit tricky to set up.

drill-press.jpg

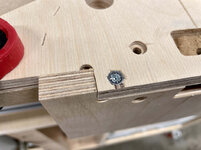
And then added some countersinks so everything would sit flush, inserted the threaded inserts, and screwed it together.

IMG-0517.jpg
IMG-0522.jpg

And that leads me to strike two against the product. All of the countersinks (which Peter recommends) tore out the plywood since it's so close to the edge. Not a huge deal but kind of annoying.

Finally ready to use it, I centered my guide bush, chucked up a 5mm upcut spiral bit, and clamped the jig into a test piece of MDF. To clamp this jig easily an MFT-style workbench is very helpful.

IMG-0521.jpg
IMG-0520.jpg


So far so good. Now the edge of the mating MDF piece:

IMG-0526.jpg

Like my old jig, this jig has a 'tight' and 'loose' mortise setting. The 'tight' setting is very tight on a 5x30 domino.

IMG-0527.jpg

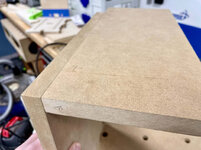
I test fit the joint, and was disappointed to find that it wasn't perfectly flush. Just a small lip.

IMG-0529.jpg

Not huge, but I was kind of expecting perfection for something over $100 that came off a CNC.

Looking at the underside of the jig, I could see that there was a thin gap between the edge of the 'loose' mortise guide and the opposing 'narrow' mortise guide. The jig is tightly fitted together, this is an error of the CNC work. Strike three against the product.

IMG-0530.jpg

Since this was a gift I didn't really want to go back and say it wasn't accurate or complain, so I decided to shim it out with some blue tape.

IMG-0532.jpg


Did another test joint, and while not perfect, it's pretty damn close.

IMG-0534.jpg

I forgot to mention, one of the neat features of the jig is it uses CNC'd clevis pin holes to index the mortises from the edge, similar to how the real Domino works. No measuring required.

IMG-0523.jpg

All-in-all I think it's going to work for me to make 3/4" thick cabinet carcasses, but I was hoping for just a bit more precision and ease-of-use, especially at the price point.

That said, the alignment is better than biscuits, and now I have an option for strong cabinet joints without fasteners.

If you want to know more about how the jig works, best to just watch the YouTube video I linked at the top.

🍻
 
OP
N

nicholam77

Well-known member
Joined
Dec 18, 2016
Messages
2,674
Location
Minneapolis, MN
The drill bit depth collars I 3d printed a few posts back need a home for storage.

IMG_0466.jpg

There was a case on Printables but I didn't love the look, so I decided to make my own.

Drill-Bit-Depth-Collar-Case-v6.png
Made sure not to upload my unconstrained sketch this time as not to upset Austin @MadeByMiller :ROFLMAO:

For the life of me I could not figure out how to get it fully constrained, even on this basic sketch.

First time trying to design anything 'snap fit' or parts that go together. I didn't leave any tolerance, and let's just say it fit a little too well.

IMG-0543.jpg

In fact I couldn't get it apart until after 5min spent with a scraper blade and some swearing.

The collars fit nicely.

IMG-0549.jpg

I'm not fast or knowledgeable at this CAD stuff, so even simple designs take effort and time. But I'm wondering if I should:

1/ use the bottom portion as-is as a tray, and keep it in my drill press cart. Downside would be the collars fall out kind of easily and might be annoying if I need to take it in the house with me.

2/ tweak the lid for a better snap fit

3/ maybe also add some protrusions to the underside of the lid that keep the collars from rattling around or falling out inside the case
 

patlun

Well-known member
Joined
Apr 12, 2015
Messages
242
Location
Värmland, Sweden
I would tweak the lid in some way, maybe using some sand paper glued to a stick. To make my life easy I would add a couple of foam strips in the lid to hold the collars in place. On the other hand this is a good time to experiment and learn :)

I am not good at CAD so I create lots of prototypes when trying to get my designs to work. In this case I would create a small box, maybe a cube with the sides around 2-3 cm (about an inch) and see if I can get that to work before creating a larger box.
 

MadeByMiller

Well-known member
Joined
Dec 29, 2018
Messages
1,230
Location
Rapid City, SD
Next time send me a message on Instagram while you're sketching and I'll help you get it constrained. As far as the case design goes, I would probably redesign it in a manner whereas the lid is not the main gripping surface. You're just begging to grab that case out of the toolbox and have the bottom fall out and the collets go flying everywhere. If you just wanted to salvage your current design, you could add some tolerance to the lid in your model, reprint, and just use rubber bands or something to hold the case together and prevent the aforementioned collet scattering.
 
OP
N

nicholam77

Well-known member
Joined
Dec 18, 2016
Messages
2,674
Location
Minneapolis, MN
I would tweak the lid in some way, maybe using some sand paper glued to a stick. To make my life easy I would add a couple of foam strips in the lid to hold the collars in place. On the other hand this is a good time to experiment and learn :)

Good idea with the foam strips.

I am not good at CAD so I create lots of prototypes when trying to get my designs to work. In this case I would create a small box, maybe a cube with the sides around 2-3 cm (about an inch) and see if I can get that to work before creating a larger box.

Normally I will print a smaller piece of a big model to test, but didn't this time for some reason. Great suggestion though, it seems like it always takes multiple tries to get parts to fit together nicely.

Next time send me a message on Instagram while you're sketching and I'll help you get it constrained.

Careful what you wish for haha, next time I'm sketching something your Insta DM's are gonna be blowin' up 🤪

Kind of you to offer though, I'll reach out if I get stuck.

As far as the case design goes, I would probably redesign it in a manner whereas the lid is not the main gripping surface. You're just begging to grab that case out of the toolbox and have the bottom fall out and the collets go flying everywhere. If you just wanted to salvage your current design, you could add some tolerance to the lid in your model, reprint, and just use rubber bands or something to hold the case together and prevent the aforementioned collet scattering.

True about the design, although I guess I figured with the right amount of snap/pressure fit, the lid would stay in place, but not so much that I can't get it off haha. Rubber band is not a bad idea.

I may or may not go back and do another attempt. If not I'll keep these ideas in mind for the next one.


As alluded to before, I have a few things going on in the background. Kitchen counters got an install date of 4/6 scheduled. I've also been furiously researching suspension / tunes / clutches for the GTI, trying to beat the warm weather.

I was going to do Bilstein B8's for the struts/shocks, but read some forum reviews paired with the lowering springs I have saying they still crash too easy, hit the bump stops etc. Some similar reviews for Koni. The challenge is the springs I have are fairly aggressive for a lowering spring (1.2" drop all around) and have a progressive rate. Bilsteins are also $$$, so I'm looking hard at this VWR Racingline kit, which is the same brand as the springs I have and allegedly made for them. But VWR also said their springs worked with stock dampers, and that turned out to not be the case. Also, I can only find a few reviews online. Been watching videos on Mk7 suspension and the fronts look like a bit of a PITA. Still leaning towards tackling it myself, though.

I think we are going to be trending above freezing for the foreseeable future. A lot of snow to melt still, but feeling the pressure a bit to get some projects in place for spring!
 
Last edited:
OP
N

nicholam77

Well-known member
Joined
Dec 18, 2016
Messages
2,674
Location
Minneapolis, MN
A new project I didn't necessarily seek out, fell into my lap this week. A few years ago (and earlier in this thread), I made my daughter her first post-crib bed out of plywood.

IMG-2025.jpg

Well, she's 4 1/2 now, and while she technically fits, my wife has been pushing a twin size "big girl bed" upgrade for awhile.

We looked for quality twin beds, and while they exist, they are not cheap. In the back of my head I knew my parents had saved my childhood bed in their attic all these years in case I'd want it some day. And that time has come.

IMG-0573.jpg

There's actually two matching beds I've inherited. They have stickers that say "Vermont TUBBS" on them and signed by the person who made them.

IMG-0574.jpg

Upon further research, Vermont Tubbs seems to be a big wooden furniture company in Vermont that is now defunct. Founded in 1840 and had close to 170 years of furniture making. According to what I found online they mostly sold wholesale to retailers like L.L. Bean, Crate & Barrel, Restoration Hardware, etc.

These particular ones appear to be made out of solid ash, and are a minimal but classic design.

IMG-0578.jpg

The rails are 1 1/2" thick, and the headboard posts are 2" thick. Nice, heavy, solid ash.

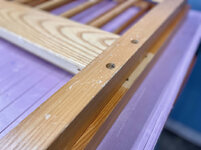
Only problem is they are a bit beat up if you look closely. Nicks and dents, finish rubbing off.

IMG-0575.jpg
IMG-0576.jpg

If I cherry-picked parts I could have one passable bed, and one that's pretty dinged up. The other thing is whatever finish they used is a "honey" color, either tinted like that or yellowed over time, I don't know. All this to say, I decided to completely sand them clean and refinish.

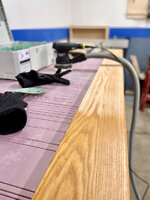
I got a start on it the other night. Wearing gloves because keep in mind it's only 35° F in my garage.

IMG-0583.jpg
IMG-0584.jpg
IMG-0585.jpg

Normally I don't care for cathedral grain, but the lumber in these beds has a mix of cathedral and straight and I think once it's all sanded and a more contemporary finish is applied they should look really nice.

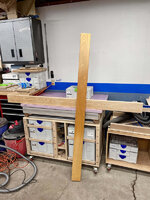
Comparison of an untouched rail (vertical) and a rail I sanded off the finish with 80-grit (on the bench):

IMG-0587.jpg

Sanded:

IMG-0589.jpg

The rails are the easy part. The headboards and footboards are going to be a PITA! :ROFLMAO:

No idea what I'm going to finish these with. Arm-R-Seal is kind of my go to, but if anyone has suggestions for an ash bed, let me know!

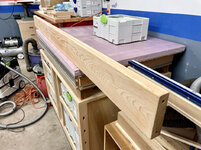
Overall pic of the "shop" and you can see the standing headboard is mostly sanded on the front surface (haven't got the spindles and inside edges yet).
IMG-0590.jpg

A lot of work, but the truth is you can barely buy a bed with thick solid hardwood lumber anymore. And if you can find one it will cost you $$$. I bet these would go for $800+ a piece these days.

And... my parents must have gotten them in the '90s, I'm sure they are 25 yrs old at least. I'm a big believer in reusing, so hopefully after I am done they will be ready for another 25 yrs and more.

🍻
 

Bob Heine

ALLIANCE MEMBER
Joined
Oct 24, 2009
Messages
10,707
Location
Boca Raton, Florida
Overall pic of the "shop" and you can see the standing headboard is mostly sanded on the front surface (haven't got the spindles and inside edges yet).
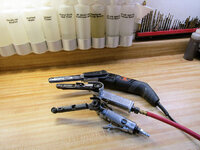
Nick, to sand things like those spindles, I have used a mini belt sander, also known as file sanders. I started with 3/8" x 13" pneumatic sanders but recently bought a 1/2" X 18" electric one.
Belt Sanders -- Small.jpg
I wanted a small one, like the pneumatic ones and found this one made by Wen. It's variable speed and the belts are reasonably priced. There's a spot right behind the roller tip that isn't supported that conforms to curved surfaces quite well. There's a supported section for flat work and another unsupported section. It's size makes it pretty handy for sanding in tight spaces. In addition to grit belts, they sell Scotchbrite belts that do a great job on finishing metal.
Wen Detailing File Sander.jpg
For less than $50 you can buy the tool and an assortment of belts on Amazon.
 
OP
N

nicholam77

Well-known member
Joined
Dec 18, 2016
Messages
2,674
Location
Minneapolis, MN
If you want an easy out with the spindles, prime with filler primer, paint your daughter's choice of colors, and kiss it goodbye.

Ha! That's tempting, and while I'm sure she would be fine with that, I'd like to preserve the natural wood.

Nick, to sand things like those spindles, I have used a mini belt sander, also known as file sanders. I started with 3/8" x 13" pneumatic sanders but recently bought a 1/2" X 18" electric one.

Oooh, good idea Bob. I think my dad might have one of those already, not sure if it's the Wen but I'll check with him.
 

ebarker9

Well-known member
Joined
Oct 1, 2010
Messages
85
Ha! That's tempting, and while I'm sure she would be fine with that, I'd like to preserve the natural wood.

One interesting option could be doing a soap finish, which can look really nice on ash:

 
OP
N

nicholam77

Well-known member
Joined
Dec 18, 2016
Messages
2,674
Location
Minneapolis, MN
One interesting option could be doing a soap finish, which can look really nice on ash:


Thanks, that is interesting, I will look into it. Judging by how beat up the frames are after my own childhood use, I have to think the soap finish might be a little fragile for this purpose, but it's totally up my alley with the natural Scandinavian look.

I have the HF version and it's terrific

Lol I think my dad has the HF one, too. I will see if I can borrow it.
 
To avoid these ads, REGISTER NOW!
Top Bottom