To avoid these ads, REGISTER NOW!

Above 1200 Sq/FT DFB's Garage

Wokspaces above 1200 squarefeet.
OP
D

D.F.B

Well-known member
Joined
Aug 2, 2023
Messages
1,600
Location
Australia
A '66 one does. Otherwise, you and I are on a unity ticket.

The BA Ghia was a great car with, as you suggest, mountains of torque. Thirsty ******* though but I wasn't paying for the fuel so didn't care. Obviously the car I wish I still had is the XY GT.

Don't your polishers and other gear refuse to operate when a Holden pulls in?
Ha ha, not if MONEY is involved! 🤑

Fuel economy and a V8 Falcon? What's that? Add a supercharger and, well.................................

IMG-4853.jpg

20.4 is liters per 100km..................or 11.5 MPG for the US readers.
 
To avoid these ads, REGISTER NOW!
OP
D

D.F.B

Well-known member
Joined
Aug 2, 2023
Messages
1,600
Location
Australia
My progression into multiple cars.

Let me say from the outset, I never intended to own a "fleet". But as I started my own business, it became obvious that I needed a second car to work from. In hindsight, my first car should have been a Ute. Fitting a lawn mowing into the back of sedan wasn’t ideal, and yes, I did do this a few times.

As background, after high school, I was studying Horticulture part time 3 days per week. (Not to gloat, but I could have taught that class, I had been gardening for years by this stage, and was mentored by my grandmother who was also a nurseryman. That's what happens when you immerse yourself in what interests you.) For work, I was doing a few hours a week at a local nursery, and mowing lawns to make ends meet.

Things just grew from there, I gained more and more hours at the nursery, where my abilities became pretty obvious. I ended up splitting my time 4 days per week at the nursery, two packed days running my maintenance business. Things became so full that I was knocking back work. Very early on, about 2005, I landed a plum role looking after the gardens of the richest family in town, in the country in fact. I had more work than I knew what to do with. A smart man would have hired someone, but I preferred being a sole operator without the headache of hiring and firing.

During the early years of my business, I would swap my Fairmont or XR6 with my father's Falcon Ute. He’d take my car to work, and I’d run all over town mowing lawns and maintaining gardens. That Ute was a 2006 BF MK II Falcon XL, the base model. We fitted it with some wheels and the chrome roll bar, and I installed a FPV leather steering wheel. I loved that car, you got all the benefits of a Ute with the comfort and POWER of a Falcon sedan. I probably drove that car harder than I should have……………I was young male after all. ;)

bf2101.jpg

apr913.jpg

In 2010, I decided it was probably time I bought my own workhorse. I started looking around for a used single cab chassis Hilux and Triton’s. I really don’t know why I wasn’t considering Falcon Utes, perhaps the fuel use of the 6-cylinder engines. In hindsight, the short gearing of the 4-cylinder Hilux’s was not all that more efficient than the lazy, torque rich 6 cylinder Falcon engine. It also had to be the single cab so that I could have a full sized tray.

The thing is, used Utes at this end of the market are all worked into the ground, with high km’s and rough interior and exteriors. I looked closely at a couple of Hilux’s, one had a shuddering clutch and the other a leaking water pump……..both at used car dealers. And the price of these things wasn’t all that much less than a brand new one! I wanted something hassle free, that was going to allow me to work from easily and efficiently. In the end, I went into my Ford dealer and ordered a brand new Ranger!

That car was a 2010 Ranger Single Cab Chassis, fitted with a 2.5 diesel engine and 5 speed manual. The only option chosen was air conditioning, bizarrely an optional extra is such a hot climate, and an aluminum tray. Previously called the Courier, these Ranger’s were the last based on the Mazda platform.

Brand new, straight out of the showroom.

pk101.jpg

Being the base model, this car was as base as it got; vinyl flooring, hard plastics, steel wheels, no ABS, no traction control, bench seating, it didn’t even have a rear window demister. Some of that was a good thing, the vinyl floors were excellent for a gardener’s muddy boots! That basicness also meant it was easily the most reliable and well put together car I have ever owned………..the Mazda influence was alive and well here. On the flip side, the seat was hard and uncomfortable, the lack of ABS and basic commercial tyres made it sketchy to drive in the rain.

pk104.jpg

pk105.jpg

To drive, it was a tale of two halves. Because of the firm suspension geared towards load carrying, teamed with the low ride height of my 2wd model, the vehicle drove better than you’d expect, staying nice and flat through corners. The recirculating ball steering was light but completely devoid of any feeling. The gearbox was actually very nice with a positive, direct feel to it. The engine was nicely torquey, and combined with the lack of weight because of the povo spec, it was decently quick. This was before particulate filters and the stricter emission standards of today, so you could make the thing put on a smoke screen at will, particularly useful for tailgaters. :ROFLMAO: In the wet, the car could be a hoot, or a scoot. For example, I may or may not have been able to have the thing sliding through wet roundabouts in third gear! Emergency stops without ABS weren’t nice though.

DSC-0133.jpg

The huge tray made it a doddle to work out of, be that carting tools around to loading it up with bulk amounts of green waste. And of course, when you own such a vehicle, everyone wants to borrow it! I ran this car for 6 years, not a single thing went wrong with it in that time. Not even a recall, TSB or flat tyre.

IMG-0165-1.jpg

The biggest downside of the car is what ultimately made me decide to trade up. The ride on this model was renowned for its harsh ride. Now, I’m fully aware that these single cab chassis workhorses were never known for ride quality, but the Ranger of this generation was the worst of them all, and a world apart from what I was accustomed to with Falcon Utes. Combine the hard ride with an equally hard bench seat, the car was brutal to live with.

These are the last shots I have it, shortly before trade. The salesman noted it was the cleanest tradies Ute he had ever seen, in fact, it sold within a week being on their used lot.

pk102.jpg

pk103.jpg

After 6 years, the ride and the lack of safety had me trading it for something newer. Despite the ride quality, I remember this vehicle fondly. It was my little workhorse, making me a lot of money in the process and allowed me to buy more cars. :ROFLMAO:
 
OP
D

D.F.B

Well-known member
Joined
Aug 2, 2023
Messages
1,600
Location
Australia
Now for a post of me using my garage for a change......................

Last week, I decided to drag the 2-stroke Mustang out of the shed to do some mowing in the back garden. Well, things didn't go to plan.

These engines are know to be diva's, suffering from a range of ailments that can make them a nightmare to own. This particular mower is eight years old now, so not a bad trouble-free run. Usually, these engines will fire on the first to third pull, any more than that, it's not going to happen! :dunno:

I say STOP at this stage because all you will be doing is making it worse and wasting your energy pulling that rope. From there you need to pull the plug, crank the fuel out of the cylinder and try again. It's amazing how you become in tune with an engine over time, any and all of them.

Anyway, looking down at the primer, there was fuel pouring out the base of the cap. So, I turned the fuel tap off and went and ordered some parts, which turned up just in time this morning. :thumbup:

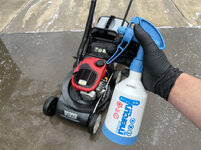
First job was the clean the poor thing. This unit gets pulled out when there some serious cutting to do, so it was showered in grass. A presoak with Bilt Hamber Surfex, a pressure wash, Surfex reapplied and agitated with a brush, followed by a final rinse. I then followed with some Hydr02, because I can! :lol:

IMG-9253.jpg

Onto the job at hand, the leaking primer cap. The rubber o-ring that seals the cap to the carb body is a known wear item, leaking from the base of the carb is the classic sign its time for replacement. These o-rings are available in a few different ways, in my case I ordered them as part of a kit so I had some spares on hand for next time. I also ordered two replacement primer caps as these are also known to perish and warp over time.

https://www.greenacresmowers.com.au/o-ring-kit-for-victa-carbs
https://www.greenacresmowers.com.au/primer-cap-needle-and-oring-kit-for-victa-2-stoke

IMG-9255.jpg

Now, you don't need to remove the fuel tank for this job, but its only three bolts and it gives you proper access to the carb. Remove the fuel inlet hose from the front of the primer cap while you are at it.

IMG-9260.jpg

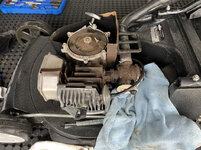
For those that don't know, the starter setup on these engines also forms the cap for the crankcase. The rubber o-ring that seals it all up is also a known wear item, and an important replacement as it prevents dust from getting into the engine.

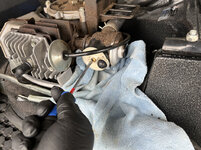
With a towel down to soak up any leaks, there was none on mine, remove the primer cap screw, which is actually the main jet.

IMG-9262.jpg

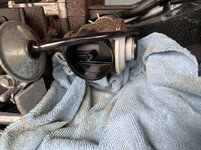
Inside the chamber was clean...............

IMG-9263.jpg

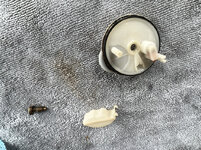
The primer cap is made up of the cap itself, a float, plastic needle and the main jet. The rubber o-ring is what keeps it airtight, in this case seemed fine but I replaced it anyway.

IMG-9267.jpg

After cleaning the cap, I replaced the o-ring with a new one and then reinstalled the needle (pointy end down) and the float. Held carefully, reinstall the cap, making sure to keep the arrow pointing upwards so the float functions correctly. Reinstall the main jet.

IMG-9268.jpg

IMG-9271.jpg

Fuel tap on, and NO LEAKS!! :rocker:

This would have been at least a $150 repair if I took it into the shop. So to have done it for a few dollars and an hour of my time is brilliant. I also got to learn more about these engines.

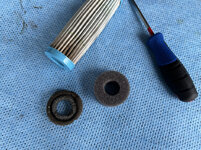
While I was at it, I chose to replace the lower foam air filter insert, the original now half the size it should have been and basically falling apart. I actually ordered two of these because the one on my grandfather's Mustang had turned to dust. The original OE Victa filter was fine and will see another round.

https://www.greenacresmowers.com.au/foam-dust-seal-for-victa-air-filters

IMG-9273.jpg

IMG-9279.jpg

IMG-9300.jpg

IMG-9303.jpg

The thing fired on the first pull and is sounding as healthy as ever..............


This is probably my favorite mower, its unstoppable when the going gets tough. These versions of the Victa 2-stroke had the ability to throttle up when under load, even with the throttle at full. The resultant noise is glorious! Where even the stoutest 4-stroke would bog down and stall, this thing just powers on through. Such a shame the greenies killed this engine off.
 
OP
D

D.F.B

Well-known member
Joined
Aug 2, 2023
Messages
1,600
Location
Australia
I grew up in the AU and BA Falcon era, both having a very influential effect on me. As mentioned earlier, my first car was 2002 AU Series III Fairmont, which made me fall even more in love with this era of Falcon. By 2011, I was feeling nostalgic and with business going well, I had the cash to buy and keep another car. This time, I was aiming for something with a little more character.

The AU Falcon arrived to in mid 1998 as the newest Falcon in a decade. It featured an all-new body and interior, a revised engines and gearboxes, an all-new double wishbone front suspension and for the first time ever on a Falcon, independent rear suspension. While not all models got IRS, for those that did, it transformed the Falcon into a brilliantly capable driving experience. That IRS design was actually based on the Lincoln LS/Jaguar S-Type design, so it had good parentage. While earlier Series 1 cars had shortcomings, the later Series II and III models are highly regarded as the most reliable and best Falcon's ever made. But......................

That styling! Due to some internal politics between Ford Australia and head office in Dearborn, the Australian team were instructed to use the "New Edge" styling language that had been used quite successfully on a range of other Ford models, the Focus, Ka and Cougar being the standouts. But for some reason, those styling themes didn't translate to the larger sized vehicles. As such, the AU Falcon was an acquired taste. Some adored it but most despised it, especially the earlier models with questionable grill designs........................

The infamous "waterfall grill"...........often referred to as the "whale teeth" or "cheese grater"........................

AU-FALCON-FORTE-IN-ALASKAN-FROST.jpg

AU-FALCON-XR6-VCT-WITH-OPTIONAL-BODY-KIT.jpg

Because of that styling, Ford had great trouble keeping sales afloat, be that from fleet or private customers. A round of styling changes were introduced in early 2000, attempting to visually straighten out some of those curves, but to limited success. The base models got a horizontal grill design and the sportier XR models had a squared off rear spoiler and more geometric shapes on the front bumper. But sales still lagged.

AU_II_FALCON_XR8_SEDAN_IN_LIQUID_SILVER.jpg

AU_III_FALCON_SR_SEDAN_&_WAGON.jpg

Interestingly, the AU Falcon Ute was a roaring success. Go figure.

AU-II-FALCON-XR8-XL-UTES.jpg

The best was saved to last though, and the reason for this post.

Initially, I was searching for a well-kept, low mile XR8 sedan. The later cars had an uprated 220 kW / 299 hp from the 5.0 Windsor V8, and while not all that fast, they sounded glorious.

AU-II-FALCON-XR8-REBEL-SHOWN-IN-VENOM.jpg

But somehow, I ended up looking further up the range.

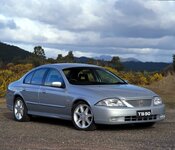
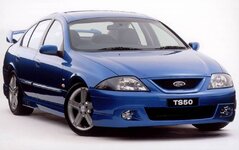
After several years of poor sales and being shamed by the competition, in late 2001, Ford decided to send the AU out with a bang in the lead up to the revised BA Falcon that would launch a year later. While Ford and Tickford (think of Tickford as AMG or BMW M) had offered higher end performance sedans, they were a considered too restrained and not powerful enough. These cars were called the T-Series, offered in TE50, TS50 and long wheelbase TL50 forms.

T1_TS50_IN_ALASKAN_FROST_2.jpg

This new T3 version was released in late 2001 and was the impact they needed to make!

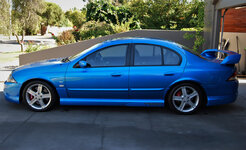
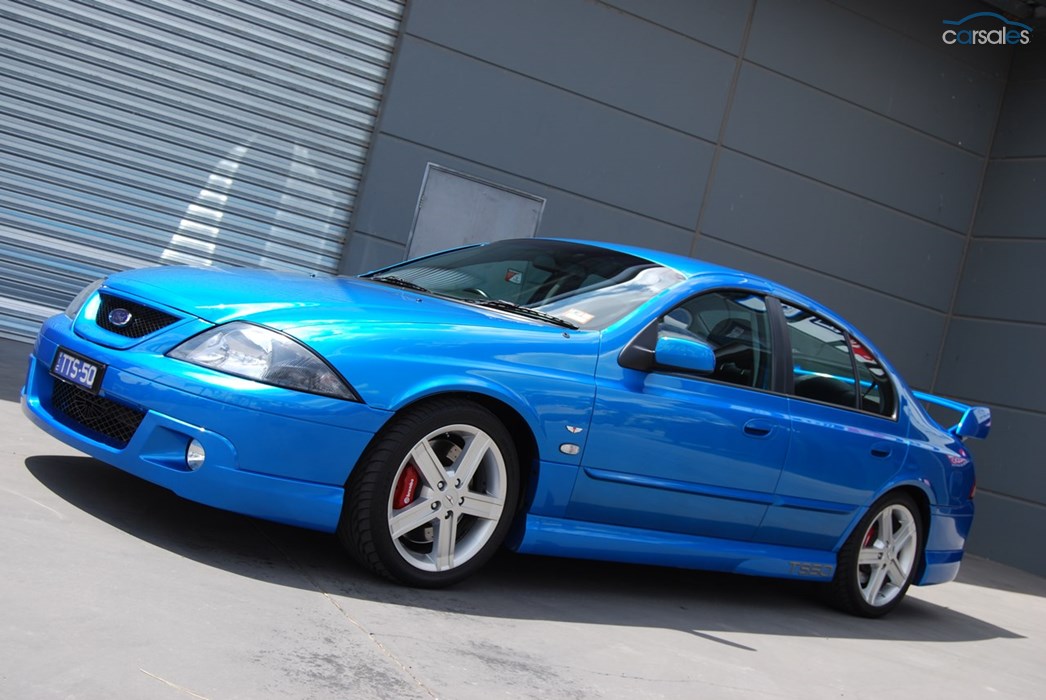
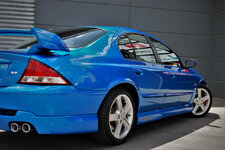
Exterior styling wise, the massive rear spoiler drew instant attention and was modelled on the Falcon race car. The chucky side skirts and front and rear bumpers completed the transformation, capped off with a **** set of wheels and square chrome exhaust outlets.

T3-TS50-IN-BLUEPRINT-2.jpg

T3-TS50-IN-BLUEPRINT.png

However, it was the engine though that made the impact. Previous to this model, Tickford would take a standard Windsor crate engine, swapped the iron heads for aluminum items, then reassembled with a more aggressive camshaft and roller rockers. They even had long tube headers. However, with the equivalent Holden (HSV) offering 250 kW / 340 hp, these 220 kW motors were just not enough. The answer was more capacity.

Those same Windsor engines were stripped down, a new locally manufactured crankshaft installed with new pistons and rods, a large trumpet style intake manifold and reworded heads. The camshaft was also new, as was the huge pod intake/filter arrangement. Each engine was stripped and rebuilt by a single technician, who then applied his signature to the righthand bank rocker cover. The result was an angry sounding 250 kW and 500 Nm of torque. (Ford Australia was the last market in the world to use the Windsor V8, having stockpiled a large number of them to make it through to the BA.)

T3-WINDSOR-5-6-L-V8.jpg

T3_WINDSOR_V8.jpg

The period promotional video -


At the time, the T3 T-Series was Ford drawing the line in the sand, the underdog swinging back.....................and I loved it! I idolized this car for years for the way it looked, the way it drove, the way it sounded! It would only be fitting that I hunted one down. And I mean "hunt" in that there were only about 400 of these cars made, making them extremely rare.

At the start of 2012, I had found and purchased one of the best examples of the T3 TS50 on the market at the time. With only 43,000 km on the clock, it had been well cared for and loved by the previous owner.

JAN_2012e_4.jpg

JAN-2012-DELIVERY.jpg

Mine was finished in Blueprint, the signature color, and optioned with the Brembo brakes, premium sound and the automatic transmission with shift buttons on the steering wheel. Three interior colors were available, black and red, black and blue, black and grey. Mine had the blue version, which looked fantastically OTT. The car was built in August 2002, so one of the very last, and numbered 154. The engine builder was Phil Geroulis.


T3-TS50-INTERIOR-WITH-NCO-VIVID-BLUE-TRIM.jpg

To drive this car was a treat and the flamboyant styling turned heads. The steering on these Falcon's was brilliant, offering superb feel and keen response, no Falcon since steered like this AU. The IRS provided superb power down, the ride was actually very good considering its sporty intensions, the brakes firm but powerful. The engine rocked at idle due to the wild cam, and it had torque for days. The induction and exhaust notes were to die for. Fuel economy? Ha ha, what's that? These cars were hilariously thirsty, often above 22 L/100 (11 mpg). I wore it like a badge of honor.

JAN-2012-23.jpg

JAN-2012-26.jpg

In the previous owner's care, this car also featured in Wheels Magazine and was displayed at an event featuring the then Ford Australia managing director.

t3101.jpg

I kept this car for about two and half years, selling it to make way for something significant. The final moments loading the car onto a carrier to be transported to it new owner was sad, but I was looking forward to something new.

DSC-0015.jpg

DSC-0021.jpg

The new and current owner occasionally reaches out to let me know how its going, the car and owner enjoying club runs and cruises.

IMG-9201.jpg

In the end, I consider myself lucky to have experienced my hero car. I'll never forget the presence it had on the road, how effortless it cruised and that noise, oh that noise.

Some of that noise for you to enjoy, an old school pushrod V8...........................


OP
D

D.F.B

Well-known member
Joined
Aug 2, 2023
Messages
1,600
Location
Australia
Back in May 2013, Ford Australia announced that they would be ceasing local production in Australia, closing the remaining three factories in Geelong and Broadmeadows. As a Ford man, or more to the point, a Falcon man, this news was hard to take. After too many years of declining sales and falling co-investment from the government, Ford said no more.

Think of this move along the lines if Ford decided to end production of the Mustang, a nameplate with millions of fans. In high performance forms, the Falcon was our muscle car, with the same concept of being an affordable performance car for the average Aussie buyer. Loosing Falcon, and all it represented, was devastating.


While the announcement was made in 2013, Ford decided to slowly exit production over a three-year period, with the last car due to roll off the line in late October 2016. That meant they would release one more Falcon, a refreshed and restyled version of the existing FG model. Released in November 2014, the result was the FG-X Falcon, the final incarnation of a model that had been in continuous production in Australia since 1960.

ford-ends-falcon-ute.jpg

st-australian-made-ford-falcon-rolls-off-thegrxium.jpg

C3CD357B-940B-4532-84A8-5C40B6B1FA49_zpstvfi7rnq.jpg

Now, when details began to filter through at the end of 2013, early 2014, I knew I wanted to have the final model Falcon. I put my name down at my Ford dealer, with intentions of buying the flagship model, which was shaping up to the be the return of the XR8. That is in fact what happened, the XR8 sedan having the big engine and brakes from the now discontinued Falcon GT flagship. I do wish I had a chance to have bought a brand-new Falcon GT, but that was not meant to be, and in a way, I ended up with one anyway.

FGX_FALCON_XR8_HEADLAMP_DETAIL.jpg

FG_X_FALCON_XR8_FINISHED_IN_VICTORY_GOLD.jpg

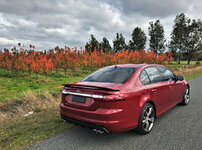
My order consisted of an XR8 sedan, the only options being choice of transmission and colour. In my case, the choice of transmission was simple, I went with the ZF 6-speed automatic as I think that teamed better with the engine. Colour though, well that was the hard one. I was looking at three; Smoke (gunmetal grey), Kinetic (classic Ford blue) and Emperor (burgundy red). Let’s just say I agonized over this choice, but in the end, I went with my heart and chose Emperor.

FG-X-SMOKE.png

FG-X-KINETIC.png

FG-X-EMPEROR.png

While I was waiting for the car to be built, I had the task of making room for it. Sadly, that meant selling the TS50, a car that had been a moment in time car for me. But I was set on having the last Falcon as a keepsake, so the sale of the TS50 was an easy and necessary decision.

DSC_0015.jpg

In December 2014, my final Falcon arrived………………………..

fff.jpg

IMG-0109.jpg

IMG-0110.jpg

IMG-0111.jpg

vv.jpg

mar2173.jpg

hl.jpg

IMG-0421-2.jpg

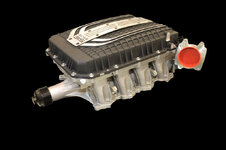
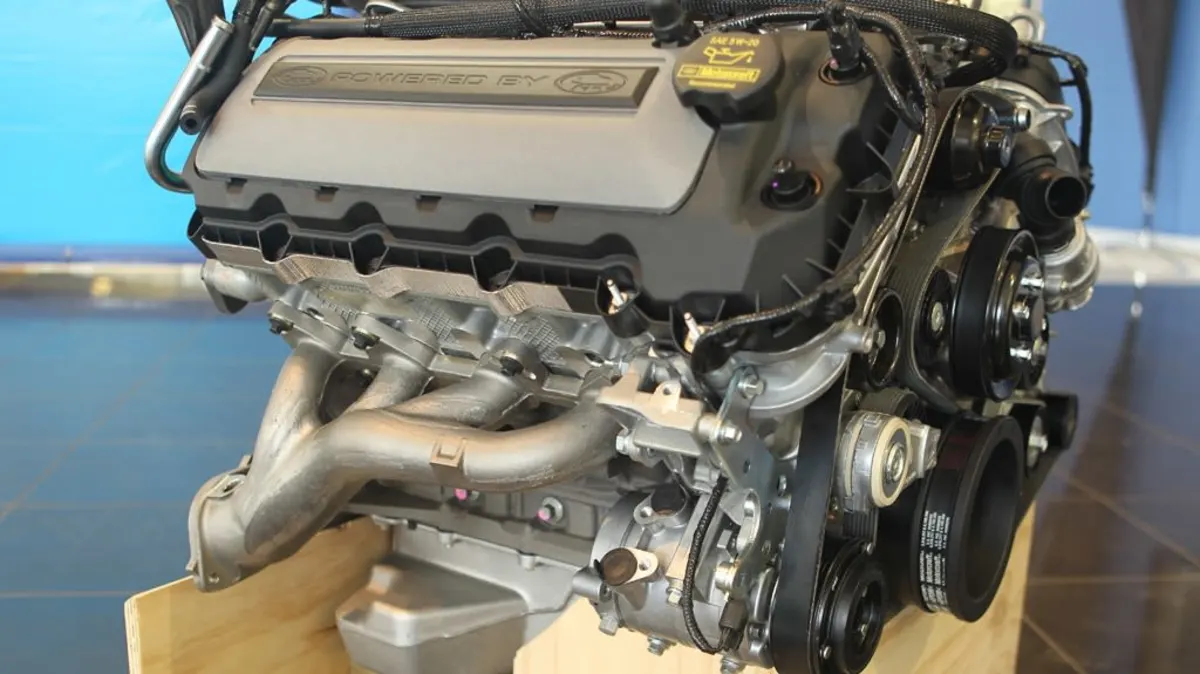
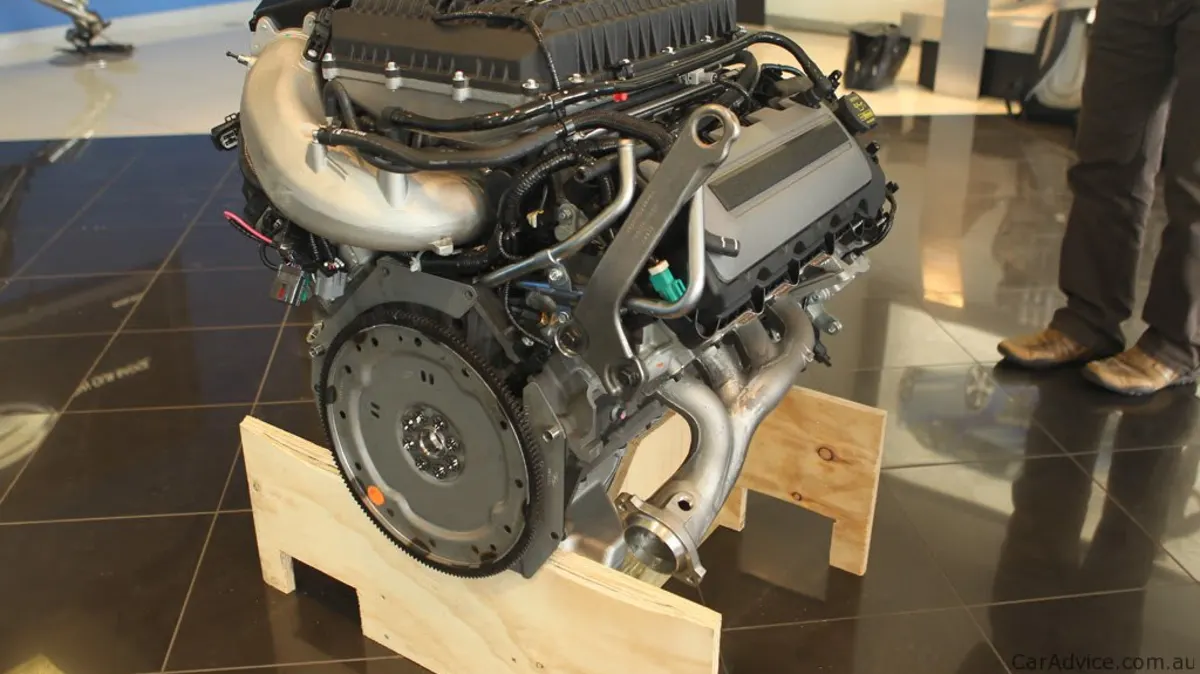
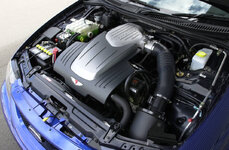
Point blank, this was the fastest car I had ever driven. It’s at this point I will talk about the nuclear bomb hiding under the bulging hood. The 5.0 Miami V8 these Falcon’s used was based on the Coyote V8, featuring the all-alloy construction and DOHC valve train. In naturally aspirated form, the Coyote is an engine that loves to rev, offering superb top end power. However, the trade off being an apparent lack of low-end torque. FPV, Ford Australia’s performance division, decided to remedy that by adding a supercharger. The result was the first factory supercharged Coyote in the world.

fgxm104.jpg

The supercharger, inlet and exhaust manifolds were locally made, while the block, heads and internals were imported from the US. FPV then hand assembled each engine, making for a very unique engine.

2010-FPV-HARROP-SUPERCHARGER.jpg

2010-FPV-BOSS-SUPERCHARGER.jpg

2010-FPV-FG-BOSS-V8-ENGINE.jpg

2010-FPV-FG-BOSS-335-CRATE.jpg


From 2012, each engine was engraved with the engine builders initials. Mine was assembled by Mr. Stevie Voice.

IMG_E1520.jpg

For the XR8, the engine was the GT spec, delivering an on paper 335 kW (455 hp) and 570 Nm. I say “on paper” because those numbers were the very least the engine would make, on over-boost, the thing would crank out 375 kw (500 hp).

IMG-E1637-2.jpg

In practice, this engine is a torque monster, pulling from idle to redline in a relentless manner. Overtaking is very fun, and if you have traction, the straight-line performance from rest is stunning. To compensate for the supercharger muffling the intake noise, FPV used a large open pod filter along with a bi-model exhaust system. The result is undeniably Coyote, but with its own twist, and the whip-crack noise on upshift addictive.

fgxm101.jpg

exh6.jpg

DSC-0281.jpg

IMG_2883.jpg

DSC_0175.jpg

To be frank, the engine dominates the driving experience. The suspension is extremely stiff at low speeds but smooths out at speed. But the driving dynamics are pretty one dimensional, this is a point and shoot type of car. The brakes consist of 4-psiton front Brembo’s, delivering decent stopping power. Traction, despite the wider rear tyres, was limited.

ax4.jpg

On the exterior, the FG-X consisted of a new front bumper, headlights with distinctive LED DRL’s, hood, and fenders. The rear had new lamps, bumper and trunk. The changes brought the Falcon closer to other Ford sedans at the time, think Mondeo, Fusion and Taurus. Colour wise, I made the right choice, Emperor red having so much character depending on the light conditions. In fact, only 100 were made in Emperor, mine being one of 76 automatics.

IMG_1321.jpg

DSC-0305-2.jpg

DSC-0297-2.jpg

IMG-E1627.jpg

q2.jpg

The interior had minimal changes, some new seat stitching and a few different trim treatments. It also got the then new Sync 2 system. The media got all catty over the lack of change, but they were missing the point.

x33333333.jpg

x3333333.jpg

IMG_0366.jpg

Frankly, Ford fans were lucky to have got a final Falcon. Ford could have simply closed the factory at the end of 2013 and walked away. Instead, they gave the employees 3 years notice to find other jobs, and delivered a car for the fans to cherish.

may48.jpg

za4.jpg

jun222.jpg

I only drive this car occasionally, when the sun is shinning and I need a power fix. As it stands, the XR8 has just under 8,000 km / 5000 miles on it. Over the pandemic, the car ended up being worth more than what I paid for it. But I bought this car for sentimental not financial reasons, it will stay with me as long as possible. This is another moment in time car, one that I feel privileged to own.

IMG_E1649.jpg

may132.jpg

edt123.jpg

IMG_2691.jpg

Some noise to go with the pictures.......................


cccoltsicehockey

Well-known member
Joined
Apr 3, 2014
Messages
1,416
Location
Charlotte, NC
Just read through your entire thread. Love the garage progress and learned a few things about the Falcon I wasn't aware of. Definitely was sad even being in the US when Holden and also the Ford Falcon were done away with.
 
OP
D

D.F.B

Well-known member
Joined
Aug 2, 2023
Messages
1,600
Location
Australia
I work weekends, so my "Sunday" is usually on a Tuesday. If I'm lucky, I get a "Saturday" on a Monday too, although now that Spring has arrived, that won't be happening much for a while. So, my day off is reserved for detailing, my ultimate way of winding down.

It was Mustang's turn this week. For some reason, this is my favorite car to wash.

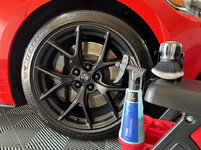
Wheel and tires are always first. I'm not welded to one single brand, so products selection is always enjoyable. For the tires, I cycle through various products, although I favor P&S Brake Buster or Carpro ReTyre with a Detail Factory Brush. On well maintained and coated wheels, I typically just use soap from my foam cannon, otherwise Brake Buster or NV Purge.

IMG-6422.jpg

These Rag Company Ultra Wheel Mitts are a recent release and are perfection for the job! I typically hate wash mitts, so that's saying a lot!


IMG-7825.jpg

I occasionally top the coating on the wheels with Carpro Hydr02. To prevent the rotors from rusting over, I use Hyde's Serum Rust Stopper.


IMG-3091.jpg

Because I'm normally dealing with some dust and a few bugs, I don't subscribe to the two-bucket method. Instead, rinse the whole car down and apply the soap directly to the paint via a foam cannon. I then use just the one bucket to rinse out the wash pad between sections. For me, this method is more efficient and ensures maximum lubrication. Naturally, if your car was dirtier, you may indeed use a pre-wash foam and the two-bucket method.

Today, I used Koch Chemie GSF, one of my favorites, any left from the foam cannon is added to the bucket for good measure.

IMG_3083.jpg

IMG-3088.jpg

IMG_5463.jpg

Once rinsed, I then blow the car down with either an EGO leaf blower or my Big Boi.

IMG-1824.jpg

IMG-2325.jpg

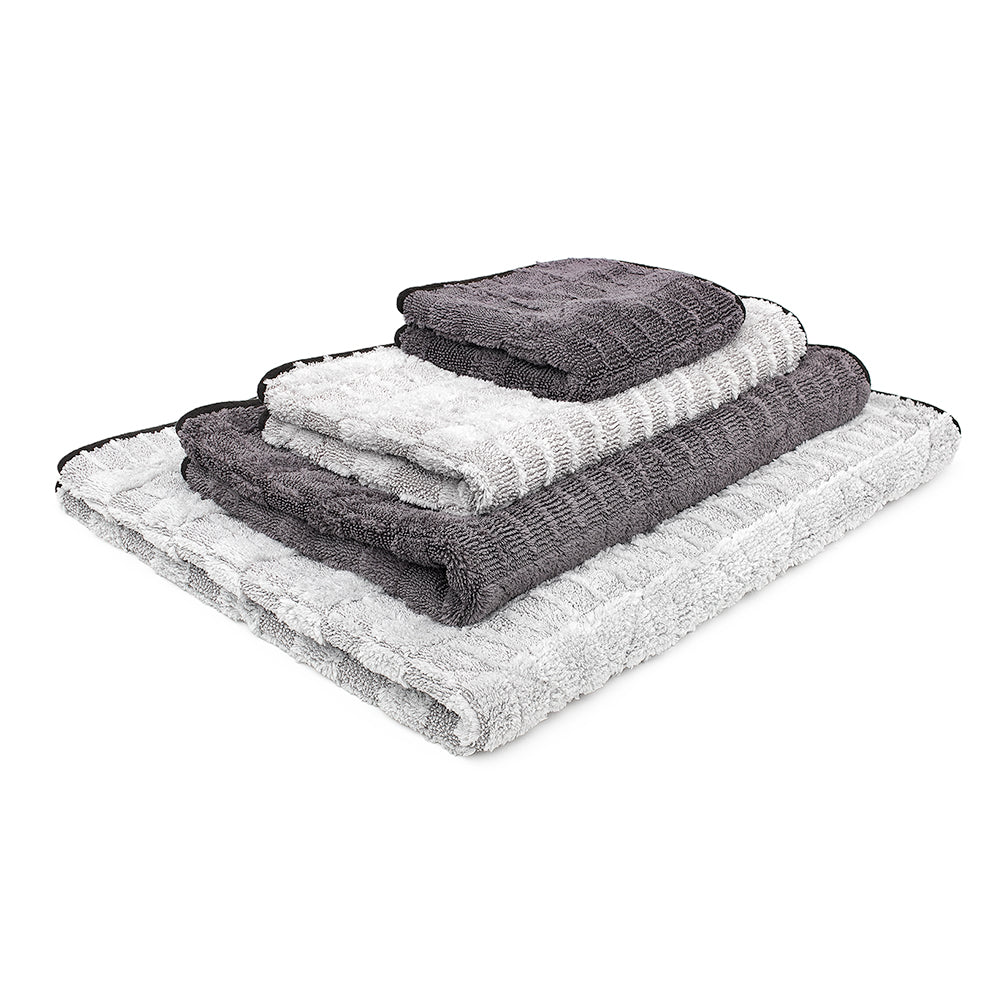
I then use a towel and drying aid to finish off any remaining water. The door jambs are treated the same way.

Again, I cycle through different products and towels for this, today I used P&S Paint Gloss, but OG Drying Aid and P&S Bead Maker are in high rotation.

IMG_5474.jpg

The hood then goes up for a quick wipe down. I find doing this after each wash negates the need for a big deep clean on a less regular basis.

IMG-8314.jpg

IMG-5475.jpg

I then clean the glass, wipe the interior over with an interior detailer (Carpro InnerQD today) and vacuum the floor mats.

The finishing touch has me returned to the wheels, a quick wipe over with NV Nova Boost on the excellent 12x12 TRC Gauntlet towel.


IMG_5483.jpg

Then onto my absolute favorite detailing task, dressing the tires. In this case, I finally tried something I have had for a while.

https://detailingshed.com.au/product...etailing-brush

IMG-9349.jpg

IMG-9354.jpg

I have had this brush since it was released, but have hesitated with what I intended to use it for. You see, at $75, that is a lot of coin to subject such a nice brush to the messy job of dressing tires.

To be clear, The Detail Factory never intended for the brush to be used this way, rather a certain influencer who doesn't really like brushes decided to dress his tires with it. Now, the brush didn't cost him $75, in fact it retails for only $30 in the US. So, taking the plunge to screw it up with tyre dressing is a more complex mindset for us in Aussie-Tax-Ville. But, letting $75 just sit un-used in the cabinet didn't compute, so I just went for it.

And.............yes, this thing is brilliant for dressing tires. The ultra soft, ultra fine bristles allow you to deliver an even, thin application without overusing product.

But I get it, this is a lot of money for a tire applicator. Since the Curveball was launched, the usual Chinese-Copy phenomenon has done its thing and you can get similar things for half the price on Amazon or Ebay.

While I typically just throw away a foam tire applicator when it get's too grotty, something like this could be washed with some tyre cleaner or APC to refresh it, somewhat negating the cost.

Either way, I wish I had tried this brush sooner.

IMG-5496.jpg
 
OP
D

D.F.B

Well-known member
Joined
Aug 2, 2023
Messages
1,600
Location
Australia
The first detail of my sisters new Volvo XC60.

For some back story, my sister placed a deposit for this vehicle back in early February, with the explanation being that the car was built, was on the water and would arrive in the country by early March. When she told me this, I knew that wasn't going to happen. Well, as I expected, the car sat at the dock for 4 months waiting to be decontaminated. From what I have been told, cars are unloaded and then sit in a holding yard until they can be cleaned/decontaminated. I mean, what do the "experts" think is going to happen, that the "bugs" they are attempting to keep out of the country are just going to stay on the car and wait for their turn to die? No, they are not, so aren't we just wasting time with all of this?

Anyway, the car was delivered a few weeks ago and was ceramic coated within the first week of ownership. From my recommendation, the car went to Prime Finish in Oakleigh, Melbourne, which they ended up using Carpro Cquartz Professional.

IMG-0213.jpg

IMG-0215.jpg

At that stage, I hadn't seen the car in person, but could tell the clarity and gloss of the paint by the pics she sent me. Apparently, the car looked completely different afterward the coating was installed. This is why you can always improve/enhance a brand-new car.

As mentioned, today was the cars first wash after the coating. I started with the wheels; massive 21-inch machined faced items that look fantastic. I used Brake Buster for the wheels and tyres, at this point I discovered they didn't coat the wheels. I (partially) remedied that with an application of Hydr02.

IMG-9377.jpg

IMG-9376.jpg

The car wasn't too dirty, a few bugs from the trip up the highway and some mild road spray. I foamed with Carpro Reset, allowed to dwell, then rinsed. This step was incredible, the bugs just flew off the paint, as did most of the road grime. In fact, even the rinsing off the soap was easier than I'm used to. Following that, I then switched to KCx GSF for a light contact wash.

IMG-9380.jpg

I get it now! For years, I always said that a ceramic coating was not for me, that a well-cared for wax or sealant was more than sufficient. But this car, the ease of washing was simply stunning. From the pre-rinse to the contact wash, to the final rinse, right through to the blow dry and wipe down, WOW, so easy.

I will also note at this point that they didn't coat the glass either, the water behavior being completely flat and very grabby underneath the towel. I ended up applying Gyeon Quick View to take care of that.

After teaming up, me using the Big Boi and my sister the EGO, we got the car mostly dry, before I went over the car using Carpro EliXir.........keeping it in the family you see. I will note that EliXir was a dream today, playing with the base Quartz underneath without a single streak in sight. I have found EliXir to be a bit of diva sometimes, but not here. I'm also loving the Creature Edgeless as a drying towel, so much nicer to manage without a boarder or extra bulk.

IMG-9382.jpg

The interior needed nothing more than a quick vac and a wipe down with a damp towel................I wasn't allowed to taint that new-car smell with a scented cleaning product. wink_2.gif I wiped the door jambs with ONR, the engine bay got a quick wipe over with ECH20.

I also found polish residue on the rear wiper arm and the front number plate plinth. Some Meguair's M39 sorted that quick smart, but..............I guess this is the difference between an obsessed-level hobbyist and a shop that churns out ceramic coatings like a factory. This, the wheels and glass made me question the very premium price paid. The wheels I can understand, the glass could/should have been done, the polish residue is sloppy.

I then dressed the tyres. I think they used Carpro Darkside, but I removed that with two hits with undiluted Brake Buster. Instead, and it took me a while to decide which dressing to use, but settled on Adam's Graphene, and wow, such a great choice.

IMG-9386.jpg

IMG-9388.jpg

IMG-9395.jpg

IMG-9397.jpg

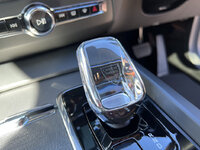
Love the crystal gear selector, very unique and a nice touch.

IMG-9398.jpg

Spec wise, this is the XC60 B6 Ultimate Mild Hybrid, finished in Silver Dawn and has the black interior. Being a mild hybrid, the car can't run on electric power alone, even at low speed. But it does offer regenerative braking and very mild assistance from rest. Like all Volvo's, the engine is a 2.0 turbo, in B6 form making 220 kW and 420 Nm.

I actually got to test drive the car on "my" road last week. Without the active air suspension and with 21-inch wheels, the ride is rather firm. Not harsh, but you do get a bit of pitter-patter, which is sort at odds with the luxury focus. I drove the car in the comfort steering setting, which I found too light.

0-100 is rated at 6.2 seconds, who else remembers when those numbers were considered quite fast? For the size and weight, the thing has some grunt, enough for comfortable highway cruising and overtaking. The electric assistance is virtually undetectable, at low or high speed. The regenerative braking is imperceptible.

Interestingly, a quick look at the rear muffler, with two hidden outlets, revealed one side is actually valved. Not that this car has anything resembling exhaust or induction note...........and I guess that's Volvo's MO. Having said that, their older 5-cylinder engines at least had a distinctive character, this engine sounds like it could be from any car company.

Probably the most interesting aspect was the active lane assist. Get up to speed, let go of the steering wheel and then watch the car steer itself.........within reason of course. I see these systems as a buffer or safety net only, not something you would rely on while reading a book or playing on your phone.

Build quality is impressive, as it should be for $100,000. The leather is ultra soft and premium feeling, the glass shifter adding some character to an otherwise austere interior.

What sells these cars is the quality of build and the clean, restrained styling inside and out. This car is not for me, but in fairness, I'm not the target buyer either. If I was shopping in this segment, I would be heading straight to the Jaguar F-Pace. I know the F-Pace is getting old now, but I prefer the styling, rear wheel drive layout, the steering feel, and the engines at least have some character tuned into their exhausts.

Either way, they are very happy with their choice.
 
OP
D

D.F.B

Well-known member
Joined
Aug 2, 2023
Messages
1,600
Location
Australia
The Workhorse!

In early 2016, after having owned and worked out of my 2010 PK Ranger for six years, it was time for an update. Not that the 2010 had many miles on it, I think it was around 27,000km / 17,000 miles when I traded it. But considering how much time I was spending in the car, the lack of comfort and safety features was starting to get old. The extent of safety on the PK Ranger extended to dual airbags and seat belts, nothing more. And the horribly stiff ride quality and hard bench seat made it taxing to live with.

PK-RANGER-RANGE-2.jpg

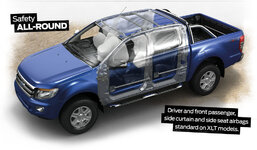
The PK Ranger was replaced by the all-new PX generation in 2012, designed and developed from the ground up in Australia by the Australian Ford development team. Where previous Ranger’s were based on the Mazda B-Series platform, this new Ranger was the debut of the all-new and all-Ford T6 platform. Everything was bigger and beefier, especially apparent when you compared the chassis frame rails between old and new. The engines were now Ford Puma based 2.2 4-cylinder and 3.2 5-cylinder diesels, they also offered a gas 2.5 that was quietly discontinued due to low sales.

2011-RANGER-XLT-2.jpg

2011-RANGER-XLT-3.jpg

PX-RANGER-ALL-ROUND-SAFTEY-DISPLAY.jpg

PX-RANGER-XL-XLT-2.jpg

PX-RANGER-XLT-DUAL-CAB-INTERIOR.jpg

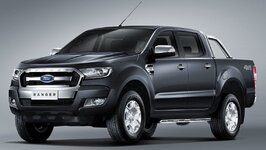
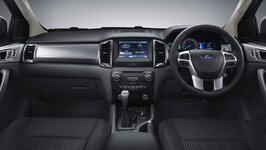
Overall, where the old Ranger felt very old and somewhat flimsy, this new generation made such a huge leap over the old that it went straight to the top of the class. Sales sort of exploded from there, to the point where Ranger has been the second biggest selling vehicle in Australia for a number of years now. For the most part, those sales have been of the high-profit 4x4 dual cab pickup models. This accelerated even more when Ford released a facelift in 2015, featuring tougher frontal design and a refreshed interior.

2016-ford-ranger-4x4-XLS-01a.jpg

ford-ranger-2015-1.jpg

ford-ranger-2015-4.jpg


It was that facelift, along with the safety improvements, that caught my attention and prompted my decision to make the upgrade. I made the trip to the Ford dealer and told them I wanted a like for like replacement.

DNA3213-Thumbnail-623x331px-2.jpg

Because Ford tend to focus their attention on the high-profit models, base model single cabs are not always stocked. Annoyingly, two days before I went in, they sold the only one in stock to a construction company.

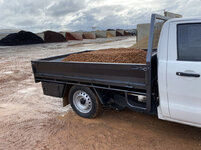
A month later, my car landed at the dealer and was sent to have the tray fitted. Initially, I wanted another aluminum tray, but the salesman convinced me to go with a steel tray. This ended up being a masterstroke because it allowed me to customize my setup. I chose the gunmetal powder coated finish, adding a lockable tool drawer and two integrated tool boxes, one each side. The steel tray also put some additional weight over the rear wheels, helping to tame that rear end.

ra123.jpg

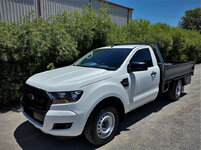
Formally, this was the cheapest Ranger in the range, an XL single cab chassis 4x2. The engine is the 2.2 and paired to an MT-82 6-speed manual. While this 2.2 engine has more power and torque than the 2.5 it replaced, the PX Ranger in general is considerably heavier than the PK model. As such, the combined effect of added weight and annoying turbo lag, this car is an absolute slug. If Ford offered this model with an optional “big” engine, I would have ticked that box in a heartbeat. It’s really the only aspect of the car I don’t like. And this is not a case of being spoiled by big V8 engines, rather the car needs to be whipped constantly to get anywhere. And that’s unladen, load it up with tools and bags of grass clippings, and it’s even worse.

sep233.jpg

IMG_2705.jpg


Apart from that, this Ranger has been a fantastic workhorse. With proper bucket seats and a much softer suspension tune, I don’t feel like I have been pummeled at the end of the day. And then aspects like ABS, DSC and 6 airbags solve the safety concerns with my previous Ranger.


IMG-2497.jpg

IMG-2501.jpg

IMG-2499.jpg

The facelift also replaced the hydraulic power steering for an electric setup. While most car guys would say that is a step backwards, on something like a Ranger it makes a lot of sense. While it doesn’t have any feel or feedback, it certainly feels perfectly weighted. I probably drive this car harder than I should, making full use of the manual gearbox, I even taught myself how to heal-toe in this car. This is very much the slow-car-fast concept in full display here.

IMG_E1387.jpg

IMG_E1364.jpg

IMG_E1606.jpg

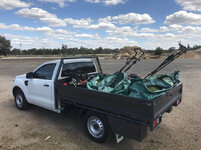
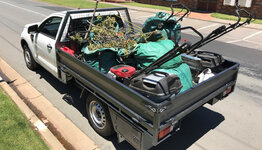
Having the tool boxes integrated into the tray allows me to keep various smaller tools and irrigation fittings on hand at all times. The drawer under the tray allow to store longer tools like shovels and rakes. I have also fitted a rubber mat to stop tools rattling/sliding around tray.

IMG-2492.jpg

ap85.jpg

ap86.jpg

ap83.jpg

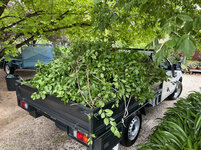
Like before, the huge tray negates the need to tow (and store) a trailer........................

IMG_2155.jpg

IMG_2257.jpg

IMG_6316.jpg

IMG_0409.jpg

IMG_0819.jpg

IMG_3484.jpg

IMG_3647.jpg

The tray has also doubled as a work bench multiple times now, being at just the right height working height.

IMG-9649.jpg

IMG-9733.jpg

IMG-9738.jpg

IMG_9919.jpg

wm4.jpg

IMG_8705.jpg

Being my daily driver, this car is supposed to be my "beater", one that I don't have to obsess over keeping clean and shiny. That theory doesn't play out though................................ :lol:

IMG_5630.jpg

IMG_5631.jpg

IMG-2353.jpg

IMG-0717.jpg

IMG_3957.jpg

IMG_5399.jpg

IMG_5402.jpg

I’m at the stage now where I would be looking to trade up to the new generation Ranger, but…………….. Ford decided for the new generation to stop importing the single cab chassis model with the “low-ride” configuration. So, all Rangers are now high-riders, be that with or without 4x4. This is not practical in my opinion for loading mowers in and out of the tray. Nor do I need the added ride height and the trade off to the chassis dynamics that brings. That’s before I even contemplate the base model being $10,000 more expensive than it was when I last went shopping for a Ranger. And for the spec I would want with the Bi-Turbo engine and 4x4, it would be $20,000 more expensive. If I wanted to stay with a low-rider, I would have to look at the inferior Toyota and Mazda alternatives. As such, I think I will run this vehicle longer and see how things pan out going forward.
 
Last edited:
OP
D

D.F.B

Well-known member
Joined
Aug 2, 2023
Messages
1,600
Location
Australia
Being a gardener, you have to work in all conditions; rain, hail or shine. That is not often a happy combination for a detail freak.

From the very beginning of the ownership of my Ranger, I decided I needed (wanted!) seat covers to deal with everything I would be throwing at the interior.

Standard cloth trim -

IMG-2499.jpg


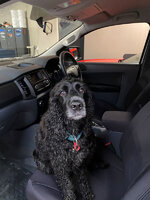
These waterproof neoprene seat covers are tailored for Ranger seats, so the fit like a glove. They are also airbag safe and machine washable. These things have been brilliant in terms of keeping the car clean, especially useful after a day in the rain or taking my dog for a ride.


nn.jpg

n.jpg

apr293.jpg

may174.jpg

Being the base model, XL Ranger's come with vinyl rubber flooring. Most people would think that is bad thing, but I see it as a bonus! I have no idea why anyone would want carpet flooring in a workhorse vehicle, vinyl is so much easier to clean when things get dirty!

IMG-0431.jpg

IMG-0460.jpg

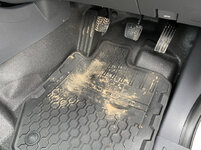
For whatever reason, Ford didn't see the need to offer floor mats that would secure in place for the Ranger XL. I guess they though it wasn't needed with vinyl flooring. However, the ability to contain dirt and prevent premature wear around the clutch pedal area, I think mats are still needed. I ran a set of OE rubber mats, but they were not secured and would slip around. Not entirely safe.

IMG-0475.jpg

The other problem was finding a solution that didn't require me slicing into the vinyl to install mounting points, from both Ford and the aftermarket. I eventually found what I was looking for.....................


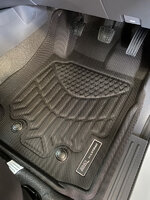
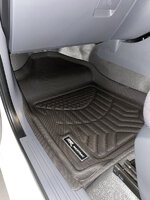
These TrueFit 3D rubber mats are again tailored to the Ranger and do a much better job of containing mud and water. For vinyl floors, they offer an adhesive mat that is installed on the floor, the Velcro-like underside of the mats then holds them in place. No drilling required.

IMG-0765.jpg

IMG-0767.jpg

IMG-1118.jpg

IMG-0771.jpg

IMG-1117.jpg

I have been running these for a number of years now and have been extremely impressed with them. They are also proving to be more durable the Ford OE items.

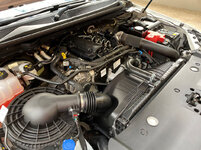
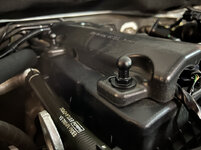
Another aspect of the povo spec Ranger is the lack of an engine cover.........................

apr155.jpg

IMG_2606.jpg

IMG_2610.jpg

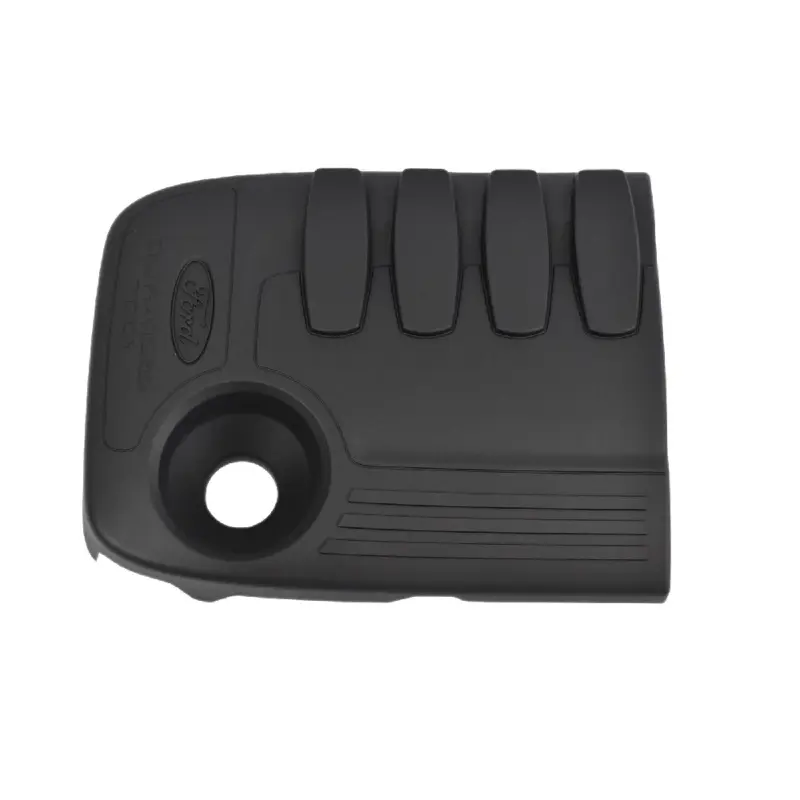
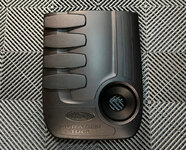
Not a big deal in the grand scheme of things, but seeing as they go to the trouble of fitting studs to the engine for one, it got me wondering. A quick search revealed there was in fact an OE cover for this engine, most likely fitted to vehicles in other markets. I took a punt and ordered one.


IMG_2613.jpg

IMG_2621.jpg

A quick test revealed that it does in fact fit, so I cleaned and coated it some Carpro Reload before installing it for good.

IMG_2694.jpg

IMG_2695.jpg

IMG_2697.jpg

IMG_2702.jpg

IMG_2704.jpg

IMG_2705.jpg

I typically keep my engine bays clean by giving them a quick wipe over after each wash, but having the cover on makes that even easier. The foam underlay has also reduced some of the diesel clatter at idle. But most importantly, it looks much better!
 
Last edited:
OP
D

D.F.B

Well-known member
Joined
Aug 2, 2023
Messages
1,600
Location
Australia
Following on from the previous post, I thought I would share what I have found to be the best way to clean, protect and revive rubber floor mats. I have come to this point after trying a number of different chemicals and brushes to get the result I wanted.

Cleaning -

For cleaning rubber, typically you want/need alkalinity. That higher pH emulsifies dirt and grease, allowing it to be easily rinsed off. I have tried various products for this role to varying effect, from all-purpose cleaners, tire and rubber cleaners, and even specific products for the job.

IMG-0439.jpg

44f.jpg

nov178.jpg

nov179.jpg

The worst of those was Chemical Guys Mat Renew Cleaner & Protectant. Despite lathering up nicely under agitation, it neither cleaned or protected. All it did was turn money into soapy suds, nothing more. That further spurred me on to find something that worked!

Enter McKee's Floor Mat & Cargo Liner Rejuvenator -

https://mckees37.com/products/floor-mat-cargo-liner-rejuvenator-22-oz?variant=41252857217187

IMG-4953.jpg

For whatever reason, this product just works! It lathers nicely and seems to deep clean rubber mats like no other I have tried.

The next key factor here is the brush! Traditionally, a stiff bristle brush is best for deep cleaning rubber. Softer flag tipped brushes don't meet that requirement..........................

IMG-0440.jpg

IMG-0547.jpg

When I first discovered the Detail Factory Tire Scrub Brush, I was immediately impressed! This brush sort of bucks the trend of very stiff bristles, offering a slightly softer bristle that better conforms to the surface being cleaned.


IMG-3459.jpg

IMG-3462.jpg

When I tried it on rubber floor mats, I knew I had a found my winner! I now have two of these brushes, one for tires and one for floor mats.

IMG-4956.jpg

So, the combination of THAT brush and THAT chemical is the secret sauce. To use, pre-rinse the mats with water, spray the mat with the chemical and agitate vigorously. Rinse thoroughly and allow to dry, using a leaf blower to speed up the process if desired.

IMG_7157.jpg

IMG-7158.jpg

Protection & Enhancement -

This step is seemingly easy, but with some caution. Typically, you don't want to be applying a product that will create a slippery or slick surface for safety reasons. In the past, I have used heavily diluted Carpro Perl or 303 Protectant for this role, making sure to buff it down thoroughly to control the slickness. This works well to add some richness back into the finish, without being too slippery. I then discovered a product called Koch Chemie GUF -


IMG-3547.jpg

GUF was designed for this role in mind, the key being that it doesn't cause slickness. It's a clear, runny liquid that goes on quite wet, then flashes away to leave a clean, anti-slip surface. The end result is not a night and day difference, but rather a subtly enhanced, darker finish.

To use, spray liberally onto the mat and work it in with a towel or microfiber applicator. Preferably, apply to dry mats, but the product will flash away any residual moisture anyway. Allow to dry and then refit to the vehicle.

IMG-3959.jpg

IMG-3550.jpg

This product does give spray heads a hard time, the trigger action parts in particular, a small tradeoff for an otherwise excellent product.
 
Last edited:
OP
D

D.F.B

Well-known member
Joined
Aug 2, 2023
Messages
1,600
Location
Australia
The Mighty Mustang –

jun223.jpg

On the very same day I ordered my current Ranger, I actually placed an order for a Mustang as well, in effect, buying two cars in one day. That ranger arrived a month later, the Mustang arrive 12 months later!

When Ford launched the S550 Mustang back in late 2015, the first ever factory right-hand-drive Mustang, it became such a hot item that waiting lists blew out to 12+ months. A combination of drop-dead gorgeous styling, a burly V8 engine and sharp pricing all contributed to the demand. In fact, Ford massively underestimated how popular the Mustang would become, to the point where Australia was either the largest or second largest export market in the world. I guess we Aussies like grunt!

kk.jpg

At the time, I placed the order fully aware of how long I would be waiting. Due to that, I sort of didn’t put a lot of thought into it until I discovered it had been built and loaded onto a cargo ship. In March 2017, it finally arrived and my Mustang journey began.

IMG-0385.jpg

IMG-0384.jpg

IMG-0397.jpg

So, onto a few of the finer details of this car. All Australian export Mustang GT’s come standard with the Performance Pack and Premium equipment group. As such, that brings the big Brembo brakes, a stiffer chassis tune, better cooling system, staggered 19-inch wheels, premium interior finishes, Sync 3 and leather heated/ventilated seats. My car was basically the cheapest V8 GT you could buy, being a hardtop with a manual transmission and non-metallic Race Red paint. The only options were a spoiler, a stripe package and automatic transmission, none of which I wanted. What I really loved about the original S550 was how dam good it looked in its most basic form, not needing spoilers or stripes. I also wanted to experience a manual V8.

DSC-0085e.jpg

DSC-0088e.jpg

I have previously spoken about what this car means to me, that from the very beginning it become a beacon of happiness and a massive positive effect on me. Well, that still rings true six years later. I love looking at it, driving it, cleaning it, talking about it. Every drive is an event, be that trundling around town are tearing up a few curvy roads.

f1.jpg

f2.jpg

Apart from the styling, the biggest drawcard for me is the joyous engine. A rev happy naturally aspirated V8 is a rare thing these days, and having full control of it via the 6 speed manual makes it even better. Many have complained about a lack of low rpm torque, but I think people are missing the point there. Revving a Coyote out is one the biggest rushes you can experience in the car world, and I especially love how it barks back through the firewall when you get back on the gas. The MT-82 also gets a lot of bad press, but I haven’t had a problem with mine.

jul253.jpg

IMG-8942.jpg

Chassis wise, the brakes are the highlight. The 380mm rotors and 6-piston front brakes are little firm under foot but offer superb stopping ability and fade resistance. The suspension tune is however quite odd, feeling very over damped and pogo-like at low speeds, but doesn’t translate into appropriate body control at speed. The steering is also completely dead, offering absolutely no feel of what the front tyres are doing. The standard issue Pirelli tyres were absolute garbage too. To be fair, if I was doing more track orientated driving, upgrading the chassis components would easily address these aspects of the car. At the end of the day, I still enjoy driving the car, so I haven’t gone down that road.

sss.jpg

IMG-E1457.jpg

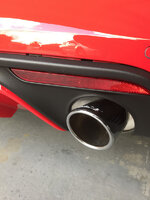
Previous to this car, I was never into modifying cars, however this changed within a short period of ownership. You see, the exhaust on these earlier S550’s was simply too restrained, to the point I was driving the car harder than I should on the public road to just hear the thing. Something had to be done, and after looking at a few options, I settled on a cat-back Borla Touring system.

IMG_0488.jpg

IMG_0491.jpg

IMG-E1906.jpg

The key requirement, other than the increase in noise, was for it to have an OE look. The Borla systems mimicked the factory chrome tips, just a little larger. The Touring has the deeper tone compared to the raspier S-Type, or the obnoxiously rowdy Attack. The noise this car makes is pure joy, refined when it needs to be, bonkers when you want it to be. Back at this time, I was new to all this, both the Mustang world as well as the aftermarket exhaust scene. While I’m more than happy with how it turned out, if I did this again, I would probably just swap out the center resonator for an X or H-pipe. With the new S650, the active exhaust sort of makes all this redundant now.

I still have he factory system taking up room in my storage shed...............:rolleyes:

n.jpg

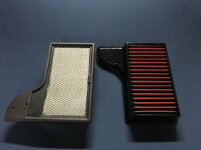
At some point, I also swapped out the standard air-filter for a AEM DryFlow item, which I’m sure allowed the engine to make another 100hp! :lol:

0p.jpg

0pp.jpg

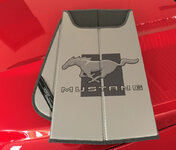
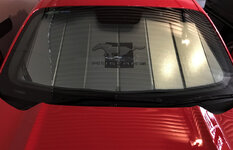
Some smaller additions included a CoverCraft cover, the trunk scuff guard, cargo net and CoverCraft sun visor. I also replaced the crappy standard floor mats for some plusher locally made items.

IMG_8473.jpg

IMG_2394.jpg

IMG_2435.jpg

IMG_2431.jpg

nov261.jpg

nov263.jpg

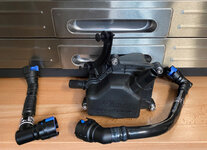
In more recent times, I have also added a Ford Performance oil separator, which I love how it blends into the rest of the engine bay rather than standing out like aftermarket items do.

IMG_1588.jpg

IMG_1591.jpg

IMG_1610.jpg

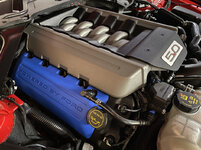
Blue coil covers were next, which I love how the bright powder blue contrasts with the surrounding Race Red paint.

IMG_1676.jpg

IMG_1686.jpg

IMG_1692.jpg

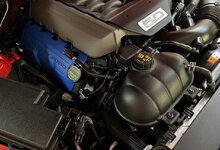
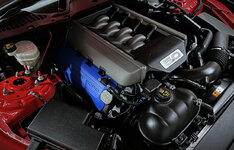
Shortly after, a coolant tank cover, hiding the discoloration that happened to all of these clear coolant overflow tanks. Again, the OE look was key.

IMG_5052.jpg

IMG_5056.jpg

IMG_5070.jpg

gt50105.jpg

gt50104.jpg

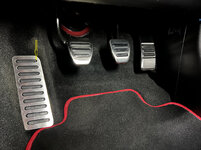
I have also added a stainless-steel dead pedal trim to match the rest of the pedals.

IMG_5031.jpg

IMG_5038.jpg

IMG_5043.jpg

But the biggest modification warrants a post all of its own……………..
 
OP
D

D.F.B

Well-known member
Joined
Aug 2, 2023
Messages
1,600
Location
Australia
I guess we'll be blown away by that.
Not quite, I already have a blown Coyote in the form of the XR8. I love the feeling of that relentless torque from the supercharger, but there is such a joy in a high revving naturally aspirated engine, something that I think is fast becoming a uniquely Mustang thing.
 
OP
D

D.F.B

Well-known member
Joined
Aug 2, 2023
Messages
1,600
Location
Australia
A Wheely Good Time…………….

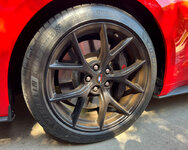
You would think being a detailing freak I would relish the challenge of maintaining these wheels…………..
Apr308.jpg

sdd2.jpg

I can’t begin to tally how much money I spent on brushes and wash tools to deal with those Performance Pack wheels. In fact, I would love to meet the nut-job who designed those wheels, we could have a little chat about the subject…………:gunfire:

may192.jpg

jan21121.jpg

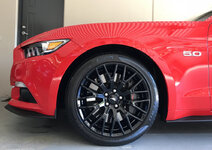
To be honest, I never really loved those wheels. Unlike the US market, Aussies had no other factory option, other than having them painted black or silver. I nearly went with silver but changed to black at the last minute. I’m sort of glad I did, the black at least hid some of the Brembo brake dust. Some………….
IMG_4854.jpg


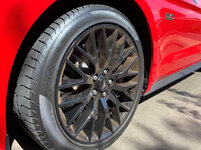
I will admit though, when they were freshly cleaned, they could look amazing……………
IMG-E2064.jpg

IMG-9279.jpg

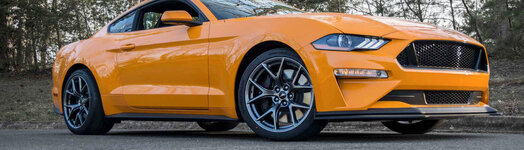
It took me 4 years before I gave up trying to love those wheels. I went looking for an OE style wheel, something that would look different but not too out of place. I will highlight at this point that this is the beauty of the Mustang, don’t like something, then change it! Both Ford and the aftermarket cater to this, allowing you take you blank canvas and go as mild or wild as you like. There were two wheels I had shortlisted, the original GT-350 design, and the PP2 design.

mr55.jpg

pp2wh.jpg

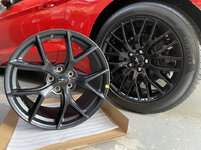
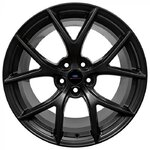
Once again, Australia syndrome kicked in and of course, I was having trouble finding what I wanted. Well, finding them was easy, but getting them into the country was the challenge. Now, both of these wheels are sold both OEM and via the aftermarket. But for various reasons at the time, I just couldn’t make it happen. I then decided to pursue the wheel Ford fitted to the locally Australia-only GT R-Spec, which came with Ford Performance HP Performance wheels, the matte black version of the PP2 wheel.
pp219.jpg

rs20.jpg

rs201.jpg

rs202.jpg

You would think it would be as simple as ordering a set through the dealer network, but no, these were VIN protected. The smart thinking parts interpreter used a VIN already in the dealer's system, ordering a single wheel to see if it was the correct part, but ended up with a standard PP1 wheel. :headscrat (The R-Spec was locally put together at the old Broadmeadows assembly plant, taking a standard GT and adding a bunch of Ford Performance parts, including a Roush Supercharger. As such, the VIN was not altered to reflect this, hence why the standard wheel turned up.) In the end, I ordered a set from CJ Pony Parts at considerable cost. Don’t go there, I stopped looking in the end, at least I got what I wanted.

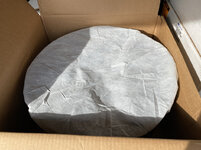
A month later, my wheels arrived from the USA. It was then another 3 week wait for a set of tyres. (This was peak Covid, so every single thing was delayed, from cars to car parts, tires, detailing products, everything!)

IMG_9407.jpg

IMG_9410.jpg

IMG_9412.jpg

IMG_9418.jpg

IMG_9426.jpg

Ford Performance offer this wheel in four different widths, I chose to go with 9.5-inch on the front and 10-inch on the rear, a 1/2 inch increase over the stock wheels. They also come supplied with Ford Performance branded center caps.

There was no cross shopping for tires, there was to be only one choice, Michelin Pilot Sport 4S or nothing! The key here is I decided to use the factory spec sizes, 255/40/R19 on the front and 275/40/R19 on the rear. Compared to the Pirelli's, these tires have a much chunkier sidewall and a squarer tread face, making them look bigger. With a much better tire and the 1/2 inch increase in wheel width at both ends, this would lend a more stable contact patch and increased traction. As mentioned in a previous post, the Pirelli tires that come standard on the Mustang were absolute rubbish. No grip, hot or cold, wet or dry. The thing was borderline sketchy in the wet, and would spin through second and third gear in the dry. I just wish I gave them a smoky send off! :ROFLMAO:

mb99.jpg

Once the tires arrived, I had them and new TPMS sensors fitted to the wheels in preparation for the next step, which was to be a new learning experience for me.......................

From the very beginning, I knew I wanted to do this right and have the wheels ceramic coated prior to putting them on the car. (Before this, I was using Capro Hydr02 to easily coat wheels, making them easier to clean and dry.) Having brand new wheels, this is the very best time to do this, before they become contaminated with iron from the brakes and general road grime. Coating the wheels is mainly to ensure ease of cleaning, and with super dusty brakes, this is an important factor for me. I will state at this point, apart from applying Carpro DLUX to plastic trim, I had never applied a ceramic coating to paint before. I considered using DLUX again, a dual wheel/plastic coating, but chose to go with NV Wheel instead.


IMG-9215.jpg

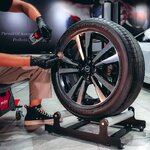
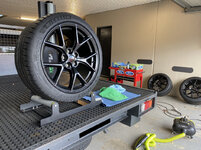
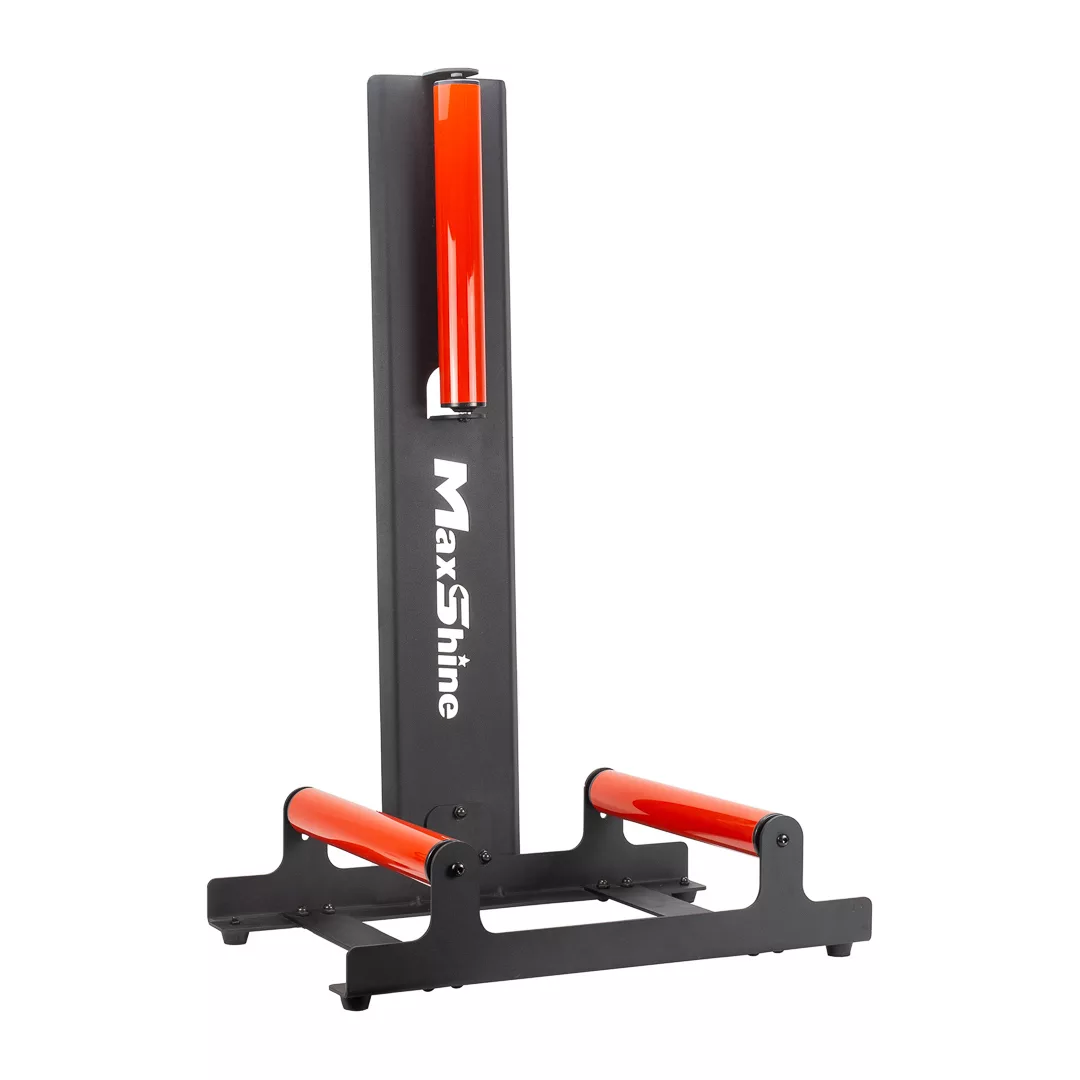
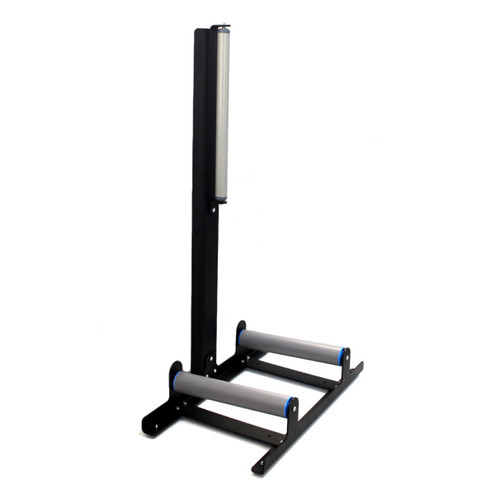
I will also note at this point that when I do something, I go ALL IN. So of course, I just had to have a wheel detailing stand………………:ROFLMAO:


msws2.jpg

msws1.jpg

IMG_9598.jpg

First step though was to prep the rubber. Fresh, new tires are contaminated with mold release agents and fitment soap. This needs to be removed to provide a clean surface for a tire dressing to properly bond. Before that, I removed all of nibs from the sidewall. This is super-**** level detailing! I had never done that before, but I thought I would go the extra mile with this project. And I must admit, it does look better with all those nibs removed. And for next level detail, I did the rear sidewall too, I mean when in Rome and all! :thumbup:

IMG_9604.jpg

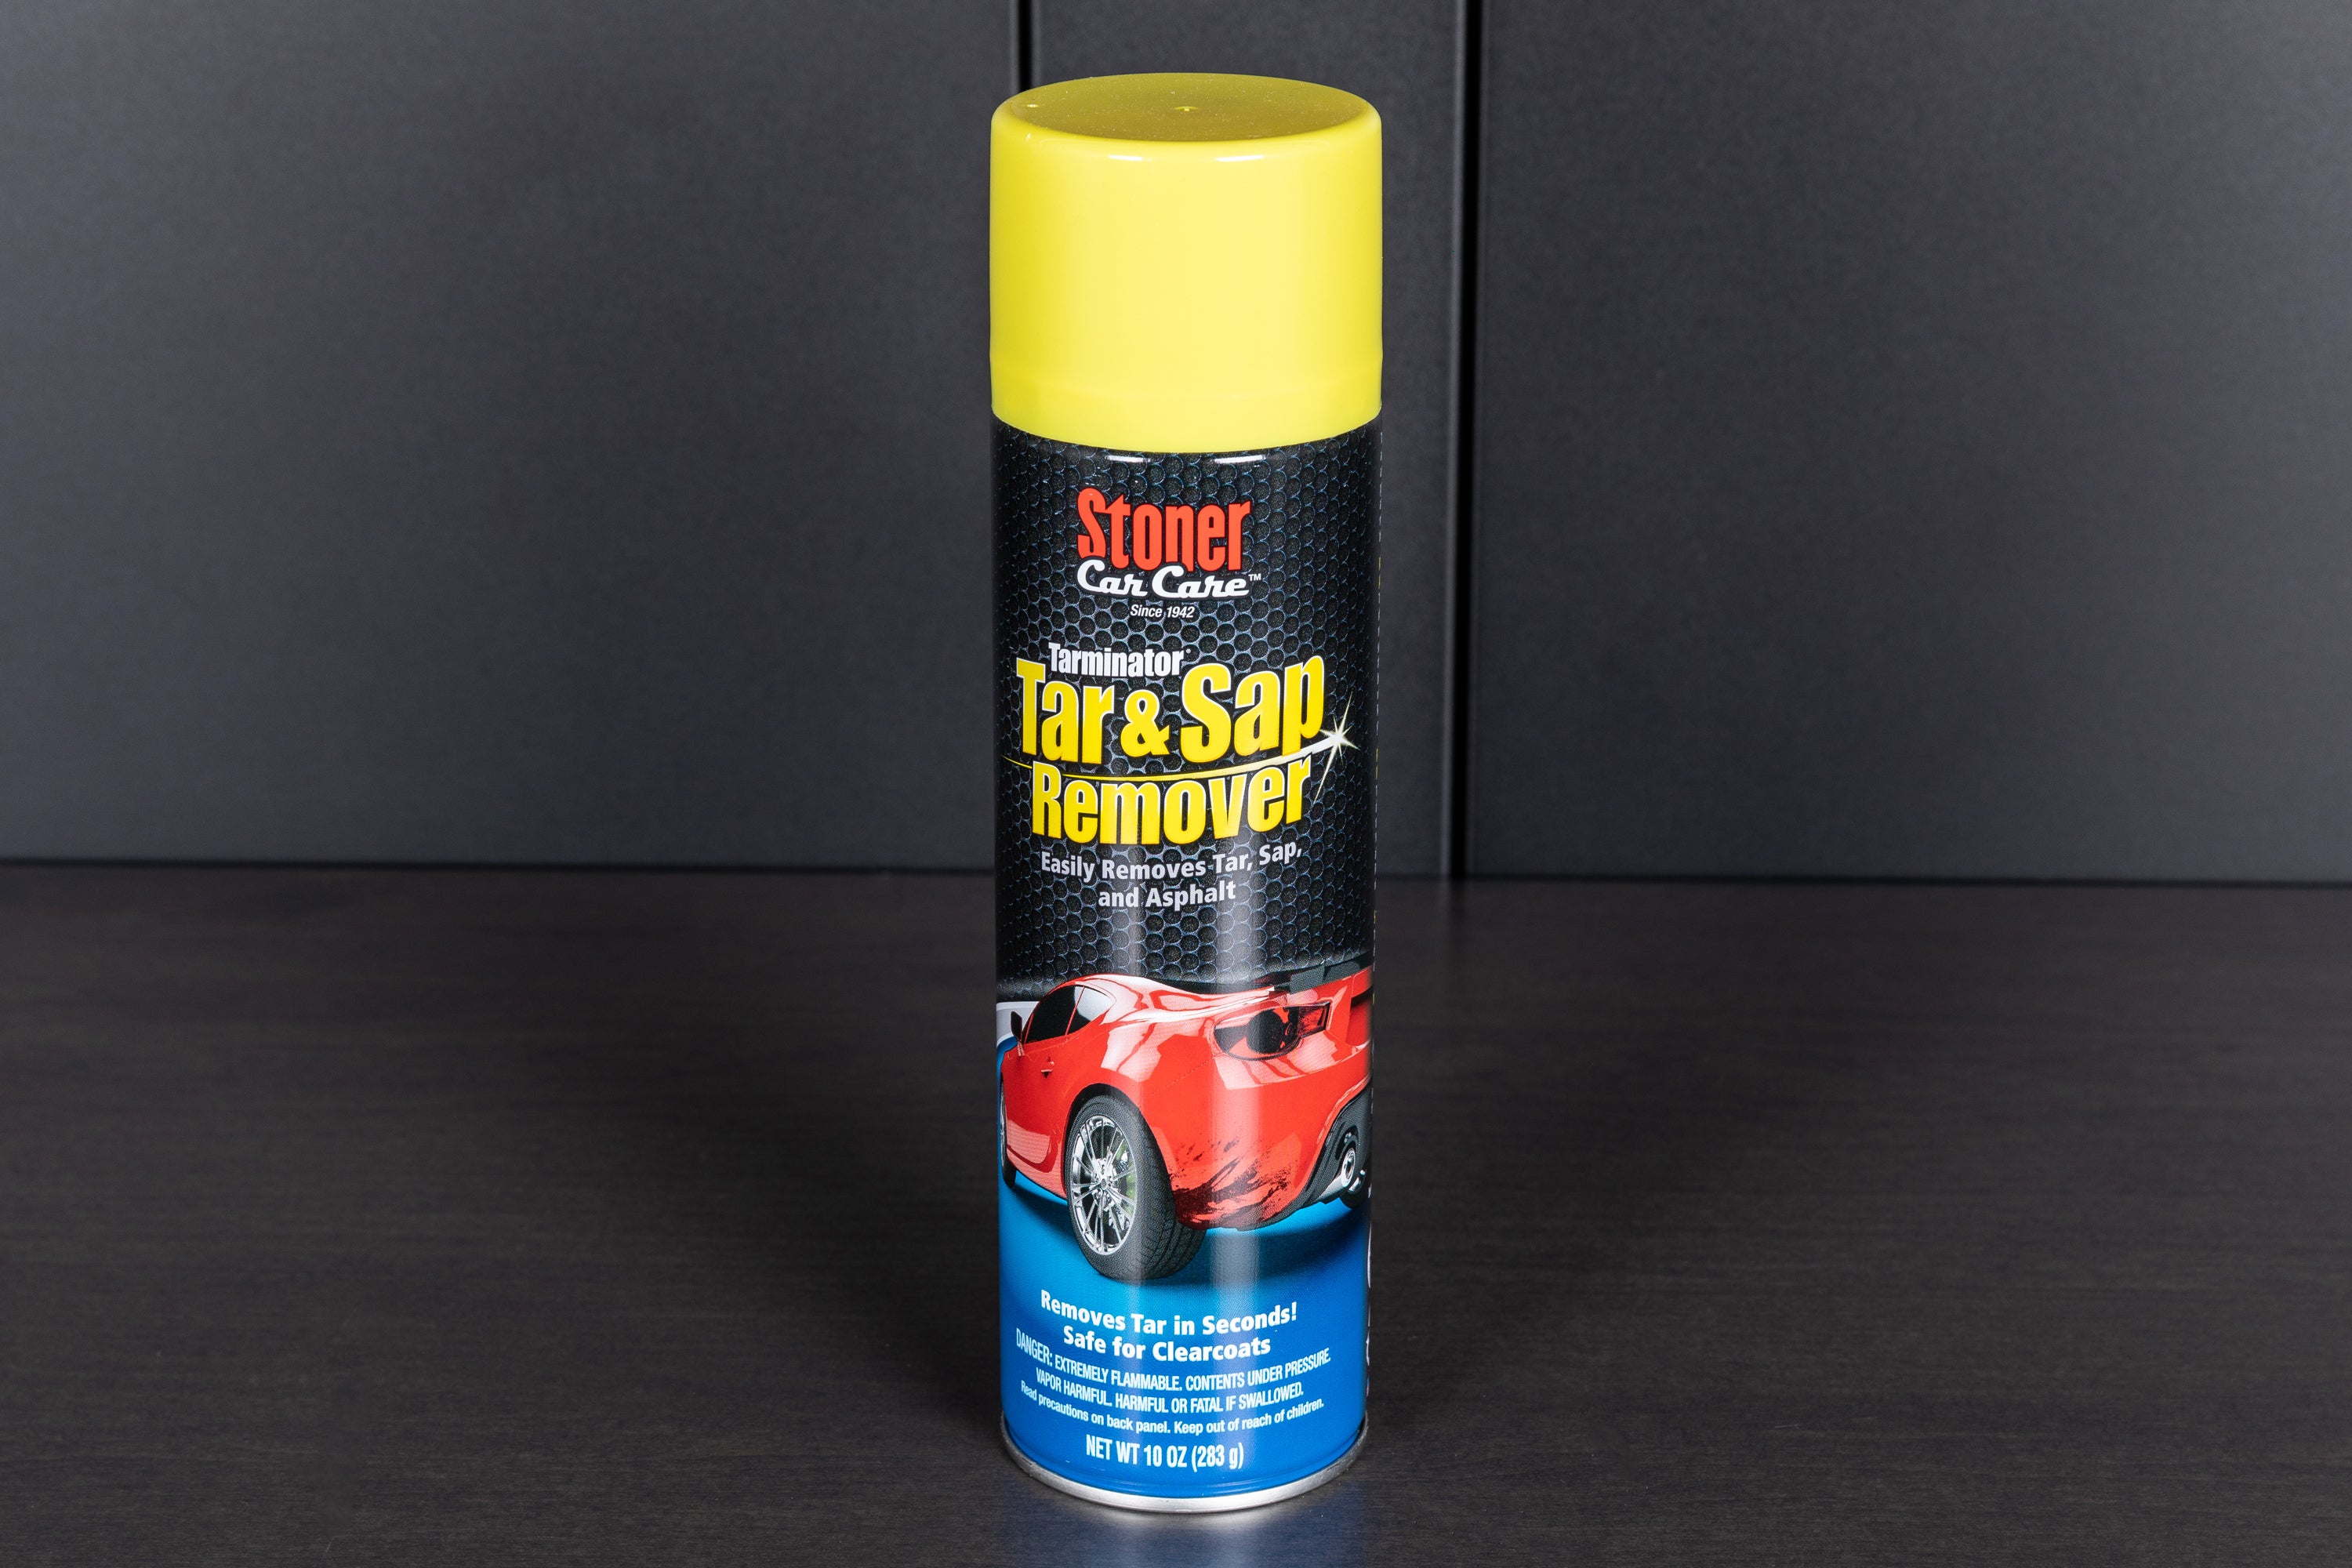
Next was to use Stoners Tarminator to strip the tires bare. Many products can be used for this including APC, degreasers and tire cleaners. Mineral Spirits works too, but tends to dry out the rubber too much. The benefit of Tarminator is the ability to do the job without using water. You can see how grotty the tires were in the before pics –


IMG_9615.jpg

IMG_9617.jpg

IMG_9621.jpg

Tarminator is best sprayed onto a towel before scrubbing the tires clean. This stuff is extraordinarily strong, both in smell and cleaning power. I would show caution when using this around painted surfaces, especially matte finishes, and remove any residue from overspray/overapplication. As you can see, this will ruin a towel so make sure to choose wisely. Those white microfibres are basically single use items so I threw these away after this job.

IMG_9618.jpg

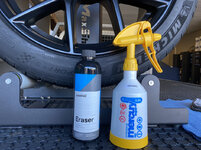
Now for wheel prep. Because I was dealing with brand new wheels, I had the ability to skip a few steps here and go straight to an IPA wipe down. If your wheels are used, you will need to use iron and tar removers, then clay them to remove all contaminants. Polishing may also be needed. Product of choice here was the delightful smelling CarPro Eraser. Liberally spray this over the wheel face and barrel before wiping with a towel until it has evaporated away. Then follow up with another application, this time sprayed into a second towel and wiping over the wheel again.
IMG_9630.jpg

From here, you are ready to apply the coating.

IMG_9645.jpg

IMG_9644.jpg

Open the bottle and apply a generous line of the product to the applicator to prime it. Once primed, a few drops are all that is needed. I started using a small round finger applicator before switching to the supplied suede cloth as I was having linting issues with the round one. Working somewhat quickly while showing care to get even coverage, wipe the applicator over the wheel face and spokes. Allow the product to flash, then start wiping with a low pile microfibre towel. Once levelled, take a second towel, and give a final wipe to ensure you have removed all the high spots. Flip the wheel and repeat on the barrel and the back of the spokes. Repeat the process for the three other wheels. NV Wheel is generally fine with one coat but can be layered with a second coat after 45min, but I stuck with just the one.

IMG_9634.jpg

IMG_9638.jpg

IMG_9642.jpg

IMG_9640.jpg


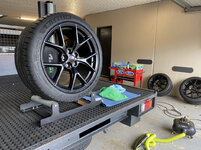
As you can see, with the sides removed, the tray of my Ranger made for a perfect work bench for this job.
IMG_9649.jpg


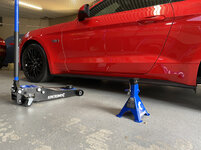
Now for fitment, allowing me to play with some toys.
IMG_9653.jpg

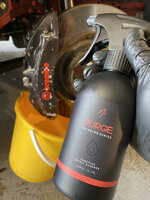
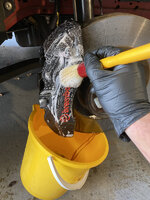
During this process, I took the opportunity to clean and then coat the front calipers while I had the wheels off. The rear calipers are nothing to look at, so I skipped doing these. With a bucket suspended under the caliper, I rinsed with water then applied NV Purge. Allowed to dwell for a few minutes, I agitated with a brush then rinsed again with water.
IMG_9657.jpg

IMG_9658.jpg

IMG_9661.jpg


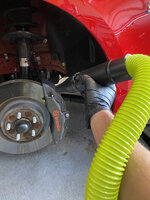
Then a wipe down with Eraser and dried using my blower.
IMG_9674.jpg


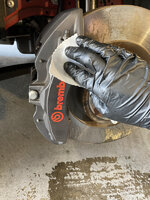
Apply the coating using the same method as the wheels, apply with an applicator, level after about a minute then wipe again with a second towel.
IMG_9666.jpg

IMG_9676.jpg


These calipers are anodized and not painted, so the coating was more about ease of cleaning rather than improved appearance.

IMG_9677.jpg

IMG_9680.jpg

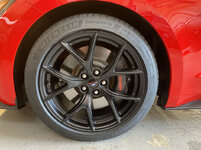
The wheels were then fitted, the lugs torqued to the factory 204 Nm / 150 ft lb spec, I then dressed the tires –
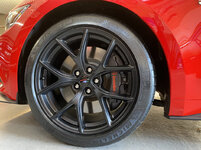
IMG_9682.jpg

IMG_9686.jpg

IMG_9698.jpg

All up, I used nearly one 30ml bottle of NV Wheel, several suede applicators, and several low pile microfiber towels. It is worth noting that those towels are either destined for the bin or for shop use only, the dried coating in their fibers has rendered them not suitable for painted surfaces again. At a couple of dollars per towel, I'm not worried about this. You will absolutely need some nitrile gloves for this task, and a well-ventilated space.
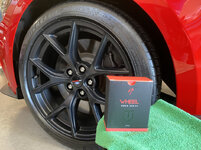
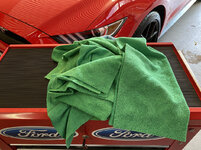
IMG_9692.jpg

IMG_9697.jpg

With this project, I learnt things I had never done before. I used a trolley jack for the first time, likewise a torque wrench. I had also taught myself how to apply a ceramic coating to wheels and calipers. These wheels represent nearly 6 months of thought and action, and I’m grateful for not only the results, but the learning process along the way as well.
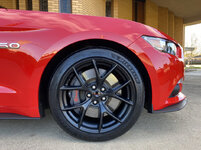
IMG_9704.jpg

IMG_9707.jpg

IMG_9712.jpg

IMG_9723.jpg

IMG_9713.jpg

IMG-9764.jpg

DSC-0340.jpg

IMG-2685.jpg

IMG-0229.jpg

IMG_9712_(2).jpg

982021.jpg


I will also say that those Michelins transformed the car. Not only did I now have this thing called "traction", they ride better and seem to produce less noise. A win on all fronts; looks, grip/traction and.............much easier to clean!
 
Last edited:
OP
D

D.F.B

Well-known member
Joined
Aug 2, 2023
Messages
1,600
Location
Australia
Question : What could be worse than cleaning Ford Mustang Performance Pack wheels?

may193.jpg


Answer : Polishing them!! :rolleyes:

IMG_9824.jpg


Shortly after fitting the new wheels, I decided to give the old ones a bit of love before putting them into storage. There were/are so many of these wheels on the used market, selling them was not worth the bother.

IMG_9702.jpg


The first step was to get them cleaned, starting with the tires using P&S Brake Buster, an alkaline wheel & tire cleaner.

IMG-9806.jpg

IMG_9794.jpg

IMG_9799.jpg


NV Purge (an iron-remover wheel cleaner) was used to provide a thorough deep clean of the barrels, spokes and wheel face.

IMG_9795.jpg

IMG_9810.jpg

IMG_9802.jpg

IMG_9803.jpg


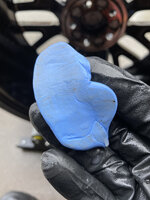
I then begun the tedious task of claying the wheels, using a piece of clay bar and Meguiar's Final Inspection as the lubricant.

IMG_9815.jpg

IMG_9818.jpg

IMG_9819.jpg


The tedium continued with the polishing process. The barrels were easy, using my 3-inch machine with a medium cutting pad and Scholl S20 Black.

IMG_9826.jpg


The spokes and wheel face were a challenge, even with the small Rupes iBrid Nano, again using Scholl S20 Black. I didn't go for perfection here, just enough to clean them up and add some gloss.

IMG_9824.jpg


After polishing, I wiped the wheel over with Carpro Eraser and then applied a quick layer of P&S Bead Maker. Not the most durable product, but these wheels probably won't see use again and the gloss it provides is second to none.

IMG_9830.jpg


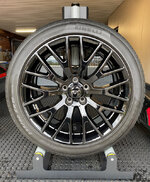
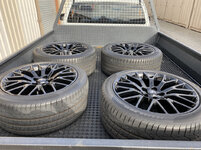
I then loaded the wheels up and put them in storage, where they have set till this day.

IMG_9919.jpg

IMG_9921.jpg
 

Blackbyrd

Well-known member
Joined
Nov 28, 2020
Messages
1,170
Location
TN
Ive considered one of those wheel cleaning dollies a few times. How do you like them?
 
OP
D

D.F.B

Well-known member
Joined
Aug 2, 2023
Messages
1,600
Location
Australia
Ive considered one of those wheel cleaning dollies a few times. How do you like them?
If you think you'll get more than one use out of it, most definitely.

Naturally, you will get the same result without the wheel stand, many suspend the wheel on a large trash can, but the ability to spin the wheel around as you work is so convenient. You still need to man handle the wheels to get them onto the stand and swap sides, but I'm glad I bought it. I'm actually going to be using it again in a few weeks.

The Maxshine version I have is sold under a few different brands, they all do the same thing.


If you can still get one, the absolute best are from Source Garage, he is sadly closing down his business. I suspect everyone copied his idea and basically ran him out of business.

 
To avoid these ads, REGISTER NOW!

Blackbyrd

Well-known member
Joined
Nov 28, 2020
Messages
1,170
Location
TN
Thanks for the links! The adams version was the only one I have seen, but definitely partial to black and red...... for reasons.....
 
OP
D

D.F.B

Well-known member
Joined
Aug 2, 2023
Messages
1,600
Location
Australia
When I installed the new wheels on the Mustang, I re-used the factory lugs. At the time, this didn't really bother me, but peer pressure got the better of me!

IMG-3130.jpg

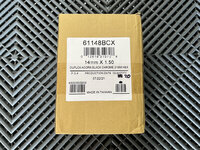
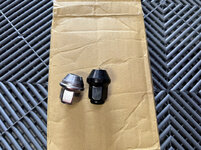
What ultimately made me change my mind was discovering how bad the Ford factory lugs were. These items have a chrome jacket covering the actual nut, which over time can swell and cause the jacket to spin on the nut and prevent removal of the wheel. Upgrading to solid lug nuts seemed the smart move, taking the opportunity to change them to black. These are Gorilla items, matching the same “acorn” design” as needed for OE type wheels.

IMG_5073.jpg

IMG_5076.jpg

IMG_5093.jpg

IMG_5078.jpg

IMG_5084.jpg

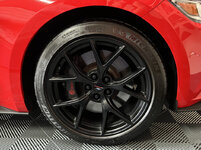
And wow what a difference, the black blending in nicely with the wheels. I could see why so many people were telling me to change them.

IMG_5096.jpg

IMG_5098.jpg

IMG-9349.jpg

82.jpg

Such a small, simple change that makes a big difference. It's all in the "details".
 
OP
D

D.F.B

Well-known member
Joined
Aug 2, 2023
Messages
1,600
Location
Australia
The Cruze Returns................

I have detailed this Holden Cruze a couple of times now, this particular example belonging to my employer's parents. I don't detail for a living, but occasionally do a few cars on the side to earn a little extra cash, which tends to end up being spent on more detailing products. :rolleyes:

IMG-9580.jpg


img-9581-jpg.jpg

img-9577-jpg.jpg

img-9576-jpg.jpg


I actually started with the worst part of this job, the interior. Looking back to the previous times I have detailed this car, vacuuming the carpet was a nightmare, so I wanted this out of the way first. And once again, it fought me the whole way! Using some P&S Paint Gloss to cut down the static helped, but in the end, I had to call it good and move on.

It was then onto the exterior, starting with the wheels.

img-9583-jpg.jpg


NV Purge for the wheels, applied after the rinse, left to dwell while I scrubbed the tires and wheel arches with Shine Supply Wise Guy. I then rinsed, reapplied the Purge and attacked them with various brushes.

img-9588-jpg.jpg


Next, I applied Gyeon Iron to the whole car. Geez, I don't know how the pro's use this stuff every day! Even after a shower, I can still smell it on my skin!
img-9591-jpg.jpg


I also applied some P&S Bug Off to the front bumper, wing mirrors and windscreen to soak them down.

img-9592-jpg.jpg


Both chemicals were then left to dwell while I rinsed the black sludge out of my wheel bucket! :oops:

img-9594-jpg.jpg

img-9596-jpg.jpg

img-9599-jpg.jpg


This car will never have been treated with iron remover before, hence the strong reaction. I then followed this by foaming Carpro Lift over the top to increase the dwell time.

img-9601-jpg.jpg


Next up, a thorough rinse to remove the soap and chemical residue. This is where the time and effort applying these products reveals a much cleaner surface to contact wash. I have to say, I was very impressed with what the iron remover, bug remover and Lift achieved here.

I then re-foamed with Lift for the contact wash. During this step, I also grabbed a car-wash towel and wiped down the door jambs.

img-9605-jpg.jpg


After all that, the paint was completely flat, not that there was much protection on the car anyway. Hydr02 to the rescue, applied to the paint, glass and wheels. I really only do this to make the drying process easier, but it does add some gloss and protection to the equation.

img-9607-jpg.jpg


After a blow down, I continued the Carpro theme by applying some Reload 2.0 to the paint and glass. I have to say, this new version is much more friendly to work with, flashing nicely and only requiring minimal towel work.

img-9610-jpg.jpg


The door jambs were then dried with ONR, the wheel arches sprayed with Hyper Dressing and the tires dressed with yet another Carpro product, this time Darkside.

Back to the interior, cleaning the plastic surfaces with Griot's Interior Cleaner.

Griot's Garage Interior Cleaner – Obsessed Garage

img-9614-jpg.jpg

The main selling point of this product is the complete lack of colouring and scent, meaning you just get an interior cleaner and nothing else to complicate the situation. This is probably the dirtiest interior that this product will deal with in the DFB garage, so it got put the to the ultimate test today. While it performed well, I can't help feeling P&S Express does a better job. I actually switched to Express to clean the leather for comparison's sake and felt like I preferred it over the Griot's.

Following the cleaning, I went over the plastics with P&S Swift. While this offers some mild cleaning ability, I like how this has just the right amount of dressing ability without leaving an oil slick behind, or looking too dry like some interior detailers can. I treated the leather to some NV Nourish, the glass was then attended to with Invisible Glass, the carpets misted with KCx FU (an odor neutralizer), and the carpets vacuumed (again!). A quick spritz of Griot's Fine Leather Scent and the interior was done.

A quick wipe over with some Bead Maker and the Cruze was done!

img-9617-jpg.jpg
 

Blackbyrd

Well-known member
Joined
Nov 28, 2020
Messages
1,170
Location
TN
Dont dismiss that product quite yet, I wont use anything else..... It does a wonderful job on my Alcantara in my ZL1. It actually does better with a bit of agitation as opposed to using it like a spray and wipe product. For Alcantara I use a microfiber cloth dampened with hot water, apply a sparing amount directly to the cloth and use it to rub/scrub the leather. When I first got the car the steering wheel was so matted down I actually thought I was going to have to replace it. The above method brought it back to life and I've continued to use it on the shift knob and seats to great continuous results.

The other product of theirs I will never be able to live without is their Heavy Duty Wheel Cleaner. Brembo brakes are notorious for being dusty and that baked on debris can be a complete PITA to clean off, but this product does it near effortlessly. I used it on my polished wheels on my GTO as well and while that wasnt quite where the product shined, it did an amazing job between polishes.
 
OP
D

D.F.B

Well-known member
Joined
Aug 2, 2023
Messages
1,600
Location
Australia
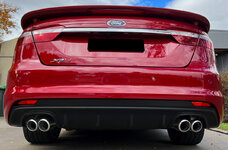
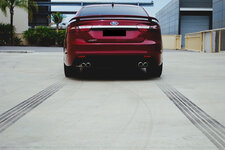
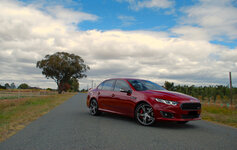
Having sat under a cover for a few months, it was so nice to finally get some seat time in the big XR8 today.

IMG-9630.jpg

IMG-9634.jpg

I may or may not have given it a REALLY good thrashing, so much so I needed to stop by the gas station for some fuel on the way home. ;)

Oh, and the black lines are not from me! :lol:
 
OP
D

D.F.B

Well-known member
Joined
Aug 2, 2023
Messages
1,600
Location
Australia
Dont dismiss that product quite yet, I wont use anything else..... It does a wonderful job on my Alcantara in my ZL1. It actually does better with a bit of agitation as opposed to using it like a spray and wipe product. For Alcantara I use a microfiber cloth dampened with hot water, apply a sparing amount directly to the cloth and use it to rub/scrub the leather. When I first got the car the steering wheel was so matted down I actually thought I was going to have to replace it. The above method brought it back to life and I've continued to use it on the shift knob and seats to great continuous results.

The other product of theirs I will never be able to live without is their Heavy Duty Wheel Cleaner. Brembo brakes are notorious for being dusty and that baked on debris can be a complete PITA to clean off, but this product does it near effortlessly. I used it on my polished wheels on my GTO as well and while that wasnt quite where the product shined, it did an amazing job between polishes.
I probably should quantify that I'm extremely analytical when it comes to detailing products. I'm often comparing minute differences between a number of similar excellent products. It's one of the reasons why I don't limit myself to one particular brand.

IMG-9308.jpg

IMG-1725.jpg

I will say that Griot's Interior Cleaner is easily towards the top of the list when it comes to interior cleaners. Yesterday, I used it in a spray and wipe application, as well as with agitation on dirtier areas.
 
OP
D

D.F.B

Well-known member
Joined
Aug 2, 2023
Messages
1,600
Location
Australia
Yaaaay! I managed to land a public holiday! Thanks Dan.................(y)

Sanity detail on the XR8 first up this morning, my antics clearly entertaining the neighbors across the street watching while they sat on the front porch.


IMG-9642.jpg


I washed the wheels with Purge for a deeper clean, tyres with Brake Buster. NV Snow was in the foam cannon, with OG Drying Aid after the wash, OG Tire Dressing on the rubber. I also decided to top the DLUX on the rear diffuser with a coat of Reload 2.0.


img-9647-jpg.jpg
 
OP
D

D.F.B

Well-known member
Joined
Aug 2, 2023
Messages
1,600
Location
Australia
Mini Holiday Project 1 - Windscreen Wiper Restoration

I'll start this post of by saying I don't do "holidays/vacations". I just don't find them relaxing, travelling somewhere, sleeping in a strange bed. As soon as I arrive, all I do is spend the whole time wanting to go home. It took me a long time to figure this out, that you don't have to go somewhere on vacation just because that's what most people like to do. Now, I please myself and stay home where I can relax and unwind by doing things that make me happy. I think the term is "stay-cation". So when I take leave, I mess about in the garage on projects that I have planned for months in advance. And so with a week off after a long, hard-working winter, I'm indulging in a bit of garage therapy.

With the XR6 turning 15 this year, I feel it's time to give it a little love in a couple of key areas. The first of which is addressing some fading of the windscreen trim panel and wiper arms.

Granted, being garaged all day for the last 13 of those 15 years had meant that the black plastic trim panel had fared better than most. The extent of the fading was limited to the exposed sections, the part covered by the hood was absolutely fine.

IMG-9674.jpg


The restoration of these plastic parts could have been done while still attached to the car, but knowing how fiddly this would be, I decided to remove the two-piece scuttle panel. These are held down by 5 Christmas Tree fasteners, one each side by the bonnet hinges, two mounted to the scuttle and one that secures the two pieces together in the middle. As I don't currently have trim removal tools, these were a touch fiddly to remove.

img-9677-jpg.jpg

img-9680-jpg.jpg

The next step was to remove the wiper arms to allow the two plastic panels to lift away from the windscreen and scuttle. For the right side, I needed a shallow socket to gain access, and a long socket for the left side.

img-9685-jpg.jpg

img-9690-jpg.jpg

The wiper arms for the most part were in good condition, however the old-style suspenders were letting the side down. These have never been changed in 15 years of ownership and are a known area to degrade on Falcon's. More on this shortly.

img-9689-jpg.jpg

img-9686-jpg.jpg

A little bit of fettling had the two plastic scuttle trims removed, the left side first, the right side next. You also need to disconnect the rubber washer jet hoses before lifting away from the car. The Milwaukee M18 Heat Gun came in handy softening the rubber before removing the hose, last thing I wanted was to break something that is now NLA!

img-9700-jpg.jpg

Check out the date codes, 22.04.08, surely one of the first to be made. I love stuff like this, the little clues hidden all over the car painting a picture of its creation.

img-9703-jpg.jpg

I was expecting worse, but this is what was underneath the plastic trim............

img-9693-jpg.jpg

img-9695-jpg.jpg

I cleaned up these areas with ONR and a towel.

img-9704-jpg.jpg

img-9709-jpg.jpg

Next, it was over to the sink for some cleaning, in this case KCx Green Star and a brush to deep clean the surfaces and remove any previously applied drying aid. In this case, I removed the rubber seal which is attached to the trims via push-in clips.

img-9713-jpg.jpg

After a rinse, it was then a liberal bath in Eraser, then a final wipe over with IPA.

img-9718-jpg.jpg

img-9719-jpg.jpg

With these two pieces cleaned and prepared, it was time for some product. There are numerous trim restoration products on the market. Having used simple dressings like 303 or Perl in the past, these just don't last long enough. I have used Carpro DLUX in the past but have sort of cooled on that in recent times. I've had good results from using Carpro Reload on black plastic surfaces, but that is more of a light enhancement rather than a restorative type of product. Which led me to this...................

Get Solution Finish Trim Restorer Online | Waxit – Waxit Car Care

img-9724-jpg.jpg

In truth, I've had this bottle of Solution Finish in the cabinet for a while now, so it sort of made sense to use this. Solution Finish is described as a "semi-permanent" trim restorer, lasting 12+ months compared to a few weeks from a trim dressing. Considering my usage patterns with this car, I'm expecting at least a couple of years out it. Solution Finish is silicone-free and uses natural oils to penetrate and then bond to the plastic, delivering a non-greasy OE level finish. The product comes in two different variations, the one here has the black finish, but there is also a grey tinted version.

Application is simple, shake the bottle, apply a SMALL amount of product to an applicator (in my case a foam block and craft brush), then start working it into the plastic. A little goes a long way and coverage is exceptional. Be sure to get into all the crevices, untreated areas will be highly obvious. Allow the product to sit for a short period, then follow up with a towel to level it down. Choose wisely with the towel, the black die will ruin it. I also decided to treat the rubber seal I removed earlier, as well as the Christmas tree clips.

img-9732-jpg.jpg

PRO TIP - put the lid back on the bottle so that you don't knock it over and spill the precious liquid all over your work surface............I mean, who would do that.......................... ;)

img-9731-jpg.jpg

With both trim pieces treated, it was time to reinstall back onto the car. Retrace the removal steps by starting with the right-hand side, then the left, connecting the washer hoses before seating everything down. Resecure the clips and rubber seal.

At this point I will highlight how much I appreciate auto-workers fitting this stuff on a production line, the stars all need to align for it to fit and seat properly. Reconnecting the washer hoses, then snapping the edge back under the windscreen, while making sure to not pinch the rubber seals took some time to perfect.

img-9740-jpg.jpg

img-9739-jpg.jpg

img-9738-jpg.jpg

For the wipers, I ordered a set of Ford OEM wiper blades and rubber suspenders. These were used on later FG-X models and eliminate the steel suspenders that had deteriorated on mine.

GENUINE FORD FALCON FG FGX RIGHT & LEFT WIPER BLADES SET ER7Z17528AA ER2Z17528AA | eBay

After cleaning the carry over parts, the new rubber items clip straight on. I'm pretty sure the wiper blades I removed today were the originals from 2008!

img-9639-jpg.jpg

I then refitted the wiper arm assemblies, a fiddly process that requires a little fenagling to get correct. And yes, I did look up the torque spec for the wiper arms, 22 Nm to be precise. See, I do use my fancy tools!

img-9744-jpg.jpg

With everything buttoned up and the rest of the engine bay plastics coated with Carpro Reload, it was job done!

img-9742-jpg.jpg

When I started to plan this little task, I was prepared to simply replace these two trim pieces and the whole wiper arm assemblies. A little research revealed the newer FG-X Falcon wiper blade and suspender were a straight swap. And the two scuttle trims are now NLA.

So today, I learnt how to remove and reinstall these parts of the car, while learning how to use Solution Finish. Including a few shop supplies, total cost was just under $100 plus a couple of hours of my time.

Next, something a little more involved.............a lot more involved. Wish my poor back luck.
 

Geoff289

Well-known member
Joined
Nov 10, 2013
Messages
1,234
Location
Melbourne, Australia
I get exhausted just reading your posts but gee the results are impressive.

The auto workers who fitted those items on the production line were probably robots.
 
OP
D

D.F.B

Well-known member
Joined
Aug 2, 2023
Messages
1,600
Location
Australia
I get exhausted just reading your posts but gee the results are impressive.

The auto workers who fitted those items on the production line were probably robots.
Thanks!

I somehow don't think the Broadmeadows plant was that sophisticated to have robots fitting plastic trims. I toured the plant in 2003, when it was at full / 110% speed during the BA Falcon days, the place was looking pretty tired. By 2008 and beyond, I can't image much was spent there.
 
OP
D

D.F.B

Well-known member
Joined
Aug 2, 2023
Messages
1,600
Location
Australia
Mini Holiday Project 2 - XR6 Wheel Renovation & Coating

Before I start this post, I will point out these wheels are 15 years old and have a few nicks here and there. None caused by me by the way, let's just say that I hate handing my cars over to someone else's "care". Sometimes we have to learn to just let things go. I would love to have these restored, but the diamond face requires specialist attention. I considered replacing them, but at $1200 EACH!, that won't be happening for a while. As such, this is my attempt to give them a spring clean and a new lease on life.

So, up on jack stands the car went. While I have used the trolley jack before, I've never used jack stands. To complicate matters, I needed to account for the flooring by placing a rubber mat underneath to prevent the stands from sliding or damaging the tiles. This stuff is actually gym matting cut into square tiles, the remaining material used under the jack.

IMG-9752.jpg

IMG-9754.jpg


I'm actually splitting this project in two, working on the right-hand side today. This is for two reasons, there was a lot of ground to cover today and a fair bit of heavy lifting. I'm also really, really nervous about putting the car up on jack stands at all four corners. Baby steps.

With the wheels removed, it was time to decontaminate them. The wheels were already "clean" from the previous wash, this was more about removing any remaining protection and an accumulation of tar deposits. I don't have many action shots of this, I was in the zone with a big job ahead of me. Annoyingly, my week's leave coincided with three days of heavy rain predicted. Typical. :rolleyes:

IMG-9758.jpg


In terms of the process here, I hit the tyres front and back with Carpro ReTyre. I have mentioned this numerous times, but these tyres resist nearly every attempt at stripping them back to natural rubber. I actually had to get the Tarminator out afterwards to get them properly bare. For the wheels, I started with Brake Buster undiluted to clean and strip, rinsed and then applied NV Purify, which provided the lubricant for the clay bar. I haven't used a real clay bar in years! After another rinse, I applied Carpro TarX and used a plastic razor to lift off the baked-on tar deposits. I also needed to use KCx Eulex to remove some wheel weight adhesive residue and a couple of more stubborn tar spots. The wheel was then rinsed and dried with the Big Boi.

As planned, the next step was to polish the wheels. I wasn't going for perfection here, just an enhancement using Sonax Perfect Finish on a Rupes yellow. I stared out using the D/A backing plate, but switched to the rotary function for better control and precision. This is the first time I had used the extension shaft on the iBrid, which allows a little more clearance for tighter spots. The barrels were given a pass over with my 3-inch ShineMate and a yellow ShineMate pad.

IMG-9762.jpg


Today was also my first try of the new Rupes prep sprays, Reveal Lite and Revel Strong. For some reason, none of the detailing suppliers in Australia have this in their stores, so I had to get it from an online tool supplier. Go figure.

https://toolswarehouse.com.au/produc...esidue-remover

(USA links)
RUPES REVEAL Lite Residue Remover 750mL
https://www.autogeek.net/rupes-revea...ver-750ml.html

IMG-9764.jpg


In this case, I used Reveal Lite for the polish residue wipe down. Lite can be used more generously, able to be applied directly to the surface if needed.

IMG-9770.jpg


Reveal Strong is best used as the final wipe down and used with care. Do not apply this directly to the surface, rather spray into a towel and wipe. This stuff flashes very fast.

IMG-9769.jpg


These two products are very nice to use, the Lite version smells delightful, while the Strong does have some potency to it. My favorite products in this space are Gyeon Prep and Carpro Eraser. The Rupes duo seem more potent than those, even the Lite version. The faster flash time of Strong could be a time saver for the pros.

With the two wheels clean, polished and prepped, it was time to apply the coating.


IMG-9317.jpg


I had to order this from the USA, Armour Detail Supply Wheel Coating offers superior water beading and slickness, something that is often missing from other high-temp wheel coatings. It's also a single layer coating, which suits me just fine!

IMG-9774.jpg


Due to the very high solids content, this coating is very grabby on the initial leveling wipe but smooths out to a slick finish with the secondary wipe.

With the two wheels coated, I directed some attention to the wheel arches. Not that they were too bad, but while the wheels were removed, I decided to make the most of it.

IMG-9777.jpg


In this case, I applied some APC, blasted with the Tornador, then doused down with ONR and dried with a towel. I've used this sort of method on engine bays before and it worked just fine here too.

IMG-9781.jpg


I also gave the calipers a quick once over with some metal polish. I didn't bother coating them, they are not painted and these brakes are not all that dusty. Original OE rotors and pads by the way. I note I need to replace the bump stops on the rear suspension though.

IMG-9783.jpg

IMG-9792.jpg


No idea what "49" means, just another little artifact of the cars birth.

IMG-9791.jpg


In preparation for this project, I ordered a set of NOS lug nuts. I actually tried to get these from Ford Spares, but they are now obsolete and could only supply me a grand total of 6. I even had to explain what "lug nuts" were to the parts guy. :dunno:

I also took the opportunity to replace the factory supplied locking lug nuts for regular ones, I've always been nervous about those things.

IMG-9784.jpg


With the wheels back on and the car lowered back down, the lugs were then torqued to 130 Nm. Factory spec is pretty vague, listing 115 to 155 Nm in the owner's manual...............yes, I read the owner's manual. :lol:

IMG-9800.jpg


Now to repeat all of that again tomorrow on the left side set. I wish I had a lift!

These are still one of my favorite Falcon wheels of all time, they really suited the FG styling theme and tied into the wider Ford lineup at the time. I wish they had explored the design a little more and made a 19" version for other models in the lineup.

I remember when the FG was unveiled with carry over wheels on the FPV models and the plain looking 19" XR option being very disappointing. As such, the 18" "Snowflake" or Y-Spoke wheels were the ones to have, standard on XR6 Turbo and XR8 sedans, optional on XR6 sedan and all XR Utes.

I actually ordered my XR6 with the ugly standard 17-inch wheels, but an hour later I called the salesman to add the 18-inch wheels for an additional $1000 to my order. My only stuff up was not paying the nominal $250 for the matching spare wheel, so an ugly space saver resides in my boot, never used by the way. Keep in mind I was 21 years old at the time, you really don't have much rational thinking at that age.
 
OP
D

D.F.B

Well-known member
Joined
Aug 2, 2023
Messages
1,600
Location
Australia
Mini Holiday Project 2 - XR6 Wheel Renovation & Coating (PART TWO)

With a process in place from yesterday, today's progress was smoother.

IMG-9801.jpg

(Pre-cleaning)

IMG-9804.jpg

You know, at the time (and now I guess) the media and general public panned the FG Falcon for being a carry-over platform or "top hat" exercise compared to the VE Commodore. The thing is, the Commodore needed to be all new, the previous model loosely based on something that came out in the late 1970's, so they had a lot of ground to make up.

The BA Falcon was in some ways that moment for Ford, the difference being that those major upgrades were out of sync with the life cycle of the Falcon at the time. What I mean by that is going by the typical 8 - 10 year model cycles of previous models, the BA didn't get an all-new body to go with the major mechanical updates. That was obviously addressed with the FG a few years down the track. The thing is, because AU was such a disaster, Ford had to make an impact with the BA Falcon, but because the body shell needed to make another 6 years, they went for mechanical improvements instead. That sort of took some of the gloss out of the FG when it arrived in 2008 compared to the truly all-new VE Commodore.

I mention all that because the FG Falcon did in fact offer some significant upgrades save for the new sheet metal wrapping around the familiar mechanical package. The most obvious being the front suspension and steering. Where AU, BA and BF's had a similar double-wishbone layout, it was all cast iron. As seen above, the spindle, upper A-arm and split lower A-arm were all made of aluminum on FG. I remember it being one of the first things I noticed when I got the car.

Anyway, history lesson over.

IMG-9803.jpg

And thankfully, it wasn't raining for today's efforts, although it was very windy. With cleaning and decontamination moved out into the driveway, I followed the same process as yesterday. Having done similar jobs like this before, having the right chemicals on hand makes it a walk in the park.

Once again, those ****** PS3's wouldn't let go of the dressing. Even with a sledgehammer in the form of ReTyre, I still had to break out the Tarminator. You can see the dressing residue still clinging to the sidewall prior to cleaning below...........

IMG-9814.jpg

One stripped tire and one ruined towel..............

IMG-9817.jpg

Polished and coated. I had to break out the CutMax on these two, for some reason these had some deeper scratches that wouldn't clear up with Perfect Finish.

IMG-9820.jpg

After cleaning the wheel arches, suspension parts and polishing the calipers, the wheels went back on, and the car lowered back to ground. On the last wheel and last lug nut, I had to re-use one of the old lugs because the new one had some galled-up threads. :rolleyes: I picked from the best of the old ones, gave it a polish and no would pick the difference..............except me.

IMG-9825.jpg

With the wheels now clean, polished, coated and back on the car, there is a problem. Well, I knew this was going to be a problem as soon as I took the first wheel off yesterday......................

IMG-9805.jpg

IMG-9807.jpg

Those dust shields should be matte black in colour. They are 15 years old and I guess frequent washing didn't help the situation. ;) Fitted to the car with the wheels on, the degradation is less obvious but..................well, you should know by now that would bother me.

The simple solution would be to sand, prime and repaint them. The cold and windy weather didn't inspire me to do that. So, the even simpler solution was to replace them. A quick call to the Ford dealer and I have four new ones arriving tomorrow. Which means taking the wheels off again. :rolleyes: Ah well, at least I get to use my torque wrench again! :thumbup:

These dust shields are largely useless on FG Falcon's with the entry level PBR brakes. Anyone who had an early BA Falcon would disagree with that, those were very dusty in comparison. Many would simply remove the dust shields, but I like how they cover up the rusty rotor hats.

So that's the next job, replacing the dust shields. I will then re-dress the tires. I think I might even have a go at replacing the rubber bump stops on the rear suspension, which seems like an easy job for a mechanical noob like me.

Oh, and I still need a lift. :lol:
 
OP
D

D.F.B

Well-known member
Joined
Aug 2, 2023
Messages
1,600
Location
Australia
Friday Tinkering..................

While I wait for the replacement dust shields, which were supposed to turn up this morning, I pressed on tying up a few loose ends.

First, I decided to swap out the K&N air filter for a new one. I've had one in this car from very early on, having a second one allows me to swap it for a clean and dry filter straight away rather than having to wait for it to dry before re-oiling. An extravagance I suppose, one that somewhat negates the point of having a re-usable filter and supports the idea of just using throw-away OEM filters. But then I wouldn't benefit from the extra 40hp the K&N brings to the table.................... :ROFLMAO:

IMG-9832.jpg


For the record, early on I tried removing the intake restrictor but immediately put it back in. At the time I remember searching for information on this apparent "free mod" only for me to discover what I felt was actually true.

That intake insert was intended to increase air velocity, in the process bolstering low-end torque and further tuning intake sound quality. So, while it has the potential to deliver more air to the engine and increase the volume of the induction note, the benefits are only felt at the top end of the rev range, while also delivering less favorable resonance. If you were racing the car, fine, take it out. But driving the car as it was intended, with the occasion run to the red line, leave it in.

This is a more technical description of what's happening I found on another forum -

"......more velocity = better atomization = better mixture distribution in the combustion chamber = better combustion = better volumetric efficiency......"

Strangely, there doesn't seem to be much imagery online about this part of the car. I lifted these shots from the video I'll post below -

intake-restrictor2-jpg.jpg
intake-restrictor-jpg.jpg


Next, onto something only the truly deranged would do............de-nibbing the tires on the XR6.

img-9835-jpg.jpg

A completely absurd exercise and one I even question the point of, but for some reason, tyres look better with them removed.

After adding some additional rubber lining to one of my cabinets, I decided to tackle the deteriorated primer bulb on my Victa MasterCut.

img-9839-jpg.jpg

img-9841-jpg.jpg

While this wasn't leaking, the rubber bulb had started to perish. The bulb is not replaceable on its own, so the whole cap must be swapped for a new one. Because I had two in stock, I thought this would be an easy fix.................

But no, after replacing the primer cap with a new rubber o-ring, I turned the fuel tap back on and ended up with fuel pouring out of the primer bulb. I removed and re-seated the cap to the same result. I then removed it again and replaced the float needle and put it back together again. Same thing happened. I then pulled it back apart and discovered the OEM float was not pivoting freely on this aftermarket primer cap. So, after cleaning the original cap and re-installed with the new o-ring, the problem stopped.

Clearly the aftermarket primer cap doesn't play well with the OE float. I'll order a couple of aftermarket floats and an updated primer cap that comes with a metal, rubber tipped needle which is supposed to prevent chamber flooding.

Victa Primer Cap and Metal Needle Suits 2-Stroke Victa G4 and LM Carburetor | eBay

So, that was a wasted 30 minutes, only to have to do it all again when the parts arrive. :confused: I'll just write it off as a learning experience.
 

Geoff289

Well-known member
Joined
Nov 10, 2013
Messages
1,234
Location
Melbourne, Australia
That intake insert was intended to increase air velocity, in the process bolstering low-end torque and further tuning intake sound quality. So, while it has the potential to deliver more air to the engine and increase the volume of the induction note, the benefits are only felt at the top end of the rev range, while also delivering less favorable resonance. If you were racing the car, fine, take it out. But driving the car as it was intended, with the occasion run to the red line, leave it in.
Who would have thought Ford engineers knew what they were doing?

I have never seen or heard of tyres being de-nibbed before. I know how to remove the tread though.
 
OP
D

D.F.B

Well-known member
Joined
Aug 2, 2023
Messages
1,600
Location
Australia
Who would have thought Ford engineers knew what they were doing?

I have never seen or heard of tyres being de-nibbed before. I know how to remove the tread though.
Bit of a pet hate of mine, when backyard mechanics think they know better than the engineers who created the car in the first place.

On Ford specific forum, there was a member who swore black and blue that his, and everyone else's, Ranger needed aftermarket transmission coolers because his scan tool revealed the car was operating at a temperature that he deemed too high. The diatribe continued even after the Ford engineer who designed the cooling system explained that the transmission was designed to efficiently operate within a certain temperature range, and that altering the cooling system would hamper that functionality. But no, he knew best and wouldn't be told.


I mean, I could make up some story that defibbing tires has a functional purpose, perhaps that it won't tear up my foam tire dressing applicators, but I use a brush for that.

IMG_9604.jpg

In fairness, I should credit the idea is curtesy of Obsessed Garage.................................

From about 5.45min -


From about 30sec mark, I also use Tarminator for prepping brand new tires -

 
OP
D

D.F.B

Well-known member
Joined
Aug 2, 2023
Messages
1,600
Location
Australia
Finally, the replacement dust shields for the XR6 arrived at the dealer today, allowing me finish what I started last week.

IMG-9848.jpg

IMG-9851.jpg

I'm actually surprised I managed to get these, a lot of Falcon spare parts are obsolete or fast becoming obsolete. The plan is to re-paint the originals and store them for another occasion.

As a mere formality, the new dust shields were ceramic coated! I even considered hitting them with polish, but these are not clear coated so the ice would have been thin.

First, a wipe down with KCx PPS, followed by a final wipe over with IPA (these were stored in sealed plastic but they had an oily smell to them, so I wanted to be through here.)

IMG-9856.jpg


Next, the coating, applied front and back. Because these are effectively matte black, every smudge ends up looking like a high-spot.

img-9860-jpg.jpg

img-9863-jpg.jpg

After curing for 15 hours, I applied a coat of Carpro Reload.

New vs Old............

img-9883-jpg.jpg


img-9867-jpg.jpg


img-9873-jpg.jpg

img-9878-jpg.jpg

Naturally, I could have painted the hub too, but even I have a limit.

With the wheels back on, I gave the rest of the car a rinse-less wash using the new version of Optimum No Rinse (ONR).

img-9891-jpg.jpg

I think you would have to be using these back-to-back to really tell the difference between old and new. The classic ONR scent is still there, as is the general ease of use, I also think this version lives up to the claim of easier drying.

After waiting for the dust shields to arrive, I finally re-dressed the tires. THAT was driving me mad by the way, they just looked naked without the dressing. I know some like the bare, natural rubber look, but in my opinion, even a lightly dressed tire will highlight the wheels so much better. Prior to dressing, I was struggling to see my efforts. Dressed, they were popping!

I'll sum up this project with the following picture, the result of 15 years of careful ownership and several (more than several) hours of nitty-gritty detailing.......................

img-9901-jpg.jpg


It's funny, it's been a week working on the XR6, always with the garage door open. Today, while washing the car, the usual suspects passed by and commented. The old guy that walks past every day at about 11am, who's name I have no clue, told me that I would wear the wheels out! :rolleyes: The lady who delivers sales pamphlets commented "weren't you doing that last week", yes, yes I was! :thumbup: And it would seem I have a new postman that is surprisingly down to earth, who told me that if it's something I enjoy doing, go for your life! :bowdown:

Oh, and I still want a lift!
 
OP
D

D.F.B

Well-known member
Joined
Aug 2, 2023
Messages
1,600
Location
Australia
Despite another cold snap, Spring is in full swing in the garden at the moment.

Convolvulus sabatius, pronounced "Con-vol-vew-lus", an oldie but a goodie that is showing off at one of my clients. It was actually trying to rain when I took that image, which you can see the tiny droplets on the flowers.

IMG-9911.jpg

The above is the original cultivar that is generally a well-priced low spreading groundcover. The flowers close up at night, reopening when the light reappears in the morning.

We only occasionally stock the original variety, preferring to offer the newer versions from PGA. These have the same shaped flower but a slightly larger leaf and more variation in colour selection. The newer cultivars also seem to be denser and less "gappy" in growth habit.

'Purple Moon' and 'New Blue Moon' for instance are much deeper in colour -


nbm101.jpg

'Artic Moon' is pure white -


cam101.jpg

There is also the dual colour 'Two Moons' -


ctm101.jpg

Another oldie, 'Cécile Brünner' rose that is in full flight at the moment.

IMG_9908.jpg

This particular example would be at least 40 to 50 years old. I've hacked it back to stubs a few times over the last 15 years, each time it laughs and comes back stronger than ever.

Being a much more vigorous variety that certainly needs a special position in the garden, we don't sell many of these anymore.............that is if we can find someone growing them for wholesale.
 
OP
D

D.F.B

Well-known member
Joined
Aug 2, 2023
Messages
1,600
Location
Australia
After having the wheels off the blue car, I think I'm ready to try for an upgrade on the standard Falcon brakes. While the disks and pads are still serviceable, they are just too weak. Two big hits in a row and they end up shuddering in protest. So, I want better stamina and to fill out the wheels a bit more.

IMG-9783.jpg

IMG-9792.jpg

For the record, Falcon's were never known for braking performance, Ford simply spec'd the brakes to be as cheap as possible to keep cost down. Models with the Brembo systems were much better but were restricted to the very top end of the range. To me, brakes shouldn't be nickeled and dimed.

The standard Falcon brake system on my XR6 is pretty overwhelmed by the size and weight of the car, 1728 kg or 3809 lbs. Previous XR6's were offered with the choice of a premium brake package, but by the time the FG model arrived in 2008, the naturally aspirated XR6 was basically the fleet and rental model and Ford dropped that option.

IMG-9901.jpg

Ideally, I would love to replace them with Brembo's. A few vendors offer a variety of different Brembo caliper and rotor upgrades for the front and rear, in both 6 and 4 piston variations and choice of red or black paint. These are the OEM parts used by Ford and are a direct bolt on.


But..................Brembo's brakes don't fit behind those wheels, and I'm not prepared to sacrifice them for a set of brakes. The actual wheel diameter is not the problem, Ford did use 355mm rotors and 4-piston Brembo's with 18-inch wheels on a selection of models, but rather the back of the spokes are not dished out enough to clear the front of the caliper. I did have someone tell me that Brembo's do in fact fit behind those wheels, but I think he had his wires crossed and I have since confirmed they don't. Then I need to consider a full Brembo 4/4 piston caliper/rotor/pad/brake line set, then adding the price of new wheels and tires would approach half the price of the car itself. I like setting fire to cash, but even I have a limit.

The basic Falcon brake setup on my naturally aspirated XR6 has PBR twin piston calipers and (tiny) 298mm x 28mm ventilated disks on the front and single piston PBR calipers with a 303mm x 16mm solid disks on the rear.

IMG_9804.jpg

IMG_9803.jpg

For the XR6 Turbo and 5.4 XR8, Ford changed the front rotor to a 322mm x 28mm ventilated disk. The front caliper and entire rear setup remain the same. So, the easiest brake upgrade for my XR6 would be to change the caliper support bracket to the high-series item, which would then allow for the use of a larger 322mm disk.

csbu101.jpg

IMG_9918.jpg

IMG_9919.jpg

IMG_9922.jpg

I then reached out to a supplier in Sydney who deals with brake upgrades on late model Falcon's and Commodores, and now have the following on the way -

Front DBA T3 Slotted Rotors 322mm (vented)
Rear DBA T3 Slotted Rotors 303mm (solid)

Front Project MU NS-EP Pads (low dust/noise)
Rear DBA SP Pads

dbat3.png

dbat32.jpg

I also asked him to quote me on a set of braided stainless steel brake lines, which I wasn't originally going to do, but have since decided to take the plunge and do that as well. The braided lines should take out the mushy feeling that I have noticed with all PBR caliper equipped Falcon's going back to the BA Falcon in 2002. I also had someone point out that the original rubber lines are now over 15 years old, so I guess this is in effect preventative maintenance.

The pads were a compromise, I didn't want dust or noise, so I'm sure I could have upped the performance even further if that wasn't a priority. For the record, the standard Falcon pads NEVER once dusted.

The above is about as far I can upgrade without changing calipers and buying new wheels. So, I'm hoping the higher quality rotors all round (larger on the front) with upgraded pads, braided lines and a fluid change will get the brakes to a standard I'll be happy with.

Now waiting for parts to arrive and organize for them to be fitted.
 
OP
D

D.F.B

Well-known member
Joined
Aug 2, 2023
Messages
1,600
Location
Australia
Two heavy boxes arrived from Race Brakes Sydney this morning..................


IMG-9950.jpg

322mm T3 vented front rotors (not shown), 303mm T3 solid rears, Project Mu NS-EP front pads, DBA SP rear pads, 4 braided hoses + hardware, two front caliper brackets (sourced elsewhere). The rotors are very, very nicely finished.

The hard part? Finding the time to install it all.
 
OP
D

D.F.B

Well-known member
Joined
Aug 2, 2023
Messages
1,600
Location
Australia
I've been very fortunate to have been sent a selection of Bilt Hamber products to sample.

IMG-9927.jpg

I've been using Bilt Hamber Surfex for a while now and have been very impressed with the cleaning ability, but until now I haven't delved deeper than that. That's mainly because of Bilt Hamber's convoluted dilution requirements that require more than a simple ratio calculation. I'm not the first to make that comment either. But, I think there is some interesting products within the range that warrant the math.

First of which is Touchless.

https://detailingshed.com.au/produc...e-wash-touch-less?_pos=1&_sid=96a2f4113&_ss=r

IMG-9963.jpg

Confession, I tried this on the Ranger yesterday and was less than impressed, in fact, I sort of had a little tantrum. Some of that was from being extremely tired after working 6 days straight, some of that was then spilling the foam cannon bottle and its contents over the bench (again, tired), and some of that from sub-par results. In truth, I probably shouldn't have been messing around in the garage in that state of mind.

Today, I upped the concentration of product in the foam cannon and got better results..............much better results!

IMG-9953.jpg

And no, that was not my Ranger. With mine having a service, this filthy loan car was the perfect gunnie pig for the test. This Ranger XL was covered in mud, bugs and road grime.

IMG-9954.jpg

IMG-9956.jpg

IMG-9958.jpg

Check out the puddle of brown dripping from the vehicle.................

IMG-9959.jpg

Touchless is a very high alkaline soap, sitting at around pH 12.0, so I would be cautious with what you use it on. If your car is ceramic coated, then this wouldn't necessarily be a bad thing. It also doesn't produce shaving cream-like foam, producing a runnier fluid film that drags contamination off the car as it drips down the panel.

I foamed Touchless on from dry and allowed to soak for several minutes. I then rinsed the car and watched in amazement at how most, if not all, contamination rinsed cleanly from the car. Was it 100% perfect, no, that would be wanting too much. To be fair, most people would be more than happy with the result, however from my perspective it provides a cleaner surface to perform the contact wash on to get that last 10% remaining.

I actually stopped right there, blew the car down and called it good. Lets just say the service advisor was impressed with how clean the vehicle was from nothing more than a foam and rinse.

Something you will note with Bilt Hamber products is a lack of scent. Touchless and AutoFoam are no different, having that rather distinct detergent smell to them, not pleasant, not unpleasant. These are workhorse chemicals, designed to perform and nothing else.

Next was Atom Mac, an anti-corrosion agent.

https://detailingshed.com.au/produc...rrosion-inhibitor?_pos=1&_sid=0f3fba540&_ss=r

IMG-9970.jpg

I've been using Hydes Serum Rustopper for brake rotors for a while now, Atom Mac is a similar product that is sold in concentrate form rather than RTU. Application is the same in that you spray the rotors after washing to prevent the film of rust forming as it dries.

IMG-9974.jpg

Atom Mac seems more effective here than Hydes, but I still need more time with it. As you can see above, the rotors are largely rust free after treatment and drying. Compare that to below for an untreated rotor.................

IMG-1567.jpg

IMG-1480.jpg

Some would question what's the big deal with rusty rotors, that they only stay that way for a few seconds. However, that rust has to go somewhere............all over your freshly cleaned wheels. On black or dark coloured wheels, you will notice this instantly.

IMG-1468.jpg

IMG-1558.jpg

Interesting to note that the above Ranger XL was the 2WD model with the base powertrain, a single turbo 2.0 diesel with the older 6R80 6-speed automatic. Till now, I've only driven the 2.0 in Bi-Turbo and 10-speed format. I was set to be disappointed but...................I think I like this powertrain more.

A lot of that centers around the 6-speed gearbox shifting in a more normal manner, as in not skipping gears. As such, it seems to shift smoother, both up and down the ratios, nor does it have that "busy" sound and feeling of the 10-speed. It's also seems better at auto rev matching when manually downshifted.

Up until this point, I've been set on ordering an XL 4X4 to get access to the Bi-Turbo and 10-speed if I ever did decide to update. But after this, maybe I don't need the Bi-Turbo after all?
 
To avoid these ads, REGISTER NOW!
Top Bottom