To avoid these ads, REGISTER NOW!

Above 1200 Sq/FT Swanny's Garage Expansion Project

Wokspaces above 1200 squarefeet.
OP
S

Swanny1953

ALLIANCE MEMBER
Joined
Jul 28, 2010
Messages
1,082
Location
Lucas, TX
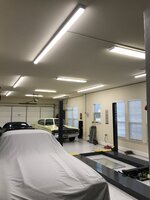
Here are pics of the completed structure. Obviously, a lot has been finished here, including the new concrete driveway and driveway monuments and landscaping. Also below are pictures of the interior and the epoxy floor.
IMG_2876.JPG
IMG_2878.JPG
In the interior picture, you can see the LED lights installed in the new portion of the garage. Many thanks to Platonic Solid and all the advice he has offered on Garage Journal. I used one of the online tools he recommended and ended up with 30 4-foot LED fixtures, arranged in 6 rows. Only the middle row in each bay are normally lit, with the option to turn on the additional 2 rows in each bay individually. It’s almost like daylight in there with all the fixtures turned on.

Also, laying on the floor in that picture is a Goff Industries curtain wall that runs the 30’ length of the addition. It will provide me a “dirty” area for welding, grinding, etc. away from the rest of the new structure.
 
To avoid these ads, REGISTER NOW!
OP
S

Swanny1953

ALLIANCE MEMBER
Joined
Jul 28, 2010
Messages
1,082
Location
Lucas, TX
After seeing the improvement in lighting quality (and quantity) in the new space, I quickly realized the lighting in the old space was woefully inadequate. I bought 6 8’ LED light strips, and wired them up so I could use a Lutron controller to switch them off and on so they wouldn’t be constantly on when not in use. The lighting output improvement was dramatic.
Off -
IMG_3155.JPG
On -
IMG_3156.JPG
 
OP
S

Swanny1953

ALLIANCE MEMBER
Joined
Jul 28, 2010
Messages
1,082
Location
Lucas, TX
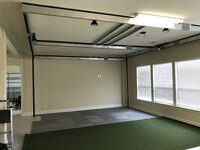
The way the original garage structure was laid out, really only ½ of the 50’x40’ area was accessible for cars without doing some heavy maneuvering. The other ½ consisted of the entry man door, stairs to the upper level and a very nice double stainless steel sink and counter. So, the plan was to have the “inaccessible” ½ of the garage be a man cave. I already had some things for it – a recliner, some exercise equipment, a TV and a net to hit golf balls into.
IMG_2951.JPG
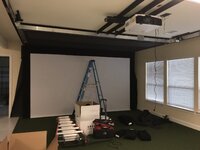
I’ve been an avid golfer for more than 55 years. After doing a lot of research, I decided to install an aboutGolf simulator system in the man cave area of the garage. Attached are pictures of the installation and the completed system. The screen is roughly 18’x10’, and I can not only project the simulator, but also anything from the internet (Netflix, Prime, MotorTrend, etc.) and from my cable box, so it can double as a media room! We bought some nice recliners and upgraded the soundbar to a Sonos surround system in the last year.
IMG_2996.JPG
IMG_2997.JPGIMG_2998.JPG
IMG_2999.JPG
IMG_3037.JPG
 
OP
S

Swanny1953

ALLIANCE MEMBER
Joined
Jul 28, 2010
Messages
1,082
Location
Lucas, TX
In early 2021, I got an email from Hemmings marketplace with an interesting car in it. So, I went to the Hemmings site and was “smitten” by a 1951 Ford Country Squire Woodie station wagon. After showing it to my understanding bride, she said “You have to buy that!” Just what I wanted to hear, but it meant I was out of space in the garage! Solution, install a BendPak doublewide parking lift!
Prior to installing the lift, I had to determine where the post tension beams were in the concrete floor, so I had a company come out and detect them with their radar scanner. I also had to modify the garage door track to go closer to the ceiling in order to clear the cars parked on the upper deck of the lift.
IMG_5245.JPGIMG_5246.JPGIMG_5248.JPG
 
OP
S

Swanny1953

ALLIANCE MEMBER
Joined
Jul 28, 2010
Messages
1,082
Location
Lucas, TX
Looks like I might have hit some limit on uploading pics as the last several I have tried, failed. I'll see if I can continue the update tomorrow.
 

dmittz

Well-known member
Joined
Dec 2, 2016
Messages
1,298
Amazing garage build! thank you for sharing.

I got a laugh out of your story about the 'john' floating across the yard in the rainstorms.
 

Jayman17

Well-known member
Joined
Feb 6, 2017
Messages
3,820
Location
Seattle, Wa
Very nice job incorporating the addition to the existing garage. Looks like it was built that way originally.
 
OP
S

Swanny1953

ALLIANCE MEMBER
Joined
Jul 28, 2010
Messages
1,082
Location
Lucas, TX
OK, back to regularly scheduled programming. I was working on this thread while vacationing with my sister and BIL in Cancun when I ran into the picture posting issue. Since returning home, life has gotten in the way of updating this thread. We’ll see how far I get with updating this time until life intervenes again!!

Before continuing with the garage expansion journey, I want to share a fun experience I had once returning home from Cancun. The company I helped start in 2008, SRS Distribution, is now the title sponsor of the SRS Distribution Las Vegas Bowl. This bowl pits a Pac 12 team against either a Big 10 or SEC team. For the 2022 edition, my alma mater, the Oregon State Beavers, were selected to play against Florida. Our CEO invited me to do the ceremonial coin toss, so a day after returning from Cancun, we were off again to Las Vegas! Only, not without some hiccups . . . . .

Our flight was scheduled to leave at 11:48AM, allowing us time to arrive and rest up before the evening’s festivities, including a concert headlined by Big & Rich. At 3:48 AM, I got an email from American that our flight had been delayed until 1:30 PM. Not a big deal, but still! ONE minute later, another email delaying the flight until 4:30 PM. REALLY??? ONE MORE MINUTE LATER, another email delaying the flight until 6:30 PM!!! Now, I’m pissed. It’s a 2 hour time difference, and a little more than a 2 hour flight, so we’d be arriving about the time the opening act starts up. Of course, no other flights were available, so we were stuck waiting around until 6:30.

We show up at DFW and the flight boards. Then, we’re rewarded with sitting on the tarmac for 1-1/2 hours waiting for the catering vehicle to provide enough water to allow them to take off! Really, you’ve had all day to plan this flight, and cannot remember to schedule the catering truck??? To add insult to injury, we watched a catering truck service the flight at the gate next to us. FINALLY, we got underway, but not without a whole lot of grumbling from all the passengers! SRS had arranged a car for us at the airport to take us to the Delano and drop off our stuff before going to the Cosmo where the concert was being held. We arrived just before Big & Rich took the stage, and JUST before they started putting away all the food! The concert was terrific, as Big & Rich always go out of their way to recognize the veterans in the audience, and this was no exception.

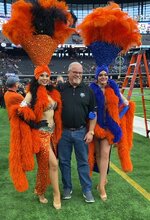
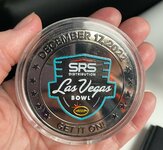
The bowl game the following day was a late morning start, so we got up early and crossed the bridge over I15 to Reliant Stadium. SRS XTV (Extreme Tailgating Vehicle) was there serving a buffet breakfast, ****** Marys and mimosas. Soon, it was time to go inside down to field level to watch the teams warm up, etc. When it was time for the coin toss, I was escorted onto the field by a couple of show girls! Time to toss the coin – and man, this was a big coin!!
IMG_5738.JPEG
coin in hand.JPEG
 
OP
S

Swanny1953

ALLIANCE MEMBER
Joined
Jul 28, 2010
Messages
1,082
Location
Lucas, TX
Here we go! I knew the coin would be big, so I had practiced a bit with a challenge coin, just to make sure I could elevate it and get it to spin in air!! Here we go –
coinflip.JPG
I successfully elevated the coin! My sister took a picture and highlighted the coin in green and sent it to my kids. My eldest sent it back with the blue arrow, pointing out the astounded look on the umpire’s face while the coin flies!
umpire wonderment.JPEG
My Beavs pounded the Gators 30-3!! So back to the hotel for a rest, before going back to the Barber Shop at the Cosmo for a birthday party, then back to DFW the following morning. Despite the travel woes headed to Vegas, it was a GREAT trip!!
 
OP
S

Swanny1953

ALLIANCE MEMBER
Joined
Jul 28, 2010
Messages
1,082
Location
Lucas, TX
Back to the garage expansion story. With the lift now installed and cars parked on it all the time in the raised position, we had a little lighting problem under the lift. So, I installed 4 15’ strands of LED lights that I can plug in when needed. I also permanently mounted and wired 2 Granite Digital Battery Savers (I use them on all my vehicles).
IMG_5513.JPG
IMG_5514.JPG
 
OP
S

Swanny1953

ALLIANCE MEMBER
Joined
Jul 28, 2010
Messages
1,082
Location
Lucas, TX
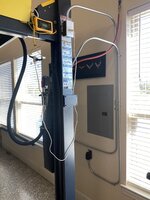
The lift installer left me with a power cord I had to step over every time I wanted to drive the Ram. I also wanted some power near the top of the lift to power the battery tenders and the LED lighting. Finally, I wanted an emergency cutoff switch for the lift just in case the motor got stuck running when I didn’t want it to. The installer said to just pull it out of the plug (which is right by the motor), but I thought an emergency shutoff switch made more sense.
IMG_6205.JPG
IMG_6206.JPG
I hadn’t worked with EMT conduit before, so was pretty happy with the way the bends worked out – just beginners luck, I’m guessing!!
 
OP
S

Swanny1953

ALLIANCE MEMBER
Joined
Jul 28, 2010
Messages
1,082
Location
Lucas, TX
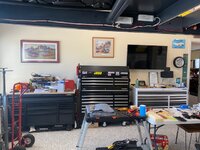
With the simulator installed in the original garage space, the 55” TV was freed up and I hung it in the new space. I have an HDMI splitter on the cable feed, so whatever is playing in the old space also plays in the new space. I also HAD to purchase a couple of additional tool boxes, one Husky, one Kobalt, to house the additional tools I have accumulated (many due to fellow Garage Journal users making me aware they existed!!). Also had to put up some decorations. The Goat Hill poster is one I originally gave to my father-in-law when he acquired his GTO in 2006. With his passing last year, I purchased his ’65 GTO and mom gave me the poster along with the car. The Woodie poster is something my bride found on Goodwill.com and purchased for me. Once it arrived, I determined it was the 25th anniversary poster for the National Woodie Club, of which I’m a member.
IMG_6207.jpg
So, that’s pretty much where we stand. All finished, it’s 3,200 feet of conditioned space, roughly 1,000 of which is man cave, the remainder of which is parking and working garage. There are 10 cars parked in this structure, including one on the maintenance lift, so I have to shuffle things around depending on what I need to maintain or want to drive. I know, it’s a first world problem!
 
OP
S

Swanny1953

ALLIANCE MEMBER
Joined
Jul 28, 2010
Messages
1,082
Location
Lucas, TX
On to a couple of projects. I may have mentioned we lost my father-in-law unexpectedly last April just one week before they were set to move from Nashville to Dallas. We had been working on them for several years to move to be closer to family in their later years (both were 83 at his passing). Their Nashville house was under contract at his passing. He was working on a ’69 Chevelle SS restoration for my brother-in-law’s best friend, and it wasn’t complete at his passing. Luckily, he had a “helper” working with him who was able to complete the car, but not until after the moving truck had packed and left for Texas.

As a result, I got to make 3 round trips from Nashville to Dallas with his box trailer to move items that didn’t make it on to the moving van, including one at the end of May to retrieve the tools we had to leave behind for his helper to complete the Chevelle project. There were not many tie down points in the trailer, so I decided to remedy that by installing some e-track. I found the following on Amazon, including 16 tie down anchors - https://www.amazon.com/dp/B09K79HKD8/?tag=atomicindus08-20 Got all that installed. The trailer had a small winch that the cable had played out on. I couldn’t get the winch to work with the switch mounted in the trailer, nor with the remote for my similar winch. So, to get all the cable rewound, I applied power directly to the winch (luckily, I got the polarity right the first time to get the winch to rewind).
IMG_6209.JPG
IMG_6210.JPG
 
OP
S

Swanny1953

ALLIANCE MEMBER
Joined
Jul 28, 2010
Messages
1,082
Location
Lucas, TX
My bride is the creative one in this partnership. Somehow, she envisioned a bench made out of a twin headboard and footboard she rescued from a dumpster where our housekeeper lives. When my BIL was here, he undertook the project by cutting the footboard in half, repurposing both halves as the armrests of the bench and building a seating area. We preserved the decorative piece from the bottom of the footboard and reattached it under the seating surface. I painted the bench for my wife, who followed up with the antique application of some contrasting paint. My sister made the cushion cover and pillows.
IMG_E6203.JPG
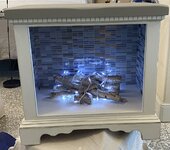
Another project Lori came up with was to convert a small end table into a “fireplace” of sorts. Again, she found the base piece along the side of the road waiting for trash pickup. I removed the doors, drawer and slider and supporting cross brace. Lori found a “log set” and illuminated it with mini tree lights. She found some faux tile applique that we put on the inner surfaces of the unit, and then applied the paint she liked. This will go to our youngest daughter.
IMG_E6204.JPG
 
OP
S

Swanny1953

ALLIANCE MEMBER
Joined
Jul 28, 2010
Messages
1,082
Location
Lucas, TX
I’m going to document the vehicle “toys” that occupy most of the space in my garage. I’m going to go in acquisition order.

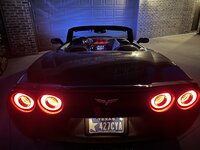
First up is a 2013 Corvette 427 Convertible. This was a single year model, made only in the final year of the C6 production, with a total of 2,552 produced. Mine is Night Race Blue (208 total) with the Dark Titanium interior 4LT package (110) with blue contrast stitching (63). At the time of purchase, I had a Monterey Red 2006 C6 convertible. I convinced my wife that “Corvette was born in 1953 and I was born in 1953 – therefore, it’s only fitting that I get a 2003 60th Anniversary Corvette”. She agreed, and the search was on. It was too late in the production year to place an order, so I began looking on cars.com and other internet sites. One Sunday, I happened to search briefly before heading to church, and a dealer in Tulsa had this car in stock. A quick email to indicate interest, and off to church we went. The following day, I learned the car was still available, and made a quick deposit to ensure it would still be there the following Saturday when I could drive up to take delivery.

On Saturday morning, I left the house before sunup for the 5 hour drive to Tulsa. Once there, we finalized the paperwork, made final payment and loaded my new toy up for the trip home.
P1120684.jpg
The only modifications to this car are a replacement shifter ball (which reduces the height of the shifter and, therefore, the length of the throw) and a wind restrictor. I had allowed the company that makes the Wind Restrictor to use my 2006 convertible as the “test mule” for the development, fitting, fine tuning, etc. of the original Wind Restrictor. They were kind enough to offer me a discount on the one for the new car.
IMG_6581.JPG
This car is now 10 years old, and has been used a lot for autocross with the Lone Star Corvette Club (I have won several club championships with this car). It has just over 16,000 miles and has been about as trouble free a car as I could ask for.
 
OP
S

Swanny1953

ALLIANCE MEMBER
Joined
Jul 28, 2010
Messages
1,082
Location
Lucas, TX
Interesting story on the license plate for the '13 427 convertible. When I applied for the plate in the above pic, the state of TX initially refused it as being "vulgar". I wrote a letter explaining that CYA was for "see ya", not what they were assuming. I further asked them to confirm that if they did decide to reject my application a second time, that they had gone through the database of active license plates in TX and the letters CYA didn't appear on any of them. A week or so later, I was notified that my custom plate application had been approved!! Go figure!
 
OP
S

Swanny1953

ALLIANCE MEMBER
Joined
Jul 28, 2010
Messages
1,082
Location
Lucas, TX
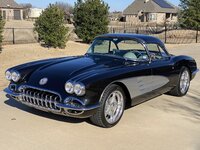
Next up is a 1960 C1 Corvette restomod purchased in July 2013. Again, I found this car on the internet in the Phoenix area. It was an older build, having been constructed in 2001-2002 by the owner. He purchased a 1985 C4 Corvette as a donor car, and grafted the front and rear suspension onto the C1 frame, and found a T56 from a Firebird and mounted it and the ’85 TPI motor in the car. This car was constructed before Art Morrison and others began churning out replacement chassis and was really well done. I hired an inspector to take a look at the car for me, and based on his report, struck a deal with the seller. Here’s the car as purchased.
Corvette[1].JPG
Several years ago, I got the bug to update this car again – the TPI motor was just a bit anemic for me, the vinyl interior had some ugly rips in it and the brakes were not inspiring, despite being from a C4 Corvette. I discussed the project with Carr Campbell of Carr’s Corvettes & Customs, and after being on the wait list for several months, we began the project in earnest in July 2019. The original scope of the project was to replace the TPI motor with a 480 hp LS3, install a new Al Knoch leather interior, new wheels (Schott Accelerator) and tires and upgrade the brakes to a Wilwood system.

As almost always happens with projects like this, we had some not insignificant “scope creep”. First up, the bellhousing for the existing T56 did not mate up to the new LS motor, so buy a new transmission. Next, we discover parts are no longer available for the Old Air Products A/C that was in the car at purchase. So, now we get to install a new Vintage Air system. Then, while rutting around under the dash, we discovered some “janky” wiring, so I authorized a new wiring harness be installed. Since we were already way over budget, Carr suggested smoothing out the firewall – Why Not, as long as we have come this far!

The last unintended consequence of all this work resulted from swapping an iron block TPI motor for an aluminum LS3 – yes, you guessed it, the car looked like a gasser with the C4 monoleaf suspension setup. That led to swapping out the transverse leaf suspension for coil over shocks from Vansteel. Here’s the completed car -
IMG_6185.JPGIMG_6186.JPGIMG_6631.JPGIMG_6629.JPG
Two years after starting, and more $$ than I had originally intended (when hasn’t that been the case!!!??), the C1 was ready to come home. Only, I didn’t really like the stock LS coil covers. I had seen a setup where someone had modified a GTO coil cover, so we bought a pair and set to making them unique to this car. We shaved off the GTO letters and found C1 Fuel Injection script and installed it where the GTO lettering was after body finishing the cover. The finished coil covers are painted to match the body (very dark grey) and the coves on the car, with the recession for the original GTO lettering done in flat black to match the engine compartment. I think it looks great and is certainly one of a kind (at least that I know of).
IMG_6594.JPG
This car is stupid fast with a 480 hp LS376/480 (probably closer to 500 hp if you were to dyno it) and is a blast to drive. I keep the hardtop on it so I can enjoy it year round with the A/C blowing cold in the TX heat.
 
To avoid these ads, REGISTER NOW!
OP
S

Swanny1953

ALLIANCE MEMBER
Joined
Jul 28, 2010
Messages
1,082
Location
Lucas, TX
The next toy is Lori’s 1969 Riverside Gold/Black Corvette coupe. This was her step-dad’s first Corvette, and probably ignited the family love affair with all things Corvette. Jack bought this almost new as a repo with less than 1,500 miles. Today, it has just over 42,000 all original miles. It’s a 390 hp 427 with a Muncie close ratio 4-speed. Since Lori got the car as a gift from her folks in September 2014, I have replaced the heater core and installed new carpeting. There aren’t any projects planned for this car, just driving and enjoying it occasionally, which can be somewhat tough in TX as it doesn’t have A/C.
IMG_6437.JPG
 
OP
S

Swanny1953

ALLIANCE MEMBER
Joined
Jul 28, 2010
Messages
1,082
Location
Lucas, TX
Next up is a 2016 Jeep Wrangler Unlimited Sahara edition bought new in June 2016. I bought this for 2 reasons – 1: to keep at the lake house so neither Lori nor I are ever stranded when the other takes off in the vehicle we drove up in; and 2: as a TOAD for the motorhome we were partners in. I found the Jeep in S. TX modified as you see it below. Once I got it, I researched and purchased the parts for the proportional auxiliary braking system, lighting system, battery booster, tow bar, etc. Then, wouldn’t you know it, we sold the motorhome and the Jeep never got used as a TOAD. Oh, well!

The Jeep has 37” tires on 20” wheels – to say they are heavy would be an understatement. It took a buddy and I both to get the spare remounted the first time I took it off. That much rotating mass made the Jeep seem very anemic, both from an acceleration and braking standpoint. The solution was to have Dallas Offroad swap out the factory gears for 5.13’s and add a Teraflex big brake upgrade kit. Now the Jeep will get out of its own way and stop with confidence. I don’t have any other upgrades or projects for this one.
IMG_1834.JPG
 
OP
S

Swanny1953

ALLIANCE MEMBER
Joined
Jul 28, 2010
Messages
1,082
Location
Lucas, TX
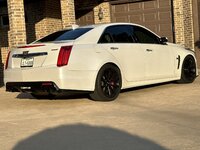
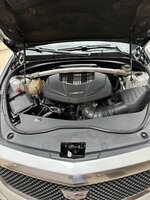
While not technically a vehicular “toy” (this is my daily), next is a 2016 Cadillac CTS-V purchased in February 2017. When I was looking to buy this one, Lori knew I was “lusting” over the C8 Z06. I was able to convince her that by this having the LT4 engine, I would be happy without getting another Corvette. It worked!! This is by far my favorite of all the daily drivers I’ve had over the last 54 years!! It now has a little over 60,000 miles and I have no intention of getting rid of it any time soon. The only modification is a Corsa Extreme exhaust system, which gives it a nasty bark on cold startup. It’s a really comfy ride, and has done 148 in a standing half mile a couple of years ago, almost keeping up with my buddies ZL1 Camaro!
IMG_6577.JPGIMG_6579.JPGIMG_6580.JPG
 

jon72vega

Well-known member
Joined
Apr 17, 2013
Messages
3,494
Location
Niles Michigan
Next up is a 1960 C1 Corvette restomod purchased in July 2013. Again, I found this car on the internet in the Phoenix area. It was an older build, having been constructed in 2001-2002 by the owner. He purchased a 1985 C4 Corvette as a donor car, and grafted the front and rear suspension onto the C1 frame, and found a T56 from a Firebird and mounted it and the ’85 TPI motor in the car. This car was constructed before Art Morrison and others began churning out replacement chassis and was really well done. I hired an inspector to take a look at the car for me, and based on his report, struck a deal with the seller. Here’s the car as purchased.
Corvette[1].JPG
Several years ago, I got the bug to update this car again – the TPI motor was just a bit anemic for me, the vinyl interior had some ugly rips in it and the brakes were not inspiring, despite being from a C4 Corvette. I discussed the project with Carr Campbell of Carr’s Corvettes & Customs, and after being on the wait list for several months, we began the project in earnest in July 2019. The original scope of the project was to replace the TPI motor with a 480 hp LS3, install a new Al Knoch leather interior, new wheels (Schott Accelerator) and tires and upgrade the brakes to a Wilwood system.

As almost always happens with projects like this, we had some not insignificant “scope creep”. First up, the bellhousing for the existing T56 did not mate up to the new LS motor, so buy a new transmission. Next, we discover parts are no longer available for the Old Air Products A/C that was in the car at purchase. So, now we get to install a new Vintage Air system. Then, while rutting around under the dash, we discovered some “janky” wiring, so I authorized a new wiring harness be installed. Since we were already way over budget, Carr suggested smoothing out the firewall – Why Not, as long as we have come this far!

The last unintended consequence of all this work resulted from swapping an iron block TPI motor for an aluminum LS3 – yes, you guessed it, the car looked like a gasser with the C4 monoleaf suspension setup. That led to swapping out the transverse leaf suspension for coil over shocks from Vansteel. Here’s the completed car -
IMG_6185.JPGIMG_6186.JPGIMG_6631.JPGIMG_6629.JPG
Two years after starting, and more $$ than I had originally intended (when hasn’t that been the case!!!??), the C1 was ready to come home. Only, I didn’t really like the stock LS coil covers. I had seen a setup where someone had modified a GTO coil cover, so we bought a pair and set to making them unique to this car. We shaved off the GTO letters and found C1 Fuel Injection script and installed it where the GTO lettering was after body finishing the cover. The finished coil covers are painted to match the body (very dark grey) and the coves on the car, with the recession for the original GTO lettering done in flat black to match the engine compartment. I think it looks great and is certainly one of a kind (at least that I know of).
IMG_6594.JPG
This car is stupid fast with a 480 hp LS376/480 (probably closer to 500 hp if you were to dyno it) and is a blast to drive. I keep the hardtop on it so I can enjoy it year round with the A/C blowing cold in the TX heat.
That is a beautiful well done C1!
 

Bob Heine

ALLIANCE MEMBER
Joined
Oct 24, 2009
Messages
10,709
Location
Boca Raton, Florida
There aren’t any projects planned for this car, just driving and enjoying it occasionally, which can be somewhat tough in TX as it doesn’t have A/C.
Gary, the A/C in C3 big block Corvettes makes very little difference. When I drove either the convertible or coupe with the top open I had to run the A/C set to bi-level to keep the hair on my legs from curling up.
I was able to convince her that by this having the LT4 engine, I would be happy without getting another Corvette.
I feel the same way about our 2011 with the LSA. I fear these are endangered so I don't drive it every day. I've owned it for 6 of its 12 years and it's coming up on 19,000 miles. Not a lot of miles but an amazing amount of smiles. My driving Corvette is an '87 convertible with the anemic L98 but headers and some work on the intake side has perked it up a tiny bit.
 

Blackbyrd

Well-known member
Joined
Nov 28, 2020
Messages
1,175
Location
TN
Just stumbled onto this thread and you have some awesome "toys". That LT4 is a fantastic platform! You didnt bring that c6-427 Street Rod Nationals in Ky this year by chance did you?
 
OP
S

Swanny1953

ALLIANCE MEMBER
Joined
Jul 28, 2010
Messages
1,082
Location
Lucas, TX
Just stumbled onto this thread and you have some awesome "toys". That LT4 is a fantastic platform! You didnt bring that c6-427 Street Rod Nationals in Ky this year by chance did you?
Thanks for the comment. No, I wasn't at the Street Rod Nationals with that car, or with any car for that matter.
I have more vehicles to post up, just need to get the pictures organized (or taken) to finish.
 

LXCam

ALLIANCE MEMBER
Joined
Apr 23, 2013
Messages
19,207
Location
AZ
Thanks for the comment. No, I wasn't at the Street Rod Nationals with that car, or with any car for that matter.
I have more vehicles to post up, just need to get the pictures organized (or taken) to finish.
We’ll get to it man! You sucked me into this years ago and I just got caught up today. You’ve got some slacking to make up for 😉

The addition turned out spectacular and the toys are just too cool to see. Very impressive my friend 👍
 
OP
S

Swanny1953

ALLIANCE MEMBER
Joined
Jul 28, 2010
Messages
1,082
Location
Lucas, TX
We’ll get to it man! You sucked me into this years ago and I just got caught up today. You’ve got some slacking to make up for 😉

The addition turned out spectacular and the toys are just too cool to see. Very impressive my friend 👍
Thanks for the comments, Cam! I pretty much have written up the remaining posts and have most of the pictures, so will continue with posting up the vehicles in my collection.

In 2017, I got the itch to see if I could find a 1966 Dodge Charger. I had a yellow/black 383 2-bbl automatic car as a senior in high school. I found a car via cars.com just before Memorial Day in MO that was the same color/interior combo, but was a 383 4-bbl, 4-speed. I showed the listing to my family, who all voted that I needed to investigate further. After Memorial Day weekend, I went back to cars.com to get contact info, and the listing was gone!! He who waits . . . . . . . . .

A month or so later, I decided to do another search. The same car showed up again. So, I called the listing for more info. The owner began by grilling me – “Are you a consignor or agent? Are you looking to flip the car?” – and other questions along the same line. After I explained to him that I had the same car in high school, he lightened up and talked to me about the car. It had gone through a fairly complete restoration prior to his ownership and he was looking to pass it along to someone who would appreciate it. So, we made a deal and my buddy and I made a road trip to bring the car home.

DSC_0006.JPG
I knew when buying the car that a couple of its unique features weren’t working properly. The first was the rotating headlights. I worked with Topher McGinnis (www.headlightmotorman.com) to get new relays, limit switches, etc. and to rebuild the rotating motors. I got everything back together and it was working for a while, but needs some more attention. I think the aged wiring in this car is getting in the way of them working properly all the time.

When purchased, the car had an ugly wart of a hood scoop and flat black accent paint on the hood. Worse, whoever did the hood decided they needed to make it “cold air induction” by cutting a big hole in the hood. So, the search was on for a replacement hood and I had a local body shop metal finish the hood and paint it body color. Much better . . .
IMG_6645.JPG
At some point, I noted the brakes were very “squishy”, and upon repeated inspection, the single pot master cylinder kept losing fluid. I couldn’t find where it was leaking – all the wheel cylinders were dry and there was no evidence of leaking around the master cylinder. I ultimately determined the master cylinder was leaking into the interior compartment. Now, I have brake fluid saturating the jute backing to the carpets and the carpets themselves. I took the backing out and washed it many times, as well as shampooing the carpet repeatedly to remove the brake fluid. I decided to upgrade the braking with a power booster, along with front disc brakes from SSBC. I also completely replaced the brake lines. It stops much better now, but still needs some fine tuning.

The Charger also had manual steering, with many turns lock to lock. I installed a Borgeson power steering kit, and the steering is now much more responsive.

The early Chargers have tail lights across the entire rear of the car. While not available from the factory, I thought this just called out for sequential turn signals. I found a company (www.easyperformance.com) that makes a LED conversion kit for the car. The old taillight lenses were pretty crusty, so I was able to find new lenses to go with the LED conversion. The rear lights are much brighter now, and the sequential function is programmable to several different configurations.

One of the neat features of this car is the electroluminescent dash, where the pointers and numbers, etc. light up instead of being backlit. Many of the gauges weren’t working properly, and only a portion of the electroluminescent dash was lighting up. Again, I found someone who created a solution for these issues. Mark Gibson (www.thegaugedoc.com) came to the rescue. I sent off the gauge cluster for recalibration and to have the electroluminescent system redone. Everything has been returned, but I haven’t yet done the install. I was stalling to make a decision about adding Vintage Air (I won’t be in this car), and will likely do a bunch of rewiring of the car along with the gauge package install. Additionally, it appears that when they media blasted the car during restoration, they didn’t remove the rear window, nor did they mask it completely. So, the glass is badly pitted and won’t polish out. That’s another project, along with swapping out the speedo gear to try and get it to read correctly. I hope to document these projects here as they get underway.
 
OP
S

Swanny1953

ALLIANCE MEMBER
Joined
Jul 28, 2010
Messages
1,082
Location
Lucas, TX
In the summer of 2018, I got the itch to add a C2 restomod convertible to the toy fleet. I found one in TN and had my FIL go take a look at it. While a nice car, there were several things that weren’t complete and the seller was unwilling to put any more money into it prior to sale. That was a red flag to me.

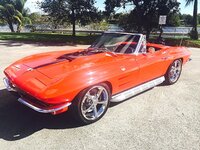
After several more months of searching, I found a 1964 Torch Red convertible listed for sale in eBay Motors. I contacted an inspector to look over the car (it was in Miami), and after receiving a satisfactory report, made a deal to have the car shipped to TX.
s-l1600 (7).jpg
s-l1600 (5).jpg
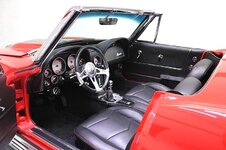
The seller reported the car had been built for display at SEMA (I cannot confirm or deny this). It rides on a Street Shop coil over shock frame, has a LS3 and TKO 5-speed manual. Other features are Vintage Air A/C, Dakota Digital gauges and a custom interior. My favorite feature on the car are the side pipes – such a sweet sound, particularly under acceleration!!

There were a couple of issues with the car when it arrived. The parking brake was inoperable (required for registration in TX) and the seller had a “janky” repair made to the windshield wipers that involved welding a 10mm socket somewhere in the system. The ride height was set so low that the rear tires bottomed out on just about every bump. We got all those problems rectified and the car is a ton of fun to drive!

I'd like to replace the wheels on this. However, the use of spacers with the C6 Grandsport wheels results in some interesting offsets, and I'd still have to use some type of spacer to make the wheels look good (i.e., without spacers, I'd have a deeper dish in the front than in the rear!). Not a high priority, but something I'm thinking about.

The other modification I made to this one is to add the Detroit Speed headlight bucket turning system. This is much quicker and more reliable than the factory system.
 
OP
S

Swanny1953

ALLIANCE MEMBER
Joined
Jul 28, 2010
Messages
1,082
Location
Lucas, TX
For 2019, Chevrolet introduced the ZR1 Corvette, a one-year only model for the last year of the C7 generation. Prior to the release of this car, I wasn’t much interested in getting a C7. However, with the impending release of the all new C8, none of which would have a manual transmission, I got an itch to find a C7 ZR1 with a manual transmission, as it would be the last and greatest version of a manual transmission Corvette.

As it was nearing the end of the C7 production run, by the time I made this decision it was too late to order a ZR1. So, I began an internet search and found one at Mak Haik Chevrolet in Houston via cars.com. I was able to get it at MSRP less the Corvette owner loyalty discount. These cars have recently sold for more than 2x what I paid for mine. So, it was off to Houston to pick up my new toy.
IMG_3992.JPG
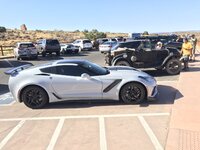
There were 2,986 ZR1s produced, 7 in the combination of Ceramic Matrix Grey Metallic over Spice Red interior (stats are per the ZR1 registry). Of those 7, only 2 were manual transmissions, and of those 2, only one (mine) was equipped without the ZTK package, making this car a true unicorn. My kids have pressed me on which car I would keep if I could only have 1 – it would be this ZR1.
 

Attachments

  • IMG_4211.PNG
    IMG_4211.PNG
    3.5 MB · Views: 33
OP
S

Swanny1953

ALLIANCE MEMBER
Joined
Jul 28, 2010
Messages
1,082
Location
Lucas, TX
The National Corvette Museum offers several Museum In Motion tours each year, one of which is a tour of the national parks of Arizona and Utah. A buddy of mine had originally curated this tour, and led it for many years. When he told me 2019 would be his last year leading the tour, I convinced my bride that we had to go. We loaded up the ZR1 and headed off to Williams, AZ to meet up with the other 22 Corvettes making this trip. On the way we stopped in Winslow, for the obligatory picture (you know, “standing on a corner in Winslow, Arizona”).
IMG_4211.PNG
Our tour started at the Grand Canyon on Monday morning. We then made our way to Kanab, UT that afternoon after a stop at Navajo Bridge.
IMG_4279.JPG
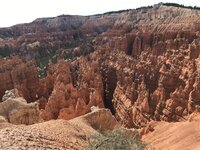
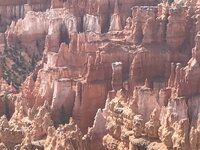
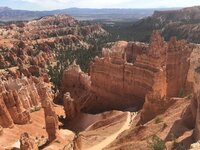
Tuesday was spent all day in Zion. On Wednesday, we went to Bryce Canyon, one of my favorite national parks. The scenery here is just so beautiful!
IMG_4426.JPG
IMG_4447.JPG
IMG_4460.JPG
 
OP
S

Swanny1953

ALLIANCE MEMBER
Joined
Jul 28, 2010
Messages
1,082
Location
Lucas, TX
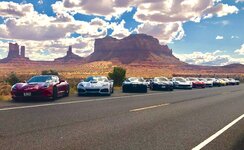
Thursday was a driving day, with us ending up in Moab, UT via Glen Canyon Dam and Monument Valley on the Navajo reservation. We stopped in Monument Valley for lunch and a tour (not in our Corvettes – the road would have torn them up!!).

On the way to Moab, we stopped for a group shot along the road. This is the place where Forest Gump decides to cease his cross country running tour!!IMG_9090-1.JPG
We got to Moab around dark, and since we were on our own for dinner, Lori and I ventured out to Red Cliffs Lodge for dinner. We were rewarded with a beautiful sunset while eating our dinner.
IMG_4526.JPG
While driving back from dinner along the Colorado River (in near blackout conditions), I noticed the gas gauge was hovering around empty. Stupid me, I hadn’t refueled before heading out to dinner. I babied the ZR1 back to town, driving slowly in the highest gear I could. When I finally made it to the local Exxon station, my 16.5 gallon gas tank took 16.9 gallons. I guess it was my lucky day!!
 
OP
S

Swanny1953

ALLIANCE MEMBER
Joined
Jul 28, 2010
Messages
1,082
Location
Lucas, TX
The following day, Friday, was the last formal day of our tour. We spent the morning in Arches National Park. I thought this picture showed an interesting juxtaposition!
IMG_4577.JPG
IMG_4579.JPG
After a farewell BBQ lunch, we all headed to Canyonlands National Park to witness another beautiful sunset from the far end of the park, followed by an after-dark drive back to Moab.

IMG_4647.JPG
Saturday morning, we had our last group breakfast and said our good bys. Before leaving Moab, Lori and I drove out along the Colorado River where there are some petroglyphs. While there, 2 young couples in a Jeep stopped where we were. They asked if we were with the group of Corvettes they had seen a couple of days prior coming out of Monument Valley. Turns out they videoed the caravan and were kind enough to AirDrop it to my wife!

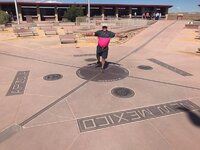
Before heading to Phoenix to finish our trip with a visit to Lori’s cousins, we detoured to Four Corners as Lori had never been there.
IMG_4666.JPG
All in, we put about 3,700 miles on the ZR1, and averaged 23.8 MPG for the entire trip, including some “spirited” driving while headed to Kanab. On one 450 mile section, we averaged 26.0 MPG – not bad for a 755 hp supercharged beast!!
 
OP
S

Swanny1953

ALLIANCE MEMBER
Joined
Jul 28, 2010
Messages
1,082
Location
Lucas, TX
In February 2021, I got an email from Hemmings’ Auctions profiling an interesting car, so I took a look at it. Not anything I had to have, so I took a look at the other ongoing auctions. One that caught my eye was for a 1951 Ford Country Squire Woodie station wagon.
2.jpg
I showed the listing to my bride, who said “That’s neat – you need to buy that!” Say no more, I can take a hint!! I made a deal with the seller (the then current president of the National Woodie Club, who was selling the car for another member) and soon it was on its way to TX.

The car was built in the early 2000’s, and has a Fatman Mustang II front end with rack & pinion (albeit manual) steering. It has 4-wheel disc brakes, and is powered by the C4 edition of the LT4, backed by a T56 6-speed transmission. It has Vintage Air and a custom leather interior.
13.jpg
24.jpg
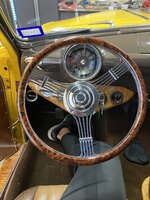
Once I got the car, I swapped out the undersized Grant steering wheel for a slightly larger Billet Specialties Banjo model and replaced the auxiliary gauges with matching Stewart Warner units (there were 3 different styles when I got it).
IMG_1237.JPG
IMG_5314.JPG
The next project was to get the speedo working. I had a Cable-X unit from the original build of the ’60 Corvette that became extra when we switched to Dakota Digital gauges. This converts the electronic sensor pulses from the T56 to work with a mechanical speedometer. One I picked up the correct input wire from the T56, I just had to “bracket and half” the settings until I got to the one that’s closest. The speedo now reads consistent with my GPS speedo on my iPhone.

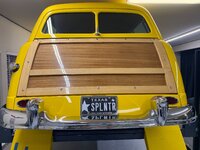
Funny story about the custom plate on this one. I had originally applied for “GUD WUD”. The state of TX rejected that saying the plate was vulgar!!! In the end, I was actually happy they did that as I came up with another option while the application was pending –
IMG_5308.JPG
 

LXCam

ALLIANCE MEMBER
Joined
Apr 23, 2013
Messages
19,207
Location
AZ
Love the collection. And that plate is insanely cool, nice job!
 
OP
S

Swanny1953

ALLIANCE MEMBER
Joined
Jul 28, 2010
Messages
1,082
Location
Lucas, TX
Love the collection. And that plate is insanely cool, nice job!
Thanks, Cam - sometimes things work out for the best. I came up with SPLNTR while waiting on TX to approve GUD WUD and actually hoped they would refuse it!!
Continuing on -
In January 2022, some friends convinced us to accompany them to the Barrett-Jackson auction in Scottsdale. This was our first time, and the event lives up to its reputation as the “Super Bowl” of auctions – so much to see and do besides the auction.

Leading up to the event, I registered and got my bidder pass, along with a guest pass for Lori. Not only does this get you access to the auction and some preferred parking, it also comes with 10 drinks per day – guess they want you liquored up to bid higher!! I started looking at the docket – really didn’t have anything in particular I was looking for, just looking at interesting cars. In looking through the docket, one car in particular peaked my interest on more than one occasion – a 1940 Chevrolet Business Coupe.1940 Chev Side View.jpg
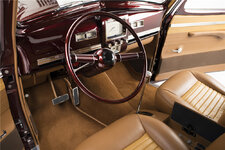
1940 Chev Interior.jpg
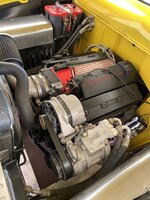
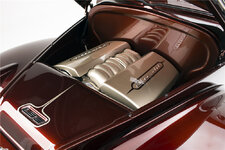
1940 Chev Engine Compartment.jpg
I knew from some research that this car had won Goodguys America’s Most Beautiful Street Rod in 2012. So, when it came up on the auction block, I began bidding. Suddenly, the hammer dropped, and I was the new owner at a price I was very happy with. In subsequent conversations with the builder, Michael Keller of Big Creek Restorations, I learned I had paid less than 1/3 of what the owner and builder had invested in the construction of this car even including the 10% buyers premium!

The car sits on an Art Morrison frame with air suspension. It has a LS376-480 and a 4-L80 automatic transmission. The instruments are bespoke, modeled after a 60’s era Bulova watch. The paint is absolutely stunning, especially in sunlight – I’m told it’s a cinnamon candy over copper base coat.

When the car rolled off the transporter in TX, it had 175 miles on the odometer – obviously, it hadn’t been driven much in the 10 years since the build was completed. I don’t have any “trailer queens” in my collection, all get driven regularly, and this one wouldn’t be any different. However, upon putting a few miles on the car, it became apparent to me why the mileage was so low. The rear brakes refused to release after a full stop! Obviously, this took some of the joy out of driving. After a couple of quick diagnostics (loosening the parking brake cable, opening the bleeder valve on the right rear caliper), it became apparent that the issue was somewhere from the master cylinder back. As the car was built to have as much of the “guts” hidden, it was hard to see any obvious culprits – there wasn’t a visible proportioning valve nor a residual pressure valve, for instance. I knew from all the construction pics the builder was kind enough to share with me that the Wilwood master cylinder was mounted at 90 degrees under the dash on the passenger side of the firewall. I’m guessing the prior owners didn’t want to tear the car apart to access the master cylinder. But, I wanted a car I could drive more than on and off a trailer!
 

LXCam

ALLIANCE MEMBER
Joined
Apr 23, 2013
Messages
19,207
Location
AZ
We went to that event and I remember that car, she's still just as gorgeous. Have you gotten it sorted out yet? never mind. :dunno:
 
Last edited:
OP
S

Swanny1953

ALLIANCE MEMBER
Joined
Jul 28, 2010
Messages
1,082
Location
Lucas, TX
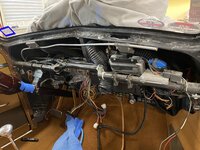
To access the master cylinder, I had to remove the windshield surround trim and take out the dash. From the construction pics, I could see the dash was a single piece and all I would have to unhook were the leads for the gauges, the A/C controls and the A/C vents. So, after taping up the top of the dash and other areas that might get scraped in removing the dash, I got started. Once the dash had been removed, this is what I was faced with –
IMG_6230.JPG
Because everything you see here was hidden behind the lower dash valance panel, they didn’t spend a lot of time “prettying” up the wiring. I did spend quite a bit of time putting everything in looms so it looks better and is grouped by circuits.

You can see the master cylinder in the upper left of the picture. Once I could access it, I was able to determine that the actuator rod was not parallel to the bore of the master cylinder. I also found that the proportioning valve was mounted on the driver side door jamb, behind the kick panel. It had been adjusted so that all the bias was to the front of the car.

I called the Wilwood technical support line. The tech asked if I could wiggle the actuator rod at all – there was no play whatsoever. Based upon that, and the fact the rod was not parallel, he diagnosed the problem as a “pre load” condition, where the plunger was stuck too far into the master cylinder bore to allow fluid from the rear brakes to return to the reservoir.

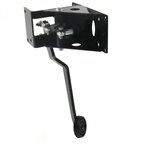
Here is a picture of a brake pedal/master cylinder mount unit similar to mine that mounts the master cylinder behind the firewall in the passenger compartment - the MC mounts to the right of the top bracket. For most brake pedals, the fulcrum is at the top of the pedal and the MC pushrod attaches between the pedal and the fulcrum. In this application, the fulcrum is near, but not at the top of the pedal rod, and pushing on the pedal causes the top of the rod to move toward the driver. There is a belcrank that converts that movement into a sideways movement for actuating the MC:
1682613064559blob (1).jpg
In my case, this ended up being a geometry problem. You can see in the picture there are 2 Heim joints with adjustable arms, one from the top of the brake pedal to the belcrank and the other from the belcrank to the MC pushrod. As I mentioned, the MC pushrod was not running parallel to the MC bore, being off about 6-7 degrees. I found that was due to the MC arm being clocked at about the 8 PM position, while the brake pedal adjustable arm was around 10-11 PM. By shortening the MC adjustment rod and lengthening the brake pedal adjustment rod, I was able to position the MC arm at closer to 6-7 PM, which alleviated the out of alignment problem and made the first movement of the MC rod go into the cylinder, rather than pushing it perpendicular to the cylinder. I was also able to properly position the MC pushrod so the preload condition was alleviated. I also adjusted the proportioning valve to have a neutral bias.

Once I made those changes, I took the car out for a quick test drive. The brakes now work as intended, with no drag whatsoever. So, back to the garage to reassemble the dash. Thankfully, my BIL was in town and able to help get everything back together properly.
 
To avoid these ads, REGISTER NOW!
Top Bottom