To avoid these ads, REGISTER NOW!

30x40 Attached Hot Rod Shop

To avoid these ads, REGISTER NOW!
OP
M

mlyonsdc

Well-known member
Joined
Nov 23, 2018
Messages
238
Location
USA
Good to know it’s not catastrophic, that can be fixed.
I plan to have it back together very soon and to knock out all the other little things that need addressed. The Buick Nats are in May and I will be able to really shake things out there. Drag Week registration opens 2-24 and I am going to try and sign up. The race is in September and gives me plenty of time to prepare.
 
OP
M

mlyonsdc

Well-known member
Joined
Nov 23, 2018
Messages
238
Location
USA
It has been a long ride on the struggle bus and it just keeps rollin.......

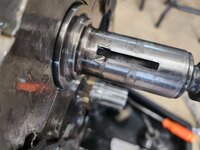
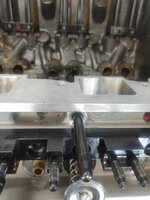
I got the motor out and apart Feb 13th and didn't get the head back on the car fixed until the beginning of this month. The area was so thin everything we did just made it worse. The first attempt to weld it just made the problem worse and moved it further into the intake port where it was impossible to get a tig torch even with an extended cup and bendable tungsten.

0312240914_HDR.jpg

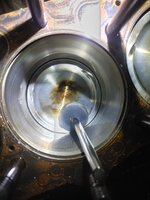
Next we tried putting sleeve in it. The idea was start small and grind to fit the pushrod, that didn't work ended up just grinding through again even with extra weld in the port.
0310241159.jpg
0310241159_HDR.jpg

So we tried a bigger hole and sleeve, no dice. I was told this one worked and actually had it back on the car and it leaked worse than originally. Plus it looked like **** and stuck out a ton into the port.

0408241439_HDR.jpg

For round three my machinist decided to just mill out everything from the intake face of the head to the back of the pushrod hole including the port wall and then had the entire area re-built with new weld. One problem we ran into was since all the pushrod holes on these heads were opened up and modified my machinist had no way of knowing what the original center line of the hole was, so by the time we fit the pushrod and fit it it would break through since it was likely off a few degrees from centerline. Fortunately I have a set of new castings which are untouched that he was able to grab the centerline from to re-machine the pushrod hole.

This time we had success AND the port matched pretty well. I did lose a little cross-section in the port but by the time the intake was bolted up it lined up very nice.
image8888.jpg

What a PIA that was to fix. I was about to give up and tried to find someone to port the new castings I have here but had no luck, most everyone is not taking any new work or customers or it was going to 9 months to over a year to get done. Seriously, WTF happened that it takes a year to get a set of heads ported!

I can't get the switch panel issue resolved either. I sent the keypad dongle into Racepak BEFORE I left for Sick Week and got it back in April. They said they replaced a resistor and that should fix the issue. It didn't!!

Since everybody is saying this dongle and keypad are the issue I went out and bought a used toggle switch panel and cable and now both go into error mode. I even eliminated the keypad and dongle all together and still had the issue with just the toggle switch panel. So, I now know what the issue is, it is in the can bus switch panel port on the Smartwire itself.

Now that I at least know what the issue is since Racepak couldn't figure it out I decide to call Tech support. I get the ever pleasant and helpful Derek who offers no advice or insight what-so-ever and his only solution is to send everything into them and they will have it at least a month and half before they can get to it. They seriously **** and for what I have into this junk it is ridiculous.
0427241646_HDR.jpg
I wish I could just get rid of it and start over, but its not that easy as I would end up re-wiring the entire car which is not easy. Not to mention the cost of buying a new PDM which is not cheap. Devin at HCR Innovations did come out with a new PDM that he has working with Holley which is tempting and I am still considering it. I wanted to re-wire the car anyway but not before Drag Week,

Oh yeah I got into the 20th Anniversary Drag Week in September!

I have a few things in the works, I found a deal on a second hand SW but even as a deal it was still expensive. For now I am going to install it and send mine in to hopefully get fixed. To get the old one out of the glove box I have to take everything apart, so I will probably re-wire it anyway lol!

Well, I got the head back on the motor and all is good or at least a trip around the block and some T-brake testing which went well but I discovered a new issue with the spool assist valve and the conv charge pressure. I don't need it anyway so it is nothing I need to worry about at least for now. I pull the car in the garage and start prepping it for Friday night T&T at Quaker city. I have everything set motor is idling on the lift for one last check for leaks and it makes a horrendous noise and abruptly stops running. WTF? I had set the rocker lash hot and figured I screwed something up again so I pulled the VC and everything is fine. I see the oil pump belt also slipped off a bit so now I concerned. I roll the motor over and it goes a few degrees and stops. I roll it back the other way and same thing. I pull the rocker are and WTF it dropped a valve!
0510241851_HDR.jpg
image9000.jpg
I first thought the timing chain broke which would have taken out some valves but a dropped valve is usually catastrophic. So I pulled the head and just when I thought the car hated me....
0510242152_HDR.jpg

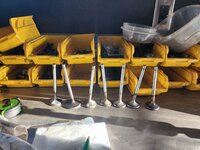
The valve broke at the keeper and stayed in the guide so it didnt bounce around the cylinder destroying everything. Had this happened on the track at 8k rpm it would have for sure destroyed the motor. In looking at the valves they weren't what I originally thought they were yet the intake valves are definitely a high end Titanium Victory Valve. For now I am just replacing all of the exhaust valves with Manley Severe Duty.

SO thats where it stands for now. I am supposed to be leaving for the Buick Nationals on Wednesday which I am not going to make with the GN at this point. I am still going just taking the T-type. Hopefully I will have my heads back by the time I return and I can get it back together and FINALLY get some testing in with the car.

I am signed up for 2 races with the GN this year, the Heads Up Hustle at the end of July and Drag Week.
 
Last edited:
OP
M

mlyonsdc

Well-known member
Joined
Nov 23, 2018
Messages
238
Location
USA
Quite the round of bad luck!

Martin
I am keeping my chin up and trying to look at this last episode as good luck lol! If that valve dropped on the track I would have lost the entire motor the fact that it happened idling on the lift and caused no significant damage saved my season this year.

Believe it or not a lot of this is normal new car blues, it is after all a mechanical device and not some possessed demon lol. At some point I will check enough boxes and it will start coming together.

I ended up calling Victory and ordering new Titanium intake and inconel exh valves for the motor I just did not want to take a chance with any of them at this point. I also got the bead-lock valve keepers which use a ring to hold the lock in place with no sharp edges. They are supposed to ship this week.

While the car is down I am tackling a few other issues. I was able to solve the Keypad/Smartwire issue. I got a deal on another used Smartwire and swapped it in the car. It did not glitch after leaving it powered up for 3 hours. It would only make it 10-20 minutes before glitching out with the original SW. I am 99% certain it is the switch panel can bus connection on the SW itself. I sent everything into Racepak so we will see. I no have 2 complete systems so once I get my original back I can use it for another project or sell it.

To get the SW out I had to yank the dash and pull a bunch of stuff apart. So I decided I am going to redo a bunch of little stuff I didnt like and clean things up a bit. I did make all the harnesses into sub-harnesses which makes this a little easier.
image9459.jpgimage9461.jpg

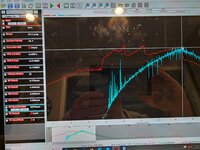
Before I dropped a valve I also managed to do some transbrake/2-step testing using the internal dump valve. At times the car will spool really fast and other times it seems to lag a little bit. I have discovered it is the internal dump valve which is the issue it sometimes works sometimes doesn't and even when its not energized it still seems to open and dump converter charge pressure. I noticed some of this before too this just confirmed it. The bigger issue is the charge pressure gets really high before the dump opens at 170+ psi. Anything more than 150psi in a TH400 can damage the thrust bearing which I will need to check while the motor is out. Below you can see two tests the first is the solid line and second is the dotted line. The graph shows RPM, TQ conv charge pressure and Boost. As you can see the first test was 4 secs to launch boost and the second was 7.
TB Testing.png
I had cleaned up the timing retard for the second which should have been a lot faster than the first not twice as slow! The internal dump for some reason did not activate right away and the charge pressure was really high.

This dump valve was developed in 2009 and was a proto-type so that pretty much means this is going to be a complicated and expensive can of worms I opened. Lonnie at Extreme Automatics is the guy who developed this and builds my transmissions. The internal dump he uses today is vastly different and far superior than this early attempt. The only issue is I need to buy a Reid SFI TH400 case and BOP bellhousing which isn't cheap or in stock. It may go back together with no internal dump and replacement stock case which I will need since this one was modified. I should be able to spool the turbo still but I wont get to the chip in 2.5 seconds which is insanely fast for a little v6 with an 88mm turbo and 96mm turbine wheel!
_part-2000000000064569_.jpgimage9541.jpg

I am hoping to be back together and finally on the track in the next 2 weeks.
 
Last edited:
OP
M

mlyonsdc

Well-known member
Joined
Nov 23, 2018
Messages
238
Location
USA
I am starting to think I need therapy or something but I just can't help myself lol!

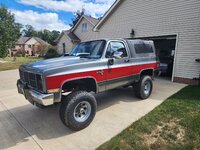
I always wanted to do a Jeep or truck build and here we go........
0613241830a_hdr-jpg.2133896

0613241831_HDR.jpg

I bought this from a friend of mine and gave him his asking price didn't haggle with him and even tried to talk him out of selling it but the price was right and I couldn't say no. He bought the truck in 2017 and it was mostly stock. The list of mods is long here are the highlights

Drivetrain
454 BBC Gen 1 block with **** crank, billet offshore rods, Wiesco Pistons, Hyd roller cam, Brodix Alum heads with alum roller rockers and some really cool VC's, Air Gap intake and 850 FST Holley carb and MSD pro-billet dizzy and MSD 6A. Abruzzi TH400 with Huges TQ conv, One ton axles 14 bolt rear Dana 60 front with 4:10s

Suspension
4" Superlift springs with Cannister Fox shocks, steering box mods with plate welded in, General 33s on 16" ProComp wheels. 4 wheel disc brake upgrade

Interior
Has decent bucket seats with factory console and rear seat, floors are raptor coated no carpet and alum diamond plate on rear panels. Factory interior is rough and needs a freshen. It has a soft top which is pretty cool IMO.

Body
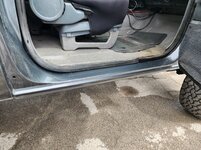
Paint looks decent from 20' but is kind of rough. It was a ****** repaint and the tops are faded and starting to peel clear coat. It is a Ga truck and actually pretty clean. Floors are solid no rust underneath a couple bubbles on passenger door and one small one on passenger rear 1/4 but the rocker panels are toast. It is actually in the shop now getting new rockers panels and other than that it is a really clean truck.

I have been driving this thing all week and it is surprising how nice it runs, drives and rides. It starts with zero issues, the ride is actually decent, steering is not all wonky. It runs at 185 degrees even with 95+ degree wheather we have had and everything actually works. It runs so well I am reconsidering the Holley Super Sniper upgrade I was planning. I already own the system from another project.

I could use some feedback on this project. I am new to off roading and planning to have some fun with this project but will ultimately end up selling it. My first inclination was to paint it restore interior etc but after considering the suspension, one ton axles I am thinking the paint is just right for what this truck is built for. I am going to get rid of the current rocker boards and build a set of rocker slides. I am adding a front bumper whinch and maybe some custom front and rear tubular bumpers with a roll cage. I am not lifting the truck anymore but considering 35's but my buddy said they will rub some on full turn or with suspension loaded.
 

Attachments

  • 0613241830a_HDR.jpg
    0613241830a_HDR.jpg
    946.1 KB · Views: 350

82355

Well-known member
Joined
Jul 13, 2013
Messages
689
Location
Bradish Nebraska
That thing is too nice to off road!

What kind of off reading are you thinking? What is local to you? What transfer case does it have?

IMG_0404.jpeg

That thing is right up my alley.

Martin
 
OP
M

mlyonsdc

Well-known member
Joined
Nov 23, 2018
Messages
238
Location
USA
That thing is too nice to off road!

What kind of off reading are you thinking? What is local to you? What transfer case does it have?

IMG_0404.jpeg

That thing is right up my alley.

Martin
I am not sure what I want to do with it just yet. That is my problem I get on these kicks and head down a rabbit hole head first with a new hobby or adventure and put to much on my plate. I have joined a few of the K5 forums and googled how far of a drive Moab is but I really have to prioritize and finish what I started with my GN first.

I have been doing a lot with it and should have it back up and running soon. I also have a mile long list of stuff to do to my Ttype which will be next thing I tackle after Drag Week in September. I am really hoping I finally get the bugs worked out of the GN and at least finish drag week. Then maybe take a break from that project and put it away in one piece for the winter. Man that would be really nice lol!!

For now I am trying to show restraint and not pull the whole damn truck apart for a total restoration! I am just addressing some of the issues with the truck like the blown out rocker panels which is really the only real negative about this truck. I ordered new inner and outer panels and it is at my buddies shop getting fixed right now and I will post pics when I get it back. I have some wiring to clean up along with replacing the most hacked up stereo install I have ever seen but that is all I really plan to do with it for now. I would like to take it to a local off road park and I am hoping I can get my 17yo daughter to go with me.


This all started with wanting to do a Jeep project thinking I could get my daugther interested in something other than tiktoc and getting her hair and nails done. She hates the truck and now wants to learn how to golf so it looks like I will be blowing the dust off my clubs and picking that hobby back up again. I really **** at golf too lol!
 

zmotorsports

ALLIANCE MEMBER
Joined
Oct 20, 2009
Messages
21,439
Location
Northern Utah
Nice Blazer. My first ride was a 1979 Jimmy, (GMC version of Blazer) and I loved that thing.

For simplicity sakes, I'd forego the EFI conversion and keep the Holley. As long as they are setup correctly and properly tuned they are an excellent choice and would be my choice.

I'm not sold on the soft tops for those but I would bet you could find a used hardtop in good condition. Even if the color didn't match, they are easy enough to sand and paint. I didn't care for the textured paint they used on the hardtops for the Blazers and Jimmy's so when I painted mine, I sanded it down and painted & cleared to match the rest of the body I was painting. I think it looked so much better and mine actually drew a lot of attention because it was pretty rare to see that 30+ years ago. Maybe now not so much though.

I think all I'd do is to zero it out as far as fluids, repack front wheel bearings and check suspension bushings then a thorough cleaning and drive it. Should make for a fun driver. Congrats on the new ride.
 
OP
M

mlyonsdc

Well-known member
Joined
Nov 23, 2018
Messages
238
Location
USA
Nice Blazer. My first ride was a 1979 Jimmy, (GMC version of Blazer) and I loved that thing.

For simplicity sakes, I'd forego the EFI conversion and keep the Holley. As long as they are setup correctly and properly tuned they are an excellent choice and would be my choice.

I'm not sold on the soft tops for those but I would bet you could find a used hardtop in good condition. Even if the color didn't match, they are easy enough to sand and paint. I didn't care for the textured paint they used on the hardtops for the Blazers and Jimmy's so when I painted mine, I sanded it down and painted & cleared to match the rest of the body I was painting. I think it looked so much better and mine actually drew a lot of attention because it was pretty rare to see that 30+ years ago. Maybe now not so much though.

I think all I'd do is to zero it out as far as fluids, repack front wheel bearings and check suspension bushings then a thorough cleaning and


Thanks Mike, I agree I am going to keep it simple and leave the carb at least for now.

Martin, the transfer case is a NP208
 

zmotorsports

ALLIANCE MEMBER
Joined
Oct 20, 2009
Messages
21,439
Location
Northern Utah
Thanks Mike, I agree I am going to keep it simple and leave the carb at least for now.

Martin, the transfer case is a NP208

Ya know, the NP208 kind of got a bar rap back in the day but I ran it behind my big block powered 1984 shortbed as a daily driver, weekend wheeler and weekend tractor pulling truck and never had a single issue with any of the NP208's that I ran. In my opinion, they are a good aluminum housed, chain driven TC.
 
OP
M

mlyonsdc

Well-known member
Joined
Nov 23, 2018
Messages
238
Location
USA
I have been at it non-stop with the GN since I got the heads back at the beginning of June. The K5 is at my buddies body shop to get new rocker panels were a mess and the only really bad spot on the truck. It was supposed to be done 2 weeks ago but you know how body shops are.

The good news is the GN is back up and running and I have knocked out a huge punch list of stuff that needed fixed, redone or finished. I am going to finish up a few smalls things on the car this week as I get ready for the Heads Up Hustle up in Michigan on the 26th. It is a 3 day drag-n-drive style event in which your avg time is your qualifying time for a heads up race on Sunday. Looks like a cool event and I am looking forward to it along with getting some track time and street miles on the car. The race is between Milan Dragway and US131 with some checkpoints and a 170 mile drive.

I can't say enough good about Victory Valves outstanding customer service and quality second to none. I replaced all the valves intake too which the Titanium intake valves that were in the heads were probably fine I wanted to go with the beadlock retainer they offer which leaves no sharp edges on the valve. Intakes are titanium with hardened tips and some special coating so no lash caps are needed, the exhaust are inconel.
0611241857_HDR.jpg

My good friend Lonnie at Extreme Automatics also took care of me and really hooked me up on the trans and dump valve. The internal dump valve in my trans was actually the original proto-type he and Steve Griner made back in 2008. It worked but had some issues like I mentioned above. The new internal dump Lonnie has requires the use of a Reid TH400 case which is really nice but isn't cheap and just not in my budget at the moment plus I had everything fit up on this trans with the carbon CSR SFI shield I just had re-cerfified. So Lonnie did me a solid and made a new valve body that would work with a factory case. I had to replace my origianl case with another case but Vince at Janis Transmissions (another close friend) had a core and also tore the trans down and put it back together for me. It is nice having good friends in the transmission business!

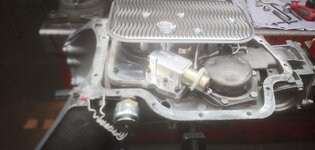
Don't call Extreme Automatics to order an internal dump valve to work with a stock case they won't sell you one and the one on my car was a one off. The internal dump is actually the solenoid on the outside of the trans that is typically the T-brake and the T-brake on this one is the billet solenoid in the pan attached to the VB. The ports for the return are on the governor cover and have jets in them so the charge pressure is completely adjustable and tunable.
0625241433.jpg

I also added an second external dump valve to use in first gear and to soften the converter in first gear when it couples and tends to pull the motor down 2-300 RPM which is also a point in which you can lose traction or shake the tires. The internal dump is used strictly to spool the turbo.
0628241655.jpg

0628241655a.jpg
0628241656a.jpg

Another issue I tackled was the oil pressure and volume I was having with the belt drive wet sump set up I have. The oil pan holds 5 quarts and I have an accumulator mounted in the trunk which hold another 3qts and was opening due to oil pressure dropping. To fix the issue is not that easy as there is only so large an oil pan I can fit on a V6 without re-engineering everything. So I decided to add an oil cooler, mount in the back and T into the feed line to the accumulator and run another -10 line to the rear from the oil pump so if the pan runs dry it reaches the accumulator BEFORE the oil cooler and returning to the motor. I know have close to 11 quarts of oil in the system too and an oil cooler which I am anticipating I will need for the drive portion. My block is also partially filled so this is going to be a really good addition. Plus over half the oil in the system isn't in the oil pan so I think my oil temps even with the diaper on will still be fine even on the longer drives.
0707241509_HDR.jpg

The motor went together and back in the car without much changing or incident and fired right up when I went to start it.
20240719_092611.jpg

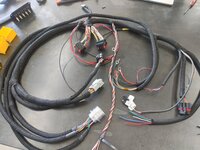
Wiring done right or at least with some thought and effort takes a TON of time. I planned to move the Smart wire and change a few things I didn't like and ended up rebuilding the entire chassis harness and front light harness. I had 30 hours into just the chassis harness and I didn't even start from scratch as I started with the harness I already had!
0703241409_HDR.jpg

It was worth it in the end it came out way nicer and way more organized than it was, check the before pic above
20240718_120234.jpg
It looks like a lot but it really isnt if you think about it. That is the entire ECU and chassis wiring and is significantly LESS wiring that would go into a stock vehicle.

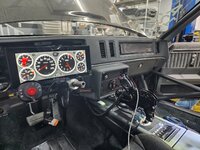
I was able to get the glove box door on now that I moved the smart wire. I put in some additional lighting inside the dash and puddle lights in the footwell along with a chassis light above the rearend. I still have more lighting to do in the trunk and under the hood and the wiring is all run for it. I still have to do something with the factory dash surround behind the Pro-dash which I originally planned to mount in the stock dash location but it fit better, I can reach it and see it with it mounted on the steering column vs the dash.
20240718_215643.jpg

So far so good, going to start testing stuff and driving it around as I am sure there will be more bugs to work out.
 
OP
M

mlyonsdc

Well-known member
Joined
Nov 23, 2018
Messages
238
Location
USA
I will have more Blazer content here soon. It is still in the body shop getting new rocker panels. The repo Ebay ones were not the best choice for the inners and I ordered a new set from Classic Industries that look good. If the GN wasn't bleeding me dry with both time and money I would love to do a whole build on the Blazer but IDK this GN DnD deal F'in killin me!!
 
OP
M

mlyonsdc

Well-known member
Joined
Nov 23, 2018
Messages
238
Location
USA
So I wrapped the car up on Friday 7-19 and instead of driving it around I drove it to the end of the street and back loaded it on the trailer and went to Quaker for TT night. It went well I made 3 passes 330' passes. We found a bunch of small issues and started dealing with them and felt pretty good about going to the Heads Up Hustle (HUH) in Michigan the following weekend.

To get ready for the race we had to get a front end alignment and before that we had to fix the issue with the passenger side control arm hitting the clamp for the x-over. When we made the x-over we fit everything which was tight to begin with but didn't account for the thickness of the clamp. At rest the clamp was just about touching the UCA.
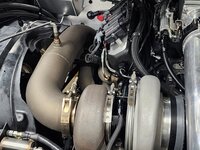
20240722_073324.jpg
We modified the support bar to make room for the clamp and it worked out pretty well

20240722_222634.jpg

I finally got it on an alignment machine. I did a home alignment with a caster camber gauge I have and a set of turn plate I bought from Amazon. It gets the alignment close but only in the ballpark lasers work best. This time I was pretty far off. We started with 18 degrees of caster which explained why the car was so difficult to turn. We ended up with 12.5 degrees which is still a lot but I wanted 7-9 originally and the UCA have 7 additional degrees built into them. The car tracks straight does not wander and is not bad to turn even at a stop. I am probably going to change this around but for now works well. I actually think I have the UCA swapped left and right but even with the additional clearance for the clamp and x-over the outter arm will still hit the downpipe. I am probably going to have a custom set made which TRZ has done for me in the past to clear downpipes and turbo headers.
image24364.jpg

The HUH started at Milan Dragway and was 170 mile drive to US131 with two checkpoint and then back to Milan for a HU race based on your avg qualifying times from the past two days. Kind of a cool format and I was looking forward to the event. I felt the car was ready and we were going to have at least some success with this race. My goal was simply to make some passes and finish the race. I did not care how fast the car was I just wanted to make it out of the parking lot and complete the event.

We planned to leave Thursday afternoon and check in/tech Thursday evening so we could be fresh and ready Friday morning for the start of the race. Of course the car had a different plan. First the front end alignment was a nightmare and took and entire day literally. I was able to get out of work on Thursday to finish stuff up pack the trailer"s" and be ready to go by 5 and maybe still make tech which went to 8pam and it was a 3 hour drive. Ray came early and we got the car back together, fired it and found the alternator was not charging. I had a CS130 case single wire Powermaster alternator on the car. I had a new stock GN alternator as a back up but needed to run 12v to it to excite the voltage regulator so it charges. We put it on and wire a SW 12v to the L pin and were off and running. We finally got loaded up by 7pm ate dinner and got on the road.

We made it to the track early unloaded and was getting a lot of attention which was cool. We made it through tech easily for a 7.50 cert
453221871_1029787979150777_22361870587761255_n.jpg
453257652_1029787099150865_6541490176454356869_n.jpg

3G who does a lot of DnD coverage did a an interview which was cool.


First day went well, the video above has my first pass which was an easy launch easy low boost pass. Basic A-B pass with a soft 60 I was off the gas after the 1/8 with a 6.28@118. The class we are racing is Small tire and 1/8 mile. We decided to make another pass as it was early and if we got on the road by 1pm we should be at the hotel by 7.

For the second pass I did not change much but increased the launch RPM as the car is REALLY lazy in the 60 and I believe we are just not leaving at enough RPM. I went from 4400 to 4600 he 60 picked up some and we were a little faster in the 1/8.
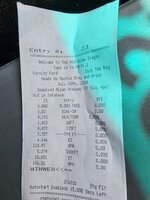
20240726_123828.jpg

We decided to turn in the slip and load up to get on the road. My buddy Jim Trettle was there with his TT LSX 67 Firebird and ripped a 5.0 pass and was ready to roll. We swapped over to street mode loaded up the trailer and started rolling till we got to the gate and found the alternator was not charging AGAIN!!. We bailed on the drive turned around and made it back to the pits when the car died.

Ray and I were debating on what to do next but then the race staff showed up with a Chevy Volt and said we were welcome to use it to run to the parts store. Seriously, they gave us a car to run and get parts how cool was that. I needed an alternator with the same orientation and clocking as a stock GN case which is NOT very common and very rare. After 2 hours of driving a GN alternator we were about to give up. On our last stop I was done and not even going to ask about a GN alt and Ray said you never know ORielys sometimes comes up with wierd stuff. They had one, not in stock but at thier warehouse in Bellville MI seriously we found a GN alternator in a warehouse. We had the Volt so long I thought we were getting DQed for overuse of the Volt lol.

It was 6 pm when we finally got the car back together and the battery charged and on the road. We actually celebrated leaving the parking lot! We had a strange issue between the two passes we made where we temporailty lost 1-3-5 cylinders. We cycled the power and ECU and it was fine and made our second pass without an issue. Well that issue came back about 10 miles in the drive. On the side of the road by luck we found one of the GND wires for the 1-3-5 coils not fully seated in the connector. This fixed the issue and we were back on the road.

One of the issues we found at the TT session the week before was that the fuel MAP of the leaded race E85 we were running from Renegade was VASTLY different from pump E85. The ethanol content was also skewed and the flex fuel sensor was scalled to pick up the change. We were off by 20% between the 2 fuels which is pretty significant. We needed to make a new MAP for pump E85 and after we fixed the 1-3-5 coils dropping were able to start sorting out and were tuning the MAP as we drove.

We are cruising at this point, driving 60-68 on the express ways with and everything working well. We made the first checkpiont and everyone was long gone but the sun was still up!
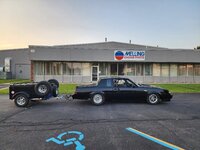
20240726_204636.jpg`

We were feeling pretty good at this point. We had 40 miles to the next check point and took the expressway the whole way up. We were making time and a 1/4 mile from the second checkpoint which was on the west side of Lansing Mi and the motor started making some not so nice noises and died. We coasted into the parking lot of the Carriage House apt complex at 10pm on a Friday night.

After we stopped the car and got out Ray was greated by the Carriage House finest residence with a Yo-Yo-Yo is this a F'in Grand National? This is my F-in dream car Yo! The evening did not get any better we were stuck in the worst part of Lansing MI in a Buick GN towing a trailer with a motor we knew was toast. I have AAA so I called for a tow. They said no problem we will send some one out but can not pick up the trailer too. We had someone from the race staff come pick up the trailer which we were over an hour away from. He picked the trailer up at 12:30am and we still have not heard back from AAA. By 3am I started calling them and finally got someone to admit no one was coming because they could not get anyone willing to pick us up and take us to Milan which should be covered. Finally we decided to have AAA tow us to a hotel 5 miles away just to get us out of the dangerous place we were stuck in.

I had the driver drop us at a Fairfield Inn which had an Enterprise Car rental next door! We got an easy in out spot at the front and things were good, I went in to get a room and they were booked full. Went across the street to the Quality Inn and samething. The clerk told us to try the Hampton Inn down the road and by 430 am we finally found a room and a place to sleep.

I got up at 730 and called Enterprise. The office was open 9-12 and if I did not want to pay for a 3 day rental I had to have the car back by noon that day. I picked the car up at 9:03 and dropped it off at 11:55, it was 95 miles to Milan and 95 back through Detroit traffic, no taffic laws were broken!

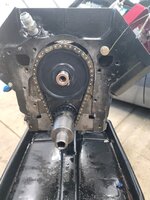
While I was sitting in the car waiting for AAA to show or the natives to attack I was kind of relieved, I was done, it has been a long haul and I am throwing in the towel. We didnt even try to figure out what was wrong as the noises from the motor when it died told us we were done and we didnt even want to get out of the car with where we we at. Once we got back to Milan and had the car and trailer all in the same place we finally looked at the car to see what happened. Intially it looked like we ate a lifter on #3 but later I figured out it was what we initially thought the timing chain let loose. It ended up being the lower gear crank key.
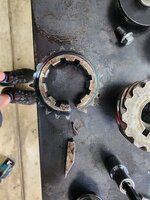
20240802_112159.jpg
20240802_112219.jpg

I have had concerns about the keyway in this crank in the past but it was never an issue until we drove it 100 miles. Drag Week starts Spet 13 and I am still planning to be there.
 
OP
M

mlyonsdc

Well-known member
Joined
Nov 23, 2018
Messages
238
Location
USA
Unfortunate turnout, but a good read.

Martin
Thanks Martin I am glad you enjoy the read I like sharing the story and like keeping a log of it here.

I am 13 days away from leaving for Drag Week, here we go again.....
 
To avoid these ads, REGISTER NOW!
OP
M

mlyonsdc

Well-known member
Joined
Nov 23, 2018
Messages
238
Location
USA
It's been a really long haul this year with this car and trying to make it through at least one DnD event. Sick Week we managed to make ONE pass with the car in competition and at Heads Up Hustle we made 2 and even made it out of the parking lot to at least to one check point, so its progress I guess.

I am really tired of working on this car it really has been non-stop. My yard is a mess, I've used my boat and cottage only a few times this summer and after 12 years of doing triathlons I am now fat, out of shape and and broke from working on this car. Good times.
First up the carnage, as expected the broken crank gear didn't miss much. When the gear let go it took out the valves I JUST put in June. All of exhaust valves were toast but 5 of the really expensive titanium intakes were salvaged and I only had to buy one new intake.
20240902_081658.jpg

The rods also smacked the camshaft ruining it and made getting out of the block a challenge since it was bent.
_part-2000000000003538_.jpg
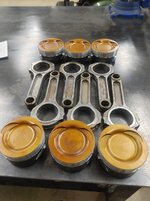
The rods and pistons also have witness marks in them which are only cosmetic but still. I also need 5 new rod bolts as the threads got boggered up from smacking the cam. And this still wasn't the worst of it, the block was cracked!!

When I got the car back in 2021 we discovered it was leaking coolant and suspected the block was frozen and cracked at the top of the #3 cylinder. When I finally got the motor out of the car in spring of 2022 I found a head stud that was leaking that could have caused it but there was visual crack along the top of the cylinder on the outside of the block. I took it to my machinist and he inspected it and said it was not cracked and it was just a casting flaw.

Great so that was the block I used for the build. When I first assembled the motor and fired it it leaked from #3 cylinder which we chalked up to being a weeping Cometic HG or stud which happens, some seal tabs sealed it up and off we went to the dyno and Sick Week. But then the #3 intake port mysteriously develops a crack in the intake port leaking oil into the intake track ending our Sick Week adventure.

I get home and we go through the nightmare of fixing the cylinder head and re-assembling the motor and once again it leaks from that same spot on #3. Seal tabs fix the issue again but then it drops a valve so it comes apart AGAIN. New valves and re-assembled this time and I re-sealed the headstuds again and also got a new set of Cometic HGs. It leaked again from the same spot, seal tabs fix it and off to HU hustle. Well this time with the block out and apart I ask my machinist to look at it that spot again and see if he can figure out why I keep leaking coolant at the #3 cylinder and guess what the block IS cracked!!!!
image24684.jpg
There is a casting flaw there but it is cracked on the ends and it extends out further than it did when we first checked it. My machinist swears it didn't leak when he first checked and while I believe him and he is a good friend of mine, it was definitely like that from the beginning. That crack was actually letting the deck of the block flex and we found evidence of it and I am pretty certain it caused the intake port to flex and crack in thin spot. I was also chasing this goofy issue were the coolant pressure dropped to zero. The purple line in the graph is coolant pressure boost is blue. I also saw this issue from the first 10psi pull we did on the dyno.
1725281578558.png

Funny thing is the seal tabs worked it only leaked after a fresh start up and once we sealed it it was never a problem again nor did it leak water and was not an issue at HuH in Michigan.

So at this point I am 6 weeks out of Drag week and I essentially have no motor. Good thing I keep spares of stuff. I had a mint back up block, a Buick motorsport forged crank, pistons and a set of rods. I just needed a camshaft and my machinist to move me to the front of his list and I could be back in business.
0504240829_HDR.jpg
0512242133_HDR.jpg
0515240722_HDR.jpg
 
Last edited:
OP
M

mlyonsdc

Well-known member
Joined
Nov 23, 2018
Messages
238
Location
USA
What doesn't kill you makes you stronger right lol!

The build on the new motor didn't go so smooth either but it does run as of today.

While I had pistons which usually take forever to get the big issue was I needed a new cam. Billet cam cores have been an issue to find for everyone yet alone a Buick V6 with a custom cam profile that nobody else has ever run in a turbo Buick.

Since I was getting a new cam I decided to update the design and changed the exhaust profile since most newer turbo profiles are going heavier on the exh duration due to changes in turbo technology. I wanted to add 10 degrees of duration on the exh side with same lift and LSA. I had a line on 8620 cores through a friend who had purchased a bunch of them from Bullet when they were available He could grind a 248/252 on 116 in with an 8620 core.
20240816_185249.jpg

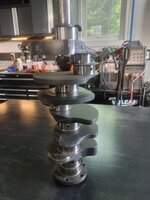
I also had to order a new set of rods the ones in the pic above were 6.5" and I needed a 6.350 my same friend with the cam cores had off shore billet cores custom made for the Buick in the length I needed. While they are pretty damn nice and look like a really high quality piece and better yet fit the piston I already have and give me all the parts I need to assemble this motor. He also spec'ed them with a quality rod bolt from P1 manufacturing. I never heard of P1 manufacturing so I was sketch on the rod bolts to begin with and ended up putting in ARP 2000s. Afterwards I come to find out they are a quality company and make a good product. I have another project I will use them with.

We first thought the motor lost a lifter on the tear down and more than a few were quick to blame the needle bearing comp roller lifters I had in the motor. They are all I ever ran and never had an issue but apparently the new bushing style lifters are markedly better if they fail they won't take out the motor. So I upgraded to Isky Redzone lifters and I also put in a new set of their Toolroom Springs so this motor will at least have all new and the most durable valvetrain components I could use.

The short block assembly went fairly smooth with a few hiccups at least till we got the the camshaft. The first issue was the rods needed clearance for the cam which is common on these little motors with long stroke cranks.
_part-2000000000006838_.jpg
I debated the whole rod bolt issue since the P1 rod bolts took 95# to stretch to .006 and I was told the spec was .006-.0065 like the ARP 2000. I was getting 85# to stretch the ARP2000 to .006 so I went with those. It ended up the spec was .0055-.006 on the P1 and I had come to find out my highend Proto TQ wrench calibration was off and 8-10# high.

I ended up buying a HF strain gauge and testing all of my TQ wrenches and the Proto was the only one off while all the cheap ones were spot on, go figure.
20240902_164013.jpg

I also ran into issues with the expansion rings of all things. I was given a high tension expander which I could not get to fit in the bore. Total Seal sent a set of standard tension rings which I got in with no issues. I was also using a ring compressor and not a sleeve since the finished bore size is 4.023 which made things a little more difficult.

_part-2000000000007653_.jpg
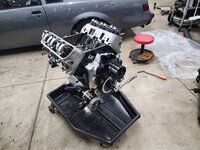
I had everything dropped off at the machinist and all the parts ordered by Aug 2 and started assembling the motor Wednesday Aug 21st which isn't a bad turn around. I was hoping to have it together and running by the end of that weekend to make a track rental on the following Wed. It will typically take me at least two full days to assemble one of these engines the rod clearance and expander rings put me a little behind but by Saturday afternoon I finally had the rotating assembly in the motor and now all I had to do was degree the cam and I could start putting the top end together.

I had over 8 hours into degreeing this camshaft! I didn't have any advance ground into the cam and I should have which was the first mistake. I ordered a new Rollmaster billet timing chain set which allows up to 8 degrees of advance or retard in 2 degree increments so I did not feel it was an issue. The cam has a 116* lobe separation and I typically install it at 112* intake centerline with 4* advanced. The first go around with this I get 118 degrees with 4 degrees of advance which is 2 degrees retarded, WTF. So I check it straight up and it is worse at 123 degrees WTF? So we start the process of trying a few other settings on the gear, then we finally read the instructions which just made everything more confusing. We started around noon and by 6:30 we gave up for the evening.
image25210.jpg
I woke up the following morning with a new plan and had another timing set along with an old cam I ran that had a damaged lobe. So I put them in and degree it and it is was spot on at 116 degrees.
_part-2000000000008495_.jpg
So then I put in the new cam and degree it with the old timing set and boom it is 118 degrees so it is definitely off 2 degrees which we kind of figured out the day before. This timing set will only advance +4 so the best I could get was 114 and I wanted 112 so went back to the rollmaster and finally figured out that timing set was indeed off by 4-5 degrees. So between the cam and the crank set being off by 7 degrees with the best I could get to was 114.5 degrees. I also degreed the exhaust lobe and checked all the timing events then plugged all the numbers into the calculator and this is what I ended up with. The cam is closer to a 250/252 and is significantly different than the cam I had in the car. Its also a pretty damn big stick for a little V6 with production style heads. I am pretty sure I am in uncharted territory with this cam profile.
20240825_105927.jpg
This is what I ended up with on gear alignment at TDC. What a mess, I will NEVER use another Rollmaster timing set even though everyone speaks highly of them, this was BS and I also have a broken crank gear that no one has seen happen before.
20240825_100042.jpg

The rest of it went much smoother the new block has a nearly identical deck height so valvetrain geometry was spot on and the new lifters were the same height as the old ones so I didn't need new pushrods. I had a small issue with the rocker stand bolts on the one head and had to heli-coil them which set me back a little but by Monday I had a completely assembled engine
20240827_212242.jpg
Now all I have to do is drop it in and fire it up, yeah right......
 
OP
M

mlyonsdc

Well-known member
Joined
Nov 23, 2018
Messages
238
Location
USA
The motor install didn't dis-appoint while riding on the struggle bus.

I was finally ready to drop the motor in Friday and cleared the whole day for it since I had scheduled it to be on the dyno Saturday morning. I originally wanted to have it running by Wednesday but I do still have an actual job and a family who vaguely remembers me. I had the motor in and on the mounts by 9:30 that morning and that was about the smoothest part of the day and was thinking we would should easily make the dyno Saturday.

I went to put the trans in and quickly figured out the pilot hole in the crank was to small and cut for a NASCAR style pilot bearing. This was my mistake, I knew to check this when the crank was out and just forgot about it until I was putting the trans in.
image25355.jpg
_part-2000000000009228_.jpg
image25365.jpg
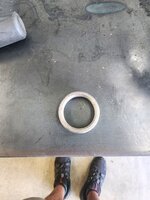
Fortunately the ring on the converter screws on, so I sent some txt to my machinist who was able to turn the ring down to fit. I fortunately caught him right before he was ready to leave town for the holiday weekend and actually closed his shop for the day.

Ray was coming after work figuring we would be loading the car by the time he got there, I at least had the transmission in by the time he got there, lol!

We finally got to the point in which we needed to prime the motor, I typically hook a mechanical gauge up to a port on the side of the block that is tied directly to the main oil feed line and tee off the cam and main oil passages. The oiling on the Buick Motorsport block is significantly different than the production blocks and the on-center blocks are really only designed for dry sump oiling.
_part-2000000000007648_.jpg

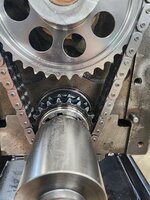
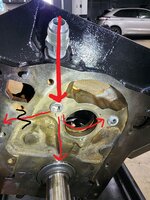
I hooked everything and start turning the oil pump which I can feel drag on the drill but the gauge is reading zero. So we check the gauge and it works, we then check the valve covers and we have oil in both valve covers which now makes no sense with no oil pressure on the gauge since the passenger side is fed through the front cam bearing as you can see in the pic above. There is a second feed on the back of the motor so we tapped into that with the gauge and boom we had 70psi on the gauge with the drill. But that wasn't the end, if the gauge is reading zero at the port there is a chance something is blocking the port and it could also be blocking the port to the main bearings. So we continued to take stuff apart and finally got a mirror in there to find the port was never drilled.
20240830_193418.jpg
I have "never seen that before" on one of these blocks but Buick would make these blocks to a race teams spec and maybe Childress just did want that port drilled out for some reason. IDK, but chasing that sucked up the rest of the evening and we called it quits for the day and canceled the dyno appointment for Saturday.

I got out to the shop early Sunday, the rest of the install went smooth. We ran into another small snag with the starter and the ignition switch wire. For some reason it grounds out at the base of the stud so we had to double nut it in the middle, who knows why, its a brand new Powermaster Hitachi style starter too. Like Ray said he's "never seen that before".

Also, on the way to the HuH race the Powermaster alternator died on us right before we loaded the car on the trailer to go. I replaced it with a new stock reman alt I had which then went back at the track the following day. The car smoked two alternators in less than 24hrs whihc is REALLY unusual and I was more than curious as to why it happened. I took both alternators to a local shop that rebuilds them. The original single wire PM alternator died as a result of a part breaking inside the he said he has "never seen that before" and the other one the voltage regulator died. So it was coincidence that I lost two of them that resulted in Ray and I spending 6 hours driving all over Detroit to find a replacement and fixing it at the track.

The motor did fire right up and ran fairly decent. Of course it had an oil leak in the front of the intake so we didn't run it very long. I pulled it and fixed the leak, it was a mistake on my part this time but it is back together and ready to go. I still haven't started it since putting the intake back on, right now it isn't broken and doesn't leak anything, that can all change quickly!

While we did manage to build an almost entirely new engine and get it in the car and running again in less than a month, I am having second thoughts on doing Drag Week. With less than 2 weeks out and the horrible track record we have had with this car I am thinking we should take a step back and consider skipping this event to work on sorting the car out more. Not to mention I have spent ridiculous amount of money on unused hotel rooms this year!

My goal was to make it to Drag Week and finish it then put the car away and forget about it until the Buick Nationals next May skipping Sick Week in January. Now I am thinking I may skip Drag Week and work on sorting the car out at home instead of on the side of the road or during a race and preparing for Sick Week in January instead.

I am doing something Friday with the car, there is a local track rental in the afternoon or I may be driving out to the dyno which I would rather do at this point. I still have a list of to do's that I need to knock out and plan to start working on today. I will post an update on what I decide to do, hopefully it is a decision I get to make and not the car!

I may also have some news on my Blazer soon as it may be getting released from body shop jail.
 
OP
M

mlyonsdc

Well-known member
Joined
Nov 23, 2018
Messages
238
Location
USA
Just a quick update. Had it out for a 60 mile test drive, stopped to fill up at a Sheetz with a 1500hp V6 towing a trailer lol!
20240910_215017.jpg

Things are going much better now, we made a track outing with 4 short passes and 2 full 1/4 mile passes, We still have issues but this was the first real test session we have had with the car and while it is slow we have a lot of data and know what direction we need to go. It doesn't leak anything and is like driving a Toyota Camry down the track.

This was the last test pass, still on a very mild tune up 27psi of boost. First gear and the 60' are a mess and I need to change the convertor stator.
image25596.jpg

I planning on changing the stator tomorrow morning and hopefully heading back to QCR to test on Friday night. If all goes well we will be loading up and packing the trailer on Saturday and heading to NTR for Drag Week 2024!
image25589.jpg
 
OP
M

mlyonsdc

Well-known member
Joined
Nov 23, 2018
Messages
238
Location
USA
Oh yeah I did get the Blazer back and my buddy did a really nice job on the rockers. The outters fit without issue but the inners did not fit that well and took some work to make fit but he did a fantastic job. It looks SOOO much better with the rockers repaired and those hideous running boards taken off!

20240907_143237.jpg
20240907_143225.jpg
image25656.jpg
image25658.jpg
I love this truck and can't wait to take it off road when I get back from Drag Week!
 
OP
M

mlyonsdc

Well-known member
Joined
Nov 23, 2018
Messages
238
Location
USA
Nice "soft" hit!

Any idea why the driveshaft rpm is so erratic?
The signal goes into the Davis Profiler first then out to the Holley and the noise happens somewhere between the two, the signal in the Profiler is clean which is what matters.
 
OP
M

mlyonsdc

Well-known member
Joined
Nov 23, 2018
Messages
238
Location
USA
Man what an adventure. It's funny how a little success will change your perspective. While the car has seriously never been this slow it still did more things right than wrong and even with the car running on point I would have ended up in the same position I got in the end. I had nothing at all for David Diehl who laid down a 7.08 at US131 with a small block on a small tire!. 2nd place winner was a guy with a Monte Carlo with a 7.72 avg which even if my car was on point it would still be a struggle to avg that number. I got another invite for Sick Week and I am signing up, I have some unfinished business in Florida I still want to take care of lol!

To pick up where I left off. We knew the TQ was an issue and Dusty at PTC has a new stator on its way. The original stator we had was a 18 blade and he sent a short window 18 blade as a replacement.
20240913_084313.jpg
image25790.jpg

After the test drive we found an oil leak that didn't show up until we didnt run the vacuum pump which we disconnect on the street.
20240913_151019.jpgThe leak was in the corner and since the crankcase is sealed for the vacuum pump I rigged up a -12an fitting to the end of my shop vac and pulled the crankcase down cleaned the area really well and put Ultra black all over the corner. I then let the vacuum run for 15 minutes and when I came back out I could see the area that was leaking. I put another layer of Ultrablack on it and it WORKED!! So far it did not leak at Drag Week and the underneath of the car was completely dry on Day 5. We also discovered we did not have enough vent with the vacuum pump disconnected which made the leak worse so we re-configured the lines to vent to the tank during the drive portion. We got a decent amount of blow by and in 200 miles we would get half to 3/4 of a quart in the vent tank.
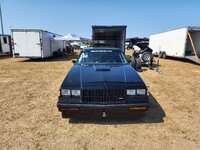
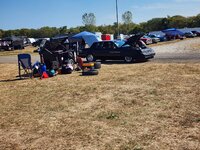
With the new stator in and the oil leak fixed we were ready to once again go to a race untested. I started at 7am on Saturday with packing and organizing and didn't finish till 8pm that night. We spent more time sorting out and organizing the trailer than we had in the past and it really paid off as we looked like pro's on our change overs which by day 5 we had down to 45 minutes.
20240915_122448.jpg
On tech day we got there early and teched by 10pm. Testing started at noon and we really didnt know what to expect with the new stator. Expecting good things we turned the starting line tune up down for a lackluster 1.45 60' on the first pass. We made a few more passes turning it up some but it became apparent the new stator did not change anything and it was actually a little worse.

For Race day we decided to just make passes and finish the race. If we can turn a 8 something pass in at each track and make it back to NTR maybe we would turn it up for the last day. Based on our track record our goal was to just make the second day!

We showed up on day one with a one and done
20240916_105208.jpg
Made the change over for the drive, yes that is Ray working his *** off while I take pictures lol! I would have never been able to do this without his help and friendship.
20240916_112159.jpg
In the pits was a guy who blew up his motor the day before. He got on FB Marketplace found another motor for $400 and was doing the swap. There is something to be said about being able to just get on Marketplace and find a replacement engine for $400 thats not happening with my combo lol. I had come to find out David Diehl was behind this and did most of the work and in his spare time was kicking everyone's *** with his bad *** small tire small block Mustang.
20240916_105715.jpg
On the road we go, the drive was smooth really no issues. Check point 1
20240916_141302.jpg
Check point #2
20240916_162640.jpg
I thought this was hilarious. The car was pretty fast too and I think he won or placed in his group.
20240916_163028.jpg
 
OP
M

mlyonsdc

Well-known member
Joined
Nov 23, 2018
Messages
238
Location
USA
And 230 miles later we are at our hotel in Indy. While everything went well it is exhausting to drive this car that far. We really need headsets and more comfortable seats. Solid mount aluminum Kirkeys in a solid chassis with all solid joint suspension is NOT fun!
image25893.jpg
The Monte beside me is my Buddy Mike Hamilton who did the dyno tuning on my car. He finished the car Sunday morning just made tech and ran an 11.04 on motor for the first day. It is a 408 LS motor. He ended up with a 10.92 on Day 4 and sprayed it for a 9.62 on Day 5. The Monza on the end is another buddy from home who is running a turbo 5.3 LS motor and was in the hunt for a 3rd place finish in Modified SB PA class till the last day when his turbo expired.
20240916_201145.jpg
The motor on the 68 Camaro was a twin blower set up, pretty cool
20240916_215624.jpg

Indy went well we got to the track early one and done, did the change over made a pass handed in the slip changed back and on the road again which was good since this was the longest day for the drive portion with 285 miles on the route.
20240917_110945.jpg
I had ordered a new pilot chute from Summit at NTR which they had at Indy for me. I had to pick it up at the NHRA HQ office. They need to get rid of the over grown tree lol!
image25926.jpg
Video of my Indy pass

Check point #1 was Bryant Goldstone's shop near South Bend In. Bryant also won the OA for the event and has the AMC you will see all over the internet.
20240917_161949.jpg
Check point #2 was Lane Automotive
20240917_181438.jpg
290 Miles and 8 hours later we are at the hotel in Plainwell Mi
20240918_185621.jpg
 

Attachments

  • 20240919_141058.jpg
    20240919_141058.jpg
    1.2 MB · Views: 2
Last edited:
To avoid these ads, REGISTER NOW!
Top Bottom