To avoid these ads, REGISTER NOW!

Between 705 & 1200 SQ/FT "DaBarn"

Workspaces between 705 and 1200 squarefeet.
To avoid these ads, REGISTER NOW!
OP
B

Bears Fan

Well-known member
Joined
Jan 26, 2012
Messages
3,442
Location
Indiana
Guys, thanks for all the positive comments on Emily's house, it was a labor of love. I told my wife that we are not going into the house flipping business...I have a day job 🤣

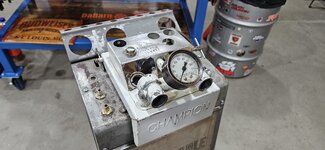
I recently acquired from a very special friend, maybe one of the coolest additions to DaBarn ever!!! it inspired me to get back out in "The Little Party Garage" this week and play :)

01-X2.jpg

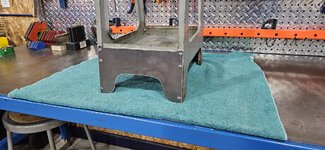
Its a Champion spark plug cleaner/tester, as you can see in the photo the legs were bent over, it being sheet metal they required some special attention.


02-X4.jpg

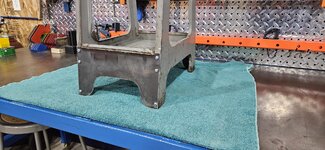
After a complete tear down, I cleaned all the pieces with Zep industrial purple cleaner and degreaser, then I used a body hammer and dolly to straighten all the years of abuse.


03-X4.jpg

After several attempts to stiffen up the base with angle iron, I ended up scrapping that idea as it really didn't look that appealing to me, so I went in a different direction with some sheet metal.


04-X4.jpg

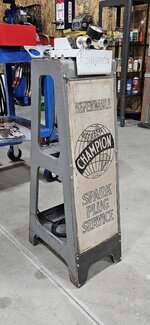
This is the backside, it ended up working out really well, it is super strong now and it looks period correct and I only had to add two extra holes to the base on each side.


05-X4.jpg

Here's the front side completed too, I added all new 10-32 bolts to the entire piece.


06-X4.jpg

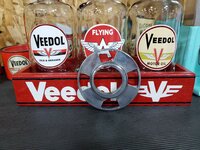
Here's some miscellaneous pieces that I cleaned and polished :cool:


07-X4.jpg

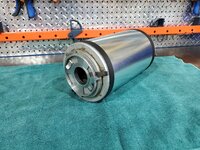
This is the media canister, from the online pictures that I found it looks like it was covered with a canvas or some other sort of soft material :unsure:


08-X4.jpg

It measured exactly 6" across so I picked up a piece of 6" stove pipe and cut it to the proper length.


09-X4.jpg

I cleaned the canister up and wire wheel the clamps and sprayed them black, then I installed the cover, PERFECT FIT (y)


10-X4.jpg

I polished the rest of the canister parts to complete the assembly, I'm missing the threaded cap for the canister.


11-X4.jpg

Its ready to install.


12-X4.jpg

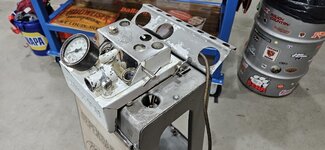
I reassembled the entire cleaner, here's a shot of the top. I'm only missing one of the brass blow off fittings and I believe there were some different size threaded inserts for different size spark plugs that are missing.


13-X4.jpg


14-X5.jpg

Front photo.


15-X5.jpg


16-X5.jpg

The right side.


17-X5.jpg

The left side.


18-X5.jpg

And the back side, now I need to send it out to "The Big Party Garage" for one of those kick *** paint jobs :giggle:

Thanks a million Don!!!
 
Last edited:
OP
B

Bears Fan

Well-known member
Joined
Jan 26, 2012
Messages
3,442
Location
Indiana
Tony that is really Cool! :cool:

Jon,

Thanks, I'm with you too, I think this is a great piece and maybe someday I'll find the ambition to paint it :sleep:


01-X4.jpg

I seem to look at everything as "I can repurpose that", I had this empty powder can and thought it would make a cool little project!


02-X4.jpg

Luckily it had an easy to peel off paper label.


03-X4.jpg

This is what it looked like after painting the cap black and adding a couple of black stripes, along with two yellow stripes, then I just added a vintage Bardahl decal, I also cut the "oil treatment" letters out on the vinyl cutter.
 
OP
B

Bears Fan

Well-known member
Joined
Jan 26, 2012
Messages
3,442
Location
Indiana
This is what happens when you agree to a hot date with the wife and you end up at Hobby Lobby :ROFLMAO:

01-X4.jpg

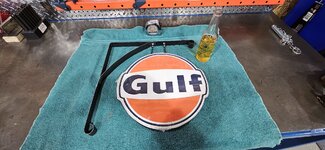
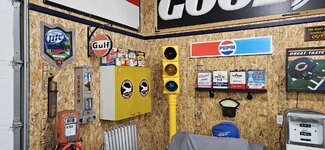
I found these two Gulf signs priced half off....so what the hell, they came home with me :thumbup:


02-X4.jpg

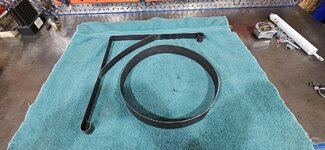
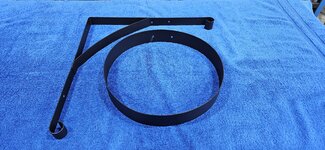
I used some strips of 16 gauge sheet metal that was left over from a different project and got to bending.


03-X4.jpg

I drilled some holes in the l-bracket and welded the two pieces together for the hanger, then I rolled another piece of 16 gauge for the sign frame to make it double sided.


04-X4.jpg

I picked up some small black chain and i-bolts to hang the frame from the bracket, I even enjoyed one of my favorite adult beverages Landshark 😋


05-X4.jpg


I just need to drill a couple of mounting holes in the bracket to hang it and paint it black :thumbup:
 
Last edited:
OP
B

Bears Fan

Well-known member
Joined
Jan 26, 2012
Messages
3,442
Location
Indiana

Bob Heine

ALLIANCE MEMBER
Joined
Oct 24, 2009
Messages
10,708
Location
Boca Raton, Florida
To mount the two signs together on the frame, I just drilled two holes all the way through the two signs and connected them with two 10-32 x 2" bolts. It worked out pretty good :thumbup:
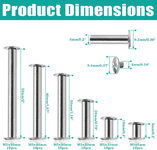
Tony, you could also use binding posts for the attachment. You get the same fastener head style on both sides of the sign that way. This assortment has a slotted/phillips head on one side.
Binding Posts.jpg
 

PugetDude

ALLIANCE MEMBER
Joined
Mar 13, 2013
Messages
22,440
Location
Superstition Mountains, AZ
To avoid these ads, REGISTER NOW!
OP
B

Bears Fan

Well-known member
Joined
Jan 26, 2012
Messages
3,442
Location
Indiana
Guys, thanks for all the Christmas well wishes and all the ideas and comments on the Gulf sign, I have yet to get the sign hanger painted. I have been pretty busy with family holiday gatherings 🎅


03-X4.jpg

I signed up for the 2023 Garage Journal secret Santa gift exchange. Garage Journals own BlakeTheCarGuy got my name and sent me a great secret Santa package, it also included a Harbor freight gift card along with everything else.

Thanks Blake :cool:


04-X4.jpg

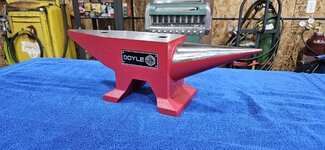
I took the Harbor Freight gift card to my local store today and picked up their 65 pound anvil, I have always wanted a anvil, but I could never find a vintage anvil in good shape that didn't cost a fortune, this anvil has pretty good reviews and its very affordable, but you have to inspect them pretty close before taking them out of the store, the top face of these can be very pitted and its where they have welded up bad spots in the casting and ground them back down, the first one I opened up at the store had a lot of pitting on the face and it looked like they ground it with a flap disc and did a horrible job of it! it looked really bad! the one they had on display was in perfect shape and the top was surfaced ground and looked awesome! so the store associate kindly gave me the display model. I'm going to build a stand for it and I will post that when I start it :thumbup::thumbup:

I'm not going to be doing any blacksmithing stuff, so this anvil will be awesome for what I want to use it for.


05-X4.jpg

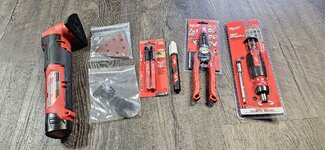
Here's a few new tools that the family got me for Christmas 🎅

Do you think they know I like Milwaukee 🤣


06-X4.jpg

My son, Cody got me three different brands of one of my favorite adult beverages 🥃 😋

Happy New Year everyone 🥳
 

BlakeTheCarGuy

ALLIANCE MEMBER
Joined
Oct 10, 2018
Messages
9,384
Location
Roanoke Virginia
Really hope you enjoy the bbq sauces. The patriot sauce is my personal favorite. Hope you got a good laugh at the name of the rub. That’s another of my favorites too but I promise all of them are good. I told my antique store friends that have a booth that I was on the hunt for Chicago Bears stuff and both were able to come up with one thing in a week which was both the cup/mug. It’s hard to find their stuff around my area so I’m glad I was able to source those for you. I’m just happy you liked it all. Definitely post pictures of whatever you smoke with the sauces and rub. I plan to get a smoker in the new year sometime.
 
OP
B

Bears Fan

Well-known member
Joined
Jan 26, 2012
Messages
3,442
Location
Indiana
Its been really busy around here lately, So I needed to take some time out to post some updates on DaBarn :thumbup: :thumbup:


07-X4.jpg
I finally painted the frame and hung the Gulf sign up :beer:

08-X4.jpg


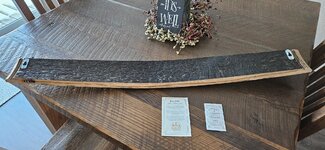
My wife bought me a pretty cool birthday present last week, she ordered it online from Holtz Leather Company, its made from old authentic used white oak bourbon barrels.

01-X4.jpg


02-X4.jpg


Hung in DaBarn :thumbup:

03-X4.jpg


04-X4.jpg


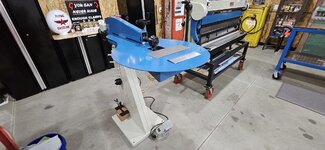
I also Decided to buy myself a birthday present 🎂 A Baileigh BR-18E-24 power bead roller :cool:

01-X4.jpg


02-X4.jpg


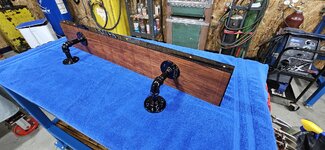
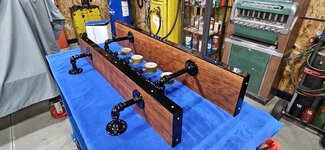
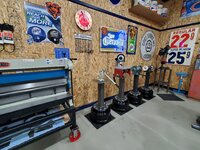
I decided to pull a couple of shelves off the wall that I made quite some time back, I painted the steel parts and put a few coats of boiled linseed oil on the cherry wood 🪵 and hung them back up :)
01-X4.jpg


02-X4.jpg


03-X4.jpg


04-X4.jpg


05-X4.jpg
 
Last edited:
OP
B

Bears Fan

Well-known member
Joined
Jan 26, 2012
Messages
3,442
Location
Indiana
01-X4.jpg

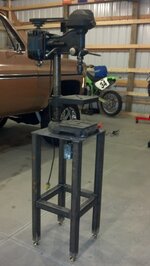
I bought this 1942 Craftsman drill press about 15 years ago and made this stand for it, it was about time that I tore it down and finish it after sitting in the barn for ever.

02-X4.jpg

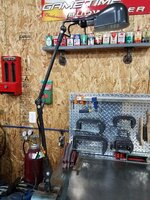
I picked up this really awesome Craftsman light in perfect shape with original paint, I just had to give it a good cleaning :thumbup:

03-X4.jpg

I drilled and tapped a couple of 1/4-20 bolts to mount it on the stand.


04-X4.jpg

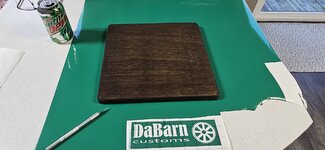
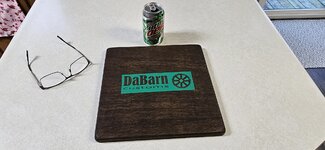
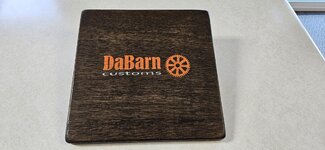
I made a shelf for the base, I stained it, then painted DaBarn logo on it and gave it three coats of spray poly to top it off.


05-X4.jpg


06-X4.jpg

I have all the pieces ready for the stand now.

07-X4.jpg


08-X4.jpg


09-X4.jpg

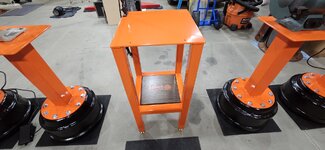
I decided to take the drill press stand and the other four pedestal's I made to the powder coater for a coat of safety orange 🟠
 
Last edited:
OP
B

Bears Fan

Well-known member
Joined
Jan 26, 2012
Messages
3,442
Location
Indiana
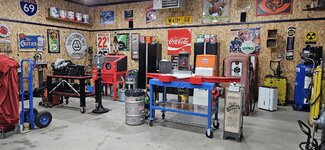
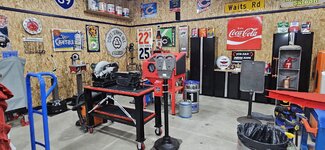
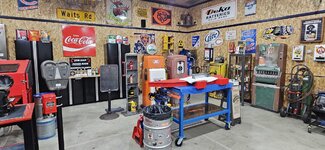
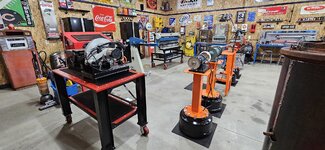
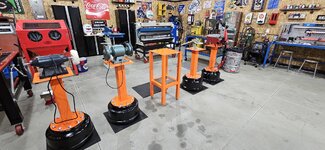
With so many new things going on in DaBarn I decided to reorganize the back half of the shop to make it a little more user friendly.

The first four pictures are before I started playing garage tetris.

01-X4.jpg


02-X4.jpg


03-X4.jpg


04-X4.jpg


And this is what it looks like now after playing garage tetris, I really like the new layout, I just created a circle in the center, the only issue is that I need to use a power cord to run stuff now.

05-X4.jpg


06-X4.jpg


07-X4.jpg


08-X4.jpg


10-X4.jpg


11-X4.jpg

I can rest peacefully now that I have satisfied my OCD. :oops: :unsure: :cool:
 
OP
B

Bears Fan

Well-known member
Joined
Jan 26, 2012
Messages
3,442
Location
Indiana
Noticed you were MIA for a while...
Glad it wasn't punitive.😉

Scott

I did manage to stay out of jail :rolleyes:

Tony, I hope you oriented everything off a datum line and then squared everything up with a laser.

Scott

I just went old school, a tape measure and a chalk line :unsure: :ROFLMAO:

Tony, That looks great, wish I could get back to my shop, it seems like the harder I try the farther away I get! can you put a recoil reel above your tool row?

Jim

I feel your pain, I think we all need more QST :cool:

That is a good idea on the power real from above, the only wiring that I do have in the ceiling is the lights, but I don't think it would overload the circuit if I added that to it. I have the lights wired on two separate circuits each one only has six lights on it. 💡
 
Last edited:

jon72vega

Well-known member
Joined
Apr 17, 2013
Messages
3,485
Location
Niles Michigan
With so many new things going on in DaBarn I decided to reorganize the back half of the shop to make it a little more user friendly.

The first four pictures are before I started playing garage tetris.

01-X4.jpg


02-X4.jpg


03-X4.jpg


04-X4.jpg


And this is what it looks like now after playing garage tetris, I really like the new layout, I just created a circle in the center, the only issue is that I need to use a power cord to run stuff now.

05-X4.jpg


06-X4.jpg


07-X4.jpg


08-X4.jpg


10-X4.jpg


11-X4.jpg

I can rest peacefully now that I have satisfied my OCD. :oops: :unsure: :cool:
Everything looks great!
I like the orange stands.
 
To avoid these ads, REGISTER NOW!
Top Bottom