To avoid these ads, REGISTER NOW!

What did you do "IN" your garage today?

To avoid these ads, REGISTER NOW!

KwikFab

Well-known member
Joined
Jul 27, 2024
Messages
1,213
Location
Central Valley, CA
Received a package yesterday afternoon from a repeat customer.

Made sense to purchase it and have it sent to me before I made something for it and send it all out to him (he's in Alaska).

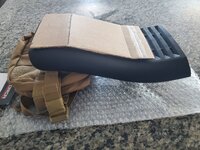
He wanted a molle panel for the rear center console cover as one person used to make them some years back; he has since shut down his website and disappeared so I got to mocking it up today.

Here's the panel -
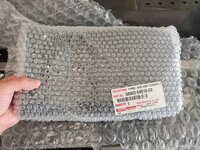
20240815_112036.jpg

The kit was advertised as being a means of carrying a first aid kit, specifically the tear-away Orca Tactical pack found on Amazon so I found it appropriate to buy one myself for mock reasons -

20240815_112219.jpg

Quick cardboard mock up -

20240815_134943.jpg

20240815_134959.jpg

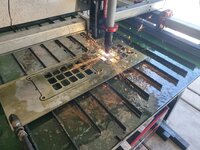
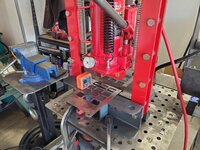
The design is super simple so it took a minute or two to draw up and get to cutting -
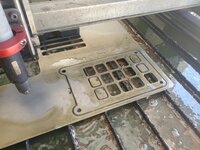
20240816_111936.jpg

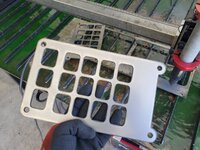
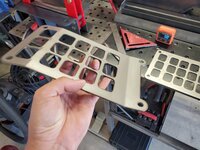
Here it is after it was cut, and bent on the press brake -
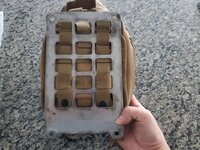
20240816_114829.jpg

Perfect -

20240816_114903.jpg

Here's the tear away action; the rear of the kit is secured nice and tight to the molle panel -
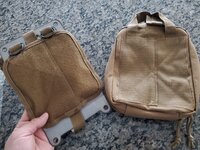
20240816_115644.jpg

Not bad for a quick first attempt -

20240816_115731.jpg

Have to say, I've used molle both in the military and in training and I remember just how secure the stuff is on your carrier and whatnot.

However, this was the first time cutting a template on steel.

Looking at how the rear looped through the panel, I may want to adjust the holes and spacing for the molle panel but that may take longer than it did making this whole thing.

Might have to toy with it tonight on CAD.

Had very little 16 gauge left so made two more.
Apparently, more people want them so onto cutting.

20240817_095748.jpg

20240817_100008.jpg

Two quick bends on each one.

20240817_101605.jpg

20240817_101958.jpg

And since it's early and I'm relaxing the rest of the day, figured I'd throw a coat of primer on them.

20240817_103119.jpg
 

rcktpwrd

Well-known member
Joined
Mar 5, 2008
Messages
1,095
Location
Raleigh, NC
While I was at work, she reinstalled the interior of the wagon. While it was all apart, she did a very thorough cleaning of everything, it looks good! Still waiting on one sun visor to be refinished, when she went to pick the stuff up the other day there was a small issue with one visor and the guy tore the fabric when trying to fix whatever the problem was...

I got out the D/A again and went over all the glass with Mothers water spot remover and a Griots glass polishing pad. Glass is better but really needs more polishing to get rid of more of the water spots and whatnot. I also think I need to get new product as what I have is 6-8 years old.
 

Magnum440d100

Well-known member
Joined
Dec 2, 2018
Messages
3,581
Location
Indiana
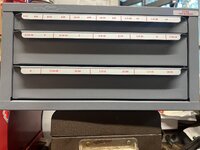
That jungle website made a delivery today.
IMG_4702.jpeg

So now I’m moving my taps and matching bits from my packouts to the drawers. Just bummed because I use/used to use 12-24 at work, and there’s no spot for it. But there is one “extra” slot it seems. Maybe that’ll be a catch all for the random ones.

Can’t wait to get the rest of the drawers. Gotta talk myself into the justification lmao
 

DGersic

Well-known member
Joined
Mar 12, 2017
Messages
6,359
Location
DeKalb, IL
Final mockup / acceptance test for the drawer on Blum tandem slides. We’re good to go. I’ll start on the real,drawers this week.

IMG_5706.jpeg

Oil change on the Camry.

IMG_5707.jpeg

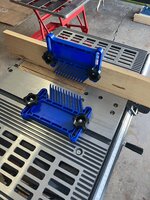
Belt sander applied to the bits that go in the track, so they fit now. Messed with getting the new featherboards on the saw.

IMG_5709.jpeg
 

Jgaz

Well-known member
Joined
Dec 16, 2016
Messages
1,689
Location
AZ
Final mockup / acceptance test for the drawer on Blum tandem slides. We’re good to go. I’ll start on the real,drawers this week.

IMG_5706.jpeg

Oil change on the Camry.

IMG_5707.jpeg

Belt sander applied to the bits that go in the track, so they fit now. Messed with getting the new featherboards on the saw.

IMG_5709.jpeg
Your “mock up” drawer looks great!

Did I read somewhere that you are looking for melamine coated bottoms for your drawers?

I used an MDF based material that had a whiteboard layer on one side and a blackboard? material on the other.
It is used in a 22”x 15” drawer I made for my wife’s cutting table.
You can see it here where I removed on of the organization trays she has in the drawer.
I liked the material and I was able to buy a 24”x24” so not much left over
IMG_4591.jpeg
I used 1/2” Baltic birch with 1/4” finger joints for the drawer construction.
I didn’t worry about glueing in the drawer bottom.
The bottom was cut as a snug fit to help square up the drawer and I really just relied on the finger joint glue squeeze out to hold it snug so it doesn’t rattle.
 

DGersic

Well-known member
Joined
Mar 12, 2017
Messages
6,359
Location
DeKalb, IL
Your “mock up” drawer looks great!

Did I read somewhere that you are looking for melamine coated bottoms for your drawers?

I used an MDF based material that had a whiteboard layer on one side and a blackboard? material on the other.
It is used in a 22”x 15” drawer I made for my wife’s cutting table.
You can see it here where I removed on of the organization trays she has in the drawer.
I liked the material and I was able to buy a 24”x24” so not much left over
IMG_4591.jpeg
I used 1/2” Baltic birch with 1/4” finger joints for the drawer construction.
I didn’t worry about glueing in the drawer bottom.
The bottom was cut as a snug fit to help square up the drawer and I really just relied on the finger joint glue squeeze out to hold it snug so it doesn’t rattle.

Thanks. I was, but we’re back to normal plywood now.
 

bulletpruf

Well-known member
Joined
Nov 28, 2013
Messages
11,121
Location
San Antonio
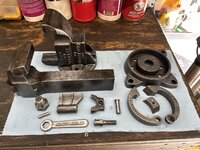
Picked up this vise from my neighbor a few years ago; didn't have a need for it at the time, but I can't pass up a deal on a decent vise.

IMG_0891.jpg

And now that I'm setting up a shop, a lot of my tools have migrated there, so now I need a vise for my chainsaw workstation/workbench.

Figured there was a decent vise under the 4 or 5 coats of paint, and I was right.

IMG_1961.jpg

Decided to leave it au naturale, but with a coat of boiled linseed oil.

IMG_1966.jpg

After this was done, I got started on a resto of a rusty and beat to hell Rock Island 94; hope to finish that up tomorrow.
 

Motorman55

Well-known member
Joined
Apr 10, 2016
Messages
2,643
Location
South Jersey
UPDATE.....The black felt came in the mail so yesterday I applied it to the three plaques. Only thing left now is to add the metal engraving plates once I get them.

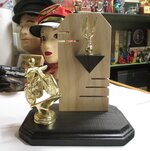
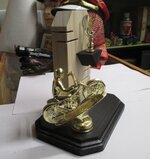
Meanwhile, I made another motorcycle trophy for our Car Show. The cast metal motorcycle topper and eagle are vintage metal pieces.

I stained the bottom plate the same 'Classic Black' as the three plaques and clear polyeurthane the base. I used my miter saw to make the horizontal slat cuts to the vertical piece to represent motorcycle cylinder fins and trimmed the top with a couple angle cuts to represent a motors head.

I used one of the cut off pieces to make the eagle perch which I also stained with the 'Classic Black' then glued it to the vertial piece. I left the vertical piece natural pine and just polished it and the perch with the Howard's Feed-n-Wax. Lastly I added the black felt to the bottom. Just have to add a brass engraving plate.

Still a few more trophies to make....1723693572035.jpeg1723693542993.jpeg1723693511113.jpeg
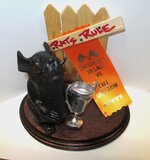
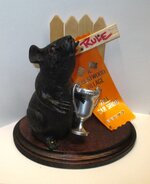
Another day another Car Show Trophy completed. This one is for the Rat Rod or Rat Bike Catagory. Its called 'Rats Rule'

Grabbing some wide wood popsicle sticks, I fashioned a background picket fence and a separate pine board sign with the name of the Trophy catagory on it. Glued the fence into a slit cut I made into the top back of the plaque and wiped some Howard's Feed-n-Wax on it. Next I stained and clear polyurethane the pine oval base plate. After it dried, I took one of the Car Show ribbons, trimmed it to size and slipped it up between the sign and the picket fence. Drilled some small holes thru the sign board and fence and attached the sign with small nails and super glue securing the ribbon at the same time.

Grabbed one of the rubber Holloween rats and leaving his body unpainted, I painted his eyes red and trimmed off a couple of his whiskers and shortened his overly long tail. Drilled a couple holes thru his feet and tail and into the wood base to mount with nails. Also painted a small plastic Party Favor trophy and super glue it to the rats body. Lastly I added some black felt to the bottom of the plaque.

And that ends the tail, pun intended, of the 'Rats Rule' Trophy. On to the next one......1723955336931.jpeg1723955273882.jpeg
 
Last edited:

Daedalus

Well-known member
Joined
Sep 28, 2009
Messages
6,048
Mama's car got some lovin' today. Bled all 4 calipers to replace the brake fluid, and drained/refilled the trans with Nissan Matic S. The brake fluid wasn't terrible, but the trans fluid was far too overdue. Shame on me. Coolant is ordered and on the slow boat. It was a bit muggy today, but not too hot, thankfully.
 

bugnut

ALLIANCE MEMBER
Joined
Jul 14, 2012
Messages
3,974
Location
Central Ohio
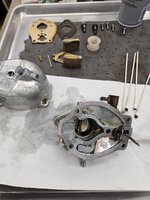
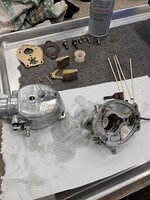
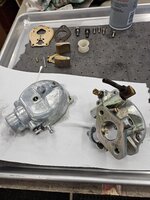
Finished the cleaning and reassembly of the Ford 8n carb. Not sure the issue, everything looked okay, but had to run with the choke on and it was surging and without power. Looks like a leak on the gasket at the choke side? Maybe?
 

Attachments

  • 20240816_125931.jpg
    20240816_125931.jpg
    732.3 KB · Views: 16
  • 20240816_125939.jpg
    20240816_125939.jpg
    873.5 KB · Views: 18
  • 20240816_125828.jpg
    20240816_125828.jpg
    838.4 KB · Views: 15
  • 20240815_105348.jpg
    20240815_105348.jpg
    666.5 KB · Views: 16
  • 20240815_105345.jpg
    20240815_105345.jpg
    773.4 KB · Views: 34

bulletpruf

Well-known member
Joined
Nov 28, 2013
Messages
11,121
Location
San Antonio
Finished the cleaning and reassembly of the Ford 8n carb. Not sure the issue, everything looked okay, but had to run with the choke on and it was surging and without power. Looks like a leak on the gasket at the choke side? Maybe?

Normally if you have to run it with the choke on, I'd say you have a vacuum leak somewhere, but there aren't many places to for a leak on one of these. If it still surges once it's back together, start it up and then spray some brake cleaner around the intake and base of the carb; when the engine picks up rpm, you've found your leak.
 

DeeDubz

Well-known member
Joined
Nov 20, 2019
Messages
1,448
Location
Socal
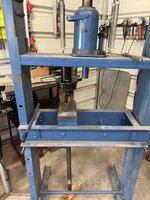
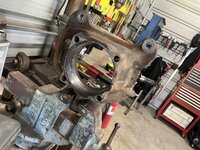
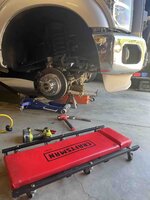
Ball joints, track bar and tie rods... fun stuff. Thankful to have the proper tools to get it done
 

Attachments

  • IMG_7918.jpg
    IMG_7918.jpg
    729.7 KB · Views: 29
  • IMG_7924.jpg
    IMG_7924.jpg
    884 KB · Views: 29
  • IMG_7921.jpg
    IMG_7921.jpg
    764.1 KB · Views: 29
  • IMG_7903.jpg
    IMG_7903.jpg
    887.6 KB · Views: 29
  • IMG_7894.jpg
    IMG_7894.jpg
    582.1 KB · Views: 30
  • IMG_7912.jpg
    IMG_7912.jpg
    461.1 KB · Views: 31
To avoid these ads, REGISTER NOW!

Snip's

Well-known member
Joined
Apr 29, 2017
Messages
1,862
Location
Ohio
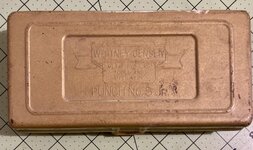
My Whitney Jensen was showing some wear and tear and looking a little grungy... Gave it a little Spa treatment...

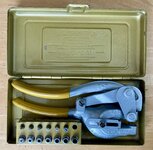
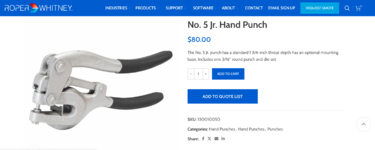
This is the #5 JR hole punch... Still in production for over 100 years... It must be a good design because the knock offs are being cranked out by "other" countries... Mine is an earlier model but is now being sold by Roper Whitney and thankfully still being manufactured in Rockford Illinois, USA :giggle: With only hand power, it can apply 2,400 pounds of hole popping force (without burrs that a drill bit would give)...

I cleaned it up yesterday in a bath of Simple Green and hit it with a splash of Rust-Oleum hammered silver....It was a little tricky because some of the parts are riveted in place... The two screws I cleaned up this morning and applied some nickel plating to resist rust...

Before:
IMG_4093.jpg

IMG_4094.jpg

Now:
IMG_4101.jpg

Nickel goodness...
IMG_4100.jpg

Screen Shot 2024-08-18 at 12.49.01 PM.png

Screen Shot 2024-08-18 at 12.51.09 PM.png
 

Bessy

Well-known member
Joined
Dec 18, 2012
Messages
995
Location
Ontario, Canada
Phone was dead, so no photos to speak of, but I finally pulled out the spindle sander and placed it on the back of the overturned whaler taking up residence in my shop, so that I could finesse (widen) the slots in my pipe clamp racks to accept the clamps I've got. Once that was done I glued up five of the six pieces of the rack. I'll finish that tomorrow after work, I think, so I can get it hung up on the wall, and populated. Many of my longer clamps are taking up residence on the outboard motor stand/cart while the OB is on the boat for the summer, but I will need that unit back come the end of September, so I need to get a move on mounting clamps up on the walls.
 

LeeG

Well-known member
Joined
Nov 29, 2012
Messages
1,531
Location
Phoenix, AZ
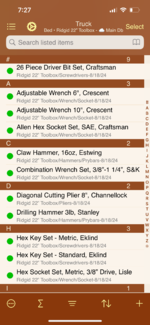
I use an app on my phone to keep track of all my stuff. Today was too hot to do anything useful, so I went through my “in the truck bed “ toolbox, removed some unnecessary duplicates, and made sure I knew what was in there.

IMG_2447.png

I know that this level of detail is more than most want to do, and it took a long time to get it all done, but I’m glad I did it.

Lee
 

Outlawmws

Well-known member
Joined
Aug 9, 2011
Messages
39,304
Location
The Badlands

Snip's

Well-known member
Joined
Apr 29, 2017
Messages
1,862
Location
Ohio
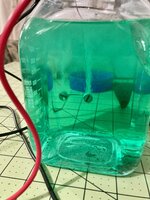
For rust removal on iron / steel / cast iron parts, I use white vinegar (5% acidity)... Pretty cheap at the grocery store...
But before the items go into the vinegar, I remove any oily surface contamination with SG... The SG lets the vinegar get to work better....
I flush the parts with cold water and quickly dry the item... Some small amount of flash surface rust may form...
Then add your desired finish (paint, BLO, wax, oil etc.)
 

niget2002

Well-known member
Joined
Oct 2, 2012
Messages
11,194
Location
Josephine, TX
Processed the first good pediment, as much as I intend to.

IMG_20240819_111401.jpg
Started printing more lost PLA masters.
IMG_20240819_112747.jpg
I need to try some lost PLA casting for some aluminum parts.

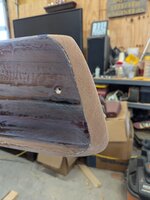
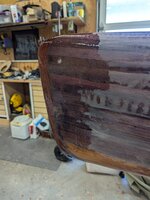
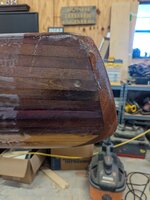
Today I finished up the construction on the Kayak. I glued on some more fiberglass layers on the bow and stern for abrasion resistance and cleaned up the underside of the coping lip.

When this epoxy dries, I'll start sanding everything down in prep for finishing. My plan at this point is to use some Automotive 2k clear. I've epoxied a test piece to test out the clear I already have. I need to check and see how much clear I have from a previous project. I think I have at least half a quart. Should be enough for 4-5 coats of clear on the kayak.
 
To avoid these ads, REGISTER NOW!
Top Bottom