
You are using an out of date browser. It may not display this or other websites correctly.
You should upgrade or use an alternative browser.
You should upgrade or use an alternative browser.
Between 265 & 485 SQ/FT Basement Bike Cave and 3D Printing Workspace
- Thread starter kppolich
- Start date
Workspaces sized between 265 and 485 squarefeet.

Greenlawnracing
Well-known member
Did you guys say “tubulars”? Throwback!that glue removal is incredible, way better than the naphtha process i used in the past
For Cyclocross at least, tubs never left!Did you guys say “tubulars”? Throwback!
I burped one front tubeless tire, cost me the race with a DNF - ever since I've been 100% tubulars. The effetto mariposa tape is excellent as well. Easy to install and super, super secure in all conditions.
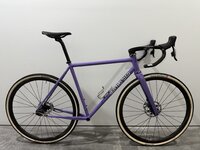
Arrived and piecing together!
Only mistake I made was not going with a larger bottom bracket shell like T47
I knew the rear hose routing through the BB would be tight with the dub spindle and bb sleeve.
YEP - too tight, ordering a GXP Red crankset and bottom bracket and texted quick with Paul and he confirmed when he did the work he tested with a 24mm spindle.
All good, as my dad used to say "There are days to make money and there are days to spend money"
Pics:


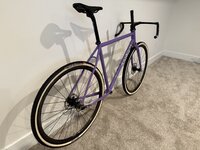

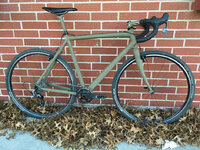
Mocked up next to my crux the geo was modeled after...mostly...
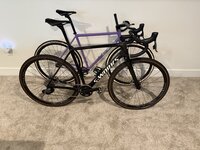
Threw the shifters on for a sec.


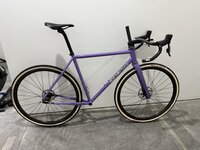


Only mistake I made was not going with a larger bottom bracket shell like T47
I knew the rear hose routing through the BB would be tight with the dub spindle and bb sleeve.
YEP - too tight, ordering a GXP Red crankset and bottom bracket and texted quick with Paul and he confirmed when he did the work he tested with a 24mm spindle.
All good, as my dad used to say "There are days to make money and there are days to spend money"
Pics:
Mocked up next to my crux the geo was modeled after...mostly...
Threw the shifters on for a sec.
tweidman
Well-known member
Very Nice. Huge departure from the Ti and black colors of your current collection.
When is the first cross race?
When is the first cross race?
It's coming right alongVery Nice. Huge departure from the Ti and black colors of your current collection.
When is the first cross race?
SRAM Red GXP Crank arrived, mounted my Quarq and 42T chainring and applied the Matte Blank Crankskins. Temporary King Ti cage on there as well.
Waiting for BB to arrive on Friday and it's time to bleed brakes and test ride.
Overall, really - really happy with this thing so far on fit and finish.
Pics:


First race is about a month out, should be ready with both sets of tubulars for dry and wet conditions.
Body is almost there, time to crank up some 30/30 intervals and work on some bike handling off-road.
Yeah, I've had some wild color bikes in the past and it feels good to be back!
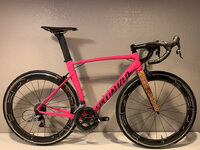
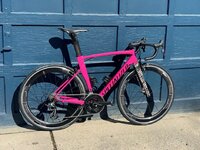
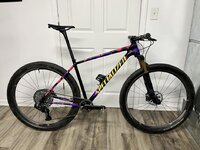


Last edited:
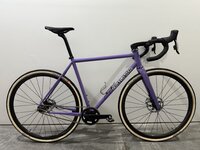
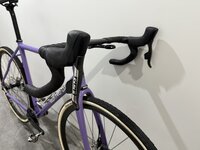
She's done minus waiting on my Effetto tape to wrap up my second wheelset.
18.2lbs of pure joy, can't wait to absolutely send it in a few weeks. Set up 42x20 right now, with room to move to a tougher gear by sliding the dropout. The King Ti cage will come on race day, but I actually like the contrast with it on there as is.
Pics!


18.2lbs of pure joy, can't wait to absolutely send it in a few weeks. Set up 42x20 right now, with room to move to a tougher gear by sliding the dropout. The King Ti cage will come on race day, but I actually like the contrast with it on there as is.
Pics!
I won't make it up for SSCX WC this year and its a bummer!The bike turned out great! MN's first cx race was last night- I saw a lot of crashes and one fist fight. I might have missed this, but are you coming up for SSCXWC?
Test Ride #1 - its sweet, and not even on tubulars yet.
No complaints!

Labor Day weekend update - it was a nice long weekend to button up a few things.
1.) Tried out this new Silica drip wax kit. Overall - super nice.
Just started using this from Silca instead of my typical CeramicSpeed UFO.
So far, so good.
It lasts longer and is quieter than the UFO stuff and its making me want to try full-on-wax here soon

2.) Put a new Carb in the timemaster and changed the oil after 10 hours of mowing with it. Oil looked OK, but glad I changed it again.
Old carb was filthy, I cleared the bulb and jet a bit when I first got it and it would pull start just fine but I could never get it to fire up using the keyed electric start unless I gave it a little spritz of starting fluid in the air filter. Also it never really idled that smoothly, likely due to worn out springs and the little rubber washers on the linkage points were caked with dirt and disintegrating.
One $28 New carb later and bang - she's fired up now fist key turn and is running strong as ever. My guess is the previous owner didn't use the good gas. Premium only from me on this thing and I'll give it a spin around the lawn later this week.

1.) Tried out this new Silica drip wax kit. Overall - super nice.
Just started using this from Silca instead of my typical CeramicSpeed UFO.
So far, so good.
It lasts longer and is quieter than the UFO stuff and its making me want to try full-on-wax here soon
2.) Put a new Carb in the timemaster and changed the oil after 10 hours of mowing with it. Oil looked OK, but glad I changed it again.
Old carb was filthy, I cleared the bulb and jet a bit when I first got it and it would pull start just fine but I could never get it to fire up using the keyed electric start unless I gave it a little spritz of starting fluid in the air filter. Also it never really idled that smoothly, likely due to worn out springs and the little rubber washers on the linkage points were caked with dirt and disintegrating.
One $28 New carb later and bang - she's fired up now fist key turn and is running strong as ever. My guess is the previous owner didn't use the good gas. Premium only from me on this thing and I'll give it a spin around the lawn later this week.
Last edited:
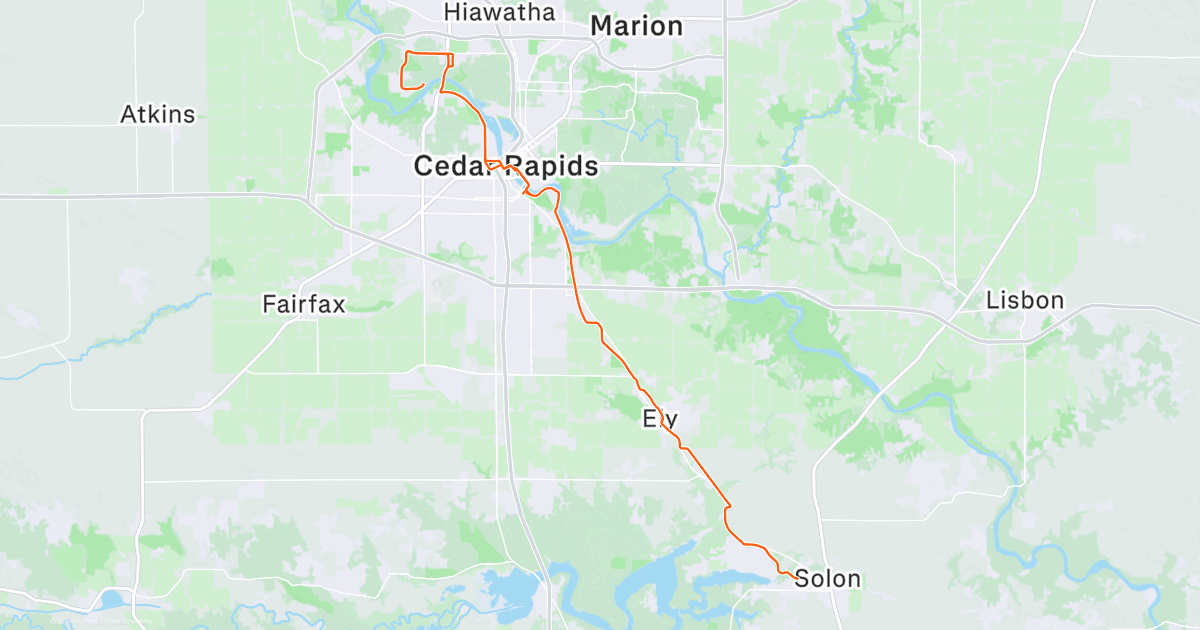
Good day to ride bikes and fire up the 3D Printer.
Fast ride today on the Tarmac to take back a longer (35min KOM)
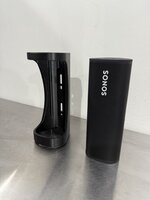
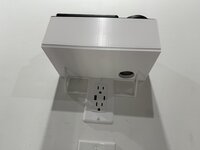
Then I wanted to clear up some workbench space so I printed an outlet cover and shelf that matched by charging station size to get things up a bit. I also printed a new white 'box' to blend things together a bit more. PETG print here and 4.5 hours total print time for the outlet cover/shelf, and box.
Still need to figure out a solution for my HDMI->USB-C adapter storage.




Fast ride today on the Tarmac to take back a longer (35min KOM)

Then I wanted to clear up some workbench space so I printed an outlet cover and shelf that matched by charging station size to get things up a bit. I also printed a new white 'box' to blend things together a bit more. PETG print here and 4.5 hours total print time for the outlet cover/shelf, and box.
Still need to figure out a solution for my HDMI->USB-C adapter storage.
moab11
Well-known member
That's a really cool print!
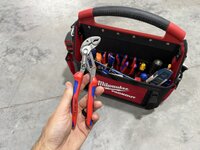
New tool day! That should complete the homeowner DIY set. Glad I stuck with the 1 a month approach and bought these over time. Super nice quality per usual from Knipex.
3D printer project since these little fake candles come with real glass light diffusers and of course I broke one so I was tasked with 3D printing some replacements so it doesn't happen again. Translucent single wall PETG in gray worked out pretty nice to be honest.
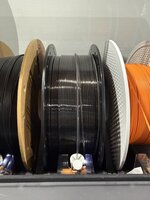

Cracked open a new bottle of Bookers after my 2016 finally ran out. Thanks to my A+ neighbor Shawn for the replacement bottle.

And puppy picture to wrap up the update for the day.

3D printer project since these little fake candles come with real glass light diffusers and of course I broke one so I was tasked with 3D printing some replacements so it doesn't happen again. Translucent single wall PETG in gray worked out pretty nice to be honest.
Cracked open a new bottle of Bookers after my 2016 finally ran out. Thanks to my A+ neighbor Shawn for the replacement bottle.
And puppy picture to wrap up the update for the day.
Quick little humpday print to allow for some extra socket storage in my existing toolbox.
Overall, $10 to buy 20 or so clips for 3/8 sockets off amazon, and a 40 minute PETG print to make my own sliding socket rail to keep things nice and tidy.
Yes, I've tried also printing my own clips, but these with the ball and spring are just more secure.
Pics:
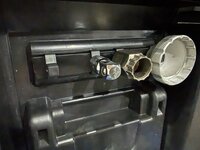
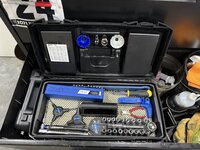
Overall, $10 to buy 20 or so clips for 3/8 sockets off amazon, and a 40 minute PETG print to make my own sliding socket rail to keep things nice and tidy.
Yes, I've tried also printing my own clips, but these with the ball and spring are just more secure.
Pics:
Last mow of the season here in Eastern Iowa I think so mowed a little shorter and then played fetch with the Marley Dog on the short, fast grass.
Overall, really happy with the Timemaster project, it saves me about 20 mins of mowing each time so I can do our entire yard and string trim/edge in less than an hour. 15 total hours on the Timemaster and I'll winterize here soon.

Overall, really happy with the Timemaster project, it saves me about 20 mins of mowing each time so I can do our entire yard and string trim/edge in less than an hour. 15 total hours on the Timemaster and I'll winterize here soon.
new road bike day---er road bike frame day---- just in time for winter here in the midwest.
Found a nice deal on a Swerks frame to make a small jump from my regular Specialized SL7. Frame was 125g lighter and the paint is special. I do have some matte black decals to cover up the 'specialized' decals on the fork and stays.
Still waiting on some black S-works rib cages, but good enough for now.
~2ish hours to build up and I moved all of the parts over from my white 2021 frame.
Color: GLOSS BLACK PEARL GRANITE OVER CARBON / CHROME
15.75lbs as pictured, build list below
Build Details:
Frame: S-Works 56cm Tarmac SL7
Cockpit: Roval Rapide 115mm x 38cm
Saddle: S-Works Power Arc (143)
Shifters: SRAM AXS D1 Hydraulic
Brakes: SRAM Red AXS D1 Flat Mount
FD: SRAM Red AXS D1
RD: SRAM Red AXS D1
Wheelset: Enve SES 4.5 laced to DT180 Ratchet EXP Hubs
Tires: Conti Archetype 700x30mm Tubeless
Cassette: SRAM Red AXS 10-28 Rainbow
Crankset: SRAM Red AXS D1, 172.5mm, 50/37 Quarq
Bottom Bracket: CeramicSpeed Dub
Chain: SRAM Red AXS Rainbow
Pics:


Found a nice deal on a Swerks frame to make a small jump from my regular Specialized SL7. Frame was 125g lighter and the paint is special. I do have some matte black decals to cover up the 'specialized' decals on the fork and stays.
Still waiting on some black S-works rib cages, but good enough for now.
~2ish hours to build up and I moved all of the parts over from my white 2021 frame.
Color: GLOSS BLACK PEARL GRANITE OVER CARBON / CHROME
15.75lbs as pictured, build list below
Build Details:
Frame: S-Works 56cm Tarmac SL7
Cockpit: Roval Rapide 115mm x 38cm
Saddle: S-Works Power Arc (143)
Shifters: SRAM AXS D1 Hydraulic
Brakes: SRAM Red AXS D1 Flat Mount
FD: SRAM Red AXS D1
RD: SRAM Red AXS D1
Wheelset: Enve SES 4.5 laced to DT180 Ratchet EXP Hubs
Tires: Conti Archetype 700x30mm Tubeless
Cassette: SRAM Red AXS 10-28 Rainbow
Crankset: SRAM Red AXS D1, 172.5mm, 50/37 Quarq
Bottom Bracket: CeramicSpeed Dub
Chain: SRAM Red AXS Rainbow
Pics:
Last edited:
trytochaseme
Well-known member
man the SL7 are such a good looking bike. I don't mind the SL8 but the speed sniffer brings it down. An SL6 ultralight has been a bucket list build I wanna do someday. Great build I bet that thing just rips!
tweidman
Well-known member
Sub 16, impressive. Super nice.
Good weekend for some car washing, paint correction, and hybrid ceramic coating ahead of winter.
Started with a wash, foam cannon and hand wash finish while doing some iron removing and bug removal along the way thanks to the Midwest roads and summer.
Then moved to a clay bar to wrap up the decon and get the paint extra slippery.
Then got to break in my Milwaukee M18 15mm DA Polisher, White hex pads, and 3D One Car Scratch & Swirl remover/hybrid compound/polish.
Wrapped up with a coating of Turtle Wax Hybrid Ceramic spray and wipe down.
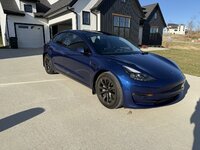

Started with a wash, foam cannon and hand wash finish while doing some iron removing and bug removal along the way thanks to the Midwest roads and summer.
Then moved to a clay bar to wrap up the decon and get the paint extra slippery.
Then got to break in my Milwaukee M18 15mm DA Polisher, White hex pads, and 3D One Car Scratch & Swirl remover/hybrid compound/polish.
Wrapped up with a coating of Turtle Wax Hybrid Ceramic spray and wipe down.
Last edited:
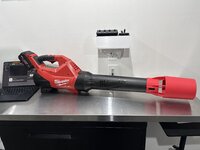
Made a thing based on a thing!
Bernoulli Principle at work. Currently printing the 2 tabs that keep it in place. 6 hour print!
Bernoulli describes the general inverse relationship between fluid speed and pressure (faster speed, lower pressure), while the Venturi effect demonstrates this within a constricted pipe, showing how a narrower section speeds up fluid and creates a localized low-pressure zone (a "venturi") that can draw in other fluids


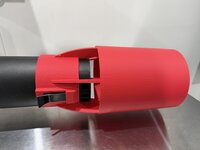
Bernoulli Principle at work. Currently printing the 2 tabs that keep it in place. 6 hour print!
Bernoulli describes the general inverse relationship between fluid speed and pressure (faster speed, lower pressure), while the Venturi effect demonstrates this within a constricted pipe, showing how a narrower section speeds up fluid and creates a localized low-pressure zone (a "venturi") that can draw in other fluids
Attachments
Last edited:
moab11
Well-known member
Well.....
How does it work???
How does it work???
Looks great, works great as far as I can tell.
I wrapped up the print at 10:30 last night and did a little indoor testing and it appears to improve the velocity at lower speeds better which was the intention.
Will test more outside today with a few leaves and report back.
I wrapped up the print at 10:30 last night and did a little indoor testing and it appears to improve the velocity at lower speeds better which was the intention.
Will test more outside today with a few leaves and report back.
Lighting upgrade weekend for the garage and bike/3d printing room.
I went with a 12 pack of these Barrina 8 footers in 5000K.
I was planning on putting receptacles in where my current light fixtures were, but of course nothing ever goes to plan as the light fixture boxes were going to require a cover plate with a rotation offset for the single gang receptacle to fit.
So, I ended up firing up the 3D printer and making some custom cover plates and hardwired them in using some Wago connectors rather than having a light to outlet adapter or something else. Keeping the porcelain fixtures in place also looked a bit odd, so I'm happy with the final solution.
Overall, pretty happy with how they turned out in both places. Although the better light makes me want to touch up the drywall tape/finish in quite a few places......Always something to do gang.
Pics----
Bike Cave: Still need to figure out the plan for the ceiling and floor here, but its a nice space for me.


Garage:
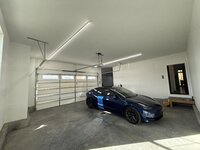

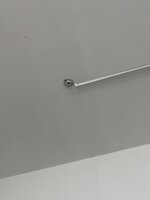


I went with a 12 pack of these Barrina 8 footers in 5000K.
I was planning on putting receptacles in where my current light fixtures were, but of course nothing ever goes to plan as the light fixture boxes were going to require a cover plate with a rotation offset for the single gang receptacle to fit.
So, I ended up firing up the 3D printer and making some custom cover plates and hardwired them in using some Wago connectors rather than having a light to outlet adapter or something else. Keeping the porcelain fixtures in place also looked a bit odd, so I'm happy with the final solution.
Overall, pretty happy with how they turned out in both places. Although the better light makes me want to touch up the drywall tape/finish in quite a few places......Always something to do gang.
Pics----
Bike Cave: Still need to figure out the plan for the ceiling and floor here, but its a nice space for me.
Garage:
Just Puttering
Well-known member
Bike Cave: Still need to figure out the plan for the ceiling and floor here, but its a nice space for me.
The pain cave floor just needs some proper sweat stains under the bike

The first set of Decals that I received from Etsy were trash.
The second set of Decals that I received from Speedy Decal were super high quality.
Link here:
https://speedydecal.com/index.php?i...t-adesivi-telaio&controller=product&locale=en
Overall, it took me ~30 mins to install and I think it looks great.
Review:
The Tarmac logo for the seat tube was the only decal that didn't fit properly. The spacing between the a-r-m in Tarmac was off. I think Speedy Decal will make this right with a partial refund or replacement decal. For now, I've removed this.
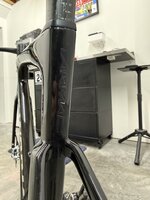

2.) I was forced to pay an additional $24.05 in tariffs before DHL Express would deliver the package today. I didn't see that called out anywhere on the website when I ordered.
3.) The decals for the rest of the bike turned out great, although I did have to apply a few of the specialized letters one at a time because the spacing was off just enough that I couldn't put them on all at once, no big deal.
Before:

After:

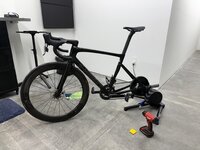
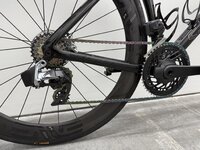
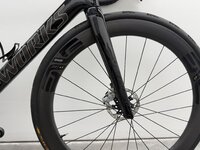


The second set of Decals that I received from Speedy Decal were super high quality.
Link here:
https://speedydecal.com/index.php?i...t-adesivi-telaio&controller=product&locale=en
Overall, it took me ~30 mins to install and I think it looks great.
Review:
The Tarmac logo for the seat tube was the only decal that didn't fit properly. The spacing between the a-r-m in Tarmac was off. I think Speedy Decal will make this right with a partial refund or replacement decal. For now, I've removed this.
2.) I was forced to pay an additional $24.05 in tariffs before DHL Express would deliver the package today. I didn't see that called out anywhere on the website when I ordered.
3.) The decals for the rest of the bike turned out great, although I did have to apply a few of the specialized letters one at a time because the spacing was off just enough that I couldn't put them on all at once, no big deal.
Before:
After:
Weekend Update - Garage Edition
Needed to do some 3D printing so I printed off some dividers for my Packout pieces to keep things tidy. Not I have separate bins for fasteners for metal, wood, and masonry
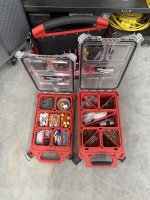
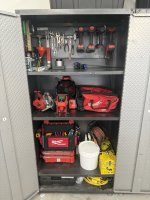
Then I spent ~30 mins or so getting the power tool cabinet in the garage organized, hung a cheapo amazon drill organizer and removed some duplicate hand tools. Still need to get rid of a few more oddball things like the extension cord on the manual reel and some other stuff, but I'm happy with the small effort to start the new year.
Needed to do some 3D printing so I printed off some dividers for my Packout pieces to keep things tidy. Not I have separate bins for fasteners for metal, wood, and masonry
Then I spent ~30 mins or so getting the power tool cabinet in the garage organized, hung a cheapo amazon drill organizer and removed some duplicate hand tools. Still need to get rid of a few more oddball things like the extension cord on the manual reel and some other stuff, but I'm happy with the small effort to start the new year.
Fired up my own version of this this chain wax chain break in tool today.
My remix is fully printable, complete with bearings and such, no metal on it at all.
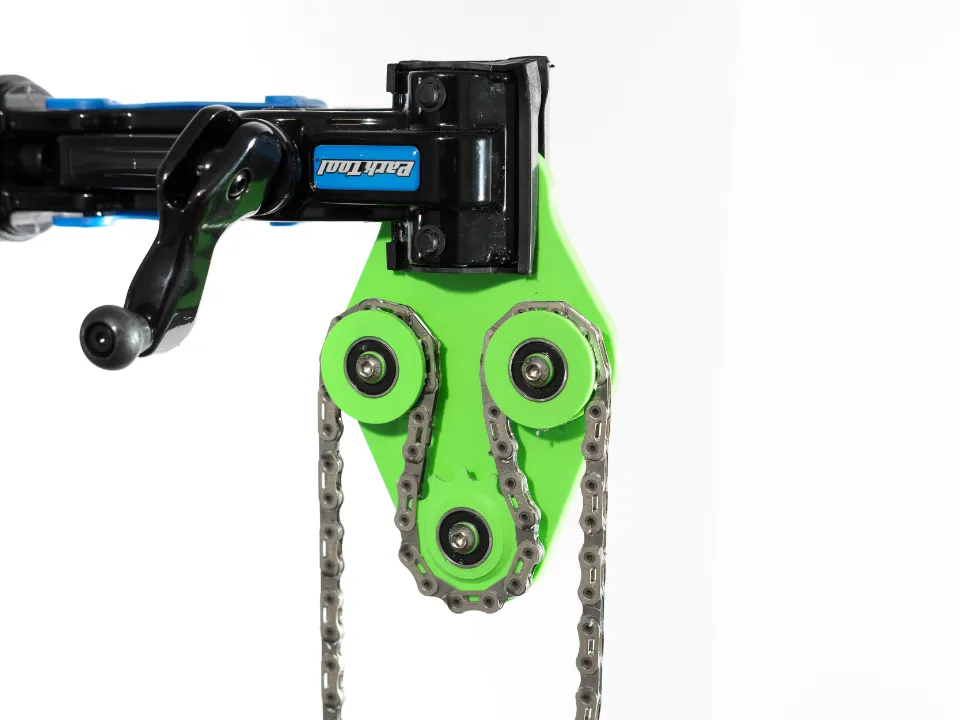
PETG for the base plate, 3d printed the bearings and such so all plastic here.
Pretty smooth, works great too, and I'll be updating the Remix of it to MakerWorld if anyone wants to make their own.
Model Link here:
Pics:


My remix is fully printable, complete with bearings and such, no metal on it at all.
PETG for the base plate, 3d printed the bearings and such so all plastic here.
Pretty smooth, works great too, and I'll be updating the Remix of it to MakerWorld if anyone wants to make their own.
Model Link here:
https://makerworld.com/en/models/2220007-bicycle-chain-wax-breaker-fully-printable#profileId-2414163
Pics:
bepjrfan
Well-known member
What’s the ”break in period like on the wax chain stuff? I just got some of the meltable wax and going to make a go of it. Just saw the “break in” wheels for the first time a couple weeks ago, what is the purpose of it? Just to remove excess wax before you install on the bike?Fired up my own version of this this chain wax chain break in tool today.
My remix is fully printable, complete with bearings and such, no metal on it at all.
PETG for the base plate, 3d printed the bearings and such so all plastic here.
Pretty smooth, works great too, and I'll be updating the Remix of it to MakerWorld if anyone wants to make their own.
Model Link here:
https://makerworld.com/en/models/2220007-bicycle-chain-wax-breaker-fully-printable#profileId-2414163
Pics:
some say 30 mins or so if you throw it right on the bike. Mine was more like 45 mins before I heard a nice quiet sound.What’s the ”break in period like on the wax chain stuff? I just got some of the meltable wax and going to make a go of it. Just saw the “break in” wheels for the first time a couple weeks ago, what is the purpose of it? Just to remove excess wax before you install on the bike?
Little mess under my bike as well, which is why I printed that thing above^^^
What's your monitor setup? Are they ran to your computer? I like the idea of having two monitors up while on the trainerUsually a few drops of sweat, but I have this floor drying fan on a smart outlet pointed right at me, so when it gets hot, I turn it on and it does a decent job of cooling things down.

Behold, the $50 Facebook Marketplace setup.What's your monitor setup? Are they ran to your computer? I like the idea of having two monitors up while on the trainer
(2) 32" Vizio TVs
-The top one has an Apple TV 4K behind it to run Youtube/Etc. Runs Zwift fine too, but I use TrainerRoad
-The bottom TV has a HDMI cord running through the wall to the top of the workbench where I usually have my TrainerRoad workout from my MacBook Air running at a nice low angle.
It does make it super convenient to have 2 things going at the same time on separate screens. It is also handy for my work from home standing desk to have 2 more screens over there.
Here's a better shot of things from earlier on in the thread.

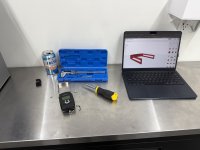
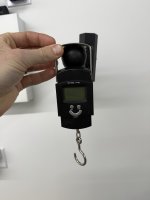
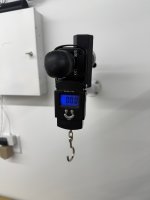
Quick little 10 min print to get organized. I have this digital luggage scale I use for weight bike wheels, frames, etc. Previously, I had a half hook thing that never really held anywhere. I decided to reprint a part of it to fit around the bike stand knob I have mounted on the wall so I don't have to hold the scale up in the air and try to read it at the same time.
PETG for this, .2 layer heigh, 10 mins, good to go. Now it lives next to the stand where it belongs on a little magnet.
Pics:


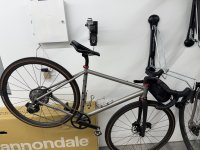

PETG for this, .2 layer heigh, 10 mins, good to go. Now it lives next to the stand where it belongs on a little magnet.
Pics:
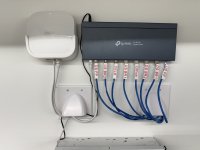
Welp, as a result of the above mini project I noticed by ethernet labeling wasn't in the best shape both condition wise and positioning as well.
Once again, 3D printer to the rescue and in under an hour here we are.
Upstairs, Downstairs, Fireplaces, etc for those curious. Just a few more ports open and I want to run a few more runs before closing in the ceiling on the room anyway.
Model:
Before:
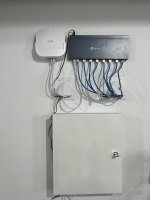
After:

Once again, 3D printer to the rescue and in under an hour here we are.
Upstairs, Downstairs, Fireplaces, etc for those curious. Just a few more ports open and I want to run a few more runs before closing in the ceiling on the room anyway.
Model:
Before:
After:
Attachments
Last edited:
kjdhawkhill
Well-known member
Wait, I recognize your name.
Followed you a few times (barely kept up, at my full tilt, given gravitational issues) on S-B at least twice or three times (a long while ago).
Totally missed this account.
Glad to see you building great spaces to go along with your great riding.
Followed you a few times (barely kept up, at my full tilt, given gravitational issues) on S-B at least twice or three times (a long while ago).
Totally missed this account.
Glad to see you building great spaces to go along with your great riding.
Current state of things on Friday the 13th. Workspace is clean - winter trainer miles ticking by and I added a HomeKit compatible smart home air purifier to the room because I've been printing with some ASA.
Next I'll be running another circuit of 20A outlets in the garage and then adding hot and cold taps as well out there. I also have my eye on a 45K BTU Modine garage heater on FB Marketplace about 90 mins away, figured I'd wait for the first 65 degree day and get it at a Midwest Discount.
Then it'll be on to the closing up the ceiling with drywall/HVAC soffit, etc and then the floors most likely.
Current State:
-Yes, white bar tape on the way for the Tarmac as well!

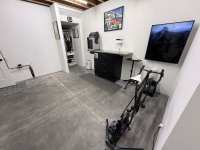


Next I'll be running another circuit of 20A outlets in the garage and then adding hot and cold taps as well out there. I also have my eye on a 45K BTU Modine garage heater on FB Marketplace about 90 mins away, figured I'd wait for the first 65 degree day and get it at a Midwest Discount.
Then it'll be on to the closing up the ceiling with drywall/HVAC soffit, etc and then the floors most likely.
Current State:
-Yes, white bar tape on the way for the Tarmac as well!