To avoid these ads, REGISTER NOW!

Between 485 & 705 SQ/FT Jar944's 3car cabinet shop.

Workspaces between 485 and 705 squarefeet.
To avoid these ads, REGISTER NOW!

jollygreengiant

Well-known member
Joined
Nov 10, 2013
Messages
2,368
Location
Ontario, Canada
They could be ledger locks.
Screenshot_20250820_120617_Chrome.jpg


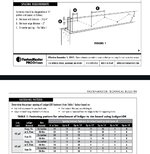
Attached solves some problems of free standing decks, but certainly makes water mitigation way more difficult.

Well that's better than screws, but still seems a bit light for how many of them I saw in those pics. Pics don't show everything though.

The garage loft pics are from @Boostingaz, but I do have a moulder or 3.


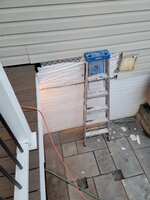
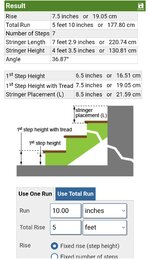
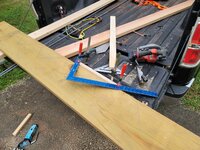
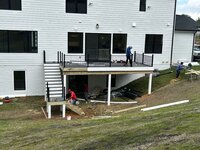
Working on layout for the deck stairs/landing. I don't want to dig and pour the stair bottom footer until I verify my measurements.
20250821_185816.jpg

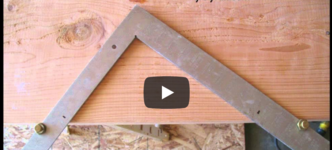
That's a slick way of using your square to lay out stairs, I'll have to remember that. :thumbup:
 

larry4406

Well-known member
Joined
Jan 27, 2006
Messages
19,510
Location
Northern Virginia
Well that's better than screws, but still seems a bit light for how many of them I saw in those pics. Pics don't show everything though.


That's a slick way of using your square to lay out stairs, I'll have to remember that. :thumbup:
They make brass stair gauges that clamp on the square for this purpose. Orange box store $8. But I agree the clamp method he employed is cleaver and no new purchase.

1755868013366.png1755868197767.png
 
OP
J

jar944

Well-known member
Joined
Jul 26, 2010
Messages
5,951
Location
Northern VA
Well that's better than screws, but still seems a bit light for how many of them I saw in those pics. Pics don't show everything though.


That's a slick way of using your square to lay out stairs, I'll have to remember that. :thumbup:
Spacing is called out based on joist span and live load. Local code requires a double (top/bottom) at the start and end of thr ledger.
Screenshot_20250822_091109_Chrome.jpg

Yeah the 2 clamps and board is the quick way, the buttons are better because they bridge any edge issues (which is why there is also a block plane in the picture.)
 

Boostingaz

Well-known member
Joined
May 21, 2018
Messages
3,699
Location
Indiana
We had one of these grills and loved it. I was very happy with the quality, how it performed etc etc. they had a store in Phoenix so I went in and looked everything over really good before making any purchases and then ended up spending several thousand with them between doors etc for our built in BBQ bar.

Here is their griddle: https://www.bbqislandinc.com/produc...s-griddle-propane?_pos=1&_fid=09c5eda90&_ss=c

Our build:

2bc532da-55d4-4052-b384-709002de0bf6-1_all_14125.jpg
 
OP
J

jar944

Well-known member
Joined
Jul 26, 2010
Messages
5,951
Location
Northern VA
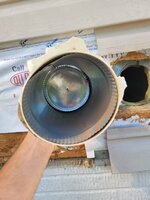
Wtf

Any idea what it should have been for?

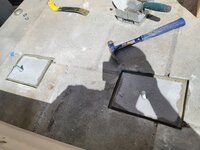
The furnace intake is about 3' to the right so I assume it was a incorrect placement and a odd order of operations.

Unrelated but I managed to kill a reasonably large paper wasp nest with a flip flop. I'd guess 50 or so wasps in the nest (under a deck chair cover. ) 47 degree morning was the key there
20250830_074821.jpg
 
OP
J

jar944

Well-known member
Joined
Jul 26, 2010
Messages
5,951
Location
Northern VA
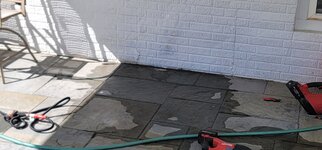
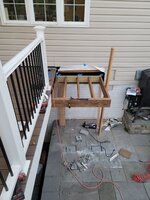
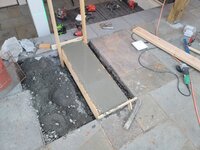
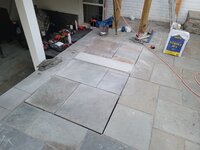
Grouted in a couple pavers to get 2" of height. Not what I wanted but should work for a landing.
20250901_114158.jpg

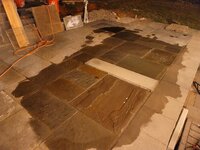
And while the cement was drying.
Screenshot_20250901_184206_Gallery.jpgScreenshot_20250901_184143_Gallery.jpg

Also realized how bad my grill was so ripped it out and grabbed a larger, but smaller replacement. Still need to find a flat top for the other side.
20250901_161044.jpg20250901_134337.jpg

I'm thinking of extending the grill area to the landing, and moving the smoker 90 degrees to the landing and adding a sink where the smoker was.
Screenshot_20250901_203901_Gallery.jpg
 

casmurbax

Well-known member
Joined
Sep 25, 2012
Messages
2,759
Location
Wilton, NY
Thank you for indulging me with the answers to my questions.

Are the pavers sitting higher then patio blocks or you needed the 2 inches of thickness for the anchor bolts?

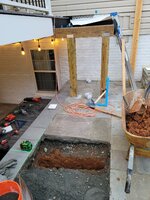
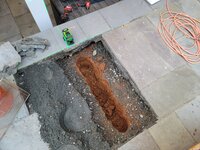
What was that pipe you cut out?
 
OP
J

jar944

Well-known member
Joined
Jul 26, 2010
Messages
5,951
Location
Northern VA
Thank you for indulging me with the answers to my questions.

Are the pavers sitting higher then patio blocks or you needed the 2 inches of thickness for the anchor bolts?

What was that pipe you cut out?

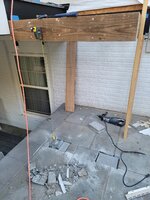
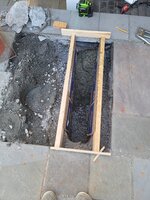
The footings were flush to the stone base under the pavers. I didn't want the simpson brackets down in a hole. The pavers are flush to the stone.

The pipe is a waste line cleanout that should have been cut when the patio went in years ago. I just cut lower and added a new cleanout lower. It's still accessible if needed.
 
To avoid these ads, REGISTER NOW!
OP
J

jar944

Well-known member
Joined
Jul 26, 2010
Messages
5,951
Location
Northern VA
That's going to be a stout stair landing when you're done. :thumbup:

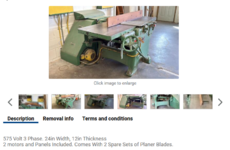
I came across these machines on an auction site. Way too big for me, but maybe big enough for you? :lol_hitti

Screenshot 2025-09-12 144054.png

Screenshot 2025-09-12 144115.png

Screenshot 2025-09-12 144141.png

The bandsaw and specifically the planer/thicknesser would be nice to have.

575v motors add a layer of complexity.
 
OP
J

jar944

Well-known member
Joined
Jul 26, 2010
Messages
5,951
Location
Northern VA
That's going to be a stout stair landing when you're done. :thumbup:

Code requirement is a 10" square 12" deep, which frankly makes no sense. Sitting directly on the stone would be effectively do the same, and frost heave like a 12" deep footing would.

Frost line is only 24" here so I decided to hopefully keep it all from heaving.
 

larry4406

Well-known member
Joined
Jan 27, 2006
Messages
19,510
Location
Northern Virginia
Code requirement is a 10" square 12" deep, which frankly makes no sense. Sitting directly on the stone would be effectively do the same, and frost heave like a 12" deep footing would.

Frost line is only 24" here so I decided to hopefully keep it all from heaving.
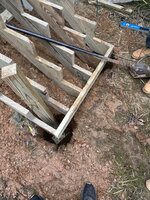
We don't do our deck stair footing/landing like that at the day job.

Instead we have posts on piers and the bottom riser acts as ledger to receive the stringers. These are work in progress pictures from different houses and all I have.
1757758761316.jpeg1757759231177.jpeg
1757759341928.jpeg
 
OP
J

jar944

Well-known member
Joined
Jul 26, 2010
Messages
5,951
Location
Northern VA
We don't do our deck stair footing/landing like that at the day job.

Instead we have posts on piers and the bottom riser acts as ledger to receive the stringers. These are work in progress pictures from different houses and all I have.
1757758761316.jpeg1757759231177.jpeg
1757759341928.jpeg

Yeah I remember you posted something similar when I was trying to decide how I was going to do the lower footing back when I built the deck.

I considered doing something similar, but didn't want any posts in the ground and the inside stringer already lands on the retaining wall.

I still think the code is wrong as for lowering bearing
Screenshot_20250908_185337_Samsung Notes.jpg
 

larry4406

Well-known member
Joined
Jan 27, 2006
Messages
19,510
Location
Northern Virginia
Yeah I remember you posted something similar when I was trying to decide how I was going to do the lower footing back when I built the deck.

I considered doing something similar, but didn't want any posts in the ground and the inside stringer already lands on the retaining wall.

I still think the code is wrong as for lowering bearing
Screenshot_20250908_185337_Samsung Notes.jpg
Yeah I am not a fan of posts in the ground either, but the deep footing shown in your figure requires that grade be dead nuts prior to building the stair or you result in a riser height error at the bottom. Your case is absolutely ideal (rare) in that you have hardscape to land on and can determine stair cut accordingly.

The post method allows the grade to be tweaked to achieve proper rise height after the stair is complete. In a production environment, this winds up being the deciding factor knowing there are trade off's.
 

legenddc

Well-known member
Joined
Aug 19, 2012
Messages
1,075
Thanks.

As for finishing its relatively straightforward.

Everything gets sanded to 150 and all corners broken. Any obvious imperfections/holes/issues het filled with bondo glazing/spot putty.

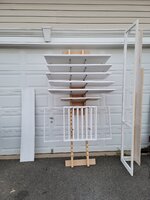
Spray primer, fill and imperfections, sand, spot prime any filled areas, sand again. 180-220g in these steps
20230419_194701.jpg20230424_174313.jpg20230426_182159.jpg

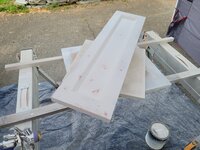
Wipe down/blow off and spray the 1st color coat. Knock down any nibs, spray 2nd color coat, if it's getting a 3rd coat repeat..

20230426_182427.jpg20230505_185905.jpg
How big of imperfections do you use the glazing/spot putty? If there's something larger than what you use it for, how do you fill it? I don't typically paint my projects so I typically would use epoxy or CA glue depending on the size.
 
OP
J

jar944

Well-known member
Joined
Jul 26, 2010
Messages
5,951
Location
Northern VA
How big of imperfections do you use the glazing/spot putty? If there's something larger than what you use it for, how do you fill it? I don't typically paint my projects so I typically would use epoxy or CA glue depending on the size.

Small things like worm holes, or minor dents/dings/scratches
 
To avoid these ads, REGISTER NOW!
Top Bottom