To avoid these ads, REGISTER NOW!

What did you do "IN" your garage today?

To avoid these ads, REGISTER NOW!

niget2002

Well-known member
Joined
Oct 2, 2012
Messages
11,202
Location
Josephine, TX
A couple of weeks ago, I built a You Tube intake air muffler for our ridiculously loud vintage DeVilBliss 5 hp recip compressor.

It did nothing to reduce the noise, as per my OSHA-approved sound pressure meter. Between 85 and 90 dB at my desk, regardless.

So today I tried another approach. Folks replied to my thread about the muffler build with some suggestions to:

1) Relocate the intake outside.

B) Use a long section of hose between the comp and the intake filter.

iii) Build an insulated enclosure for the comp. Now, this just ain't happening due to where the comp is used to living.

So, a long hose leading to an outside intake. That I can do.

I have most of the parts I need around the shop: Some 1" plumbing fittings, a bunch of 1 1/4" tubing (hose) and a 1" wall flange from the muffler build.

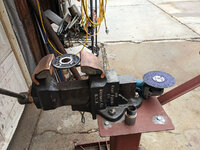
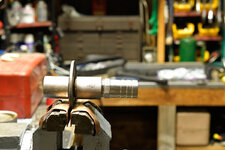
Problem is, I need the wall flange to be a pass-through so I can mount the intake filter to the wall outside. This means re-tapping it all the way through:

54931044840_f42f650e6e_o.jpg

54929867897_108368a7d1_o.jpg

Big tap require big wrench.

Now the flange is too thick for a close ******, so grind the boss off (yes, tapping it would have been much easier after grinding it down--but that would be thinkin' ahead):

54930943788_f3e716db0e_o.jpg

Gawds, I love those 3M Cubitron II disks!

54931044815_dd4a43a19f_o.jpg

That's the ticket!

Shoot a heavy coat of black gloss on, and get it into the curing oven.

While that's happening (and after the weekly office meeting), I bored a 1 1/2" hole through the wall with a hole saw.

54930738551_090ae61f87_o.jpg

I mounted the intake well away from and lower than the Rinnai water heater exhausts so I don't pick up a bunch of CO. I also moved the outer coupler to the inside of the wall as the filter housing was sticking out too far in a forklift zone and the hose barb on the inside wasn't sticking out far enough.

Now, I'd ordered two 1 1/4 barb X 1" MNPT fittings to attach the hose to my fittings. Of course, what I got from The Jungle were two 1 " barb X 1" MNPT. Fortunately, it's a low-suction applications so this will work:

54931044825_27d32de2a6_o.jpg

Finished:

54931044810_8bf5a072ca_o.jpg

It seems a little quieter to me, but best get out the meter and check. Nope. Still 85-89 dB at my desk. Maybe a dB or so of reduction, but I guess it's just a damned noisy old compressor.

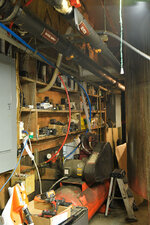
You can see why an insulated enclose ain't practical there. I guess I'll live with it. At least the comp isn't sucking out what warm air I can muster in the shop anymore.
You don't need a full enclosure. If you can just make a small divider wall with foam on one side to place in front of it, it'll divert a lot of the noise up into the rafters. Make the divider wall movable for when you need to get to stuff back there. it'd probably need to be ~6' tall to be effective. But it looks like you have a lot of stuff on those shelves, so it might just be in the way all the time.

EDIT to add, looks like I'm a few days behind on this thread and this has already been recommended.
 

rd65

Well-known member
Joined
Sep 29, 2017
Messages
2,807
Location
Granite Falls, WA
The Central Maryland Ratchet Whisperer strikes again in the dark of night.

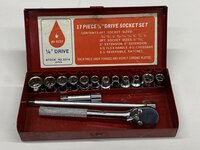
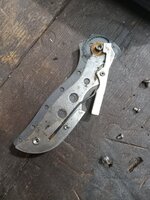
I found myself reaching for a 1/4" ratchet in the basement workshop earlier today, and the one I was reaching for wasn't... there. Hunting for it while I had one hand ******* with the workpiece, I ran across this little set that I had sorta inherited a while ago:

1763516577949.jpeg


It got the job done, but, my oh my, what an awful excuse for a ratchet it was. I shoulda spelled that "ratshit."

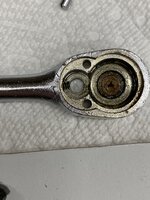
Fast forward to later in the day, and curiosity got the better of me, so I performed essentially the same surgical procedure on this one as I'd recently done to a trio of miniature bit ratchets with quite a bit of success.

1763516740565.jpeg

1763516758605.jpeg


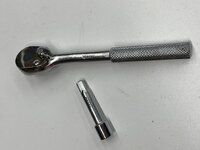
Degunked, spring shortened quite a bit, a light swipe with SuperLube, and reassembled. Somewhat to my surprise, it's as if it is now a different tool. The anvil will always be a sloppy-loose amusement, and the tool will never be a quality item. I'd never try to lean on it hard, either. But, I'd estimate that the back-drag is now somewhere in the 10-20% range of what it had been, and the ratcheting is much smoother than it had been.

1763516987173.jpeg


Now I'm pondering which of the coupla dozen other ratchets that are resting around here might be candidates for a similar hot-rodding...
I disassembled and greased a 3/8 rachet ONCE. Then took it back apart and used oil. Much, much better.
 

KwikFab

Well-known member
Joined
Jul 27, 2024
Messages
1,213
Location
Central Valley, CA
Just remember, wood is a lot lighter to handle than steel/metal.
I get that, but wood will never be an option

I don't want to invest in tools for a completely different application.

I'm not patient enough to wait for staining, glue up, etc.

The dust it creates is significantly more fine than metal dust - I do wear a respirator for metal dust and being that it's heavier, it's easier to clean up

Wood is subject to lots of things outside my control especially when dealing with unprocessed stuff or whatever you call it

I find wood work boring (the work I see is awesome, but it doesn't interest me)

And there are lots more but those are just off the top of my head lol
 

Beerhippie

Well-known member
Joined
Oct 13, 2023
Messages
9,941
Location
Far NE Oregon
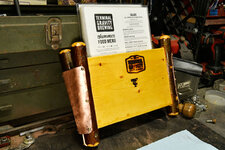
Starting a new project.

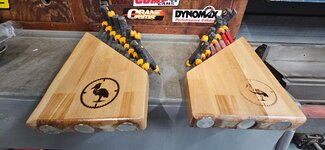
The PTB asked me to make a holder for menus so folks going upstairs--our main seating area for the winter--can grab a menu on the way. I pointed out that there were plenty available cheap, but they want me to make something creative and rustic.

Here's my plan so far:

54933602147_1b00d0944a_o.jpg

Those are serving trays--"flights"--for our beer samplers, made by a local artisan (not me). We used to sell a flight for $5, but the servers hated them as filling a whole bunch of tiny glasses was time-consuming and tedious. So they've sat in storage for a few years.

I figure I'll shave the bottoms of those river-birch sticks--our trademark--so they fit together at about 22.5 degrees, then make some side pieces of flattened out copper pipe drops. For the bottom, I'll use some hardware cloth so crumbs and dust can drop out.
 
Last edited:

Jgaz

Well-known member
Joined
Dec 16, 2016
Messages
1,690
Location
AZ
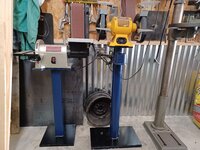
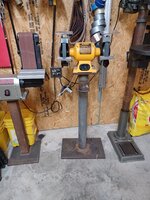
Cleaned, flung, put away. Blew out the dust and stray leaves with the leaf blower. Bolted the belt sander and bench grinder back on their newly painted stands.

Before:
20240321_185130.jpg

After:
20251118_122924.jpg
How do you like the BuckTools disk/belt sander? There is a 1HP unit on FBM near me.
What size disk is your machine.
Thanks
 

welder4956

Well-known member
Joined
Apr 8, 2010
Messages
3,072
Location
Birmingham, AL USA
How do you like the BuckTools disk/belt sander? There is a 1HP unit on FBM near me.
What size disk is your machine.
Thanks
It does well for my use, which is light sanding of metal - cleaning up corners and rough edges, and sharpening mower blades. But I really would like something a little stronger. This one is 3/4 HP with a 8" disk. The 1 HP unit would be better.
 

Beerhippie

Well-known member
Joined
Oct 13, 2023
Messages
9,941
Location
Far NE Oregon
For once, no brushfires to put out so I can get on with my menu holder project. PTB want it to look rustic and handmade. It will be.

I want to make some end pieces from copper, so first thing is to make some 2" pipe into sheets.

Gotta get it good and hot, so the Coleman rosebud (500) comes down from the shelf:

54935284083_3ff55a6c76_o.jpg

I forget just how many BTUs that thing produces, but it's soon shirt-sleeves weather in the shop.

Hot enough to get started:

54935324249_5f66773fb8_o.jpg

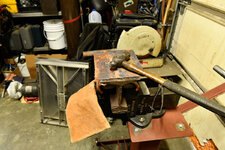
If I turned the lights off, that would be dull red. Perfectly annealed, and I'll be striking while the copper is hot. I used a couple of pair of linesman's pliers to open them up--soft as butter--then rough-flattened on the bench plate.

PTB want rustic, so I gave 'em a good working over on my vise anvil with a 2 lb ball-peen.

54934204092_4bed5fa353_o.jpg

I used the face, not the ball.

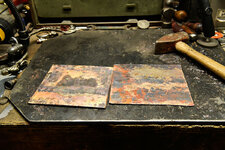
Then a final flattening between a heavy plate and my bench plate:

54934204182_25d6cf4f8e_o.jpg

Set those outside to cool.

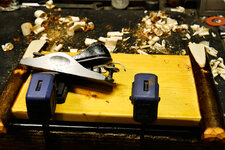
Now to put a bevel on the sticks of the old flights:

54934204297_16be264650_o.jpg

Finally an excuse to use my Stanley No. 9 1/2!

About there:

54935324649_b6f43b30d5_o.jpg


There's probably a right way to put bevels on those sticks with a block plane, but, damnit, Jim, I'm a pipefitter, not a cabinet maker!

54935383490_5fe4cdd210_o.jpg

Not too bad for an old Beer Hippie.

Now for the copper work.

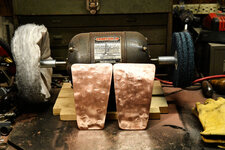
I marked the end pieces directly from the menu holder, then cut them out with a cut-off disk on an angle grinder. I cleaned up the edges with a flap disk in another angle grinder held in my useless POS Asian Roughneck vise.

Then gave 'em a goodly shinifying using blending disks on my new-to-me shinfier:

54935284498_bfd88804cd_o.jpg

Fitting, drilling, more fitting, screwing and:

54934204537_7286957e70_o.jpg

54935324874_86073cc1e5_o.jpg

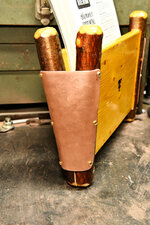
My mandrel for making the ends:

54935383705_f029c62c34_o.jpg

I don't know how the hammer marks ended up disappearing from the copper ends. I decided to put them back, so I spent a few minutes beating the hell out of the ends with the ball end of a 12 oz ball peen.

I need to make some hangers--tomorrow--and get it hung once the PTB decide where they want it.
 
Last edited:

Beerhippie

Well-known member
Joined
Oct 13, 2023
Messages
9,941
Location
Far NE Oregon
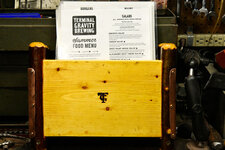
Hint: If you use a wood brand, don't attempt to brand wood that's been heavily sealed with a poly finish.

54935522185_c84517128e_o.jpg

That did not come out well. The vaporizing poly actually pushed back, making aligning the brand near impossible, and it came out looking like wet, warm, doggy-doo.
 
Last edited:

GrayFlattop

Well-known member
Joined
Jan 18, 2018
Messages
1,051
Location
Chicago
For once, no brushfires to put out so I can get on with my menu holder project. PTB want it to look rustic and handmade. It will be.

I want to make some end pieces from copper, so first thing is to make some 2" pipe into sheets.

Gotta get it good and hot, so the Coleman rosebud (500) comes down from the shelf:

54935284083_3ff55a6c76_o.jpg

I forget just how many BTUs that thing produces, but it's soon shirt-sleeves weather in the shop.

Hot enough to get started:

54935324249_5f66773fb8_o.jpg

If I turned the lights off, that would be dull red. Perfectly annealed, and I'll be striking while the copper is hot. I used a couple of pair of linesman's pliers to open them up--soft as butter--then rough-flattened on the bench plate.

PTB want rustic, so I gave 'em a good working over on my vise anvil with a 2 lb ball-peen.

54934204092_4bed5fa353_o.jpg

I used the face, not the ball.

Then a final flattening between a heavy plate and my bench plate:

54934204182_25d6cf4f8e_o.jpg

Set those outside to cool.

Now to put a bevel on the sticks of the old flights:

54934204297_16be264650_o.jpg

Finally an excuse to use my Stanley No. 9 1/2!

About there:

54935324649_b6f43b30d5_o.jpg


There's probably a right way to put bevels on those sticks with a block plane, but, damnit, Jim, I'm a pipefitter, not a cabinet maker!

54935383490_5fe4cdd210_o.jpg

Not too bad for an old Beer Hippie.

Now for the copper work.

I marked the end pieces directly from the menu holder, then cut them out with a cut-off disk on an angle grinder. I cleaned up the edges with a flap disk in another angle grinder held in my useless POS Asian Roughneck vise.

Then gave 'em a goodly shinifying using blending disks on my new-to-me shinfier:

54935284498_bfd88804cd_o.jpg

Fitting, drilling, more fitting, screwing and:

54934204537_7286957e70_o.jpg

54935324874_86073cc1e5_o.jpg

My mandrel for making the ends:

54935383705_f029c62c34_o.jpg

I don't know how the hammer marks ended up disappearing from the copper ends. I decided to put them back, so I spent a few minutes beating the hell out of the ends with the ball end of a 12 oz ball peen.

I need to make some hangers--tomorrow--and get it hung once the PTB decide where they want it.
I’ve had that exact same shinifier for ages- it’s awesome as a buffer.

I admire your industry for “creating” copper sheet from copper tube. Too bad you’re so far away, I’d be happy to give you some. It’s only 0.040” thick though.
 

SMOKEYBEAR

Well-known member
Joined
Jan 3, 2016
Messages
461
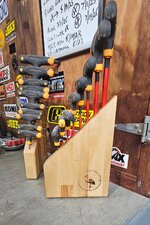
Wrapped up the T handle hex holders. Came out good enough for functional use. Everything was left over from other projects, so $0 directly invested. If I made another one, I'd just add a bit more space between the holes. Tested the brand on them too, Pictures no order..
 

Attachments

  • TH5.jpg
    TH5.jpg
    243.1 KB · Views: 52
  • TH4.jpg
    TH4.jpg
    285.4 KB · Views: 52
  • TH3.jpg
    TH3.jpg
    179.9 KB · Views: 48
  • TH2.jpg
    TH2.jpg
    309.8 KB · Views: 47
  • TH1.jpg
    TH1.jpg
    96.3 KB · Views: 42
  • TH6.jpg
    TH6.jpg
    255.8 KB · Views: 44
To avoid these ads, REGISTER NOW!

GrayFlattop

Well-known member
Joined
Jan 18, 2018
Messages
1,051
Location
Chicago
Resumed putting things back together after tearing up the front of the garage to install the aforementioned shelf for the ol’ pile of copper sheets. I put a second one up to hold the shorter 4’ sheets. The rest of that shelf was perfect for a stack of veneer that has been looking for a home. I don’t think I’ll be incorporating any of that into a project any time soon, but at least it will be out of the way until then.

Cleaning that corner of the front part of the garage revealed a number of surprises, like a bundle of base shoe that I had primed and sanded a long time ago. Yep, I have a plan for that soon. Also discovered (or rather, rediscovered) a 5 gallon bucket 3/4 full of 304 stainless hardware- brackets, 3/8 bolts, nuts, washers, lag screws - all good stuff reclaimed from a deck and pergola I removed when I put an addition on the house. I’ll use a lot of that for the new front porch next year.

Then I started creating a pile of power tools to give away. Don’t worry - they are all the oldest of the many multiples I’ve got. I’m tired of tripping over them in the woodshop. My overarching goal is to bring order back to the woodshop after neglecting it for a long, long time. Or rather a long, long, long time. This will take months. Maybe years, but you’ve got to start somewhere.
 

Beerhippie

Well-known member
Joined
Oct 13, 2023
Messages
9,941
Location
Far NE Oregon
I’ve had that exact same shinifier for ages- it’s awesome as a buffer.

I admire your industry for “creating” copper sheet from copper tube. Too bad you’re so far away, I’d be happy to give you some. It’s only 0.040” thick though.
The big "buffer" shakes like a dog... you know the rest. I don't know which part of the kludge it is. I'll figure it out. Plenty of power, 'though.

Having a large stock of 1/16" (type L) copper is nice--even if I have to flatten it out myself. At one time, all of our plumbing in the brewery was copper--I hung miles--but we've gradually moved away from that. We have lots of drops still left over.
 

bugnut

ALLIANCE MEMBER
Joined
Jul 14, 2012
Messages
3,974
Location
Central Ohio
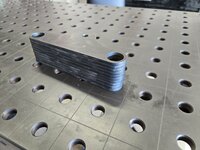
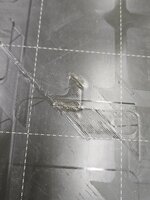
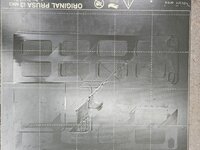
Following a power blip the prusa decided to try working as a cnc milling machine, and machining the build plate. I disassembled and started trying to determine what works/doesn't and then I'll order parts.
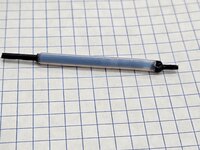
My favorite knife made too many trips through the dishwasher and the handle has given up a bit, so removed the sticky rubber coating and then the plastic. Trying to decide on wood, antler or plastic for the new handle or just buy another off the web.:unsure:
 

Attachments

  • 20251119_114801.jpg
    20251119_114801.jpg
    877.5 KB · Views: 42
  • 20251119_115923.jpg
    20251119_115923.jpg
    640.5 KB · Views: 34
  • 20251119_115959.jpg
    20251119_115959.jpg
    781.2 KB · Views: 33
  • 20251119_120006.jpg
    20251119_120006.jpg
    879.6 KB · Views: 30
  • 20251119_120012.jpg
    20251119_120012.jpg
    695.8 KB · Views: 30
  • 20251119_120040.jpg
    20251119_120040.jpg
    883.6 KB · Views: 29
  • 20251119_120049.jpg
    20251119_120049.jpg
    1.1 MB · Views: 30
  • 20251119_124507.jpg
    20251119_124507.jpg
    1.1 MB · Views: 29
  • 20251119_124513.jpg
    20251119_124513.jpg
    694.2 KB · Views: 30
  • 20251119_124523.jpg
    20251119_124523.jpg
    818.8 KB · Views: 46

Prospecter

Well-known member
Joined
May 16, 2015
Messages
2,437
Location
Maine
Resumed putting things back together after tearing up the front of the garage to install the aforementioned shelf for the ol’ pile of copper sheets. I put a second one up to hold the shorter 4’ sheets. The rest of that shelf was perfect for a stack of veneer that has been looking for a home. I don’t think I’ll be incorporating any of that into a project any time soon, but at least it will be out of the way until then.

Cleaning that corner of the front part of the garage revealed a number of surprises, like a bundle of base shoe that I had primed and sanded a long time ago. Yep, I have a plan for that soon. Also discovered (or rather, rediscovered) a 5 gallon bucket 3/4 full of 304 stainless hardware- brackets, 3/8 bolts, nuts, washers, lag screws - all good stuff reclaimed from a deck and pergola I removed when I put an addition on the house. I’ll use a lot of that for the new front porch next year.

Then I started creating a pile of power tools to give away. Don’t worry - they are all the oldest of the many multiples I’ve got. I’m tired of tripping over them in the woodshop. My overarching goal is to bring order back to the woodshop after neglecting it for a long, long time. Or rather a long, long, long time. This will take months. Maybe years, but you’ve got to start somewhere.
You've found the key. . . Just get started!
 

KwikFab

Well-known member
Joined
Jul 27, 2024
Messages
1,213
Location
Central Valley, CA
My post was meant to be sarcastic, your position on woodworking is clear.lol When I was younger I thought I wanted to be a woodworker, but fabricating came more natural. Or maybe it was just more useful for my interests.

Oooh no I get it, it was meant more for the other people I don't interact with that read here :ROFLMAO:

Metal working is just soooo much easier, and fun

Like really, who wants to play with sand paper and 2 by 4s when you can melt metal together!
 

Outlawmws

Well-known member
Joined
Aug 9, 2011
Messages
39,305
Location
The Badlands
My favorite knife made too many trips through the dishwasher

I've stopped putting sharp knives in the dishwasher, it's hard on the plastic handles, death on the wood, not that great if the blade is beating on the plastic coated racks; and a hand wash with a soap saturated Dobie Pad is fast and easy. the pad is in a scution cup mounted SS basket in the sink, so handy and only gets the sink wet.

Same with our Revereware pots and their plastic handles.
 

Outlawmws

Well-known member
Joined
Aug 9, 2011
Messages
39,305
Location
The Badlands
Like really, who wants to play with sand paper and 2 by 4s when you can melt metal together!
I had that attitude about 50 years back, but I got over it. but my kind of fabrication, especially back then, could not be considered "cleaner' than wood working. Building race cars by hand was messy work and lots of grinding wheels and such...

I can see with your CNC table it being a lot more controlled and clean.
 

afinepoint

Well-known member
Joined
Jul 16, 2024
Messages
198
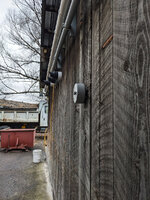
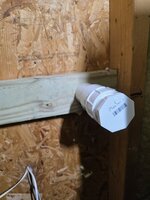
Added air to outside. Probably my most shade tree execution to date. The compressor is on the opposite side. This is the garage's rear. Stick the hose through and go. Faster and cheaper than fittings. Zero corrosion concerns and it's large enough to pass other things if needed. And only I see it. The hole saw size made for a perfect tight friction fit. No additional support required. BTW a laser level allowed DNO centering of the pipe through the siding. Sheathing/masonite/vinyl spaces filled with foam. Caulked. Capped. No water or insect intrusion concerns.

Came in handy for running a roofing gun away from the house and yesterday blowing water out of the supply lines running out to my wife's garden.

20251120_101035.jpg20251120_110748.jpg
 
Last edited:

Jgaz

Well-known member
Joined
Dec 16, 2016
Messages
1,690
Location
AZ
Added air to outside. Probably my most shade tree execution to date. The compressor is on the opposite side. This is the garage's rear. Stick the hose through and go. Faster and cheaper than fittings. Zero corrosion concerns and it's large enough to pass other things if needed. And only I see it. The hole saw size made for a perfect friction fit. No additional support required. FWI a laser level allowed DNO centering of the pipe through the siding.

Came in handy for running a roofing gun away from the house and yesterday blowing water out of the supply lines running out to my wife's garden.

20251120_101035.jpg20251120_110748.jpg
I might have to “reverse engineer” that idea
 

KwikFab

Well-known member
Joined
Jul 27, 2024
Messages
1,213
Location
Central Valley, CA
I had that attitude about 50 years back, but I got over it. but my kind of fabrication, especially back then, could not be considered "cleaner' than wood working. Building race cars by hand was messy work and lots of grinding wheels and such...

I can see with your CNC table it being a lot more controlled and clean.

Oooh my friend I need to show you all the pics of manual labor because my boss was the cheapest guy in the world :ROFLMAO:

We had a small foundry and you'd be shocked to see where he collected most of his aluminum for the casting of our benches

Everything from those dollar store mops (with aluminum handles, found in the trash) to soda cans, discarded pipe, and more!

And let me tell you, welding on dirty cast aluminum is the worst lol but I still loved it cause I got to learn a lot and really put my time in before I spoiled myself ;)
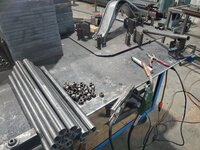
 

KwikFab

Well-known member
Joined
Jul 27, 2024
Messages
1,213
Location
Central Valley, CA
Oooh my friend I need to show you all the pics of manual labor because my boss was the cheapest guy in the world :ROFLMAO:

We had a small foundry and you'd be shocked to see where he collected most of his aluminum for the casting of our benches

Everything from those dollar store mops (with aluminum handles, found in the trash) to soda cans, discarded pipe, and more!

And let me tell you, welding on dirty cast aluminum is the worst lol but I still loved it cause I got to learn a lot and really put my time in before I spoiled myself ;)

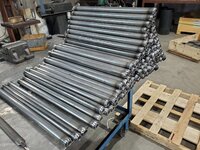
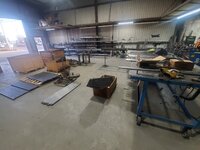
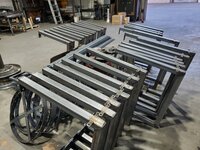
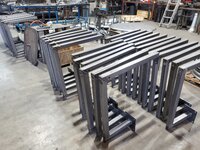
"We need some nuts welded, center and 1/3rd of the way sticking out. The county ordered a lot of benches for a new park as well as redoing one of the main streets."

20211216_161818.jpg

"You can make your own jig if it helps..."

20220124_163209.jpg

"...in various lengths to match each other, with a hole drilled for hanging on a hook."

20220317_173615.jpg

"And we'll need about 200 of them. Don't forget to clean up the welds with a nice conical shape."

20220318_121309.jpg

I don't even know where the pictures are when I had them all done but it was a **** ton :ROFLMAO:

20220124_163633.jpg

While still knocking all these out for Disneyland cause they had an order of 30 table setups. Another 3 were for a new 76 gas station.

20220308_175130.jpg

20220318_121618.jpg

Got a ton more pictures of stuff but won't bore you all. I was the only welder/fabricator there and it was my first welding job I had, with only 1 year of welding experience at the time lol
 

Beerhippie

Well-known member
Joined
Oct 13, 2023
Messages
9,941
Location
Far NE Oregon
Oooh my friend I need to show you all the pics of manual labor because my boss was the cheapest guy in the world :ROFLMAO:

We had a small foundry and you'd be shocked to see where he collected most of his aluminum for the casting of our benches

Everything from those dollar store mops (with aluminum handles, found in the trash) to soda cans, discarded pipe, and more!

And let me tell you, welding on dirty cast aluminum is the worst lol but I still loved it cause I got to learn a lot and really put my time in before I spoiled myself ;)
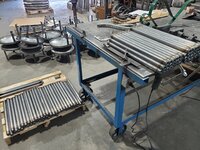
I once knew an old rancher who would save beer and soda cans to sand-cast things. I clearly recall the brake handle of his tractor which he made that way.

That's a LOT of beer cans!
 

PassnThru

Well-known member
Joined
Jan 5, 2010
Messages
6,512
Location
Bowling Green KY
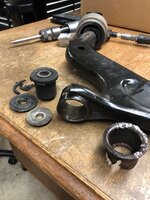
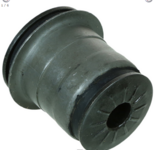
A few weeks back I put new front lower control arms on the Taurus. I used the loaded arms so it was a fairly easy process. I had the old arms laying around so today I decided to see how hard it would be to change the front bushing. I don't have any experience with that so a great way to learn instead of being under the gun. I managed to remove the old one in about 3 hours and I had to destroy the rubber portion of the bushing so I could get a hacksaw in to cut a slot in the outer metal piece - it was rusted in solid. Made enough of a slot in it to use the air hammer to peel it back enough to loosen it up. I'm not going to put a new bushing in it but I imagine it would be easier than removing the old one. A useless exercise on the face of it but lessons learned and experience gained.
The victim and what a good bushing looks likeBushing.JPG:

1763674145746.png
 
To avoid these ads, REGISTER NOW!
Top Bottom