tinbender 66
Well-known member
Wow! Congrats on the big win! After reading your tome I was pretty sure you would get it but ya never know.
You're gonna have even more fun now .
.
You're gonna have even more fun now
. .
.(Also speaking as a writer, I want to thank you for dropping the apostrophe from your logo. Looks much better.)
RL,
Our openers are different so take this for what its worth.
That bolt is the ultimate stop and it merely protects the motor head against over-travel. There are normally limit switch screw adjusters inside the motor housing that are intended to stop the traveler at the proper time, up and down. If it's hitting that bolt, the limit switches are out of adjustment and the motor head is now relying on the torque limiting feature to shut things down - not really a good thing. That is only supposed to be used when something obstructs the door from moving.
Do you have an operator's manual for the door? It will tell you where the adjusters are on the motor head and how to set them. Most are available online if the opener is not too old.
Good luck.
Neither can He! And neither can the rest of us... I agree, great shot!
Dave, mine GDO is also different then yours and it has the limiting sensors that shopnut was talking about. My homework assignment tonight will be to analyze the operational procedures of the actual opening feature of the garage door opener and see what happens. I just thought that when I pushed a button, I got more light and fresh air in the garage.
BTW, what door opener do you have (make, model...)?

In regards to the flooring contest - they are probably still trying to make the first pass through your story (j/k, of course)
Dave,
Dumb question...is an Atlas DP made by Craftsman? I am on CL looking...always looking.
Shaun
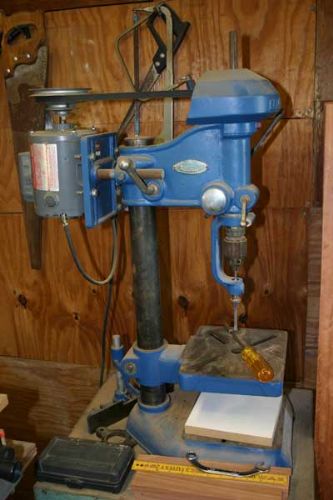

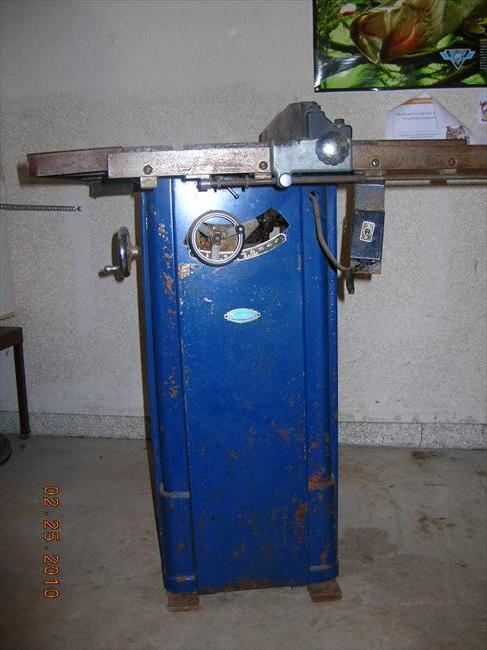 . As well as a bunch of other killer OLD drill presses .
OK, on your floor, here is my recomendations. Jack hammer the old floor out and pour new, you will have a much happier outcome. My saying is something FREE always cost you money.
I just painted my floor about 6 months ago, and it was a new floor but the guy who poured it was an amature and cheaper than the others, and of course it had high and low spots and a waste of money and time. I grinded it down the best it could be done, and once the new epoxy paint went on, it magnafied the imperfections by 100.
I'm sure money is an issue , but you won't be sorry on a smooth floor. The epoxy needs to be done all at once for the best looks, but I'm sure you can do in 2 parts if no other way. But its your baby, just my 2 cents.
Back to work.
. Dont get me wrong I like checkerboard and have considered doing VCT checkerboard style in my garage buuuut with the metal kitchen cabinets and somewhat of a diner vibe goin in my shop it would work . Your place is more um " classy " and I think the checkerboard pattern would be to busy against the rest of the place.). 


 , so that one is out.
 No problem doing it this way, but plan to waste a bit more material. Once part A and B are mixed, it has to be used. Unfortunately, you must tend towards the over-estimating side on what you mix up so you don't run out with 3 sq ft to go. This happens twice now. A two color job will be even more waste. Point is, it's not like regular paint - you can't just put the lid back on what is left over.No matter what, I'd have to do it in 2 sections, no question about it.
And, if the border stripe is wide enough, it will give you a place to set things while doing the center.I could probably get away with doing a border stripe all at once by putting everything in the center of the garage.
This is one of my truly favorite threads, Red Leader. Thank you.
Andy
 . This would let you move all the machines into the center do the border . Then let it set up and then move all the machines against the walls tape off the border and then do the center .
Andy,
Thank you very, very much! I appreciate your compliment! Do you have a build on here? Let me know if you do and I'll check it out!
You could always make the border a bit smaller if you want by blocking things up enough to allow the roller to pass under one edge of the machine bases. I'm thinking 4x4s would do it, and maybe let you get 8 to 10" closer to the wall with the center color.Dave I like Shopnuts idea of doing the border as wide as your widest machine plus a few inches for tape
Rick
Rather than grinding down the high spots, my suggestion is to pour a self-leveling topping over the entire slab and then put the epoxy coating on that. Something like Ardex K 500 would work.
I've used a similar product (Ardex K15) to level concrete so that tile could be installed in a building lobby and it worked great.
Red Leader, good luck on the floor rehab. If it were my garage, I would opt for the KISS approach. I would check the floor for level to see how much slope I was dealing with, and then I would prep the highest section for a layer for self-leveling concrete after rigging some form boards around a section. Do a section at a time, dance the equipment around until all sections are filled to minimize the differences of the existing slab. As far as color/pattern selection, I'd go the path of least hassle. Pick the color closest to the lower wall color and lay it down with no border or pattern. The reason being when a color extends from the floor up the walls, it fools the eye; the space appears much larger than it actually is. Anyway, that my $0.02. Have fun!
....close enough for guberment work "
Rick

Congrats on the flooring win! Huge score, to a deserving contestant. The last pics are just great. I have been looking for vintage power tools everywhere now, and I have you to thank. I am not sure what tool to start with, as to my space requirements, but I think that if I find the right one, that I will just change some things around. I am also trying to keep it to a budget, so that is making it a little more difficult. My mom grew up in Athol, Mass, where the Athol vise was made, (also where Starrett's tools are made) so I was thinking about one of those. A guy has one here, it is 4 or 5 inch, and about 60lbs, he wants $135.00, Thoughts???
Congrats again on your big win!
BK