To avoid these ads, REGISTER NOW!

Considering porcelain tile and have questions

BMEP

Well-known member
Joined
May 15, 2011
Messages
89
Location
Placerville, CA
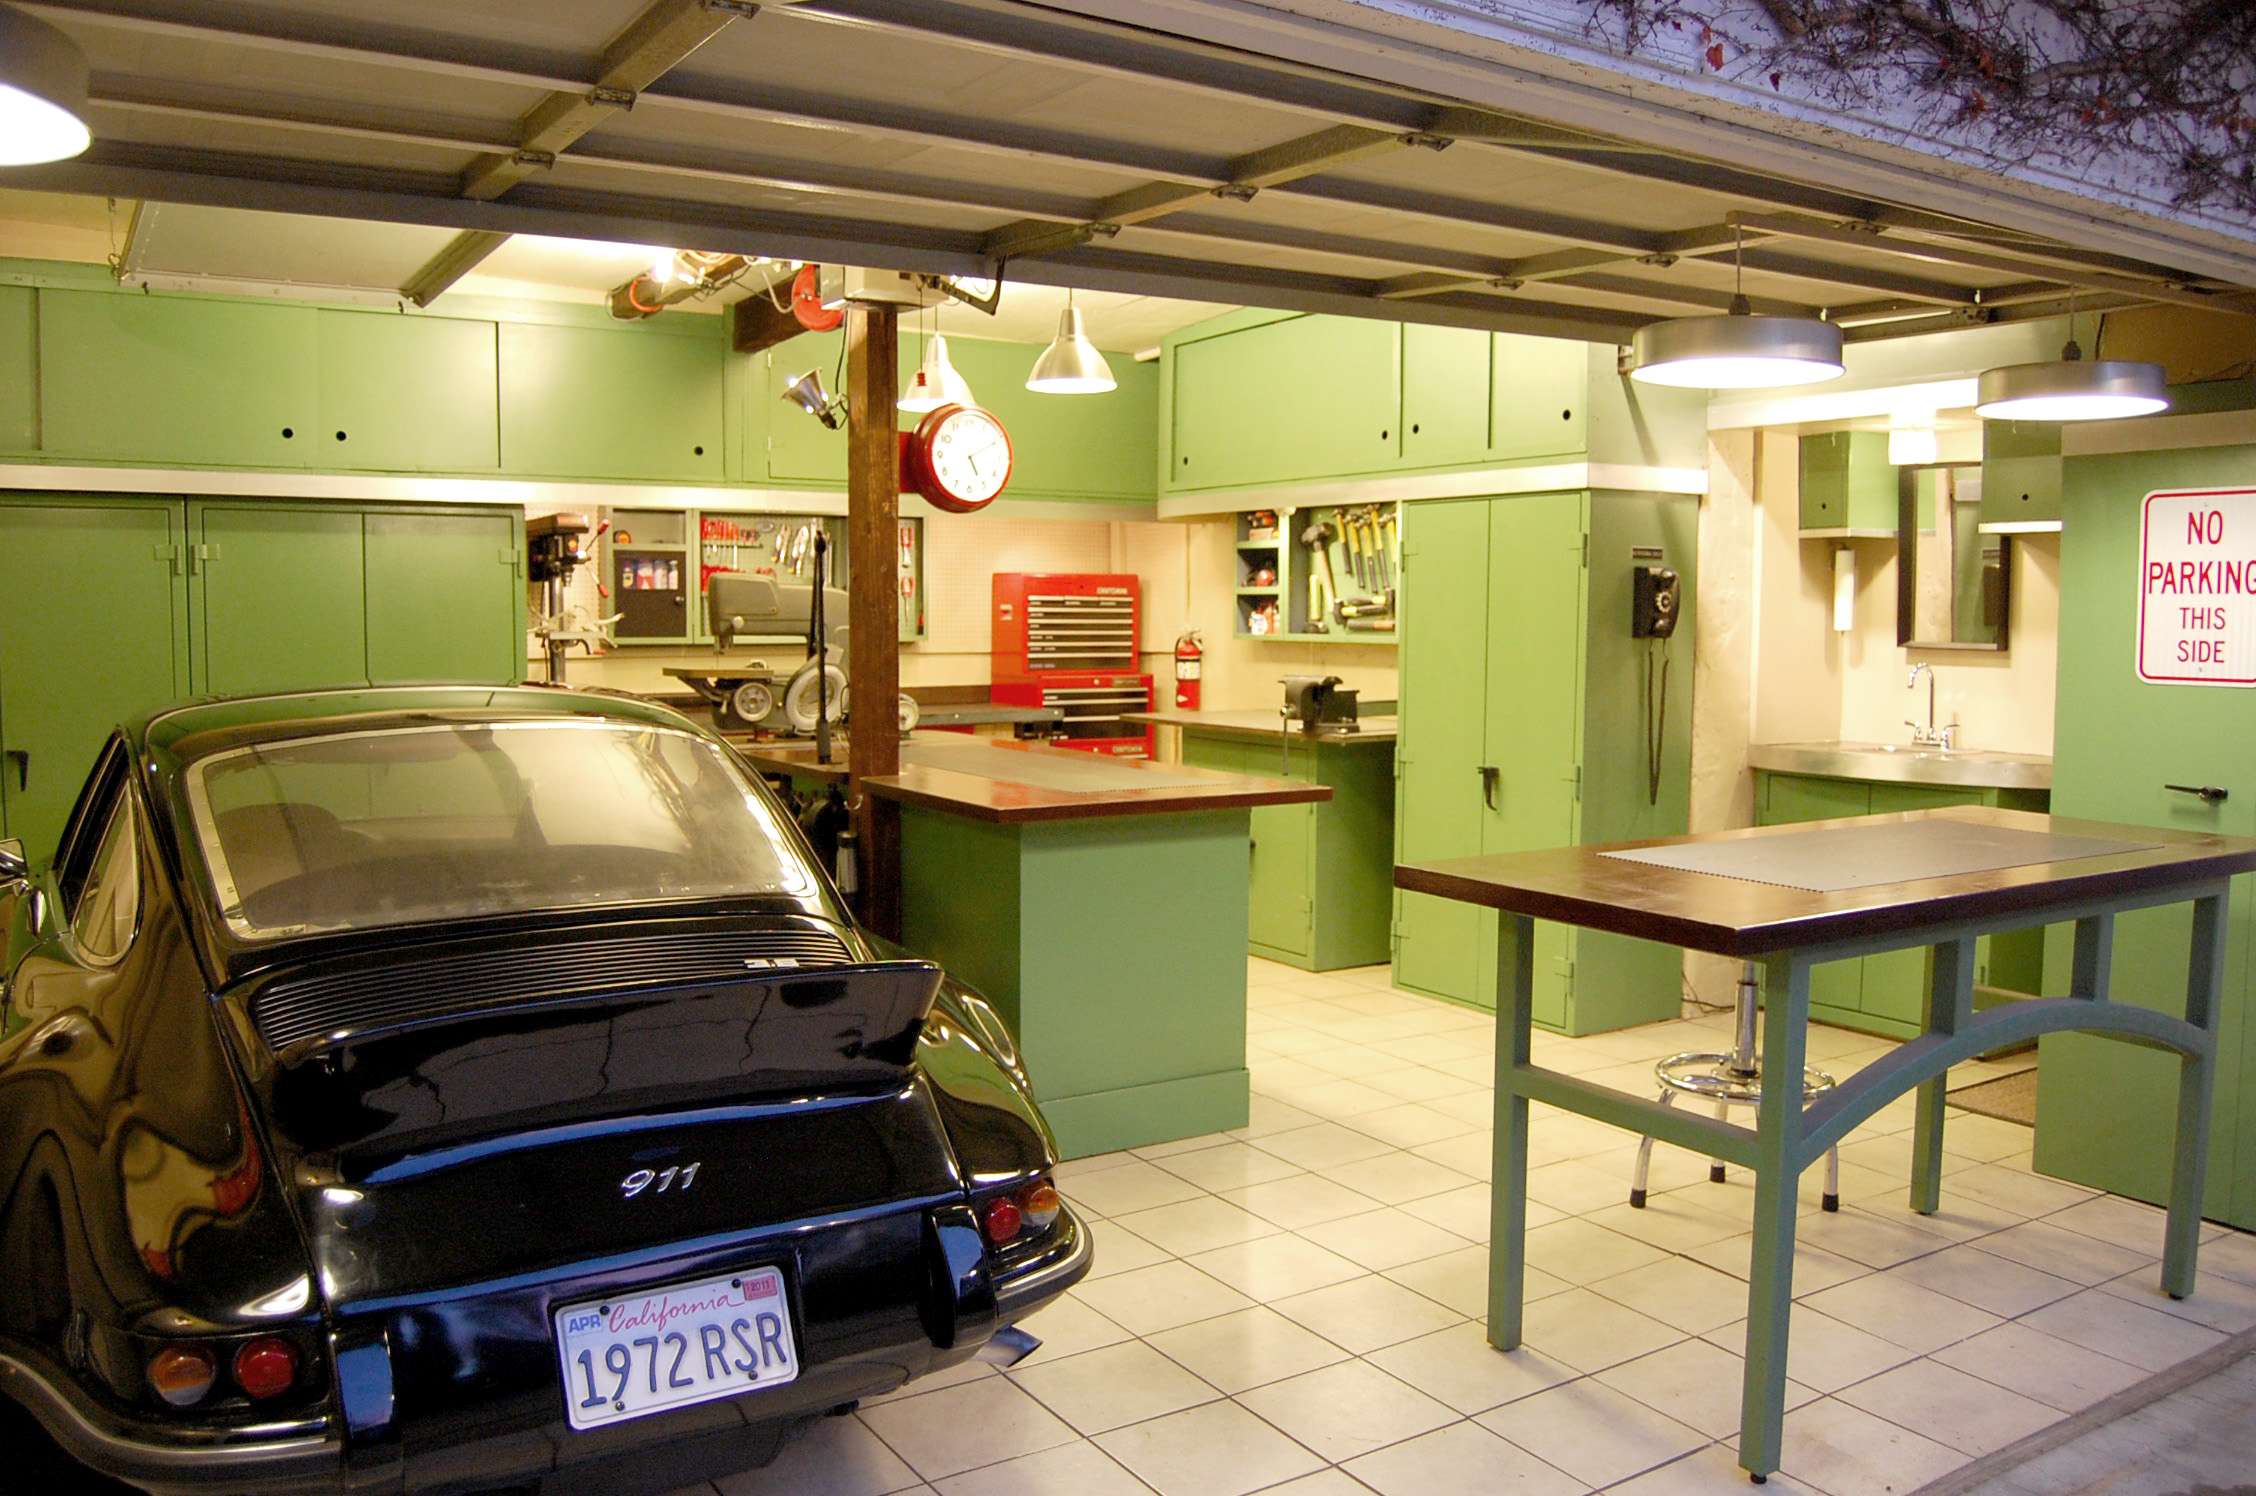
I’ve been trying to decide what to on my garage floor. I used Rustoleum Professional (solvent based) epoxy w/clear coat on my last floor and it was fine. However, it was easy to scratch if anything was dragged on it. I’ve ruled out Race Deck or similar plastic tile so I’m down to epoxy (likely I’d use Wolverine) or porcelain tile. This will be a working garage.

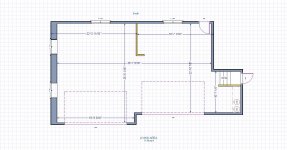
The area I have is approx 40’ x 23’. There are numerous control joints (formed with an edger before the concrete set) in the floor and an expansion joint (fiber) aound the entire outside.

I’m figuring on a matte finish, through body, PEI5 porcelain tile, probably 12” x 12”. I’m looking for any input on laying the tile, especially things like necessity of expansion joints, floor prep, etc. I plan to use epoxy grout for oil resistance. Also, as much as I’d like to use tile with a rectified edge and small grout joints, the tile I’ve been able to find is just too expensive.

Some of my questions are:

Do I need some sort of expansion joint in this floor? Do I need to use Ditra?

Can I just lay this right on the concrete (properly cleaned, assuming no moisture problem)? I was figuring a modified thinset adhesive

Do I need to diamond grind the floor or will I get good adhesion without grinding?

Does anybody know a good source for tile? I'm in the Sacramento, CA area and haven't yet looked locally but have found a couple places online.


Any help is appreciated!

Rob
 

Attachments

  • floorplan.jpg
    floorplan.jpg
    145.6 KB · Views: 47
To avoid these ads, REGISTER NOW!
OP
B

BMEP

Well-known member
Joined
May 15, 2011
Messages
89
Location
Placerville, CA
super50, I still haven't decided! :) I did order some porcelain tile samples today though. I think the porcelain floor would be the best for what I want. I guess it really comes down to whether or not I feel like I can get the tile to work on my floor without spending a ton on some sort of membrane or the like.

What sort of floor do you have?
 

moorer1

Member
Joined
Jul 9, 2008
Messages
5
Here's a tile I'm considering:

http://www.builddirect.com/Porcelain-Tile/tile-
Lightwood/ProductDisplay_6933_p1_10018051.aspx

I'm grappling with the same options you are, Rob. Are you contemplating installing the tile yourself?

I had a tile guy come out yesterday. He planned to install right over the concrete without any grinding. I'm suspicious. I had assumed I'd grind, use Ditra, install tile, then epoxy grout. I'm afraid I won't be able to stomach the cost of paying a pro to do it.

My concern is getting all 600 sq ft done in a timely manner...without killing myself...

Bob
 
OP
B

BMEP

Well-known member
Joined
May 15, 2011
Messages
89
Location
Placerville, CA
Bob - that's the exact tile I'm looking at except in Ivory Bone and Steel Gray (I plan to do a checkerboard pattern).

I am figuring on doing the tile myself. Ditra has me wondering... it'll really add to the cost and I'm not sure if it's necessary. I'm thinking maybe I could put in 1 or 2 flexible grout joints where I'd use polyurethane calk in the grout joint instead of grout (but grout everything else) to allow for movement. It's interesting to hear that your tile guy was just gonig to lay tile on the concrete. I'm wondering that if you have it clean, put expansion joints in and use the correct adhesive, wouldn't that be enough? I also assume that you couldn't have a moisture problem or that will lift the tile.

I hear what you're saying about getting it done and still living through it. :) One nice thing about tile, you don't have to lay it all at once. That's a necessity for me since I can't completely empty my garage of stuff (no place to put it all).

BTW, I just ordered the John Bridge "Tile Your World" book but it won't be here for another week.

One thing for sure, I need to get moving on this floor.

Rob
 

Jack Olsen

Super Moderator
Staff member
Joined
Mar 22, 2009
Messages
6,678
Location
Los Angeles
I'm not a tile professional. I'm like your barely-sober uncle who claims he's an expert at everything. So take this with a grain of salt.

But I just bought the cheapest tile I could find (.59/sf), used regular grout in a dark brown color to make stains a non issue, and used regular thinset. I did all the work myself, figuring it out as I went along.

My pad was poured in 1925 and I live within a half mile of the famous La Brea Tar Pits in earthquake country. In other words, the cracked up sections of my pad would not be what you would generally call 'stable.'

I didn't know what leveling cement was when I did it. I used some patching cement to correct some of the irregularities in the pad.

04+Level1204948395.jpg


05+Tile1204948474.jpg


06+Grout1204948561.jpg


My floor has held up great for years, now. I love it. It sweeps easier than concrete, doesn't absorb oil and grease like concrete does, and you can comfortably walk around on it barefoot.

So that's a data point for you.

Before:

02+Stage11204947376.jpg


After:

10+Garage1204948874.jpg


And years later, everything has changed in the garage except the tile:

closein.jpg
 
Last edited:

R6 Racer

Well-known member
Joined
Feb 21, 2010
Messages
1,632
Location
Northern Ontario Canada
Again... like others I am no expert. I have tiled a few floors before & during that process I did learn a bit.
AFAIK Ditra should be used when
1) you put tile on a floor that can shrink & swell, like a floor in your house (wood). the Ditra will give your tile a surface that will not shrink or swell, keeping it from cracking.
2) you need to waterproof the floor, as in putting in a shower. The Ditra in this case will create a waterproof barrier between the tile & the surface you are installing it on.

In your case I wouldn't bother with Ditra at all. IMO it would be a big waste of $$$ & be completely unnecessary. (Unless of course you are going to be running a car-wash & the floor will be constantly flooded)

I also would be worried that the Ditra would allow the tile a small bit of flex under the weight of an automobile which could make for quite a few broken tile, often


IMHO a FAIL

Steve
 

Wills.WindowsAndWheels

Well-known member
Joined
Sep 29, 2011
Messages
348
Location
Gilbert,Az
I'm not a tile professional. I'm like your barely-sober uncle who claims he's an expert at everything. So take this with a grain of salt.

But I just bought the cheapest tile I could find (.59/sf), used regular grout in a dark brown color to make stains a non issue, and used regular thinset. I did all the work myself, figuring it out as I went along.

My pad was poured in 1925 and I live within a half mile of the famous La Brea Tar Pits in earthquake country. In other words, the cracked up sections of my pad would not be what you would generally call 'stable.'

I didn't know what leveling cement was when I did it. I used some patching cement to correct some of the irregularities in the pad.

04+Level1204948395.jpg


05+Tile1204948474.jpg


06+Grout1204948561.jpg


My floor has held up great for years, now. I love it. It sweeps easier than concrete, doesn't absorb oil and grease like concrete does, and you can comfortably walk around on it barefoot.

So that's a data point for you.

Before:

02+Stage11204947376.jpg


After:

10+Garage1204948874.jpg


And years later, everything has changed in the garage except the tile:

closein.jpg


Hey man just wanted to give you props on your floor...you were wrong in one thing though...the tile was the same years later yes...but so was the green color on the cabinets lol!

Seriously though, it looks great. Few questions for you,


Have you ever done tile before?

Can you name some of the 'hang ups' you encountered and what you did to correct them

Did you put any sealant over the tiles at all (i know personally i love tiles that have a nice high gloss).

Lastly...sweet car. I have my own car detailing business ive been building up over the last few years...too bad you're not a state over (im in Az), i'd love to polish that baby out :)
 
OP
B

BMEP

Well-known member
Joined
May 15, 2011
Messages
89
Location
Placerville, CA
I was just looking at the Laticrete web site - some good info there. They mention laying tile directly on concrete. There are also a few technical books on their site that I found http://www.laticrete.com/homeowners/technical_design_manuals.aspx but haven't read yet.

I noticed that their installation instructions say, "Expansion joints shall be provided through the tile work from all construction or expansion joints in the substrate. Follow ANSI specification A108.01-(3.7) “Requirements for Movement Joints: Preparations by Other Trades” or TCNA detail
EJ-171 “Movement Joints—Vertical & Horizontal”. Do not cover expansion joints with mortar."

I'm going to check into that.
 

moorer1

Member
Joined
Jul 9, 2008
Messages
5
Jack,

What's the total area you tiled, and how long did it take you?

Bob

I'm not a tile professional. I'm like your barely-sober uncle who claims he's an expert at everything. So take this with a grain of salt.

But I just bought the cheapest tile I could find (.59/sf), used regular grout in a dark brown color to make stains a non issue, and used regular thinset. I did all the work myself, figuring it out as I went along.

My pad was poured in 1925 and I live within a half mile of the famous La Brea Tar Pits in earthquake country. In other words, the cracked up sections of my pad would not be what you would generally call 'stable.'

I didn't know what leveling cement was when I did it. I used some patching cement to correct some of the irregularities in the pad.
 

Frank The Plumber

Well-known member
Joined
Feb 19, 2011
Messages
2,644
Location
Chicago.
I've done a few tile jobs, I like to use bonding mortar. If there is a cut for cracking I'll cut the tiles as well and run them along the cut. I'll use a caulk like a colored tile caulk on that section instead of grout. Porcelain is going to be hard to cut, I use a diamond blade on it. It should be plenty tough though.
 
To avoid these ads, REGISTER NOW!

1Bigdog

Member
Joined
Mar 20, 2011
Messages
7
I put a tile on my garage floor. Its surface is very abrasive and feels like a fine sandpaper.

Great when dry....still a bit slippery when wet.

IMG_1468.jpg
 

Jack Olsen

Super Moderator
Staff member
Joined
Mar 22, 2009
Messages
6,678
Location
Los Angeles
Have you ever done tile before?

Can you name some of the 'hang ups' you encountered and what you did to correct them

Did you put any sealant over the tiles at all (i know personally i love tiles that have a nice high gloss).

Lastly...sweet car. I have my own car detailing business ive been building up over the last few years...too bad you're not a state over (im in Az), i'd love to polish that baby out :)
Thanks.

No, I had never done tile before. I googled it and found some guides, and also followed the instructions on the back of the bags. It's a nice job at ten feet -- the floor was never going to be level and I have chipped some of them. But it's pretty easy to just replace a tile or to even touch it up with my tan wall paint, which is pretty much the same color.

There weren't any big hang ups or surprises to the install. Cutting a section out of a tile is tricky. I had a score-and-snap cutter and also a cheap tile saw from Harbor Freight. Cutting the tiles took a little learning, but the cuts required for this job were pretty basic.

If I did it again, I met set all of the tiles at a 45° angle, which I think looks more professional. But I snapped a chalk line for the first row and used spacers (and tape measures) to keep everything straight from there.

I didn't use any kind of a sealer. These don't have much of a gloss, although the surface is hard and non porous.

And if you saw my car in person, you'd be shocked by all the stone chips. But that's the price of tracking a car on a monthly basis. (Especially with fiberglass body panels.)

What's the total area you tiled, and how long did it take you?
I think it was at least part of each day for three consecutive days. With the tile setting, I kept measuring/stepping-back/worrying about everything. Cutting the edge pieces had a learning curve.

Grouting was the hard day. Buffing the haze off put some meat on my shoulders.
 

Wills.WindowsAndWheels

Well-known member
Joined
Sep 29, 2011
Messages
348
Location
Gilbert,Az
Thanks.

No, I had never done tile before. I googled it and found some guides, and also followed the instructions on the back of the bags. It's a nice job at ten feet -- the floor was never going to be level and I have chipped some of them. But it's pretty easy to just replace a tile or to even touch it up with my tan wall paint, which is pretty much the same color.

There weren't any big hang ups or surprises to the install. Cutting a section out of a tile is tricky. I had a score-and-snap cutter and also a cheap tile saw from Harbor Freight. Cutting the tiles took a little learning, but the cuts required for this job were pretty basic.

If I did it again, I met set all of the tiles at a 45° angle, which I think looks more professional. But I snapped a chalk line for the first row and used spacers (and tape measures) to keep everything straight from there.

I didn't use any kind of a sealer. These don't have much of a gloss, although the surface is hard and non porous.

And if you saw my car in person, you'd be shocked by all the stone chips. But that's the price of tracking a car on a monthly basis. (Especially with fiberglass body panels.)

I think it was at least part of each day for three consecutive days. With the tile setting, I kept measuring/stepping-back/worrying about everything. Cutting the edge pieces had a learning curve.

Grouting was the hard day. Buffing the haze off put some meat on my shoulders.


Ever hear of Dr. Color Chip? Its suppose to be really simple to use for rock chips...would help make it look a lot nicer...not quite a repaint but a big improvement
 

stevelh

Well-known member
Joined
Nov 1, 2010
Messages
53
Location
Indiana
? for Jack. Did you fill all of your expansion joints with anything or did you just thin set over them? Looks like from the pictures, some are filled and some are not.
 

MBfreak

MEMBER EMERITUS
Joined
Dec 10, 2010
Messages
2,301
Location
Linkoping , Sweden
Hi.
Live in mid Sweden, -25 C in winter, +25 C in summer.
Garage is built on a well insulated and drained concrete slab. Which was impossible to keep tidy and had been badly painted some 20 years ago.
I borrowed a diamond grinder and a HUGE vacuum and kept at it for two days, removed something like 150 kG of floor surface. Got a uniform grey and scratchy surface . Slab had a crack right across from poorly installed plumbing to a radiator.
Used cheap light brown "frostproof" tiles and did it exactly as per instructions.
Garage is 6x7 m .
Took me two full days an was careful not to work for longer than 20 minutes before stretching for 5 minutes.
Let it sit for a week and then grouted the joints .
This was ten years ago and I am well pleased with the result. Have some welding burns and two blisters from dropped parts.

This is a job that most of us can do well, but of course not as fast as two pros working in tandem.

Go for it!

Ola
 

Attachments

  • New starter work.jpg
    New starter work.jpg
    134.1 KB · Views: 68
OP
B

BMEP

Well-known member
Joined
May 15, 2011
Messages
89
Location
Placerville, CA
Thanks for the replies guys.

Jack, 1Bigdog, Wills.WindowsAndWheels - nice looking floors!

A couple things I didn’t mention about my garage: There is an expansion joint around the entire outside of the slab. That will be tough (impossible?) to tile over so I'll have to figure out something there.

But more importantly, there are control joints in the slab about every 12’ or so. Unfortunately, these aren’t saw cut joints, they’re tooled with an edger so they’re fairly wide at the top and “radiused” also.

After quite a bit of reading, here’s what I’ve learned:

The John Bridge forums are a GREAT place for information about tile.

If you want to tile over an expansion or control joint, you need to “honor” the joint – that is, make sure the tile can move above the joint. From what I can see, there are a couple ways to do this:

- Put the grout joint directly above the control joint and use something flexible in the grout joint (like caulk). I don’t think that’ll work in my case since the control joints on my floor are so wide (about ½”)

- Use a product like Schluter Dilex DWS http://www.schluter.com/4_18_dilex_akws.aspx This would be put right over the expansion joint. If the joints don't happen to fall where a normal tile edge/grout joint, I'll have to cut tile to make it match. That could be a lot of cuting since I have so many joints.

- ”relocate” the flexible joint to the nearest grout joint so you can keep the tile layout the same. To do this, you need to use an isolation membrane like NobleSeal CIS http://www.noblecompany.com/Portals...ons/NobleSeal CIS Product Decription 0409.pdf

So now I just have to figure out how the tile will lay out in relationship to my control joints and decide what to do. I’ll get some photos of the expansion and control joints.

This isn’t going to be a small job but at least it's starting to make sense.
 

slickgt1

Well-known member
Joined
Oct 11, 2010
Messages
1,674
Go with Porcelain tile. You will not be more pleased with such a durable and maintenance free floor. Here are two of my links.

This is the renovation thread. I have a now, 6 month old daughter that is eating up a lot of time. So progress has become way to slow to update any meaningful pictures. But the tile has been done, and working great so far.

http://www.garagejournal.com/forum/showthread.php?t=90047

Second is the tile durability thread.

http://www.garagejournal.com/forum/showthread.php?t=95966

My floor was seriously messed up. The house is pushing 100 years old, and the concrete was pitched in all directions. Cracks, holes, old paint, everything was messed up with the floor. I am no tile pro either. But a friend of mine is, and he did the mud job for me. I laid the tile right behind his mud job. You need knee pads. Don't get the crazy huge ones, you need the thin flat ones with felt inside. You will thank me later. You do not want to be on your knees on concrete for any period of time.

Remember to back butter the tiles as well as the floor, you do not want any voids in the tile. My 20' x 22.5' tile job took for ever. I was only able to do it on weekends and nights, and the mud job required a lot of sand and cement that I had to mix and help with. If my floor was good, I think I would have been done in a weekend.

Lay the full tiles first. Deal with the ones you need to cut later. Make sure you clean up the thinset from the areas that you are going to tile after.

Grinder with a mason blade is your friend. I made circle cutouts with it so neat you would think the tile was made that way.

Remember, you can score and break a tile too. Much easier for a straight cut.

Plan to buy new shirts, as your arms will not fit in your current ones after this, lol.
 

Jack Olsen

Super Moderator
Staff member
Joined
Mar 22, 2009
Messages
6,678
Location
Los Angeles
? for Jack. Did you fill all of your expansion joints with anything or did you just thin set over them? Looks like from the pictures, some are filled and some are not.
I didn't know any better so I filled the larger voids and just spread the thinset from wall to wall. And like I said, I'm on very fluid ground here -- earthquakes and active oil drilling from underneath my property -- and it hasn't been an issue at all in the three years and six months it's been in place.

I guess one thing to consider is that my slab did have adequate time to settle. Calvin Coolidge was president when it was poured. :)
 
To avoid these ads, REGISTER NOW!
Top Bottom