To avoid these ads, REGISTER NOW!

Above 1200 Sq/FT Restored 1930's Auto Shop

Wokspaces above 1200 squarefeet.

Mickm

Well-known member
Joined
Nov 8, 2006
Messages
156
Location
Louisiana
I've been readings this post on and off for some time. There are some very cool old item here.
I saw way back where an Eco Air Meter was restored, with perfection.

I have been wanting one of these for my shop for a long time and finally scored one this past weekend.

This unit is all original (I was told) with the original glass, chrome, handle, etc.

The unit was painted in Gulf colors and has been sitting in the previous owners livinging room for 15 years!

While I am dieing to open it up and inspect, restore, caliborate so I can use it in the shop, I love just sitting and looking at it as it is now.

Cheers!
Mickm
 

Attachments

  • IMG_0361.jpg
    IMG_0361.jpg
    133.7 KB · Views: 215
Last edited:
To avoid these ads, REGISTER NOW!
OP
B

BB767

Well-known member
Joined
Dec 24, 2009
Messages
3,724
Location
Philo, IL
I've been readings this post on and off for some time. There are some very cool old item here.
I saw way back where an Eco Air Meter was restored, with perfection.

I have been wanting one of these for my shop for a long time and finally scored one this past weekend.

This unit is all original (I was told) with the original glass, chrome, handle, etc.

The unit was painted in Gulf colors and has been sitting in the previous owners livinging room for 15 years!

While I am dieing to open it up and inspect, restore, caliborate so I can use it in the shop, I love just sitting and looking at it as it is now.

Cheers!
Mickm

Hello there Mickm. Nice air meter you have there! :thumbup: 
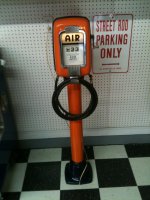
Depending on what has been done to it in the past, don't be surprised if you don't have to do a whole lot to it. These ECO units are amazingly tough and well built. Your's look like the same vintage as...
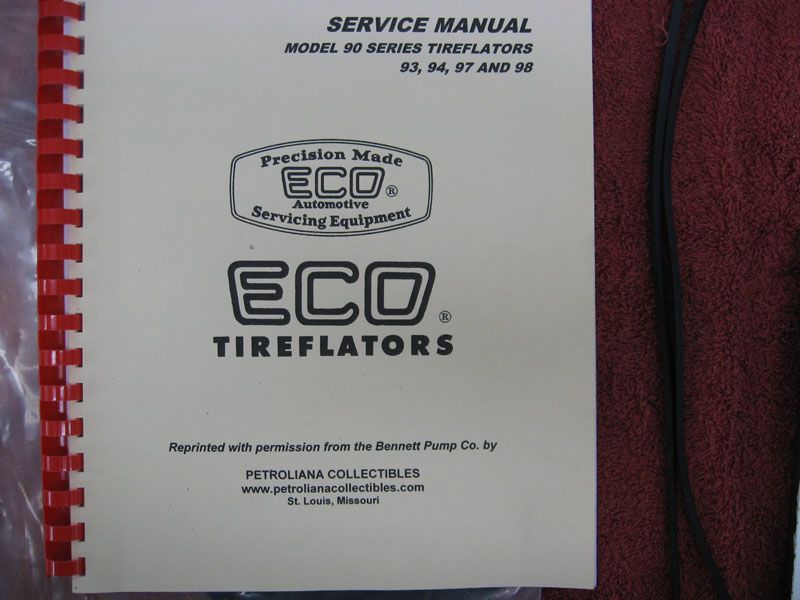
IMG_3174.jpg


...the one I'm going to install outside the barn, seen here.

IMG_3176.jpg


It's the same year, 1953, as my wall mount model 97 only this one is model 98 pedestal unit just as yours appears to be. I needed a pedestal unit since the wall is not as substantial as the old shop block wall and these air meters are heavy!

Hook yours up to an air source and try it out, you might be surprised that it works just great as is, you never know. Once they are calibrated they are surprisingly accurate. My wall unit is within 1/2 pound of the selected pressure time after time. I probably don't even need an air gauge anymore but I still check the first tire for accuracy but the other three I don't anymore. You'll find it's mighty handy to have around the shop.

Thanks for dropping us a note. Let us know how it works out.

Thomas
 

Mickm

Well-known member
Joined
Nov 8, 2006
Messages
156
Location
Louisiana
Hi BB767,
You are correct, mine is a model 98. It appears to be all original. You can tell the chrome is original as it is tarnished (not pitted) and the handle is brass (I think).
The numbers roll smoothly in time with the handle movement so you may be correct about the possibility of it working. I need to order a manual for this since I don't know where to hook the air into it.
I downloaded all the pictures of your renovation you posted for future reference.
I'll let you know what happens when I hook it up.
I did rotate the base so the cord is not pinched any longer lol.
Thanks for all the help,
Mickm
 

Bob Telep

Member
Joined
Nov 30, 2009
Messages
20
Sun distributor tester

OK, I know these posts on the Sun distributor tester are few and far apart. I'll try to bring this project home.

Here's a shot of the new drive wheel. The polyurethane of the original wheels gets hard over time, and leaving the wheel engaged with the drive cone after shutoff creates a flat spot. Both cause noisy operation. I had these wheels custom made and they work very well. The wheels are supported by two ball bearings and they were replaced as well.

tn_DSCN3553.JPG

The upper and lower cabinets were attacked with plenty of elbow grease and new wires. Since the boots for the distributor test leads were in good shape, they were retained.
tn_DSCN3557.JPG tn_DSCN3560.JPG
tn_DSCN3565.JPG tn_DSCN3665.JPG
tn_DSCN3555.JPG


The motor switch was disassembled, cleaned, and lubed. Easy to do.
tn_DSCN3575.JPG
 
OP
B

BB767

Well-known member
Joined
Dec 24, 2009
Messages
3,724
Location
Philo, IL
Hi BB767,
You are correct, mine is a model 98. It appears to be all original. You can tell the chrome is original as it is tarnished (not pitted) and the handle is brass (I think).
The numbers roll smoothly in time with the handle movement so you may be correct about the possibility of it working. I need to order a manual for this since I don't know where to hook the air into it.
I downloaded all the pictures of your renovation you posted for future reference.
I'll let you know what happens when I hook it up.
I did rotate the base so the cord is not pinched any longer lol.
Thanks for all the help,
Mickm

Mickm the original handles were chrome plated brass. I suspect the chrome is mostly worn off of yours. The part your fingers hold should roll or turn separate from the crank itself. Reproduction handles are all one piece so hang on to that handle if it's a two piece. The model 97 & 98 both have the same head units. Remove the head and...

IMG_3842.jpg


...right in the middle, on the bottom of the unit, you should see a fitting which is where the air is introduced into the meter. You can see it here just above the brass line fitting on mine. For my Wall Mount unit (#97) I used a flare fitting and attached it to a copper air line I brought through the shop block wall. For my Pedestal unit (98) I attached a quick disconnect to the bottom of the unit and then a short hose with a quick disconnect on the other end of it. That will come out the bottom of the base and attach via a 32" long hose to...

IMG_3172.jpg


... a quick disconnect thats on the barn outer wall. I don't plan on leaving the meter outside during the winter. This will make it easy to disconnect the air and bring the unit inside.

IMG_3149.jpg


Service manuals are readily available and are invaluable should you be lucky enough on own one. Here's a link for Jack Sims service manual who is "Mr. ECO Air Meter". :) It's well illustrated and quite thorough using original ECO material. Jack is also a good source for parts and is probably the most well informed individual on all things ECO. He has vast knowledge of these units.

http://www.petrolianacollectibles.com/eco 90 literature.htm

Good Luck with it and congratulations on a great piece of vintage equipment. :thumbup:

Thomas
 
Last edited:
OP
B

BB767

Well-known member
Joined
Dec 24, 2009
Messages
3,724
Location
Philo, IL
Thanks Bob for the continuing updates on the Sun. I know you're a busy guy and I'm sure I speak for many who love seeing those before and after pictures showing your careful, good work. :thumbup:

Thomas
 
OP
B

BB767

Well-known member
Joined
Dec 24, 2009
Messages
3,724
Location
Philo, IL
IMG_6394.jpg


I'm not always restoring shop equipment or cleaning out the tool shed like I should be. (I bet Joe has just about given up on me :dunno:) Every so often I'm lucky enough to get to do "actual" work on my regular cars. The Walker Jacks are in the old shop so one of the Snap On's got rotated out to the barn.

IMG_6391.jpg


At present Cameron and I are doing some service work on the '62 and using the barn space as I had envisioned it long ago. The filler hose connecting the fuel filler tube with the fuel tank had a leak so we're correcting that and going through the whole fuel system while we're at it. Not a terribly big project but one I've put off a while.

Patience Joe, patience! :eek:

Thomas
 

Mickm

Well-known member
Joined
Nov 8, 2006
Messages
156
Location
Louisiana
BB767,
Thanks for the info. I will give Jack a call and get one of the service manuals coming my way.
You are right (again), my handle is a two part assembly with the knob rotating freely.
I guess the chrome has been worn off.
I plan to keep the unit just as it is just because it is all original and I like that look.

I'd love to see more pics of the '62, I am an old car nut.

Thanks,
Mickm
 

hobbitss

Well-known member
Joined
May 31, 2010
Messages
341
Location
Southestern Massachusetts
I'm not always restoring shop equipment or cleaning out the tool shed like I should be. (I bet Joe has just about given up on me :dunno:)

Patience Joe, patience! :eek:

Thomas

The weather has started to change already, you wont have much more time before the snow starts and we will be waiting until the end of spring... :(

Maybe just a few photos to hold us a little longer??? :thumbup:
 

dreamingmuscle

Well-known member
Joined
Dec 4, 2005
Messages
3,472
Location
Tryon Oklahoma
I've been readings this post on and off for some time. There are some very cool old item here.
I saw way back where an Eco Air Meter was restored, with perfection.

I have been wanting one of these for my shop for a long time and finally scored one this past weekend.

This unit is all original (I was told) with the original glass, chrome, handle, etc.

The unit was painted in Gulf colors and has been sitting in the previous owners livinging room for 15 years!

While I am dieing to open it up and inspect, restore, caliborate so I can use it in the shop, I love just sitting and looking at it as it is now.

Cheers!
Mickm


We had one in the fleet garage I worked in. It was over 50 years old and still worked like a charm. I don't know if it was serviced before I got there in 92 but when I left in 06 it still worked like a charm.

Glen
 
OP
B

BB767

Well-known member
Joined
Dec 24, 2009
Messages
3,724
Location
Philo, IL
BB767,
Thanks for the info. I will give Jack a call and get one of the service manuals coming my way.
You are right (again), my handle is a two part assembly with the knob rotating freely.
I guess the chrome has been worn off.
I plan to keep the unit just as it is just because it is all original and I like that look.

I'd love to see more pics of the '62, I am an old car nut.

Thanks,
Mickm

Mickm you say you're an old car nut? I thought we all were here?? :dunno: Want more '62 pictures, sure...

IMG_0584.jpg


It still has 3 of it's original T-3 headlights...

IMG_0583.jpg


...poor car. I got it just after I bought the shop property and haven't had a chance to do a thing to it except wash it one time...

IMG_0582.jpg


...thankfully it's in pretty good overall condition- 31,000+ miles...

IMG_0579.jpg


...made in November, 1961...

IMG_0581.jpg


...making it an very early Super Sport. I feel fortunate to have Verne Frantz as a personal friend who came to the shop to document it. He's generally considered the countries leading authority on early '60's full size Chevys.

IMG_0589.jpg


In production the exterior trunk panel around the tail lights was changed from a Satin Finish, which all Impalas had to Engine Turned Metal finish like the side trim here, a SS exclusive. This was done in late November, early December, 1961 as a running change for all SS cars. Most '62 Impala SS cars you see have that Engine Turned Metal trunk panel since they changed to it fairly early in the production cycle. It's kind of a shame mine doesn't have it since those later SS panels were so good looking IMO.

IMG_0448.jpg


BTW, the exhaust is incorrect, it shouldn't have those chrome tips. Haven't corrected that...yet. I'm sorry I don't have many pictures with it outside in lavish settings...

IMG_0446.jpg


...I just haven't had it out that much. I'm correcting that however by finally going through the complete fuel system as a first step to getting it back to driving on a semi- regular basis.

Thanks Mickm for an excuse to post some pictures of it. I'm a car nut too!!!!! :D

Thomas
 
OP
B

BB767

Well-known member
Joined
Dec 24, 2009
Messages
3,724
Location
Philo, IL
We had one in the fleet garage I worked in. It was over 50 years old and still worked like a charm. I don't know if it was serviced before I got there in 92 but when I left in 06 it still worked like a charm.

Glen

Hi Glen and thanks for the note. Wish you had a picture of it!

As I've mentioned a time or two, those air meters were designed to be outside in all kinds of weather 24/7/365...for decades without much attention. As such they are extra, extra beefy and if they were fortunate enough to be located inside a shop they just keep going. The reason I finally decide to go through my model 97 was because it had a small diaphragm leak. It still worked just fine, it just leaked some air through the unit and I wanted it to be right. After going through it and learning about them, I really came to respect what a great piece of equipment they are.

Thanks again.

Thomas
 

Red Leader

Well-known member
Joined
May 15, 2011
Messages
2,689
Location
Denver, CO
That Impala is a beaut:thumbup:

Everything about your garage is classy.

Might need to pick up one of those vintage air meters...

...after I get a vintage Wall-o-matic...

...which I'll get after I get some vintage speakers...

...which I'll get after I get a vintage refrigerator...

...which I'll get after a vintage air compressor...


never ends, does it?

(I'm kind of glad it doesn't:D
 
Last edited:
OP
B

BB767

Well-known member
Joined
Dec 24, 2009
Messages
3,724
Location
Philo, IL
Almost looks like you put some sort of coating on the tank Thomas.

Actually charlief1 what I'm doing is removing the old factory undercoating off the tank. That and all the surface rust in preparation for re-zinking it.

IMG_6393.jpg


I got it done late this afternoon and am letting it dry over night. I'll post the results tomorrow. I'm happy with the tank as of right now. Then of course the tank straps and hardware all had to be reconditioned. As long as I'm in there I'll put in a new fuel sending unit plus new anti squeak material on the tank straps etc. Also replacing all the rubber fuel line and reconditioning the hose clamps, flushing out the hard lines, doing it all up to the carburetor. That was rebuilt about 8 years ago so it's not a problem.

Say, while I've got your attention on rubber fuel hose let me ask all of you with original cars, or cars with older fuel hose, to replace your rubber fuel hose if they are older than say 5-8 years old. I was at a seminar a few years back and the engineer that was presenting it pleaded with attendees to do just that, replace old rubber fuel hose. He was a GM Pontiac engineer and related that rubber fuel hose, older than at that time, 5 years old, breaks down rather quickly when exposed to the new reformulated gas now sold at gas stations. He personally knew of 3 mid- '60's Corvettes that were all original right down to the fuel hoses. Those Corvette people especially value originality. Anyway, it these 3 cases, the original rubber fuel hose began to leak while being driven, sprayed gasoline on the exhaust manifolds and all 3 burned to the ground! :eek: Please don't let that happen to you. If the car is driven, it should have fuel hose that is made to be compatible with todays gasoline. Keep the original fuel hose if you must, but remove them off the car. Don't have it on your car when it's driven.

There, I feel better now having said that. Thanks everyone, I rarely get on my soap box here but this is pretty important.

Thomas
 

magnusk750

Well-known member
Joined
Nov 6, 2010
Messages
501
Location
Estonia
When I see these shining true beautys I cant help thinking of that these cars are the ultimate pop among the greasiest swedish rednecks, subculture of subculture, the so called 'Pilsnerhäckar' or 'Pilsnerbutts. If I dare I can take you along on a virtual shock tourism trip to the outbacks of Sweden, but it takes some brave googleing in a late night.:scared::evil:
 

charlief1

Well-known member
Joined
Dec 1, 2010
Messages
248
You are correct on the fuel lines Thomas. Newer lines are made to be alcohol resistant but they do rot faster now because of the alcohol content in gas these days. Rubber rots after 5 years and bushings start breaking down quickly after this point. Check all the rubber in the car on a regular basis because of this. Most people don't think about things like body bushings ect and they afe very important for a car. Just make sure to check them on a reguarl basis or go with poly and put up with the squeeks.:)
 
OP
B

BB767

Well-known member
Joined
Dec 24, 2009
Messages
3,724
Location
Philo, IL
When I see these shining true beautys I cant help thinking of that these cars are the ultimate pop among the greasiest swedish rednecks, subculture of subculture, the so called 'Pilsnerhäckar' or 'Pilsnerbutts. If I dare I can take you along on a virtual shock tourism trip to the outbacks of Sweden, but it takes some brave googleing in a late night.:scared::evil:

magnusk, would that "virtual shock tourism trip to the outbacks of Sweden" involve anything resembling this...

IMG_5924-1.jpg


...Sabb seen at Bonneville a few weeks back? :scared: If it does I'm all in!! :D

BTW, that's a supercharger, under the gray cover, sticking up through the hood. :drool:

Thomas
 
OP
B

BB767

Well-known member
Joined
Dec 24, 2009
Messages
3,724
Location
Philo, IL
The weather has started to change already, you wont have much more time before the snow starts and we will be waiting until the end of spring... :(

Maybe just a few photos to hold us a little longer??? :thumbup:

I can do that Joe. Truth be known I really plan on spending quite a bit of time out there and getting at least one of the two remaining buildings cleaned out while I'm home this time. Weather here is going to be beautiful for another week so that's my agenda this time around. I'm as anxious as you to see what else is lurking about in there.

Thanks for the gentle prod all the same. :)

Thomas
 

Bob Telep

Member
Joined
Nov 30, 2009
Messages
20
Thomas, your Impala SS is absolutely gorgeous! It doesn't matter from which angle you view it, it just looks "right".
The '62 is my favorite year of the 58-64 Chevrolets, especially from the styling standpoint.
Love the full width front plastic floormat.

Another fine example of American style and class of the 60's direct from the Philo Auto Museum & Garage!
 
To avoid these ads, REGISTER NOW!

Bob Telep

Member
Joined
Nov 30, 2009
Messages
20
Sun distributor tester

OK, I know these posts on the Sun distributor tester are few and far apart. I'll try to bring this project home.

Here's a shot of the new drive wheel. The polyurethane of the original wheels gets hard over time, and leaving the wheel engaged with the drive cone after shutoff creates a flat spot. Both cause noisy operation. I had these wheels custom made and they work very well. The wheels are supported by two ball bearings and they were replaced as well.

tn_DSCN3553.JPG

The upper and lower cabinets were attacked with plenty of elbow grease and new wires. Since the boots for the distributor test leads were in good shape, they were retained.
tn_DSCN3557.JPG tn_DSCN3560.JPG
tn_DSCN3565.JPG tn_DSCN3665.JPG
tn_DSCN3555.JPG


The motor switch was disassembled, cleaned, and lubed. Easy to do.
tn_DSCN3575.JPG

Now on to the vacuum pump..........
Some Sun models used a single piston pump driven mechanically by an eccentric on the drive cone shaft. Other models used a twin piston pump driven by eccentric on the end of an electric motor. The displacements are similar since the single piston has a larger diameter.
tn_DSCN3574.JPG tn_DSCN3573.JPG


The piston lip seals are leather and are pretty durable, and since they are difficult to find, I usually clean them up and they work just fine. The check valves are rubber discs, and any wear is generally corrected by wet sanding the disc against a flat surface. The assembled check valves are tested for leakage using a Mityvac pump.
tn_DSCN3570.JPG

New grommets were installed to restore vibration isolation.
tn_DSCN3572.JPG


On this particular pump, the motor would run only on occasion. The problem was traced to a broken winding on the armature. A little solder later, all was well.
tn_DSCN3681.JPG
 

Attachments

  • tn_DSCN3713.JPG
    tn_DSCN3713.JPG
    65.1 KB · Views: 66
OP
B

BB767

Well-known member
Joined
Dec 24, 2009
Messages
3,724
Location
Philo, IL
So I got some external fuel tank treatment material from Eastwood that contains zinc to protect the '62 fuel tank after the outside was all cleaned up.
I managed to clean it down to bare metal before coating it. The inside of the tank looked close to new so I didn't have to do anything to it. That's partly the result of the car always being garaged from day one, almost 50 years ago. It's not as likely to experience condensation "issues" in the fuel tank while sheltered and keeping the tank fairly full helped also.

IMG_6414.jpg


Here's the tank, hanging from the rafters, drying in the two car garage...

IMG_6416.jpg


...and here it is in the barn waiting installation in the '62. All the fuel hard lines have been flushed out and new fuel hose has been installed through out. Just about ready to wrap up this little project. Waiting over in the other corner of the barn...

IMG_6402.jpg


...the Barn Bench is in the finishing stages. But that's for another post.

Thomas
 
OP
B

BB767

Well-known member
Joined
Dec 24, 2009
Messages
3,724
Location
Philo, IL
Now on to the vacuum pump..........
Some Sun models used a single piston pump driven mechanically by an eccentric on the drive cone shaft. Other models used a twin piston pump driven by eccentric on the end of an electric motor. The displacements are similar since the single piston has a larger diameter.
tn_DSCN3574.JPG tn_DSCN3573.JPG


The piston lip seals are leather and are pretty durable, and since they are difficult to find, I usually clean them up and they work just fine. The check valves are rubber discs, and any wear is generally corrected by wet sanding the disc against a flat surface. The assembled check valves are tested for leakage using a Mityvac pump.
tn_DSCN3570.JPG

New grommets were installed to restore vibration isolation.
tn_DSCN3572.JPG


On this particular pump, the motor would run only on occasion. The problem was traced to a broken winding on the armature. A little solder later, all was well.
tn_DSCN3681.JPG

Bob, the length and breath and skill of your work speaks for itself. :thumbup: That Sun Distributor Tester should be functioning well after I'm done with it. Thanks for the additional update. I hope anyone out there with one of these machines see's how they can be revived to "live again" in near new operating condition.

Thomas
 
OP
B

BB767

Well-known member
Joined
Dec 24, 2009
Messages
3,724
Location
Philo, IL
That Impala is a beaut:thumbup:

Everything about your garage is classy.

Might need to pick up one of those vintage air meters...

...after I get a vintage Wall-o-matic...

...which I'll get after I get some vintage speakers...

...which I'll get after I get a vintage refrigerator...

...which I'll get after a vintage air compressor...


never ends, does it?

(I'm kind of glad it doesn't:D

Red Leader I consider that high praise indeed from a man who owns such a fabulous garage as your 1950's Craftsman Garage. Chris and I have been following your progress and urge anyone who wants a visual treat to check it out. Your attitude toward restoring old equipment and lavish attention to detail shows we share many of the same values and work ethics. :thumbup: As to your question, "never ends, does it?"

The clear and only answer is....nope :D

I'd love to come see your garage in person, for sure!

Thomas
 
OP
B

BB767

Well-known member
Joined
Dec 24, 2009
Messages
3,724
Location
Philo, IL
You are correct on the fuel lines Thomas. Newer lines are made to be alcohol resistant but they do rot faster now because of the alcohol content in gas these days. Rubber rots after 5 years and bushings start breaking down quickly after this point. Check all the rubber in the car on a regular basis because of this. Most people don't think about things like body bushings ect and they afe very important for a car. Just make sure to check them on a reguarl basis or go with poly and put up with the squeeks.:)

I've tried the poly and the squeaks were like fingernails down a chalk board to me. I HAD to change back to rubber. Simply couldn't abide all that squeaking!! :eek:

Thomas
 

Red Leader

Well-known member
Joined
May 15, 2011
Messages
2,689
Location
Denver, CO
Red Leader I consider that high praise indeed from a man who owns such a fabulous garage as your 1950's Craftsman Garage. Chris and I have been following your progress and urge anyone who wants a visual treat to check it out. Your attitude toward restoring old equipment and lavish attention to detail shows we share many of the same values and work ethics. :thumbup: As to your question, "never ends, does it?"

The clear and only answer is....nope :D

I'd love to come see your garage in person, for sure!

Thomas

Very nice words - thank you:)

Anytime you get stuck in Denver in-between flights and have some time to burn, give me a heads up and I'll have you over for a beer and we can talk shop/tools:beer:
 
OP
B

BB767

Well-known member
Joined
Dec 24, 2009
Messages
3,724
Location
Philo, IL
So, to wrap up the '62 fuel system saga...

IMG_6428.jpg


...a new fuel sender unit (measures the amount of gas in the tank and "sends" that information to the gas gauge in the dash) was installed...

IMG_6430.jpg


...in the refurbished fuel tank. The tank was then reinstalled with all refurbished original hardware and new "anti squeak" material on the tank straps, new fuel hose and...

IMG_6440.jpg


...then out for a test drive, the best part of the whole operation. :)

That concludes this portion of our program. Its on to the Barn Bench to get that wrapped up as well plus the the tool shed and lean to. I've also got one more race to fit in for the season final next weekend.

Thomas
 

cool50

Well-known member
Joined
Jan 22, 2009
Messages
275
Location
Il
Nice job Thomas. I don't know if you have been asked before, but hear goes. What do you think of the Boeing 787? Do you think you will ever fly it?
 

Bob Telep

Member
Joined
Nov 30, 2009
Messages
20
Now on to the vacuum pump..........
Some Sun models used a single piston pump driven mechanically by an eccentric on the drive cone shaft. Other models used a twin piston pump driven by eccentric on the end of an electric motor. The displacements are similar since the single piston has a larger diameter.
tn_DSCN3574.JPG tn_DSCN3573.JPG


The piston lip seals are leather and are pretty durable, and since they are difficult to find, I usually clean them up and they work just fine. The check valves are rubber discs, and any wear is generally corrected by wet sanding the disc against a flat surface. The assembled check valves are tested for leakage using a Mityvac pump.
tn_DSCN3570.JPG

New grommets were installed to restore vibration isolation.
tn_DSCN3572.JPG


On this particular pump, the motor would run only on occasion. The problem was traced to a broken winding on the armature. A little solder later, all was well.
tn_DSCN3681.JPG

Before we get to the electronics, here are a couple of items:

The very early Sun testers used a fairly sophisticated regulator to adjust the vacuum, but later ones, such as Thomas' 600 use a simple flat disc to uncover a bleed orifice. I suspect Sun changed to this design as a cost reduction, but the adjustability is hair trigger sensitive. A needle valve was made to replace the disc and the improvement was quite noticeable (sorry I don't have a picture showing the needle itself, use X-ray vision instead)

tn_DSCN3576.JPG

Here are a couple more before and after pics

tn_DSCN3557.JPG tn_DSCN3560.JPG
tn_DSCN3568.JPG tn_DSCN3665.JPG
tn_DSCN3717.JPG
 

Bob Telep

Member
Joined
Nov 30, 2009
Messages
20
Before we get to the electronics, here are a couple of items:

The very early Sun testers used a fairly sophisticated regulator to adjust the vacuum, but later ones, such as Thomas' 600 use a simple flat disc to uncover a bleed orifice. I suspect Sun changed to this design as a cost reduction, but the adjustability is hair trigger sensitive. A needle valve was made to replace the disc and the improvement was quite noticeable (sorry I don't have a picture showing the needle itself, use X-ray vision instead)

tn_DSCN3576.JPG

Here are a couple more before and after pics

tn_DSCN3557.JPG tn_DSCN3560.JPG
tn_DSCN3568.JPG tn_DSCN3665.JPG
tn_DSCN3717.JPG

On to the electronics!!
The electronic circuits in the Sun distributor testers, in my opinion, were very well designed to perform their intended task, that is, measuring how well the distributor was doing its job. The earliest testers from the 1940s through the 1970s are remarkably similar in basic construction, but the design progressed steadily with higher speed capability, upgraded power supplies and components, elimination of the batteries to power the meters with an internal power, etc.
Thomas' 600 tester is in the middle of the evolution, and is well capable of handling most distributors. One of the major change made during the rehab was the elimination of the batteries. As mentioned before in a previous post, the tachometer circuit used a 1.35V mercury battery because it had the desireable characteristic of maintaining a near-constant voltage throughout its useful life. Most owners of these testers, I suspect, use a 1.5V AA battery which is more like 1.6V new, which will give a false high RPM reading. Worse yet, it will slowly go "downhill" from there.
The dwell meter does not have this problem, as it has an internal calibration feature; nonetheless, not having to change batteries is a nice upgrade.

Sun used high quality electronic components for the time. However, some components, notably the capacitors, especially the paper and electrolytic types, are prone to failure over time. So, it is prudent to replace them.

Here are the original circuit boards

tn_DSCN3654.JPG tn_DSCN3669.JPG

To fix things up, separate AC adapters were used, one for tach, the other for dwell. The adapters were plugged into a power strip and located in the main cabinet (no picture). Two separate regulating circuits were fabricated and mounted:
tn_DSCN3667.JPG

The capacitors, and any other suspect components were replaced with high quality parts. It is always a good idea to double check component values:

tn_DSCN3666.JPG tn_DSCN3673.JPG

The meters are very well made, and the rule of thumb here is - unless you know exactly what you are doing , leave them alone, don't go looking for trouble. The meters were cleaned up, and a couple of mods were made. First, a small amount of adhesive was applied to reinforce a joint in the armature. Second, a ground strap was added per the picture. This was a design upgrade by Sun and all their later meters have the ground strap. So now Thomas, you have updated meters!
tn_DSCN3662.JPG

We are almost done. I will get this project wrapped up in one or two more posts.
 

67ImpalaSS396

Member
Joined
Apr 17, 2007
Messages
17
Location
Michigan
Actually charlief1 what I'm doing is removing the old factory undercoating off the tank. That and all the surface rust in preparation for re-zinking it.

IMG_6393.jpg


I got it done late this afternoon and am letting it dry over night. I'll post the results tomorrow. I'm happy with the tank as of right now. Then of course the tank straps and hardware all had to be reconditioned. As long as I'm in there I'll put in a new fuel sending unit plus new anti squeak material on the tank straps etc. Also replacing all the rubber fuel line and reconditioning the hose clamps, flushing out the hard lines, doing it all up to the carburetor. That was rebuilt about 8 years ago so it's not a problem.

Say, while I've got your attention on rubber fuel hose let me ask all of you with original cars, or cars with older fuel hose, to replace your rubber fuel hose if they are older than say 5-8 years old. I was at a seminar a few years back and the engineer that was presenting it pleaded with attendees to do just that, replace old rubber fuel hose. He was a GM Pontiac engineer and related that rubber fuel hose, older than at that time, 5 years old, breaks down rather quickly when exposed to the new reformulated gas now sold at gas stations. He personally knew of 3 mid- '60's Corvettes that were all original right down to the fuel hoses. Those Corvette people especially value originality. Anyway, it these 3 cases, the original rubber fuel hose began to leak while being driven, sprayed gasoline on the exhaust manifolds and all 3 burned to the ground! :eek: Please don't let that happen to you. If the car is driven, it should have fuel hose that is made to be compatible with todays gasoline. Keep the original fuel hose if you must, but remove them off the car. Don't have it on your car when it's driven.

There, I feel better now having said that. Thanks everyone, I rarely get on my soap box here but this is pretty important.

Thomas


Thomas,
Thanks for posting the warning about old fuel lines! :shocking: Quite frankly, I never really thought about how quickly these lines might deteriorate, or what effect today's fuels might have. I was just out yesterday taking a friend for a ride in my 1959 Vette (picture below). I've had the car since 1984, when I picked it up as a restoration in process. I put all new fuel lines, bushings, etc in at that time, and since it only gets driven sparingly, I never really thought about replacing the fuel lines, etc. After hearing your story, I will be replacing the rubber fuel hose before it hits the road again, for sure. Thanks for the important heads-up! Regards, John

398867257.jpg
 

hobbitss

Well-known member
Joined
May 31, 2010
Messages
341
Location
Southestern Massachusetts
Thanks Craig for that bit of information. That would explain why they were with all the other blacksmithing tools.

IMG_3530.jpg


Here is a point of reference for them. I believe they measured about 18" - 20" long but you are correct they are very small on the working end. I'll get a close up of both ends, the hinged end with the open loops are unusual to me.

IMG_3536.jpg


Here's a heavy duty tool box I uncovered and rescued out of the tool shed.

IMG_3537.jpg


Inside, more tools....

IMG_3528.jpg


I haven't had a chance to unload it yet. Looks to be a little bit of everything in there. I bet Rick would just love to have a chance to show his oil quenching expertise on these!


IMG_3607.jpg


The snow is pretty well melted by now so I can get back into the tool shed and lean-to for some more neat "stuff"! :D


Thomas

Sorry... I was suffering from Post Tool Traumatic syndrome and needed a fix...
 
OP
B

BB767

Well-known member
Joined
Dec 24, 2009
Messages
3,724
Location
Philo, IL
Nice job Thomas. I don't know if you have been asked before, but hear goes. What do you think of the Boeing 787? Do you think you will ever fly it?

Cool 50, no it hasn't been asked but it's a fair question. My admiration for Boeing designers and engineers knows no bounds. From a pilot's prospective they make just terrific aircraft, really, the best in the world IMHO. That said, I'm certain in time the 787 will be another in a long list of legendary aircraft. The problems it's had so far have been primarily from production, not design. We are scheduled to receive 6 of them next year starting in July, 2012 and have a total of 25 on firm order with options for more. I do not plan on flying them right away, if ever frankly. I'll have to wait and see the type of trips and schedules they fly. My personal life is most important to me at this point and the 767-200's/400's do the kind of flying that works best for my present situation. With the merger in full bloom right now, many different options might be in play however. We'll just have to wait and see what develops. :dunno:

Thank you for the interest however. :thumbup:

Thomas
 
OP
B

BB767

Well-known member
Joined
Dec 24, 2009
Messages
3,724
Location
Philo, IL
On to the electronics!!
The electronic circuits in the Sun distributor testers, in my opinion, were very well designed to perform their intended task, that is, measuring how well the distributor was doing its job. The earliest testers from the 1940s through the 1970s are remarkably similar in basic construction, but the design progressed steadily with higher speed capability, upgraded power supplies and components, elimination of the batteries to power the meters with an internal power, etc.
Thomas' 600 tester is in the middle of the evolution, and is well capable of handling most distributors. One of the major change made during the rehab was the elimination of the batteries. As mentioned before in a previous post, the tachometer circuit used a 1.35V mercury battery because it had the desireable characteristic of maintaining a near-constant voltage throughout its useful life. Most owners of these testers, I suspect, use a 1.5V AA battery which is more like 1.6V new, which will give a false high RPM reading. Worse yet, it will slowly go "downhill" from there.
The dwell meter does not have this problem, as it has an internal calibration feature; nonetheless, not having to change batteries is a nice upgrade.

Sun used high quality electronic components for the time. However, some components, notably the capacitors, especially the paper and electrolytic types, are prone to failure over time. So, it is prudent to replace them...


...We are almost done. I will get this project wrapped up in one or two more posts.

Bob, again you have demonstrated why my trust and faith in you was so amply rewarded. It's all in the details and execution. That Sun won't be leaving my shop until they pry it out on my cold, dead fingers!!!!!!!!! ;)

Thomas
 
OP
B

BB767

Well-known member
Joined
Dec 24, 2009
Messages
3,724
Location
Philo, IL
Thomas,
Thanks for posting the warning about old fuel lines! :shocking: Quite frankly, I never really thought about how quickly these lines might deteriorate, or what effect today's fuels might have. I was just out yesterday taking a friend for a ride in my 1959 Vette (picture below). I've had the car since 1984, when I picked it up as a restoration in process. I put all new fuel lines, bushings, etc in at that time, and since it only gets driven sparingly, I never really thought about replacing the fuel lines, etc. After hearing your story, I will be replacing the rubber fuel hose before it hits the road again, for sure. Thanks for the important heads-up! Regards, John

398867257.jpg

Hello John and thank you so much for the note. Time has a way of slipping away without us realizing it, doesn't it? Something you just did to a car turns out to be done 20 years ago. :eek: It wouldn't matter so much if it just meant the engine stopped and we were inconvenienced for and an hour or so. But this is just so important for the health and safety of the machine and operator. A visual inspection doesn't work either. Hairline cracks in black hose are next to impossible to detect, especially on the backside away from view. You might get away with it indefinitely.... but then again, maybe not. As you look at a smoldering pile of metal that was your pride and joy just a few minutes earlier you'd have to ask yourself. Was it really worth putting off just a very few minutes of time, money and effort. That's just the conservative pilot in me coming out. I learned early on in my aviation career "if it can happen, it will happen".

Beautiful Corvette by the way. Rolling sculpture from end to end. Thanks for posting it. :thumbup:

Thomas
 
OP
B

BB767

Well-known member
Joined
Dec 24, 2009
Messages
3,724
Location
Philo, IL
Very nice words - thank you:)

Anytime you get stuck in Denver in-between flights and have some time to burn, give me a heads up and I'll have you over for a beer and we can talk shop/tools:beer:

Red Leader that is an invitation I'll take you up on! Might even have a word or two on older "industrial" type wood working machines we both seem to have a fondness for. ;)

OliverDicSander-2.jpg


Here's my Oliver 20" disc sander, manufactured in 1939. This was taken back when I had hair!! It's a 3 phase, 240 volt GE electric motor, rated at just 2 HP. I'd say that's a conservative rating.

OliverDiscSander-1.jpg


When I turn it off it takes 28 minutes for the disc to coast to a complete stop. Boy I sure love old equipment!

Thomas
 

Red Leader

Well-known member
Joined
May 15, 2011
Messages
2,689
Location
Denver, CO
Red Leader that is an invitation I'll take you up on! Might even have a word or two on older "industrial" type wood working machines we both seem to have a fondness for. ;)

OliverDicSander-2.jpg


Here's my Oliver 20" disc sander, manufactured in 1939. This was taken back when I had hair!! It's a 3 phase, 240 volt GE electric motor, rated at just 2 HP. I'd say that's a conservative rating.

OliverDiscSander-1.jpg


When I turn it off it takes 28 minutes for the disc to coast to a complete stop. Boy I sure love old equipment!

Thomas

Beautiful.

I'm finding that more and more there are less and less people that appreciate these older tools. There was an enlightening discussion on this matter here that might be worth reading:

http://owwm.org/viewtopic.php?f=1&t=89040

Once the satisfaction of a good deal wears off, it kind of makes me sad, that in many cases it is more classic Americana being 'thrown away'. As I have mentioned in my thread and others, their is a certain population of people that keeps growing to the point where most actually prefer the newer overseas tools. The skills to keep an older tool running for 50, 60, or 100 years (really, just simple bearing and belt changes, like cars) are being lost in favor of simply just throwing the tool out when it dies after just 5 or 10 years, which to me stands ironically in direct contrast to the 'environmental' trend so popular right now. So many people would cringe at the idea of owning a 50 year old fridge, even when their 2 year old side-by-side just died and they can find that 9 out of the 10 vintage fridges they see on craigslist are running just fine.

I have learned so many great skills from working on these old tools - electrical skills, mechanical skills, how to pull and push in bearings, how to true up different parts, how to prep and do paint work - and I'm still relatively new at this. I still have lots of skills to learn, like setting knives, welding, fabricating new parts, foundry skills, etc. Those skills translate into home ownership skills, where you take care of your stead yourself, instead of having to go broke paying someone else what you were too uninterested to learn for yourself.

And on that note, I may be going to take a look at some old tools tomorrow:D

Like I said, if you are ever stopping by Denver for any length of time, it would be my pleasure.
 
Last edited:

porschedude996TT

Well-known member
Joined
Oct 28, 2007
Messages
2,384
Location
Santa Maria, California
I agree, dad taught me to work on anything at an early age, or at least try to fix it.

He would say:
"Keep the repairman out of house and garage and the money you save can buy more tools and save your income for other things."
 
To avoid these ads, REGISTER NOW!
Top Bottom