To avoid these ads, REGISTER NOW!

Between 265 & 485 SQ/FT The 12-Gauge Garage

Workspaces sized between 265 and 485 squarefeet.
OP
J

Jack Olsen

Super Moderator
Staff member
Joined
Mar 22, 2009
Messages
6,678
Location
Los Angeles
Thanks.

The back yard as it sits is just a square plot of land that -- at 20'x21' -- is slightly smaller than my garage. It's surrounded on four sides by walls. And while I wait to book a dumpster for leftovers from the garage renovation, it has the look of the set for the old television show Sanford and Son. It's a disaster.

I'm going to float a deck over the entire area, 16" above ground, probably with a galvanized frame set in concrete, but with a wood (or composite) deck on top of that. Then, above everything, I want to cover the whole thing in a wrought-iron-style pergola. I've looked at lots of other approaches, and I haven't found anyone who's done what I have in mind -- which is a shame, since I like to steal good ideas and adapt them.

But it's still a while off.

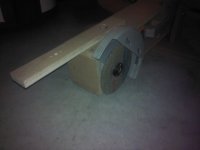
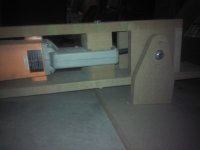
I guess the good news is that I've got all the saws I need for it already. :)
 
To avoid these ads, REGISTER NOW!

Zeke

Well-known member
Joined
Aug 13, 2009
Messages
17,176
Location
Long Beach CA, the sewer by the sea.
I have built decks for several people, all but me. When I get done with a deck in a city lot all I can see is that you're now up above the legal fence height and everyone on both sides can see you better while you're "on stage."

Now I don't know Jack's layout, never been there. He might have 10 foot or better walls on the 4 sides. For me, I stay low. ;) :D

I think of decks as a way to add level space on a sloped lot. An expensive way with prices currently running from $20 per sq ft to big time.

But if Jack does it, it may be in Sunset magazine. Seriously. I got one project in Sunset that I did years ago for some rich folks up in the canyons above L.A.
 

PNagel

New member
Joined
Dec 11, 2006
Messages
2
I went into the scary basement and pulled out the 9 inch HF grinder, still mounted in it's chop saw frame. Pictures are below:

The idea is pretty simple, build a four sided box and find a way to basically trap the grinder in it. I discovered that the removable handle is a M14 x 2.0 thread, so a quick trip to the hardware store procured the hardware to safety bolt that sucker down while using the factory handle taps to screw the grinder into the frame. The trigger has a lock on it, and I have a router speed controller to control the motor remotely. The whole thing pivots on a piece of threaded rod. There is a surprisingly small amount of lateral play when it's all screwed down to the bench. I even extended the tail of the box to all me to install counter weights. That grinder, as you know, is a hefty thing, and a little ballast on the other end makes using it a breeze.

And you're right, it removes a surpising amount of material in short order. So much that it was painfully showering me with chips and grinding wheel dust, as well as making a hell of a racket when fired up. As the peak of my madness I rigged the whole business into a large MDF box with a plexiglass window and internal work light. A few pieces of well placed threaded rod and a drill press vice allowed me to do some crude machining. Nothing too fancy, but it made me happy, and allowed me to make repeatable parts without going crazy measuring. Just count the turns, adjust as needed to compensate for wheel wear...you get the picture.

If you're going to have a *spare* grinder now, you might as well put the HF version to good use :)
 

Attachments

  • grinder frame 1.jpg
    grinder frame 1.jpg
    53.9 KB · Views: 241
  • grinder frame 2.jpg
    grinder frame 2.jpg
    56.2 KB · Views: 214
  • grinder frame 3.jpg
    grinder frame 3.jpg
    74.7 KB · Views: 208
  • grinder frame 4.jpg
    grinder frame 4.jpg
    59 KB · Views: 201
OP
J

Jack Olsen

Super Moderator
Staff member
Joined
Mar 22, 2009
Messages
6,678
Location
Los Angeles
Let's see... Walls on all four sides. 20'x21'x1.3' That's 21 yards of concrete and you're done in a couple hours. No metal work. No welding. Just have them dump it and smooth it out.
If I could get a truck back there, I'd consider it. But I think that would pretty much break my budget -- and I wouldn't be able to get any free storage space down below the deck.

I have built decks for several people, all but me. When I get done with a deck in a city lot all I can see is that you're now up above the legal fence height and everyone on both sides can see you better while you're "on stage."

Now I don't know Jack's layout, never been there. He might have 10 foot or better walls on the 4 sides. For me, I stay low. ;) :D

I think of decks as a way to add level space on a sloped lot. An expensive way with prices currently running from $20 per sq ft to big time.

But if Jack does it, it may be in Sunset magazine. Seriously. I got one project in Sunset that I did years ago for some rich folks up in the canyons above L.A.
Thanks, Zeke. I'm pretty sure this won't end up in any magazine. And I hope I can stay well south of even your low figure there. Remember, I'm cheap. But then, material costs are hard to bend too much -- and steel is pricey right now.

I went into the scary basement and pulled out the 9 inch HF grinder, still mounted in it's chop saw frame. Pictures are below:

The idea is pretty simple, build a four sided box and find a way to basically trap the grinder in it. I discovered that the removable handle is a M14 x 2.0 thread, so a quick trip to the hardware store procured the hardware to safety bolt that sucker down while using the factory handle taps to screw the grinder into the frame. The trigger has a lock on it, and I have a router speed controller to control the motor remotely. The whole thing pivots on a piece of threaded rod. There is a surprisingly small amount of lateral play when it's all screwed down to the bench. I even extended the tail of the box to all me to install counter weights. That grinder, as you know, is a hefty thing, and a little ballast on the other end makes using it a breeze.)
That's a great idea. I'm trying to work out when I would have a need for it -- since I've got a cut-off saw and three band saws, now. But I definitely haven't come up with a better use for the thing.

A small update:

I got the spare parts for my portaband today -- a new handle and two new blade guide assemblies. Now the blade is actually parallel to the direction of the miter guide.

This thing cuts nice.

bandsawcut.jpg


I'm very impressed with the Swag Off-Road base.

bandsawone.jpg


And as big as it looks in these pictures, the fact that it uses my vise as a base means I can store it on a shelf.

bandsawtwo.jpg
 

NUTTSGT

Super Moderator
Staff member
Joined
Sep 14, 2009
Messages
50,957
Location
Northern Central Ohio
Man Jack, I really like that Portaband with the vise base. That'd be a great addition to my garage as I'd love to have a metal cutting bandsaw.
 
OP
J

Jack Olsen

Super Moderator
Staff member
Joined
Mar 22, 2009
Messages
6,678
Location
Los Angeles
It mounts to the same pair of points where the little base mounts. In the second picture, you can see how it normally would be.

Mounter1318699958.jpg


Yesterday I put in a better switch for the other band saw.

Switcheroo1318699940.jpg


And if something's worth documenting, it's worth overdocumenting, right? I snapped a picture of how the new saw fits into its storage cabinet. It's kind of hard to see, but it stores with the table part still attached. To start cutting, all I have to do is pull it out and set it in the vise.

Shortened+Cabinet+Storage1318778485.jpg
 
Last edited:

PhantomEB

Well-known member
Joined
Feb 6, 2006
Messages
6,765
Location
Medicine Hat, AB, Canuckistan
Frick, never seen that stereo nicely hidden up there, definitely an idea I gonna steal as I got Satellite radio, just need to open door and turn on, set volume and go then shut off when I not out there.
 

bad_idea

Well-known member
Joined
Jun 11, 2011
Messages
4,332
Location
Pasquotank, NC
i have been eye balling a portaband for a while, waiting for one to show up on cl. use them all the time at work and planned on making my own table for it. then i saw this wasn't a new idea! honestly planned on making that same thing minus the miter gauge. i think i will include the miter gauge on mine. very nicely done again jack.
 

Omphaloskeptic

Well-known member
Joined
Oct 11, 2008
Messages
2,346
Location
Ultima Ratio, Wa.
Jack, very nice set-up for the port-a-saw, and very nice use for those 12-gauge cabinets.

I have to ask - why on earth you have an electric heater? Is it for those bitter cold days of 65 degrees? lol
 
OP
J

Jack Olsen

Super Moderator
Staff member
Joined
Mar 22, 2009
Messages
6,678
Location
Los Angeles
Thanks, everybody.

Frick, never seen that stereo nicely hidden up there, definitely an idea I gonna steal as I got Satellite radio, just need to open door and turn on, set volume and go then shut off when I not out there.
It's a good way to keep the amplifier from catching all the saw and metal dust. I used some double-sided tape on the iPod case so getting the music on would be as simple as hitting the power button on the amp and the play button on the iPod.

I have to ask - why on earth you have an electric heater? Is it for those bitter cold days of 65 degrees? lol
You forget how wimpy we Californians are. 65° is cold. :shocking:

Actually, it gets down into the low fifties in the shop in the winter. And it's a propane heater. Even without good insulation, it gets things up to a comfortable temperature pretty fast.

AC, on the other hand, is a problem I haven't really solved yet. I've got one of those portable units sitting next to my main bench, but it doesn't keep up at all. And there simply isn't a space for a wall/window unit. I'm even thinking about one of those units that go on top of an RV.

i have been eye balling a portaband for a while, waiting for one to show up on cl. use them all the time at work and planned on making my own table for it. then i saw this wasn't a new idea! honestly planned on making that same thing minus the miter gauge. i think i will include the miter gauge on mine. very nicely done again jack.
Make sure you get the 'deep-throat' kind. The Swag setup will only work with DeWalt/Milwaukee deep-throat saws.

That's a slick port-a-saw setup. Swage always has cool stuff.
I've exchanged a few emails with Troy there. He's a nice guy.

Agreed. Nice way to tuck the smaller tools in there:thumbup:
What's strange is how they all seem to follow a red/gray/black color scheme. I'll admit to trying to find red hand tools for the pegboard above my main bench. But this 'matched set look' inside the cabinet was accidental.
 

The J

Well-known member
Joined
Mar 4, 2010
Messages
152
I was at one of my customer's sites last week and in their tool & spare parts room was nothing but Strong Hold cabinets. Even the workers' lockers were Strong Hold.

Their cabinets had heavy-duty drawers that were remarkably easy to slide open and closed. Very impressive build quality.

Two years ago I would have thought, "Yep, industrial cabinets."

Now I think, "Oh cool, Jack's got those!"
 
OP
J

Jack Olsen

Super Moderator
Staff member
Joined
Mar 22, 2009
Messages
6,678
Location
Los Angeles
Quick and Cheap Garage Door Insulation

As the title says, this was less than four hours and about $38.

Granted, I'm in a pretty mild climate, but the afternoon sun hits my door and makes it hotter in the summer, and heating the garage in the winter with an uninsulated door is wasting propane that could be better used grilling me steaks. I've also thought for a long time that I should try to reduce the noise that makes it through the door, since I live close to my neighbors. I know styrofoam isn't a particularly good sound dampener, but something is better than nothing, right?

I've got your basic two-car roll-up garage door. I'm sure it's the economy model, but it does the job.

1520112.jpg


I've looked at those ready-to-go insulation kits. It seems the price is high for what you get, and you still need to cut panels to fit. I have 16 panels in my garage door, and there are six different sized in that mix. So I decided to just get some 1" foam EPS panels. They're 4'x8', light as a feather and sell for eight bucks each at Lowes. They come with a plastic lining on each side, one of which is (fortunately) blank white.

01inchthickeps.jpg


The thing that will make this sort of thing ugly is to leave it unpainted. And in fact I think painting both the frame and the panels the same color would look kind of weird. So here's my lazy man's tip for painting a garage door interior: do the painting before you do the actual project. I was able to do all the painting in about 30 minutes because there was nothing to mask and no adjoining colors to deal with. But the effect I'll get is of two colors close together.

First the door frame parts that will still be visible:

02paintdoor.jpg


Then, the panels (once they've been cut).

03paintpanels.jpg


To cut them, I used a straight edge and a razor blade. If you cut 1/3 the way into the EPS, you can snap the rest of the line. If you need a very clean cut, this wouldn't be the way to go. But the edges of the panels were mostly concealed by a folded edge on my door.

I cut the panels and painted them yesterday evening so they could dry before I'd be handling them. I used two tubes of Liquid Nails to adhere the EPS to the door.

Here are the first two panels inserted into the frame:

04firsttwoin.jpg


This shows you how painting the pieces before doing the project saved me the headache of masking everything off.

05maskedlines.jpg


And here's the door, now in the same colors as the rest of the garage.

06finished.jpg


Next up will be replacing that seal down below. It's not good that you can see sunlight coming through. But that's for another day.

:beer:
 
Last edited:
OP
J

Jack Olsen

Super Moderator
Staff member
Joined
Mar 22, 2009
Messages
6,678
Location
Los Angeles
Re: Quick and Cheap Garage Door Insulation

Him: What do you think?
Her: Well, it's... green.
Him: What do you mean? It's tan.
Her: I know. But the things that go up and down -- it looks green.
Him: It's mostly tan.
Her: It's too green.
Him: In this garage? The whole thing is green.
Her: No. The garage is tan. The things in it are green.
Him: You think it should be all tan?
Her: No.
Him: What should it be?
Her: I don't know. Not so green, though.
Him: But - I mean, it's just a garage.
Her: Right. Don't worry about it. It's just a garage.
Him: That's what I said.
Her: Exactly. Just leave it like it is.
Him: Okay. Of course. That's what I'll do.
Her: Why are you staring at it?
Him: You think it's too green?
Her: It's just a garage.
Him: But you say it's too green.

So 45 minutes later:

halvsies.jpg


And 90 minutes later:

brownbf.jpg


I take back everything I said about the easy way to avoid painting headaches. :)
 

ishiboo

Well-known member
Joined
Oct 27, 2010
Messages
9,481
Location
Oshkosh, WI
Re: Quick and Cheap Garage Door Insulation

It's too brown :p

Really though, pure opinion but I'm on your side... looked better green.

Either way, fantastic job as usual.
 

NUTTSGT

Super Moderator
Staff member
Joined
Sep 14, 2009
Messages
50,957
Location
Northern Central Ohio
Re: Quick and Cheap Garage Door Insulation

I was going to say "Damn, even the door frames are green!" But I guess I'm a little late.

Honestly Jack, the brown looks great. From here(Ohio) it almost looks like wood trim. :thumbup:
 
To avoid these ads, REGISTER NOW!

rickairmedic

Well-known member
Joined
May 31, 2005
Messages
4,165
Location
louisville ,Ky
Re: Quick and Cheap Garage Door Insulation

Jack as usual well done looks better than my factory insulated door . I like it both ways and if the color coordinator thinks the brown looks better she is probably right :D.


Rick
 

Zelatore

Well-known member
Joined
Sep 22, 2011
Messages
835
Location
Walnut Grove, CA
Re: Quick and Cheap Garage Door Insulation

My cheapo garage doors face right into the setting sun and my master bedroom sits above the garage. You can guess what the summer sun here in the CA delta does to the temp in the bedroom with those 100* days.

Didn't take long to come up with pretty much the same plan you did. Although I cut my insulation tight enough I didn't even need the liquid nails. Just pop it in and it stays.

I did however skip the painting..

Made quite a difference in the temps during the summer. Not perfect, but more than worth the money!
 

Keep

Well-known member
Joined
Jan 1, 2009
Messages
1,398
Location
Oshawa, Ontario
Re: Quick and Cheap Garage Door Insulation

Looks great. No matter if its "Just a garage" A happy wife is a happy wife!
 

fitz11

Well-known member
Joined
Jun 16, 2011
Messages
974
Location
Fox Valley, WI
Re: Quick and Cheap Garage Door Insulation

Looks good in either color! I did mine with pink insulation, maybe its time for some paint now lol
 

PassnThru

Well-known member
Joined
Jan 5, 2010
Messages
6,510
Location
Bowling Green KY
Re: Quick and Cheap Garage Door Insulation

I'm still trying to figure out how you painted the green in only 30 minutes :headscrat
Apparently only one coat - and from the close up it covered well. And it even looks like you sprayed it on. But I doubt that since I don't see any overspray.

Apparently, I am the slowest painter ever.
I figure at least 2 hours for that job for me.

For the first coat :wtf:
 

buening

Well-known member
Joined
Dec 17, 2007
Messages
1,338
Location
Decatur, IL
Re: Quick and Cheap Garage Door Insulation

LOL, thanks for the laugh Jack! Your wife and mine would get along well
 
OP
J

Jack Olsen

Super Moderator
Staff member
Joined
Mar 22, 2009
Messages
6,678
Location
Los Angeles
Re: Quick and Cheap Garage Door Insulation

Thanks, guys.

PassnThru, my painting style is reckless and fast. For the green, I wiped the old metal off, and hit it with two coats of acrylic paint applied with a 3" roller. There are lots of points where the roller brushed the back side of the door, but I knew that would be covered with the insulation.

For the tan panels, I used a full-size roller and actually ran out of paint. If you see it in person, you'd see the top row has a lot of thin spots. But it's close enough for garage work right now, and I can roller some more on with the next gallon of paint I pick up.

For the brown re-do, I used Rustoleum enamel (it was what I had on the shelf) and applied it with a disposable brush. I couldn't mask the panels for fear of lifting off the tan paint, so I just went at it freehand. In a digital picture taken from 15 feet away, the results look pretty good. If you walked up to it, you'd see it's, well, again, close enough for garage work.
 

IDASHO

Well-known member
Joined
Mar 5, 2007
Messages
1,809
Location
Moscow, Idaho
Re: Quick and Cheap Garage Door Insulation

Looks great Jack!

Funny story about the wife and the color choice. Im sure most of us on here can relate to that :spit:

I have a fully insulated door on my garage. Im sure you have WELL less into yours than I do mine though. Factory insulated doors are SPENDY
 

87handmedown

Well-known member
Joined
Oct 10, 2011
Messages
105
Location
Kansas
Re: Quick and Cheap Garage Door Insulation

I liked the green much better, but you're the one that has to live with your wife. I still think your garage, and everything that you've done, is incredibly impressive.
 

markszabo

Member
Joined
Oct 20, 2011
Messages
5
Geez, Jack, I leave you alone for a few years and you go bonkers on your garage. It looks awesome, and this thread (which I stumbled upon just looking for some BB2 ****) was highly entertaining for a few days.

Since it's been so long, allow me to go down the abbreviated list: congrats on the first kid, the second kid, getting BB2 into shape and into so many magazines, and finally, your awesome garage.

Here's what I've been up to:

dad_and_harrison.jpg


He's almost 20 months old. His name is Jack Olsen Szabo.


I'm just kidding. His name is Harrison Marshall. :)

Yes, I miss my 911, but...I have a plan. I need to move first, to a place with a 3-car garage, so I may begin my nefarious plan to build the ultimate work space and return to my rightful place as a Porsche owner.

Good to see you're doing well, brother, and the next time I'm in LA I'll give you a heads-up and we can get together again!
 

Falcon67

Well-known member
Joined
Jun 11, 2009
Messages
18,371
Location
Merkel, TX
Re: Quick and Cheap Garage Door Insulation

Can you bend those panels any to get them under the lips on the door bracing, or did you just cut to fit the opening and call it good nuff. I did my old shop door with 1" pink. I cut the first big and tried to bend it into the opening but it snapped big time, slapped me in the face, there was a brawl and I had to buy another sheet to finish. After that, I just cut them close and wedged them in, no glue at all. It worked like gangbusters but the pink door was a little too...joyful.
 
OP
J

Jack Olsen

Super Moderator
Staff member
Joined
Mar 22, 2009
Messages
6,678
Location
Los Angeles
Re: Quick and Cheap Garage Door Insulation

Looks great Jack! I have a fully insulated door on my garage. Im sure you have WELL less into yours than I do mine though. Factory insulated doors are SPENDY
Yeah, this is a $38 solution. It's not a complete seal by any means. A fully-done door is probably worth it -- unless you're in a gentle climate like this one.

I liked the green much better, but you're the one that has to live with your wife. I still think your garage, and everything that you've done, is incredibly impressive.
Thanks. I actually think the green looks better in the pictures. But in real life, the brown is better -- to my eye. But really, we're talking about a garage door. I've already over-thought it as it is.

I liked the green, go back.
Ha! My wife has earned her place in the garage color decisions. You've still got a way to go, my friend. :)

Can you bend those panels any to get them under the lips on the door bracing, or did you just cut to fit the opening and call it good nuff. I did my old shop door with 1" pink. I cut the first big and tried to bend it into the opening but it snapped big time, slapped me in the face, there was a brawl and I had to buy another sheet to finish. After that, I just cut them close and wedged them in, no glue at all. It worked like gangbusters but the pink door was a little too...joyful.
I could have gotten a better fit using 1-1/4" panels, breaking them up into pieces where flexing them wouldn't work. But 1-1/2" was the closest size to that, which would have meant finding a way to shave the edges down (a hot knife) to make them fit. Shy of both of those solutions, even using some expandable foam would go a long way toward filling the voids.

But this is Southern California, where it never gets below the forties. I had two extra panels worth of material (from the four sheets I bought), and I used them to work out how much the EPS would bend before it snapped or creased. The pieces are slightly oversized, but there are still gaps on some edges. For now, I can live with that.
 

Capt Chrysler

Well-known member
Joined
Mar 6, 2011
Messages
1,160
Location
Middle of nowhere.
Re: Quick and Cheap Garage Door Insulation

I guess this is really not, Jack Olsen's garage. It's Mrs Jack Olsen's garage! :shocking:


Quick! Can someone send Jack a copy of Man Rules! I think he lost his!

Sorry Jack.

Capt. Chrysler
 

PassnThru

Well-known member
Joined
Jan 5, 2010
Messages
6,510
Location
Bowling Green KY
Re: Quick and Cheap Garage Door Insulation

I could have gotten a better fit using 1-1/4" panels, breaking them up into pieces where flexing them wouldn't work. But 1-1/2" was the closest size to that.....

That was the case for me as well. So I bought 3/4" and doubled it. It's more flexible. Also, since the 'hole' isn't square (it has lips in it that are about the same size) the two layer approach fills the voids where it steps up and down. Also, to get it under the lips on the side, I cut the panel to size and then cut them in half with an angled cut. Slip it in and then tape the seam. Then the same with the outer piece but stagger the seam. I then finished with some radiant barrier which hides the tape.
 
OP
J

Jack Olsen

Super Moderator
Staff member
Joined
Mar 22, 2009
Messages
6,678
Location
Los Angeles
Thanks guys.

The J, I'm always amazed when companies spring for Strong Hold cabinets and it's not in a real warehouse (as in forklifts bumping into stuff) setting. But I'm also glad when companies get them for their mops and brooms or whatever -- because that means one day they'll show up on the used market. :)

And hey, Mark. It's great to hear from you. You've gotten a glimpse of the post-kid(s) chapter of my life. There's less travel to far off tracks, and more nesting -- of the 'dad' variety, I guess.

Jack Olsen Szabo is a great name. I'm not sure why I like it so much, but it just has a ring to it. :)

Kids throw a monkey wrench into the time and energy we have to treat ourselves like kids. But they also are a great motivator to use our time a little more effectively and to value the stuff that's ours, I think. It's odd, but I haven't had a serious crash or spin (actually, no spins at all) since I had the kid. I think they remind us at some deep, primate-brain level that we need to stick around so we can talk them through adolescence, or whatever. We'll see.

In any case, welcome to the Garage Journal and shoot me an email if you're going to be in Los Angeles.
 

Hottrod

Well-known member
Joined
Jul 6, 2011
Messages
150
Location
West Indies
Re: Quick and Cheap Garage Door Insulation

Jack, just in case there was any doubt in anyone's mind: you ARE the man!
 

Agent1320

Well-known member
Joined
Aug 5, 2011
Messages
398
Location
Texas
Re: Quick and Cheap Garage Door Insulation

Looks good. I dig the brown over the green, but the green did look good. I have 1" foam insulation throughout my entire shop. It's a 1200sqft metal building with two 14' high doors, and 16' high ceilings, and about 3/4 of the shop is covered with a 12' high elevated ceiling. The insulation was in the shop when I moved in. All the pieces are just wedged in between the perlins and behind some 1x4s to keep them from falling off the walls. The roof didn't have any insulation and I didn't want to spend any money since I just rent the shop, so I figured I'd just deal with it. A few weeks after I moved in, I was peeking above the elevated ceiling to see if there was anything living up there, and I found a stack of twenty 4x8 sheets of foam insulation. This was mid August in Texas, the temp inside the shop was 128 degrees with the doors down, maybe 105 outside. I borrowed a friends 10' ladder, put it in the bed of my dually and installed the foam sheets into the ceiling. The next day in the shop was a much more pleasant 114 degrees, same 105 outside. I was surprised it made that much of a difference. I've been here for over 3 years and still haven't insulated the doors, but now that I saw this thread, I might go pick up a few sheets and cover them.
 
To avoid these ads, REGISTER NOW!
Top Bottom