To avoid these ads, REGISTER NOW!

Above 1200 Sq/FT OldCarGuy’s New Toy Shop

Wokspaces above 1200 squarefeet.

e-tek

Well-known member
Joined
Dec 19, 2007
Messages
10,690
Location
Saskatoon, SK
What would you have used to move the lift if you didn`t have the Trolley
Mine will be showing upo next week and I have no idea how to get it off the transporter!:headscrat
 
To avoid these ads, REGISTER NOW!
OP
O

OldCarGuy

Well-known member
Joined
Nov 29, 2005
Messages
2,005
Location
Ohio
What would you have used to move the lift if you didn`t have the Trolley
Mine will be showing upo next week and I have no idea how to get it off the transporter!:headscrat


If the truck is going to drop it off at your home, you’ll have limited options. But your best option would be to disassemble the lift from the bundle it’s shipped in. And just man handle the pieces. Three healthy men and a case of beer would do the trick. A cherry picker would help; but you still need to take a piece at a time. At least with my cherry picker.
 

szypulsk

New member
Joined
May 1, 2008
Messages
1
Which lift did you buy e-tek? I just received and installed an HD-9ST-B lift. If you bought the same one, I can tell you how it was packaged and how I got it home from the commercial delivery point, if you'd like.
 

kvom

Well-known member
Joined
Feb 1, 2008
Messages
820
Location
*******, GA
A cherry picker would help; but you still need to take a piece at a time. At least with my cherry picker.
If the lift is on a high truck bed then the cherry picker might have to extend so that it's at the half-ton setting. If it's on the ground, weighing around a ton, I'd think lifting it would be doable with most 2-ton hoists. Of course you'd still have to be able to roll the hoist to where you want it.
 

mshedb

Well-known member
Joined
Jul 22, 2005
Messages
51
Location
USA
Actually BenPak is having the lift installed for me, Wednesday of next week. I’ve installed a dozen lifts myself. And I’m going to find it enjoyable to stand around and watch. Taking pictures and documenting the process.

How did the install go?
 
OP
O

OldCarGuy

Well-known member
Joined
Nov 29, 2005
Messages
2,005
Location
Ohio
How did the install go?


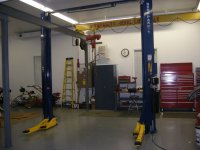
The lift was installed yesterday. As planned I installed the driver’s side column on the far side of my bridge crane’s runway I beam and having the cross bar above the runway beam. That will limit the crane’s travel from the front wall to the lift. Still adequate coverage for engine removals that it was intended for. So far it looks and works great and had no problems lifting my 7,100 pound 3/4 ton Avalanche! I will follow up with a complete report.

DSCF2208.jpg


DSCF2232.jpg
 

revlover

Well-known member
Joined
Mar 27, 2008
Messages
264
Can you post pictures of the install? Or will you be starting a new thread for that...?
 
OP
O

OldCarGuy

Well-known member
Joined
Nov 29, 2005
Messages
2,005
Location
Ohio
Can you post pictures of the install? Or will you be starting a new thread for that...?

I have started working on that,, compiling pictures to go along with describing the installation. Unfortunately I wasn’t able to finish it today. And I’m leaving in the morning for a three-day weekend. However I’ll post it in a separate thread the first of next week.
 

e-tek

Well-known member
Joined
Dec 19, 2007
Messages
10,690
Location
Saskatoon, SK
Thanks for keeping me up (again!!) WAY past bed time:bounce:. The wife thinks I'm cheating on her (I guess I am!!). And cheers on the reply about getting my lift out of the transporter - I'll be warning some BIG freinds right away!:thumbup:
Szypulsk - I'm getting the BP HD9-XTW (Xtra Tall and Wide) four-post. Any info you have I'd appreciate! You can PM me.
 

pickmeup

ALLIANCE MEMBER
Joined
Jun 12, 2007
Messages
8
Geez you guys make my mouth water.
Been stuck in a flat(condo to you) for 3 years waiting to work on my cars.
At least I can dream on here with you all,keep them photos and ideas coming:thumbup:
 
OP
O

OldCarGuy

Well-known member
Joined
Nov 29, 2005
Messages
2,005
Location
Ohio
hows that bendpak compressor, i have been eying it for a while ?

I’m really impressed how the air compressor looks. The machinery mounts just arrived yesterday and will be setting it up next week. And looking forward to firing it up and see how well she’ll perform. Then I’ll be posting a complete writeup.
 

birdman1

Well-known member
Joined
Jul 10, 2008
Messages
74
Location
Erwin, N C
Great shops, you've made us all green with envy. Congrats to you.I like the electrical work.too. I'm the son of an electrician and do all my own work also.Now have fun with all the toys.
Mike
 

Frazier

New member
Joined
Apr 5, 2008
Messages
1
This will be my first post.

OldCarGuy,

I am in the process of building my 30 x 40 and I'm very interested in the bridge crane. How exactly did you anchor your crane uprights to the floor? Were the anchor bolts poured in place or did you drill and use drop in anchors?

Thanks,

Frazier
 

birdman1

Well-known member
Joined
Jul 10, 2008
Messages
74
Location
Erwin, N C
Thanks for sharing the pics of garages,CARS, and the equipment. Wow, I share your beliefs in not waiting too long to enjoy your earnings. I think folks should support their church first and then pay themselves with a few toys. Why should we work all the time just to hand it all out to the children.My Dad bought his first electric drill in 1976-he was 56 years old and always wanted a motorcycle and pickup truck that he never owned and he was a top electrician in a factory. Don't wait too long for the toys, I love all the pictures,thank you so much for sharing them with all.
Mike
 
OP
O

OldCarGuy

Well-known member
Joined
Nov 29, 2005
Messages
2,005
Location
Ohio
This will be my first post.

OldCarGuy,

I am in the process of building my 30 x 40 and I'm very interested in the bridge crane. How exactly did you anchor your crane uprights to the floor? Were the anchor bolts poured in place or did you drill and use drop in anchors?

Thanks,

Frazier

I drilled the holes in the concrete floor with a hammer drill after the uprights were in place. And installed Wej-It anchors to their specifications. Never been a problem. After all they are used to keep a two-post lift from toppling over.

.
 

TejasBimmer

Well-known member
Joined
Mar 1, 2008
Messages
540
Location
off I-35, TEXAS!
I am so amazed of the equipment you have...so many of them I have used at past companies and damn...if I had the room. Thanks for keeping the thread alive!
Also great car collection.
 

DRRummel

Well-known member
Joined
Feb 19, 2008
Messages
122
Location
Baltimore, Maryland
I first bolted the four columns to the cement floor. Since the ceiling is higher than the old garage, I added a piece of wide flanged 6” I-beam to the top of each column to increase the hook height. The two runway beams are then placed on top of the columns and braced to the garage walls. The magnet drill press was used to drill holes in the runway beams so that they can be bolted to the columns.
DSCF1717-1.jpg

DSCF1720-1.jpg

I am curious. I understand that this makeover was not in the original plan. So since you were not planing on installing the bridge crane in this garage, what kind of footer do you have under those four support I-beams? If I remember correctly, it has been a long read, the floor was a 6 1/2 bag (4500 PSI) mix in a 6 inch pour.

BTW, we share the same tool problem. If there is a tool I don't own - it's a problem. But you have had it longer then I have.

As I get older, I have to echo the earlier sentiments. Enjoy your retirement. Life is not long enough for most.
 
To avoid these ads, REGISTER NOW!
OP
O

OldCarGuy

Well-known member
Joined
Nov 29, 2005
Messages
2,005
Location
Ohio
I am curious. I understand that this makeover was not in the original plan. So since you were not planing on installing the bridge crane in this garage, what kind of footer do you have under those four support I-beams? If I remember correctly, it has been a long read, the floor was a 6 1/2 bag (4500 PSI) mix in a 6 inch pour.

BTW, we share the same tool problem. If there is a tool I don't own - it's a problem. But you have had it longer then I have.

As I get older, I have to echo the earlier sentiments. Enjoy your retirement. Life is not long enough for most.

Six inches of 4500 PSI concrete floor has enough strength that I didn't feel the need to put in a footer. After all,, car lift manufacturers only recommend 4” of 3,000 PSI floor. While a single column on my bridge crane carries a load less than 2,500 pounds. One column of a 10,000 pound two-post car lift carries 5,500 pounds.

Then you have that defective gene that I've possessed all these years. And having it since birth has given me the chance to collect even more of the good stuff. Cheers to you! :beer:
 

MrBeast

Member
Joined
Aug 29, 2008
Messages
24
I am pretty impressed with your setup, I really love the gantry. I am going to machinsits school right now, looking at your shop has been a majore drool fest. Keep up the good work.
 
OP
O

OldCarGuy

Well-known member
Joined
Nov 29, 2005
Messages
2,005
Location
Ohio
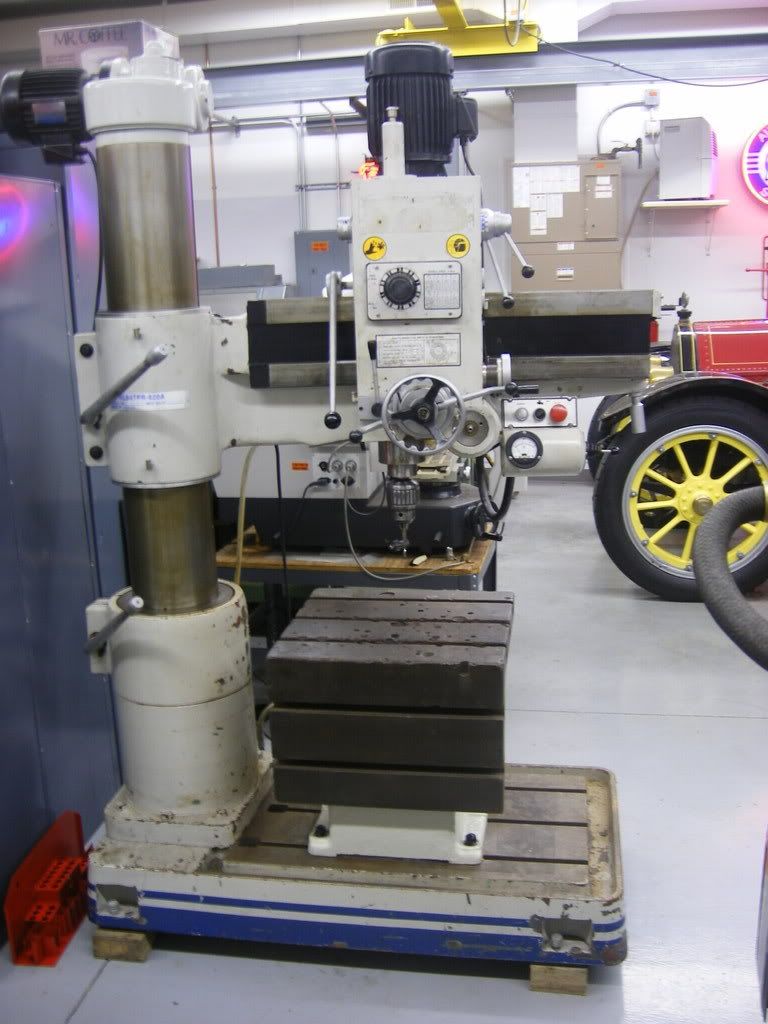
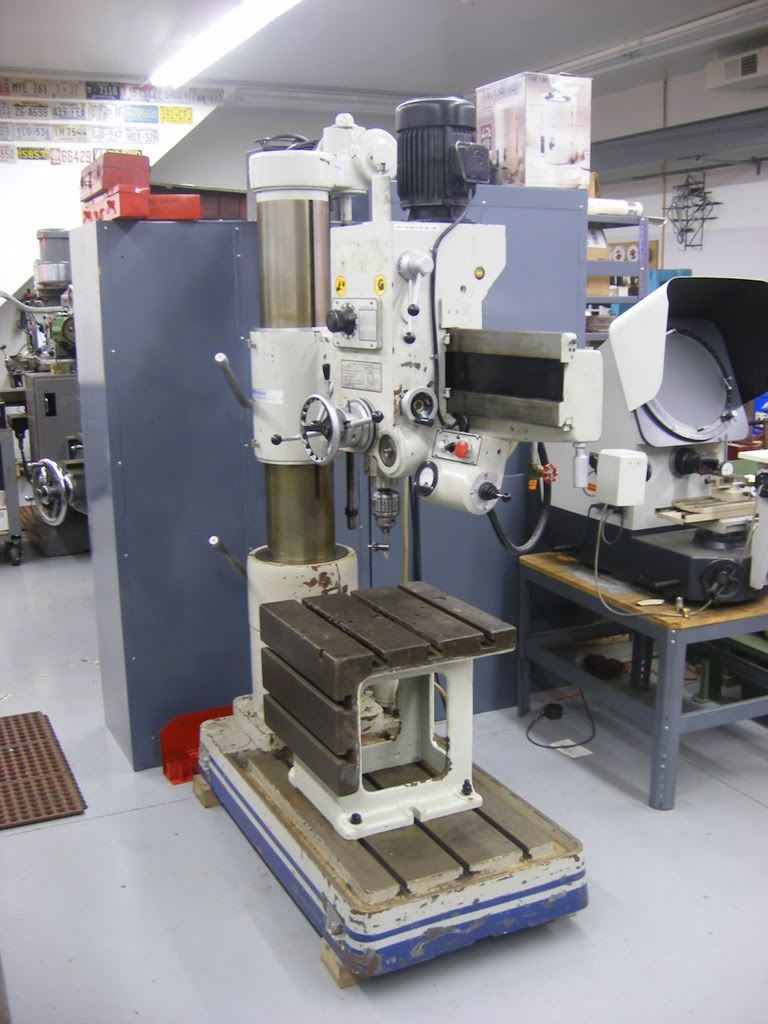
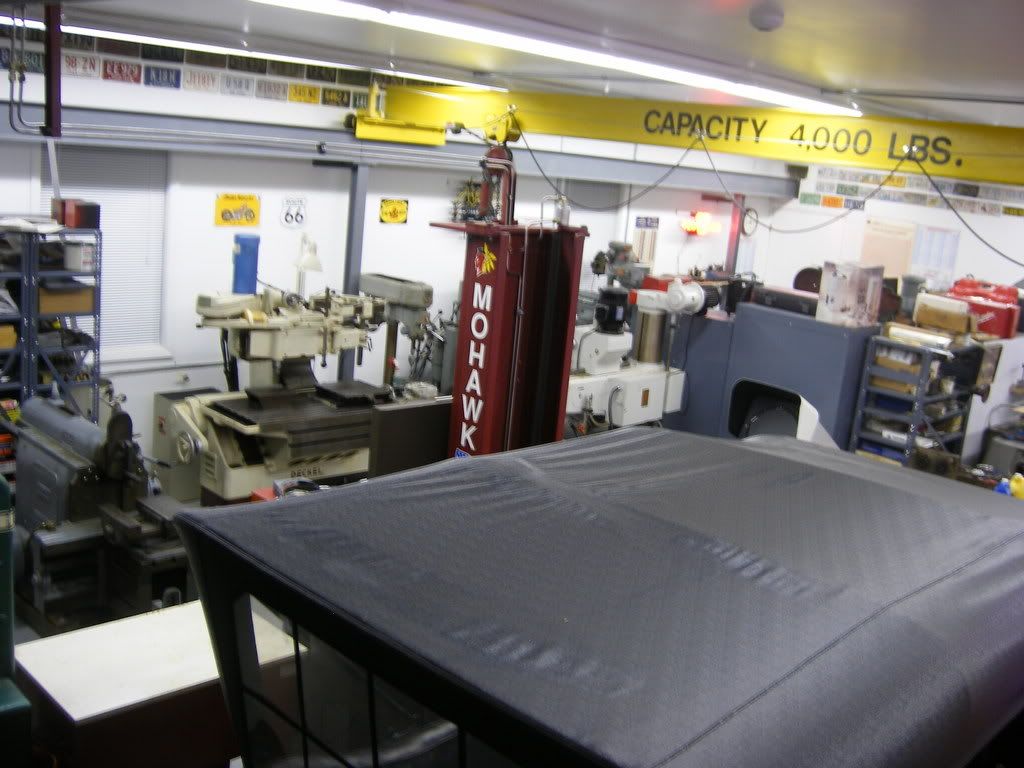
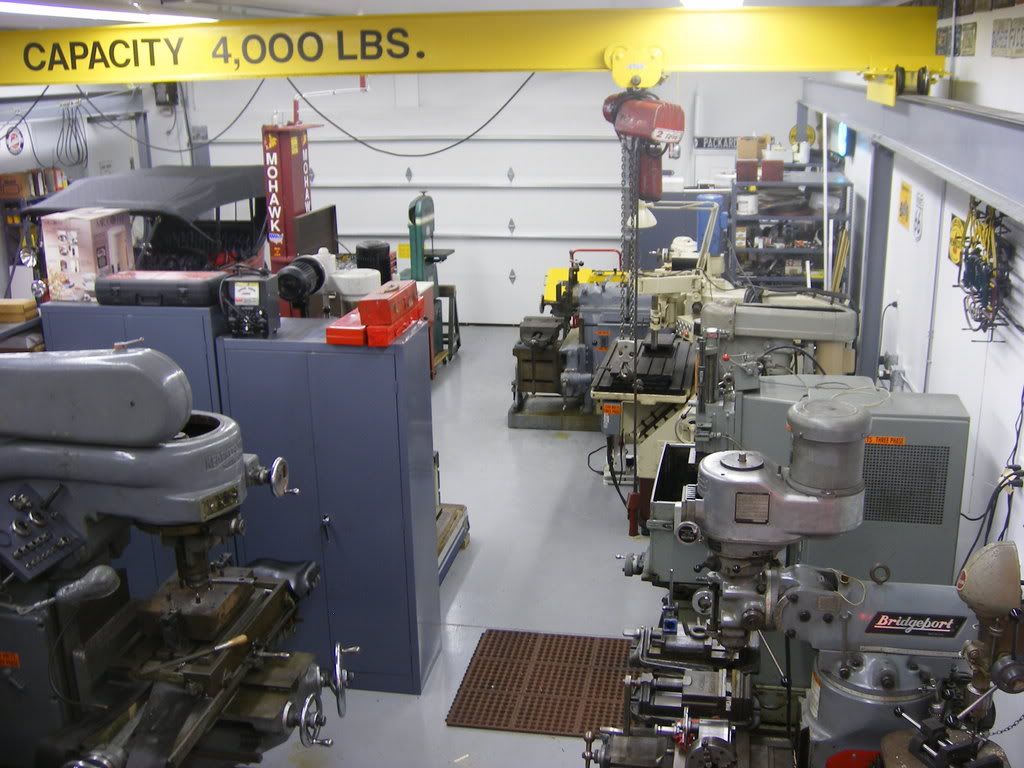
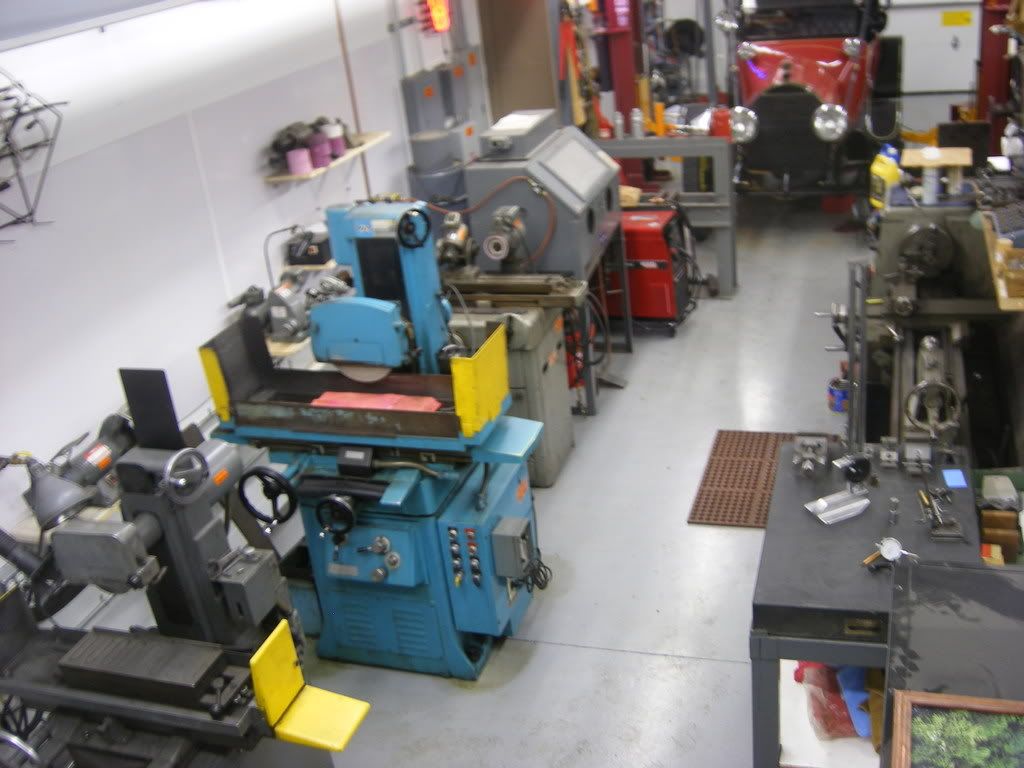
I thought I'd take the time to post some updated pictures of my attached garage workshop since I have added a number of machines to my toy shop. I had to play musical machinery to shoehorn in my latest acquisition. A 36" arm 9" column Radial Arm Drill Press that I moved in last week. It has a 3 HP spindle motor with speeds from 75 to 1800 RPM's and a number 4 morse tapered spindle. A 1HP motor to raise and lower the arm and a small coolant pump. I’m going to build a barrier wall to keep the chips from the Radial Drill from getting on my optical comparator placed behind it. http://www.garagejournal.com/forum/showthread.php?t=21640

DSCF2825.jpg


DSCF2828.jpg


Click on the picture below to see a short video clip of my Radial Drill running.


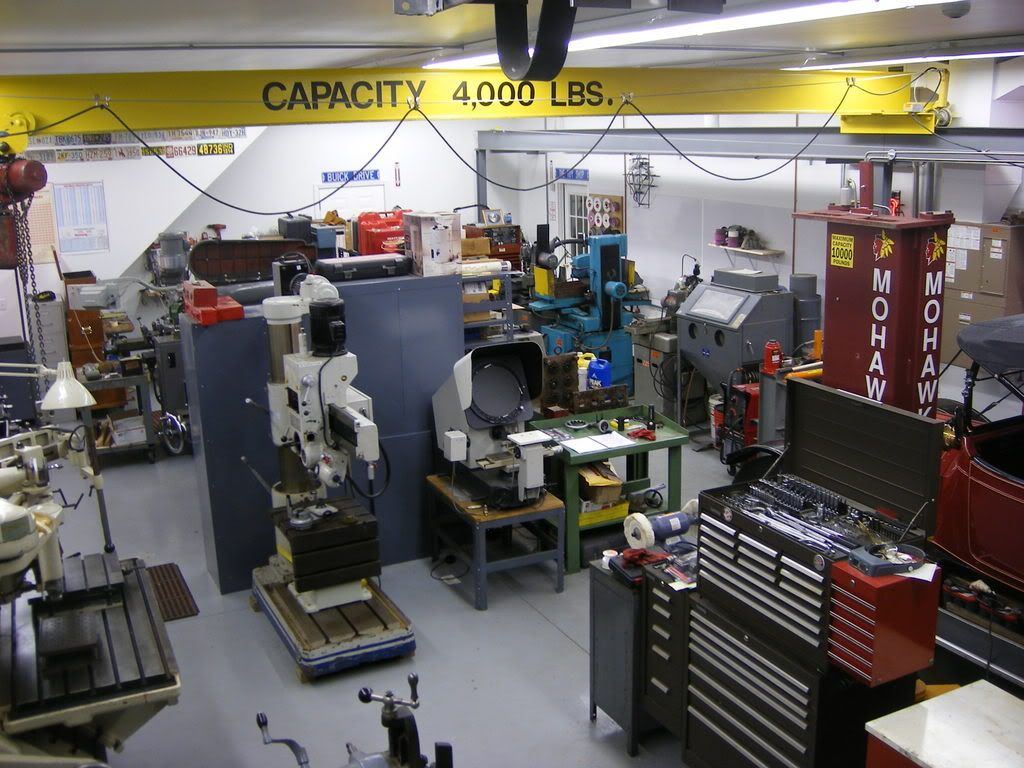
These pictures were taken from near the ceiling at the four corners of my shop. The second picture is obstructed by the top of my 1914 Cadillac that I presently have on my lift for repairs... As you can see my shop has been filling up with equipment in the past few years. At this pace I’ll have to come up with plan B to accommodate much more equipment!

DSCF2806.jpg


DSCF2809.jpg


DSCF2811.jpg


DSCF2824.jpg
 
Last edited:

bluesman2a

Well-known member
Joined
Aug 16, 2005
Messages
1,312
Location
Atlanta, Ga.
OK, I'll just go ahead and admit it. I get all giddy like a school-girl when I see this thread pop up with an update from OCG...
As always, you have some FINE toys, sir.
 

akdiesel

Well-known member
Joined
Aug 8, 2008
Messages
2,617
Location
Wasilla, AK
I bet the power grid goes into alarm when you are in your shop.
Your shop is amazing.
We have one of those radial drills at work. those things are a monster.
 

kvom

Well-known member
Joined
Feb 1, 2008
Messages
820
Location
*******, GA
Isn't 2 surface grinders overdoing it just a little? ;-)

I noticed you had 2 vises on the Bridgeport table. Is there a reason, or just storing them there?
 
OP
O

OldCarGuy

Well-known member
Joined
Nov 29, 2005
Messages
2,005
Location
Ohio
Isn't 2 surface grinders overdoing it just a little? ;-)

I noticed you had 2 vises on the Bridgeport table. Is there a reason, or just storing them there?

What me overdo it? :bounce:

Why two surface grinders? I use the smaller 8” by 18” surface for smaller grinding jobs and form grinding operations. It is a totally manual grinder that has 1/ 2” wide by 7” diameter wheel. Because of its' size, it's handier to use on smaller workpieces. Although it is setup for wet grinding, I never use coolant on this machine.

My larger grinder is fully automatic and has flood coolant that keeps the workpiece from heating up and distorting. And having a 1” wide by 12” diameter wheel, it can remove more stock faster. Has a larger capacity and can grind a 10” by 20” surface flat. While having the capability of running automatically, it frees me up to do other chores around the shop.

Here's a small video clip of the larger grinder running.


The vice under the Bridgeport spindle is clamped to the table and is normally used on that machine. The larger Kearney Trecker vice to its' left is just resting there while I have something else set up the Kearney Trecker.

Here's a small video clip of that vice in use on the Kearney Trecker Rotary Head Mill. I'm cutting a 3.00" outside diameter channel 5/8" wide and taking a depth cut of .040". To a finished depth of 3/ 4". That will take about 20 circular passes. The head takes about 30 seconds to complete its’ circular path. And about ten minutes to complete the channel. The blue hose is used to blow the chips out of the cutter’s path. The mill has an air pump as standard equipment.


tdkkart

Well-known member
Joined
Jun 17, 2006
Messages
6,887
Location
Eastern Iowa
Had to laugh when I saw the top cover of the KT mill opened up. If there's one PIA on that machine it's having to climb up top to change speeds. We've got several at work, the belt covers are never closed. If and when I ever get hold of one for home I'll seriously consider a VFD to make speed changes.
The KT is my favorite machine in our all manual shop at work. Used it the other night to spin a few .900" switch holes in a plastic electrical box cover.
The KT actually generates better swung holes than most CNC because it is a true circle rather than a "digitized" circle that most CNC programs do.

If you ever run across a KT in reasonable shape you'll probably get it at a reasonable price. Most unknowing folks pass them off as huge and ugly at first glance. And since it doesn't have "Bridgeport" cast into it they often times go cheap.
 

flesburg

Well-known member
Joined
Aug 15, 2006
Messages
105
Location
Pontiac, IL
Old Car Guy:

What sand blast cabinet do you have. My son has one and I have seen others, and they all leak so much dust and dirt that everything within 10 feet of them gets filthy dirty. Yours is installed right among machine tools that you certainly want to keep free of sand blast grit.

Just curious about your experience with sand blast cabinets.

Based on my Son's experience, I have planned to put the one I intend to buy on casters and taking it outside to use it, or to build an "out house" around it and keep it permanently away from my other tools etc.

What have you done?
 

PAToyota

Well-known member
Joined
Jan 20, 2006
Messages
4,366
Location
South Central Pennsylvania, USA
I can't speak to the make, but I think the key is the cylindrical object behind the cabinet - the dust collector. I have one on mine where the exhaust is vented through the outside wall. With the negative pressure I have never had a problem with grit outside the cabinet other than what falls off the piece when I take it out of the cabinet.
 
OP
O

OldCarGuy

Well-known member
Joined
Nov 29, 2005
Messages
2,005
Location
Ohio
Old Car Guy:

What sand blast cabinet do you have. My son has one and I have seen others, and they all leak so much dust and dirt that everything within 10 feet of them gets filthy dirty. Yours is installed right among machine tools that you certainly want to keep free of sand blast grit.

Just curious about your experience with sand blast cabinets.

Based on my Son's experience, I have planned to put the one I intend to buy on casters and taking it outside to use it, or to build an "out house" around it and keep it permanently away from my other tools etc.

What have you done?

As you can see from the pictures of my shop, I do not have any problems with abrasive dust migrating around my shop. I purchased my sandblast cabinet new 20 years ago that was made in the USA. And believe it's a Mac-Blast. Its' construction is superior than a lot of equipment that is manufactured today. The key to a good cabinet is in the rigidity of the frame and doors along with good door seals. And as PAToyoto pointed out I have an oversize dust collector that keeps a negative pressure inside the cabinet. While in operation you can actually see the parts you're blasting as the vacuum collector removes the air-born abrasive media. Makes a world of difference.

Although it would be ideal to keep all the abrasive machines in a room by themselves, I have limited space. Or maybe I have way too many toys... Though I did group the abrasive equipment in one area. Plus I have a 3" diameter pipe running along the wall so that the dust collector can be used to collect the abrasives from the other grinders.
 
Last edited:
OP
O

OldCarGuy

Well-known member
Joined
Nov 29, 2005
Messages
2,005
Location
Ohio
OldCarGuy - where are your light fixtures from? Do you feel the types with the reflector help?

My garages have over 50 eight foot Lithonia Fluouresent Fixtures that I purchased from a local electrical supply house. They have non-apertured shades. That means there are no openings in the shade and do not allow any light to go upwards toward the ceiling. And directs all the light downward. Because all my walls and ceiling are smooth drywall surface painted with industrial semi-gloss enamel, I really didn’t need the shades to direct the light downward. Old habits are hard to change, I purchased them merely because I like the look of shades!
 

Bacchus

Well-known member
Joined
May 6, 2006
Messages
49
I have to admit. I love all this, but I'm not even sure I know what half those machines do. I'm like bambi.
 
To avoid these ads, REGISTER NOW!
Top Bottom