To avoid these ads, REGISTER NOW!

Above 1200 Sq/FT The ASYLUM - Happy 40th Birthday to Me! (Est. 2005)

Wokspaces above 1200 squarefeet.

akdiesel

Well-known member
Joined
Aug 8, 2008
Messages
2,617
Location
Wasilla, AK
Now if those could be autographed... I can see a new product line... Shopnut's Ofishal ASYLUM Memorabilia!. Hey, it could pay some expenses, like buying a can of paint or something... :thumbup:

I think those that contribute money could use it as a write off also, since the place is a Government sanctioned facility...right. It has Parking Authority (parking meters), A Care Giver (The Wife), and a Tenant (hmmm). lol

shopnut

You are keeping us very intrigued and entertained. Keep up the great work.
 
To avoid these ads, REGISTER NOW!
OP
S

shopnut

Well-known member
Joined
Feb 22, 2006
Messages
4,237
Location
Florida
HOTFR8 - It must be a much drier region where you are. I have seen quite a few of those swamp coolers in places like Utah and the like, but our humidity is so high here that their efficiency drops off quite a bit. Plus, the tools rust pretty badly as is, and NOBODY like rusty tools :).

I really wish I could take advantage of the natural evaporation of water to cool this place, though. You guys are lucky to be able to do so.

Heat pumps are most prevalent here for heating and cooling. Of course, they are cooling 9 months out of the year. The one in our house maxes out at about a 20F (11C) temperature differential inside the house compared to the outside temp on the hottest days 95F (35C)

Wingnut65 - Something seems a little "fishy" with that whole money making scheme. A can of paint?... In my dreams! :)

GGB - Man, I was really hoping there was a "Seriously" at the bottom of that masterpiece! Too funny. :thumbup:

Ideas for the concessions (just to play along)...
I eat much better when Mrs. Shopnut tags along, but I'm not real picky when I'm out there alone. I'm not much for spending a lot of time in the kitchen (actually most of my injuries occur there come to think of it :headscrat) so most of my meals originate in the freezer. Breakfast is most often Jimmy Dean maple sausages on toast with a slab of cheese - takes me longer to eat it than prepare it. I don't keep many perishables out there otherwise an egg would be slapped on there as well.

I will bake a pizza and eat it for a couple lunches (cold when as leftovers as I don't even like waiting for the microwave). Dinners after a hard day are usually one of those Stouffers dinners (lasagna, spaghetti, etc.) which are actually quite good when you are half asleep after a full work day and nice warm shower. Oh yeah, for snacks, its peanuts or crackers with cheese on them.

Drinks consisted almost entirely of beer until I figured out Gatorade gets me through a hot day better with less fatigue at night. Lately with all the high altitude work, I shift to beer the minute I step off the manlift for the last time though, and will drink quite a few before hitting the sack. I may sneak a beer or two during the day if I'm working at ground level for awhile.

Well, I guess it could be a lot worse, but I let Mrs. Shopnut treat my taste buds and she does a fine job of it! :thumbup:

akdiesel - Wait a minute! You mean some of this could be a tax write-off since it is considered an institution? Dang!!!

Thanks buddy.

Vernmotor - I'M SPEECHLESS!

2045-Surprised-Kid-01.jpg

That’s just wrong on so many levels (including the horizontal :)).

You might as well save that nail for my coffin!
 
Last edited:

HOTFR8

Banned
Joined
Mar 2, 2007
Messages
24,498
Location
Castlemaine, Victoria. The Hot Rod Centre of Austr
HOTFR8 - It must be a much drier region where you are. I have seen quite a few of those swamp coolers in places like Utah and the like, but our humidity is so high here that their efficiency drops off quite a bit. Plus, the tools rust pretty badly as is, and NOBODY like rusty tools :).

I really wish I could take advantage of the natural evaporation of water to cool this place, though. You guys are lucky to be able to do so.

Heat pumps are most prevalent here for heating and cooling. Of course, they are cooling 9 months out of the year. The one in our house maxes out at about a 20F (11C) temperature differential inside the house compared to the outside temp on the hottest days 95F (35C)

I must have had :Homer: moment. I have to keep reminding myself your climate of Florida is more like that of North Queensland and not like mine here in Central Victoria. Will not be long and I will have the wood heater going in my shed.
 

Bob Heine

ALLIANCE MEMBER
Joined
Oct 24, 2009
Messages
10,708
Location
Boca Raton, Florida
I must have had :Homer: moment. I have to keep reminding myself your climate of Florida is more like that of North Queensland and not like mine here in Central Victoria. Will not be long and I will have the wood heater going in my shed.
You are also headed to your shortest days of the year. The flipping of the seasons isn't bad most of the time but I couldn't get used to Christmas eve being light out until 9:30 at night in Sydney. Coming from Florida, the warm December weather wasn't as shocking but I don't think I've ever celebrated like this (Manly Beach):
ChristmasontheBeach1990_zpsc29dd054.jpg
 

akdiesel

Well-known member
Joined
Aug 8, 2008
Messages
2,617
Location
Wasilla, AK
We were suppose to be in the end of spring and getting all the trees green for summer, BUT Mother Nature and her ways decided to change it up a bit. Good thing we are heading to Florida for a vacation.
 

Attachments

  • IMG_2498.JPG
    IMG_2498.JPG
    92.3 KB · Views: 60
OP
S

shopnut

Well-known member
Joined
Feb 22, 2006
Messages
4,237
Location
Florida
HOTFR8 - No worries. I have plenty of those "moments". Can't quite call them "senior moments" yet, so Homer is probably more appropriate.

Vernmotor - You folks are getting to know me too well on this forum.

Bob Heine - That scene reminds me of something from a Corona commercial. (And pleasant, nevertheless)

akdiesel - After a few days in our heat, you may wish you bottled up some of that weather and brought it with you.
 
OP
S

shopnut

Well-known member
Joined
Feb 22, 2006
Messages
4,237
Location
Florida
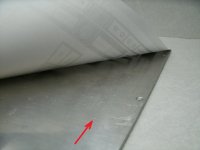
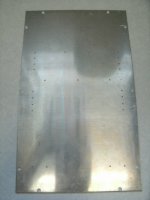
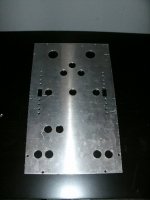
DRILLING HOLES IN THE FRONT CONTROL PANEL…

I taped the template onto the 1/8" thick aluminum and used it to mark the hole locations with a center punch.

2046-Front-Control-Panel-56.JPG 2047-Front-Control-Panel-58.JPG

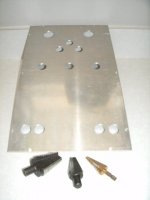
I used a small drill bit to make the first set of holes. I have found this tends to keep your locations accurate since drilling with a much larger bit initially can "wander" if you are not careful. The small pilot hole give the big bit something to follow.

2048-Front-Control-Panel-60.JPG

Then the holes were enlarged to their final size. A 1/2" twist drill got the process started and then step drills finished it. The largest hole needed to be 1-1/8".

2049-Front-Control-Panel-75.JPG

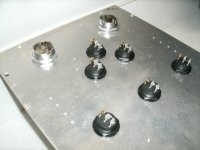
Here are a couple views with most of the switches installed. I don't remember what size the 16 LED holes need to be so the project will be on hold until I get back to the Asylum to measure one (I hate when that happens).

2050-Front-Control-Panel-62.JPG 2051-Front-Control-Panel-63.JPG

And a view from the backside.

2052-Front-Control-Panel-66.JPG
 
Last edited:

Omphaloskeptic

Well-known member
Joined
Oct 11, 2008
Messages
2,346
Location
Ultima Ratio, Wa.
The AFCP is looking good! What is your plan for labeling? Are you going to be able to take an image of the template and turn it into a stencil or possibly a vinyl 'decal'?
 

Wingnut65

Well-known member
Joined
Apr 21, 2010
Messages
3,170
Location
Tampa Bay, FL
Nice progress on the panel.

... I don't remember what size the 16 LED holes need to be so the project will be on hold until I get back to the Asylum to measure one (I hate when that happens).

It's just times like this that would make want to put the panel in the truck (or on the bike) and haul it back home to continue the progress. But then only to realize that I forgot one bag of all the parts I need to finish the project sitting on the workbench by the door. And it would probably take me an hour to find where I set it down when I did get back to the shop... But that's just me. Your system is working just fine. And all the pieces (except the LED's) are in one location. :thumbup:
 
OP
S

shopnut

Well-known member
Joined
Feb 22, 2006
Messages
4,237
Location
Florida
HOTFR8 - I seem to recall a thread on this forum dedicated to talking about members repeating themselves giving advice, sometimes in the same very thread.

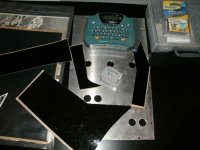
Omphaloskeptic - Thanks. There has been several times where I wanted to have someone make a custom vinyl decal from my digital image, but I have never carried through with it. This time I specifically sized the border and labels to match what I had readily available. The black outlines will be cut from scraps of decal material I have left over from some bike projects. I will then use my trusty old Brother label maker loaded with silver tape to make the text labels. I have a feeling it will come out pretty good, but won't know until I try it. Here is the stuff I will be using:

2053-Front-Control-Panel-79.JPG

Wingnut65 - Every time I'm about ready to hop in the truck (or on the bike) for a special trip because of my failing memory, I remember the ba-zillion other things I could be going by just staying where I am and saving the drive time. Sometimes having 20 projects going at once has its advantages :).
 

Omphaloskeptic

Well-known member
Joined
Oct 11, 2008
Messages
2,346
Location
Ultima Ratio, Wa.
"Omphaloskeptic - Thanks. There has been several times where I wanted to have someone make a custom vinyl decal from my digital image, but I have never carried through with it. This time I specifically sized the border and labels to match what I had readily available. The black outlines will be cut from scraps of decal material I have left over from some bike projects. I will then use my trusty old Brother label maker loaded with silver tape to make the text labels. I have a feeling it will come out pretty good, but won't know until I try it. Here is the stuff I will be using:"


Very slick Shopnut, cheap, easy, and forgiving way of doing it. I need to get out my label maker and use it; I might even get somewhat organized by doing so. lol

Don't know if this idea would work for the AFCP after you label it and before you mount the switches, but I wonder if they sell sheets of laminating plastic big enough to do the panel with one piece? I do know most home stores carry 'clear' shelving contact paper which might also do the job of keeping the labels from lifting/curling, preserve the nice shiny finish of the aluminum, and make it easy to clean off Shopnut's grimy paw prints! lol
 
OP
S

shopnut

Well-known member
Joined
Feb 22, 2006
Messages
4,237
Location
Florida
e-tek - Busy? - I'm about to go on overload! (Those who know me, know I'm just kidding). Of course it helps having the finish line within sight.

HOTFR8 - Good one! 

Omphaloskeptic - I was considering a sheet of plexiglass or something to protect those labels from the rigors of everyday use. But some clear film as you mention would be much easier to add because the holes could be simply cut out with an X-acto knife. I think either could make future additions a bit harder however :dunno:, so I'm going to give it a go without any covering. I'm pretty sure the black decal material will be fine since it is intended for number plate backgrounds on dirt bikes. After making 2 or 3 replacement text labels though, I might reconsider that decision ;).
 
OP
S

shopnut

Well-known member
Joined
Feb 22, 2006
Messages
4,237
Location
Florida
PACKING THE WIRES IN…

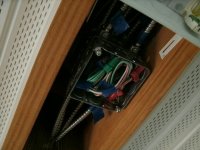
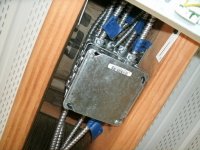
After the inspector (the bird shown earlier) flew the coop, it was back to finishing up some of the wiring. This shot shows how all the rafter wiring fits in J-box. It looks a little snug in there, but I really didn’t struggle at all to get it to fit. The wire bundles were curled around and tucked in. I added a box extension to ease the effort. With all two fluorescent and 8 LED fixtures, I figure there will be about 5 amps total flowing through the 3 circuits that will be initially hooked up and those 12 gauge wires will just laugh at that current.

2054-Center-Rafter-112.JPG 2055-Center-Rafter-114.JPG

CENTER LIGHT FIXTURE - COMPLETE…

With the connections made at the J-box, nothing was stopping me from installing the bulbs in the center fixture and giving it a try. As usual, the fluorescent bulbs took maybe 10 minutes to “burn in” and match the color and intensity of the other 6500K bulbs along the side walls, but I’m very pleased with the results.

2056-Center-Rafter-116.JPG 2057-Center-Rafter-118.JPG
 
Last edited:

Wingnut65

Well-known member
Joined
Apr 21, 2010
Messages
3,170
Location
Tampa Bay, FL
It is always better to upsize your wire now than wish you had later.

Looks nice. I'm sure having them all up will be a noticable upgrade to the illumination.
attachment.php
 
To avoid these ads, REGISTER NOW!

akdiesel

Well-known member
Joined
Aug 8, 2008
Messages
2,617
Location
Wasilla, AK
shopnut

I can make some vinyl tags in blue, red, green, yellow, etc... from 1" to 4" widths if you'd like. They can be black or white writing and just about any design or writing.

What exactly was the lighting situation prior to this design? I've got three rows of three 8' fluorescent lights in a 12' ceiling. Those lights and all the white panels will make it easy to see anything. You just might need some welding goggles.
 
OP
S

shopnut

Well-known member
Joined
Feb 22, 2006
Messages
4,237
Location
Florida
Wingnut65 - Thanks. I used 12 gauge wire everywhere just so there would be no regrets later on. Plus, I think it's easier to stock just one wire size. Wiring the receptacles and switches inside the boxes is a bit rougher on the hands however.

That center fixture really helps brighten up the middle of the shop.

akdiesel - So what do you use to make those decals, a monster label maker? Sounds kind of handy for all sorts of things.

I have rows of lights along the walls (originally planned to be within easy reach of the library ladder for easy bulb changes) and I was planning a rolling center fixture that shared the hoist track up there that would allow bulb changes standing on the front loft. But with the manlift now, I decided to go with a stationary center fixture for simplicity.

Since my fixtures aren't of the high bay variety, I think some light has trouble making it down to working level. I'm no lighting expert, so I'm just adding them until illumination seems acceptable. It pretty evenly distributed now, but I doubt I will ever complain about having too much light. I will say, light spilling out of the clerestory windows really lights up the woods at night. Sometimes I just walk outside at night to admire the view of the place from a different perspective. I'm sure the neighbors think I'm nuts! (Of course, they are right!)
 
OP
S

shopnut

Well-known member
Joined
Feb 22, 2006
Messages
4,237
Location
Florida
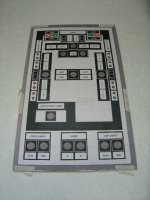
ANOTHER PEEK AT WHAT THE “AFCP” WILL LOOK LIKE…

(AFCP = Asylum Front Control Panel)

I sometimes assemble things 5 or 6 times while I’m building something new. Most of the time, it’s to check fit-up, but other times I just like to see if it is turning out the way I had envisioned it. Just a reminder as I show you this - the white panel will be painted yellow to match the rest of the doors.

2058-Front-Control-Panel-67.JPG 2059-Front-Control-Panel-69.JPG

Of course, all the switches ended up getting removed as soon as those pictures were taken so I could add the rectangular cutouts for the window rocker switches. These were a pain because I drilled 3 holes and then cleaned out the rest of the material with files. Luckily it’s aluminum! At the far end, you can see the other similar switch installed in its cutout.

2060-Front-Control-Panel-78.JPG

With sample LEDs in hand, I was finally able to enlarge those pilot holes to the proper size. Shown below is the LED with the matching panel bezel that allows them to snap into a hole.

2061-Front-Control-Panel-86.JPG

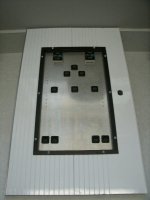
And here is the panel with all the holes added.

2062-Front-Control-Panel-82.JPG

At least, I think all the holes are drilled. It’s starting to look like Swiss cheese!
 
Last edited:

akdiesel

Well-known member
Joined
Aug 8, 2008
Messages
2,617
Location
Wasilla, AK
shopnut

The Swiss make great things. The panel looks great. I've got some of the 5mm led bulbs and they can be bright straight on. What color are they?
 
OP
S

shopnut

Well-known member
Joined
Feb 22, 2006
Messages
4,237
Location
Florida
akdiesel - Thanks. Half of those LEDs are red and half green. And yes, they are bright. They are 24V units which I'm powering at about 12V, and they are still a bit too bright. I need to be sure they are down below eye level when installed on the wall. Or maybe go down even more on the voltage.
 

akdiesel

Well-known member
Joined
Aug 8, 2008
Messages
2,617
Location
Wasilla, AK
shopnut

It was good to actuallybe admitted to the Asylum. Thanks for showing us around.
As good as you have described and taken pictures, the pictures do not do it justice. There is defiantly a place for everything and JUST about everything in its place due to the work in progress.
The location and the view also allow for a perfect place to sit back after working and drink a few.
If I have any ideas for the gas pump I will be sure to let you know but I think the idea you had for it is perfect.
 

Omphaloskeptic

Well-known member
Joined
Oct 11, 2008
Messages
2,346
Location
Ultima Ratio, Wa.
Shopnut, the AFCP is going to look very professional; will visitors then not believe that you made it? lol

Your mention of the LEDs being too bright made me think of the series vs. parallel solution for incandescent bulbs, but realizing that I do not suffer the same condition as the LEDs (that is, I know I'm not too bright! - lol), I googled the question and came up with this web page. Seems to be useful info for your application...

http://www.mikesflightdeck.com/led_dimmer/leds_and_dimming.html

I hope it helps you on the AFCP and don't get your wires crossed; we don't want the owner-inmate of the Asylum to undergo inadvertent 'ELECTRO-SHOCK THERAPY'! :shocking:
 

IGO2XS

Well-known member
Joined
Apr 24, 2012
Messages
1,415
Location
Sarasota, FL
akdiesel - Thanks. Half of those LEDs are red and half green. And yes, they are bright. They are 24V units which I'm powering at about 12V, and they are still a bit too bright. I need to be sure they are down below eye level when installed on the wall. Or maybe go down even more on the voltage.

The panel looks awesome. I purchased similar LED lights in the red and green. They are like laser beams they are so bright. You are so detailed it is amazing.
 
OP
S

shopnut

Well-known member
Joined
Feb 22, 2006
Messages
4,237
Location
Florida
akdiesel - I’m so glad you and the boys found some time in your busy vacation schedule to stop by. I had a hunch we would get along great. Thanks for the kind words. I had a million questions about Alaska because it’s so different from where I live, but I guess I can save them for the next time we meet - maybe in Wasilla? :dunno: :)

I didn't even get a chance to ask you about your first Harbor Freight store experience. Obviously it wasn't terrible if you bought something.

As far as the gas pump goes, I sort of liked the grill ideal one of the boys had. I could see that being a great way to hide it when not being used.

Omphaloskeptic - Thanks for the primer on dimming the LEDs. That Mike guy is kind of funny too. Although my LEDs are on 16 different circuits, each individually controlled by a reed switch on the air cylinder bodies, perhaps his method will still work for me. I will need to study it a bit more. What do you think that component 7805 is in his diagram - some kind of voltage regulator? The 2N3906 looks like a transistor if I remember my electronic symbols.

IGO2XS - Thanks man. The next week or two should afford a little time to wrap up the AFCP minus all the wiring. If I come up with a simple way to dim those LEDs, I will share. I was even considering applying a dab of black paint to the tip of each LED, but the electronic route might be a little more appropriate.
 

Omphaloskeptic

Well-known member
Joined
Oct 11, 2008
Messages
2,346
Location
Ultima Ratio, Wa.
Here's some references for your (our) edification.

http://en.wikipedia.org/wiki/78xx

http://www.fairchildsemi.com/ds/LM/LM7805.pdf

http://9circuits.com/blog/2011/09/19/electronics-101-basic-circuit-design/

In scanning the above references, it seems you should examine your LEDs and go online to find their datasheet to make sure your choice is correct for your application (voltage, current, resistance) of the circuit(s). You don't want to stick a bargain bin LED into a circuit only to watch it turn into a blob of melted plastic. The above references are by no means the answer to the AFCP prayers... :lol_hitti
 
OP
S

shopnut

Well-known member
Joined
Feb 22, 2006
Messages
4,237
Location
Florida
WORK CONTINUES ON THE CENTER RAFTER…

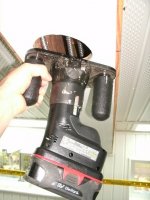
The bottom vinyl skin was installed earlier so the next step was to cut out the holes for the 4” LED can lights. I used my cordless router for this with a quarter round bit installed. I forgot to turn off the front fans when cutting the first one and vinyl shreds were blown everywhere when they floated down into the air stream. :sad: (Well, at least the place was already a total mess so it didn't make it look much worse :eek:)
2063-Center-Rafter-120.JPG 2064-Center-Rafter-121.JPG

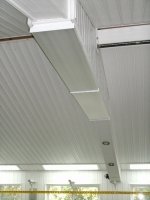
A shot from below.

2065-Center-Rafter-126.JPG

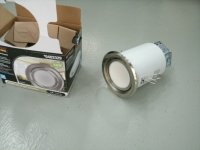
Here are the lights that I chose. There will be 6 total installed in the ceiling, 4 in the center rafter and 2 in the rear rafter.

2066-Center-Rafter-127.JPG

Since all connections were previously made in the junction box, there was nothing stopping me from powering them up as a test before popping them in their respective holes.

2067-Center-Rafter-129.JPG

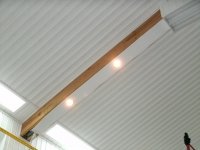
And with the lights in their final places.

2068-Center-Rafter-130.JPG
 
Last edited:
OP
S

shopnut

Well-known member
Joined
Feb 22, 2006
Messages
4,237
Location
Florida
Here's some references for your (our) edification.

http://en.wikipedia.org/wiki/78xx

http://www.fairchildsemi.com/ds/LM/LM7805.pdf

http://9circuits.com/blog/2011/09/19/electronics-101-basic-circuit-design/

In scanning the above references, it seems you should examine your LEDs and go online to find their datasheet to make sure your choice is correct for your application (voltage, current, resistance) of the circuit(s). You don't want to stick a bargain bin LED into a circuit only to watch it turn into a blob of melted plastic. The above references are by no means the answer to the AFCP prayers... :lol_hitti

Good info O!

The bad news is I have some of those bargain bin LEDs :sad:, and I'll probably be lucky to find any kind of data sheet on them. They appear to have a small resistor buried under the heat shrink so maybe cutting up one of my spares is worth the exercise. From some simple calcs on one of those websites, I'm guessing I will find around a 1K ohm resistor in there.

On a brighter note, I've had them on for 3 or 4 days straight before and have not noticed them getting hot, so maybe all is okay from a heat standpoint.

Their intensity, on the other hand, is amazingly high and they actually light up place all by themselves at night, at least straight out from the existing panel. I have other lights for that so I need to tune them down a bit to avoid the need to have visitors sign legal waivers before coming in the place :) (Don't want to get sued for any fried retinas, you know)

Being the packrat that I am, I have a whole box of 110VAC to DC wall warts in various voltages so maybe I will try some in the 5 to 12V range :dunno:
 

Wingnut65

Well-known member
Joined
Apr 21, 2010
Messages
3,170
Location
Tampa Bay, FL
Nice work on the downlights. :thumbup:. And the LED's could be your night light for the whole shop!

Instead of dimming, what about some nail polish or piece of window tinting formed over them to tint them down some? Not as fun as Mike's Flight Deck info from O, but may be quicker to get moving onto other projects...
 

Omphaloskeptic

Well-known member
Joined
Oct 11, 2008
Messages
2,346
Location
Ultima Ratio, Wa.
Have fun 'bread-boarding' that LED circuit! One site I quickly scanned suggested the use of a variable potentiometer for a test set-up. Plug it into the test set-up, adjust the pot to get the desired brightness of the LED, power down the circuit, then use a VOM to read the resistance of the pot at that setting. You can then be sure of the values of the resistors you need to acquire. As long as all the voltage sources are the same, the same resistor should produce an equal brightness from each LED.
 

akdiesel

Well-known member
Joined
Aug 8, 2008
Messages
2,617
Location
Wasilla, AK
shopnut

The lights look good. Have been able to use them alone to see how well the pattern is at ground level?
My HF experience was good but I thought the stores would be like a Wallmart for tools and such. I was still able to get the tubing roller I wanted. So I saved some money not using them to ship for the their cost of approx $280, ouch. Buuuttt we found something and it is an impulse buy. A 35' class c diesel RV. I Ned to better plan for these vacations.
 
OP
S

shopnut

Well-known member
Joined
Feb 22, 2006
Messages
4,237
Location
Florida
Wingnut65 - Thanks. Yeah, I think 20 of these LEDs strategically placed around the shop would do a pretty good job of keeping me from stumbling on things during a quick pass through at night. Good idea to tone those LEDs down too - there's certainly a long list of things I should be working on.

Omphaloskeptic - Good trick with the pot. Sounds like it would work just fine. Thanks for your continuing effort to educate me - it's a tough job I'm sure :)

akdiesel - What? You bought a motorhome while in FL? :wtf: Wow - that was quite an impulse buy. Congrats! Are you driving it home? I do remember you saying you had a 6 weeks vacation so you saved some to make the trek.
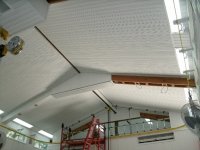
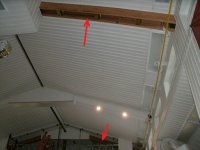
BTW, the lights flood the area nicely below the beam. And as you predicted, just getting some light bouncing around in there on those white walls really brightens up the place. Pictures to come shortly.
 
OP
S

shopnut

Well-known member
Joined
Feb 22, 2006
Messages
4,237
Location
Florida
VINYL ON THE SIDES OF THE RAFTER…

Now it was time to skin the sides of the rafter and for this I used some fascia material and starter strips readily available at Lowe’s. On the left are the pieces pulled apart so you can see their raw form. On the right, they are pressed together the way they were installed. This method allowed me to adjust the width for full coverage along the 9 foot length.

2069-Center-Rafter-159.JPG

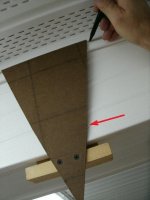
I predrilled the bottom holes on 12” centers before taking the vinyl up there, but the top holes were drilled after installing. I wanted the screws directly plumb above the bottom ones so I made this little template to help out. The V-shape allowed it to work on either side of the beam. I will be doing 10 sides total, which equals to about 90 holes, so it was easy to justify the 20 minutes it took to make it.

2070-Center-Rafter-161.JPG

Here it is with one half of the rafter covered up.

2071-Center-Rafter-134.JPG

And all done.

2072-Center-Rafter-164.JPG 2073-Center-Rafter-167.JPG

Well, it's not quite all done. I still have two more rafters to go. :sad:

2074-Center-Rafter-177.JPG
 
Last edited:

Wingnut65

Well-known member
Joined
Apr 21, 2010
Messages
3,170
Location
Tampa Bay, FL
akdiesel, Glad you had a chance to visit our fine state and even meet our own Shopnut! :thumbup: I passed through your town last year on the way to Talkeetna, but the bus didn't want to slow down for me to get in touch. Neither did the train ride back...

I predrilled the bottom holes on 12” centers before taking the vinyl up there, but the top holes were drilled after installing. I wanted the screws directly plumb above the bottom ones so I made this little template to help out.

Only you would know this detail (and the whole GJ family)... You are just too much! Still keeping up that high quality work. :thumbup:
 

akdiesel

Well-known member
Joined
Aug 8, 2008
Messages
2,617
Location
Wasilla, AK
shopnut

Three of us are driving it back home. My wife, youngest son, and me. Your taxes here are very high. 6% sales tax. We sent the paperwork home to get tags and titles for the rv to save a few thousand.
Good to hear the lighting worked as planned. Are you going to install the Insteon smart link system? It could also be a good security use when not there.

Wingnut65

Thanks. Even though the temp and humidity is high I still like coming down here.
If any of you are up in Alaska let me know. We can get together.
 
To avoid these ads, REGISTER NOW!
Top Bottom