To avoid these ads, REGISTER NOW!

west of Philly - barn saving

OP
R

rieferman

Well-known member
Joined
May 18, 2009
Messages
2,586
Location
Collegeville PA (30 min west of Philly)
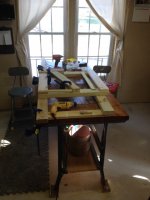
Last weekend, I did a bunch of batch building, and thought an update was in order.

I'm pretty happy with the chair design that I've come up with. I like to build things efficiently in general (I'm a process improvement type of guy) and also enjoy minimizing waste in a project.

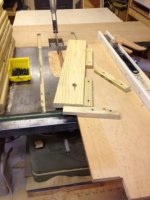
My chairs are all built from pressure treated 2x4’s (except the arm rests which use deck boards). Much of the chair employs a a clever design that I came up with where I slice ¾” off the width of a 2x4, and save that slice for the seat slats (so the seat slats are each 1.5” x ¾”). The remainder of the 2x4 is then flipped on edge and ripped in half to create 2 parts that are each ¾” thick for the back slats (so the back slats are 2.75 x ¾”).

Doing it this way makes the chair design very cost effective (I spent about $300 to create 6 chairs and 3 tables), and also efficient… For one, using a 2x4 to create 3 pieces is a material efficiency… Secondly, avoiding tasks that require the band saw (or jig saw) is an important efficiency since band sawing is much slower, more painstaking task, than table sawing. So, since I get two back slats out of each trimmed 2x4, I can make the back slat profile cuts one time, and THEN split it in half. This gives me 2 identical back slats with only one time consuming band saw event.

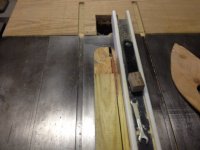
Another efficiency I applied this time around is that I built a “taper jig” for the table saw. As an example, the arm rests and the seat support both have long shallow angles – too long and shallow to simply use the miter guage on the table saw, or to cut on the miter saw. Previously, I would need to cut those by hand either on the band saw, with a jig saw, or with a circular saw (again, these are time consuming and difficult to get perfectly consistent). The taper jig allows me to set stops on a board that I send past the table saw blade so that it carries my piece through at a consistent angle every time. I was able to cut all tapers very quickly and accurately this way.

When it comes to assembly, I have quick little jigs that help me set pilot holes the same way each time, or spacers to be consistent on how I setup various pieces.

And, finally, like Henry Ford, it’s much more efficient to build components in a focused and specialized way. The sides of the chairs are the key component in this case. I was able to build each side piece in about 15 minutes apiece on average.

When these types of efficiencies are multiplied over 6 chairs, it really adds up.

Now, time to put them all together.


(PS – don’t be too impressed though… As you can see in the last picture, I got one fully assembled this weekend before noticing a flaw in my math in shortening the lifeguard chair plans to this height… my arm rests are 3.75” too tall. How on earth I didn't notice sooner, I'll never know. Anyways, as a result, I needed to take that chair apart a few steps, shorten the arm rest supports, and then manually adjust all my other batch-built components too… but you can get an idea of what they’ll look like from this pic. Damn, other than this miss, the build was flawless. Salvageable mistake, but a pain in the ****. I'll post pics of all 6, with correct height arm rests, after this weekend)


edit: I now have plans written for the lower chairs in addition to the lifeguard chairs. If interested, PM me with your email address. The plans are pretty detailed but assume some basic woodworking knowledge. Build at your own risk.
 

Attachments
  • 2x4 trim down step 1.jpg
    2x4 trim down step 1.jpg
    96.6 KB · Views: 101
  • chair with too high arm rests.jpg
    chair with too high arm rests.jpg
    11.4 KB · Views: 130
  • batch build.jpg
    batch build.jpg
    141.2 KB · Views: 95
  • jigs 3.jpg
    jigs 3.jpg
    113.4 KB · Views: 95
  • taper jig.jpg
    taper jig.jpg
    117.6 KB · Views: 95
  • 2x4 trim down step 3.jpg
    2x4 trim down step 3.jpg
    103.4 KB · Views: 91
  • 2x4 trim down step 2.jpg
    2x4 trim down step 2.jpg
    114 KB · Views: 94
Last edited:
To avoid these ads, REGISTER NOW!
OP
R

rieferman

Well-known member
Joined
May 18, 2009
Messages
2,586
Location
Collegeville PA (30 min west of Philly)
Thanks guys! It's really cool to be to this point where each project brings a big advancement. During the early days of saving the barn and the farm house, the list was so long that it often felt like we were in quicksand.

---

Didn't get to work on the chairs at all this past week or weekend. Instead, we were busy prepping for the pool install and hard scaping project. My excavator called me early last week to say that weather would allow him to come over and do the site prep today, so I had to shift gears and make sure the yard was ready for him. He's out there right now. Exciting stuff!
 
OP
R

rieferman

Well-known member
Joined
May 18, 2009
Messages
2,586
Location
Collegeville PA (30 min west of Philly)
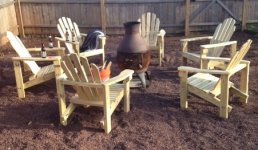
While the landscaping is not complete yet (pool goes in next week, followed by patio etc.) I got a chance to crank out the assembly of the rest of the chairs, and couldn't resist giving them a brief test run around a camp fire. In the end, I became really fast and efficient.

This weekend I'll build the tables that will accompany the chairs. My wife will be in charge of sanding and staining as I have many other tasks left on my list still. It's a good division of labor.

The chairs are very comfortable, and cost effective. Pleased with the results.
 

Attachments

  • lots of chairs.jpg
    lots of chairs.jpg
    82.2 KB · Views: 175
OP
R

rieferman

Well-known member
Joined
May 18, 2009
Messages
2,586
Location
Collegeville PA (30 min west of Philly)
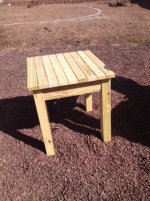
And, I finished the side tables too this weekend. 3 tables so that each pair of chairs can share one for drinks/snacks etc.

Very simple design once again. Used the same idea as with the chairs where 1st cut off the 2x4 created a table top slat, and the next cut created 2 of the skirt boards for the table. The legs are just 1.5 x 1.5's cut from another 2x4. Skirt/legs assembled with pocket screws, and the top slats are just face screwed. Should last many years.

About $10 and 1 hour spent per table.
 

Attachments

  • side tables.jpg
    side tables.jpg
    64.9 KB · Views: 91

vonhef

Well-known member
Joined
Apr 4, 2011
Messages
454
Location
Southern, Ok
I can't believe that I have missed your build thread after all these years. You do good work, thanks for posting!
 
OP
R

rieferman

Well-known member
Joined
May 18, 2009
Messages
2,586
Location
Collegeville PA (30 min west of Philly)
Thanks Vonhef!!!

----

Exciting week at the rieferman household!


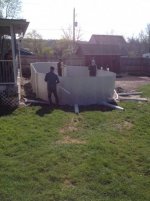
The pool was installed!

:rocker:

I'll post an in-process photo now, and save the final photo until the landscaping is in place. The installer did a very nice job and was even more precise than I'd hoped in terms of ensuring everything went perfectly etc. And, he didn't mind taking time to tell me about how the pool components went together etc.

Also, I had recently added a 2nd door to our screened in porch so that the flow for accessing the pool by gaggles of kids and parents would make more sense... which meant I had to build some steps. I had never done deck stairs before, so I was sort of procrastinating while I figured it out. But, this weekend was the time to do it.

Now, keep in mind 2 things... One, the long term plan is to build a deck that goes right up to the pool - so having a set of 50 year stairs wasn't the plan. Then again, it might be 4-5 years before we do the deck, so I wanted something solid that would last double that. I think I accomplished that.

I was lucky that pre-built stringers from Lowes would fit my application. I wasn't worried about cutting my own, but needed any time savers I could get due to busy schedule and kids' activities etc.

First, I had to extend the rim joist so that the top of the stairs had a place to terminate. So, I sistered some PT lumber to 3 consective joists, and extending down below the rim joist. I then attached the new, extended rim joist to those extended joists.

Next, I found it easiest to attach the top of the stringers to the stair/joist hanger, square them up, and affix one tread. This allowed me to figure out exactly where to dig out, and how deep to dig, for a landing support. The joist hanger allowed enough "hinge" movement for me to keep the stairs out of my way while digging, propped by some blocks. I dug deep enough to enable a PT 6x6 to rest on a bed of gravel and be leveled. Once it was fine tuned, stakes through the 6x6 to keep it stable, and then surrounded on all sides by more gravel - I wanted to ensure the 6x6 will drain well.

Then I was able to lower the stairs down and attach them to the 6x6. I cut a PT 2x4 to fit exactly between the stringers. This was face screwed to the 6x6, and then the stringers were fastened to the 2x4. Very solid.

With the stringers solidly in place, I dug a hole for the railing post. I filled the bottom of the hole with gravel, attached the post to the stringers with galvanized carriage bolts, ensured plumb, and backfilled the hole with gravel, compacted. Very solid.

Using a piece of string, I determined the railing angles, cut the top of the post, cut the 2x4 railing in the shop, and affixed. Very solid.

Lastly, I attached all treads. The pre-made treads at Lowes were terrible, so I had them cut a 2x12 to 36" pieces. All of them measured more than 36", so I trimmed all in the shop, notched one of the treads to fit around the railing post, and used spacers to position each tread consistently. 3 screws on each side made for a strong connection.

Tonight, once the electrician is finished with his trenching work to feed power to the pool, I will install a small retaining wall next to this area to separate the stepped up area by the stairs from the rest of the pool area. Then the excavator will return to install landscape fabric and red tibble gravel throughout the entire area. Lastly, I have stepping stones to allow shoeless kids and parents to make their way from the porch to the pool steps without hurting their feet on the gravel.
 

Attachments

  • stairs install.jpg
    stairs install.jpg
    55.6 KB · Views: 182
  • pool install.jpg
    pool install.jpg
    45.2 KB · Views: 210
Last edited:
OP
R

rieferman

Well-known member
Joined
May 18, 2009
Messages
2,586
Location
Collegeville PA (30 min west of Philly)
My folks were in town this weekend, so I took the opportunity of having my dad's strength and know-how on hand to get the retaining wall in place. I had already pre-cut the 6x6's to the proper length so it was just the right amount of work to do on a lazy day like we had planned.

First, we used a long 2x4 with a level on top of it to ensure level ground where the 6x6's would be set. Then, we prepared a base of gravel and ensured that was level as well. Next, we carefully measured off of the house to establish a perfectly parallel line. We set the first row of 6x6's and drove spikes through them into the ground below. Then, liquid nail was applied before setting the 2nd row, which was additionally spike connected to the first row.

And, that was that. Dad and I enjoyed a few cold beers afterwards while staring at our accomplishment.

The entire pool area will now be covered with landscape frabic and 1/4" red stone (locally, called "tibble"). That will be the finished surface, at least for the foreseeable future. Perhaps someday patio pavers or stamped concrete will be added, but not anytime soon. (edit: the small retaining wall will have gravel behind it as part of this process... plus gravel underneath... will drain nicely, and is not holding back much pressure)
 
Last edited:
OP
R

rieferman

Well-known member
Joined
May 18, 2009
Messages
2,586
Location
Collegeville PA (30 min west of Philly)
I have been working my **** off lately.

The pool (and heater, stairs, solar cover with reel) is in, the gravel patio is in, stepping stones are installed, the chairs are all where they belong, the sidewalk is finished, dirt work has been raked and seeded.

Pics of all that coming in a few weeks when the grass comes in.

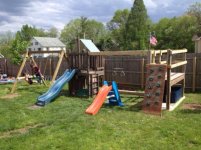
In the meantime, the kids had outgrown their existing swingset and jungle gym. It was a hodge podge of things I'd cobbled together over time, and was just not standing up to the fact that the kids are all over 50-60 pounds each now.

The new jungle gym is again a hodge podge (typical of my Yankee frugal ways) but enhanced with a very sturdy design and much cleaner look and feel. I counter sunk all nut connections and trimmed off excess length of any carriage bolts. Everything is through bolted with lock and flat washers.

I was able to keep their original tower, but needed to build an entirely new swing set. Even with 4 kids (my two plus two of the neighbor's) going full steam there was no deflection or sway with this new design. Their old rickety monkey bars were replaced with a twice-as-long version that will hold up for a long time - I was able to re-use the rungs from that set, as well as ladder rungs from that set to achieve the run of monkey barring fun.

The new tower is recycled mostly... I took parts from the previous swing set, and a platform that I had already laying around (we used to put stools on top of it next to our smaller Intex pool last year). The rock climbing entry was from the old set and still in good shape.

Underneath the old tower is a sandbox that I grabbed from the curb awhile back. Underneath the new tower is fabric, gravel, and storage for yard toys (baseballs, soccer balls etc.).

Between the two towers, I used an excess piece of 6x6 to create a balance beam.

In a couple of weeks when the new lumber dries out, I'll stain the entire thing a common color to complete the transformation.
 

Attachments

  • new jungle gym.jpg
    new jungle gym.jpg
    57.7 KB · Views: 215
OP
R

rieferman

Well-known member
Joined
May 18, 2009
Messages
2,586
Location
Collegeville PA (30 min west of Philly)
Ahh, all the hard work is starting to pay off with summer relaxation...

Oh wait.. that's right... my neighbor's tree fell into our yard and took out a section of fence... And since this particular neighbor is a total deadbeat, I lost an entire weekend of my life resolving the situation all on my own.

On the bright side, I now have some experience using a chainsaw. Between my buddy's tutorial, a bunch of online research and video watching, it went well.
 
OP
R

rieferman

Well-known member
Joined
May 18, 2009
Messages
2,586
Location
Collegeville PA (30 min west of Philly)
Happy Father's Day GJ!

After all the recent hard work, we finally hit the point where I can slow down a bit and enjoy the fruits of our labor, and just in time for family fun on Father's Day weekend.

Of course, yesterday, I had to get my shop back in order after months of basically allowing it to turn into a huge disorganized closet. I don't consider that work though, it was therapeutic to get things back in order.

While I was at it... ha ha... I finally decided to solve a lumber storage issue that I have had for a long time now. Basically, where we keep the kids' bikes, helmets, and basketballs is also where I need to store lumber. Also, last year I had an enormous black walnut taken down as well as a large cherry tree. Both trees had straight sections that I was able to have milled into rough lumber locally. That batch of lumber has been air drying for a full year behind the barn, and it was time to bring it inside so that it will be ready for fall projects that I have planned.

So, necessity as the mother of invention required a vertical lumber storage solution. I'd prefer horizontal storage to avoid warping issues, but properly supported boards that are standing directly upright will work fine, and there are plenty of examples of professional woodworkers using this method of lumber storage.

A few shop made L-brackets screwed into studs and some safety bars and ropes gives me plenty of storage while still keeping floor space available for bikes etc.

As usual, it ain't pretty, but it's effective and cost me $0.
 

Attachments

  • lumber rack.jpg
    lumber rack.jpg
    105.3 KB · Views: 119
  • lumber rack 2.jpg
    lumber rack 2.jpg
    119.1 KB · Views: 117
Last edited:
OP
R

rieferman

Well-known member
Joined
May 18, 2009
Messages
2,586
Location
Collegeville PA (30 min west of Philly)
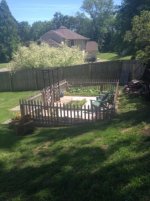
And, the grass finally came in enough to take the final pics of the yard project. For good measure, the wife's new garden is also included.
 

Attachments

  • garden complete.jpg
    garden complete.jpg
    47.8 KB · Views: 221
  • yard and pool complete.jpg
    yard and pool complete.jpg
    133 KB · Views: 242
OP
R

rieferman

Well-known member
Joined
May 18, 2009
Messages
2,586
Location
Collegeville PA (30 min west of Philly)
Last weekend, I could only dedicate a little bit of time to work at the house. It has been a lot of years of not really ever taking a break, so it's really nice to be at a place where it doesn't stress me out to slow down a bit. It's also cool that the portion of my project list now is often pretty fun work.

So, this weekend's relatively fun/easy work was to start staining all the new chairs that I built and to re-organize the shed.

The chair staining was tedious, and I handed the duties over to the wife after I helped her with the first coat. Between both of our efforts, we finished the lifeguard chairs, but still have the regular adirondacks left to do. In the future, I am considering either learning about spray finishing, or dip finishing. In the meantime, get it done.

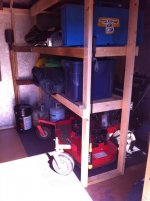
The shed project was a long time coming. My commercial grade walk behind mower takes up valuable foot print space in the shed, but there's plenty of space above the mower deck to use for storage. So I created a shelving system to take advantage of that. While I was at it, the old ramp I had built to get the mower into the shed was on its last legs, so I rebuilt new, better ramps. And when I was all done, I cleaned up and organized everything. Yes, I did drill holes in the handled of my tools, don't judge me. Ha ha. edit: The shed project came to $0 due to materials on hand.
 

Attachments

  • shed re-org 3.jpg
    shed re-org 3.jpg
    136.7 KB · Views: 125
  • shed re-org.jpg
    shed re-org.jpg
    140.4 KB · Views: 123
Last edited:

rixtrix1

Well-known member
Joined
Aug 25, 2013
Messages
3,010
Location
Chandler, AZ (from west NE)
Came back to your thread again after seeing a reference in "The Swedish Barn" thread from Kevin54. I skimmed over the first few pages to re-familiarize the reno and a question came to mind: Did you have any problems with the roof after bringing the building back closer to square?

The 24x24 detached garage in our first home was poorly done. Besides not sitting squarely on the slab(*&* &$$ @#$%#@), the ridge was severely bowed down, even though it was only a 3/12 pitch. The sill plates were square, so I just pulled the walls together much like you did using come-alongs and anchored the tops of the walls with 2x4's every 24" to match the rafters. There were only 2 2x4's holding the tops of the wall together! The ridge beam was only a 2x6-24 and pulling the walls into square didn't push the ridge beam up very much. Not knowing what I do now, 35 years later, I was afraid the 30 year old shingles would just break apart, or leak if I tried to push the beam up in the middle.I really couldn't afford to replace anything else, so I left it alone and we moved to Arizona 2 years later. You've done such a great job with your barn, and the GJ is such a great source of information, I'm ready to take on almost anything. Thanks and keep on sharing.
 
Last edited:
sean Buick 76

Well-known member
Joined
May 7, 2013
Messages
3,221
Location
Edmonton Alberta
Really good job on all the projects! It is great spending some family time with your father.... I recently spent a day with my dad working on projects and it was a lot of fun!
 
OP
R

rieferman

Well-known member
Joined
May 18, 2009
Messages
2,586
Location
Collegeville PA (30 min west of Philly)
Came back to your thread again after seeing a reference in "The Swedish Barn" thread from Kevin54. I skimmed over the first few pages to re-familiarize the reno and a question came to mind: Did you have any problems with the roof after bringing the building back closer to square?

NICE! Visitors! Thanks for stopping in!

Moving a building can cause all sorts of ripple effects. In my case, the barn was so loose and the goal was structural strength (as opposed to plumb/level perfection) that I stopped pulling on the building when she started really screaming... Combined with the huge beams that were holding the tops of the walls together, I was lucky that the ripple effect didn't bother the roof.

If I had to do it all again knowing what I know now, I probably would have been tempted to aim for perfection, because it would have been well within the realm of possibility.... but it would have caused a lot of additional expense and work. The building was standing for 110 years without any help at all, so the amount of assistance I provided should allow the "system" to stay up for quite awhile longer.

I use the term "system" because a Frankenstructure like mine (and really any building) is a series of interrelated components that work together. Think of building a box frame out of some 2x4's. Without the fasteners, it won't work. Even with the fasteners a small child could rack the box. Add plywood sheathing to the box, and you could put hundreds of pounds on it without issue. For the box to fail, a lot within the system would need to go wrong.

My barn is sort of like that. Taken all together, she is quite solid despite her many, obvious, imperfections.

Ha ha, that really way over-answers your question. Sorry to ramble.


Sean wrote:
Really good job on all the projects! It is great spending some family time with your father.... I recently spent a day with my dad working on projects and it was a lot of fun!

Thanks Sean! I've been lazy for the last bunch of weeks, enjoying the fruits of lots of labor. But mornings and evenings lately have had a little crispness to them, which makes me think of Fall time, and woodworking projects, and bathroom renovations, and a re-work of the barn's 1st story floor plan.... and, my Dad is visiting in September, so maybe I'll just have to put him to work!

:beer:
 

shopnut

Well-known member
Joined
Feb 22, 2006
Messages
4,237
Location
Florida
I've been lazy for the last bunch of weeks, enjoying the fruits of lots of labor. But mornings and evenings lately have had a little crispness to them, which makes me think of Fall time, and woodworking projects, and bathroom renovations, and a re-work of the barn's 1st story floor plan.... and, my Dad is visiting in September, so maybe I'll just have to put him to work!

I just stopped by with some beers to say HI :beer:

I'm looking forward to it cooling off here so I can get some real work done!

Funny what you say about your dad - whenever I go visit mine or he visits me, we always line up several projects to work on together. Most people just go fishing or something. But tinkering what we love to do. :)
 
OP
R

rieferman

Well-known member
Joined
May 18, 2009
Messages
2,586
Location
Collegeville PA (30 min west of Philly)
Project time is good productive fun, I agree!

Some of the list that could be in play soon:

I have to get a moisture meter to test the lumber that I have been air drying for the past year to see if it's ready to work with yet. I'd like to create a living room set using materials from my own property (the black walnut and cherry that I have on hand was milled from trees that we had to take down last year).

Also, we have a pantry in the kitchen that is equipped with wire shelving (yuck) and I'd like to do custom built ins. That project could use less expensive/fancy wood because it will take a beating over time. Possibly just pine. Or poplar perhaps.

The big one on my near term list is the upstairs bathroom. Needs a complete gut and re-build. I think that will wait until Spring though for budget reasons.

And, in the 3 year plan is converting our screened in porch to a 4 season room. That entails re-siding the entire house, a roofing project, and new windows.... and much of that project will be hired out for multiple reasons. So, you can imagine the budget impact, which therefore sets the timing further out so we can build up our reserves.

The other thing I've been thinking about is the chairs I made for around our pool and by the fire pit. Everyone that comes here loves them. Everyone says I should sell them. On an hourly basis, it's not lucrative to do so really (compared to my salary time, or how I value my leisure time etc.) but perhaps there's room to further add efficiencies to my processes....

All that to say this... I'm basically still gonna sit on my **** and do nothing for another couple weeks and enjoy the end of summer.

:)
 

J-man67

Well-known member
Joined
Aug 10, 2012
Messages
218
Location
Delaware
Re: west of Philly - barn saving (tours on pages 14, 19, and FINAL tour on 35)

Not too far out for us. Let me know when you want an estimate on the siding, roofing, and windows! :)
 
To avoid these ads, REGISTER NOW!

Wreckster23

Well-known member
Joined
Aug 15, 2014
Messages
369
Location
Newburgh, NY
Wow, end of the work day and just finished reading. This took me 2 days to get through, and I am amazed by what you have been able to do with just a few years time!

You kind of seem something like myself (though a few years my senior) though I've been dreaming of winning the lotto to work on cars for the rest of my days :). I would love to get into wood working also, though haven't the funds to do anything like that.

Your work is definitely an inspiration and I look foward to keeping up with what you are up to.

BTW, Look up the book The Majic of Recluce by L.E. Modesitt. Fantasy adventure type of book if you're into that or not, but there is a good bit of wood working in the book I thought was enjoyable.
 

Jimbo..

Well-known member
Joined
Jan 21, 2013
Messages
90
Location
Northern California
Wow. Just read this entire thread. Amazing. Wow, wow, wow. All I can say is Wow... What an epic journey, both inspiring and humbling. Rieferman, I feel like I know you after reading the whole thing. Love everything you did with that old barn, love how you did it, love your attitude and dedication. If I ever find myself west of Philly, I will make sure to bring a six pack of good beer with me and reach out. If you invite that Jim guy over, I'll probably need two six packs...
 
OP
R

rieferman

Well-known member
Joined
May 18, 2009
Messages
2,586
Location
Collegeville PA (30 min west of Philly)
Hey guys! Thanks so much for the comments! My updates these days aren't quite as fun as when I was in the heart of the barn saving, but it's nice to know people are still reading and enjoying the effort.

And yes, visitors are welcomed anytime... especially when they come armed with a 6 pack!!
 

48RON54

Well-known member
Joined
Dec 27, 2013
Messages
2,666
Location
Inland Empire, CA
I just found this thread today, and I'm impressed. I only made it to page 17 today as my work day is about over and it's about time to head home and start on some of my own projects. I really like your give just about anything a shot mentality and your ability to make mistakes and learn from them. Watching your desire to tackle anything and the results of that hard work is really impressive. It gives me the drive to attempt to tackle things I've shied (sp?) away from for sometime. Nice work and nice views! I look forward to hopefully going over the rest of this topic tomorrow (work permitting). Nice job sir!
 
OP
R

rieferman

Well-known member
Joined
May 18, 2009
Messages
2,586
Location
Collegeville PA (30 min west of Philly)
Hey Ron, Thanks for the kind words!

My attitude was born from necessity.... Quite simply, if we wanted to have nice things, and also have my wife stay at home to raise the kids, we needed me to be able to figure things out on my own for the most part.

I'm thankful for the choices we made, and resulting "forced" learning. Thanks largely to my wife's focus on raising our family, our kids are turning out to be smart, cool, well adjusted little buggers. And, I have picked up a set of skills and hobbies that will benefit us for the rest of our lives.

Go ahead and tackle your projects! Books, friends, GJ, youtube... they're all here to help you figure it out. Take it slow. Worst case scenario is that you have to adjust your approach and fix a mistake. The good news is that learning is exponential - the more you figure out, the easier it is to figure the next piece out.
 
OP
R

rieferman

Well-known member
Joined
May 18, 2009
Messages
2,586
Location
Collegeville PA (30 min west of Philly)
On the previous page (post #779) I noted several projects that are coming down the pike at some point soon. As the weather turns more and more fall-like, my project brain begins to stir, and I'm never quite sure where I'll land until I land.

The project I'm most interested in doing is a living room set (end tables and a coffee table) using the black walnut and cherry that I had milled from some trees on our property.

But, as I sat watching some pre-season football last night, I realized that the TV in my house is no match for the TV that I have come to know and love that is out in the barn. If I purchase the TV that I have in mind as a Christmas present, it will require reworking of the wall where the current TV is mounted. Creating a full wall built in to house the TV, components, and some small stuff storage would be awesome. And if it was trimmed out with the same wood as the living room set, that would be even cooler.

Which gets me to the project at hand.... (ha ha! you thought that ^ was the project? no!!)

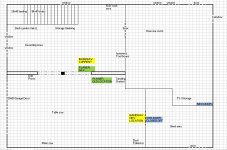
I think I've mentioned that I want to move the door that goes from my shop to the shed area to instead lead from the exercise room into the shed area. What this does for me, is allows an additional full wall of shop space, and also keeps the kids from needing to walk through the shop to get to their bikes and basketballs.

The additional wall space in the shop will enable me to relocate my band saw. Relocating my band saw enables me to move my planer back to its old location which I really liked/preferred, and somehow my router table will also find a permanent home during this reorg as I can't stand having to setup equipment everytime I need to use it.

The reason this project must preceed the TV/built in/living room set project is because I will need a full tune up of all my equipment, and will need to really focus on precision throughout that build. It only makes sense to do such a tune up after equipment has moved to its new home, and the better layout will also help me stay focused on precise work. Plus, I'm just sort of "project rusty" since I took 2 months off, so it'll be good to get my brain and body going again.

See pics for further explanation
 

Attachments

  • shop reorg fall 2014_d.JPG
    shop reorg fall 2014_d.JPG
    113.4 KB · Views: 219
  • shop reorg fall 2014_c.JPG
    shop reorg fall 2014_c.JPG
    41.2 KB · Views: 244
  • shop reorg fall 2014_b.JPG
    shop reorg fall 2014_b.JPG
    60.8 KB · Views: 278
  • shop reorg fall 2014_a.JPG
    shop reorg fall 2014_a.JPG
    65.5 KB · Views: 307
OP
R

rieferman

Well-known member
Joined
May 18, 2009
Messages
2,586
Location
Collegeville PA (30 min west of Philly)
Getting ready to start on the project above.. .GJ, I need your opinion!

Can you see wisdom in my design changes, or am I nuts?

My biggest worry about this proposed change is that I have visions of turning the shed area into a finishing room at a later date.... in which case a door between shop and finishing room would be quite convenient.

But... I'm so annoyed with having to move my planer and router table everytime I want to use them!!!

Router table... I can built that into my table saw setup perhaps.. that eliminates one problem... Can't see a solution to planer movement...
 
OP
R

rieferman

Well-known member
Joined
May 18, 2009
Messages
2,586
Location
Collegeville PA (30 min west of Philly)
<<<<<crickets>>>>>>

Well, I've been arguing with myself about this over and over, and I think I've landed on not wanting to close in the door to the shed area at this time.

Although that solution would allow 100% of my tools to never have to move, the loss of efficient access to the future finishing room is too big of an impact.

Unfortunately, I think I have to swap my planer and bandsaw placement back to their original positions. I have so much planing to do in the next few months that eliminating the need to move the planer every time is the best option. And it will just have to be annoying to me to move the bandsaw for certain cuts.

Damn, I hate less than optimal solutions.
 

36truck

Well-known member
Joined
Jul 13, 2010
Messages
980
Location
UP of Michigan
The problem of to small of shop space. I think we all would love to build a monster garage but know that we can't. Love your build.
 
OP
R

rieferman

Well-known member
Joined
May 18, 2009
Messages
2,586
Location
Collegeville PA (30 min west of Philly)
Sigh... I think you're right. Space is just slightly too small to accomplish what I want without having to move equipment from time to time. I'm going to still think out of the box and try to solve it, but might just have to agree to let this one go.
 
OP
R

rieferman

Well-known member
Joined
May 18, 2009
Messages
2,586
Location
Collegeville PA (30 min west of Philly)
Had the rare midweek day off today (daughter home sick, helping the wife stay sane) and was able to get out to the barn to prepare for the Fall/Winter woodworking season (my favorite time to be in there).

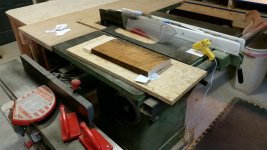
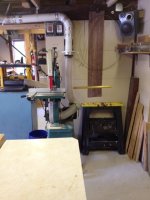
The swap of the planer and the bandsaw went off well. This is back to their original spots, but I did shift things over just enough to help minimize the situations where I would need to move the band saw.

In this new configuration, I have 10+ unobstructed feet on the infeed and outfeed side of the planer. For the bandsaw, I have 10+ unobstructed feet on the infeed side, and 5 unobstructed feet on the outfeed - pulling the bandsaw straight away from the wall about 1 foot gains me another 2 feet on the outfeed side, and putting the bandsaw at an angle gives me even more.

While I was at it, I cleaned and organized the entire shop - there were tools everywhere from a summer's worth of projects outside of the shop.

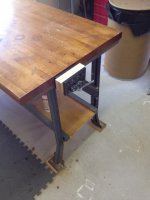
And finally, I had gotten a vise awhile back on clearance for $4 and finally had a chance to mount it on the assembly table. I'm constantly clamping stuff to the table, so this will allow me to evolve my workshop processes a little bit more.
 

Attachments

  • vise.jpg
    vise.jpg
    72.7 KB · Views: 141
  • bandsaw move of 2014_4.jpg
    bandsaw move of 2014_4.jpg
    83.7 KB · Views: 130
  • bandsaw move of 2014_3.jpg
    bandsaw move of 2014_3.jpg
    92.5 KB · Views: 145
  • bandsaw move of 2014_2.jpg
    bandsaw move of 2014_2.jpg
    64.4 KB · Views: 142

shopnut

Well-known member
Joined
Feb 22, 2006
Messages
4,237
Location
Florida
Hey rierferman,

Have you ever thought about flip up "trays" on the planer for incoming and outgoing wood? Our new computer printer sitting on the desk gave me the idea. Then you wouldn't be reliant on the assembly table and table saw for those functions.

Just a thought after reading through everything again.
 
OP
R

rieferman

Well-known member
Joined
May 18, 2009
Messages
2,586
Location
Collegeville PA (30 min west of Philly)
Hey Shopnut,
Thanks for dropping in! Not sure I understand the idea that you're proposing, but let me explain the motivation for the equipment move a little more clearly in case that helps you reply.

The planer that I have does have flip down trays that adequately support lumber as I send it through. But, in the previous location I would have to move the planer each time to avoid having the lumber crash into a nearby wall (about 5 feet away) on the outfeed side of the operation.

By moving the planer to the new spot (errr... where I had it originally a year ago) there are no obstructions for the lumber to encounter during the operation. The infeed is open space, and on the outfeed is higher than the nearby table saw.

This unobstructed in and outfeed was why I wanted the bandsaw in this position previously.... I tend to use the bandsaw more throughout a project, so I thought having less frequent instances of needing to move equipment would be better. But, the bandsaw is far more easily moved around than the planer (the planer is intentionally on a fairly stationary stand).

The downfall of the bandsaw and planer swap is that the wall obstruction burden is now passed to my bandsaw. If I'm cutting anything longer than 5 feet, the band saw placement will have to be temporarily adjusted to avoid that wall obstruction (it's on casters, and the dust collector connection has some slack, so not a huge deal).

The last time I tried this configuration, I had the bandsaw even more crunched towards the wall, so the outfeed obstruction was more like 3.5 - 4 feet. Therefore, I was constantly moving the tool for nearly every cut. With more outfeed room now, I expect the inconvenience to happen less frequently. Most furniture parts (especially those that have shape cuts) are less than 5 feet long, so bandsaw moving should be minimal.

I think.
 

shopnut

Well-known member
Joined
Feb 22, 2006
Messages
4,237
Location
Florida
I guess I was thinking about much longer trays or supports so there wasn't a risk of the wood falling to the floor after feeding through. But I went back and read that you actually like using the other tables as the staging areas, so never mind.

Regarding the bandsaw... Is there a spot where you can feed long material out a temporarily opened door (or maybe even a newly added little trap door?. I have mine with it's back to a door. When more than 3' of depth is needed, I just roll the door up and out goes 8' pieces. I don't necessarily worry about letting a lot of heat out in the wintertime though like you might ;). It could just as easily be a door to another interior room.
 
OP
R

rieferman

Well-known member
Joined
May 18, 2009
Messages
2,586
Location
Collegeville PA (30 min west of Philly)
Regarding the bandsaw... Is there a spot where you can feed long material out a temporarily opened door (or maybe even a newly added little trap door)?.


Good ol' Shopnut, ever the engineer ;)

I'll monitor the number of times I need to move the bandsaw over the course of time to determine if a better solution is needed. I checked this morning and found that my 5 feet of outfeed clearance increases to 7 feet just by pulling the bandsaw (which is on casters) 8 inches away from the wall. Further angling the bandsaw by a few degrees gets me over 8 feet of clearance.

So, while I like a fancy solution as much as the next guy, I think the "do nothing" choice might win out in this situation.

:beer:
 
OP
R

rieferman

Well-known member
Joined
May 18, 2009
Messages
2,586
Location
Collegeville PA (30 min west of Philly)
Hi GJ!

It's been a busy stretch of weeks and months, so I haven't been in the shop a lot. I've been coaching two youth basketball teams (my daughter's 1st and 2nd grade team, and my son's 3rd and 4th grade team), playing sports of my own (men's basketball league), and have been slammed at work (got promoted though!).

Anyways, for the holidays coming up, I have 11 days off in a row, and quieter weekends too. I'm going to use that time to get started building a really nice coffee table for our family room.

A long while back, I had some black walnut and some cherry milled out of trees that we had removed from our property. After 18 months of air drying, they're ready to be put into furniture.

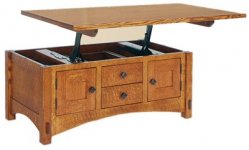
The design I have planned includes two small cabinets, and two small drawers within the base of the table, and a "lift top" so that I can bring a laptop or snacks closer to where we sit on the couch. There will be plenty of technical challenges such as mortise and tenon, and dovetail joinery.

Here's the table I'm using as my inspiration:
 

Attachments

  • lift top table inspiration.jpg
    lift top table inspiration.jpg
    21 KB · Views: 51
OP
R

rieferman

Well-known member
Joined
May 18, 2009
Messages
2,586
Location
Collegeville PA (30 min west of Philly)
I got started on the table project over the last couple of days.

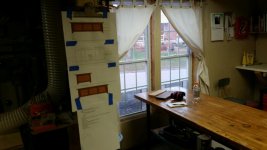
To begin, I finished drawing up my plans. I usually draw the plans either in Excel or Sketchup (this time, Excel) and then write a parts list. As I add each item to the parts list, I think through (and document) the details of that part - mortise placement, tenon size, shape cuts etc. Finally, I write myself a set of steps to follow. All of this gets pinned to my clipboard in the shop (see pic 1).

Then, while I had most of the items I need already at home, I needed to run to the hardware store for a couple things, and also had to make a couple of online orders. An edge guide for my router is on the way - I'm going to use this setup for cutting my mortises (there are a lot to cut, and this is a fast way to do it). And, a dovetail saw guide is on the way to help me build the drawer boxes. I'll post pics of this stuff when it all arrives.

At this point, I had to get my shop set for the project. I had a belt to replace on my sanding station, the knives needed swapped out on my planer, and some other basic organization steps.

Finally, time to start working!

Safety first! Sawdust in general is not good to inhale. Black walnut specifically causes allergic reactions for many. Therefore, a good mask, plus the usual eye and ear protection, is a must. See pic 2.

Step 1 was to "chalk up" the rough lumber. Basically, I use the parts list to guide me as I pick through my pile of rough lumber to choose which portions of the boards will end up being specific components of the table. Picture 3 below is what the rough lumber looks like once planed - I'm always amazed at how ugly rough lumber can be compared to planed lumber. Pic 4 is my chalk up. Pic 5 shows two particularly nice black walnut boards (15" wide!!) that will become the table top. As a reminder, all of this lumber came from trees on my property that I had milled locally at the sawmill.

Step 2 was to cut boards to rough length in preparation for milling. Some woodworkers prefer to mill big boards and then cut to rough length (a few inches longer than finished length, to allow for fine tuning later)... others prefer to make the boards more manageable by cutting them to length and then milling... I usually go this latter route, and did so in this case too. Once to rough length, I separated the parts into piles based on what procedure is needed to get 4 finished sides that are 90 degree angles to one another. Some pieces will start by travelling on a sled through the planer, some will be face jointed first, others need to be edge jointed and ripped... See pic 5.

More soon. Let me know of any questions so far.


Pic 1 = plan of attack
Pic 2 = Safety first
Pic 3 = Planed examples (Cherry is lighter, Black Walnut)
Pic 4 = Chalked up
Pic 5 = Wide Walnut
Pic 6 = Ready to mill
 

Attachments

  • ready to mill.jpg
    ready to mill.jpg
    98 KB · Views: 81
  • wide boards.jpg
    wide boards.jpg
    96 KB · Views: 78
  • chalked up.jpg
    chalked up.jpg
    126.1 KB · Views: 82
  • cherry and walnut.jpg
    cherry and walnut.jpg
    115.1 KB · Views: 84
  • safety first.jpg
    safety first.jpg
    41.4 KB · Views: 102
  • plan of attack.jpg
    plan of attack.jpg
    77 KB · Views: 92
OP
R

rieferman

Well-known member
Joined
May 18, 2009
Messages
2,586
Location
Collegeville PA (30 min west of Philly)
Progress!

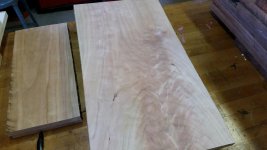
For the side panels to the table, I had cherry of sufficient width that I could accomplish the design without a glue up... BUT, that causes issues with milling the lumber as it is then too wide for my jointer. A simple sled and some hot glue solved the issue nicely. See pic 1. The resulting cherry panels are very pretty even though they haven't yet taken their red hue as a result of UV exposure. See pic 2.

I'm a big believer in batch cutting. There's only one fool proof way to ensure that parts of the same dimension actually end up being the same dimension... and that's to cut them all at the same time with the same machine settings. My pile of lumber is starting to look like a pile of parts. See pic 3.

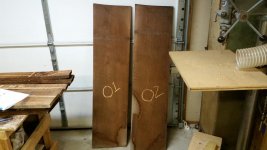
I chose two consecutive slices off the black walnut tree to become the table top. The grain patterns are nearly twins. By carefully labeling the pieces before milling, I now know exactly how to glue these up for a nice look. See pic 3 for a mockup of what the top will look like.

Pic 1 = sled
Pic 2 = cherry is beautiful
Pic 3 = parts taking shape
Pic 4 = top mockup
 

Attachments

  • sled.jpg
    sled.jpg
    119.2 KB · Views: 73
  • cherry.jpg
    cherry.jpg
    79.4 KB · Views: 69
  • parts taking shape.jpg
    parts taking shape.jpg
    104.5 KB · Views: 77
  • table top mockup.jpg
    table top mockup.jpg
    115.2 KB · Views: 79
To avoid these ads, REGISTER NOW!
Top Bottom