Last weekend, I did a bunch of batch building, and thought an update was in order.
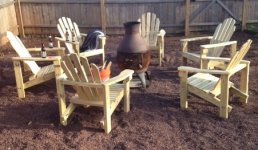
I'm pretty happy with the chair design that I've come up with. I like to build things efficiently in general (I'm a process improvement type of guy) and also enjoy minimizing waste in a project.
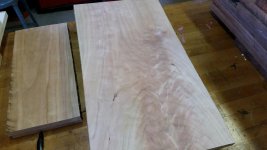
My chairs are all built from pressure treated 2x4’s (except the arm rests which use deck boards). Much of the chair employs a a clever design that I came up with where I slice ¾” off the width of a 2x4, and save that slice for the seat slats (so the seat slats are each 1.5” x ¾”). The remainder of the 2x4 is then flipped on edge and ripped in half to create 2 parts that are each ¾” thick for the back slats (so the back slats are 2.75 x ¾”).
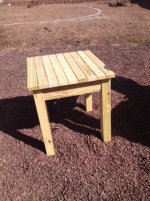
Doing it this way makes the chair design very cost effective (I spent about $300 to create 6 chairs and 3 tables), and also efficient… For one, using a 2x4 to create 3 pieces is a material efficiency… Secondly, avoiding tasks that require the band saw (or jig saw) is an important efficiency since band sawing is much slower, more painstaking task, than table sawing. So, since I get two back slats out of each trimmed 2x4, I can make the back slat profile cuts one time, and THEN split it in half. This gives me 2 identical back slats with only one time consuming band saw event.
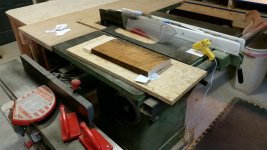
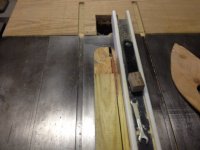
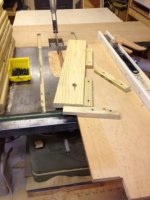
Another efficiency I applied this time around is that I built a “taper jig” for the table saw. As an example, the arm rests and the seat support both have long shallow angles – too long and shallow to simply use the miter guage on the table saw, or to cut on the miter saw. Previously, I would need to cut those by hand either on the band saw, with a jig saw, or with a circular saw (again, these are time consuming and difficult to get perfectly consistent). The taper jig allows me to set stops on a board that I send past the table saw blade so that it carries my piece through at a consistent angle every time. I was able to cut all tapers very quickly and accurately this way.
When it comes to assembly, I have quick little jigs that help me set pilot holes the same way each time, or spacers to be consistent on how I setup various pieces.
And, finally, like Henry Ford, it’s much more efficient to build components in a focused and specialized way. The sides of the chairs are the key component in this case. I was able to build each side piece in about 15 minutes apiece on average.
When these types of efficiencies are multiplied over 6 chairs, it really adds up.
Now, time to put them all together.
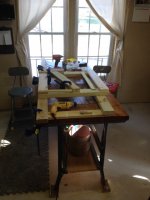
(PS – don’t be too impressed though… As you can see in the last picture, I got one fully assembled this weekend before noticing a flaw in my math in shortening the lifeguard chair plans to this height… my arm rests are 3.75” too tall. How on earth I didn't notice sooner, I'll never know. Anyways, as a result, I needed to take that chair apart a few steps, shorten the arm rest supports, and then manually adjust all my other batch-built components too… but you can get an idea of what they’ll look like from this pic. Damn, other than this miss, the build was flawless. Salvageable mistake, but a pain in the ****. I'll post pics of all 6, with correct height arm rests, after this weekend)
edit: I now have plans written for the lower chairs in addition to the lifeguard chairs. If interested, PM me with your email address. The plans are pretty detailed but assume some basic woodworking knowledge. Build at your own risk.
I'm pretty happy with the chair design that I've come up with. I like to build things efficiently in general (I'm a process improvement type of guy) and also enjoy minimizing waste in a project.
My chairs are all built from pressure treated 2x4’s (except the arm rests which use deck boards). Much of the chair employs a a clever design that I came up with where I slice ¾” off the width of a 2x4, and save that slice for the seat slats (so the seat slats are each 1.5” x ¾”). The remainder of the 2x4 is then flipped on edge and ripped in half to create 2 parts that are each ¾” thick for the back slats (so the back slats are 2.75 x ¾”).
Doing it this way makes the chair design very cost effective (I spent about $300 to create 6 chairs and 3 tables), and also efficient… For one, using a 2x4 to create 3 pieces is a material efficiency… Secondly, avoiding tasks that require the band saw (or jig saw) is an important efficiency since band sawing is much slower, more painstaking task, than table sawing. So, since I get two back slats out of each trimmed 2x4, I can make the back slat profile cuts one time, and THEN split it in half. This gives me 2 identical back slats with only one time consuming band saw event.
Another efficiency I applied this time around is that I built a “taper jig” for the table saw. As an example, the arm rests and the seat support both have long shallow angles – too long and shallow to simply use the miter guage on the table saw, or to cut on the miter saw. Previously, I would need to cut those by hand either on the band saw, with a jig saw, or with a circular saw (again, these are time consuming and difficult to get perfectly consistent). The taper jig allows me to set stops on a board that I send past the table saw blade so that it carries my piece through at a consistent angle every time. I was able to cut all tapers very quickly and accurately this way.
When it comes to assembly, I have quick little jigs that help me set pilot holes the same way each time, or spacers to be consistent on how I setup various pieces.
And, finally, like Henry Ford, it’s much more efficient to build components in a focused and specialized way. The sides of the chairs are the key component in this case. I was able to build each side piece in about 15 minutes apiece on average.
When these types of efficiencies are multiplied over 6 chairs, it really adds up.
Now, time to put them all together.
(PS – don’t be too impressed though… As you can see in the last picture, I got one fully assembled this weekend before noticing a flaw in my math in shortening the lifeguard chair plans to this height… my arm rests are 3.75” too tall. How on earth I didn't notice sooner, I'll never know. Anyways, as a result, I needed to take that chair apart a few steps, shorten the arm rest supports, and then manually adjust all my other batch-built components too… but you can get an idea of what they’ll look like from this pic. Damn, other than this miss, the build was flawless. Salvageable mistake, but a pain in the ****. I'll post pics of all 6, with correct height arm rests, after this weekend)
edit: I now have plans written for the lower chairs in addition to the lifeguard chairs. If interested, PM me with your email address. The plans are pretty detailed but assume some basic woodworking knowledge. Build at your own risk.
Attachments




Last edited: