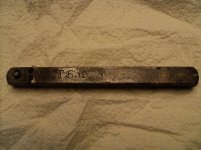
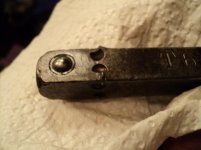
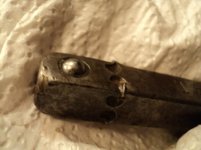
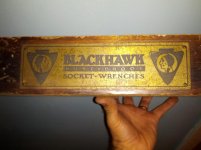
I just picked up a Blackhawk top box off CL that I'm hoping to get more information on from the experts here. It is the same top box as depicted in those posts over on the HAMB cited earlier. It's the box for a "Chief" wrench set with the lift out tray and 3 side drawers. It doesn't have a medallion or label on the cover, but the inside decal is there and near pristine condition. It says the wrench set is No. 100-W. I was hoping someone with access to old Blackhawk catalogs might be able to give me some information on that set?
Also, the box is not painted red. It's painted a dark olive green, almost what you would expect for a military box. The CL seller claimed it was originally his grandfather's but that he had used it as a kid. He painted over the green as a kid in crappy red paint that is now peeling. There is also surface rust in the top and side. But the way the inside decal appears, and the condition of the underlying olive green paint makes me wonder if it isn't original? Did Blackhawk ever offer boxes in olive green? If not, and only color ever offered was red, this means that the kid's grandfather "refinished" the box back in the day - way ahead of his time! The quality of the green paint speaks original to me - no overspray, no visible underlying red paint, and condition of the decal.
It came with bottom cabinet that appears homemade to me, unless someone here can identify it. Seems hand-crafted given the method of construction. Though interestingly, the inside is painted in the same olive green as the Blackhawk???
Here are some photos - any info. would be greatly appreciated.


 ::
::