To avoid these ads, REGISTER NOW!

Show us Your Vintage Bench Grinders!!!!

exmaxima1

Well-known member
Joined
Jun 25, 2011
Messages
6,341
Location
Midwest
Ex,

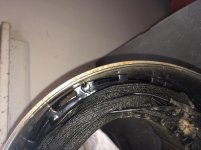
Do you find the vibration free link belt stretches over time?

I put one on my table saw last year. A couple weeks ago I checked the setup and the motor had drooped to the bottom of its travel. I removed two links and all is well.

Is there some sort of initial stretch associated with new belts?

Yes, they stretch a lot initially as the individual links seat themselves, and then hold a pretty good tension. BTW, I tried the Harbor Freight link belts (made in Europe, and probably the only thing there NOT made in China) and they work the same as the higher priced brands.
 
To avoid these ads, REGISTER NOW!

GETRIDAONE

Well-known member
Joined
May 21, 2013
Messages
1,549
Location
Auburn, GA
I finally got around to finishing this 1940's 1/2 HP Craftsman grinder. The stand was from a J G Blount buffer #1. It was the most rusty thing I have ever worked on.
The grinder was in good shape and hadn't been used much according to the stones with hardly any wear. It had a bearing singing the blues and it had leaked all the grease out ? I replaced it and repacked the other and all is well.
I am surprised it hadn't shorted out, a couple of wires were cracked with bare spots. I replaced the internal wiring with Hi Temp oven wire and soldered all the connections.
I put new rubber pads on the grinder and the base. I turned over the water
trough so I could have a flat surface for the grinder to sit on. The extra Craftsman logo on the front was a PITA. The shields were made out of picture
frames and brackets that I had to make.
 

Attachments

  • jgb grinder.jpg
    jgb grinder.jpg
    27.7 KB · Views: 120
  • DSC00763.jpg
    DSC00763.jpg
    142.9 KB · Views: 118
  • DSC00792.jpg
    DSC00792.jpg
    56.3 KB · Views: 118
  • DSC00791.jpg
    DSC00791.jpg
    48.4 KB · Views: 112
  • DSC00794.JPG
    DSC00794.JPG
    96.8 KB · Views: 107

drivesitfar

Well-known member
Joined
Oct 23, 2013
Messages
36,014
Location
Pacific Northwest
Get: I've owned a lot of Craftsman's grinders, but haven't seen that version yet. nice stand too. i think this is even more amazing than some of your vise restorations.

quick question. usually Craftsman's bearings on the blocks are sealed. are the pre 40's bearings open so you can grease them? any inside or during restoration pics? :bowdown:
 

exmaxima1

Well-known member
Joined
Jun 25, 2011
Messages
6,341
Location
Midwest
quick question. usually Craftsman's bearings on the blocks are sealed. are the pre 40's bearings open so you can grease them? any inside or during restoration pics? :bowdown:

Really? I replaced the bearings in my 3/4hp block and they were double shielded, but not sealed. There was a felt washer in the stack that kept the bearings clean.

Keep in mind that sealed bearings have quite a bit of drag and many of the smaller non-cap-start grinders may have a hard time getting up to speed. I like to use shielded in any high speed application, especially if there are felt washers or very tight clearance holes (like in Baldors), and only use sealed as a last resort.
 

firemanast

Well-known member
Joined
Nov 7, 2014
Messages
275
Location
Bentonville,AR
I finally got around to finishing this 1940's 1/2 HP Craftsman grinder. The stand was from a J G Blount buffer #1. It was the most rusty thing I have ever worked on.
The grinder was in good shape and hadn't been used much according to the stones with hardly any wear. It had a bearing singing the blues and it had leaked all the grease out ? I replaced it and repacked the other and all is well.
I am surprised it hadn't shorted out, a couple of wires were cracked with bare spots. I replaced the internal wiring with Hi Temp oven wire and soldered all the connections.
I put new rubber pads on the grinder and the base. I turned over the water
trough so I could have a flat surface for the grinder to sit on. The extra Craftsman logo on the front was a PITA. The shields were made out of picture
frames and brackets that I had to make.

Nice job looks great !
 

GETRIDAONE

Well-known member
Joined
May 21, 2013
Messages
1,549
Location
Auburn, GA
Sorry, as usual I didn't take any in progress pictures. The bearings were
sealed on the inside and have a washer shield that covers the outside then a felt washer & retainer.

Thanks for the comments
 

Outlawmws

Well-known member
Joined
Aug 9, 2011
Messages
39,230
Location
The Badlands
I think you are over-thinking this. For years the tension was handled by motor weight alone, with no shimming required. Attached is a pic of an old Foley belt sander that came with a factory motor pivot. Compensates for belt stretch and exceptional easy to change belt speeds. I recently added a spring to it since those link belts like to jump around under load, but motor weigh alone works pretty well.

This ^^^ :thumbup::thumbup::thumbup:

Which one would you rather build, mine or yours? :lol: 
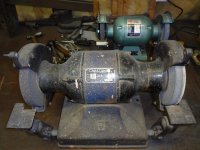
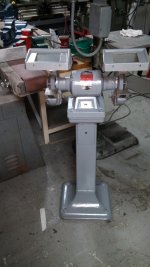
The motor weight tensions this belt. I'm not sure you understand the shimming. It just can't get more simplified.

Is much easier than This^^^ and requires NO shimming. I've used a 4" door hinge to make the one above, and it don't get any simpler than 2 holes in a mounting surface. (the hinge holes lined up on the motor base)
 

Outlawmws

Well-known member
Joined
Aug 9, 2011
Messages
39,230
Location
The Badlands
Yes, they stretch a lot initially as the individual links seat themselves, and then hold a pretty good tension. BTW, I tried the Harbor Freight link belts (made in Europe, and probably the only thing there NOT made in China) and they work the same as the higher priced brands.

Not the only thing but its definitely on the short list. They used to carry the US made link belts, and based on a GJ recommendation, I bought a pair of work/mechanics gloves I really like that have become my driving gloves this winter... Made in Pakistan, but I'm OK with that. (ABC)
 

Outlawmws

Well-known member
Joined
Aug 9, 2011
Messages
39,230
Location
The Badlands
I finally got around to finishing this 1940's 1/2 HP Craftsman grinder. The stand was from a J G Blount buffer #1. It was the most rusty thing I have ever worked on.
The grinder was in good shape and hadn't been used much according to the stones with hardly any wear. It had a bearing singing the blues and it had leaked all the grease out ? I replaced it and repacked the other and all is well.
I am surprised it hadn't shorted out, a couple of wires were cracked with bare spots. I replaced the internal wiring with Hi Temp oven wire and soldered all the connections.
I put new rubber pads on the grinder and the base. I turned over the water
trough so I could have a flat surface for the grinder to sit on. The extra Craftsman logo on the front was a PITA. The shields were made out of picture
frames and brackets that I had to make.

Get, that came out gorgeous! :drool: I was going to say you should have restored the J G Blount, but that looks like it was made for each other. :thumbup::thumbup::thumbup:

I'd still say you should rig a belt speed reduction and make a slow speed grinder out of the J G Blount, for sharpening. Mount it on a plate and have a quick release motor that can just drop in when needed (to keep the weight down - motor can be small/light too with the reduction), and only set it on a bench when you need it.
 

classicJackets

Well-known member
Joined
Sep 26, 2014
Messages
448
Location
SE Michigan
I finally got around to finishing this 1940's 1/2 HP Craftsman grinder. The stand was from a J G Blount buffer #1. It was the most rusty thing I have ever worked on.

Ah ha! You're the one who bought that! Good find and I'm glad to see you got it put to good use. Looked like a cool piece. What did you do with the part that was on top?
Doug
 

zkling

Well-known member
Joined
Jan 23, 2007
Messages
16,939
I finally got around to finishing this 1940's 1/2 HP Craftsman grinder. The stand was from a J G Blount buffer #1. It was the most rusty thing I have ever worked on.
The grinder was in good shape and hadn't been used much according to the stones with hardly any wear. It had a bearing singing the blues and it had leaked all the grease out ? I replaced it and repacked the other and all is well.
I am surprised it hadn't shorted out, a couple of wires were cracked with bare spots. I replaced the internal wiring with Hi Temp oven wire and soldered all the connections.
I put new rubber pads on the grinder and the base. I turned over the water
trough so I could have a flat surface for the grinder to sit on. The extra Craftsman logo on the front was a PITA. The shields were made out of picture
frames and brackets that I had to make.

Great job. I've got that one in 1/3 hp I'm almost finished with. Fantastic job on making the shields, they look factory from the front.
 

GETRIDAONE

Well-known member
Joined
May 21, 2013
Messages
1,549
Location
Auburn, GA
Ah ha! You're the one who bought that! Good find and I'm glad to see you got it put to good use. Looked like a cool piece. What did you do with the part that was on top?
Doug

I had seen the grinder before you posted it. I didn't think much of it because it was so rusty. After seeing your post I figured at least I could save the stand, it was just plain ugly with the big rough cut hole in the back. I got a piece of 16 ga metal and covered the hole.
I do still have the grinder but it rust pitted all over and a good project for the E Tank.

zkling, The frame was a double one with two hinges in the middle. I drilled out the tiny rivets and they happen to be on the 3" side. I made a bracket out of 16 ga and used blind rivets to attach it back to the frame. I used black adhesive silicone to hold the glass in the frame. It came out pretty sturdy after the glass was in.
 

drivesitfar

Well-known member
Joined
Oct 23, 2013
Messages
36,014
Location
Pacific Northwest
Get: i saw this today on my local Craigslist and thought of you. yours look a million times better, but this one looks like it might have the original lamp so wanted to post up a few pictures for you. he's only asking a Benjamin and its at a pawn shop, but if you hadn't heard i probably have more grinders than vises so because it's only a 1/3 i'm going to pass.

if i do buy it (HEE HEE) i'll get a few more pictures of the light or maybe trade you the light for one of your little vises you have a duplicate of.
 

Attachments

  • 01010_92rXYYgQmZN_600x450.jpg
    01010_92rXYYgQmZN_600x450.jpg
    37 KB · Views: 76
  • 00202_ao7xoeFJZUL_600x450.jpg
    00202_ao7xoeFJZUL_600x450.jpg
    19.5 KB · Views: 84
  • 00V0V_k9b7UHAYSES_600x450.jpg
    00V0V_k9b7UHAYSES_600x450.jpg
    33.9 KB · Views: 75
  • 00v0v_4B9anUvvvmE_600x450.jpg
    00v0v_4B9anUvvvmE_600x450.jpg
    22.1 KB · Views: 89
  • 00A0A_9g7K4mR5Nbm_600x450.jpg
    00A0A_9g7K4mR5Nbm_600x450.jpg
    17.7 KB · Views: 91

zkling

Well-known member
Joined
Jan 23, 2007
Messages
16,939
I don't think that lamp is original. Actually I don't think alot of that unit is original. Something doesn't look right with the spark arrestors, guards and tool rests.
 

bluebolt

Well-known member
Joined
Dec 28, 2008
Messages
5,441
Location
Benton LA
I don't think that lamp is original. Actually I don't think alot of that unit is original. Something doesn't look right with the spark arrestors, guards and tool rests.

Found a very similar one in the 1941 catalog

The guards look original but highly modified (exhaust ports). The right side shield appears original looking at it from the cord side but the left side shield appears to be fabricated.

The tool rests don't look original at all.
 
Last edited:

jholder

Active member
Joined
Jun 29, 2013
Messages
35
Location
Huntsville, AL
Was working on my grinder, getting it ready for paint (or hopefully powder coat) and ran into an issue that may or may not be resolvable. To powdercoat the central motor housing it needs to get to get the outside metal to around 400 degrees for 10 minutes. I don't want to put the center casing in the oven with all of the wiring and what not in it. I thought I could just remove the internals, and reinstall them but I can't for the life of me see how it was installed in there in the first place. I've attached some pics, hoping that someone can provide some guidance. Any thoughts on how to remove and reinstall them?
 

Attachments

  • IMG_1593.jpg
    IMG_1593.jpg
    132.2 KB · Views: 35
  • IMG_1594.jpg
    IMG_1594.jpg
    135.6 KB · Views: 32
  • IMG_1596.jpg
    IMG_1596.jpg
    142.8 KB · Views: 37
  • IMG_1595.jpg
    IMG_1595.jpg
    140.6 KB · Views: 42
To avoid these ads, REGISTER NOW!

torqueman2002

Well-known member
Joined
Jun 3, 2009
Messages
6,140
Location
SE Michigan
Was working on my grinder, getting it ready for paint (or hopefully powder coat) and ran into an issue that may or may not be resolvable. To powdercoat the central motor housing it needs to get to get the outside metal to around 400 degrees for 10 minutes. I don't want to put the center casing in the oven with all of the wiring and what not in it. I thought I could just remove the internals, and reinstall them but I can't for the life of me see how it was installed in there in the first place. I've attached some pics, hoping that someone can provide some guidance. Any thoughts on how to remove and reinstall them?
jh - If you haven't already posted your question on the site dedicated to old USA machines (wood and metal working), you may get additional help there.
http://owwm.org/index.php
 

Dennis Leigh Henry

Well-known member
Joined
Apr 8, 2013
Messages
6,302
Location
South Central, IN USA

drivesitfar

Well-known member
Joined
Oct 23, 2013
Messages
36,014
Location
Pacific Northwest
AB: i really like your old Baldor grinder and the metal name plates are awesome.

Dennis: another quality tool picture of one sitting in your shop. very nice huge grinder. i'll check out the links showing your other tools and i remember you posting up a nice drill press with all the attachments a while back.:thumbup:
 

torqueman2002

Well-known member
Joined
Jun 3, 2009
Messages
6,140
Location
SE Michigan
Here is my daily Grinder. I believe it to be from 1946, She runs strong.
BaldorGrinder1946_zpsaf0339ae.jpg
Nice DD!

Do you know what the connection is between Baldor and Delta Equipment Agency?
 

torqueman2002

Well-known member
Joined
Jun 3, 2009
Messages
6,140
Location
SE Michigan
I picked up a 1/2 HP Delta grinder on Friday.

I saw it in a Lancaster OH, CL ad that was just a few hours old.

The seller was the 2nd owner, the 1st was the local HS machine shop.

The best I can make out from the machine tag is:
1/2 HP | 115/230 Volts |60 Cycles |1 Phase | 3450 RPM

I will need to do some internet searching to determine what the other tag numbers indicate, like: model number, ...

a1%20FI%20P1080535.jpg


a2%20FI%20P1080536.jpg


Looks like a 'cooling fin' needs to be fabricated. Any ideas will be appreciated.
a3%20FI%20P1080534.jpg


a4%20FI%20P1080532.jpg


a5%20FI%20P1080541.jpg


a6%20FI%20P1080545.jpg


The machine tag is very dark colored, like a varnish gets when it ages. I tried Simple Green and lacquer thinner with no effect. Then I thought, maybe there's a decal that may get destroyed. Any information will be helpful.
a7%20FI%20P1080547.jpg


a8%20FI%20P1080548.jpg


a9%20FI%20P1080566.jpg


b1%20FI%20P1080565.jpg


b2%20FI%20P1080569.jpg


Tag on back.
b3%20FI%20P1080570.jpg


Bottom cover removed, showing casting number.
b4%20P1080576.jpg


Base of stand with casting information.
b5%20P1080526.jpg


b6%20P1080527.jpg


Top view of stand.
b7%20P1080530.jpg


Thanks for looking.
:)
 

sailah

Well-known member
Joined
Sep 17, 2013
Messages
165
Location
Hingham, MA
My little Dayton. It was a mess, cleaned and sandblasted most of it. Powder coated the stand and the wheels covers, painted the motor. Polished everything else on no scotchbrite wheel. Runs beautifully.

The cast pieces off gassed in the oven and bubbled the powder coat. I kinda like it that way, at least not enough to try and remove it haha


jholder

Active member
Joined
Jun 29, 2013
Messages
35
Location
Huntsville, AL
Like this? Its taken me a long time to get these amassed..

http://www.garagejournal.com/forum/showthread.php?t=210324

http://www.garagejournal.com/forum/showthread.php?p=4542694#post4542694

Post #524 is an up to date picture of my SBL stuff…

Cheers!

Very nice. How long did it take to collect all that? We never have much in the way of heavy duty machinery down here. I guess being mainly agricultural (historically) kind of limits the number of manufacturing/heavy machinery available to us.
 

zkling

Well-known member
Joined
Jan 23, 2007
Messages
16,939
Here is my daily Grinder. I believe it to be from 1946, She runs strong.
BaldorGrinder1946_zpsaf0339ae.jpg

Very nice, those are really heavy units. Does yours tend to get a bit warm on the back side after it has ran for a while? Mine seems to, not scalding, but certainty warm to the touch. Went through it and nothing stood out to me. :dunno:
 

Dennis Leigh Henry

Well-known member
Joined
Apr 8, 2013
Messages
6,302
Location
South Central, IN USA
Very nice. How long did it take to collect all that? We never have much in the way of heavy duty machinery down here. I guess being mainly agricultural (historically) kind of limits the number of manufacturing/heavy machinery available to us.

The 10k Lathe was first sometime in the 1980s, the drill press was maybe 1990/91, shaper joined ~1995, vertical mill ~ 1999 and the grinder in the ~2008 region.

You're best bet is to scour the Craigslistings and auctions.. or watch Ebay for items close by (that's how I got my grinder and the vertical mill..

Good luck.. !!
 

tedsters

Well-known member
Joined
Oct 29, 2012
Messages
1,443
Location
Michigan
My little Dayton. It was a mess, cleaned and sandblasted most of it. Powder coated the stand and the wheels covers, painted the motor. Polished everything else on no scotchbrite wheel. Runs beautifully.

The cast pieces off gassed in the oven and bubbled the powder coat. I kinda like it that way, at least not enough to try and remove it haha


thats a dandy dayton you did an awesome job on it
 

torqueman2002

Well-known member
Joined
Jun 3, 2009
Messages
6,140
Location
SE Michigan

drivesitfar

Well-known member
Joined
Oct 23, 2013
Messages
36,014
Location
Pacific Northwest
Sailah: that is a sweet looking "little" Dayton grinder. In most guy's shops a 3/4 old US made grinder would be called a big beast. it is amongst some monsters on this thread so maybe "little" is appropriate, but i bet there won't be too many times you push into the running stone or a wire wheel and making it stop. nice restoration too.

TM: your grinder selections are great and once they hit your hands they always improve. that looks like a new challenge which i'm sure you are up to spiffing it up.

ZK: so is the light not original on that old Craftsman? i really don't know because Get's was the first one I think I've seen of that version. I've got some older Craftsman grinders and some newer blocks, but hadn't seen that long C version.
 

AdrianBoomer

Well-known member
Joined
Jan 16, 2015
Messages
235
Location
Novato, California
Very nice, those are really heavy units. Does yours tend to get a bit warm on the back side after it has ran for a while? Mine seems to, not scalding, but certainty warm to the touch. Went through it and nothing stood out to me. :dunno:

I did a bunch of wire-wheeling just the other day cleaning up hand planes and actually I put my hand on the unit and felt some warmth there. I have friends that say these baldors will run literally all day long so I am not concerned. I figure this unit just reaches an operating temp and stays thee happily!
 

Scimonetti

Well-known member
Joined
Aug 25, 2014
Messages
431
Location
VT
I salvaged this 7/8" lh thread shaft and babbit pillow block from my great grandfathers homemade table saw. I decided the only reason I NEED a large grinder is for buffing and wire wheeling, so I will make an arbor buffer with easily removable guards and tool rests. I look forward to designing it! Just need to choose a motor and find a set screw adapter for the unthreaded end. this is the first time I've messed with babbit in good shape and it is smooth!
 

zkling

Well-known member
Joined
Jan 23, 2007
Messages
16,939
ZK: so is the light not original on that old Craftsman? i really don't know because Get's was the first one I think I've seen of that version. I've got some older Craftsman grinders and some newer blocks, but hadn't seen that long C version.

I posted mine a few pages back, blinding yellow. It's the 1/3hp version. I don't think they ever produced a light for those units. :dunno:
 

Attachments

  • craftsman grinder ad 1940 catalog.jpg
    craftsman grinder ad 1940 catalog.jpg
    151.6 KB · Views: 57
Last edited:

sailah

Well-known member
Joined
Sep 17, 2013
Messages
165
Location
Hingham, MA
Sailah: that is a sweet looking "little" Dayton grinder. In most guy's shops a 3/4 old US made grinder would be called a big beast. it is amongst some monsters on this thread so maybe "little" is appropriate, but i bet there won't be too many times you push into the running stone or a wire wheel and making it stop. nice restoration too.

Thanks. I'm on the hunt for a big daddy, something with 12" wheels that dims the lights when you hit the go button. I'll get some more pictures of my stuff up in other threads, I def don't do things half baked. I like em big :lol_hitti
 
To avoid these ads, REGISTER NOW!
Top Bottom