Outlawmws
Well-known member
BAGGED
IMO it should move freely without sticking, snagging or hesitation.....the two components are designed with clearance at their mating surfaces so they should be free moving....
This ^^^^ but not sloppy loose.

BAGGED
IMO it should move freely without sticking, snagging or hesitation.....the two components are designed with clearance at their mating surfaces so they should be free moving....
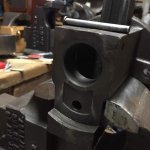

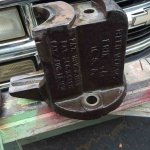
Bagged: You bet. Happy to hear your reed 404 is working now as designed. Might be hard to let that one go to auction. Keeper??
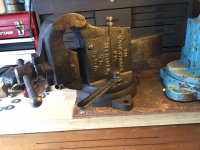
Bagged: You bet. Happy to hear your reed 404 is working now as designed. Might be hard to let that one go to auction. Keeper??


Bagged: use the best parts of the 404's to make one nice one. i might use the main screw and handle of the new parts vise on the other one instead of just the vise nut, but your call.
i'm not a pro at polishing yet so you'll need to contact either Kevin, Joe, Get, Autopts and a few others that make their metal shine better than it came out of the factory. check out this thread for the other guys that maybe only did one or two vises because i know there are some that are amazing. also Ritzblitz makes amazing handles so maybe he'll share how he polishes his.
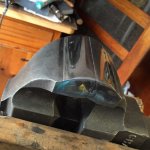
BTW you did an amazing job shining up those old Parker jaws.

 .....................................
BAGGED
Beautiful job on the jaws!.....
Bagged:
If those shiny jaws are not even buffed out yet all I can say is "WOW". I'm blown away at your knowhow and skill at attaining what looks like a mirror finish on hardened steel at a stage you don't even consider quite finished!
..........................................
I bet your jaws were in better shape than ones I am working on. These were rough as a cobb and I'm not even close. If you can make those jaws look that good you should have no problem with the handle knob. I like the machined look on metal, not to say highly polished doesn't look great. I have noticed some handles & knobs shine better than others. It must be the metal is a little different.


I bet your jaws were in better shape than ones I am working on. These were rough as a cobb and I'm not even close. If you can make those jaws look that good you should have no problem with the handle knob. I like the machined look on metal, not to say highly polished doesn't look great. I have noticed some handles & knobs shine better than others. It must be the metal is a little different.
Getridaone and Bagged:
As I'm sure you have realized after working on your very first restoration, the problem with polishing or even just cleaning up the handle knob is access. Unless you remove the handle itself, you just can't get into all the areas with the normal shop tools like flap wheels or Roloc disks.
If those jaws are a test, let me be among the many to assign you a grade of "A" Maybe an A+ with the final refinements.
Have any of you guys used mini Dremel attachments? If so which ones? (Unless that is classified information)
THE MAKING OF A MASSIVE VISE HANDLE, REED 206.
So I bought a Reed 206 for a decent price. I've redone the vise but was hesitant putting it back together as I never really liked the homemade vise handle that it came with. Though well made by its toolmaker former owner, it lacked "balls" so to speak. The Reeds that I own have, well, huge balls. I like that feature in them so decided that this needed fixing.
The owner told me that his handle was cold rolled, seemed pretty hard to me. The ends were an elaborately lathed creation that had been bent over further abuse. It is 1 in diameter so 1 7/8 balls were in order.
I removed the ends, hacked off his lathed creation, drilled and tapped 3/8 16 holes for a stud, then attached some balls from McMAster Carr. I wanted to go with a bigger hole (McM C sells up to 1/2 hole in the 1 7/8 ball), but was just paranoid about getting it straight and the right sized holes for 3/8 tap had already been started with the previous setup. They were 10 each plus shipping, ouch.
My new to me Grizzly 3 way vise worked amazingly in my Rockwell 665 for drilling, and tapping the holes.
I then filed a flat spot at the threaded end of the ball to equal the diameter of the handle. Im sure there's a faster way, but a good sharp file gave me what I needed here. Eventually I'll Loctite and thread a stud in there. This thing is extra long and HEAVY! I better get some serious rubber grommets.
As in Kevin's statement above: don't we think alike
I used an old 1 1/8" pry bar to make my handle (24" long) for the Prentiss 98. I bought 3/8" threaded cast iron balls (1.70 each) and smoothed them down. My process was the same as yours and I added a thick rubber washer between the ball and handle for the finger saver.
I have a bunch of Dremel buffing shapes, wheels, and pads. I use mostly the little wire wheels. It might be time to buff up my pee wee vise again.


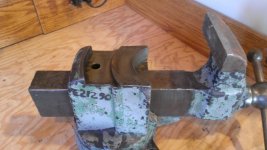
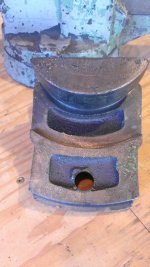
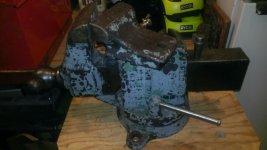
A little update for those interested and a call for help...
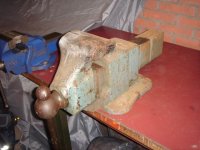
Still trying to dissassable the Reed 106. Kind of a struggle.
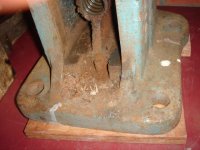
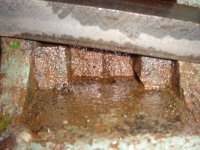
The main nut will not come out. There's no movement at all in the main nuts dovetail.
So far I have:
- let it soak in penetrating oil for a couple of weeks.
- heated
- cleaned and two days electrolysis
- heated
- used a kind of press with a 1-ton bottle-jack
- heated
- let it soak in rustyco rust remover for two days.
- used a kind of press with a 12-ton bottle-jack until the M12 threads
ripped off (and one of the M12 nuts flew away)
- gently hammerd on it (with a piece of hard-wood to protect the metal)
- heated again
I could just leave it like it is now, but don't want to give up so easy
Did anyone deal with something like this and know what else I could try?
Thanks!
Gert
McBrownie I will share a picture of the B & D Workmate later but have not found time to make a picture yet.
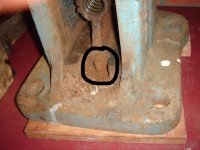
A little update for those interested and a call for help...
Still trying to dissassable the Reed 106. Kind of a struggle.
The main nut will not come out. There's no movement at all in the main nuts dovetail.
So far I have:
- let it soak in penetrating oil for a couple of weeks.
- heated
- cleaned and two days electrolysis
- heated
- used a kind of press with a 1-ton bottle-jack
- heated
- let it soak in rustyco rust remover for two days.
- used a kind of press with a 12-ton bottle-jack until the M12 threads
ripped off (and one of the M12 nuts flew away)
- gently hammerd on it (with a piece of hard-wood to protect the metal)
- heated again
I could just leave it like it is now, but don't want to give up so easy
Did anyone deal with something like this and know what else I could try?
Thanks!
Gert
McBrownie I will share a picture of the B & D Workmate later but have not found time to make a picture yet.

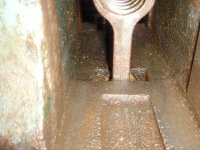
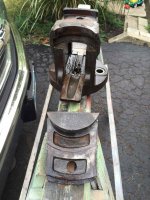
^Check out the third picture, he already did. That sucker is frozen in there. I'd just leave it.
Definitely doesn't make things any easier not being able to nudge the front bottom of that nut assembly. That's a gangly looking stem you're applying pressure to. If it was a bit chunkier, you could be a bit more forceful with it, but that looks quite frail.
Thanks for all the suggestions guys.
Knowing myself, I cannot stop to try some of the solutions you suggested, although I believe it is better to keep it like it is now.
Taking my time and keep doing things gentle.
Will keep you updated.
mbeck1Something like CRC freeze off? http://crcindustries.com/auto/?s=05002. I might try that as well.
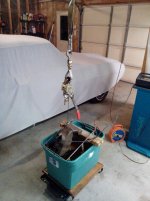
It might be time for an upgrade on the E Tank. I had to do the front half and then the back would only fit at an angle.. That front portion and rail is about 24" long and over 100 lbs.
It is a Miller Falls 7" rail vise.
Gert,---What Drive said.---After you've cleaned and dried it, leave the little pond in place and go back with penetrating oil.---Fill the pool and let set a couple of days.
Penetrating evaporates pretty quick so you may have to monitor and add.
Your slight jacking pressure, accompanied with light tapping and the viscosity of the oil should start to make it move.---When I say light tapping, I mean very light tapping, as in baby ball peen, because all you want is the light vibration exciting the oil soaked rust, which should start giving up the ghost.
The trouble with heating or chilling a large chunk of metal with two components is that by the time you get the outside unit expanded, or the inside unit contracted, the opposing pieces have expanded or contracted simultaneously.---You broke even.---Same problem.
Good luck.
 You want repeated lite taps, like a low frequency vibration to get it started. I'd go easy with a brass punch and make sure you are hitting it low to prevent sticking from the 2:1 mechanics rule.
Improvised Impact Driver
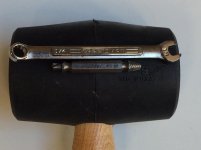
My 20v drill wasn't providing enough torque to extract a stripped screw from a jaw facing. I've had good luck with a Speed Out for this situation, but my manual impact driver can't chuck up a Speed Out. This seemed like a long shot, but it worked. Recalling Get's advice on using the tools you have on hand and JRobb's warning about extractors breaking off, I proceeded with caution.
Starting with light taps, the wrench bounced in place. Gently and gradually increasing the force got the wrench turning and the screw out.